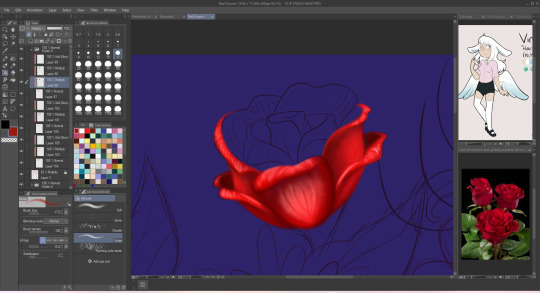
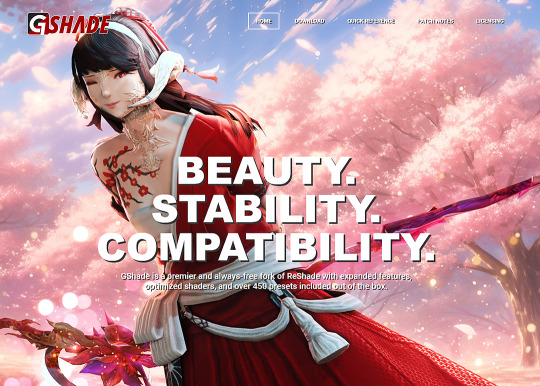
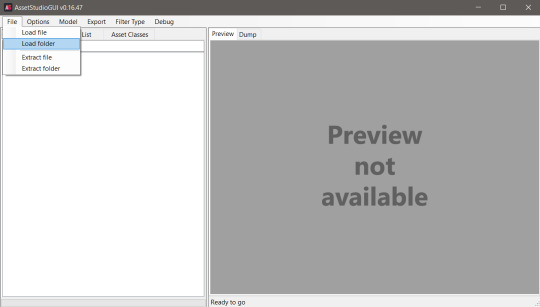
#open folder: png
Text
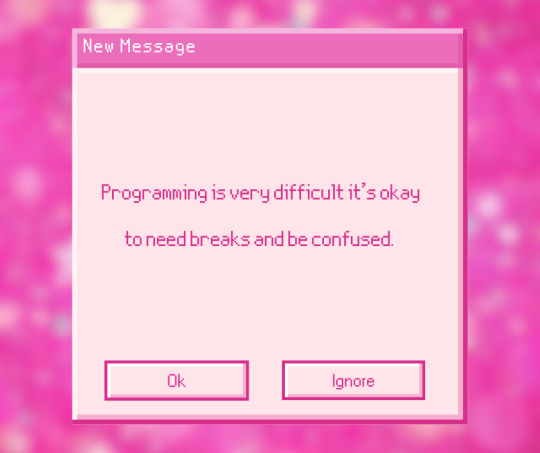
#gentle reminder#bunny makes blinkies#codeblr#coding#open folder: png#progblr#studyblr#css#programming#code blog#programming blog#programming blr#comp sci#computer science#2000s tech#pink#pink tech#pink aesthetic#old web#old tech#techcore#webcore
1K notes
·
View notes
Text
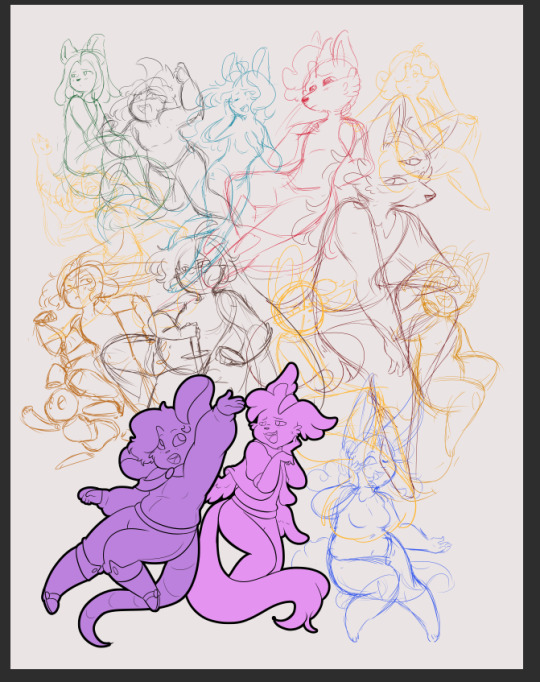
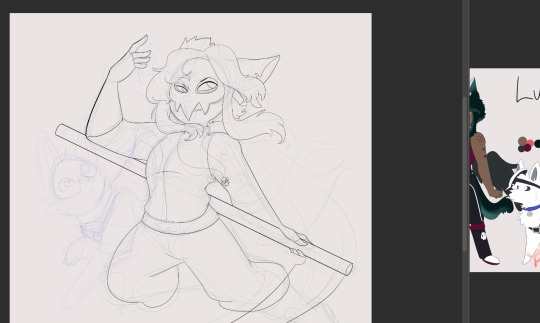
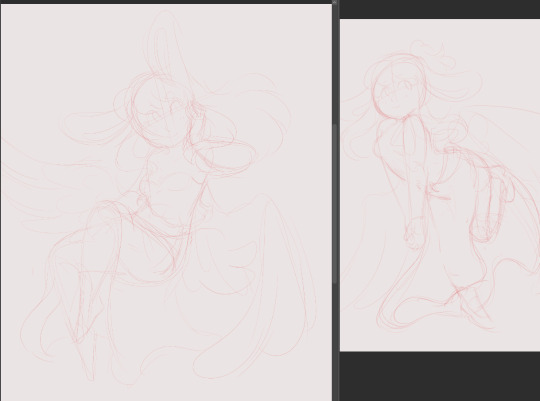

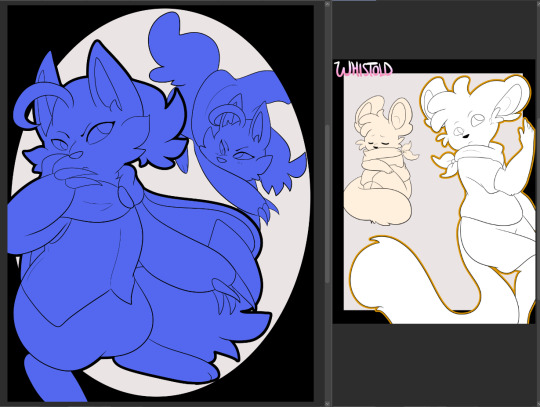
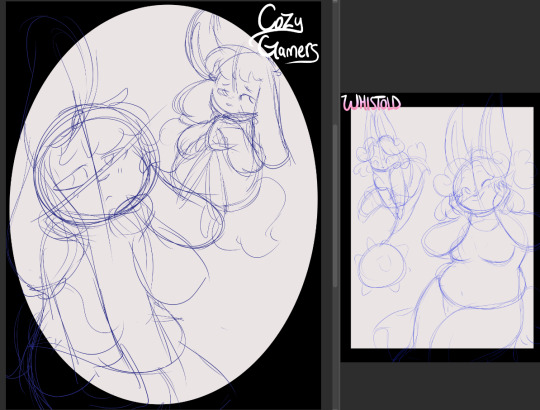
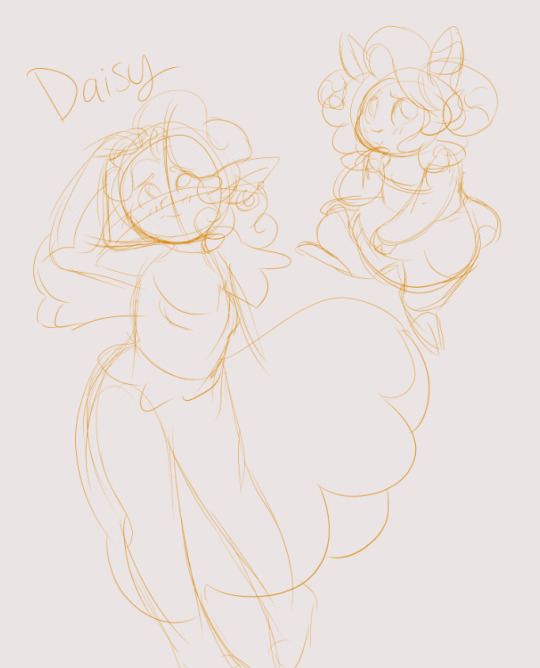
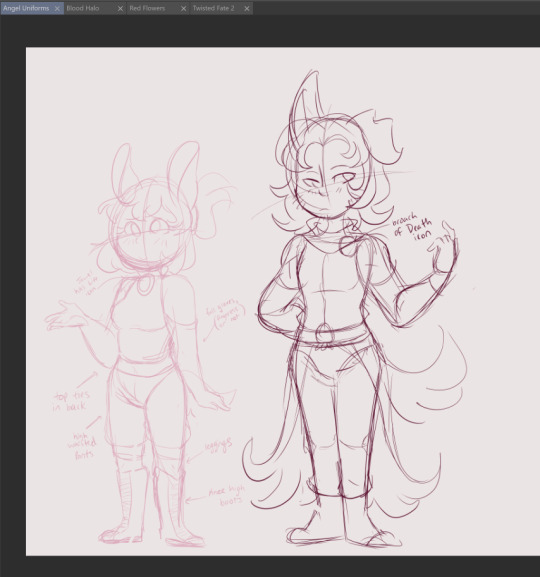
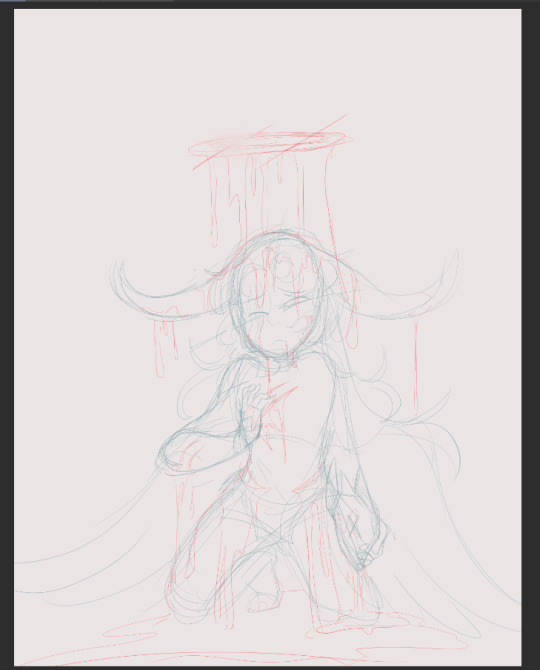
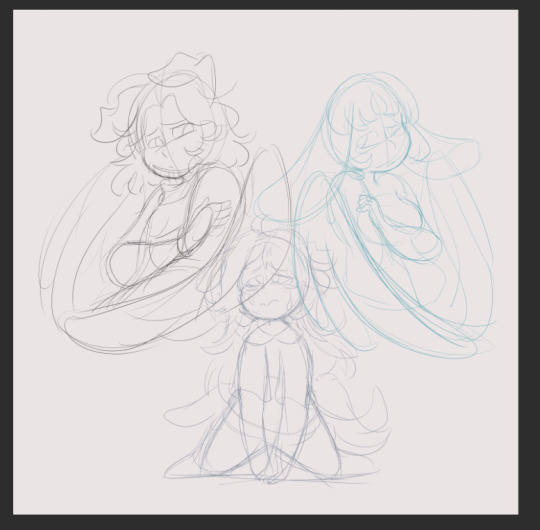
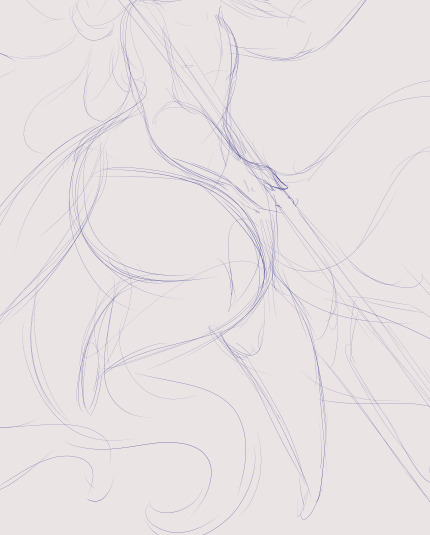
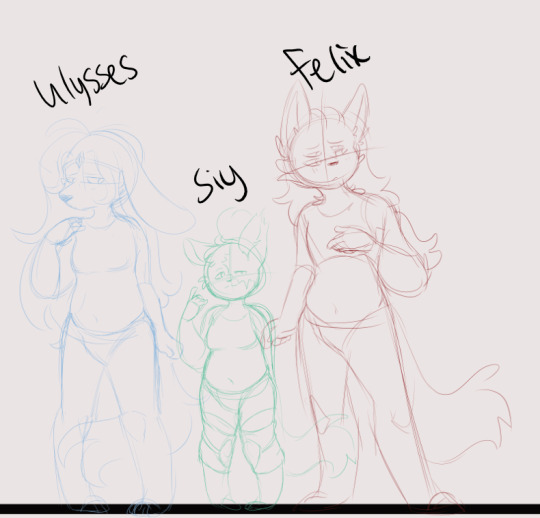
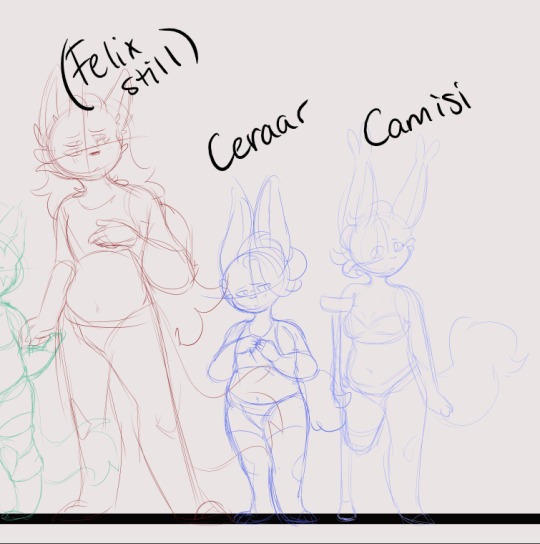
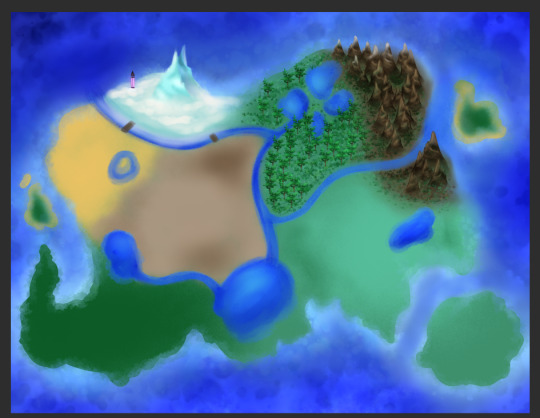
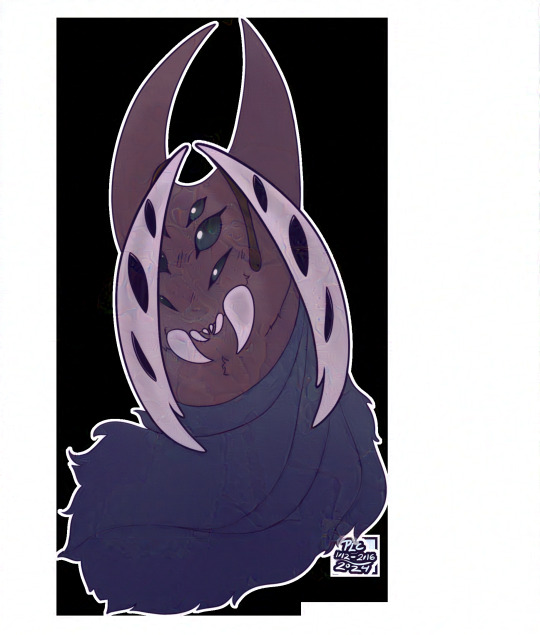
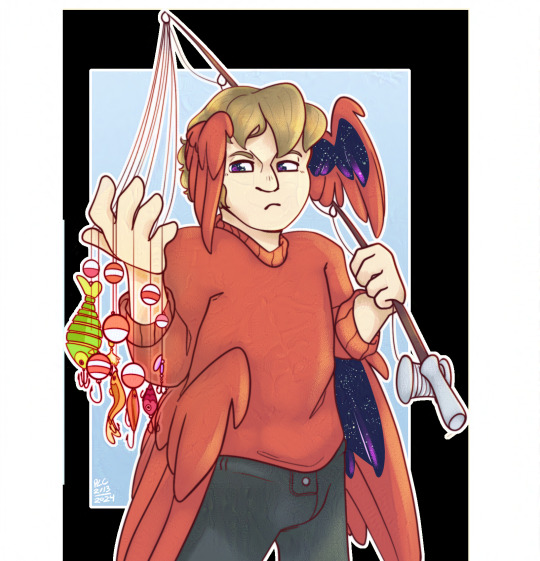
Way to many projects dump
some old sketches I'll never finish, some I plan to, some I need to but lost motivation to (*cough cough*Whistoldmap*coughs*)
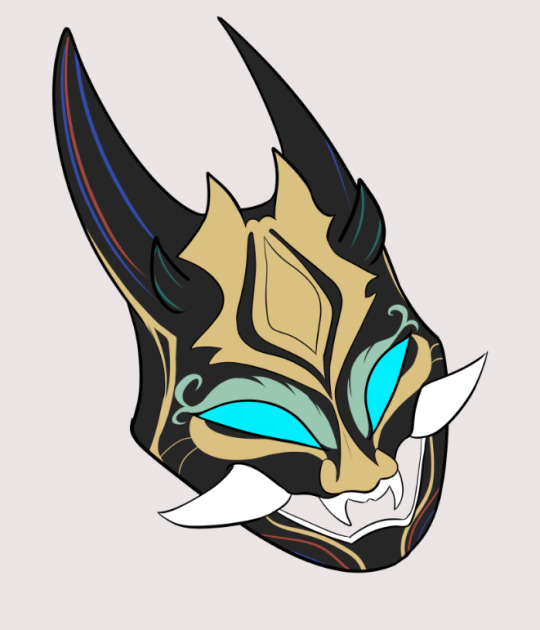
And the flat color of Xiao's mask from a drawing that is definitely already dont and posted
#wips#this is a lot of stuff#i just. went through and started opening canvases that never got exported as png#basically 'it was never finished so it never left the csp file stage#some of these i really love and need to finish#others im like.. nah#*looks at several screenshots of the same big drawing*#can i even bring myself to finish you#months old lots of detail flower drawing with an ugly luis#i didnt even open my genshin impact folder and im sure there are more there#primordial life#whistold#cozy gamers#some of these were artfight prep i didnt finish in time lmao
3 notes
·
View notes
Text
fandom wiki makes it take like twenty steps to save a .png image but by fucking god i am determined to get there
#find image#click on image to get image viewer#right click and open image in new tab#remove everything from the url past 'revision' to get the original size#save image as with the only option being webp#show file in folder#open with ms paint#save as png#delete original webp file#repeat ad nauseum for every fucking image you want to save#fucking hell#personal
3 notes
·
View notes
Text
my coworker is so bad at computers 😭 to the point where he doesnt even understand the advice i give him its so hdkdjdkjddmdh
#him: why is this showing other documents when i press the arrows#me: because you are in the photos app. it goes through the images in that folder#him: will the other ppl see it when i send the file?#me: no. they are different files. you are just going through them because they are pictures#him: hm. ok anyway i will make this into a pdf#me: okay! you should right click and 'print' to do that :)#him: right clicks. clicks open with. searches for adobe acrobat. opens#acrobat: you cannot open this with me that is a png.#him: well what the hell is going on! [rescans the page directly into a pdf instead of doing what i said]#m
2 notes
·
View notes
Text
i luv clip studio paint i luv when my power goes out and then when i get my computer back on app decides to just ??!!? delete all my recovery files so i lose a ton of sketches!!!!!
#kms!!!!!!!!#i am shit at organizing my stuff + like this is also just my fualt for never saving but#when i say it was like. at least 300 drawings. that is not an exageration 😁😁😁#to very various degrees of finishedness but still im so upset#having joyous fun tonight im actually so happy and thrilled rn#nothing in the backups folder and it just has the files i had open all single layer pngs YAYYY 😂🙏#this is a new issue like my computers reset on me before + all was fine so i did not foresee this being such a problem#but okayyy!!!!!!!! YAYYY!!!!#uwgwghghghhh#months worth of art i will just never see again aweeesomeee
1 note
·
View note
Text
THE NEXT PERSON WHO SAYS IT DOESN'T WORK GETS PUBLICLY EXECUTED VIA HAMMERCAR (check reblogs for further info)
"what's it like to use nightshade/glaze?"
so based on my own experience I thought I'd make this more transparent since I know a lot of people hesitate to take action on some things if they do not know Exactly what happens. it's me i'm people. So;
Nightshade takes about 30 minutes on its fastest setting. The end result tends to look like mild jpeg artifacting, very slightly creased paper, or just brush texturing. Looking at it normally, it is undetectable. Glaze is very visually similar, given the strategy, except that Glaze's longest time setting is 5 minutes.
You put in a file, select how much you want it affected and for how long you want it to render. For Nightshade, you also attach a tag to it, that way AI finds what it's looking for with an associated word. You select a folder for the final result to save to, then hit run.
It takes a lot of GPU/CPU. The fans on my laptop sound a bit like I'm running Minecraft, and it refuses to run if you have too many programs open. I could run Youtube and Nightshade at the same time, but Youtube did Not like it. Best to just take a break while you let it do its thing. Run Nightshade before you go out or something.
It does NOT like transparent png backgrounds. Makes me wonder how AI does with 'em. Anyways, running a backgroundless drawing through Glaze and Nightshade respectively makes it turn out like this:
creasing effect is more noticeable, and it adds strange blocky black and white backgrounds to it. If you want good results for your time, be that less than 1 minute or 180 minutes, consider getting rid of the transparency.
I would post a before and after picture of a Nightshaded piece but of course, I would like to post exclusively poison on this site.
As one last note, it took me a lot of effort to find where you're actually supposed to download these tools, so Glaze is here and Nightshade is here. Overall I highly recommend using them if you can. Don't let AI run you off of your sites: run the AI out yourself.
7K notes
·
View notes
Text


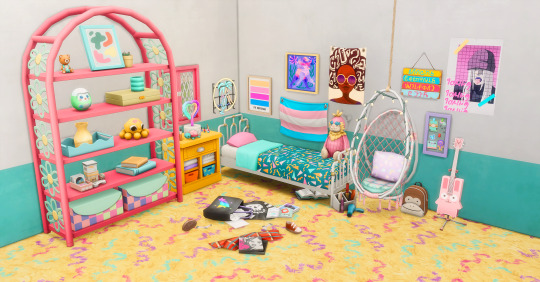
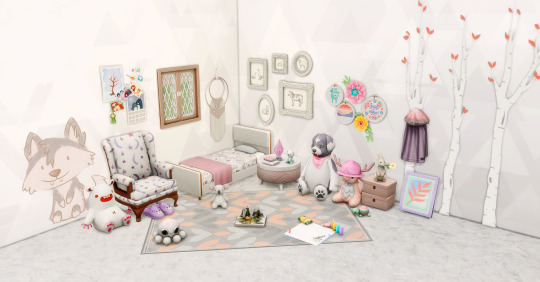
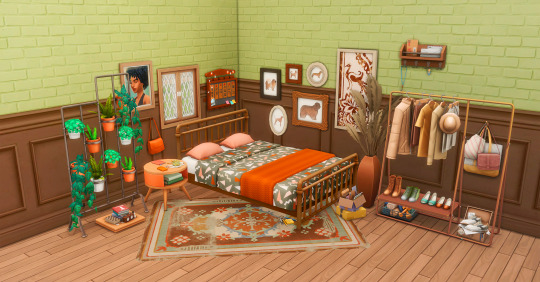
PATTERN POP BEDDING
oi oi look who it is again...alas, nobody exciting, only me, BUT i come baring more garish furniture to make up for it! I loved the patterns for the bedding in the new Pastel Pop Kit, but, true to form, I want VIBRANCE. i want colours so saturated they'll burn your retinas if you look at them for too long. so, naturally, i remade the 80s-esque pattern with the original swatches and a BUNCH of super colourful variations, too - 32 in total. I'm sharing the patterns, too, for anyone to use however they want!
I've recoloured three bits of separated bedding (double, single, and toddler mattresses) by the forever incredible @myshunosun, and the meshes are included thanks to their exceptionally generous terms of use!
Details, swatch previews and downloads under the cut!
@maxismatchccworld @emilyccfinds @mmfinds @maxismatch @mmoutfitters
Details
Recolours of @myshunosun's double, single and toddler meshes - thank you so much for your open terms of use, and incredible content!
All 3 are BGC and can be used with maxis-match bed frames (of course, I totally recommend any of @myshunosun's - check out all of their amazing cc here!)
Recreation of the 80's pattern from the Pastel Pop Kit, plus additional colourways - 32 swatches in total, on all 3 mattresses
Custom thumbnail, correct colour tags
Swatch Preview
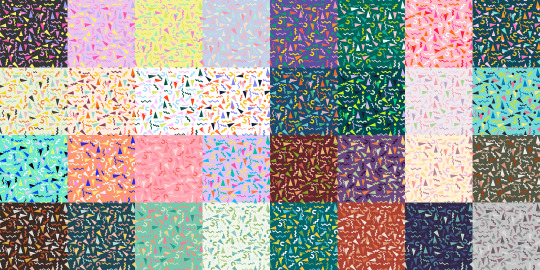
I've included an optional folder containing PNGs of all the swatches, plus the Photoshop pattern set. You're free to use them however you want, as long as whatever you make with them isn't paywalled. Credit is always appreciated if you do use them, but you do you!
Anyway, I thiiiink that's all the info? Once again, all credit for the lovely meshes goes to @myshunosun! Thank you to everyone who tested these, and to the creators of all the CC used in the preview pics - if anyone has any WCIFs, let me know!
Download:
SFS │ Patreon (both 100% free to everyone, always.)
#TS4 cc#sims 4 cc#ts4 cc#sims 4 maxis match#maxis match cc#my cc#sims 4 custom content#sims 4 cute cc#ts4 cute cc#sims 4 decor#sims decor#sims 4 furniture#ts4 furniture#sims 4 build buy#simblr#sims 4 beds#sims 4 resources#ts4 bedding#sims 4 bedding#sims 4 bedroom cc#sims 4 bedroom#sims 4 bed cc
5K notes
·
View notes
Text
quick temporary fix to enable skin details, overlays, & default eyes for infants
for people asking how i figured out how to get things like skin overlays enabled for infants (namely @delicateism & @simminnikas on my post).
this is not by any means a long-term fix or even probably the most convenient way to do this, it’s just what i ended up doing for the moment so that the babies would be cute. it’s also not a way to fix default skins; it’s just a way to get your infant to have the skin you like. whoever has a better way to do this, i’d totally love to know how! this is just how i jerryrigged it for the time being :)
first, i went into sims 4 studio, and went file > open > then i clicked the package file of the skin overlay i wanted. this has to be a nondefault version of a skin overlay—it can be set as a skin detail, or maybe makeup, whatever. if your favorite skin has a nondefault skin detail/makeup version, open that in sims 4 studio, and a window will pop up.
once the window pops up, i go to the tab that says ‘texture,’ where you’ll see a picture of the skin overlay. click export, and it will export this skin overlay to a png file. that’s the first part done!
after this i went back to the home screen of sims 4 studio. on the home screen, i selected ‘override’ under the blue tab that says CAS, then clicked on that blue CAS tab, which opened a window full of assets from the game.
under the search bar, i typed ‘storkbite’ which brought up the skin detail asset that is the infant stork bite birthmark thing. once you select it & click next, it will prompt you to name the file before you make it, so name it something so u know what it is.
after this, a window like the one from before with the skin overlay will pop up. under the same texture tab from before, you want to press import this time. you’ll want to import the png file that you exported from your favorite skin overlay earlier.
click save, and the name you chose earlier will be a package file now that you should put in your mods folder. now, when you go into the game in create a sim and select the stork bite detail, instead of giving your infant sim a stork bite, it will give them the face overlay you selected. (you can choose to have your skin overlay replace the other infant skin details instead, like the birth marks on their backs and legs, but you’ll have to scroll through the assets during step 3-4 until you find the one you want your skin overlay to replace.)
this same process can be done with makeup, too. there’s no makeup tab for infants, but by following this same process, you can choose to make your favorite blush/whatever replace an existing base game infant skin detail (or maybe you can make the makeup be an added swatch of an existing skin detail without actually replacing the original, if while on the home screen during step 3 you select ‘add cas part swatch’ instead of ‘override’, but i haven’t actually tested this).
if you follow a similar process, but instead of replacing a stork bite, you make overrides by changing both the texture AND the specular of the default base game eye color assets in sims 4 studio (which will be listed as yfeyecolor, but that’s fine, it works the same), you should be able to make your favorite default eyes work for infants, too, but it’s kind of an arduous process that i haven’t fully completed yet. i’ve done it with one eye color, which worked just fine, but it looks like you might have to do them all manually, one at a time?
if anybody knows a more efficient way to fix default eyes, please, please, PLEASE rb & tell me lmaoooo. if anyone has a good way to fix default skins, please rb with that, too! <3
2K notes
·
View notes
Text
GIFMAKING TUTORIAL: PHOTOPEA (for Windows)

Screencapping
Gif Width/Size Limit/Ezgif
Loading Frames
Cropping and Resizing
Rasterize/Make Frames
Sharpening
Coloring (not detailed. Links to other tutorials included)
Exporting
Obligatory Mentions: @photopeablr ; @miwtual ; @benoitblanc ; @ashleysolsen
Definitely check out these blogs for tips, tutorials and resources, they're a gold mine. Finally I recommend browsing the PHOTOPEA TUTORIAL / PHOTOPEA TUTORIAL GIF tags.
DISCLAIMER: English is not my first language and I'm not an expert on what I'm going to discuss, so if anything's unclear feel free to drop another ask.
1. SCREENCAPPING -> PotPlayer (the one I use) or MVP or KMPlayer
INSTALL PotPlayer (tutorial)
Play your movie/episode and press Ctrl + G. The Consecutive Image Capturer window will pop up. Click Start to capture consecutive frames, Stop when you got what you needed.
Where it says "Image Type -> Format" I recommend picking PNG, for higher quality screencaps.
To access the folder where the screencaps are stored, type %appdata% in windows search, open the PotPlayerMini64 folder (or 32, depending on your system) and then the Capture folder. That's where you'll find your screencaps.

Admittedly MVP is a lot faster but I prefer Potplayer because it generates (at least in my case) higher quality screencaps. MVP kind of alters the hue and it made it harder for me to color my gifs. Still, if you're interested in how to use it, I recommend this tutorial.
As for KMPlayer, every tutorial out there is outdated and I couldn't figure out the new version of the software.
2. GIF WIDTH/HEIGHT, SIZE LIMIT, EZGIF OPTMIZER
At this point you should already know how big your gifs are going to be. Remember the ideal gif width(s) on tumblr are 540 px / 268 px / 177 px. These specific numbers take into account the 4 px space between the gifs. No restrictions on height. Here are some examples:
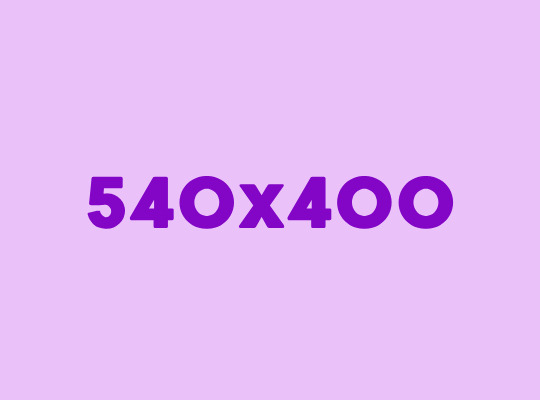
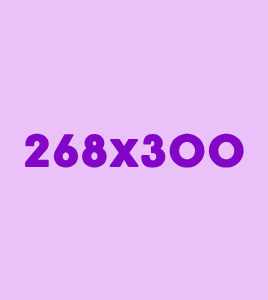

You can play around with the height (177x400, 177x540, 268x200, 268x268, 268x350, 268x400, 540x440, 540x500, 540x540 etc) but if you go over the 10 MB limit you'll either have to make your gifs smaller/delete some frames.
OR you can go on ezgif and optimize your gif, which is usually what I do. The quality might suffer a little, but I'm not really (that) obsessed with how crispy my gifs look, or I'd download photoshop.

Depending on the gif size, you can decrease the compression level. I've never had to go over 35. It's better to start at 5 (minimum) and then go from there until you reach your desired ( <10mb) gif size. Now that I think about it I should have included this passage at the end of the tutorial, I guess I'll just mention it again.
3. LOAD YOUR FRAMES
File -> Open... -> Pick one of your screencaps. The first one, the last one, a random one. Doesn't matter. That's your Background.
File -> Open & Place -> Select all the frames (including the one you already loaded in the previous passage) you need for your gif and load them.
(I recommend creating a specific folder for the screencaps of each gif you're going to make.)
WARNING: When you Place your screencaps make sure the Crop tool is NOT selected, especially if you've already used it and the width/height values have been entered. It will mess things up - I don't know why, could be a bug.
You can either select them all with Ctrl+A or with the method I explained in the ask: "when you want to select more than one frame or all frames at once select the first one, then scroll to the bottom and, while pressing Shift, select the last one. this way ALL your frames will be selected".
WARNING: Depending on how fast your computer is / on your RAM, this process may take a while. My old computer was old and slow af, while my new one can load even a 100 frames relatively fast, all things considered. Even so, I recommend ALWAYS saving your work before loading new frames for a new gif, because photopea might crash unexpectedly. Just save your work as often as you can, even while coloring or before exporting. Trust me, I speak from experience.
Now you can go ahead and delete the Background at the bottom, you won't need it anymore.
4. CROPPING AND RESIZING
Right now your screencaps are still smart objects. Before rasterizing and converting to frames, you need to crop your gif.
Technically you can rasterize/convert to frames and then crop, BUT if you do it in that order photopea will automatically delete the cropped pixels, even if you don't select the "Delete Cropped Pixels" Option. Might be another bug, unclear.
Basically, if you crop your gif and then realize you cropped a little too much to the left or the right, you can go ahead, select the Move Tool (shortcut: V) and, after selecting ALL YOUR FRAMES, move them around on your canvas until you are satisfied. You won't be able to do this if you rasterize first and then crop, the excess pixels will be deleted. I don't know why, I found out by accident lol.
CROPPING
(Cropped pixels: the gray/opaque area outside of the selected area. That area disappears once you press enter and crop, but the pixels are retained, so you can move the frames around and reposition them as you like. In this case I could move the frames to the left and include Silver's figure [curly guy in the foreground] in the crop)
After deleting the Background, you will need to select all your frames (using the Shift key), use the C shortcut on your keyboard to choose the Crop tool. Or you can click on it, whatever's more convenient. Once you do that, a dropdown menu is going to appear. You need to select the "FIXED SIZE" option, as shown in the following screencap.
Once you do that, you can type in your desired width and height. Do not immediately press enter.

Your work area should now look like this. Now you can click on one of the white squares and enlarge the selected area until the edges are lined up. You can then move it around until it covers the area you wish to gif.
WARNING: to move the big rectangle around, you're gonna have to click on a random point of the work area, PREFERABLY not to close to the rectangle itself, or you might accidentally rotate it.

See? When your cursor is close to the selected area it turns into this rotating tool. Move it away until it reverts to your usual cursor, then you can start moving the rectangle. Press Enter when you're satisfied with the area you selected.
RESIZE
This isn't always necessary (pretty much never in my case) - and it's a passage I often forget myself - but it's mentioned in most of the tutorials I came across over the years, so I'd be remiss if I didn't include it in mine. After cropping, you'll want to resize your image.
IMAGE -> Image Size...

This window will pop up. Now, should the values in the Width and Height space be anything other than 540 and 400 (or the values you entered yourself, whatever they might be) you need to correct that. They've always been correct in my case, but again. Had to mention it.
5. RASTERIZE & MAKE FRAMES
Now that your screencaps are cropped, you can go ahead and convert them.
LAYER -> Rasterize (if you skip this passage you won't be able to Sharpen (or use any filter) on your frames at once. You'll have to Sharpen your frames one by one.
Photopea doesn't feature a timeline and it's not a video editor, which makes this passage crucial. When you select all your smart objects and try to apply a filter, the filter will only by applied to ONE frame. Once you rasterize your smart objects and make them into frames, you can select them all and sharpen them at once.
Unfortunately this also means that you won't be able to - I don't know how to explain this properly so bear with me - use all smart filters/use them in the same way a photoshop user can. For example, you can sharpen / remove noise / add noise / unsharp mask... but you can't act on those filters in the same way a photoshop user can.
When you work on smart objects you can change the blend mode - which is critical if you decide to use a filter like High Pass. If you simply apply a high pass filter on photopea you won't be able to change the blend mode and your gif will look like this (following screencaps). Or rather, you will be able to change the blend mode by clicking on the little wheel next to "High pass" (circled in green in the 2nd screencap), but you'll have to apply the filter to each frame manually, one by one.

Then you can rasterize/make into frames, but it's extremely time consuming. I did it once or twice when I first started making gifs and it got old pretty soon haha.
Layer -> Animation -> Make frames. This passage will add "_a_" at the beginning of all your frames and it's what allows you to make a (moving) gif. As I said in the ask, if you skip this passage your gif will not move.
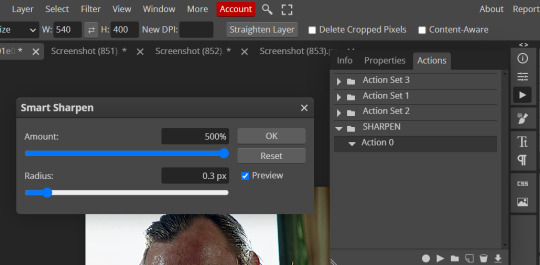
6. SHARPENING
Some people prefer to color first and sharpen later, but I found that sharpening filters (more or less) dramatically alter the aspect of your gif and already brighten it a bit (depending on your settings) and you may end up with an excessively bright gif.
Now, sharpening settings are not necessarily set in stone. The most popular ones are 500/0.4 + 10/10, which I use sometimes. But you may also need to take into account the quality of the files you're working with + the specific tv show you're giffing. I've been using different settings for pretty much every tv show I gif, especially in the last couple months. Some examples:

followed by
OR
AMOUNT: 500% RADIUS 0.3px
followed by
AMOUNT: 20% (or 10%) RADIUS 10px
You'll just need to experiment and see what works best for your gifs.
Some gifmakers use the UNSHARP MASK filter as well (I think it's pretty popular among photopea users?) but it makes my gifs look extra grainy, makes the borders look super bright and it clashes with my coloring method(s), so I use it rarely and with very moderate settings. Something like this:

Again, depends on the gif and on what you like. I've seen it used with great results by other gifmakers!
REDUCE NOISE
Sometimes - and this is especially the case for dark scenes - your gif may look excessively grainy, depending on how bright you want to make it. Reducing noise can help. Keep it mind, it can also make it worse and mess up the quality. BUT it also reduces the size of your gif. Obviously, the higher the settings, the more quality will suffer.
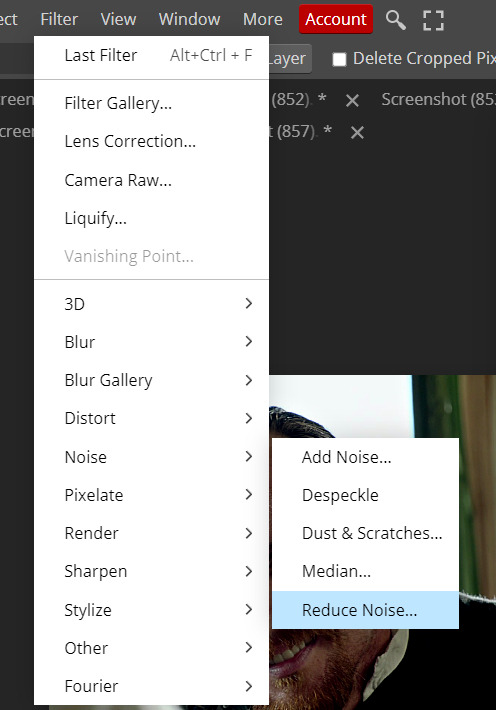

These are my standard settings (either 2/70% or 2/80%). It's almost imperceptible, but it helps with some of the trickier scenes.
ADDING NOISE
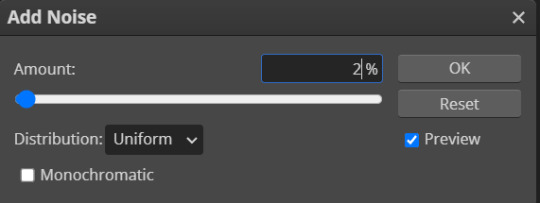
Adding noise (1% or 2% max) can sometimes help with quality (or make it worse, just like reduce noise) but it will make your gif so so so much bigger, and occasionally damage the frames, which means you won't be able to load your gif on tumblr, so I rarely use it.
You'll also want to create ACTIONS which will allow you to sharpen your gifs much faster.
HOW TO CREATE AN ACTION ON PHOTOPEA
The Action Button (shaped like a Play button as you can see in the following screencaps) may not be there if you're using photopea for the first time. If that's the case click on the magnifiying glass next to "Account" (in red) and type "actions". Press Enter and the button should immediately show up.
Once you do that, click on the Folder (circled in yellow)

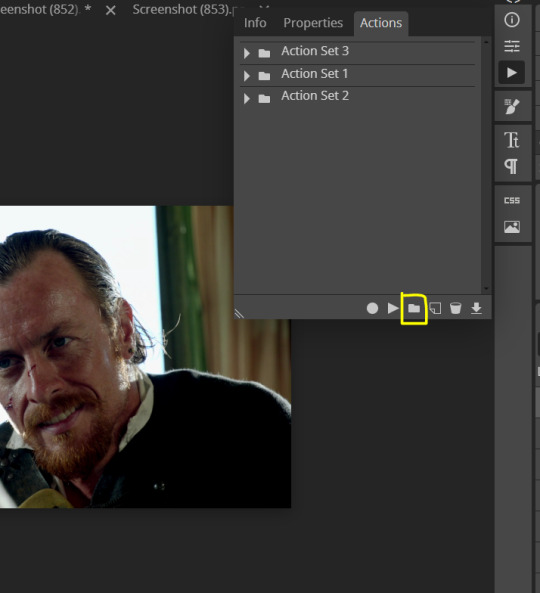
and rename it however you like.

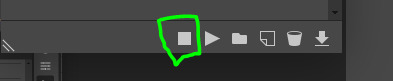
now click on New Action (circled in red). now you can press the Recording button (circled in green)

Now
FILTERS -> Smart Sharpen
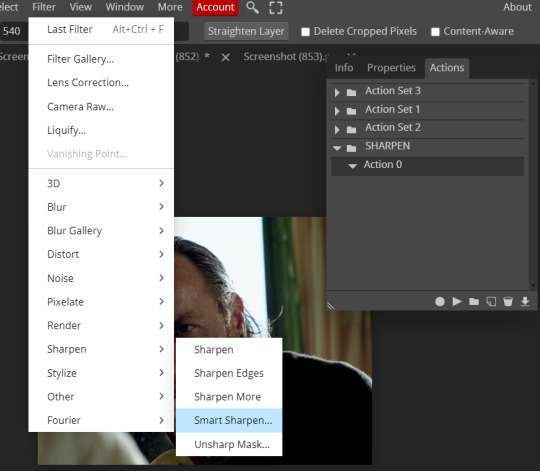
and you can enter your values. Then you repeat this passage (WITHOUT pressing rec, WITHOUT pressing new action or anything else, you just open the smart shapen window again) and, if you want, you can sharpen your gif some more (10%, 10px, or anything you want.)
Maybe, before creating an action, experiment with the settings first and see what works best.
When you're satisfied, you can PRESS STOP (it's the rec button, which is now a square) and you can DOWNLOAD your action (downwards facing arrow, the last button next to the bin. Sorry, forgot to circle it) .
You need to download your action and then upload it on your photopea. When you do, a window will pop up and photopea will ask you whether you wish to load the action every time you open the program. You choose "Okay" and the action will be loaded in the storage.
When you want to sharpen your gif, you select all your frames, then you click on the Play button, and select the Action, NOT the folder, or it won't work.

Actions can also be created to more rapidly crop and convert your frames, but it doesn't always work on photopea (for me at least). The process is exactly the same, except once you start recording you 1) crop your gif as explained in step 4, 2) convert into frames. Then you stop the recording and download the action and upload it. This won't work for the Rasterize step by the way. Just the Animation -> Make Frame step.
7. COLORING
Now you can color your gif. I won't include a coloring tutorial simply because I use a different method for every tv show I gif for. You normally want to begin with a brightness or a curve layer, but sometimes I start with a Channel Mixer layer to immediately get rid of yellow/green filters (there's a tutorial for this particular tool which you will find in the list I mention in the link below)
[Plus I'm not really an authority on this matter as my method is generally... fuck around and find out. Two years of coloring and I still have no idea what I'm doing. 70% of the time.]
Simple Gif Coloring for Beginners -> very detailed + it includes a pretty handy list of tutorials at the bottom.
8. EXPORTING
Now you can export your gif. Some gifmakers export their (sharpened) gifs BEFORE coloring and then load the gifs on photopea to color them. I'm not sure it makes any difference.
FILE -> EXPORT AS -> GIF
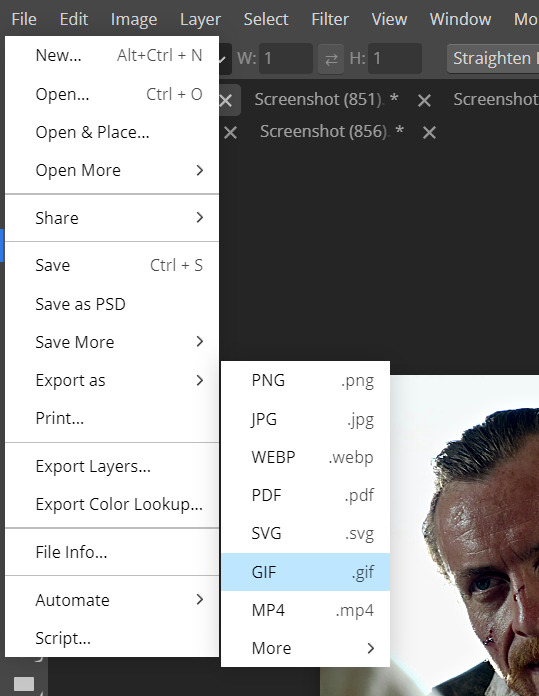
(not colored, just sharpened)
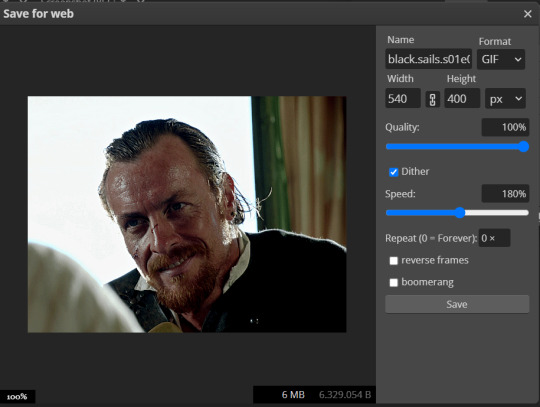
As you can see, unlike photoshop the exporting settings are pretty thread bare. The only option available is dither - it sometimes help with color banding - which, and I'm quoting from google for maximum clarity:
"refers to the method of simulating colors not available in the color display system of your computer. A higher dithering percentage creates the appearance of more colors and more detail in an image, but can also increase the file size."
SPEED
When you export your gif, it will play at a very decreased speed (100%). I usually set it at 180/190%, but as for every other tool, you might want to play around a little bit.
GIF SIZE/EZGIF OPTIMIZER (See Step 2)
And that's it.
P.S.: worth repeating
Save your work as often as you can, even while coloring or before exporting.
#photopea#my inbox is open if you have any questions <3#image heavy under the cut#photopeablr#tutorials#gif tutorial#allresources#photopea tutorial#completeresources#gifmaking
186 notes
·
View notes
Text
INSTALLING// GShade + ReLight for The Sims 4
I've been getting a lotta asks about how I got the up to date GShade working with ReLight ( ALPHA ), so here's a mostly quick tutorial, that will hopefully get it working properly for you too!
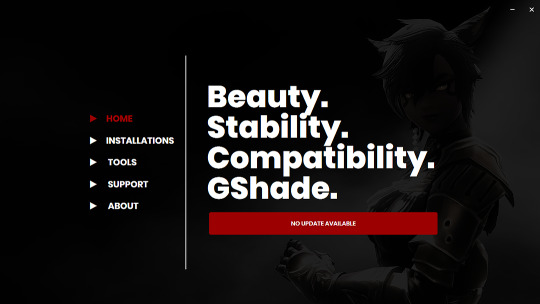
Firstly, download and install GShade, unless you've already got it installed, then just be sure it's up to date.
Click, or right click pics below and open in a new window to see them in more detail.
Now I don't currently have it installed into any of my games, bc I mainly use Reshade 2, so if you need to know how to do that, you're in luck!
I'll walk you through it.
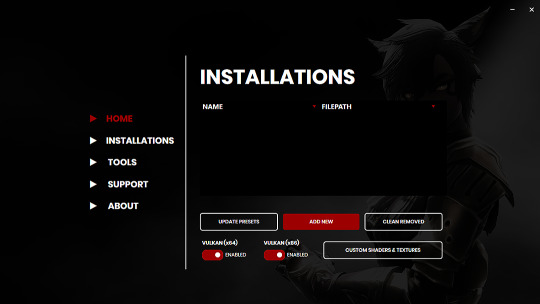
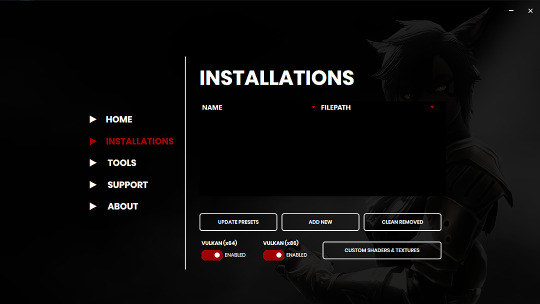
Click Add New.
Then locate your TS4_x64.exe, and click Next.
This will open another window with a bunch of ticked boxes, and tbh I didn't mess with any of these. Many them are greyed out anyway, and it all works fine for me.
So if yours look like this, then you should be fine too.
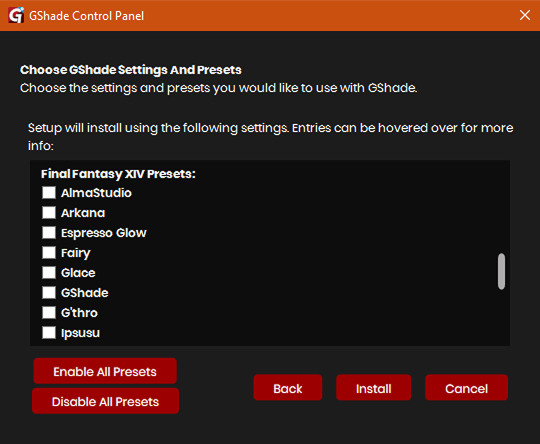
Lastly, at the bottom you can preload some presets if you like, but it's purely up to you. They aren't required.
When done, click Install.
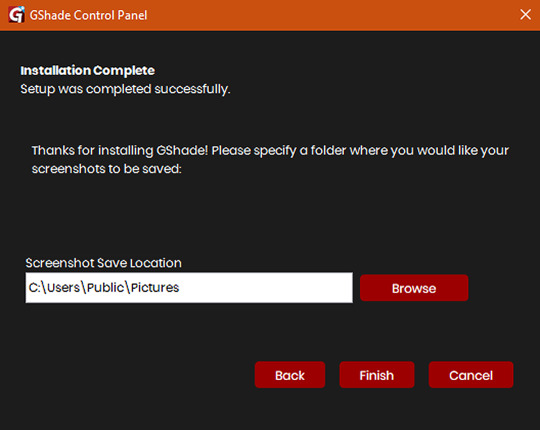
There will be another window that asks you where you'd like to save your pictures. Once again, this is purely up to you, click Browse to locate your preferred folder, or if you use programs like Nvidia for screenshots, just ignore it, and click Finish.
Then when it asks if you're okay with the chosen location, click Yes.
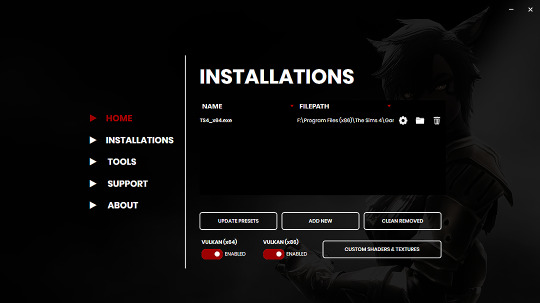
Once you've finished, TS4_x64.exe should show up in the Installations tab of your GShade installer, which means you're part way there!
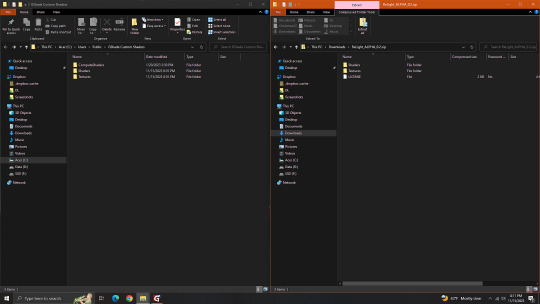
Now, click on the Custom Shaders & Textures button at the bottom, this will open the folder where you need to install ReLight.
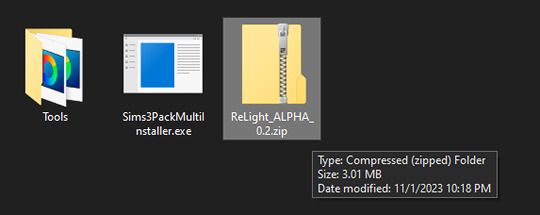
Locate your ReLight_ALPHA_0.2 download. Mine was in my Downloads folder.
Double click it, or unzip it, and you'll find a couple folders inside it.
Click or right click pics below and open in a new tab for more detail.
Here's a side by side comparison of the GShade Custom Shaders folder we just opened, and the ReLight_ALPHA_0.2 folder we unzipped and opened, so you can see how there are two identically named folders.
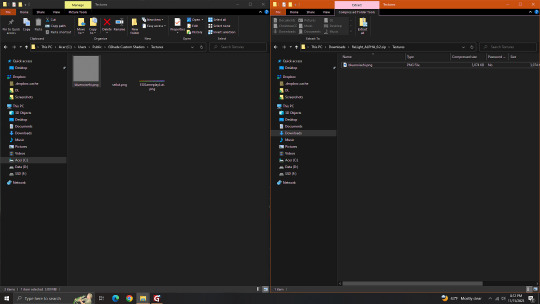
The goal is to put whatever is in the Shaders folder of the ReLight folder, into the Shaders folder of the Custom Shaders folder, and then repeat this process again for both Textures folders, until they end up looking like this...
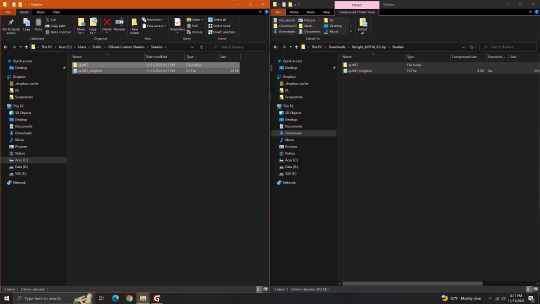
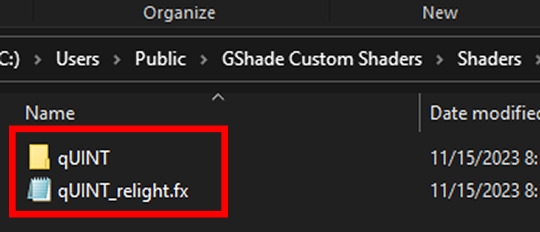
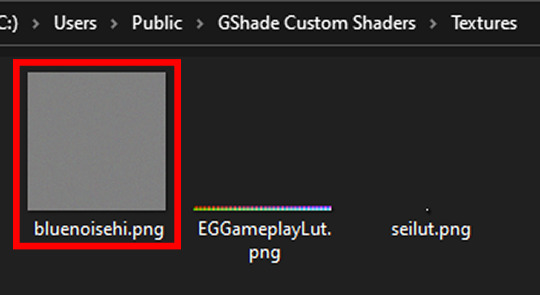
In conclusion, your GShade Custom Shaders > SHADERS folder should have these two files in it...
While your GShade Custom Shaders > TEXTURES folder should have this .png in it...
Good? Now let's turn on The Sims 4.
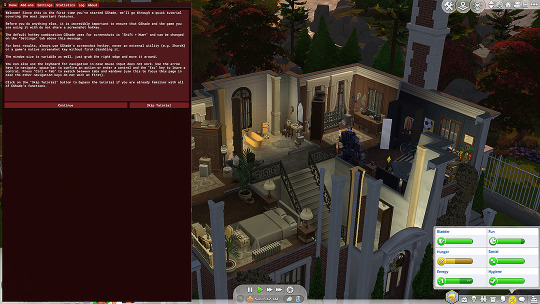
When you've opened you game, load your save ( idkw, but the GShade UI won't open in the menu screen ), then hit Shift + Backspace on your keyboard to open up the GShade UI.
You can choose to go through the tutorial, or skip it. Either way just keep clicking continue or OK until you get to the Home panel.
Now, I've got a preset already, if you've got one too, good, activate it, if you don't there should be like a default one you can use until you create one or get one.
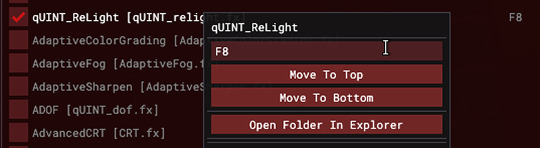
Main goal at this moment is to find ReLight in the list of shaders, and activate it so we know it works.
Tick the Performance Mode box at the bottom, and scroll down 'til you find this...

This list should be alphabetized so just scroll down to the Q's, then tick the box beside it.
Then click Active to Top, and scroll back to it.
One thing I would suggest is binding it to a key ( right click while hovering over it ), this will make it easier to find if you lose it again, since clicking Active to Top also recalls any shaders that are bound, even if their box isn't ticked ( isn't active ).

I've bound mine to F8, but it's up to you what you wanna use, I only suggest it be F6 or above, since The Sims 4 already uses F1-F5 I believe.
Oh, and whenever you're done messing around with it, be sure to untick Performance Mode, so your computer won't beat your ass.
273 notes
·
View notes
Text
Tutorial - extracting stuff from Disco Elysium (+ viewing the models in blender)
Due to... recent events, I decided to finally get myself to write a tutorial about this, because all I found was some half-assed reddit comments when I was trying to figure out how to do it sometime last year.
I'll show you how to extract... pretty much everything (including voice lines) from the game.
This is a beginner tutorial, so you don't have to know shit about any of these programs, I'll try to explain everything.
I promise it's pretty easy! I extracted stuff from various games, and this is one of the easiest I ever did, so yeah.
You'll need:
Disco Elysium on PC
AssetStudio
Blender
+1 Interfacing
+2 Endurance (mostly to survive my bad jokes)
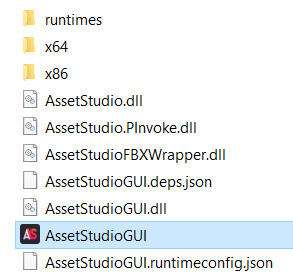
First of all, open AssetStudio. You don't have to install it or anything, just unzip the file you downloaded and open the program inside (AssetStudioGUI).
This is how the bad boy looks like, we'll be able to see the asset list on the left and the preview on the right.
Click on File../Load Folder.
Select the folder where the game is installed. For me it's Steam\steamapps\common\Disco Elysium\disco_Data. You can load individual files too, but it's easier to just list everything and then filter them imo.
Wait... for a while. It's a lot of assets. Make a tea or something (hydration is important).

After everything loaded up, click on the Asset List tab. You can see all the stuff! Well, it's rather confusing. Let's see what is what!
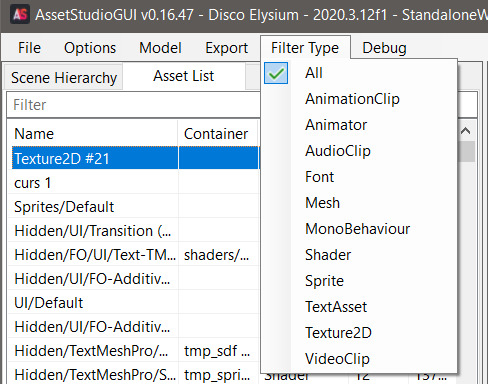
If you click on Filter Type, you can see the types of the assets. These are:
AnimationClip: I think these are supposed to be the animations, you can export them if you select an animator asset alongside and right click Export Animator + selected Animation Clips (couldn't get the animation to play but that's probably on me).
Animator: These are the rigged models, you can export them to .fbx format, but I couldn't figure out what to do with them in Blender because they were kinda distorted (funnily enough, when I imported it to the shitty Milkshape program it showed up just fine... and people wonder why I prefer shitty Milkshape XD) Anyway, I hope someone can figure this out that actually knows something about Blender lol.
Audio Clip: Sounds, voice lines, background music. (.wav format)
Font: Well, fonts. Can be exported and installed to your device like any fonts.
Mesh: 3D models of the characters, objects, scenes. (.obj format)
MonoBehaviour: No fucking clue.
Shader: Shaders for the game. Not interesting in our case.
Sprite: Images that the game uses: portraits, object thumbnails, user interface elements.
Texture 2D: The textures that belong to the 3D models. (.png format)
TextAsset: ??
VideoClip: The stuff that plays when you open the game.

You can preview any assets (well, the ones that you can preview), if you click on them. You can view them in the right panel.

You can extract by left click on the asset in the list -> Export selected assets. You can select multiple assets and export them at the same time.

The program will ask you to select a folder where you want to export the stuff. It'll export them into separate folders, by assets.
Well, yeah, now you know what is what, and how to extract them, but there are still a lot of assets. Good news, you can filter them with the little search bar too, if you type in some gibberish! Some stuff are a little tricky to find.

Voice lines are grouped by task / place, so if you know where the particular thing takes place, you can try to filter for those. The assets are named with the speaker's name - either a character or a skill. I think the numbers mean some kind of order, but I couldn't really figure it out. If you click on one of them, you can preview, and listen to it in the right panel! Super easy! (if you want your own daba-doop-doop-dead it's Kim Kitsuragi-YARD HANGED MAN-556. Just saying)
For objects and characters, you can find them by name, although some characters are named differently. Like, Harry is referred as Tequila in the game files.
Basically if you want to have a character or an object extracted, you’ll need to extract a mesh and a texture that belongs to it. You can quite literally play dress-up game with Harry, because all of his clothes are separate files (and named with kinda the clothing item name). The Kineema has multiple parts (exterior - interior - door - whatever else).
Anyway, let's move on to the Blender part before I forget how to do it (I learned it this morning lol).
(Disclaimer: I don't know jack shit about Blender, I use it for extracting stuff and creating the simplest shapes in existence. I use the godforsaken program Milkshape on a daily basis.)
Open Blender.
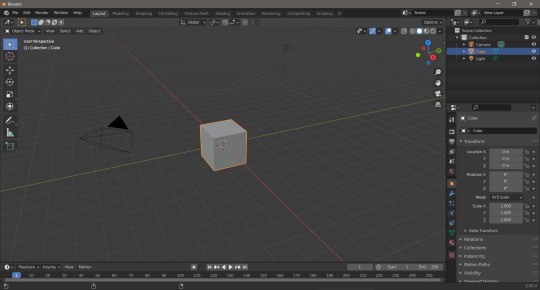
Hit delete to get rid of this beautiful default cube.
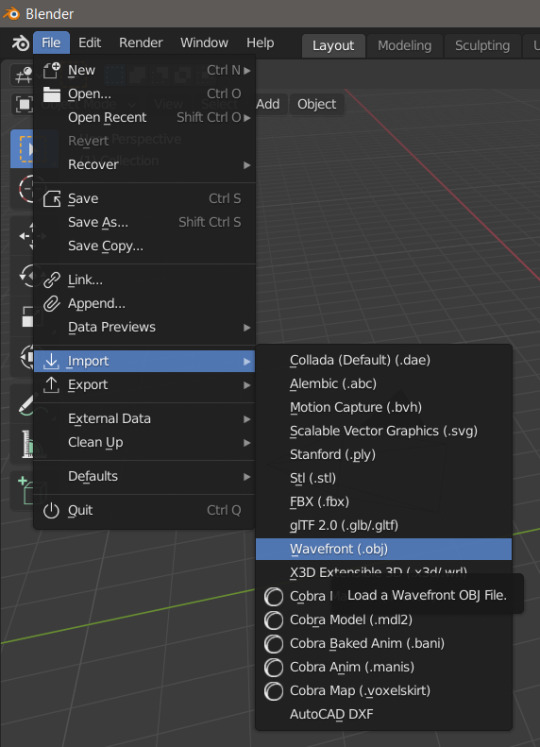
File.../Import.../Wavefront (.obj)

Select the thing you want to import (I'll import the gremlin child).

There he is! And he doesn't fucking care!
Btw, you can zoom with the middle mouse button scroll or middle mouse button + Ctrl, rotate with middle mouse button, move the view with middle mouse button + Shift. So you can see his itty-witty mischievous face from very close!

Now, that's great, but he doesn't have textures still. First of all, change the Viewport Shading to Material Preview.

Select him (just click on him, you'll see an orange outline). And go to the Material Properties tab on the side.
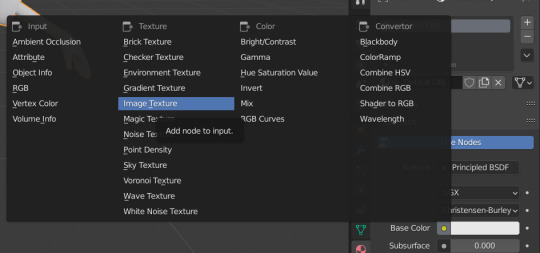
Click on the little dot next to Base Color, and select Image Texture.


Click on the Open button that appeared out of nowhere, and search for the Cuno texture.
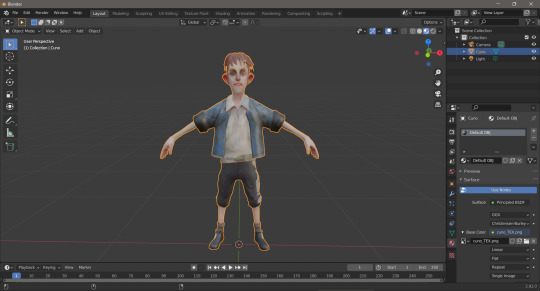
Tada! He looks beautiful now! (and he still doesn’t fucking care)
You can do the same with any 3D models, objects from the game, really.
Well, that's it lol. I hope it made sense! And I really hope someone runs away with extracting the animators + animations, because I'm pretty sure it's doable, I just have no clue how.
502 notes
·
View notes
Text

PSDs For Dummies <3
— as written by a dummy
hello dear readers and welcome back to canarysage, the world’s least comprehensive tutorial blog. today, we’re back at it again with photopea for dummies, and we’re tackling something i probably should have done first: psds.
example psds are: 1 (@cutesiplushi) 2 (@didlivio) & 3 (@lumieron)
what is a psd?
excellent question, dear reader! psd stands for photoshop document, and it’s a type of file format (like .png or .gif) that allows you to store a project’s individual layers! it’s a file format that, for obvious reasons, is exclusive to photoshop and photopea.
in editing circles, psd has become shorthand for filter. people use psds to save configurations of adjustment layers that are then used to filter images consistently, without having to remake them every time. when someone posts a psd, they’re posting a folder (hopefully it’s in a folder) with their specific set of adjustment layers for anyone to use!
where can i get psds?
right here on tumblr! check your favorite edit blogs, as they may have posted some, or search ‘free psd’ or ‘psd coloring’ in the search function. tumblr doesn’t allow you to upload psds directly, so you’ll be redirected to a site outside tumblr. probably either deviantart, google drive, or ko-fi, all of which are easy to use. deviantart requires you to have an account to download anything (luckily, an account is free!) and ko-fi may require you to pay money. google drive doesn’t have a search function in and of itself, but it’s extremely easy to download off of.
also, shameless self plug, but i post psds right here on canarysage! i personally use deviantart, but again, an account is free. if send me an ask, i may be able to provide you with a google drive link, if you ask really nicely (。•̀ᴗ-)✧
and of course if you don’t want to use someone else’s psd, you can always make your own.
how do i use a psd?
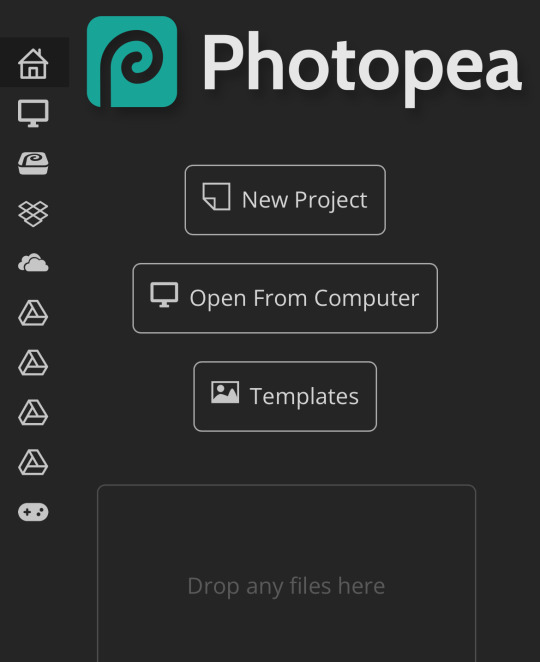
once you have a psd of your choice downloaded, open up photopea! or photoshop, if you’re rich like that.
once you open photopea, click this here button right in the middle of the screen, the one that says “open from computer”
from there, go to choose files and open up your psd! depending on from whom you got it, psds will look different once you open them. i’m using one of my own as an example.

you can see there’s two layers in my psd, a folder, and an image. the image is just for me so i know which psd this is once i save it—i like to save all my psds with images of real people so i know how it looks on moodboards or stimboards.
the folder is the important part here, that’s where the adjustment layers are contained. to transfer a psd, you can either go to file > new
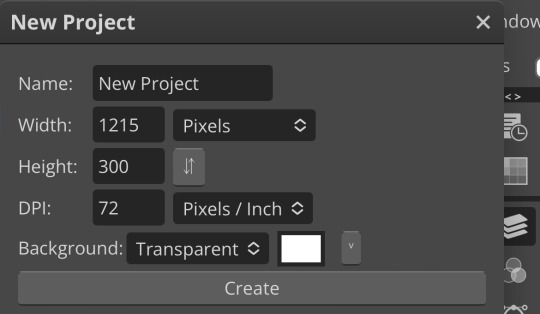
which lets you start an entirely new project, or you can open an image using file > open
which will give you the image you selected.
as an aside, if you’re opening a psd and you already have a project in progress, make sure to click file > open and not file > open & place, as open & place won’t give you the adjustment layers.
then to move the folder, go to layer > duplicate layer into while having selected the folder (just tap on it, that will make it a lighter gray to show it’s selected) and duplicate the folder into whatever your image is
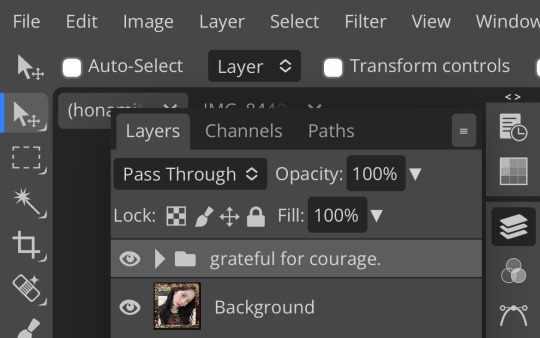

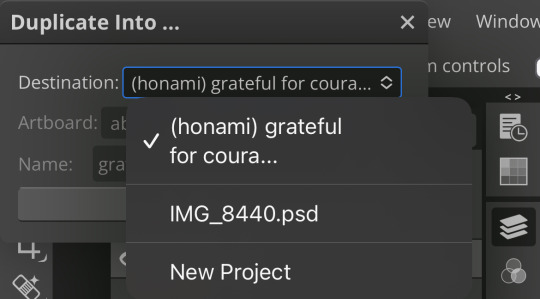
i’m moving mine to a random image of honami i found which is why it’s named like that. once the folder’s duplicated into your project, go over and take a look!
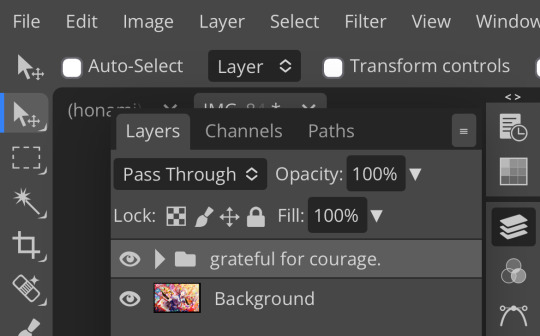
you should now see something like this! ensure that the folder is on top, as otherwise the adjustment layers won’t work.
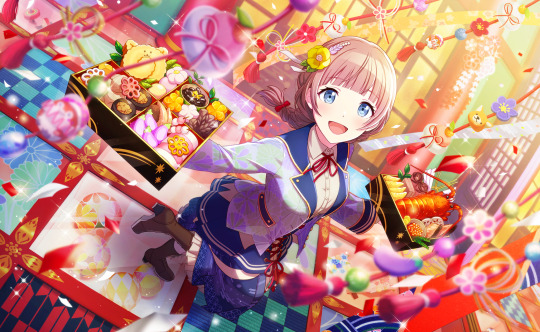
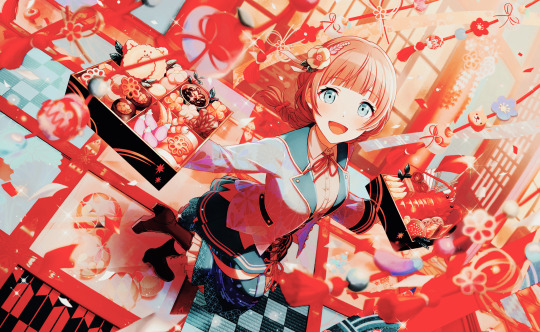
here’s the difference between the unfiltered image and the image with my psd!
to save images in photopea (like i did just now) go to file > export as > (your preferred file format)
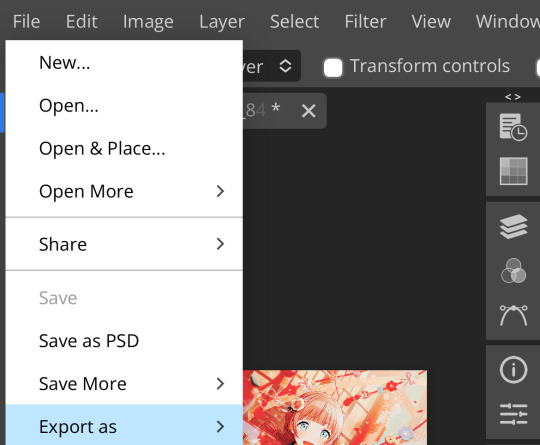
which will pull up something like this
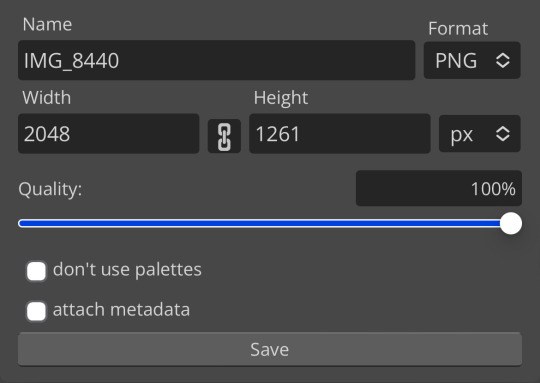
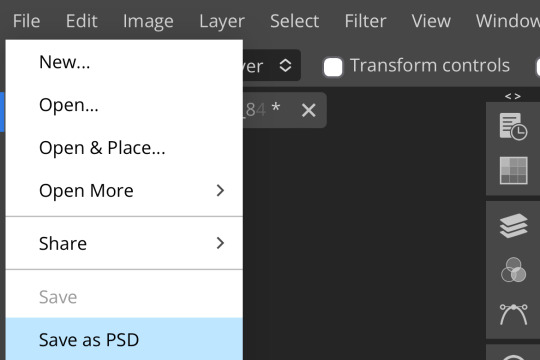
i recommend either saving as a png (for still images) or as a gif (for… gifs) but that’s up to you! in order to save a psd, go to file > save as psd! that will save your project to your device
bear in mind that tumblr doesn’t accept psds as a file format, so if you’re going to post an edit, you have to save it as something else. also, don’t just save other people’s psds and claim them as your own—psds take a lot of time, effort, and skill, like any other art form.
can i make my own psds?
100% yes! i can’t give you a step-by-step process unfortunately, as there really is no one way to make psds. i recommend familiarizing yourself with adjustment layer and seeing what works.
shameless self plug again, but you can check out my other posts in this series to find out about some of the adjustment layers!
basically, i like to think of adjustment layers as a few different categories. light/darkness adjustments (ie: brightness/contrast, levels, curves, exposure, black & white, and threshold to a certain extent.) saturation adjustments (vibrance, hue/saturation.) color adjustments (hue/saturation, color balance, photo filter, channel mixer, selective color, gradient map depending on how you use it, and replace color.) and also, miscellaneous (posterize, which gives your images a pop-art crunchy kind of effect, invert, which… inverts your colors, and color lookup, which is a set of filters unto itself)
how you utilize adjustment layers is up to you! i personally like to use a variety and see what happens, my personal favorites being channel mixer, photo filter, and hue/saturation. you can also utilize blending modes (shameless self plug again,) or opacity.
if you have no idea where to start, you can look at other people’s psds to see their process. don’t copy or steal, for obvious reasons, but you can toggle layers on and off and see what happens and what each layer does.
making psds isn’t as intimidating as it sounds, you just have to start a project and start creating! it gets really fun once you get the hang of it (*'▽'*)
i don’t edit with photoshop or photopea, can i still use psds?
short answer: nope!
long answer: if you want use psds but you’re super used to ibis paint or whatever you currently use, have no fear! you don’t have to switch all your editing to photopea. you can make your main project in ibis or whatever as normal, then upload it to photopea and add a psd.
you can also make perfectly fine filters in ibis paint in your own right, with enough tweaking. there’s also apps such as polarr and picsart which come with filters, but i’ve never used them so i’m unable to vouch for how they work.
do i need to use psds when editing?
nope! psds are 100% optional. they’re a style like anything else—some people prefer them and some people don’t. it’s up to you.
did you genuinely write 1178 words answering questions no one asked?
yep.
what if i have a question you didn’t answer?
feel free to shoot me an ask! i don’t mind explaining further, and i promise i don’t bite. as with anything, this is just meant to explain to anyone who needs assistance—photopea for dummies by a dummy, after all. we can be confused together!
are you done now?
i am! congratulations for reading this far!
yours truly, canarysage
113 notes
·
View notes
Text
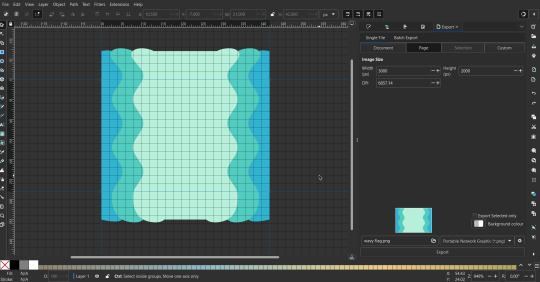
Flag Making Tutorial
This will be a more technical step-by-step tutorial on how I make my flags (also a long post because I wanted to be thorough, plus I love flags lol).
The program I use is Inkscape, a free vector (.svg) editor program for pc.
I have templates set up, so the actual flag making process is pretty easy/quick.

Hotkeys/Locations/Other Reference
I'll be mentioning these options, so I thought to put them here all in one list.
(They list the keyboard shortcuts first)
Snapping: magnet symbol (top right of screen), or under the adjacent arrow ◀️ symbol.
Document properties: shift+ctrl+D, or under the file menu (top left corner of screen).
Display (1st tab)
Guides (2nd tab)
Grids (3rd tab)
Fill and Stroke: shift+ctrl+F, or under object (top of screen).
Layers and Objects: ctrl+shift+L, or under object (top of screen).
Align and Distribute: ctrl+shift+A, or under object (top of screen).
Import (Images): ctrl+i, under the file menu, or by dragging into the Inkscape window.
Save As: ctrl+shift+S, or under the file menu.
Export: shift+ctrl+E, or under the file menu.
Selector Tool: S, or cursor symbol (left side of screen).
Click, or click and drag around the objects, to select them.
Locking a selection: lock symbol between the width and height boxes at the top of the screen.
Transform Selections: the width/height and x y position can be changed by typing in the X,Y,W,H boxes (near top middle of screen), or by dragging the corners/edges (resize) and inside the object (move).
Duplicate: ctrl+D.
Delete: delete key, or right click on the object.
Node Tool: N, or below the selector tool (left side of screen).
Rectangle Tool: R, or square symbol (left side of screen).
Pen Tool: B, or pen symbol (left side of screen).
Gradient Tool: G, gradient square symbol (left side of screen).
Mesh Tool: swirly square symbol (left side of screen).
Dropper Tool: D, or dropper symbol (left side of screen).
Undo: ctrl+Z.
Redo: ctrl+Y.
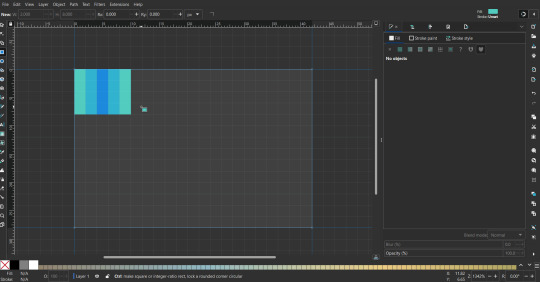
Creating the Template
Download Inkscape and open it, under the Time to Draw tab, click New Document.
First, snapping needs to be enabled, and under advanced mode enable grids and guide lines snapping.
(This is crucial for making the stripes equally sized, spaced, and the overall flag in the right ratio.)
I'll be making a template with a 2:3 flag ratio.
Open document properties.
(I like to move these types of windows to the right side.)
Under display, set the width to 42px and height to 28px.
Under guides, just click create guides around the current page.
Under grids, make sure rectangular grid is selected, and click new.
(Grid units should be in px.)
For the major grid line every option, change it to 2.
(I also prefer to change the minor grid line color to be transparent.)
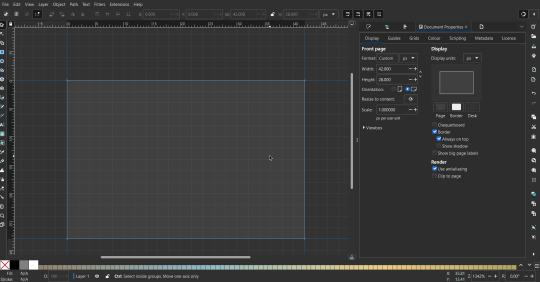
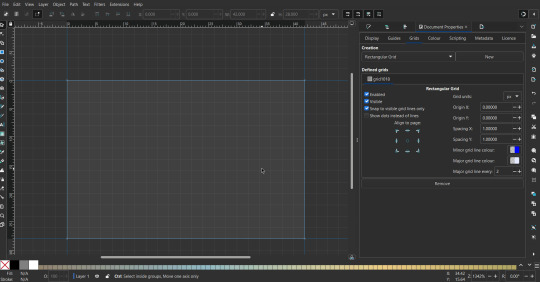
That's pretty much it, your template is done :D !
Just save it wherever you want. I like putting it in an easy-to-access flag folder, as it is needed to open it every time to make new flags.

You can use a different width / height / grid size / flag ratio if you want, these are just the numbers I'm comfortable with / used to.
Also, since this is a vector, the image can be infinitely big or small without any quality loss, so the small dimensions above don't actually translate to a low res image.
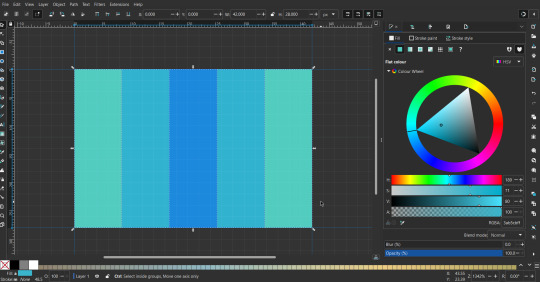
Creating the Flag
(I'll be using the rainbow flag to demonstrate.)
Start by having the template open.
You can import images (like .png/.jpg files) to color pick / reference if you want.
Said images can be transformed (resized/moved) by selecting and transforming them using the options mentioned in reference.
(This is optional, they should just be off to the side so they don't get in the way.)
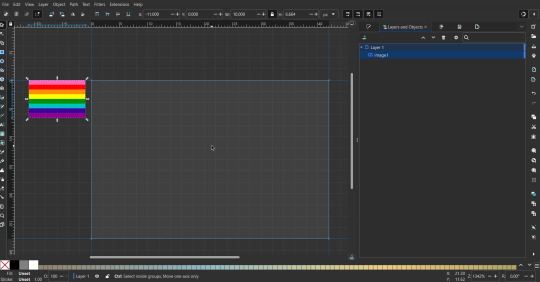
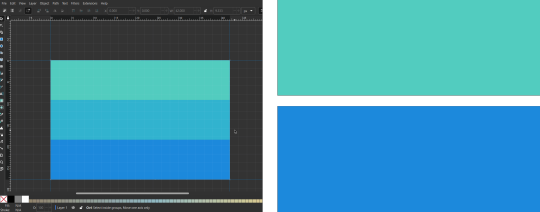
To create the stripes, use the rectangle tool.
Click and drag from one grid corner, to a lower grid corner.

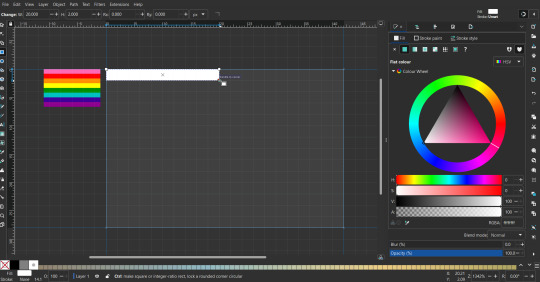
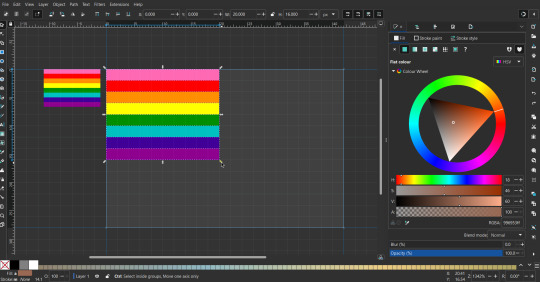
While the rectangle is selected, use the dropper tool to pick a color from a imported image.
You can also use the fill and stroke (shown on right) tab to create your own colors / edit colors / etc.
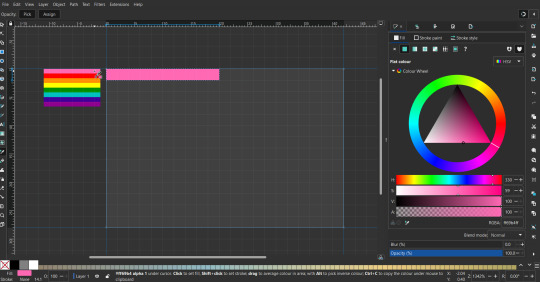
You can make these stripes however you want, they just need to all be equally sized. (They don't have to all have the same height, if you intentionally want that (like the demisexual flag for example).)
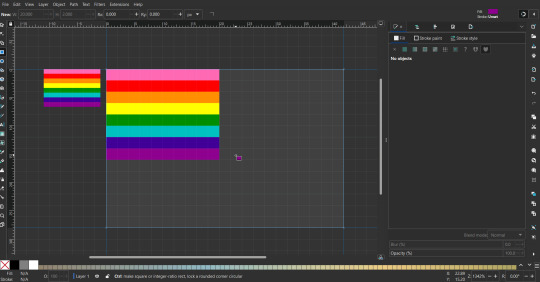
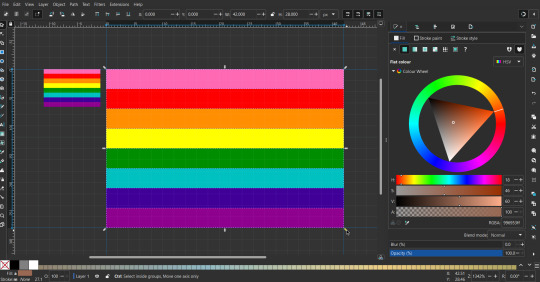
Then select all the stripes and transform them so that they fit the page.
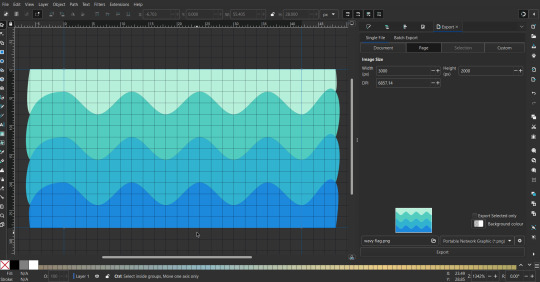
All that's left is to save/export it.
To export it, use the export tab, under single file, page, adjust the width and height (in px) to however high res you want your image to be. (I usually do 3000 by 2000.)
Type in the desired file name in the box next to the folder symbol,
use the folder symbol to choose its export location (which can also be used to determine the file name and save/export it),
the adjacent drop-down-menu to select what to save it as (,png, .jpg, .svg, etc.),
and the gear symbol to adjust other settings (I leave it as default, with antialias turned off (set to 0)).
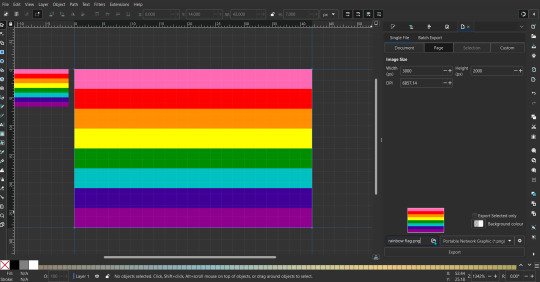
And done, you've made a flag :D 🏳️🌈
Extra Notes
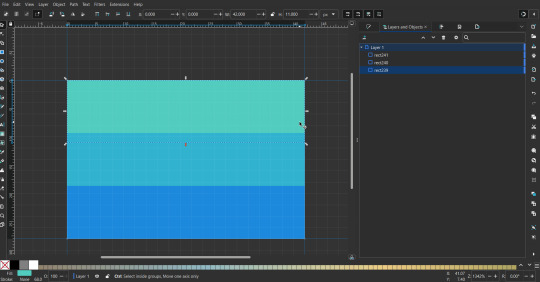
Layers and Objects: a menu that can be used to manage objects. Like their layering position (whether they are above or below another object), and other options can also be done here instead of with keyboard shortcuts.
Vertically striped flags: it's very similar to above. You would just make the rectangles taller rather than wider.
Wavy stripes: first use the pen tool to create zigzags.
(The pen tool works like a outline, so just click along the grid corners, and join the line at the end. The fill and stroke menu can be used to make it a solid colored shape, and remove/add outlines).
The steepness/frequency of the zigzags is up to personal preference, they just need to extend off the page a bit.
To create equally sized wavy stripes, have the all side lengths (highlighted in red) be equal except (depending on how you draw your zigzags) the first or last wave, which should have half the side length of the others.

Select everything, and with the node tool, select all the zigzag nodes (the corners don't need to be selected), and click make selected nodes smooth (half circle with point in middle symbol, at top of screen).
(It'll likely look like it has weird lines in-between the waves, see glitch section at the end for how to fix that.)
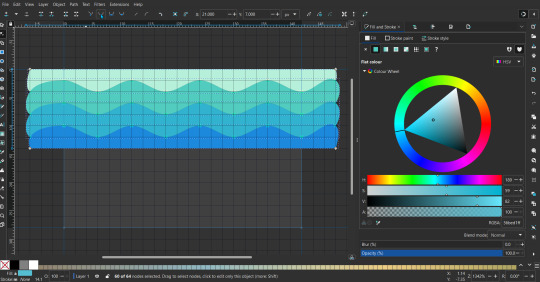
Then resize it all to the height of the canvas. And done :)
This can of course be vertical too.
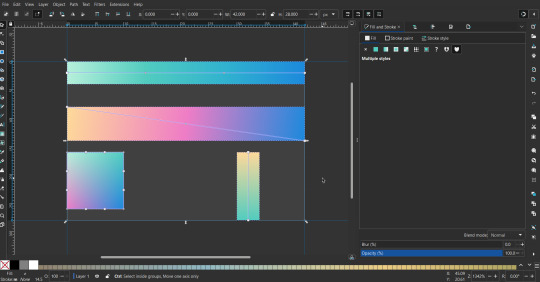
Gradients: You can use the fill and stroke dialogue, gradient tool, or mesh tool to do this.
To create the gradient, select the object, click the linear gradient symbol (gradient box) under fill and stroke. Or dragging / double clicking with the gradient/mesh tools.
(The mesh tool is what I used to create the square gradient.)
To change the colors, click on the arrows or circles under fill and stroke, or by clicking the points on the shape, to select the nodes. Then use fill and stroke to change the colors.
To create new colors/stops, click on the plus+ symbol under stops (under fill and stroke), or double click on the gradient. Edit the new colors in fill and stroke again.
To change the location of stops, use stop offset under fill and stroke, or drag the nodes on the gradient. You can also move the end points on the object to make the gradient slanted or vertical.

Symbols: I make my own when I can (like the demi- triangle can be drawn with the pen tool, and resized to the correct proportions). When the symbol is too complicated, I import a .svg of it. Wikimedia commons is a great resource, and the popular twemoji comes in .svg format too.
You could also edit it on over the .png in a rastor program if need be.
The align and distribute tab can be used to center symbols (or any other selected object). Select page for the relative to option, and use the symbols underneath to center/align it however you want. (You can also use different relative to options, like last selected, if you want to align it to an object instead.)
Deleting imported reference images: you can do this before saving it as a .svg, if you don't want to keep them / want to clean up the .svg file.
Antialiasing: an option that blurs things basically. A image with antialiasing off will be sharp pixels, while a image with antialiasing on will have transition colors between the main colors.
Below is an example. The left side is without antialiasing, and the right side is with antialiasing.

I can see why it might be preferable to have it on (like for diagonal shapes), but antialiasing can make recoloring .png (not .svg) files hard. The extra different colors messes with fill tools.
I also think it looks cleaner without, so I prefer it off.
Exporting glitch: sometimes an exported image will have a thin line between the stripes, despite the fact the stripes are perfectly next to each other.
(This seems to not just be a problem with Inkscape, but with vectors in general.)
Below is a zoomed in example of what it'd look like. The left side shows the stripes are all next to each other, but the right image has a transparent line in-between the stripes.
This can be fixed a number of ways.
You could select all the objects, and duplicate them twice.

Or overlap them.
The stripes will still be the same size when overlapped, but they will technically be behind each other, so there will be no gap.
With all the different stuff mentioned, you can basically think of them as building blocks with the grid as reference. They can all be mixed and matched together.
I didn't mention all the options, just because there's that many different things you can do in Inkscape. I'd encourage you to play around with all the different options/tools yourself.
There's also some great Inkscape guides on YouTube, it's where I learned how to do a lot of this from (even if they're not for flags specifically, the concepts in those videos can be applied to flags).
Here's an overly elaborate flag I made, just to demonstrate some (but not all) of the things that can be done.
Anyways what a long post haha. But maybe this will be helpful for anyone interested in making (pride) flags.
172 notes
·
View notes
Note
how did u get the idea for the emoji icons? and can we make our own for our characters :pleading:
OOC: a few years back i made edits of official twemoji animal emojis (pngs at the time) to be sparklecare characters! they're really outdated and old and crusty because i only used pngs at the time, but when i started working on cometcare i thought it would be a cute little thing to make the profiles unique.
i'll try and explain how i do this as best as i can, sorry if this is confusing!
for context, twemoji is an open-source emoji font that is officially made by twitter. it's what discord uses for its default emojis! it's completely free. you can find all the assets and svgs here on the official github page. to edit them, go into the 'assets' folder after downloading and find your chosen emoji by scrolling for it in the 72x72 folder, these are all pngs.
unfortunately, the files arent sorted by name of what it is, but instead just letters and numbers. once you find the one you want, copy-paste the file name and search it in the svg folder (as the svg has the same file name as the png version) and copy it into your vector editing program.
its kind of a hassle to navigate through these repeatedly because there's SO MANY OF THEM, so what i recommend doing is copy-pasting all of the animals (and other objects if you want to do stuff like use the tophat like i did for soob) into one big svg canvas (or a folder if you want, but i recommend the canvas just so its easier) and copy and re-use them for each of your characters. i also recommend scaling up the image so when you export it, it's not super small and you can put it in an art program to make the icon.
you absolutely can use this idea, no need for credit! if you don't know how to work with vectors, it's relatively easy to learn, check out inkscape since its a free program! there's also paid programs like adobe illustrator but inkscape is something i learned to use in a high school art class so i'm pretty familiar with using it
you can use this method for basically anything you want, you don't need to limit it to toyhouse icons or anything! you can make custom emoji for servers and stuff too if you want :]
in theory you can make edits of the regular pngs, but its not as easy to edit the colors as it is in a vector editing program and can make the lines crusty
67 notes
·
View notes
Note
Thank you so much for answering my question. The animations like the ones you have in your Ben Barnes gallery catch my eye (that would be the third avatar). The animations of Lee Dong Wook's avatars too. The first one above is beautiful. Have an excellent day <3
Hello again dear anonymous person!
Well, it's nothing fancy, but I made a short video. I recorded the steps to make this kind of animation! I hope it helps you!
Unfortunately, my Photoshop is in French. But here are the steps will be available bellow the video :
1) You have to open your avatar (jpg or png) in Photoshop.
> I like to use one that is already styled. I just need to add the animation.
2) Create a folder (I named it ANIM) in your layers panel.
> This step is optional, but I like to do it to keep everything clean and easy to find.
3) Create your first empty layer in the folder, name it clearly.
> I choose 1 because it'll be my animation's first frame.
4) Draw the elements you want in your animation with the pen tool in the color of your choice.
> Here I choose the rough shapes of the flowers
5) Create a new layer in your anim folder and draw the second frame of your animation.
> In this step I like to keep the old layer visible so I can see where I put my first animation layer. This is optional.
6) Repeat step 5 and create a third layer for the animation.
> I like to do 3 to 5 layers, depending on the animation I decided to do, but nothing more to make them really light.
7) When all your layers are done with drawing, hide them all with the little eye in the layer panel.
8) Open the Timeline window.
> If it's not already open, you can find it in the "Window" menu of your Photoshop) and make sure you have the "Frames" selected (if you see a timeline, you're not in the right mode, you can easily change it by selecting the 3 little squares at the bottom of the window).
9) You should have an existing frame once you are in the timeline mode. If not, click on "create frame animation".
10) Then click on the little [+] button at the bottom to add a frame near the trash. If you have 3 layers, make sure you have 3 frames
11) Select all 3, then click on the 0s and choose 0.1s (this will control the duration of the frame animation)
12) Select your first frame > then make your layer 1 visible. // Select your second frame > then hide your layer 1 and make your layer 2 visible. // Select your third frame > then hide your layer 2 and make your layer 3 visible.
13) Then you can "save for web" and play your gif to see if you like it!
Again I hope this helps!
Enjoy your creation time!
May you make a lot of nice things that makes you happy!
#tutorial#short tutorial#animation diy#avatar#gif avatar#a devious route explain#ressources#rpg ressources#a devious route
71 notes
·
View notes
Note
Hello, do you have tutorial for how you get 3D models into your game?
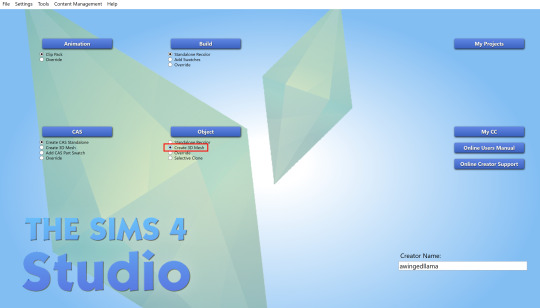
hi! it's easy, here's a quick tutorial:
So first off you'll need Sims 4 Studio, Blender, and a very general idea of how to use Blender to make CC
Your 3D model needs to be in a file format supported by Blender. I use 2.76 which supports what you see in the screenshot below. If the model you found isn't available in a supported format, there are converters online which can convert models to .obj (anyconv.com, etc.). Just give it a Google
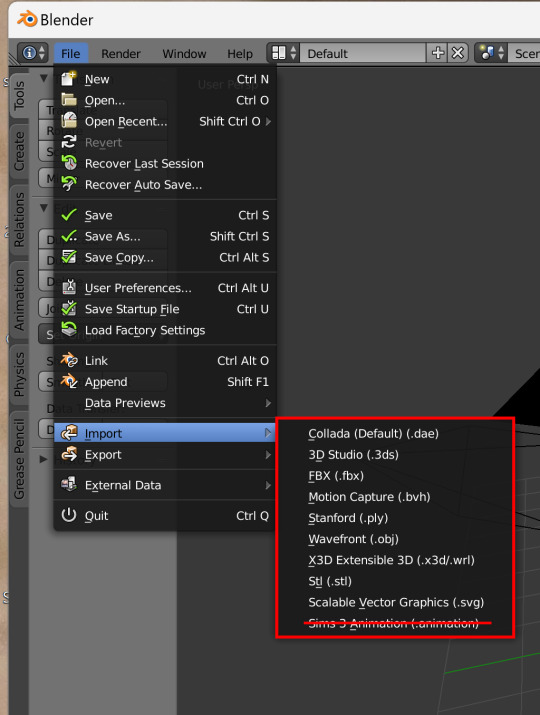
I found a .dae model of an old TV on freepoly.org to use for this tutorial (the download came with a textures folder and a model folder).
In S4S, create a 3D mesh for whatever kind of model you downloaded (or just a deco object, if you don't want it to be functional).
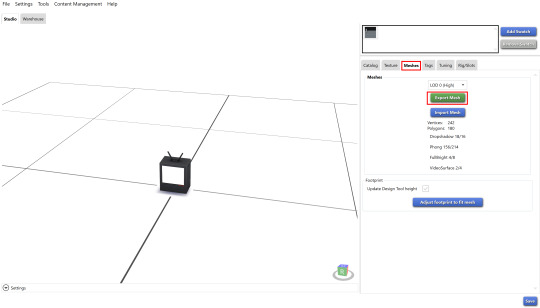
In the meshes tab, export the mesh of the EA object.
Open the blender file of the EA object, and import the 3D model into the scene. The TV model is a collada file, but you'd import whatever kind of file you downloaded.
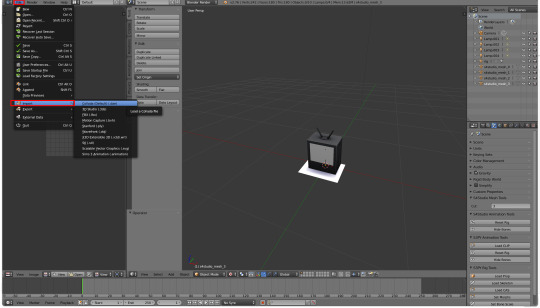
If it looks like nothing happened, don't worry! Your model is there, it's probably just to scale - which means super huge in comparison to the tiny Sims 4 object. Zoom out until you can see it, and then size it down with the 'S' key. Move it to the same place as the EA mesh
Rename UV Map to uv_0. Then, after deleting the EA mesh in edit mode, join the 3D model with the EA object. Shift-click the imported model then the EA object in the outliner, before pressing Ctrl+J (you have to be in Object mode for this to work. Use Tab key to quickly toggle between Edit and Object mode)
If you are using a deco object, you'll be replacing s4studio_mesh_1. s4studio_mesh_0 will probably be a shadow plane, which can be left alone or hidden altogether in your mesh
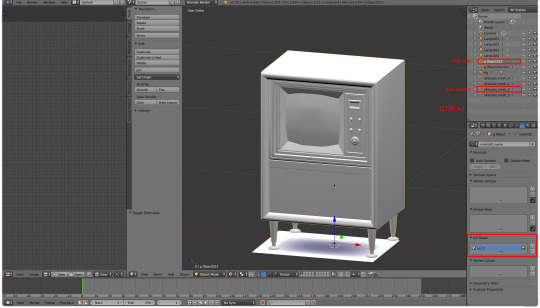
Apply a decimate modifier to the mesh if necessary (some 3D models are pretty geometry heavy – you'll probably want it under 10k polys). Since decimating is destructive, you don't want a very high poly mesh, because it won't look good after the modifier is applied. (you can retopologize the mesh but that's a whole other thing)
Import the mesh in S4S (the higher poly the mesh, the longer this takes), then import the texture that came with the model. This texture was a 4k JPEG, so it needed a bit of work (especially as TS4 doesn't support 4k textures). I sized it down to 1024x1024 and converted it to a .png.

Replace all LODs and shadow meshes. Make sure to import a blank bump and specular map, or else your object will be oddly lined and shiny
This last step is optional, but as most 3D models (that aren't game ready) are made for rendered environments, a lot of the textures don't have ambient occlusion or highlights. It makes for a bit of a plain-looking object in TS4, so I like to add these by baking the shadows in blender and painting highlights in PS. I also used the oil paint filter in Photoshop on the wood to make it more maxis-match.

If you haven't made anything for TS4 this might seem complicated, but once you get the basics it's very, very simple. Like copy-and-paste
the only other thing would be to make sure that the license for the 3D model permits personal use! (and not to paywall it obviously because beyond being crusty behaviour, that is legally perilous)
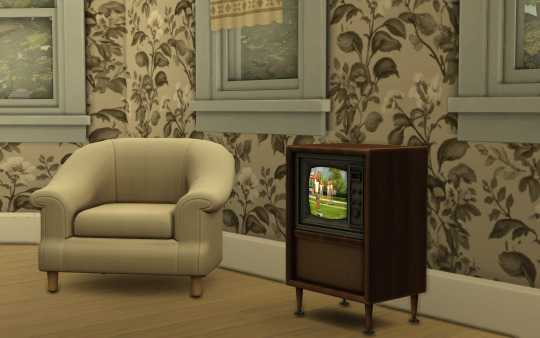
download the TV here if you like
and if you have any questions about specific steps, dm me!
357 notes
·
View notes
Last Seen Blogs

sandhyaenterprises
Sandhya Enterprises
dovecameron-news
Dove Cameron News

didalovprofer-home-blog
DIDALovprofer home
thousandth-island
whats thousand island
dooblesdoodles
Whoopsies