
Don't wanna be here? Send us removal request.
Statistics
We looked inside some of the posts by zong-gaming and here's what we found interesting.
Average Info
Notes Per Post
0
Likes Per Post
0
Reblog Per Post
0
Reply Per Post
0
Time Between Posts
13 days
Number of Posts By Type
Text
17
Last Seen Tumblr Blogs


Fun Fact
25% of US internet users with an annual income of $80-100K use Tumblr.
Text
Metaphor: ReFantazio

Gameplay : ★★★★☆ Graphics : ★★★★☆ Story : ★★★★☆ Customizability : ★★★☆☆ Replayability :★★★☆☆
Metaphor - ReFantazio is a game that follows the popular Shin Megami Tensei Persona franchise, which I am a fan of. For the record, I played almost all Shin Megami Tensei games except 3 and 4, and all Persona games except 2. If you are interested I have posts on SMT5 and Persona 5 Royal.
Story
Spoiler Alert!
The story begins where the king was assassinated by the main antagonist, Louis who was a prodigal tactician and a master of magla (magic) arts. His own heir, the prince, fall to Louis' fatal curse since young and never woke up since then. The main character was a close friend of the prince. After the King's assassination, he was asked to infiltrate into the military to deliver a message to a contact there. Turns out the messenger was the swordmaster of the Prince, and his order was to kill Louis.
After enlisting in the military, in his first mission he encounters a monster he can't beat. Lead by a voice in his head, he awakens to a power hidden within him, transforming him into a true spirit of a hero - Archetype.

Seems like all of this series likes to inflict self-harm before awakening
Later on during the King's funeral, the King's magic allowed him to speak to the people one final time, and this time he mentioned that whoever gained the most faith of the people shall becomes the King.

There are 2 top candidates, Louis and the head of the church, Forden. The King's magic also casts a protective barrier over all top candidates, making assassinating them impossible. The main protagonist's party have no choice but to take part in this popularity contest, mixed into Louis' rank hoping to get close to him and find an opportunity to better kill him.
In one of the mission, the party got their hands on the Divine Relic Lance, which can overwrite the King's magic and pierce through even the candidates. After a series of events, using the Divine Relic Lance, the team was one plan short of killing Louis, and Louis used the Lance to instead kill-off Forden, who admitted he was the mastermind behind the prince's curse, where he threathened Rella, sister of Junah to kill the prince. Rella sacrificed herself to atone for her misdeed, thus awakening the Prince. However Louis, who by then knew that the Prince is not dead yet, has already sent his underling to kill the Prince. The party was too late, and lie before them was the body of the Prince. It was then a sudden revelation revealed that the protagonist is actually the prince.

It began when the prince's will was so strong from reading a novel, that the divine relic in the form of that same novel, created an entirely new entity with pure magla (source of magic) to create a manifestation of the prince's desire.
The two entities finally merged together and they are full again. Now they must earn back the trust and support of the people to defeat Louis in the throne ranking.
Gameplay Mechanic

Gameplay are mostly similar with Persona series. Outside of combat, you have to make full use of your limited days to get stronger, increase your bonds, etc.
Encounters


Normal Combat begins when you touch/attack an enemy (or vice versa) in the overworld, similar to SMT. You can also perform a sneak attack on an unaware enemy, which will deal large damage to all enemies, while stunning them for one turn. However, attacking stunning enemies will have a chance to un-stun them, so you need to be careful.
In the overworld, you can also activate Fae Sight to identify enemy's strength via their colour highlight. By attacking weaker enemy highlighted in blue, you will defeat them straight away without entering battle. If a weaker enemy attacks you, you will also not enter battle, though your main character will take damage.
Combat
Combat is just what you would expect from SMT/Persona game.
Each turn in battle you have a certain amount of Turn Icon denoting the number of times your party can take action. You can use this to perform actions such as normal Melee attack, casting skill, guarding, or passing. Guarding will greatly decreases the damage you take and prevents any weaknesses from being exploited. Passing the turn however will only cost half a turn.
Like Shin Megami Tensei, enemies have weak points, and hitting them with their weakness or scoring a critical hit will only decrease Turn Icon by half instead of full. However if an attack is nullified or evaded, the number of Turn Icons consumed is doubled, and if it is reflected or absorbed, all Turn Icons are lost. These apply to the enemy as well.
Synthesis Skills

Synthesis skills are cooperative skills that requires at least 2 characters of a specific archetype to perform. They will consume Turn Icon equal to the number of participants, and each character will consume the required resource to cast the skill.
Formation
Formation is something new and I don't recall it being on SMT/Persona. Basically you can assign position to your party members. Front row units will deal more damage with melee attacks, while back row units will take less damage from enemies. This can be freely changed during battle without using any turn icon.
Retrying battle
One QoL the game offers is the ability to retry a battle. Anytime in battle, if you are unhappy with how the battle went, you can restart it from the beginning.
Bonus

When defeating an enemy and achieving certain successes such as being unscathed, you will receive bonus to the amount of EXP, Mag, and money.
Stat Point

Upon leveling, 1 stat point will be added, and you will receive 1 additional stat point that you can freely allocate to any of your stat.
Archetypes


If not clear enough already, Archetype is the Persona version in this game. A character can unlock Archetypes by consuming MAG, a resource earned after winning a battle. Higher tier Archetypes will require the lower Archetype to reach a certain level before it can be unlocked.
Levelling up Archetypes will allow them to learn new skills. Once learn you can also perform Skill Inheritance, to give the skills to other Archetypes at the cost of MAG. At any point in time you can only have up to 4 inherited skills, though you can swap in/out outside of battle.
You will also receive rewards by unlocking enough Archetype per character. The best weapons in the game can also be gotten this way.
Mastering an Archetype will also provide permanent stat boost to your character. It is worth mastering all Archetype because of this.
Followers


Another Persona mechanic, where you can befriend and get closer to people to support you. By strengthening your bonds with your Followers will unlock various abilities, higher tier archetypes, and additional skill inheritance slots.
Travellers' Voices
Another QoL feature. This feature requires you to connect to the network to see other players' cleared party formation, useful if you are having a tough time clearing the dungeon.
Royal Virtues

Another Persona feature, where there are social stats that you can improve in various ways. You will need a high enough virtues to increase your follower's rank.
New Game+
New game+ will allow you to transfer
All items (except key items)
MAG
Royal Virtues
Scanned Enemies
Memorandum
Archetype statues
Total Play time
Also, clearing the game will unlock the hardest difficulty - Regicide. In this difficulty,
Enemies will do more damage
Lower EXP gained
Higher MAG costs to unlock Archetype
High drop rate
Retry feature is unavailable
Apart from this, there is also a new SUPERBOSS that is only available to challenge in new game+ - the Redscale Apocalypse Dragon.
Tips:
If you need a guide, i recommend this. I personally used this guide and managed to 100% during my first playthrough. It is very useful with maps and boss strategy. If you are on your new game+ though, I would recommend this walkthrough that is simpler to read and better in min-maxing in my opinion.
Exchange items (item with "Consider selling it" in description) are safe to sell.
Exchanging MAG for money will have a better rate during rainy days. Though i dont recommend doing this as money is much easier to farm compared to MAG, and you need alot of MAG to learn new Archetypes.
Auto save will happen when you open a door, or just before you pick up an item.
Once you got your Gauntlet Runner, remember to visit the pantry everyday to get food ingredients. If you are spending the night on the Gauntlet Runner, check the campfire for random items as well. Also every 5 days you should also visit the toilet for a permanent +1 Luck.
Cook only 1 dish at a time. Because you will receive one additional dish no matter how many you make. Thus cooking 1 dish will net you greatest profit with double the amount.
Managing MP is crucial to clear dungeons. In early game, make sure most (if not all) of your characters learn Thief's "Plunder Magic" skill, learnt at rank 11. This allows your character to drain MP from enemy in battle.
During Watersday, purchase "Archeypal Ring" sold by Nidia Shopleer at Merchant's Bazzar on Port Brilehaven. This accessory increases the amount of A-EXP earned. Recommended to buy 7, one for each playable character.
It is totally fine to equip Archetype that is already maxed out in level. For every 1000 A-EXP received, you will receive an item that will grant 1000 A-EXP to any Archetype you want in return.
When grinding, change your difficulty to easy to get 50% more MAG and 25% more Archetype EXP.
The best way to farm end-game is at the final dungeon, fighting the fish-head human. I usually equipped with Faker/Gunner lineage so i can snipe them from far without needing me to move around.

My Opinion:
The Good:
1 Alot of QoL features, such as immediately killing off weak enemies without going into battles, allowing you to use your favorite Archetype even when its max level to avoid wasting A-EXP, etc.
The Bad:
Clothes only gets visually changed in dungeon. And during cutscenes, their clothes will be reverted back to the default.
My Playthrough


Played the game in normal mode, completed all side-quests and bounty, collected all 50 gold beetle, maxed out all virtues and followers' rank. Grinded in the final dungeon to max out all Archetypes for all characters, before changing the difficulty to HARD and defeated the final boss.
Then I played new game+ in Regicide difficulty and defeated the final boss and SuperBoss - Redscale Apocalypse Dragon.
Party Setup
For my party I am going with a full Tycoon build. In this game single Archetype party is very strong due to certain passive giving higher boost the more same Archetype you have in your party.
Protagonist


My protagonist is my main attacker who will use "Gold Rush" attack as his main attack. This attack can't be block or nullify as it is almighty element. On top of it, it has a very high crit rate, couple with "Gambler's Manual", it will deal an absurb amount of crit damage.
For inherited skills, - Dilligent Discipline - This will further boost critical rate. WIth 3 other Tycoon, "Gold Rush" will reach 100% crit rate - Sense of Kinship & Heat Up - Increases attack based on the number of same Archetype in party - Short-Range Boost - Slight boost to attack when in front row
Strohl


Strohl has the same role/equipment/inherited skills as my protagonist, dealing damage with "Gold Rush". Why I use Strohl here is due to his high attack. He and Basilio has the highest attack out of all members, so either will do.
Hulkenburg


This third role is to cast debuff on enemy, so that the 2 attackers can deal more damage. The only reason why I use Hulkenburg here is due to her passive being able to shield Protagonist.
For inherited skills, - Masked Revelry & Revitalise 3 - To provide some MP regen for sustainability - Front Boost - To further boost Protagonist & Strohl damage - Vidyartha - Bread and butter of this role, to reduce enemy's attack & defense by 2 tiers.
Heismay


For my last role it will be a dodge tanker + buffing allies. Heismay is a no-brainer given that he has the highest agility out of all members, allowing him to dodge easier.
Serene Headband to further help him in dodging, while Dodger Ring will deplete all enemies' turn icons when they miss.
For inherited skills, - Shadow Dwellers & Third Eye - To further increase his evasion - Knight's Proclamation - To taunt enemies into attacking him to result in them missing and losing all turn icons - Formation of Vigor - To buff Protagonist and Strohl's attack.
0 notes
Text
Space Prison

Gameplay : ★★★☆☆ Graphics : ★★★☆☆ Story : ★★☆☆☆ Customizability : ★★★☆☆ Replayability :★☆☆☆☆
Space Prison is a survival tactical game developed by an Indie company where you need to adapt to your life in prison and gather resources, craft items, build up repute, with the end goal of escaping the prison.
Gameplay Mechanic
Starting character

At the start you will be able to choose your main character. There are 3 races, each with their own traits. Then you can also choose a crime, which also simply translates to additional trait you want on your character.
Exploring the prison

Every day, there are 8 hours where you can move around the prison. Every location moved will take 1 hour. After 8 hours are up, you will be back in your cell and prepare to sleep for the next day.
Prison is shaped in a node-based structure, and you will encounter different nodes when moving from one location to another. The node can be a battle, event, loot, or special.
Hunger and Hope

Just like most survival game, there are gauges that you need to manage. Hunger is as it sounds, how hungry your character is. Every hour will reduce 4 hunger gauge. Hope is the "mental" gauge denoting how mentally sound your character is. There will be positive effect on your character if these 2 gauges are high in value, as such providing additional Action Point (AP) in battle. If these values drop, your character will receive debuff instead.
Combat


Combat is a turn-based battle in a grid layout. Units with higher agility will move earlier. Each unit will have a certain amount of Action Points (AP), denoting the amount of actions that unit can perform in battle. Certain abilities will cost only 1 AP, and certain more powerful abilities will cost 2 AP.
Abilities in this game is interesting as its not simply just an attack command. It can also involve different movement and effect. For example one ability can consist of: (1) Move forward 1 grid (2) Attack enemy (3) Push back enemy. Coupled with traps around the battlefield, the combat mechanic is really interesting in my opinion.
Note that row doesn't really matter, only column matters. For example, if your character is on the top row, he can hit the bottom row more than 1 space even if the attack range is 1.
Items, Crafting, and Upgrading


Crafting and upgrading is the main way to survival in this game. By gathering resources around the prison, you can craft items to help you in your exploration and survival. You can also craft equipment (weapon and armor) to help in battle, cook ingredients to provide you with meal to fill your hunger, etc.
Upgrading allows you to improve the facilities of the prison, allowing you to get more benefits out of everything.
There are two kind of items, contraband items and non-contraband items. Contraband items are items that are forbidden in the prison, and if caught red-handed by the guards, it will be confiscated. Non contraband items on the other hand, are free to carry around the prison.
Your character has item bag to store items, and this is also differentiated by secret stash and non-secret stash. When placing contraband items in secret stash, it will not be discovered by guards around the prison.
Gang

At the beginning of the game you will have a choice to join one of the two gangs in the prison. The other gang you didn't join will becomes your rival gang and they may extort you.
You can fight against different gang members to prove your worth. Coupled with doing quest for your gang members, you will be able to climb up the gang ladder and eventually be the gang leader.
Everytime you climb up the ladder, you will receive an implant of your choice. Implant is basically permanent passive buff.

By doing quest, you will earn respect of your fellow gang member and they will join you in battle. However, each member can only participate in battle once per day.
Party Crew

Throughout your life in the prison, you can befriend rats or craft drones to help you in battle. Unlike gang members, rats and drones can continue to fight in multiple battles until their HP drops to 0. Different unit has different required leadership value, and the number of units you can bring to battle depends on your leadership value, which will increase as you progress.
You can also craft equipment to gear up your party crew. These equipment's durability reduces by 1 for every battle.
Rats also have their own unique skill that can be used once per turn in battle. These skills can be leveled up by simply using them in battle.
Info

Throughout the gameplay you will have another resource - Info. This info can be used on any gang member to reveal detail about the member. Each member has two types of info, Personal and Combat. Meaning to unlock full information about a member, you need 2 info points.
Death

When you die, it's not game over. Your mind will be transferred over to a new body, and your items, equipment, gang ranking and affinity, passive abilities, rats/drones will still remain. Basically everything EXCEPT your credit. Thus remember to use finish your credit before choosing to die.
New Game+
There is no new game+. Upon defeating the final boss and escaping from the prison, you will return to main menu and your save data is invalidated. Fortunately I saved and transferred out my save data before the final boss so I can still resume when needed
Tips:
Remember to give away items that can't be sold to your gang members to increase your relationship with them.
You can save the game by choosing "Save and exit". This is the only way to manually save the game
You can fight with certain guards (with red radar rather than blue) and defeating them will net you Electric Baton which is an ingredient for the best weapon in the game.
It can get very costly to repair equipment. For easy battle, I would recommend removing equipment with durability. If using rats or robots, feel free to equip the weapon and unequip the armor, as the weapon for both are either free to repair, or has no durability.
My Opinion:
The Good:
Battle are easy, fun and interesting
Being able to upgrade your prison is fun
The Bad:
It feels more like an inventory management game because i spent more time deciding what to keep in my inventory and stash. Understand that this is part and parcel of a survival game, but just hoping if the game can provide us with larger inventory spaces.
At a certain point you will need to die and transfer your mind to a new body with random traits. This is bad because it makes the initial character creation redundant.
My Playthrough

Completed the game in 26 days, upgraded all facilities to the max, became gang leader and maxed out all relation.
Party Setup


For my main character I choose Nex+Saboteur combo. Nex is very useful for its Hover trait, and it's Telekinesis is useful to reposition enemy. As you will be mainly using Rats to help you in battle, being a Saboteur is very useful to reduce their required cost for deployment.
I mainly use Rats in my playthrough, and until late game I used 4 K1LL-3R Drone, which in my opinion is the best unit. I have 2 passives, each reducing the Leadership cost of Drone by 1, resulting in my Drone only having 3 cost.
For my drones' equipment, I equip its best weapon - "Warzone Rig". For armor, I equip it with "Repair Module" to help with health restoration.
For my main character's equipment, I equip with the best and most OP weapon in the game, "Sturdy Electric Baton". For armor, I use "Reaper's Eye Implant" for it's passive to reduce Drone's leadership cost.
0 notes
Text
Dragon Quest III HD-2D Remake

Gameplay : ★★★☆☆ Graphics : ★★★☆☆ Story : ★★☆☆☆ Customizability : ★★★☆☆ Replayability :★☆☆☆☆
This game is a remake of the original Dragon Quest 3 in year 1988. I'm a fan of the series, but did not manage to play DQ3 until this remake.
From my memory, in the Dragon Quest series I've played - Dragon Quest VIII: Journey of the Cursed King - Dragon Quest Swords: The Masked Queen and the Tower of Mirrors - Dragon Quest XI S: Echoes of an Elusive Age - Dragon Quest Monsters: The Dark Prince
Story
Dragon Quest 3 tells the story of the main character hearing a voice in his/her head to travel around the world to collect all 6 orbs (kinda like Dragon Ball) to defeat the Archfiend and return peace to the world.

Upon defeating the Archfiend, peace was only but a short while, before the real antagonist, Lord of the Underworld, Zoma, resurfaced to the world.
Meanwhile in the journey, the Hero will also uncover the truth of his father, who was also a Hero who saved the world back in the days.
Gameplay Mechanic
Combat


Combat is a traditional turn based JRPG where you can have up to 4 characters in your party, and having them attack/defend/cast spells/use abilities etc each turn.
Combat here is also unique to the olden days of Dragon Quest where enemies may be grouped together. There is no way to target individual enemy within a group, as the system will random attack anyone in the group. There are weapons/abilities/spells that can target all enemies or all within a group.
Personality

At the start of the game, you will be asked a series of question to determine your hero's personality. Personality is like Nature in Pokemon, affecting stat growth.
Personality can be changed permanently by using Book items around the world. Some accessories can also temporarily change Personality of wearer when equipped in the main accessory slot (except cursed items).
Character and Party

Unlike most RPG games, including other Dragon Quest series, you do not have characters joining your party as the story progresses. Instead, you need to form your party in Tavern, be it picking up preset characters, or creating characters from scratch, allowing you to customize their starting class, personality, initial stats, etc. You can create as many characters as you like, but only 3 can be in your party with your main Hero.
Vocation

Apart from Hero, any other character can change their class, or Vocation once they reached level 20. When changing Vocation, they will return back to Level 1, but retain all their learnt abilities and spells. Their stats will also be reduced by around 50%. However note that stats raised by seed will not be reduced.
Friendly Monsters


Throughout the world there are monsters that are friendly and can be recruited. Once recruited, you will be able to use them in Monster Arena.
On top of it, there is a class/vocation that learns skills based on the number of monsters recruited. Definitely worth to have the class with you all the time.
Mini Games
Monster Arena


You can choose 3 monsters out of all you recruited to form a party to challenge the monster arena. You can't give commands to them, however you can select the different tactics for each of them.
New Game+
There is no new game+, but there are some post game contents. Upon defeating the final boss, Zoma, you can save your cleared data. Loading this save will bring you back before you defeated Zoma, so you can challenge it again as many times as you like. You can also finish anything remaining, such as monster arena, collecting mini medals etc.
Apart from that there are new dungeons and 2 Superbosses to challenge.
Tips:
Open up menu, go to Misc > System Settings > Text/Running Settings, and set Running to Toggle. This will help to ensure you are always running
Vamp personality is the best since it offer the highest total stat growth combined compared to other classes. However this requires your character to be female (appearance B)
When creating a character, the amount of different seeds you allocate will determine their personality. Also note that a given combination will also result in getting different personality. Simply press back until you can reallocate the seeds and repeat until you get the personality you want.
Use Seeds item as soon as possible as changing vocation will not reduce stats gained by Seeds. Some seeds also increase the speed of stat growth, thus its recommended to use them.
"Holy Protection" + "Padfoot" can help to reduce most random encounters.
"Wild-Side"+"Monster Pile-on" is one of the easiest boss killer skill in the game, dealing high damage as long as you recruit lots of monsters. Note that buff like oomph or debuff like sap doesn't increase the damage of this skill
Max money you can hold is 999,999. Note that you can earn alot of money by playing Monster Arena, so if it is reaching the cap soon, remember to deposit into bank.
You can refer to here for fast leveling tips
If you want a walkthrough, you can find a decent one here. It will bring you the full walkthrough with all mini medals. However during the walkthrough not all friendly monsters are recruited, you need to find the remaining ones.
My Opinion:
The Good:
Bringing back one of the most classic Dragon Quest series with a nice HD graphics.
Dialogues are simple, short and not long winded. Great for players like me who are more interested in combat rather than reading.
The Bad:
Agility in this game is weird. Unit with highest Agility does not always go first. This makes it difficult to speed tune your characters.
My Playthrough


Completed the game in "Dragon Quest" difficulty, which is essentially normal difficulty.
Collected all Mini medals, recruited all friendly monsters, highest monster arena rank, completed post-game contents and defeated the super boss Xenlon in 13 turns and Grand Dragon in 20 turns. Not the best as my setup wasn't made specifically to quickly kill them.
Party Setup
Hero - Main Healer

The Hero is a jack-of-all-trade, master of none - being able to use physical attacks, magical attacks, and heal. Perhaps the only thing he can't do is support. He is the weakest character in my opinion, as he cannot change vocation to increase his stats and learn many different skills and abilities.
The best way for me to use him is to let him be the dedicate healer of the team, as he can learn the 2 best healing skills in the game, "Fullheal" and "Omniheal". While Omniheal is good, it consumes too much MP for it to be sustainable. Unfortunately he can't learn "Multiheal", the next best party-healing skill, BUT there is a reusable item "Sage's Stone", that when used in battle, will case "Multiheal"!
Thus for me, in battle, he will just focus on healing by either using any of the 3 - "Sage's Stone", "Fullheal", or "Omniheal".
For equipment, I simply gave him the equipment that only he can equip. Accessories will be "Meteorite Bracer" so he can be fast enough to heal, and "Goddess Ring" to not only regen MP outside of battle, but also to provide Wisdom that is taken into account when healing.
Warrior - Main Attacker

Warrior is my main physical attacker. Why Warrior and not other classes like Martial Artist? Because only Warrior can equip some of the best equipment in the game. Also, as I will be mainly using "Monster Pile on" as my main damaging skill, attack stat isn't as important, so I might as well prioritize survivability as a Warrior.
In battle, there are only 3 commands that he needs to use. 1. Use "Wild Side" when its not active 2. Use "Monster Pile-On" when Wide Side is active 3. Use "Focus Pocus" when you need MP regen, while Wide Side is inactive.
For vocation progression (Changing class only after everything is learnt):
Thief -> Martial Artist -> Monster Wrangler -> Warrior
Sage - Support

Next character is my Support Sage. Why Sage and not some other classes like Thief for the extra agility? Because I want this character to equip "Duplic Hat", which allows user to cast spell twice, and this hat can only be equipped on Mage, Priest or Sage. Buffs such as "Kabuff" or "Magic Barrier" can be stack, thus being able to cast twice is very awesome. With "Wild Side", it will be cast 4 times every turn!
In battle, this character will 1. Remove debuff if any 2. Provide buff to the team by mostly alternating between "Kabuff" and "Magic Barrier", and use "Accelerate" or "Insulate" only when needed. 3. Optional: Use "Focus Pocus" when need MP regen. 4. Optional: Wild Side to move twice 5. Use "Monster Pile-on" against bosses if needed
For vocation progression (Changing class only after everything is learnt if not stated):
Priest (After learning Multiheal -> Monster Wrangler -> Gadabout -> Sage
Sage - Magic Attacker

The last character on my list is a magic attacker Sage. This sage will simply use "Rubiss's Sword" to cast free Kazap every turn. This is purely for crowd control. Against single target bosses, her efficiency is very low. Thus she can follow the Warrior Strategy, to use "Wide Side"+"Monster Pile-On". This is great as it doesn't really rely on the stat, so she can deal equal amount of damage as the Warrior class.
For vocation progression (Changing class only after everything is learnt if not stated):
Mage (After learning Oomph) -> Merchant (Level 20) -> Monster Wrangler -> Gadabout -> Sage
Seeds Distribution
The following is how I distributed by Seeds to my characters:
Seed of Strength - Warrior Seed of Defence - To my 2 Sages to ensure they are as durable as my other 2 characters Seed of Stamina - To my 2 Sages to ensure they are as durable as my other 2 characters Seed of Wisdom - To my Attacker Sage Seed of Agility - Warrior Seed of Luck - Warrior Seed of Life - To my 2 Sages to ensure they are as durable as my other 2 characters Seed of Magic - Warrior
0 notes
Text
Tiny Tina’s Wonderlands

Gameplay : ★★★☆☆ Graphics : ★★★☆☆ Story : ★★★☆☆ Customizability : ★★★☆☆ Replayability :★★☆☆☆
Tiny Tina's Wonderlands is the successor of the popular Borderlands series by Gearbox+2K. I'm a fan of this game series as well, who played all 3 Borderlands. I have my Borderlands 3 post here if you are interested.
Story Setting

You are a player in a tabletop RPG game where Tina is the gamemaster.
Gameplay Mechanic
Its mostly similar to Borderlands 3 so I wont repeat much.
Class and skills

Unlike Borderlands, you get to choose a class to start with, rather than a character. But its actually not much different as classes here works the same as characters in Borderlands, each with its own unique skill tree and abilities. In Tiny Tina's Wonderlands however, you get to choose a secondary class, which adds more variation and customization. Each level will grant 1 skill point and 1 stat point that can be freely allocated.
Myth rank

The maximum level in this game is 40, once hit, you will no longer be able to level up. However when you earn EXP, instead of leveling up, you will level up what is called Myth Rank. Each rank will grant 1 point where you can allocate to the Myth Rank Tree.
What the Myth Rank Tree can offer is tons of different stats. There are 4 different set of Tree, and once you allocated a point to a tree, you will be forced to move on to the next tree (in clockwise order).
Overworld

Tiny Tina Wonderlands also add a new touch to the game with the overworld. It basically is how the player traverse to different parts of the world.
Enchantment Reroller

This is only unlocked post-game, where you can use "Moon Orbs to reroll a piece of gear's enchantment for a different one. Everytime you reroll the same gear, the cost will increase exponentially.
Chaos Chamber

An end-game content which is also unlocked post-game. In this game mode, you will need to clear rounds of encounters. Upon completing an encounter, you will be given a choice of Curses, which comes in Easy, Medium, Hard difficulties. The difficulty of a curse determines how impactful it is on your Chaos Chamber run. Curses on the easier side will help you by providing buff, while harder Curses will buff enemies while debuffing you.
During your run you can also earn a "Crystal" currency. These can be used to purchase blessing at Altars, granting you powerful upgrades to your stats and abilities during your run.
Clearing an encounter will also allow you to choose different form of rewards
"Meet the Dragon Lord's challenge" to choose a new curse, heightening risk in exchange for greater rewards. "Accept Queen Butt Stallion's favor" to receive a blessing upon one of your passive skills. "Choosing the Crystal Die" will net you a bounty of Crystals. "Going for the Gear Die" will provide you with a new piece of gear.
After completing a run, you can use all remaining crystals to feed to an equipment of choice. The more you feed, the higher chance of the equipment being rarer and more powerful.
New Game+
There is no new game+. Upon defeating the game, you will be sent back to continue your adventure. However as per Borderlands, you can store your gears in your Bank so that other characters can use them too, adding some values to playing new game.
Tips:
Most of my tips are similar to tips I had for Borderlands
You can open up your menu and fast travel to Brighthoof to sell your item anytime. It will create a portal from the last checkpoint where you were previously.
I would recommend not buying anything from the vending machine, except replenishing ammo. This is because you will level up quite fast and a specific weapon will lose its usefulness very fast. On top of that, weapons are easily found through chests and enemy drops.
Exit the game before you die so that you will not lose any money.
Prioritize upgrading of backpack SDU as the more you can carry, the faster you can get richer.
If you are looking for a walkthrough, there is one that I found to be very awesome here by the author named MathewReuther.
If you are looking for some end-game build, you can refer here.
My Opinion:
The Good:
Having 2 classes allows for more customizability
The Bad:
I don't know if its just me, but it feels like the enemy hits harder compared to Borderlands. Just a few shots and your shield is broken, and a few more before you are dead. I don't recall it was this unforgiving in Borderlands.
Myth Rank feels like a roundabout system to force you on how to distribute stat points.
My Playthrough


Completed the game in Balanced difficulty. Found all collectibles including lore scrolls, lucky die, lost marble, and poetry pages. Also completed all challenges: side-quests, obelisks and rune puzzles.
Upon finishing the game for good, I was at max level 40, Myth Rank 60.
Character Setup


The classes I chose for my playthrough were Spore Warden + Brr-zerker. Spore Warden because it is essentially one of the easier class for solo play, as your companion can help revive you when you are down. Brr-zerker is also one of the class with better survivability.
0 notes
Text
The Thaumaturge

Gameplay : ★★★★☆ Graphics : ★★★★☆ Story : ★★★☆☆ Customizability : ★★★☆☆ Replayability :★★☆☆☆
Gameplay Mechanic
The Thaumaturge is a story-driven RPG where you follows Wiktor who solves mysteries and crimes with his innate detective skill, being able to follow traces of emotions/thoughts/actions/words and reached a conclusion based on what he has found.
Combat

Combat is turn-based where you can choose commands to attack enemies. There are action time-bar on the top of the screen. Different skills has its own speed, and powerful skills are usually slower.

Apart from yourself, you can also choose a "Salutor" to attack. Salutor is basically a spirit that fights with you in battle, kind of similar to Persona in Shin Megami Tensei games. Over the course of the game, you will be able to recruit up to 8 Salutors, and you can freely swap between them as they offer different skillset and abilities.
Skills

There are a total of 5 different command skills you can use in battle with your main character.
Once you unlocked enough skills, you can see that your main character skills' will change to another skill once used. Basically, using a skill will upgrade it so that the next time you used it, it will be a better version. There are 3 tiers, and once you used the tier 3 skills, it will revert back to the tier 1 base skill.
Also note that using a different skill will revert back all other skills to basic tier 1 skill, so it is recommended to consecutively use the same skill thrice.
Focus, Breakdown & Strong Attack
Focus is quite similar to Final Fantasy's Break gauge if you are familiar with it. Apart from HP gauge, units in battle also have their Focus amount. Some attacks can reduce Focus, and when depleted, it will cause the enemy to be in Breakdown state, rendering them unable to act for one turn, and during which you can use powerful "Strong Attack" skills against it.
Traits

Traits are passives abilities that enemy units may have. These traits are powerful, such as reducing all damage by 80%, or negating all negative status effects. These traits can be removed by fulfilling certain condition, such as attacking with a specific Salutor, or causes the enemy to Breakdown. The former method however, will require you to have at least a certain amount of corresponding stat which can be increased by spending points in Thaumaturgy explained below.
Thaumaturgy and Upgrades

This is basically skill tree, where you can spend Thaumaturgy Points, gained once per level, to unlock skills or upgrades.
Upgrades can be slotted into skills to provide additional effects to the skill. Each skill can only be slotted with one upgrade. Also it should be noted that Upgrades have different level, and can only be slotted into a skill where it can support Upgrades of that level or above.
By spending points in Thaumaturgy, you can also increase the 4 different stats. These stats are important in and out of combat. Outside of combat, it helps in your detective skills to read other people's emotion, actions, words, and thoughts left on items. It can also unlock certain dialogue. In combat, you need to have a certain amount of corresponding stats to be able to remove traits from an enemy unit.
New Game+
There is no new game+. Upon completing the game you will be sent back to the main menu.
Tips:
Note that upgrade effect comes after skill effect. For example, "Thief of Thought" which reduces enemy's Focus by 1 if the enemy is in the Suffering state, will be triggered on the same turn when slotted with "Old Wound", which inflicts Suffering state on enemy.
Picking a fight anywhere you go is the way to go for that extra juicy EXP
Most of the quests are time-limited. Look at the time icon next to the quest to tell how much soon it will be gone.
My Opinion:
The Good:
Slotting upgrades into skills is an interesting and fun customization.
The Bad:
Thaumaturgy sounds like a skill tree but there really isn't much customization here since most likely you will need to spend points in everything.
My Playthrough


Completed with Balanced difficulty. Managed to get all collectibles except missing one sketch unfortunately. Also completed most if not all sidequests and urban quests.
Party Setup
For battle, I like to go with Focus centric build, because it is fast, able to combo with strong-hitting skills, and will interrupt enemy's action once they are in Breakdown, increasing your survivability.
For upgrades, only certain commands really matters:
Diversion -> Lucky Chance Distraction -> Weak Mind Torture -> Diversion Concussion -> Double Down / Accumulation
At the start, Wiktor will constantly use "Influences" spells consecutively 3 times, combo-ed with either Upyr or Lelek to reduce enemy's focus. Upyr or Lelek depending on whether you want to remove any debuffs, or protect yourself from debuffs. Take note to use Wiktor's Influence skills 3 times, breaking it isn't recommended.
NOTE that rather than reducing enemy's focus to 0, my strategy is to reduce it as much as possible but not 0.
The reason for this is to combo up with Krampus's "Devil's Punishment" skill, which deals damage equal to 5x all enemies' combined missing Focus. If we breakdown an enemy, the enemy will regain back all Focus the next round, which isn't recommended. However if you have to breakdown an enemy due to any reason (maybe because of damage reduction), use Krampus' "Deadly Schnapps" as it will deal damage to all enemies.
With the above strategy, when Wiktor is reducing Focus, Krampus will start killing off enemy one by one, starting with the one with most focus or most HP. Leave any enemy with the reducing damage trait to the last. Once its down to last enemy, you can switch to Morana's "The Price of Peace" skill, or Breakdown that enemy to use Wiktor's Strong Attack.
0 notes
Text
Hard West 2

Gameplay : ★★★★☆ Graphics : ★★★☆☆ Story : ★★★☆☆ Customizability : ★★★☆☆ Replayability :★☆☆☆☆
Sequel of Hard West. Hard West 2 undergo a massive improvement in terms of gameplay, graphics and audio. There is also no longer different scenarios, but rather one main scenario with a total of 6 characters that can be used in battle.
Gameplay Mechanic
Action Points
Each character starts a turn with 3 Action Points which can be used for moving, shooting and using abilities (instead of just 2 AP in prequel). There is no longer a need to reload weapon now as opposed to its prequel. Different weapon will also consume different amount of AP.
HP
Character will retain the amount of HP with which they finished the combat. However HP can be healed by visiting surgeon or consuming a consumable item. When a character falls in combat, they will recover 1 HP after combat.
Bravado

When your unit kills an enemy, they get Bravado and recover all Action Points. This is probably the most important mechanic to master as it will allow your character to act multiple times in a turn.
Ricochet

This mechanic was also in the original Hard West but made better here. Basically you can bypass enemy's defenses by ricocheting your bullet off an object to hit the enemy. However each ricochet will lower the chance of hitting.
Luck and Luck Points
The Luck mechanic gets a total revamped from the prequel. Luck in the prequel acts kind of similar to a Shield gauge, but that's no longer the case here. Now, when a character gets shot by enemy, or misses an attack on enemy, they receive Luck Points, which can be consumed to boost your chance to hit.
Loyalty Points
When you need to make a choice in a dialogue, choosing the option suggested by one of your team member will earn that character Loyalty Points. With enough Loyalty Points, traits and additional dialogue choices can be unlocked.
Cards

Similar to its prequel, each character can equip up to 5 cards to grant stat increment. The difference in this game is that the bonus from having a poker hands will unlock traits that are unique to different characters. Better hands will give more traits, e.g having a Royal Flush set equipped will also unlocked traits that need at least a pair.
Unique Skills
Each character has their own unique skill that can be used in battle. Apart from Gin, all other characters require at least Two Pair cards equipped before their first tier unique skill is unlocked. By equipping with a better poker hands will allow the character to gain more traits and unlock a higher tier of unique skill
Exploration


The exploration also underwent a welcome revamped. It is now in full 3D, and the UI is now better in my opinion
New Game+
There is no new game+. Upon defeating the final boss, you will be sent back to the main menu.
Tips:
Look out for treasure chest around the battlefield. It cant be collected initially, but you need to move your character near it before the side objective will show up asking you to collect it.
Consumable items are one time use items, whereas Reusable items can only be used once per battle, but will not be used up.
Enemy with Duelist buff is very troublesome to deal with, as it will allow enemy to counter shoot you. You can either use Laughing Deer's unique skill as it doesn't proc counter, or what I like to do is to ricochet the shot so that the enemy cannot counter.
There are many choices which gives you different reward. However I would prioritize getting Loyalty Points over anything else since it can help you more over the long run
My Opinion:
The Good:
Dialogues have voice-over now
Riding on horses are cool

The Bad:
My Playthrough
Completed the game in Hard difficulty. Unfortunately I missed getting all the cards for a perfect run.
Party Setup
Lazarus


Lazarus is the character I wanted to use the most out of all characters. Reason being his unique skill is so useful that it allows him to be a healer for the entire team. As I am someone who hate to spend money for recovery, he is necessary for my team.
In terms of play style, I usually put him in the back behind cover, and use his unique skill on any character who needed healing. He can then shoot if required to support the team, but that's not his main job.
Very importantly, I equipped him with "Burned Horseshoe" trinket. This trinket grants him 25 luck per turn but with the downside of him getting 1 damage at the start of every turn. This trinket is so good on him when paired with his "Reverse Tell" trait, which consumes 100 Luck to heal all of his HP. What this means is that he can use his unique skill to swap HP with any ally who requires healing, and after 4 turns his HP will be fully healed again, allowing him to heal the next character. Early game before getting this awesome trinket, I equipped him with trinket that heals HP upon kill, and I generally let him get all the kill to heal back his HP after he uses his unique skill. Pair that up with his "Fiery Sermon" trait, it allows him to gain "Patching Up" status upon every kill, allowing him to regen 4 HP every turn.
Note: For cards I equipped him with Diamond's Straight Flush. It will be better to use Hearts since it will provide him with more health. Its just that I was missing 9 Hearts to form a Straight Flush.
Cla'Lish


Cla'lish is the next character that I really want in my team. Main reason is again due to her unique skill that helps in the team's survivability. However unlike Lazarus who is mostly good due to his trait, Cla'lish is also a wonderful long range attacker, as she has several traits that increase the damage potential of her Rifle weapon. Because of that, I equipped her with 2 rifles, "Chain Gun" and "Hellfire Rifle". Chain Gun is good because it only uses 2 AP, which can be used when Cla'lish needs to move or use her unique skill. Otherwise, she will mostly use Hellfire Rifle, which is a super awesome sniper rifle that allows her to attack from far.
For trinket, I equipped her with "Targeting Ocular", which ties in perfectly with her kit using Rifle, allowing her to deal higher Bullseye (critical) damage with her already high Bullseye hit chance.
For item, it is possible to get 2 "Gold Nugget" in the game, which I actually recommend getting and equipping it to Cla'lish (though I didn't do it in my playthrough as I was blindly prioritizing Loyalty Points). Gold Nugget is a reusable item that can be used once every battle. By consuming Gold Nugget, the character will get +50 Luck. I recommend letting Cla'lish consume both Gold Nugget at the start of encounter, and letting her Luck stays at 100 without consuming it. This is for her "Fate Foretold" trait, which will increase all damage dealt by her by 1.
Laughing Deer


The next character in my party is Laughing Deer, who is probably the strongest attacker in the game when used right. He is also the only character who wants to get in close with enemies since he is a melee-based character. I generally use him to get the last kill, because his trait "Natural Predator" allows him to stack his bullseye chance for every kill he get. Nearing end of battle, he would've stack enough to have a 40-50% chance, allowing him to go around and kill off everyone in a turn.
For trinket, I equipped him with "Coyote Tooth Necklace" to further increase his Bullseye chance.
Gin


My last slot is generally a free slot, but since the final battle requires Gin, I put him in my last slot.
Gin is a Pistol character, so I equipped him with 2 Handguns - Derringer and Bullet Bouncer. His trinket "Profane Bullets" will increase his handgun damage by 1.
0 notes
Text
Hard West

Gameplay : ★★★☆☆ Graphics : ★★★☆☆ Story : ★★★☆☆ Customizability : ★★☆☆☆ Replayability :★☆☆☆☆
Gameplay Mechanic

Hard West is a turn based strategy game similar to XCOM. With the same mechanics of AP, shooting, reload, cover etc.
Luck
In my opinion, Luck is a parameter/stat that can also be interpret as a "Shield". Each character has a certain amount of Luck. High luck helps you avoid getting shot by consuming a certain amount of Luck that is equal to opponent's hit chance. On the other hand, when getting shot, Luck will be replenished.
Cards

Each character can equip up to 5 cards. Each card has extra effect such as increasing stats or granting ability. When equipped with cards following poker hands, extra bonuses will also be granted.
Scenario Map


Outside of combat, the characters can move around the map and explore Depending on the different scenario, the mechanics are different.
Injuries and scar
During your exploration, your characters may be inflicted with different injuries that will reduce the character's stats. One interesting mechanic here is that the injuries may turn into scar after combat, turning it into a beneficial permanent buff.
Equipment

Each character can equip up to two weapons that can be swapped anytime in combat; 2 usable items; and 1 Talisman. Talisman is essentially accessory that can provide different effect or stat increment.
New Game+
There is no new game+. You can continue to play different scenario before and after beating the game.
Tips:
If you are looking for a good guide, you can find one here that I referred to.
My Opinion:
The Good:
Interesting exploration mechanics.
The Bad:
It's possible to be soft-locked. Once, my main character has so many injuries that he is down to 1 Max HP, and afflicted with Poison. In battle, the game was auto-saved and ending the turn causes Warren to immediately died. There is no way to bypass as loading the save data will immediately go into the battle. Luckily for me my save data was backed up with Onedrive so I could restore to an earlier save.
Doesn't make much sense that you can make a shot even without proper line of sight (enemy behind cover totally)
UI seems to not display correctly alot of the times

My Playthrough

Completed the campaign and DLC "Scars of Freedom" in normal (middle) difficulty.
0 notes
Text
Banner of the Maid

Gameplay : ★★☆☆☆ Graphics : ★★☆☆☆ Story : ★★☆☆☆ Customizability : ★★☆☆☆ Replayability :★☆☆☆☆
Gameplay Mechanic


Banner of the Maid is a tactics game made by Chinese Indie developer, that felt very similar to Fire Emblem or Dark Deity, with similar battle mechanics such counter-attacking, weapon-triangle, weapon durability, classes upgrade, and double-attacking when speed against enemy more than a certain amount.
Advantage
Like Fire Emblem's weapon-triangle system, different class has advantage/disadvantage over another. In this game instead of a triangle, it is four-way. Line Infantry > Heavy Calvary > Light Cavalry > Light Infantry > Line Infantry. Artillery class is on its own and doesn't have any advantage/disadvantage over any other class.
Damage and hit chance will increase or decrease based on advantage/disadvantage.
Weapon Durability

Each units have 4 item slots which they can carry weapon or items. Similar to Fire Emblem, upon attacking/counter-attacking with a weapon, the durability will decrease by 1. However when the durability reaches 0, instead of the weapon disappearing for good, it is only no longer usable till the end of the battle, and will be fully replenished for the next battle.
Morale

Hitting or defeating enemy will increase morale. When the Morale Gauge is full, you can use Heroic Attack which increases the damage, hit chance, and experience.
Terrain and environmental effect
Like most tactics game, there are effects coming from terrain and environment. E.g if a unit is in a grass, the dodge rate will increase. Other environmental effect includes heavy rain, which reduces dodge of all units, and doubling the cost of ammunition and cannonballs.
Reputation
Through dialogue choices, you will improve your reputation with any of the 5 factions. When your reputation with a faction reaches a certain milestones, you will be able to receive rewards.
Class Upgrade

Class upgrade in this game is very basic as compared to Fire Emblem. In Fire Emblem there are 2 tiers of promotion and more class branches. However in this game, there is only 1 tier of promotion available when the unit is at level 15. You can only choose the one and only promotion class for most units as well.
New Game+
After winning the final battle, you get to save a cleared save file. You can either load back this save file, or start a new game+. Loading back this save file allow you to continue your current game to clear any remaining quests.
Starting a new game+ will
Carry over funds and faction reputations
Items cannot be carried over, but they will all be sold for funds
1.5x EXP
Start with all recruited characters
Antoninette will join the army from the start if Desaix was in your army before
Tips:
You can perform soft reset to title screen by pressing Start+Select+R1
Pause the game in battle, and on the bottom right of the screen it will show the number of trophy in that battle waiting to be collected.
There are 3 hidden characters that can be recruited, Therese: In Chapter 18, Therese must survives the end of the battle. Philipp: In Chapter 19, let Ernestine talk to him. Leclerc: In Chapter 24, let Pauline or Aimee talk to him.
To max out alliance points, follow the choices marked circle below. Disclaimer: I am not the one who created this, full credits to the original author

My Opinion:
The Good:
Lots of Waifus!


The Bad:
No notification icon to inform you on any achievement unlocked for reward
You can rotate the map during battle
There is no way to tell the amount of stacks of morale level...?
The number of characters you can deploy is not consistent and can varies alot. This makes setting up your party difficult.
The class promotion mechanics is too lacking
My Playthrough


Played in Officer Mode. Maxed out all reputations. Completed all side quests until final battle. Was too tired to tackle side quests that only appears in post-game. Got all but one achievements.
Party Setup
I will base my party size based on the total size of 12, to allow the party to split into groups of 2 when required, and each group having at least 1 class except Artillery which I dont really use.
Out of my 12 slots, 2 will definitely go to the only 2 healers in the game, Aimee and Eugene.. They are irreplaceable given how important healing is.
Military band
1. Aimee

2. Eugene

Next for the remaining slots I want to have a balance team of equal classes. For Light Infantry, I want to have both Julie and Dutheil due to their passive allowing nearby ally units to restore current's weapon durability. It is especially strong when combo with Military band's "Triumph Music". With Pauline as a required character in most battles, I will have 3 Line Infantry units.
Line Infantry
3. Pauline

4. Julie

5. Dutheil

Light Infantry
Light Infantry is mostly referred to as the strongest class due to their high damage, as well as ability to dodge. Since I have 3 Line Infantry, 2 in Team A and 1 in Team B, I decided to have 3 Light Infantry as well, with the extra going to Team B so that now I have 3 units in both teams.
6. Cosette She is my top pick for this class due to her passive skill "Long Range" and "Aerial View", allowing her to hit further and harder than her peers.

7. Laure She is my next chosen pick due to her passive skill "Long Range" allowing her to hit further.

8. Adelaide She is the next best pick for me. She is a dodge tank. To be honest she works exactly the same way as Ernestine, so this unit can be swapped with Ernestine.

Light Calvary
9. Charlotte

10. Leclerc He is awkward because he equips rifle and thus dealing low damage to Light Infantry because of it, even though he should be matched against them due to the class advantage. I would replace him with Murat actually if I knew earlier.

Heavy Calvary
11. Oscar

12. Desaix

0 notes
Text
Final Fantasy XVI

Gameplay : ★★★☆☆ Graphics : ★★★★★ Story : ★★☆☆☆ Customizability : ★★☆☆☆ Replayability :★★★☆☆
Story
The story starts with a 15 year old young Clive, who was the first born son of the ruler of Rosaria. However, he did not inherit his family's Phoenix's flames. Instead, it was his younger brother, Joshua, who inherited it and awaken as Phoenix's Dominant, someone who can transforms into Eikon (aka Summon). Clive then dedicated himself to become the Shield of Rosaria tasked to guard the Phoenix.
However in one of the mission, her mother was in cahoot with the Holy Empire of Sanbreque and betrayed her whole country leading to destruction. Clive was fortunate enough to be saved, and later on forced to join the Imperial Army for 13 years, until in one of the mission he was tasked to kill off his childhood friend Jill. That was when he decided to turn his blade against the Imperial Army. Cid, who was the leader of the Rebel Army saved him, and later they joined hands.

Clive awoken to the power of Ifrit, becoming the Dominant of Ifrit. Clive also had a mysterious power of a "Mythos", a being able to absorb the power of other Dominant, allowing him to use different Eikon's power.
Later they deduced that the "Mothercrystals" scattered across the world might be the one leeching aether (aka mana) from the earth. Thus the party went on to destroy all the "Mothercrystals". However, Cid was killed in one of the mission, and Clive took over his role as Cid the second. Clive also reunited with Joshua, his little brother who he thought was killed by himself.
They later find out that the source of all evil was a godlike being named "Ultima", who created humans, Eikon, as well as the Mothercrystals to harvest aether to one day produce a vessel strong enough to channel it, and that vessel is Mythos - Clive.
Active Time Lore

Active Time Lore is something that can be activated anytime, even during cutscene, to provide information relevant to the story
State of the Realm


Given the complication of the story, its nice that FF16 introduced an easy to reference chart on the relationship of each major characters as well as the events for each time period.
Gameplay Mechanic


FF16 is a typical action game that requires you to dodge or button mash to attack, quite similar to FF15 or FF Origin. You control the main character Clive throughout the game, and most of the time you have your trusty dog with you in the party. There are other NPCs who will also join and leave the party, and these NPCs will generally attack on their own and they do not have any health gauge.
Abilities

Clive is able to equip 3 Eikon's feat and 6 Eikon's abilities at any time in battle. Eikon's feat has no cooldown while abilities have a cooldown before being able to use again.
You can unlock or upgrade abilities by using Ability Points earned by completing quests or defeating enemies. Ability Points can be reassigned without any penalty to encourage experimenting with different abilities.
Before an ability is mastered, you can only equip the ability under the Eikon's feat stemming from the same Eikon. However once the ability is mastered, you can equip the ability under a different Eikon.
Will Gauge

Will gauge is the gauge under enemy's HP bar that you can reduce by attacking them. Once their Will gauge is broken, the enemy will be in a "Staggered" state for a short amount of time, increasing the amount of damage dealt to the enemy. While enemy is staggered, there will be a damage multiplier that will increase the more you deal higher stagger damage, up to a maximum of 1.5x. Yes, this is called "Break Gauge" in other Final Fantasy games, not sure why they changed the name.
You can reduce Will Gauge faster by performing what is called "Magic Burst", which essentially is alternating between melee attack and magic command.
Limit Break

Limit Break Gauge will fill in battle by taking damage or performing offensive/defensive maneuvers. Once filled Limit Break can be used, temporarily grants increased damage and speed, gradual HP regeneration, and guard-breaking strikes.
Renown

Completing sidequests or defeating notorius marks (strong enemies) will earn Renown, allowing you to earn rewards depending on the amount of Renown you currently have. Note that it is not a currency to exchange rewards.
Quick Time Event

FF16 also have QTE incorporate into the cutscenes requiring you to either press button to dodge, attack, or mashing attacking buttons within a short period of time
Eikon Battle


During the game there are major battles where Clive will transforms into Eikon. The base battle mechanics remains the same where you need to dodge, attack, cast magic, or cast special abilities with cooldown. However Eikon Battles are really graphically stunning.
Gear

In this game you can buy equipment or craft them using materials. Equipment can also be reinforced using materials to become stronger.
New Game+
Upon defeating the final boss, you will be able to save a clear data. You can load back the game to continue from before fighting the final boss, and there will be a few additional challenges available. Ultima, a new Eikon becomes available as well.
You can also start a new game+ with this clear data, where Level, item, equipment, money, abilities, ability points will be carried over. Ultimaniac Mode, accessed through Hideaway's Arete Stone will be available in new game+ . This is a challenge mode to battle against the game's toughest foes.

There is also a new difficulty mode, where enemies level starts at a minimum 40+. In this new difficulty, the level cap for Clive increases from to 110. Equipment can also be further reinforced from the original +2 to +5. Weapon also has a new stronger version, and the best weapon, Ultima Weapon, is also available only in this new difficulty mode.
Tips:
"If the game is lagging, go under Graphics Settings and set Super Resolution to Legacy.
Note that you do not need to view the Hunt notice board before the Notorious Mark will appear.
After completing "Cid the Outlaw" main quest, go to Charon and buy "The Wages of Warcraft". This awesome item will help you in farming ability points.
If you are looking for a guide, I find this to be decent enough. It doesn't cover 100% but I think its good enough
"Lightning Rod" is one of the more useful ability in the game. Note that you can change the position of the Lightning Rod after placing it by casting the skill again.
Again on "Lightning Rod", it has great combo synergy with other abilities such as "Will o' the Wykes" and "Gigaflare"

My Opinion:
The Good:
Eikon battles are too graphically satisfying! Simply beautiful! I guess most of the game development cost went into creating the best graphics instead of having a great gameplay.
Shiva is so pretty in this game!

The Bad:
It seems that the performance isn't too optimized as frequently encountered frame rates dropping. You need to set super resolution to legacy to fix it, which drastically reduces the graphical quality.
Story is too boring for me
I can't really put it to words but I really feels that this game doesn't have the usual Final Fantasy vibe where most of the fun comes from the tons of different customizability options for your characters and party. FF16 just feels like a typical action game with the only customizability coming from abilities/equipment selection. However even FF15 or FF Origin feels more FF-alike with all the classes and customizability.
Final Fantasy franchise has been moving towards Action game for quite awhile, and because of this I really feel that it is starting to lose its identity.
The game does not tell you the effect of upgrading a specific ability
Tonberry looks so creepy and ugly in this series!

My Playthrough


Played in Story-focused mode as I know myself to suck in Action games. Completed the 2 DLCs (Echoes of the Fallen and The Rising Tide), all Sidequests, defeated all Notorious Marks, and completed all 20 levels of Kairos Gate.
Setup
I'm really not good in action game to perform complicated combos (such as those utilizing Rift Slip or casting Zantetsuken 3-4 times within one stagger), so my setup is as quite simple.

In normal encounter, I will use Leviathan's "Serpent's Cry" with its Y-button (or triangle on PS5) command as it is great for crowd control with great damage.
Tips: While in Leviathan "Serpent's Cry", you can double tap dodge button to travel longer distance
For boss fight, or whenever I encounter a stronger enemy with a Will Gauge, my strategy is to stagger it as fast as possible, before dealing as much damage as possible.
Before Staggering
For staggering, I am using "Impact" and "Deluge". "Deluge" can also be replaced with "Gouge" earlier. After using "Impact", note that once the orbs turned gold, you can execute the ability again to explode the orbs, dealing more stagger damage to the enemy. For "Deluge", it can be harder to aim if the boss move around the battlefield, or interrupt you with its attack. Because of that, I use "Shiva" as my main Eikon and use her "Cold Snap" ability to dodge enemy attack, to inflict Permafrost on enemy, freezing enemy for a couple of seconds for me to use "Deluge". Note: You can double tap on Shiva's feat button to also freeze enemy temporarily.
During Staggering
After Staggering, the first thing I do is to lay a "Lightning Rod" because it has a great combo with what comes after.
Then, I immediately cast "Diamond Dust" to reach 1.5x bonus damage multiplier right away.
After which I activate "Limit Break" before using "Gigaflare" and "Tsunami" (can also be replaced with "Judgement Bolt" earlier) one after another to deal massive damage. This will generally end the battle with mini-bosses. If enemy is still alive, immediately deactivate Limit Break and activate Leviathan's "Serpent's Cry" and use the X-button (or square on PS5) continuously on the boss until the stagger is over, before repeating the process.
Note: "Zantestuken Lv.5" has the highest damage output of any ability but I didn't use it because I dont really like building the gauge. While a "Dancing Steel" with newgame+ accessory can build the gauge to level 5 in one cast, it will use up an accessory slot. If we do not use the accessory, "Dancing Steel" will not be able to cooldown fast enough before the next stagger for it to cast twice to reach level 5. Using "Arm of Darkness" is a choice but it will lower your DPS. Thus, even though I know that it's good and it will allow you to reach the highest possible damage, I decided to drop this playstyle.
As above, my required Eikons are only Shiva and Leviathan. For the last slot, it can be anything really, so I went with Garuda as it can stun boss with 50% stagger bar for a short while with its feat.
0 notes
Text
Suikoden II HD Remaster - Dunan Unification Wars

Gameplay : ★★★★☆ Graphics : ★★☆☆☆ Story : ★★★☆☆ Customizability : ★★★★☆ Replayability :★☆☆☆☆
Sequel of Suikoden 1.
Story
Spoiler Alert
Suikoden 2 takes place 3 years after the end of Suikoden 1 with a new main character which I will simply named him Hero. Hero is in Highland Royal Army with his best buddy Jowy. One night, their captain betrayed the whole army acting in accordance to the main antagonist of the game, Prince Luca Blight from the Royal Army. This led to Hero and Jowy jumping down a cliff in order to avoid getting ambushed.
Hero was washed up ashore and discovered by Viktor from Suikoden 1, who became part of the mercenary after the events from Suikoden 1. Hero started to work under the mercenary to fight off the royal army commanded by Prince Luca Blight who tries to spark war wherever he go.
In the middle of everything, Hero and Jowy each received half of the power of Rune of Beginning, one of the 27 True Rune. However in one of the mission, Jowy was captured in exchange for Hero to escape. He later on returned, but betrayed the group. Seems like he has been aiding the opposition after his captured. He later went back to the Royal Army and serve them as their general, and got engaged to Luca's younger sister, Princess Jillia. On the surface it seems that he is aiding the opposition, but in actual fact he has a hidden plan to dethrone Prince Luca and work his way up to the throne instead. True enough his plan came to fruition after working with Prince Luca to kill the King, and working behind the scene to get Luca killed by Hero and his army, earning him the King position after getting married to the sole surviving heir to the royal family Princess Jillia.
However, even after becoming King, the war isn't over as Jowy is still planning something.
Gameplay Mechanic
Most of the gameplay mechanics are similar to Suikoden 1, so I will not repeat. I will however list differences.
Characters

One interesting add-on to the 108 stars of destiny you can recruit is that some will consists of Animals. These animals' weapon cannot be upgraded, and they cannot equipment anything.
Animals characters are good in early game where you are not ready to invest heavily in characters. Some bigger animals will occupy 2 character slots instead of 1.
Rune slots
One good change in Suikoden 2 is that each character can now equip up to 4 runes instead of just 1. This means more customization for each character! However some slots required the character to reach a certain level before it can be unlocked. And some characters are still only limited to 1 or 2 slots. Out of the 4 available runeslots, 1 of them is to be equipped on a weapon. This runeslot in particular is more restricting than the other 3 runeslots, as you can only equip either Elemental Magic Rune or Weapon Rune. However note that equipping elemental magic rune to weapon runeslot will only provide passive effect and will not allow you to cast that rune's magic.
There are also more runes in this game to go along with this change.
Unite Magic
Unite Magic is mostly similar to its prequel so I will not explain much about what it is. However in the prequel, you need 2 characters casting Tier 4 magic to be able to turn it to Unite Magic. In Suikoden 2 however, because each character can equip more than 1 Rune, its possible for a single character to cast a Unite Magic on its own.
To do that, a character needs to equip 2 magic rune of compatible element. Once you do that, a Unite Magic selection will becomes available in the rune command.
War


War in this sequel took a huge change. Instead of the original Rock-paper-scissors concept, it is now a tactics game.
You can have up to 3 recruited character in one squad, which will be represented as a unit on map. Each of these characters either provide passive effect or stat boost to attack or defense for the whole unit.
Duel

Duel undergo no change from the prequel, still a Rock-paper-scissors game.
Mini Game
Fishing


To fish, first you need to cast out your line and wait for a fish to strike. Once casted, even if you reel in before a fish strikes, you will still have to change the bait, which cost 100 gold.
Once a fish is on the line, there will be a gauge on the right of the screen, and you need to mash a button to keep the gauge within the box. The fish will close in while maintaining the gauge, and once it reaches you, you will catch the fish.
Whack A Mole

There are 6 holes and you need to press corresponding buttons to whack moles in different hole. There are 3 types of moles, normal, slow, and fast. On top of moles there will also be Woodchuck, which is basically something you should avoid hitting. There are 3 difficulty mode, and the game ends after 3 misses or after times up.
Dance

A very simple game where you need to memorize the button keypress and execute in the correct order.
Rope climbing

You compete with 2 NPCs to see who can climb up to the top the fastest. On your turn you can either roll a die or place a mark (slide stopper). Roll any nummber from 2 to 6 to climb that many knots, while rolling a 1 will slide you down to the last mark you placed.
New Game+
Similar to its prequel, there is no new game+. Upon defeating the final boss, you get to save a clear data before sending you back to main menu. However, the clear data has unknown use to me apart from the gallery accessed in main menu. Unless Suikoden 3 remaster is coming up...?
Tips:
You will be forced to bring Nanami into the team most of the time, making her a good candidate to hold the "Prosperity Orb". However note that she will no longer be available nearing the end.
Early game I would recommend you to use Animal characters for the minimal investment.
If you are looking for a good guide, I recommend this.
Rare finds in shops refresh once every 30mins. However if you save before entering the shop, you can reload your save file if the shop doesnt have the rare items you want, as the rare finds item doesnt actually generate itself until you visited the shop.
It may be worthwhile to farm Double-Jab rune while you are in "North Sparrow Pass" and Fury Rune in "Muse City"'s rare find early in the game. Because you can only re-enter nearing end of the game if you dont.
My Opinion:
The Good:
Item management is improved from the prequel.
Not sure if this should falls under Good or Bad, but having auto battle for War is such a good feature given that it is quite uninteresting to me.
The Bad:
Encountered a bug where game will crash if I striped a character's item which causes the store inventory to exceed the max limit. Understand that in most cases the strip will be unsuccessful, but it occurred to me few times.
Similar to prequel, the 3x fast-forward button in battle will unlocked mid-way without informing,
My Playthrough

Completed on HARD difficulty. Recruited all 108 characters.
Party Setup
In Suikoden 2, unlike it's prequel, you are no longer required to bring 3 mandatory character for your final battle, which expands our team building possibilities.
For my party, rather than going pure DPS build that can one turn kill the final boss, I like to go with a balance party with the traditional tanker/attacker/supporter/healer role.
Firstly let's talk about the main Hero character, since he is the only required character in your party. There are a few options in mind for his role:
Single attacker focus
Have Nanami in team and use Unite Attack with 2x damage multiplier every turn
Have Tir in team and use Unite Attack (0.75x damage multiplier) when there are multiple enemies.
Healer+Supporter focus
Option 1 Lets calculate the damage multiplier potential he can reach with this option:
Hero (Double-Edge Rune + Double-Jab Rune) = 4x
Option 2 We need to equip Nanami with "Balance Rune" so she will not suffer from Unbalance. Let's calculate the damage multiplier potential they can reach with this option:
Nanami (Double-Edge + Balance Rune + Unite Attack) = 4x
Hero (Fury + Double-Edge + Unite Attack) = 6x
Total = 10x, i.e averaged to 5x per character.
That's already higher than option 1, but one important note is that Nanami will not be in your party nearing the end. Making this option useless.
Option 3 Lets calculate the damage multiplier potential per enemy with this option:
Hero (Fury + Double-Edge+ Unite Attack) = 2.25x
Tir (Fury + Double-Edge + Unite Attack) = 2.25x Note that this is damage multipler PER ENEMY. Every enemy in the field will increase this. This sounds like a good option which will exceed the damage potential of option 1 & 2 when there are 3 or more enemies. But what about boss battle when there is only 1 enemy? They can still either attack separately to deal 3x damage multiplier, or they can cast their own unique rune. Being able to cast their own unique rune is a good option since they are stucked with 2 very useful Runes in the game. Now this sounds like a good option the more we explore.
Option 4 Healer is a necessity role and Hero is a good candidate due to his own unique Rune. To be more single-healing focus he can equip Water/Flowing/Cyclone Orb. And with Mother Earth Orb he can helps to support for turns where healing isn't necesssary.
Decision Now considering all the 4 options, I would've go for Option 3 if not for the fact that you need to run through a forest full of monsters to put Tir in your party EVERYTIME he gets removed from the party. This is annoying enough for me not to use Tir. Now between Option 1 and 4, I decided to go for Option 4 because - No other character can AOE heal as well as he can - His damage multipler for option 1 is not as strong as other attackers which will be mentioned below. Thus below is my build for Hero.
Hero

Moving on to the next role, I wanted to have a tank role with "Firefly Rune" for more aggro, given that most of my party members will be very fragile with "Double-Edge Rune". I basically am only thinking between 2 characters for this role who can wear the heaviest armor, Humphrey and Pesmerga. Humphrey has higher DEF, but Persmerga has higher MDEF. To be honest either is fine, but I decided to go with Humphrey because he joins earlier.
Humphrey

Now that's 2 out of 6 decided! For the rest I will be filling out with attackers.
For attackers, characters who can equip 3 rune slots are especially valuable. Why is that so? That is because of the several new Rune/Orb introduced in this game, granting each slot to deal additional 1.5x-2x more damage. These rune/orbs are:
Fury Rune (User is always Berserk; i.e damage x1.5)
Double-jab Rune (Attack twice in a row)
Double-edge rune (Increase physical damage dealt and received by 2x)
If a user were to equip 3 of the above-mentioned runes, they will deal 6x more damage! The list of characters who have 3 free runeslots are:
Chaco
Gantetsu
Hai Yo
Killey
Luc
Rina
Sheena
Sid
Kahn
Other notable characters with 2x damage multiplier Rune (They only have 1 free slot each):
Oulan/Valeria/Anita/Kasumi: With "Double-Edge Rune" = 4x
As they only have 4x multiplier, they are considered less effective than above mentioned characters with 3 rune slots that can have up to 6x multiplier.
Let's look at Unite Attack next to see which characters can reach at least 6x damage multiplier. If there are any, they will take priority over above-mentioned characters who can reach 6x damage multipliier via 3 free runeslots, as those runeslots will cause that character to take increased damage.
Viktor/Flik: Each of them can equip 2 free slot. "Fury"+"Double-Edge"+Unite = 4.5x.
Chaco/Sid: Each of them can equip 3 free slots. "Fury" + "Warrior" + "Double-Edge"+Unite = 5.175x
Long Chan-chan/Wakaba: Each of them can equip 1 free slot which needs to be Fury, as their unite attack requires them to be berserk to be available. Thus "Fury" + Unite = 4.5x
Flik/Nina: Their unite attack is 2.5x. Each of them can equip 2 free slots, but Nina needs one to be equipped with Balance Orb. Flik with Fury and Double-Edge will deal 7.5x, while Nina with balance and Double-Edge will deal 5x, averaged to 6.25x per character.
Valeria (Balance orb) + Anita (Double-Edge): Their unite attack is 3x. Valeria with balance orb will have 3x, and Anita with Double-Edge will have 6x, averaged to 4.5x per character.
Seems like Flik/Nina is the only combination able to achieve higher than a 6x damage multiplier! Thus these 2 are the first to enter my party!
Flik

Nina

For my last 2 slots it will be 2 from the 6x damage multiplier. It's really up to anyone from the list above, but I limit down to between Sheena, Chaco and Killey as they have the highest ATK out of the rest. However Sheena is the only S range character out of the 3, and since he will be carrying Double-Edge Rune to receive 2x damage, it might be better for me to get M or L range characters so they can hide at the back. Thus my final 2 members:
Chaco

Killey

0 notes
Text
Suikoden HD Remaster - Gate Rune War

Gameplay : ★★★☆☆ Graphics : ★★☆☆☆ Story : ★★★☆☆ Customizability : ★★★☆☆ Replayability :★☆☆☆☆
Suikoden is back! It is still by far one of my favorite JPRG series till date, and I'm so happy that this remaster version allows me to replay with better graphics. Previously I was equally hyped for Eiyuden Chronicles, which is supposedly a Suikoden clone, but was left disappointed because the Unite attack was broken.
What's new?
Firstly let's talk about what is different compared to the original Suikoden made in 1995.
Better graphics
Additional HARD difficulty
Added Fast forward and Auto in battle
No more Holy Crystal for dashing. Instead it comes by default
Story
Spoiler alert
The story starts off with the main character joining the imperial army along with his friends. During one of the mission, one of his friend, Ted used a special rune power to save the team, but this unfortunately is seen and reported to a witch (from Gate Rune Clan) who has been chasing Ted's for his one of the 27 true runes for 300 years. To prevent the rune from falling into the hands of the evil witch, he handed the rune to the main character before passing away.
Because of this, the main character and his friends are now being pursued by the Empire. Later, they met with people from the Liberation Army and decided to join them. Soon afterwards the leader of the Liberation Army died, and the main character is appointed as the new leader! And his main task? - To start recruiting as many people as possible!
Gameplay Mechanic
Basic Combat

Suikoden is a classic turn based JRPG game. Throughout your adventure you will be able to recruit up to 108 characters, but you can bring up to 6 characters into your party, 3 in front row and another 3 in back row. Each character has an attack range determining how far they can hit. Short (S) range characters can only hit enemy's front row if they are placed on the front row. Medium (M) range characters can hit 2 rows away, i.e if they are placed in the front row, they can attack either the enemy's front or back row, but if they are placed in the back row, they can only attack enemy's front row. Long (L) range character can hit enemy's front or back row regardless of where they are placed in.
Rune

Rune is a special piece of item that each character can equip. Each character is only limited to have maximum one rune equipped at any point in time. There are different types of rune in the game. The first type of rune is a magic type where you can cast in battle to provide different effect, such as attack, support, or healing. You can think of it as the equivalent of Magic in most other games. This type of rune has 4 Tiers, and to cast each Tier you need to have MP for that tier. MP in this game works differently in the sense that it is not a gauge, but rather each character has 4 tier of MP, denoting the amount of times they can cast rune of each Tier.
The second type of rune is an attack rune that doesn't cost MP to use. These are runes that may provided additional effect or damage to your basic attacks. The third type of rune is a passive type of rune, where it provides passive effect to that character, such as increasing that character's stat, or allowing your character to earn 2x EXP. Last is Unique Rune. These runes are tied to their original user and cannot be unequipped. The effect of this type of rune can differ and can be from any of the type mentioned above.
Unite Attack

This, to me is the bread and butter of Suikoden. Unite attack is basically a special combination attack between 2 to 4 different characters if they are placed in the same party. By placing these specific characters together they will be able to unleash strong attack during battle. It's important to note that these attack doesn't cost any unique resource to cast, so they are very strong and useful.
*Note: Unite Attack will not crit
Unite Magic

Unite Magic is similar to Unite Attack, except that you need 2 characters to cast Tier 4 magic runes together in the same turn, and the element of the magical rune must be compatible. The list of compatible elements are:
Fire + Earth (1300 damage to all enemies)
Fire + Lightning (1500 damage to all enemies)
Water + Lightning (2000 damage to 1 enemy + heal all allies HP + cure all allies status)
Water + Wind (800 damage to all enemies + heal all allies HP + cure all allies status)
Wind + Earth (1000 damage to all enemies
Weapon & Rune Piece
Each character comes with their own weapon and cannot be changed/unequipped. However you can spend gold to upgrade a character's weapon.
In addition, you can attach a Rune Piece to a character's weapon to provide additional effect. Each character's weapon can only be attached with 1 Rune Piece, however you can keep attaching the same Rune Piece up to 9 stacks. Rune Piece cannot be removed but you can replace it by attaching a Rune Piece of different element, and the previous attached will be removed regardless of the amount of stacks.
It is important to note that Rune Piece is actually quite rare and valuable, and I would only attach it once you are clear on which characters you want to use.
War


One of the 2 battle feature that makes Suikoden! War is sort of like a Mini Game, but not really since it plays a large role in the game. Every Suikoden has its own War, and in Suikoden 1 it is very basic. It is something like Rock-Paper-Scissors, where you and the opposing army each choose 1 command. Characters you recruited during the game will be used for each command. There are also special commands such as allowing you to know what the opponent is choosing next. Once any of the side is depleted of army, the opposing side will win.
Note that characters can have permanent death when defeated in War.
Duel
The other feature that makes Suikoden! Similar to War, it is a Rock-Paper-Scissors game. However at the start of every turn, the opponent will mention a sentence which denotes the action he will perform, making it easier for you to guess what the enemy will choose, before choosing the right command.
Mini Game
Marco's Cup

This is a mini game where you can bet either 100, 1000, or 10000 gold to figure out where the coin is hidden under the 3 cups. Lower bet will decrease the speed of the cup moving around and its quite easy to tell, but at the highest bet its almost impossible to tell with human's eye. Winning will allow you to win back the amount you bet.
Note: The glitch in the original where the RNG remains the same after loading a save file has been fixed in this remastered version.
Chinchirorin

You and the NPC each takes turn to roll 3 dice up to a maximum of 3 times until there is a score. A score is calculated when you rolled 2 of the dice to be of the same number, with the third dice to be the score. The player with higher score wins. However, here comes the catch: - Rolling 1, 2, & 3 causes you to lose immediately and have to pay double of what you bet. - Rolling 4, 5 & 6 causes you to win immediately and earn double of what you bet - Rolling 1 on all 3 dices will also cause you to lose immediately and have to pay triple of what you bet. - Rolling same number except 1 on all 3 dices will cause you to win immediately and earn triple of what you bet. In addition, there is a moving indicator to decide where you want to throw. If any of the dice doesn't fall into the bowl it will count as an immediate lost too.
You can start the bet with 9900 for the first throw, but after every winning, you can continue to bet for twice the amount.
This is the easiest way to earn money once unlocked, with slightly more than 50% chance of winning, compared to 33% in Marco's Cup. (Slightly more than 50% because Gaspar will start the throw first, so if he throws out of the bowl you immediately win).
George's Card

Basically the traditional memory card game where you flip 2 cards and if they match the cards will disappear. Finish matching all cards before the time ends to win.
New Game+
There is no new game+. Upon defeating the final boss, you get to save a clear data before sending you back to main menu. However, the clear data does not have much use apart from letting you import your progress to the sequel, Suikoden 2.
Tips:
Earn easy money by saving before playing Dice with Gaspar. Reload if you lose big. I got from 10k to 999k cap in about an hour.
You will be locked with Gremio for half of the game. However during the part where you need to tackle Soniere Prison, remove all valuable items and rune on him
You will be stuck with Viktor for a long time, so I personally would recommend you to attach orbs like "Prosperity Orb" to him. But your choice.
You will definitely need a good guide if you want to be sure you don't miss out on any Stars of Destiny, and I personally recommends this guide here
My Opinion:
The Good:
Glad that they added Hard difficulty as the original was too easy. Also added some QoL features such as Auto battle and fast forward
The Bad:
You will need to toggle fast-forward in each battle.
For a game centered around recruiting different characters to form party, having half of your party locked to required characters from start to end is a huge huge bummer for me.
When you received an equipment, you don't even know if its a helmet, armor or accessory. You need to blindly go to equipment to see which body part can that item be equipped to. Sometimes you might not even have anyone being able to equip that in your party to know what it really is!
I'm not sure why but most of the Rune/Unite Attack are stating the wrong damage multiplier. E.g "Kobolds & Pal Attack" is 3x but written as 2x; "Guardian Attack" is 2x but written as 1.5x. Ronnie Bell's "Blaze Rune" is 3x but written as 2x.
Game is still quite easy even on HARD difficulty.
3x fast-forward feature in battle will unlock mid-way without informing.
My Playthrough

Completed the game in Hard difficulty. Recruited all 108 characters.
Party Setup
For the final battle, out of the 6 slots in your party, 3 are locked and you are required to bring in the required characters: Main character, Viktor and Flik. Because of this, my party will consist of them, and I only have 3 remaining slots to play with.
First let's go in-depth on how to maximize these 3 characters before we look at the other 3 characters.
Viktor

Viktor has a high attack and short attack range, making him a physical attacker on your team. He does not have any Unite Attack with anyone in the game, so that is out of the option.
I equipped him with Double-Jab Rune, which allows him to attack twice in a turn.
Flik

Flik is someone who is a jack of all trade, master of none. His Str and Mag are slightly above average, but nothing spectacular. He can use Unite Attack with Alen and Grenseal to deal 2x damage to one enemy. However all of their stats are nothing too spectacular either, resulting in quite an average amount of damage.
Therefore the best way to utilize him is for him to be a healer, since you will definitely need a healer in your team, and healer doesn't need to have excellent stats, just need to have high MP, most suitable for someone like him who is just decent but forced his way into your team. Therefore I equipped him with Flowing Rune.
Main Character

The Main Character to me is just like Flik, someone who is just decent in anything. His Str and Mag isn't the highest either. He does has an useful Unite Attack with Kai, dealing 1x damage to all enemies. That is one way of utilizing him. Alternatively, you can use him like a Mage, as his Soul Eater Rune allows him to deal the highest single target damage compared to other Magic Runes. However his Mag stat isnt the highest so his damage still falls off compared to top-tier Magic users. We will further decide his role again based on the 3 other characters that we will be choosing below.
Candidates for the 3 remaining characters
Now this is where we think about team synergy by choosing 3 other characters to make this the party that I want. Firstly it should be noted that with Viktor and Flik, 2 of your front row characters are already filled. While essentially you can place Flik in back row given that he is the healer, I would still recommend him to be placed in the front row just because he can equip a shield.
The first thing that came to my mind in building the party I want, is to look at whether there is any Unite Attack worth using with these 3 locked characters. Mentioned above, Viktor does not have any Unite Attack with anyone, Flik's Unite Attack is lackluster, and the only one worth considering is the Main Character + Kai. Which means Kai is one of my candidate.
The other candidates are Ronnie and/or Valeria. They have the strongest Rune in the game, being able to deal 3x damage without any penalty. Because of this, the 2 of them are the highest damage attacker in the game. These 2 essentially become my choices as well.
If I want to have a magic attacker in my team, Crowley or Luc will also be my choice, given that the 2 of them have the highest Magic stat in the game. However they will deal about the same damage as Ronnie/Valeria but requires to use MP. I KIV them first, but most likely they won't be in my top 3.
Now as a long-time fan of Suikoden, Unite Attack has always my favorite given that they are strong and free to use as long as you have the required characters. Looking at the list of Unite Attacks, the strongest one has to be "Kobolds & Pal Attack", which deals 3x damage to one enemy. Compared to this, the rest of the Unite Attacks are not really worth using (Apart from the Unite Attack from Main Character + Kai, which can help you clear waves of enemies easier). Thus, Kuromimi, Gon, Fu Su Lu became my candidates as well. However the 3 of them must come together as a set. They are not worth using otherwise.
Party
Putting everything together, I came up with 2 different parties for my final team.
1. Balanced team
[Front row] Viktor (Double-Jab Rune)
[Front row] Flik (Flowing Rune)
[Front row] Valeria (Falcon Rune)
[Back row] Main Character (Soul Eater Rune)
[Back row] Kai (Hazy Rune)
[Back row] Ronnie Bell (Blaze Rune)
Pros:
Balance team able to do single target and full party attack
Higher damage than team 2 the more enemies there are
Apart from Main character and Kai, the other characters are not reliant on one another. So you can still bring them in, mix & match even if your party is locked to 4 or more characters during any chapters.
As opposed to Team 2, Fu Su Lu, Kuromimi and Gon must come as a set of 3 else they will be quite useless on their own.Flik and Crowley can cast the strongest Unite Magic in the game
2. Single-Target Focus team
[Front row] Viktor (Double-Jab Rune)
[Front row] Flik (Flowing Rune)
[Front row] Fu Su Lu (Free slot)
[Back row] Main Character (Soul Eater Rune)
[Back row] Kuromimi (Free slot)
[Back row] Gon (Free slot)
Pros:
Higher single target damage compared to team 1
Higher survivability given that you target and kill one enemy at a time, as opposed to Team 1 where you will want to damage all enemies equally to maximize the gain from Main Character+Kai Unite Attack.
Fu Su Lu, Kuromimi, and Gon does not have any runes locked to them, meaning you have the flexibility to equip what I call "Convenience" rune to them, such as "Prosperity Orb", "Sunbeam Orb", "Champion Orb". As opposed to Team 1, you will not have the luxury to even equip 1 convenience rune.
Decision

In the original PS version, I was using Team 2 so that I have someone to equip "Holy Crystal" so I can move faster. That alone is invaluable.
However in this remaster version there isn't a need, so I decided to use Team 1 for the main reason of easy clearing of random encounters with Kai. Build for the final 3 characters are as follows:


0 notes
Text
Dark Deity

Gameplay : ★★★☆☆ Graphics : ★☆☆☆☆ Story : ★★☆☆☆ Customizability : ★★★☆☆ Replayability :★☆☆☆☆
Gameplay Mechanic
Dark Deity may seem like a Fire Emblem clone, and while its not far off to say that, Dark Deity did include some mechanics unique to itself.


Dark Deity is a tactics game where you can bring up to 14 characters into a battle. Throughout your adventures, you will be able to recruit up to 30 characters.
There is not much to do outside of battle. The game progresses from chapters to chapters, and there is no exploration or any sort outside of the battle. Storyline will also progress automatically.

Weapon Type The weapon system in Dark Deity is where it gets vastly different from Fire Emblem.
Firstly lets talk about similarities. There is similar advantage and disadvantage using a certain weapon type against different enemies classes/armor type. E.g Piercing attack deals less damage against Plate Armor enemies, while deals additional damage against Cloak Armor enemies. This is well displayed in the game by selecting a unit, and enemies will either have up or down arrows depending on the advantage/disadvantage.

Now lets talk about the differences. Firstly, unlike Fire Emblem, there is no "Durability" system, where a certain weapon can only be used a limited number of times. This is great for someone like me who always hoard strong weapon and not use them.

Secondly and the main difference, is the weapon categories. Each character has their own weapon types such as Sword, Spear, Axe, Bow etc, but each weapon has 4 different categories that the character can switch between anytime during battle. They are Power, Finesse, Focus and Balance. Power category (displayed as red weapon) has higher damage. Finesse category (displayed as blue weapon) has higher critical hit chance. Focus category (displayed as green weapon) has higher accuracy. Balance category (displayed as yellow weapon) has more average stats and with higher speed.
Each of these category can be upgraded using tokens either earned in battle, or purchased through shop.
Class

Similar to Fire Emblem, character can change their class when they reached a certain level. Characters have their own preset starting Tier 1 class. There are 9 different tier 1 classes in total (Warrior/Ranger/Rogue/Mage/Cleric/Adept). Each of these Tier 1 class will branch out to 4 Tier 2 classes, and 4 Tier 3 classes. Note that unlike Fire Emblem, picking a Tier 2 class will not lock you into a specific Tier 3 class.
Each class has its own passive skills too. One important and interesting mechanic is, even if you are at Tier 3 class, you get to keep chosen Tier 1 & 2 class' passives, increasing the level of customization for each of your character. Each class also has its own stat growth as well.
Aspect

To make it simpler to understand, you can think of Aspect as an Accessory that character can equip, providing bonus passive effect to the character. Each character can bring up to 4 aspects into their inventory, but can only equip 1 Aspect at any point in time. These aspect can be swap during battle without any penalty.
Bond

Bond is something that Fire Emblem has as well. Characters who participated in battle together and placed adjacent to one another will get a chance to increase their bond after the battle ended. However, there is almost no reward to having high bond, as it mainly serve to have dialogue exchanges between 2 characters. The only exception to this is one Aspect which can increase the damage of nearby allies with close bond.
Death penalty
There is no permanent death in this game if your character is killed in battle. However that character will have a random stat being decreased permanently.
New Game+
There is no new game+. Upon game completion, you are forced to the main menu.
Tips:
If any of your character were to fall in battle, quickly hit the pause button and go back to main menu. Under load game, you can load from the start of the previous turn in battle.
Do not waste your gold to buy Tier 1 Token as you will be getting quite alot. Similarly for Tier 2, but if you want you can purchase just a few (not more than 3). Most of your gold should be used to purchase Tier 3 and Tier 4 as you do not get enough of it for all your characters if you don't buy them.
My Opinion:
The Good:
Simple, traditional tactics gameplay, great for players who love Fire Emblem alike games.
The Bad:
The game resolution supports up to 1080p only. On my 4K monitor it appears blur.
Graphics can be better. Not a huge fan of pixel art style.
Sliders under Options doesn't work with controllers.
Selection always started in the top left corner of the map
You can't manually save during mid battle
The game does not save who you chose to use in your previous battle. Instead it always automatically choose characters with higher level.
Not sure if it is a bug (seems like it to me though), but enemy with attack range 2 will be able to counter-attack even when being attacked from a range of 3. Because of this, classes like Sniper lost much use.
My Playthrough

Completed the game on Hero (normal) difficulty, left with about 100k Gold as I didnt purchase any permanent stat booster.
Team Setup
For my team setup, I heavily reference on the best build for each unit explained here, but my thought process in coming up with my team came from my own.
Firstly I would like to show my final team setup before explaining why I chose each of them. For my team of 14 I split them into 2 groups of 7, as it is more efficient to do so for many of the map layout.
Group A
Healer - Maren Tank - Liberty Dodge Tank - Brooke Range - Maeve Melee - Benji Magic - Monroe Last slot to cover attack weakness - Thae'Lanel
Group B
Healer - Nil (Fulfilled by Vesta/Faust) Tank - Vesta Dodge Tank - Faust Range - Rose Melee - Alexa Magic - Alden Last 2 slots to cover attack weakness - Caius, Aurima
Explanation
For my team I am trying to play with a balance team, half meelee, half range, and able to cover most of the armor weaknesses equally. Healer


The first key member of each group has to be the healer. In this game, apart from Maren, other healers will not be able to heal themselves. Which is why we have Maren as the solo healer for Group A, while Vesta & Faust in group B. Vesta & Faust were chosen because apart from being a healer, they can contribute as being a tank. Faust especially is great, because he is very dodgy, which means he doesnt need to be able to heal himself if he doesnt take damage in the first place.
Tank

Next I wanted a tank from each team to absorb damage, even though in my opinion, a tank role isnt that good in this game. Reason being, the maximum attack range in this game is 3 range only, unlike Fire Emblem. This means that your other units will have to stand very close to the enemy to attack, and during enemy's turn they can simply walk pass your tank to hit your other characters. Nonetheless, this role can be good sometimes , such as being the only unit to step into enemy's attack range to lure enemies over. For Group B, my tank is already chosen as Vesta who can also acts as a healer. For group A, I chose Liberty not just because she is defensively strong, but also because she is able to counter attack no matter the range.
Dodge Tank

Next I wanted a dodge tank. In this game, enemy tends to target characters that they have weapon advantage against, thus having a dodge tank with a different armor type as my Tank (as Tank will generally want Plate type armor), will serve as an aggro to enemies with different weapon type.
For Group B, this character is already chosen as Faust who also acts as a healer. For group A, I chose Brooke, who has the highest dodge in the game.
Range


Next I wanted a range character. I regretted this to a certain extent though. Originally I wanted to have an attacker with 3 range to mainly target enemies with 1-2 range so that they can chip down enemy's health without afraid of counter attack. However after using, I realized that enemies with 2 attack range can also counter attack from 3 range, making a flaw in my theory-crafting. Nonetheless, for this role I chose Maeve and Rose who seems to be the strongest Sniper class.
Melee


Next to make my team balance, the next character I want shall be a melee character. I chose Benji and Alexa. Benji can easily one-hit kill most enemies, while Alexa is the strongest Dragon Knight in the game, having a high mobility and attack.
Magic


Next, on top of Melee and range, I want magic attackers in my team to cover different weaknesses. Alden and Monroe are chosen because they have the highest power under the Mage class.
Last 1-2 slots
For my last few slots, I want characters to cover attack-weaknesses that each group is lacking.

For Group A, it is severely lacking in someone who is good at attacking Plate enemies. The only character in Group A strong against Plate enemies is Maren, but she is my dedicated healer. So I really need someone strong against Plate. I have 2 weapon choices for this character, Crushing or Arcane. This essentially leads me to the question whether I want melee or range attacker. Healer aside, I have 2 melee characters (Brooke & Benji), and 3 range characters (Liberty & Maeve & Monroe), thus I went for melee (crushing). Thae'Lanel seems to be the best candidate for crushing, thus he was chosen.


For group B, I have 2 slots remaining. While the weakness covering is already quite balance and not as bad as Group A, it is still quite lacking against enemies with Rune and Leather Armor. Looking at the weakness/advantage chart, I want these 2 characters to be a Fire and Slashing characters. This brings me to Aurima and Caius as they seems to be the best candidate for each of these weapon types.
0 notes
Text
Miasma Chronicles

Gameplay : ★★★★☆ Graphics : ★★★★☆ Story : ★★★☆☆ Customizability : ★★★☆☆ Replayability :★☆☆☆☆
Story
Miasma Chronicles tell the tale of a post-apocalypse after nature strikes with Miasma, a condition that petrifies human races. The main character lives in a place safe from Miasma but was handed down a special glove that seems to be able to absorb Miasma from his mother, who told him to search for him on the other side of the wall once he has the power to.
Gameplay Mechanic
Miasma Chronicles is a turn base strategy game from the same developer from Mutant Year Zero and Corruption 2029.

The basic gameplay is drastically similar, more similar to Mutant Year Zero however, and I will not cover them again. However Miasma Chronicles comes with more customization, which is great!
Party

There are a total of 5 playable characters, and the party size this time remains the same as 3 in a party. However, 2 of the characters are mandatory, and you can only choose 1 out of the other 3 characters to put in your party.
Cover/Flank
Similar to XCOM, you or your enemy can hide behind cover. Cover can be full or partial. You only have 50% accuracy against enemies in Partial Cover, while 20% against enemies in Full Cover. Covers are only effective from the front.
Moving to the side or behind an enemy will "Flank" them instead and give you a 100% accuracy.
Rage
Rage is a counter that once filled up to 100, will allow any of your weapon attack to deal critical strike with additional damage. The gauge will increase by 10 per attack.
Skill Deck

Essentially skill tree where you can exchange Points for new active or passive skills. Skill Points can be freely refunded without any penalty. 1 Skill Point will be awarded for each level up.
Weapon and Weapon Mod

Similar to its predecessors, each character can be equipped with 2 weapons. However now you can better customize the guns. Each gun allows you to insert 2 modification, one scope, and one magazine. These mods can be easily equipped and unequipped anytime outside of battle.
Miasma Powers and Kilowatts

Miasma Power is a special power granted to selected few. Out of all 5 characters, only 3 can use Miasma Power.
To use Miasma Power, they must first be equipped with one. After which they can cast it during battle provided they have the required amount of "Kilowatts" for it. "Kilowatts" is a special resource that can be replenished by using Energy cells items, or through some other ways such as equipping a weapon mod that allows you to earn Kilowatts with very attack.
Similar to Weapon, Miasma Power can also be customized with "Miasma Chips" to provide additional effects.
Power Cores

The last piece of customization is Power Cores. You can easily think of them as "Accessories" from other games. Each character can equip up to 2 Power Cores.
New Game+
There is no new game+. Upon defeating the final boss you are forced back to main menu.
Tips:
Early game before you have your second Silent weapon, use Elvis' Glove Shock skill to help clear enemies with Jade.
There is no need to buy any weapons as you will be getting alot through exploration. Save your plastics to exchange 7000 of it with one of the best gun in the game.
My Opinion:
The Bad:
It is quite buggy. E.g there was a time when enemy spawned inside a tree and is untargetable, forcing me to reload the game. In another time the game crash after I leaped on an enemy. The display for modifying is also buggy.

My Playthrough
Completed the game on Standard difficulty with Light Tactical. Completed all 16 side quests.
Team Setup
For my team setup, I use Jade as my third member since you will be forced to use her for the final battle anyway. Apart from that she is an awesome sniper with high crit, and also since you will generally be using her for ambush to stealthily take out enemies, using her is more comfortable for me.
Elvis


For Elvis, when he attacks he will regen abit KW for Miasma Powers. When push comes to shove, he can summon Witch Doctor for healing, especially for boss battles.
He is equipped with a shotgun as his secondary weapon for better crowd control, as well as shredding multiple enemies' armor if needed.
Diggs


Diggs is my tanker due to his inherent skill allowing him to have more armor, and my main Shotgun user, since he can run closer to enemy with his higher armor, coupled with his leap and sprint skill.
Given that Elvis has a Silent skill, and Jade has her Silent rifle, I gave Diggs my second Silent rifle "Mute Assault Rifle" so he can help with taking out enemies stealthily.
Jade


Jade is my sniper and main user for ambush stealth kill. Her job is to look for high platform for the increase chance for crit. This is also a reason why she has the teleport miasma power.
0 notes
Text
REVERSE COLLAPSE CODE NAME BAKERY
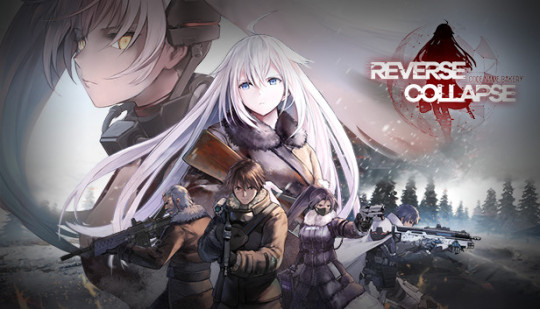
Gameplay : ★★☆☆☆ Graphics : ★★☆☆☆ Story : ★★★☆☆ Customizability : ★★☆☆☆ Replayability :★★☆☆☆
Story
The story follows Jefuty who is the main character of this game, who is looking for her little sister, captured by the enemy. The other main character, Mendo, is on a mission to protect Jefuty, but is constantly ambushed by the enemy large force. Through multiple attempts, the two are always met with dead end and killed in action.

However the main twist here is that Jefuty, when dead, will pass on her memories and knowledge to the other Jefuty in another timeline, allowing her to make different choices to avoid the previous dead end.
Gameplay Mechanic

Reverse Collapse is a turn-based strategy game without much mechanics. Most of the missions either involve killing enemies or reaching a certain point in stealth mode.
Characters also have AP and skills like in many similar games. However contrary to many games, you do not have a limited party slot etc. Characters will join and leave your party depending on the mission, and they will be forced to be in the battle.
Action Points (AP)
Action Points are simply the number of movement+action your unit can perform in a turn. Different weapons/items will cost different amount of AP to attack/use, and moving through different terrain type will also cost different amount of AP.
AP will increase as the game progresses.
Range

Optimal Range is displayed in RED, while Suboptimal Range is displayed in YELLOW. Attacks on targets in Suboptimal Range have reduced Accuracy.
Weapons

Each unit holds different weapons. New weapons are acquired as the game progresses. Weapons can be swapped anytime in battle without any penalty.
Weapons can be upgraded by consuming special materials found at supply points in battles, or by defeating specific enemy. You can also install accessories to enhance the weapon's attributes. Installed accessories can be removed at any time outside of battle.
Genes (aka skills)

Genes can be enhanced through "Genetic Enhancement", which is basically a character's unique skill tree. There are 2 different kinds of "Genes", passive and active. You can only equip up to 4 active genes/skills per character, and it require Skill Points (SP) to use in battle, which is earned by defeating enemies. Passive genes on the other hand, will be permanently in effect once unlocked. Each Gene can also be leveled up by using "Potential Keys", obtained when the unit leveled up.
Ultimate

Each unit has its own Ultimate skill that requires a significant amount of Skill Points to use, and a long cooldown. Ultimate can also be leveled up via Genetic Enhancement, though it is less direct. You will need to spend a certain number of "Potential Keys" on other genes to earn points to level up Ultimate.
Level

Completing missions will grant EXP that will increase Team's level. This level is standardized across all characters, even if the character didnt join the battle, or join the team later in the game. The max level is 50, and every level, their HP, Accuracy and Evasion will increase. They can also unlock skills based on the level requirement.
Enemy Action Mode
Displayed on top of each enemy is their Action Mode. There are 3 types of action modes, Standby, Attack, and Defense. Enemies in Standby mode will not move, and will switch to attack mode when an enemy unit enter its movement range. Enemies in Attack mode will actively moves towards enemy units and attack. Enemies in Defense mode will only attacks enemy units in range and does not move.
Stealth
Units can also enter Stealth mode so they can move without being detected. You can right click on an enemy to show their Visual Range, represented in Green or Yellow tiles. Green tiles will mean that you can move safely past them without breaking the stealth, while moving through yellow tiles will break your stealth.
Special terrains can help provide better concealment. While in them, units can only be detected by adjacent enemies.
In one of the mission you can even hide in cardboard like in Metal Gear Solid!

Special Terrain
Units can gain different status effects when standing on different Terrains, for e.g some terrain offers higher evasion when unit is on it. There are also certain terrain that will damage your unit if they are on it.
Backpack

Items can be put in the backpack for use in battle. There is a limited capacity, which will increases as the game progresses.
Item Modification

Item Modifications makes items more powerful and improves important attributes such as Carrying Capacity and Effective Range.
To perform Item Modification, you need to reach the required Tech Level, and use a certain amount of Research Points. Tech Level can be raised by consuming Research Points. Higher Tech Level will also unlock more item modifications.
Research Points can be obtained by completing Battles.
Divergence Point

From Chapter 4, there will be moments when decisions need to be made, resulting in different route of objective. This is referred to as Divergence Points, and lead to different Timeline. Missions can be revisited to achieve a different route.
When you complete the final battle of a timeline, you will obtain Memory Points. These points can be consumed to perform a "Memory Leap", allowing you to jump to any Preparation Phase of an unlocked battle leading on from the current battle.
New Game+
Upon defeating the game (chapter 4), if you collected all secret documents, Chapter 5 will be unlocked. This will unlock 3 additional missions, and completing them will allow you to save a cleared data. With this cleared data there are 2 things you can do.
One endless mission will be unlocked where you play as a solo Jefuty against endless wave of enemies to try to survive as long as you can
Start a new game + with the cleared data to bring over "Potential Key", Research Points", and "Parts".
Tips:
Collected items cant be collected again even if you reload your save file. What this mean is that, for hard to reach items, save your game first, then get the item, before reloading back your save file. The item will still be considered collected. What I like to do here is to feed a character "Special Braised Pork" and "Field Ration" to replenish his/her AP while that character makes his way to the collection. After which, reload your save file.
Once you received "Autonomous Recon Vehicle", make use of it in every battle as it can help you collect supplies on the map.
Turret is your best friend in the game, as they generally deals more damage per AP used.
For "Item Modification", you can use "Reset Disk" to remove some of the points used for items you are not using, but allocated points to increase Tech Level. However when resetting, do not go below the Tech Level to avoid decreasing the level.
When in Chapter 4, try not to use Visual Leap on the timeline too much. Originally I thought that you can just leap to any unlocked node, but I didnt know you can only leap to certain node for free. This means that if you are at the far end of the node but leaped away from it, the next time you want to go back to the node, you either need to consume a certain amount of Memory Points, or you need to play through all the in-between nodes again.
As the battle is quite hard even if you are a veteran at tactics game, I would personally recommend for you to use Training Simulation to reach the max level cap before every battle.
The fastest training simulation in my opinion is "Breakthrough". In this simulation, you can simply run towards the exit to clear the mission. Apart from "Breakthrough", the next best simulation is "Assassination" in my opinion. In this simulation, simply start by stealth-ing your character until you are close to the enemy target, because removing stealth and kill off the enemy target.
If you need a guide for collectibles, refer here.
There will be times in the preparation screen where you characters will have speech bubbles allowing you to initiate conversation. When that happens, remember to click on it as it may reward you with "Special Braised Pork" item, which when consumed will recover 15 AP!


My Opinion:
The Good:
The game provides a story recap of what happened in the previous chapter, good for someone like me who always tend to forget what happened
The Bad:
The outfit only changes the sprites in battle, not the conversation display
Dialogue between each battle are too long, takes about 15-20 mins to finish. Feels like a visual novel.
Many of the missions felt like solving a puzzle with only one or very limited number of ways to complete the objectives, especially missions requiring you to stealth. This makes it feel more like doing trial and error to solve puzzle rather than a strategy game with different ways to approach the objectives.
Not much customizability. Apart from how you upgrade your items and which skills you want to use for each characters, there is almost no customizability.
The translation and text are not properly QA-ed. There are many times where you can see chinese text, or text with html tagging


My Playthrough

Until Chapter 5-1, I completed on Standard difficulty, collected all collectibles and achieved S rank for all missions. However in Chapter 5-2, I was actually quite drained out from the long battle, so I threw away my pride and played on Casual.
Character Setup
Mendo


Mendo is a turret personnel as his passive, "Turret Calibration" allows all turrets within 4 tiles to gain additional attack and accuracy. Because of this, and how useful Turrets are in the game, one active skill I used is "Temporary Upgrade", allowing your turret to be even stronger. Second skill I used (but seldom) is "Alert Area". This provides Mendo with 2 defensive shots which is quite nice. The third skill I used is "Silencing Strike", seeing how many Stealth mission there are in the game, this skill is very useful. For the last skill, I used "Harmonic Resonance" which is unlocked nearing the end of the game. Before that I use "Emergency Transfusion" as a backup healing. Note: Originally I used "Target Locked On" hoping to inflict Vulnerable debuff to enemy, however most bosses are immune to status effect making it useless.
Weapon wise, Viper is his strongest weapon, and it is really very strong. I upgraded this weapon to Tier 5, but i do use and upgraded the other 2 of his weapons to Tier 4 as well, to save on his AP for lower health enemies, as Viper's normal attack costs quite a fair bit of AP.
Jefuty


Jefuty is a sniper and is really good at what she does. Skill wise, "Collapse Bombardment" is a must-have for boss killing. It deals so much damage that it will trivialize boss battles.
Second skill I most often used was "Penetration". There are many times where many enemies lined up in one go, allowing me to kill all of them immediately. Third skill I found to be useful is "Support Fire". This allows Jefuty to provide additional damage in the event that other characters fail to kill off an enemy. The last skill I used is "Burning Blood". Shrike enemies are such a pain that this skill is very useful against them.
Weapon wise, I mostly used her "Mosin-Nagant" weapon, but against mechanical enemies, I will swap to "Petrel" weapon for the additional damage.
Atena


Atena is a tanker and item user. The most important skills for her are "Mad Bomber" and "Draw Fire". The former allows her to deal tremendous damage with items such as Grenade or Rocket Launcher, while the latter allows her to draw aggro from enemies, increasing her armor, and heal her HP to full.
The third skill I have for her is "Chain Shot". This allows her to deal large amount of damage by shooting twice for every normal attack. The last skill I upgraded for her is "Fire Support" to combo with "Chain Shot" for better accuracy.
Weapon wise, "OSK" weapon is her best weapon because of her passive, "Return To Sender", which allows her to counterattack when using OSK pistol. However against Mechanical enemies, I will swap to "Oryx" weapon for its "Armor Break" weapon traits.
Carl


Carl is a supporter who specializes in buffing and debuffing. However in my opinion, he is the weakest character in the game, even though his ultimate is useful in reducing allies cooldown.
Skill wise, "Assault Operation" is my most-used skill, and I usually pair-ed this with Atena to allow her to use even more items. "Tactical Deception" is a fun skill that may be quite useful to a certain extent. Apart from the mentioned 2, I also use "Area Disruption" and "Provoke", though these 2 are seldom used, but Area Disruption is useful against bosses who will counter-attack you when dealt damage.
Weapon wise, I will use both, but I have "Draco" to Tier 5 while "AT-77U" to Tier 4, as a Tier 5 "Draco" will inflict 2 debuffs on the enemy which I deem to be more useful. I will start the attack with "Draco" to debuff enemy, before swapping to "AT-77U" for the additional damage when enemy is under a debuff.
Jevon


Jevon is an attacker and can be a boss killer character. Skill wise against boss, I will activate "Full Focus" and "Limit Break". These 2 work very well together, allowing Jevon to shoot more with higher damage.
The third skill I used for him is "Assault Tactics", allowing his next 3 normal attack to be critical hit. Combine this with his "Fortune Favors the Bold" passive, it may result in an extra 300% critical damage.
The final skill I have for him is "Raging Flame", a useful skill against mechanical enemies.
Weapon wise, I actually use both. "Meteor" is generally better with it's high attack and long range. However against bosses, I like to use "Orca" due to its lower AP cost. After activating Jevon's Limit Break skill, it will reduce the normal attack AP cost to 2, allowing you to hit more for more damage with "Full Focus".
Lige


Lige is the only melee attacker in the game. Even though melee is very dangerous in the game, she is equipped with very good kit that allows her to survive. Her passive generally allows her to heal with every damage dealt, and even if her HP is full, she can have additional temporary HP pool.
Skill wise, given that she is a melee character and movement is very important, "Phantom Blade" is one of her most important skill to allow her to get close to enemy without spending too much AP on movement. "Blossom Blade" and "Blood Burst Thorn" are also good AOE attack skills. For the last skill it has to be "Bone Blade Sharpening", increasing the amount of damage she dealt by a tremendous amount.
Weapon wise, both are useful. "Bone Blade" deal slightly higher damage to adjacent enemies, and "Throwing Knife" give you slightly more range for lower damage.
Item Modification

For item modification, I prioritized the following whenever available:
Blood Bullet
Blood Grenade
Soporific Dart
Low-Frequency Acoustic Generator
Rocket Launcher
Fragmentation Grenade
Field Ration
Replenishment Drink
Medicine
Medkit
Melt Bomb
Cruise Missile
Then I would just put in points in others if they are not available for upgrade.
0 notes
Text
Ratchet and Clank Rift Apart

Gameplay : ★★★★☆ Graphics : ★★★★☆ Story : ★★★☆☆ Customizability : ★★☆☆☆ Replayability :★★☆☆☆
Rachet and Clank is one of the series that I really enjoyed playing as an action game, and Rift Apart was not a letdown to me. It is very enjoyable without being too demanding on controls unlike most action games.
In Rift Apart, the game brought in another protagonist, Rivet, who is a counterpart of Rachet.

The title is "Rift Apart" because in this game, one of the mechanics is to use the "Rift", aka blackhole, to move around areas and navigate to different dimensions.
Gameplay Mechanic

As an action game, most of the mechanics are similar. Ratchet can attack with melee weapon, shoot with range weapons, jump, and dodge.
Leveling up
Ratchet will gain exp when defeating enemies, and can level up. Each level will grant Ratchet 10 more HP. However I cannot be sure if the damage will increase.
Weapons

Over the course of the game, Ratchet can use the screw currency earned by defeating enemies, to purchase more weapons. These weapons are only the range weapon, and Ratchet's main melee weapon cannot be replaced. Weapons can also level up based on usage. The max level of each weapon is cap at 5. Each level will allow you to upgrade the weapon with a special material called Raritanium.
Armor

Armor if part of a collectibles that you can find and collect in the game. There are 3 different types of armor, Helmet, Chest and Boots. Each piece of armor will grant a bonus passive effect, and successfully collecting all 3 of a set will grant even more bonus. Note that you do not need to equip the armor to net the bonus effect. As long as you collected it, the effect will stays with you.
Collectibles
Apart from Armor, there are 3 other kinds of collectibles in the game.

The first being "Gold Bolts". These, when collected, will grant you some effect that are mostly asthetics, such as changing how your weapon looks, or allow you to see the damage number you inflict, or adding more stickers/frames in Photo Mode. However there are also non-aesthetic effects and are some of the game-breaking effect such as infinite Health and Ammo.

The second kind of collectibles is the Spybots. There are a total of 10 Spybots in the game, one in each world. When all 10 are collected, you can earn a very powerful gun.
The last collectibles is the Craiggerbear. This collectible does not play a part in anything, but collecting it lets you earn achievements.
Minigames

Rather than minigames, there are alot of different control playstyles in the game. For example you can ride a "Dragon" to soar the sky, or ride a "Worm" as I would like to call it, to move in swamp.
New Game+

Upon completing the game, you can use the cleared data to create a Challenge Mode. What the mode does I'm not too sure as I didnt proceed with it. I believe it is similar to New Game +.
Alternatively you can still continue the current journey to get anything you missed out.
Tips:
This game is all about collecting collectibles. If you need a walkthrough, I would recommend from here.
No need to be too stingy about purchasing and upgrade weapons. At the end of the game I had about 200k screws and 150 Raritanium, which means that there are more than enough for you to purchase and upgrade more weapons.
My Opinion:
The Good:

You can preview how a new weapon will be played before you purchase them.
The Bad:
It can sometimes get too flashy and makes the whole screen hard to see

My Playthrough


Played on Rebel Agent (default) difficulty, collected all collectibles such as Raritanium, Craigger Bear, Armor, Gold Bolts, Spybots
Setup
For weapons I like to use,
Blackhole Storm - This gun has the highest DPS for single target, very useful for boss battles.
Shatterbomb - Very good for crowd control as it damage all enemies within a large radius.
Blast Pistol - While it is your first gun, it is actually quite decent and can carry you throughout the game.
Ryno 8 - While it is the ultimate weapon, the ammo is small and thus cannot be used to spam. If you are using Infinite Ammo, then definitely look no further, this is the only gun you will need.
0 notes
Text
King Arthur Knight's Tale

Gameplay : ★★★★☆ Graphics : ★★★☆☆ Story : ★★★☆☆ Customizability : ★★★★☆ Replayability :★☆☆☆☆
Gameplay Mechanic

Battle is a simple traditional grid base tactics game very similar to XCOM. Every movement and abilities will cost Action Points (AP). Every hero has a set amount of APs which refill at the start of every turn.
Similar to XCOM, heroes can also take cover. Half cover reduces incoming ranged damage by 50%, while full cover is untargetable with range attacks.
Reserve
Consumes all remaining AP to save some for next turn. The character will get 1/2/3 bonus AP next turn for 1/3/6 AP reserved. All unused AP will be automatically reserved after the end of your turn.
Overwatch

Overwatch here is similar to Overwatch in XCOM, which allows you to select an area to guard, and when an enemy enters one of the tiles, that character will execute an attack. Using Overwatch requires a certain amount of AP equal to your basic attack. The unit can also unleash more than one overwatch attack if there is more AP leftover as well.
Vitality, Health and Armour
Vitality is your Heroes' consititutional Health. Taking damage that reduces Vitality can lead to persistent Injuries and eventual Death. After mission, all lost HP and Armour will be restored but Vitality damage needs treatment in your Camelot HQ.

Also scattered across maps are resting areas where you can use it to regain some Health or Armour. The number of times you can rest depends on the difficulty.
Ranged Penalty
If any enemies are within melee range, Ranged Heroes will have their damage cut by half.
Skill Tree

Each character has their own skill tree, mostly influenced by their class. Every level they will gain 2 SP that can be used on the skill tree. Skills cost 2SP to learn, and some skills that have sub skills under them cost 1 SP to learn the subskills.
Camelot


Camelot is basically your headquarter. Here you can construct and upgrade buildings with the gold and resources earned in battle. You can also assign different heroes to different titles for different passive effects.
Morality

During your journey you will have to make different choices that will affect the story outcome and your allied Heroes' loyalty. Each of these choices will be represented on the Morality Chart. Depending on the amount of points on each alignment, you will unlock abilities and Heroes unique to that alignment. There are a total of 4 alignment. On the vertical axis you can either be a "Rightful Ruler" or a "Reckless Tyrant". On the horizontal axis you can either be a "Devout Christian" or "Old-Faith".
You can also unlock new characters by having enough points on the right morality.
Loyalty

Loyalty denotes how loyal a unit is to you, and can be seen on the top left UI in the character's screen. Having a high loyalty will increase damage and AP in battles, while having low loyalty will decrease it. Loyalty can be increased or decreased by a various number of methods, such as an event's choice.

Note that having low loyalty is very dangerous as it will cause an event where your main character will suffer heavy injury and you might have to kill off that unit.
Essence

Essence are powerful passive that you can let your heroes learn by consuming a potion. Each hero can only have up to 4 essences so make it worth!
New Game+
There is no new game+. Upon defeating the final boss, you unlocked more side missions in the post-game. In the Rising Eclipse DLC, Sidhe Shrine will be unlocked, where you can spend Eclipse Shards to unlock global passive bonuses that will affect all Heroes. Once DLC is completed, there is really nothing left.
Tips:
You can change unit's facing direction by left clicking in the direction to face
Level is capped at 25, while equipment level is capped at 20.
If you want to reroll Relic item you get in a map, do not collect any treasure chest until you can finish the mission. Once you do, save and start collecting chest until you find the chest that contains Relic item. Then reload and start collecting the chest that contains the Relic item. Finish the mission and see if it contains the effect you wants. If not, reload, collect another chest before picking up the chest with the relic item. This is to use up the random seed so that you will get a different item with a different effect when you pick up the relic chest. Repeat the process with all the other chests in the map until you find the item you want. As this is quite a tedious process, I only recommend doing it near the end game when you start getting level 20 items. Note that non-chest loot can also consume the random seed, but it is not marked on your map, so recommend to just collect as you go.
My Opinion:
The Good:
Alot of different heroes with lots of customizability.
Game will inform you that there are uncollected treasure if you try to leave without collecting.

The Bad:
Not very intuitive to play on controller
UI can be quite misleading in that players may thought that there is a cap to the numbers of items that can be held at any point in time, or the number of aspirant heroes in the round table. However based on my testing there is no cap
You cannot use your season save data across to the next season, as you can only load up the save from which you defeated the final boss to a new season. AND if you overwrote your save, you are basically screwed and need to complete the story again.
The UI can be hard to see at times.

My Playthrough

I completed the game on Normal difficulty, went on to play the DLC, Rising Eclipse, and defeated the final boss of the DLC.
Team Setup
For my team I am going with the concept of 1 tanker + 3 range. This team is especially strong as each of them has a very important role to play.
Lancelot (Tank)

For my tank I am using Lancelot. Before defeating the story's final boss, Mondred filled up this role as he is mandatory. However upon reaching Post game, Mondred is no longer a mandatory character so I swapped him out. I prefer using Champion instead of Defender for this tank role, as Champion are more efficient in depleting enemy's armor. As for why I chose Lancelot out of all the other Champion, well, to be honest there isn't any strong reason. I was using Kay for a long time before changing to Lancelot. One of the key consideration I have for this role is to have the "Damage Focus" and "Melee Expertise" skills. These skills are good because this role will often be outnumbered and surrounded by enemies. "Melee Expertise" can help with being outnumbered, while "Readiness" from "Damage Focus" will help this role regenerate Armour. Lancelot and Kay are 2 of the characters who have these 2 skills. Lancelot has "Ice Aura" skill that can help in crowd control, and Kay on the other hand is also useful for his Whirlwind. In my opinion, Kay is a better attacker while Lancelot is a better Tanker, which is the main reason why I chose Lancelot in the end, since my other 3 characters are already focus on attacking.
For this role, I always start the battle with Lancelot performing "Assault" to bring himself to the center of battlefield, open up "Ice Aura", and basically "Overwatch" all the time. Because "Readiness" works so well with "Focused Watch", he is able to regenerate so many armour per turn simply by overwatching.
For his gear, I also focus on the ability that allows him to gain 3 armour for each AP reserved. With this, he is ultra tanky.
Bors (Range Attacker)

Bors is one of my main range attacker. I've saw many comments online saying that Marksman class is bad in this game, however I definitely think otherwise. Bors is actually one of my strongest character, able to deal the highest amount of damage per turn.
Bors is a master of Overwatch. His main and sub skills under "Sentinel" is so strong, that he simply need to Overwatch to kill everything. When geared right, his Overwatch only needs 1 AP to perform an attack, and with that he can attack more than 10 times in a turn. His gear should focus on anything to do with Overwatch, and look for an ability where "Shoot" can hit another random enemy for 50% weapon damage within 5 tiles range. His other skill, "Cover Expert" is also good as it allows him to deal higher damage and have a longer range. Good, open cover can be hard to find in a battle, which is why my next character compliments well with Bors.
Morgana (Support Attacker)

Morgana is a support based attacker. Firstly, her "Ice Wall" helps Bors to build cover, allowing him to do better in what he does. Secondly, as I only have a tank in my party, there may be situation where my party is surrounded by enemies. Having "Ice Wall" allows my party to block off one entry point, and my Tank to block off another. Definitely a very useful skill to have, given that majority of my characters are range characters.
"Ice Wall" can also be learnt by Sage class, however they are generally melee based, which is why I use Morgana instead. Another good thing about Morgana is that she has "Death Hex". Post game, bosses have large amount of HP, and having this skill allows her to reduce the boss' HP by so much that they will just die. Just remember that the boss need to die during that one turn, else the reduced HP from "Death Hex" will lose its effect the next turn.
Her role when "Ice Wall" or "Death Hex" are not needed is simply to target 3 enemies with her basic attack, preferably melee attackers, to inflict chill on them. Chill will cause enemies to have 33% less AP, resulting in them attacking less, and for melee attackers they may not have enough AP to move to your party, while you take them out with the other long range attackers.
Gear wise, I equipped her with anything that increases Hex intensity, to allow her "Death Hex" to chip off more HP.
Merlin (Fire DOT Attacker)

The last character in my party is Merlin. He is my fire DOT attacker, and I gotta say, this guy is crazy. This basic attack allows him to target 3 enemies and inflict burn on them. While this doesn't sound much, it is quite crazy when he is equipped with items that increases his burning damage. Post-game, he is able to deal about 100 burning damage. With 3 enemies, thats 300 damage in a turn. But it doesnt end there. You can also equip him with items that increases the Burning Duration. This means, the next turn, he can target 3 other enemies that are not already inflicted with Burn, and that increases his damage per turn to 600! Enemies usually just burn themselves to death with this.
0 notes
Text
Capes

Gameplay : ★★★☆☆ Graphics : ★★★☆☆ Story : ★★★☆☆ Customizability : ★★☆☆☆ Replayability :★☆☆☆☆
Story

Capes follows the story similar to X-Men, where powers will awaken within certain people but not widely accepted by the public. Heroes come together to fight against the company who wants to kill/kidnap these people with power.
Gameplay Mechanic

Capes is a traditional turn based tactics game. In each map, you can bring up to 4 heroes. Each hero will take turn according to their initiative, and the turn order will be displayed on the top right corner. Each hero can move and perform up to 2 actions per turn. However, each action can only be used once per turn.
Skill tree

Each hero can learn a number of active/passive skills using SP. Skills can also be upgraded using SP. To learn skills, apart from having the necessary SP, the hero will need to be at a specific level or higher to be able to unlock that skill/upgrade for learning.


SP can be earned by completing missions, fulfilling optional objectives and hero challenges. SP is a shared resources among all heroes, thus it is most recommended to use SP on heroes that you are using.
Team up


During a hero's turn, the hero can use an improved version of his/her skill if another hero is within 3 squares. This is called teaming up.
Ultimate


Each hero possess a powerful ultimate ability that can be used after building up the Ultimate bar when meeting their own unique condition. Performing Ultimate does not consume any action point.
Disarm

Disarm is one of the main battle mechanic in this game. Enemies will usually be holding onto a weapon allowing them to deal higher damage or to use a special skill. However they can be disarmed using skills with disarm effect, to drop their weapon. Stronger enemies will have more than 1 bar of disarm gauge, meaning they will require more disarm effect before they will drop their weapon. The disarm gauge is the blue bar below an enemy's health bar.
Pushing

Pushing is also another battle mechanic. There are skills where the hero can push an enemy away, and if this will result is pushing the enemy off the ledge, this will results in instant KO.
New Game+

There is no new game+. Upon completing the main story, you will be sent back to the lodge with one additional mission, and is the hardest mission of all as you will need to fight all 4 main bosses in the game together at the same time.
Tips:
You will get enough SP to upgrade all heroes' skills, so don't be too worried about learning a skill. However, do prioritize heroes you are using most.
My Opinion:
The Good:
Classic traditional tactics game that is suitable for casual players as well.
The Bad:
Lack of optimization. The only thing that you can optimize is choosing which heroes in your party.
My Playthrough

I completed the game on Normal difficulty with All in one bonus turned off. I completed all missions and their side objectives. Also completed the mission post-game.
Team Setup

The final 4 heroes in my party are Facet, Rebound, Mindfire and Mecurial. Facet is a well needed tanker as the rest of the team are fragile. In easier difficulty he isn't much needed, and I would swap him with Weathervane instead.
Rebound is a decent damage dealer with very good mobility. She can also help other heroes get around easier with her teamup skill. Also most importantly, she is invaluable in stealth mission.
Mindfire is the strongest single-target damage dealer in the game, which I used against bosses or enemies with high HP. He can attack multiple times per turn, and his ultimate once charged, allows him to use it 3 times before he needs to charge it again. Mecurial is a mobility hero who goes around pushing enemies off ledge resulting in instant ko. As most map allows you to push enemies off, she is invaluable even if her damage is low. Mindfire will give her ultimate a huge boost.
0 notes