
Don't wanna be here? Send us removal request.
Statistics
We looked inside some of the posts by wt3dproject and here's what we found interesting.
Average Info
Notes Per Post
2
Likes Per Post
1
Reblog Per Post
1
Reply Per Post
0
Time Between Posts
6 days
Number of Posts By Type
Text
17
Last Seen Tumblr Blogs


Fun Fact
Tumblr posted its first advertisements in May 2012 and subsequently earned $13M in revenue.
Text
Making My Game
My game is trying to solve Climate Change so a good start to make this possible making the questions actually about Climate Change is a good start. I was so lost on how to change the questions and add new ones I had to find it in the Tutorial again (At 23 minutes and 41 seconds). So you need to be in the HUD

Event Graph

Then in the Variables list select your Question Array
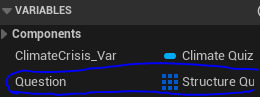
Then in Details Under Default Value, then under Question is where the Questions are.

These were the first 2 I rewrote

0 notes
Text
What is a UV Map used for
When texturing a 3D Model it becomes difficult to Apply or Paint the Texture on correctly and efficiently, so a UV Map allows game developers to Apply or Paint the Textures on more precisely.
0 notes
Text
5 games made in Maya
Deus Ex Mankind Divide


Mirror Edge Catalyst


Ratchet and Clank


COD Black Ops 3


Uncharted 4 A Thieves End


0 notes
Text
What is a PNG File in Photoshop
A PNG stands for Portable Network Graphics. I t is a raster format file that offers lossless compression, that are built with a set number of colour pixel, unlike vector files which use a mathematical algorithm. To save it on Photoshop go to File

then Save As
Then open the Save as type and select PNG

0 notes
Text
What is a State machine in Unreal
A State Machine is a useful tool to allow us to Transition between 2 States rather than us needing to make a bunch of Ifs.
For Example imagine your game has a Running State and a Swimming State Rather than needing to use a Branch
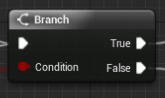
to check if you are in a liquid you can swim in. Now although that example may seem a bit bad as it is simpler to just use a Branch. However if you have lots of different States it becomes hard to understand the code. Say you have a walking, running, sprinting, swimming, climbing ladder, swinging, hanging, flying, wall climbing, gliding and sky diving STATES doing all of those Branches will be a nightmare to code and it will be hard to find.
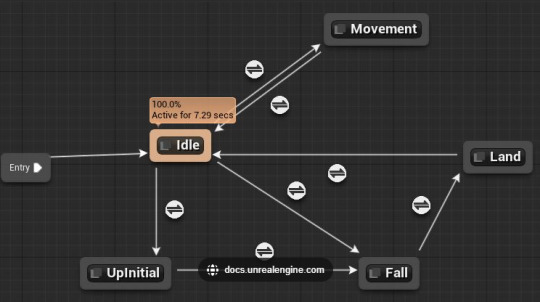
Here is a State Machine in Unreal The Boxes are the States and the arrows are the Transitions
0 notes
Text
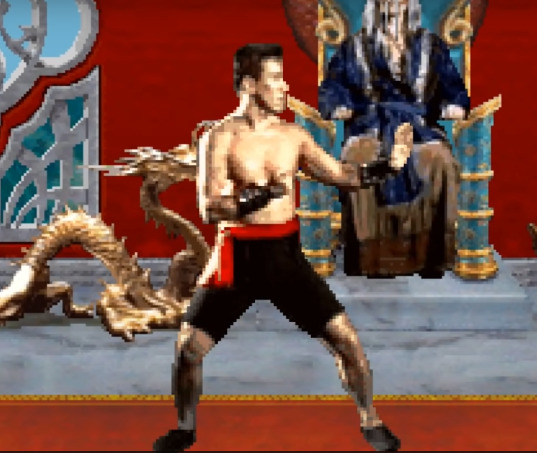
How was Mortal Kombat's Sprites made
They got small actors who also had talents in marshal arts and stuck them to only wearing one colour they filmed it in a storage space in the back of the pinball manufacturing plant which they converted into a simple studio.

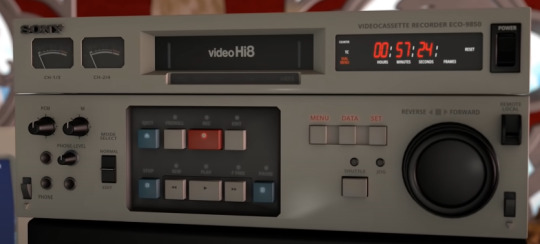
The Footage was shot with a Hi8 camcorder a consumer analog 8 mm tape format that had just been brought into the market by Sony and Canon in 1989.

This had a 400 lines resolution in comparison to VHS tapes which had only 240 lines this made it better for the developers capture images for the big sprites they had envisioned with a limited budget.
Before putting all the characters through the workflow they did an initial test with marshal artist Daniel Pensina. The shot material was loaded in the Hi8 deck and connected to the TARGA board in the work station.
By using the WTARG software Tobias could capture paused frames to digital files. The software reduced them in colour with the newest colour reduction algorithm. Images were booted in contrast and saturation for a more vibrant look and the backgrounds were painstakingly removed frame by frame, the edges in particular required a lot of care, because arcade hardware didn't support transparency values per pixel at the time. Tobias had to make the edges work for both light
and dark background

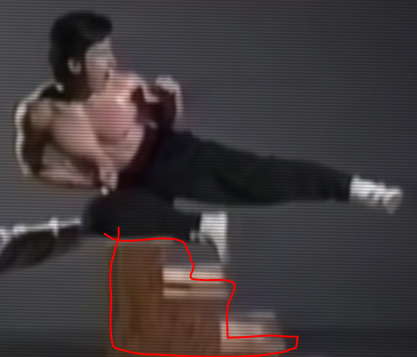
The test shoot greatly helped to figure out which moves would translate well in low resolution sprites.
To do air attacks they tried to just do it (normally) but this would result in motion blur.

So to solve this they used a small wooden stair so they could keep their position.
Artist John Vogel began to work on the project for the game's background based on Tobias' sketches
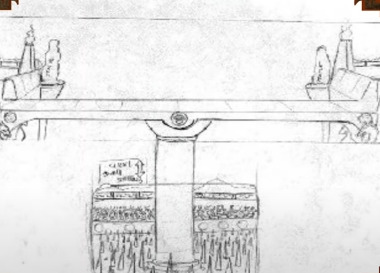
He filmed statues and other models with an emphasis of care to where light was coming from and the shadows. The separate Digitized objects were composited in the software package TIPS. Most of the game was digitized to look like the real world art style they were going for.
Programmer Ed Boon
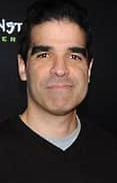
took the digitalized assets and started making the game. He had a good grasp of gameplay and envisioned a fast paced game, to do this reduced the number of frames to minimum to make gameplay responsive, and reduce the overall memory footprint.
To make the game feel impactful he used audio queues, blood that splatters and the shaking of the camera, giving that sense of impact to the player.
0 notes
Text
What is a Game Mode in Unreal Engine
A Game mode is like the police of a game in the way that they enforce the rules, however unlike real life the code follows it.
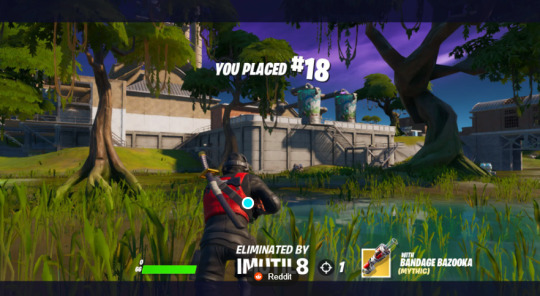
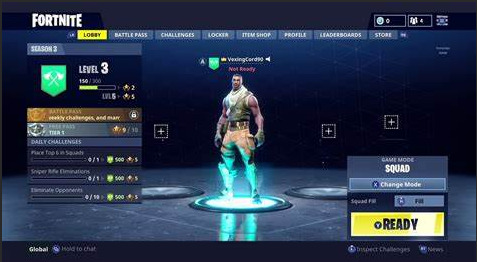
Different games have different rules and a Game mode sets those rules. For example in Fortnite when you die you get sent back to the lobby.
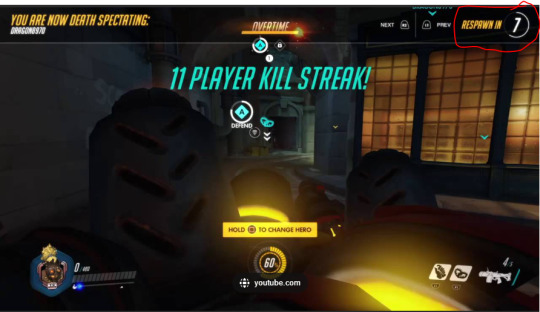
But meanwhile in Overwatch if you die you just respawn after a certain amount of time.
This allows games to have different rules which allows games to be different.
To get to this in Unreal you Right Click the Content Drawer

Then select Blueprint Class

The Select Game Mode Base
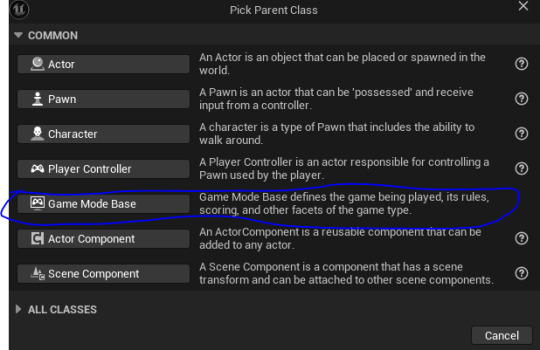
Then call it what you want.
0 notes
Text
Making a Road (Spline) in Unreal Part 2
(Alright now where were we)
Now we got to go back to For Loop's Index.

Now Drag it out and search up Get Location and Tangent at Spline Point

Now drag of the Spline and search up Get Location and Tangent at Spline Point

Now back at For Loop's Index drag out another Node and this time search up Add/ "+"

And change the bottom number to 1
Now connect this to the second Get Location and Tangent at Spline Point's Point Index

Now Connect the Get Location and Tangent at Spline Point without the Addition and connect its Location and Tangent to Set Start and End's Start Position and Start Tangent

Now connect Get Location and Tangent at Spline Point with the Addition's Location and Tangent to Set Start and End's End Position and End Tangent

Now remember that error, well that was because I forgot to connect Add Spline Mesh Component's Return Value to Set Start and End's Target.

Now there is one more thing. Now we drag off of Set Start and End and search up Attach Component To Component.

Now we get Add Spline Mesh Component's Return Value again and connect it to Attach Component to Component's Target

And finally from the Attach Component To Component's Parent drag out and search Get DefaultSceneRoot (if it is still called that)

And now it is done.

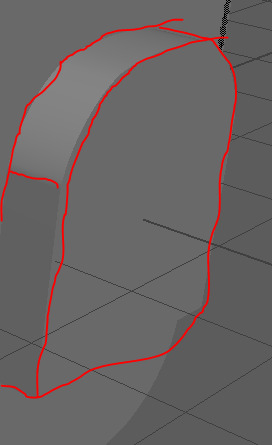
However I don't actually have anything to build it with.

I tried to just add a Cube with the Material.

However the Object wouldn't allow me to stretch it like a normal Spline. And then I tried to (F) Find it and then I was sent to Space.

0 notes
Text
Making a Road (Spline) in Unreal Part 1
(quick note I am doing this for 3 reasons, 1: I have almost done nothing for my blog, 2: this is very useful and difficult code which I want to have on something, 3: Jake did everything and I feel bad so I want to do it semi by myself so I know how to do it.)
First we make something in Paint (or Photoshop if it's more detailed). Then we go to File

Then select Save and then save it into your preferred folder.
Now in Unreal Engine in the Content Drawer Click Import
Now it should be in your Content Drawer listed as a Texture.

Now Create a new Material by holding Right Click and going to and selecting Material
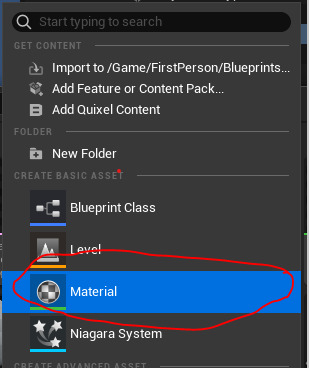
now give it a name close enough to your texture so they are right next to each other to make it easier to navigate.

Now double click on the Material to Open it. You will be greeted with this screen

First we need to get some code. Now Right Click on the Blueprint and search up Texture Sample.

Now select the Texture Sample so there is a yellow outline, then go to the Detail Panel in the Bottom Left

Go to the Texture and Search up what you called your Texture. (Mine was MSPaintPavement). Now connect the RGB in Texture Sample to Base Color of what your Material is called (MSPaintPavement_Mat)

Now Hold Right Click and search up Custom Rotator and connect its Rotated Value to Texture Sample's UV's. This to make sure that the texture is properly applied on all the faces of the 3D object's UV as the Texture is 2D.

Now out of Custom Rotator's UVs (V2) Drag it out and search up Texture Coordinate

Now Hold 2 and Left Click and you should get this

then change both the X and Y values to 0.5 and then connect it to CustomRotator's Rotation Center (V2)

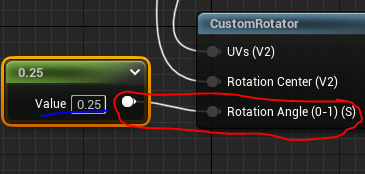
Now Hold 1 and left click and you should get this

then change the Value to 0.25 and then drag it to Custom Rotator's Rotation Angle (0-1) (S)
Now the Code is complete

Well Texturally at least.
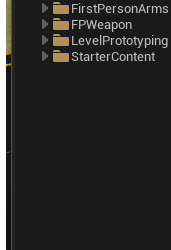
Now we go back to the Content Drawer, and again Hold Right Click, but this time select Blueprint Class.

And then select Actor.

Then call it what you want I called it Pavement

Now double Click it to open it. You'll be greeted with this screen.

In Viewport in Components select + Add and search up Spline and probably just name it Spline.

Then Click + Add again and search up Cube. The in Details go to Materials and change it to your material (MSPaintPavement_Mat)

Now go to Construction Script

Now drag off Construction Script and search up For Loop
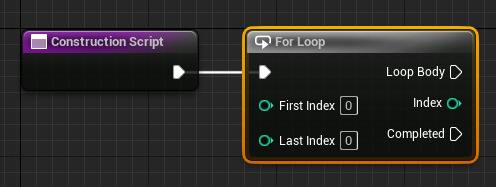
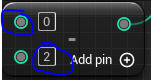
Now off of Last Index search up "-" or Subtract.

Now change the bottom number to 2
Now out of the top one drag it out and search up Get Number Of Spline Points. (The Spline, Target comes as well)
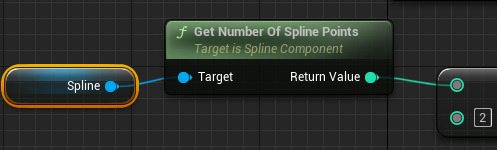
Now from For Loop's Loop Body search up Add Spline Mesh Component

Now Out of Add Spline Mesh Component search up Set start and End

Now if you try to Compile it will say Error!

0 notes


Text
Creating my Loot Crate Part 2
Now I'm going to add a front compartment to my bag like the bag i have in real life.
To do this we spawn a Cube.

And make it a Cuboid (A 3D rectangle) with the Scale Tool

Now get the Multi Cut Tool

Hold Shift + Ctrl to cut the top by 50%.

Now Hold Right Click and go into Edge mode

Then select the Top edge and use the Translate Tool to pull the Edge up.


Now Hold Shift and Left Click on all the Edges at the top.

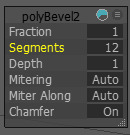
Now use the Bevel Tool

Then set the Fraction to 1 and the Segments to 12

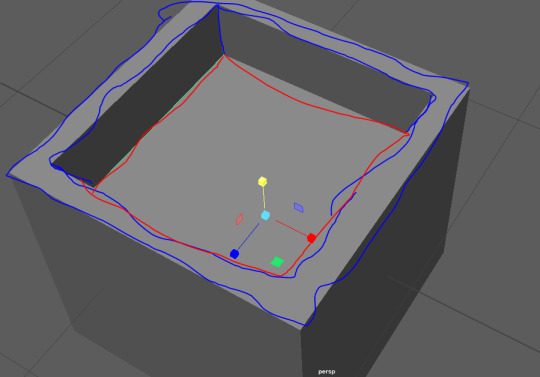
Then just move it into place (which is at the front of the bag in the center.
Now the "Box" (which is the main Cube of the Bag missing its roof) is quite thin.

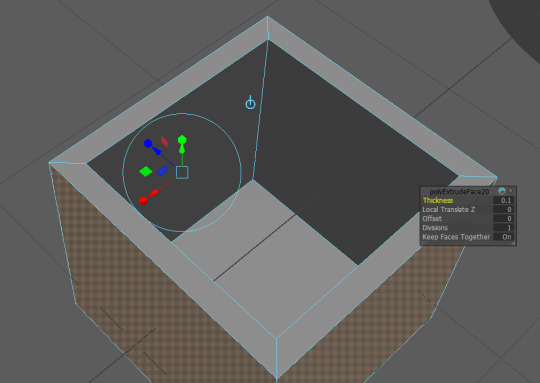
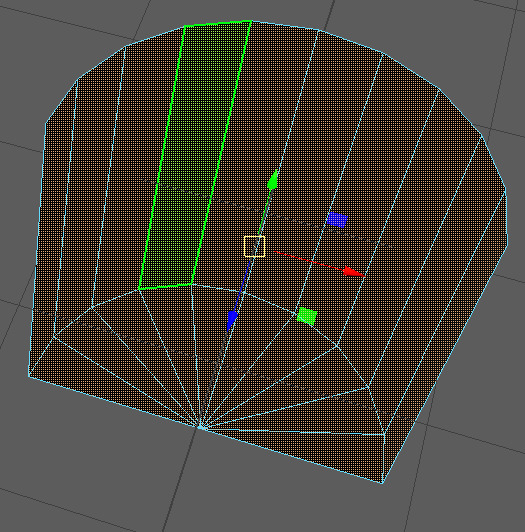
So to solve this we are going to go into Face Mode by Holding Right Click and dragging to it.

Then we are going to Hold Shift and Left Click every Face from in the inside.

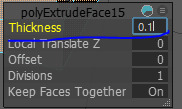
Now we go to the Extrude Tool

And we increase the Thickness to 0.1
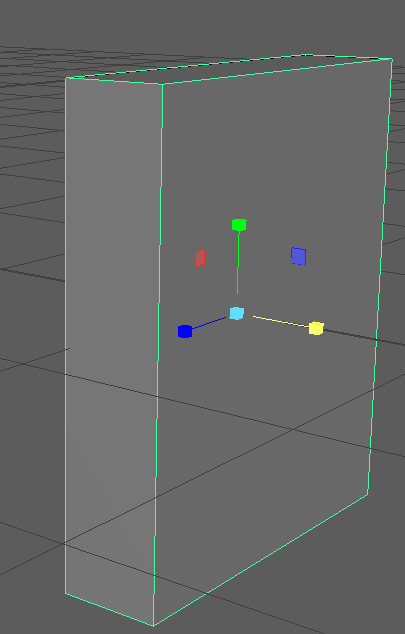
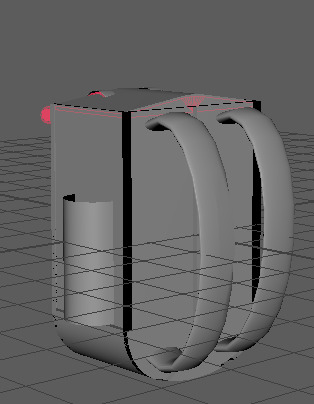
Now I want a Key to fit into this and that will be easy but a lot of this bag will be wasted space add I don't want to model the inside of this bag too much or need to o shadows so instead I will fill most of it up with a "Lunchbox" in reality just a Cube with a Handle.
So what we do is we spawn a Cube.

And Scale it so it fits perfectly, using the Scale Tool.

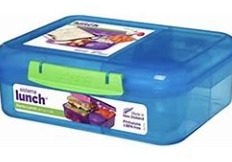
Now to make it more believable that it is a lunchbox I'm going to add a handle, so I don't have to make it see through.
So it is more like this Lunchbox

And less like this one
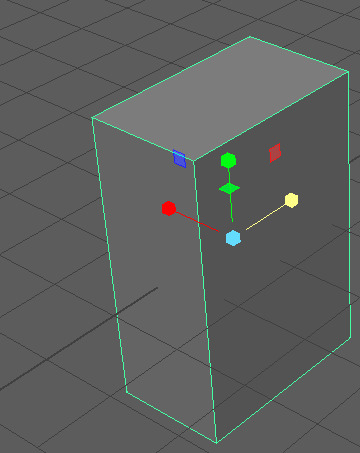
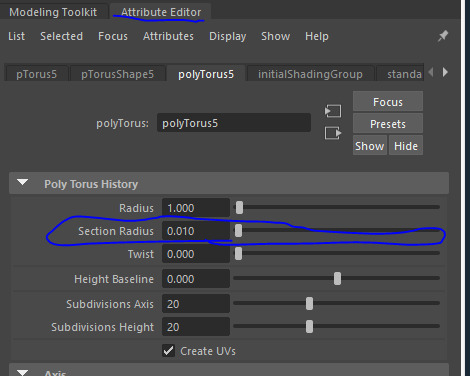
To make this Handle I'm gonna use my Good friend Donut.

Once again we got to go into the Attribute Editor of the Donut and change the Section Radius all the way down to 0.010

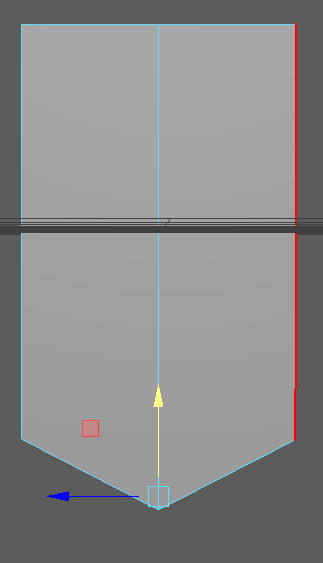
Now we use the Scale tool to decrease the radius but widen the strand.

Now we use the Rotate tool to turn it 90 degrees to the right.

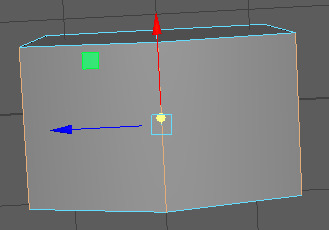
Now we hold Right Click to go into Faces Mode.

No we delete Half of the Faces to make it a Handle

Now use the Scale Tool to stretch the Handle to the correct proportions and then fit it into place.

0 notes
Text
What is UV mapping and why it is important for games design.
UV mapping is a 3D modelling process that projects a 2D image onto a 3D model's surface for texture mapping.

Here this is the 3D model of a Compass.
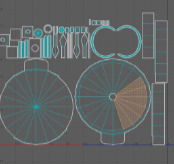
This is the UV Map of the same compass.
This is important for game development because it allows you to create a realistic and consistent art style across the whole model and makes selecting every face easier to access.
0 notes
Text
Mood board and Creating my loot crate
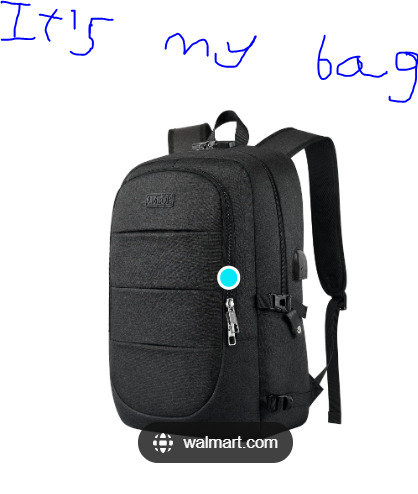
My loot crate Idea is a backpack that the biker wears on their journey to the College that when they arrive at the college they open the bag to get out their key to lock their bike.

This is my bag, its so cool you need two angles to see it fully.

To make the main build of the Bag is a Cube.
First Spawn a Cube.

Then turn it into Cuboid (A 3D Rectangle)
Then I want to make a Hole at the top so stuff can go inside the bag. So Hold Right Click and drag to Faces.

Then select the top face and just Delete it.

Now Flip the Camera to the Bottom we want to make it curvy. So select the Multi Cut Tool.

Then Hold Shift + Ctrl and cut it at 50%

Now use the Translate Tool to Drag out the edge a bit.

Now while on Edge mode select all the bottom Edges.
Then use Bevel Tool

And make the Fraction 1 and the Segments 12

For the Straps I used Hoops/Donuts

While the Donut is selected in the Attribute Editor you can go down to Section Radius and set it to 0.010
Then use the Scale Tool

stretch it to what you want it.
Now to make it a strap rather then just clipping it into the bag and adding unnecessary Trises, you hold Right Click and select Faces

Then start deleting all the unnecessary faces.
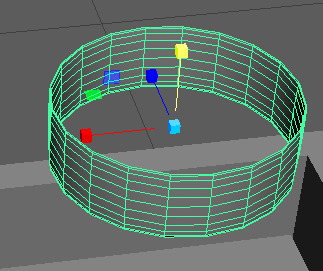
On the Left and Right of the Bag are bottle holders . What I did for this was I spawned two Cylinders.

And then I hold Right Click again and select Faces Again, and then Delete the unnecessary Faces AGAIN.

Basically chopping it in half.

Then Delete the rest of the top to make a hole.

Then to make it a bit more realistic and so no clipping glitches happen I made it thicker. You do this By Holding Shift and Left Clicking on all the faces in the inside.
Then get the Extrude Tool

The set the Thickness to 0.1.

And then just move it into place.
0 notes
Text
Making a place holder house in Maya
My size proportions are 1 Maya unit is equal to 10 cm. (even though it doesn't matter since you can just scale them in Unreal).

This is the average height of a house so I'm going to make it 10 meters tall which is equivalent to 10 Maya units.
I'm going to build it out of 1 Cube (that's right).
First we spawn in a Cube.

Then I make the the Scales all 7

Then we get the Multi Cut Tool.

Then Holding Shift + Ctrl Cut it at 50% vertically

Now Hold Right Click and select Edges.

Now select the Cut Edge on the Top of the Cube
Using the Transform Tool

Drag the Edge up to what height you want it, mine will be 3 Maya units.


Now go to File, Export All, save it to your hard drive and call it something recognizable mine is called Maya Prototype House.
Now in Unreal Engine.
Go into the Content Drawer by pressing Ctrl + Space. Then at the top select Import.

After you find it in your browser and click Open you will be greeted with this Window.

Then Click Import All
0 notes
Text
Part 3
(you know the drill)
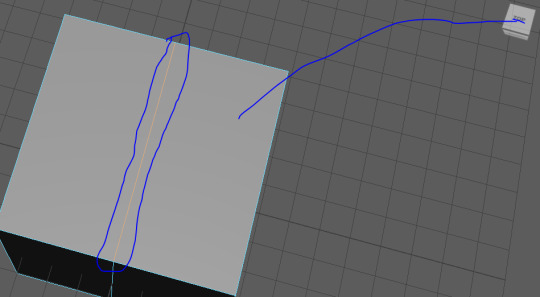
The small cylinders were too small as their original size so I have changed it to Scale X= 0.02 Scale Y= 2.6 Scale Z=0.02.
Then move them into the wheel and leave about 45 degree angles per cylinder.

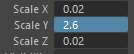
Now to make all of these one object Hold Shift+ Left Click and drag over all of the objects.

Now open the Modeling Toolkit and go down and select Boolean.
Now make sure they almost all are Union and then click Select.

Now delete the History to make sure that Maya only thinks of it as one object.

Now I want to get my chain spinner up right and where it will be. I though I could just turn it 90 degrees but the hole cutting Boolean wouldn't allow it.
So I changed the Boolean type from Difference (A-B)

To Union.

So they would be both solid then I turned it 90 degrees

And a few cylinders later and ta da.

My Prototype Bike is Complete.
This is a fill in bike for the time so I can begin the Level Creation, Game Coding process and get those done before finishing the bike Model. I guess you could say I'm Grey Biking.
0 notes
Text
Part 2
Same shtick 30 image limit)

Now we need to sharpen these pokey out bits.

So first we need to get the multi cut tool

And Holding down Shift + Ctrl and make each cut at 50%

Holding Right Click and go into Edge mode select the edges in the middle of the extrudes.

And then using the movement tool

Only pull the ones that are one the grid lines

Go into Object mode and rotate the whole object until a new edge is on the line and pull it out.
Pull all the edges out as much as you see fit.

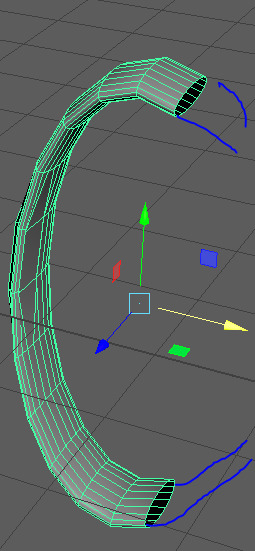
All that we need to do is make the shape curvy.
First we get activate the edge tool and select the two vertical edges between two different points. Hold Shift while doing this to select multiple at the same time.

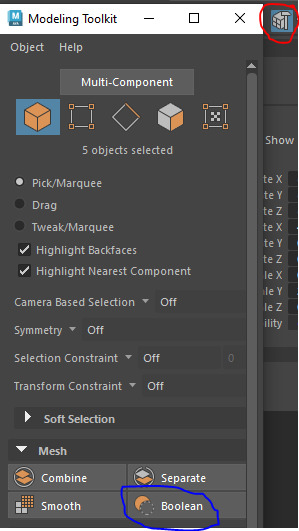
Then select the Bevel Tool. By opening the Modeling toolkit by clicking on the Hammer and Cube in the top Right.

When you do this setting will be in your Viewport Window.

The Fraction means how steep it is. And Segments is how curved it is.
I set these to the max Fraction at 1 and Segments at 12.

Repeat this for all of them.

Now we can make a seat.
Spawn in a Cube.


And then flatten it, and make it more rectangular.

Using Multi cut while holding Shift + Ctrl cut the front by 20%.

Then using the Edge tool select bot of the corner edges on the face of the longer sides and stretch them out equally.


Using the Edge tool select these edges,

Now use the Bevel tool

and maximize the Fraction and segments.


So to combined this to a cylinder pole select the seat then hold shift and select the pole go and select a Boolean. Turn them into a Union.


And then delete the history.

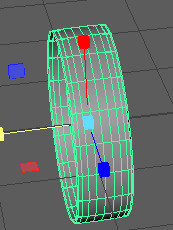
Now inside of Bike wheels are all of those little bars that keep the structure of the wheels.

Simply all we need is a lot of cylinders at a very small size

However I'm going to the Save the Scene with them as flat square being Scale X 0.005 and Scale Z 1

1 note
·
View note