The blog of cloud-based continuous security testing service "VAddy"
Don't wanna be here? Send us removal request.
Text
Introducing the Ability to Scan for Vulnerabilities on Web Applications Spanning Multiple Domains

Today we are pleased to announce that we have just released a new feature that allows you to scan for vulnerabilities on web applications spanning multiple domains! Until now you could only register your application with VAddy if it used a single domain, but this update makes it possible to register applications that use several different domains, as well.
Many medium and large scale web applications are structured using separate domains for various features. For example, consider an e-commerce site that uses login.example.com to process login requests and mypage.example.com to display a user’s account page. The only way VAddy could have scanned for vulnerabilities on this web application before was to separately test each subdomain; if the application was inaccessible without a login feature provided on a separate domain, VAddy would not have been able to scan it.
In the new version of VAddy that we just released, you can collect multiple domains into a single project and scan them all at once, allowing you to test even a web application like the one described above using a single set of crawl data (i.e. a single test case). You can also specify domains that you would like to exclude from testing—such as your authentication server—for more flexibility when configuring scans.
This feature is available in all of VAddy’s plans (though it cannot be used together with VAddy PrivateNet).
There are a few important points to keep in mind when using this new feature; if you are already a VAddy customer, we invite you to take a look at the following FAQ and support articles. Note that you cannot combine any server you have already registered with another domain until you have created a new project with that existing domain name.
Differences Between v1.0 and v2.0
Working with Projects
0 notes
Text
Announcing VAddy PrivateNet: Scan for vulnerabilities on your intranet or localhost!

VAddy is a web service that not only makes it easy to scan your website for vulnerabilities, but can also be automated together with other continuous integration tools. VAddy was originally designed to scan websites by sending requests from its own servers to those websites’ servers over the Internet. As a result, VAddy could only scan servers that had public IP addresses.
Unfortunately, many of our customers only have test servers on their intranets or can only access their own development machines. For this reason, we have often been asked to make VAddy available in the same environments as Travis CI, CircleCI, and other continuous integration services.
We are happy to announce that we now have an answer to these requests: VAddy PrivateNet.
VAddy PrivateNet allows you to scan for vulnerabilities on web servers that do not have public IP addresses. In the process of building and testing this new feature release, we scanned web applications running on our development machines(macOS) as well as web applications running on VMware(Linux guest OS). We did not need to set up a dedicated test server and were able to scan for vulnerabilities even before we committed our code, so we have first-hand experience of how convenient this can be while writing software. We’re extremely pleased with how this feature turned out, and would like to invite you to give it a try!
VAddy PrivateNet is currently included in all of our plans, including the Free plan. At some point in the future this may become a premium-only feature, so sign up for an account and try it out for free while you can!
To learn more about getting started, see the VAddy PrivateNet Quickstart Guide.
Implementation Details
Our VAddy PrivateNet command-line tool gives VAddy limited access to one of your internal web servers. (The tool itself does not have a built-in scanning engine.)
VAddy’s servers use remote port forwarding through an SSH tunnel to access your internal web servers. As a result, we can continue to provide VAddy as a service while performing regular updates and maintenance.
For more information on how VAddy PrivateNet has been implemented, see the How It Works section of the VAddy PrivateNet Quickstart Guide.
You can download the VAddy PrivateNet command-line tool on GitHub.
Caveats
Because the VAddy PrivateNet command-line tool uses Java, Bash, and SSH commands, it currently runs on macOS, Linux, BSD, and any other Unix-like operating system. There is no native Windows support, but you can use Vagrant or some other virtualized environment on Windows to provide a Linux host for the command-line tool.
VAddy PrivateNet also creates SSH tunnels, so you cannot use it on a network that blocks SSH access to the Internet.
Questions
If you would like to learn more or need help adopting VAddy at your company, please don’t hesitate to contact us or reach out on Twitter.
We really value your feedback. Every new vulnerability that we can report to developers is a victory for a more secure web, so we would love to hear your thoughts and suggestions! VAddy wouldn’t be what it is today without the support of people like you.
Thanks for reading, and we hope you enjoy using VAddy PrivateNet!
0 notes
Text
Scanning for parameters anywhere in a URL path
VAddy has been able to scan for vulnerabilities in URL path parameters for quite some time, but it has only looked for parameters at the end of URL paths. In a URL like http://example.com/foo/bar/1, for example, VAddy would consider “1” to be a parameter.
However, some web applications place parameters in the middle of their URL paths. In a URL like http://example.com/foo/username/edit/1, for example, both “username” and “1” are parameters. We thought that it would be helpful to have parameters scanned for vulnerabilities regardless of where they appear in a URL, so now they are!
This and other updates are based on customer feedback. If you have any questions or feature requests you’d like to share, please get in touch via email or Twitter!
0 notes
Text
Scanning for vulnerabilities with VAddy and AWS CodeBuild
At last week’s AWS re:Invent 2016 conference, Amazon announced its new “fully managed build service that compiles source code, runs tests, and produces software packages that are ready to deploy”: AWS CodeBuild. In this blog post, I’d like to explain how you can start scanning for security vulnerabilities with VAddy and AWS CodeBuild today.
Step 1: Create a (GitHub) repository to build
Let’s get started by setting up a GitHub repository that we can use to run a test build. Create a new repository and then add a new file named buildspec.yml in the root (top level) directory. Once committed, the file should contain the following YAML data:
AWS CodeBuild will follow this build specification to download VAddy’s command-line tool and run a vulnerability scan during the post-build phase.
version: 0.1 phases: install: commands: - echo Nothing to do in the install phase... pre_build: commands: - echo Nothing to do in the pre_build phase... build: commands: - echo Nothing to do in the build phase... post_build: commands: - git clone https://github.com/vaddy/go-vaddy.git govaddy ; govaddy/bin/vaddy-linux-64bit - echo Build completed on `date`
Step 2: Create a CodeBuild project for testing
Next, let’s sign in to the AWS Management Console and choose one of the three regions that support AWS CodeBuild (as of December 8, 2016):
US East (N. Virginia)
US West (Oregon)
EU (Ireland)

Click Create project. Under Source: What to build, choose GitHub as the Source provider. Once you have connected CodeBuild to your GitHub account, choose the repository that you just created above from the Repository drop-down list.
For Build specification, leave Use the buildspec.yml in the source code root directory selected.
If you attempt to run the build now, you should encounter an error because you haven’t provided a username and API token to VAddy’s command-line tool. Let’s fix that now.
Step 3: Use VAddy to scan for vulnerabilities when your build has completed
Here you are going to use environment variables to configure the authentication credentials that you need to run vulnerability scans via VAddy’s web API.
Near the bottom of your CodeBuild project’s configuration screen, there should be a Show Advanced Settings menu item. Select it, and then add values for the following three environment variables (as shown in the screenshot below):
VADDY_TOKEN
VADDY_USER
VADDY_HOST

If you run the build and no vulnerabilities are found, every phase should indicate that it has completed successfully:

Step 4: Check your build logs for vulnerabilities
If VAddy’s command-line tool detects any vulnerabilities, it will exit with an error code and cause the build to fail:

Conclusion
Because AWS CodeBuild was just announced last week, it doesn’t yet provide more fine-grained controls—such as the ability to specify a particular branch in your Git repository—but I would expect these and other use cases to be addressed soon in upcoming updates.
We currently maintain a Jenkins installation on an EC2 instance that is always running as part of our development environment for VAddy, but going forward I’d like to consider running builds on demand with AWS CloudBuild, instead, and possibly save some money on our monthly EC2 bills.
— Yasushi Ichikawa (@ichikaway)
0 notes
Text
CacooUp Taipei & Meet Taipei
CacooUp Taipei
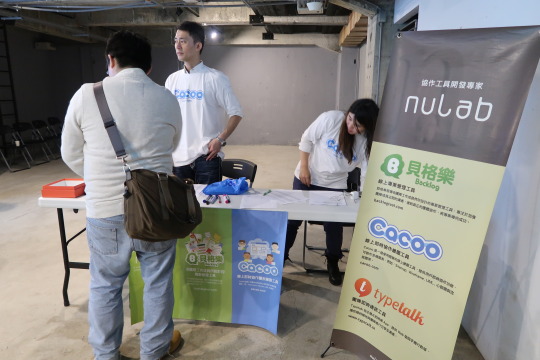
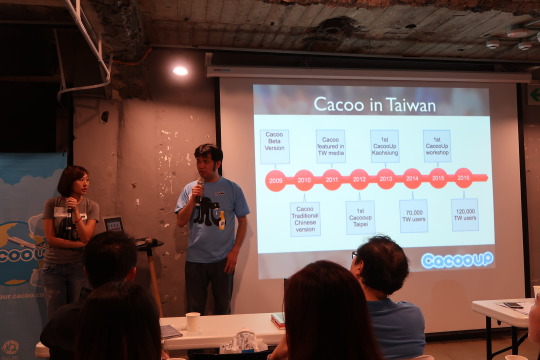
Our friends at Nulab recently invited us to speak at CacooUp, a meetup for Cacoo users in Taiwan (of whom there are now 120,000!) that Nulab has been hosting since 2012.

There were about 40 designers and programmers in attendance at this particular meetup. We were impressed with the turnout and would like to use Nulab’s approach as a model for building our own fanbase abroad.
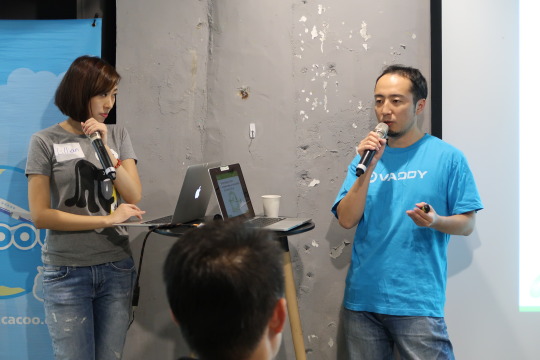
We talked about how we use Cacoo to create mind maps and wireframes for our websites and pamphlets. We are grateful to one of Nulab Taiwan’s team members, Lilian, for interpreting our presentation from English to Mandarin for the audience.
Meet Taipei
Our friends at Nulab also invited us to set up a booth in the Global Pavilion at 2016 Meet Taipei, an expo for Taiwanese startups in a wide variety of industries (not just tech!) that was held the day after CacooUp.


We were amused to find that our booth was in the Fukuoka section. (One of our developers does indeed live in Fukuoka…but our headquarters are in Tokyo.) :)

With the government publicly providing support and resources to startups in the country, the President of the Republic of China, Tsai Ing-wen, spoke during the opening ceremony about the importance of startups to the Taiwanese economy.

Unlike other events where we have set up a VAddy booth, there was a stunning variety of industries represented at 2016 Meet Taipei: FinTech, FoodTech, TravelTech, social media, VR, the Internet of Things, 3D printers, drones, furniture, plants, clothing, health foods, and more! It was hard not to notice the palpable sense of energy and excitement the Taiwanese exhibitors brought to the show.


It’s a shame that we couldn’t learn more about the services presented at the expo through their posters and pamphlets—everything was written in Mandarin—but luckily almost every exhibitor we met was also able to talk to us in English when we approached them.

Even though I couldn’t help but get the impression that a security service for web application developers must seem a bit dull, the programmers who visited our booth listened to what we had to say with great interest. Unfortunately, every time we asked, “Do you run any security tests?” we were met with the same sheepish response that we are used to getting in Japan: “No.”
At some point we were invited to the Taipei DevOps Meetup by one of its attendees; we’re definitely going to have to take them up on the offer the next time we’re in Taiwan. :)

At one time I think that most conversations about expanding into overseas markets as an Internet company would have evoked images of the United States in general and Silicon Valley in particular, but now I’m becoming convinced that it may make just as much sense for other Japanese companies like us to begin their overseas expansion in a neighboring Asian country, instead. The Internet may have made the world a much smaller place, but we still can’t entirely ignore the challenges presented by physical distances. Immediately after launching a new service, it’s important for companies to give their users opportunities to speak with them directly. We’ve learned this lesson from personal experience: VAddy is a much better product now as a direct result of the opinions and feature requests that our customers shared with us in person at VAddy meetups. Taipei is only a 3–4 hour trip from Tokyo, so it is certainly feasible for us to talk with our customers there in person, as well.
Earlier this year, the cities of Fukuoka and Taipei announced a partnership to provide assistance to startups. The stage is still being set for startups to expand in the Asia-Pacific region; we’d like to keep our eyes on further developments in this area in the coming months and years.

Thank you, Nulab, for giving us this valuable opportunity to visit Taipei! — Katsuya Nishino
Bonus Material (Food Porn)


0 notes
Text
Improved access to crawl data for review
It’s been a long time coming, but you can now (finally) view the crawl data used for each of your scans with VAddy!
Crawl data includes the URLs that are scanned as well as the request parameters that are sent to your web application when you register crawl data by accessing your application through VAddy’s proxy servers before you begin a scan. This new feature makes it easier for you to review the test scenarios that your crawl data represent and thus label them accurately.
To view your crawl data, first log into your admin console and select your server. Next, select Proxy Crawling from the sidebar and click View for any of the entries under Crawl Status.

The crawl data shows each URL that was crawled as well as the HTTP method (e.g. GET, POST, PUT, or DELETE) that was used for each request to give you a better sense of which test scenario the crawl data corresponds to.

To further drill down into the HTTP request data, click the View button in the rightmost column of any row. This will show you the actual request data that was sent to your web application, including any relevant GET and POST parameters (as you can see in the screenshot below).

You can also view the crawl data used for any scan by clicking the links under the Crawl Info column on your Scan Results page.

We hope this feature will give you better insight into your crawl data if you haven’t been able to check it through Selenium or another end-to-end testing tool’s settings until now.
VAddy is easier than ever to use, but don’t take our word for it—check it out for yourself!
0 notes
Text
Introducing go-vaddy
We are happy to announce that we have just released a new command-line tool for Mac, Linux, and Windows: go-vaddy. As the name implies, it is implemented in the Go programming language and uses VAddy’s web API to scan your site for vulnerabilities. This new tool complements our existing Jenkins plugin and Ruby client, making it easy to incorporate VAddy into your CI processes even if you don’t have a Jenkins server or if you haven’t installed Ruby on your test server.
You can find Mac, Linux, and Windows binaries on go-vaddy’s GitHub page. Although we’ve made the source code available for your perusal, we’d also be happy to provide binaries for additional platforms on request.
The go-vaddy client scans your site through VAddy’s servers and fetches the results, returning a status code of 0 when no vulnerabilities are found or 1 when at least one vulnerability is found. You can use this status code to conditionally run other commands after go-vaddy exits. For example, you could run the following series of commands through a Bash shell to send a notification to Slack when a vulnerability is found:
./vaddy-linux-64bit || slack-command
Note that you will need to provide your username, API key, and other required parameters as environment variables or command-line arguments. For more details on how to use go-vaddy, please see the project’s README file.
(In case you were wondering, we assure you that our motivations for writing go-vaddy had nothing to do with its name! 😄)
0 notes
Text
Showing HTTP status codes for server verification errors
VAddy automatically generates a verification code when you register a domain name (server) to scan. To verify your ownership of this domain name, you must place an HTML file with this code in your webserver’s root directory. (For more details on this process, see Registering and Verifying Your Server.)
VAddy used to show a generic error message if it encountered any problems during this verification process. Whether your server returned a 404 error to indicate that it was unable to find the verification file, a 401 error to indicate that the necessary credentials were not provided for basic access authentication, or a 403 error to indicate that requests for the verification file are being rejected, you were responsible for examining your server configuration and getting to the bottom of the issue.
Needless to say, this was not a very good user experience. We have remedied this with our latest update: VAddy will now show you the HTTP status code (and message) of any error that your server returns in response to requests to access the verification file.
For example, the second line of the error shown in the following screenshot includes a status code of 404 along with the message “Not Found.” This indicates that the verification file has not been properly placed in your webserver’s root directory.

The following screenshot shows a status code of 401 along with the message “Authorization Required”, indicating that an error occurred during basic access authentication.

We added this feature to make the process of troubleshooting errors easier and less stressful. We plan to apply more small, iterative usability updates like this in the future, so please email us or contact us on Twitter with any other features or pages that you find hard to use or understand!
0 notes
Text
Viewing response data (with XSS highlights) when vulnerabilities are detected
VAddy has always shown you the URL of each vulnerability it detects in your web application along with the parameter names and request data that were used to detect it. But what if there is more than one vulnerability for a given parameter at a single URL? To help you visualize exactly where each vulnerability occurs, we just updated VAddy to also show you the response data that it receives while scanning. By looking at the raw (e.g. HTML or JSON) responses, you can more easily identify where vulnerabilities actually occur in your application—and fix them.
Furthermore, if an XSS vulnerability is found, VAddy highlights the HTML response data in yellow (as shown below). This makes it easier to determine where you have neglected to escape user input in your application’s view.

We hope you find this new feature to be as useful as we do!

1 note
·
View note
Text
Scanning for vulnerabilities with crawl data labels via Jenkins
About a month ago, we updated VAddy’s web API to allow you to scan for vulnerabilities using custom labels added to your crawl data. As an example of how this feature might be used, you could choose to add a “login screen” label to your login-related crawl data to make it easy to scan for login-related vulnerabilities later.
We’re happy to announce that we just updated VAddy’s Jenkins plugin so that you can now specify crawl data with your own custom labels when scanning for vulnerabilities with Jenkins, as well.

It’s easy to try out this new feature:
Update your VAddy Jenkins plugin to version 1.2.8.
Restart Jenkins.
Navigate to the VAddy plugin's configuration page.
Under the Build section, in the Crawl ID or Label (Optional) field, enter your custom label name. Make sure that this matches one of the custom labels you entered on VAddy’s admin console.
Note that this change will not break any of your existing settings—you can also continue to specify your crawl data by ID when initiating a scan. As always, we’d love to hear what you think about this new feature. You can reach out to us any time via email at [email protected] or on Twitter @vaddy_support.
0 notes
Text
Scanning for vulnerabilities with crawl data labels via VAddy’s web API
VAddy allows you to scan for vulnerabilities using historical crawl data (i.e. URLs and parameters that you have registered in the past). Unlike other scanners that must spend a long time automatically crawling and scanning your entire web application, VAddy can quickly and efficiently scan only the updated URLs that you specify.
We recently added the ability to specify crawl data via VAddy’s WebAPI, but we required developers to use unique IDs assigned to the crawl data. These IDs can be difficult to remember, so we have just made it possible to specify crawl data with user-defined labels, as well.
For example, assume that you’ve added several new features to your application’s login screen and, for each feature, you generated crawl data with the labeling scheme “loginScreen xxx”.

If you were to specify a crawl ID to scan your login screen for vulnerabilities via VAddy’s web API, you would need to update this crawl ID to the latest value every time you created new crawl data for the login screen. On the other hand, if you were to specify a label to scan for vulnerabilities, you could continue to use the same label even after you create new crawl data because VAddy allows you to run scans using the latest crawl data for a specified label (e.g. “loginScreen”).
The README for VAddy’s Ruby client provides an example of how to scan for vulnerabilities using “useredit” as a search keyword for crawl data labels. After fetching every crawl ID whose label contains the string “useredit” in descending order, the client will then run a scan on the most recent ID.
Note that these improvements only apply to scans initiated via VAddy’s web API; we plan to make a similar update to VAddy’s Jenkins plugin next week. If you have any further questions, comments, or suggestions, you can email us at [email protected] or reach out to us on Twitter @vaddy_support.
0 notes
Text
Scanning for vulnerabilities with historical crawl data via VAddy’s web API and Jenkins plugin
VAddy combines machine learning techniques with a set of URLs and parameters that you provide (called “crawl data”) to determine how your web application is structured and scan it for vulnerabilities.
We recently allowed you to scan for vulnerabilities with historical crawl data from VAddy’s admin console; now you can also accomplish this via VAddy’s web API or updated Jenkins plugin. This gives you the flexibility to create crawl data for a single page on your web application and manually scan it from the admin console while still creating crawl data for comprehensive scans that you run as part of your continuous integration cycle (e.g. via Jenkins).
Using the admin console
You can choose to use historical crawl data from VAddy’s admin console by specifying the crawl ID number that appears in the leftmost column of the Crawl Status table on the Proxy Crawling page. For example, crawl ID #15 is highlighted below.

Using the web API
You can also choose to use historical crawl data from VAddy’s web API by sending a POST request to https://api.vaddy.net/v1/scan with the crawl data’s ID in the crawl_id parameter. If you send a POST request without the crawl_id parameter—or if the parameter has no value—VAddy will start a scan using the latest crawl data. You can see these changes in a recent update to VAddy’s web API documentation.
VAddy’s Ruby client has also been updated to accept crawl IDs when starting a scan and when checking scan results.
Using the Jenkins plugin
You can also choose to use historical crawl data from VAddy’s Jenkins plugin by updating it to version 1.2.6 and then specifying a crawl ID from the configuration screen (as shown below). If you leave this field blank, VAddy will scan for vulnerabilities using the latest crawl data.

Summary
This feature was requested by attendees at a recent VAddy meetup in Tokyo. Though at first we didn’t understand the use cases for specifying historical crawl data with CI tools, customers like you were able to clarify them for us and encourage us to release this new feature.
As always, we continue to welcome your feedback while we strive to make VAddy a more useful tool for you. You can email us at [email protected] or reach out to us on Twitter @vaddy_support.
Happy scanning!
VAddy’s web API documentation: https://github.com/vaddy/WebAPI-document/blob/master/VAddy-WebApi.md
VAddy’s Jenkins plugin (version 1.2.6): https://wiki.jenkins-ci.org/display/JENKINS/VAddy%20Plugin
VAddy’s Ruby client: https://github.com/vaddy/vaddy-api-ruby
0 notes
Text
SCALE 14x
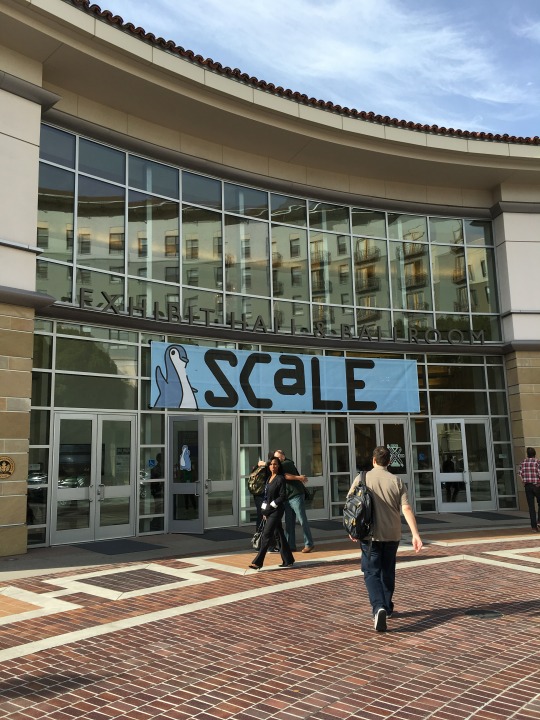
Hot on the heels of php[world]2015, we recently headed to Los Angeles to attend SCALE 14x.
The Southern California Linux Expo (SCALE) is an annual Linux and open source software conference held in Los Angeles, California. Now in its 14th year, SCALE hosted over 150 exhibitors and organizations as well as nearly 130 sessions, tutorials, and special events.
We chose to attend SCALE because it has a wider target audience (“current and potential users of OSS”) than php[world] (PHP programmers). This allowed us to reach—and solicit reactions from—a wider range of people than we could before.
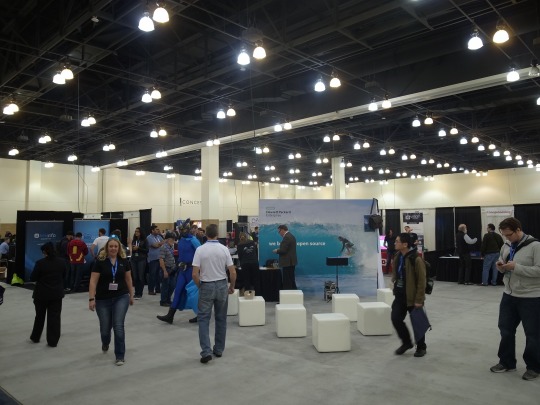
Businesses and organizations set up their booths in the Exhibition Hall, a dedicated space apart from the session rooms. The atmosphere at SCALE was slightly more business-oriented than at php[world], which had felt more like an opportunity for programmers to meet face-to-face and participate in workshops with their peers.

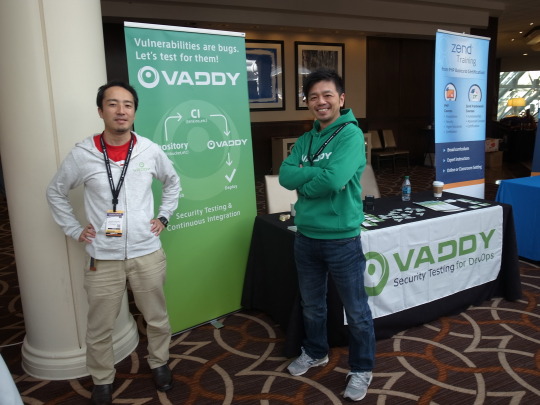
As a Silver Sponsor, we had our own booth in the Exhibition Hall. Because we spent quite a bit of time at php[world] explaining what type of service VAddy is, we adjusted the slogan on our banner (poster) for SCALE to clearly state that VAddy is an automated web vulnerability scanner.
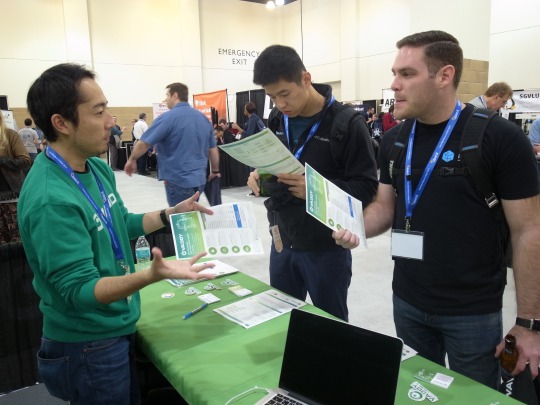
Despite the fact that web application developers only comprised a fraction of the attendees at this “Linux Expo,” our clearer branding appeared to be effective: it helped us to attract well over a hundred people to our booth.
Vulnerability scanners that empower developers to run their own security tests—like VAddy—are still relatively uncommon, even in the U.S. There may be a lot of talk about incorporating security best practices into DevOps, but there currently aren’t any tools or methods for breaking this process down into concrete steps.
Nevertheless, we get the feeling that the idea of combining DevOps and security practices is (slowly but surely) spreading throughout our industry. Perhaps this just speaks to the technical and intellectual proficiency of SCALE attendees, but we seemed to get deeper, more probing questions at SCALE than we did at php[world].
Many attendees told us that VAddy is exactly the kind of service they’ve been looking for. We don’t know how many of those people actually signed up for accounts since they spoke with us, but even so we could see that VAddy has high potential. Going forward, we will be tasked with making VAddy into a service that our customers find even easier to use.
Though it may take a while for VAddy to really take off worldwide due to the nature of the service, it has been steadily gaining traction in Japan. We will continue to do our best to make VAddy an attractive tool for all our overseas customers, as well.
Scenes from the conference
Unlike in Japan, where the recent introduction of national identification numbers has made companies much more security conscious, at SCALE VAddy was only one of approximately three booths for security vendors.

Facebook set up rack servers as part of their Open Compute Project.

Who doesn’t love O’Reilly books?

There were several booths dedicated to robots and the Internet of Things.

There were also instructional materials and services for children.
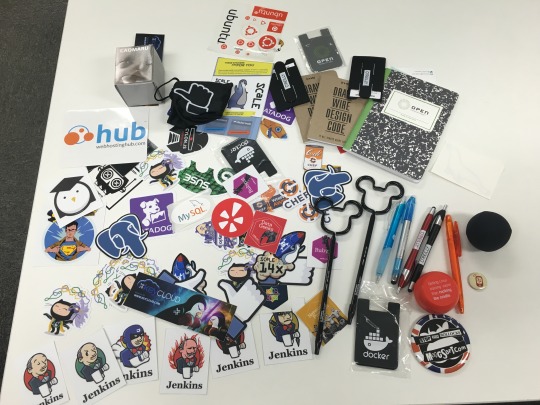
Most of the booths had swag to give away or games to play. This state of affairs has its pros and cons for the exhibitors: giveaways will attract attention to your booth, but some people will walk away as soon as they’ve taken a souvenir for themselves. If you work at a Japanese company and are thinking about setting up a booth at a conference abroad, you may want to bring some items with a Japanese flair for the attendees.
We haven’t decided which conference we’ll attend next, but we would like to make some appearances at events in Asia, as well. Stay tuned for more updates, and thanks for reading!
— Katsuya Nishino
2 notes
·
View notes
Text
Scanning for vulnerabilities with historical crawl data
VAddy uses crawl data and machine learning techniques to determine the structure of your web applications and scan them for vulnerabilities. Crawl data records the URLs and parameters to be scanned; to create it, you simply change your browser’s proxy settings to the IP address and port number used by VAddy’s proxy server and then access pages on your web application through your web browser.
In the past VAddy could only scan for vulnerabilities using your latest crawl data, but you can now choose to use older crawl data instead.

VAddy automatically assigns IDs to historical crawl data to help you tell them apart, but you can also name them with your own custom labels. To do so, open your list of recorded crawl data, click the edit icon next to the data you would like to name, and then type your custom label (as shown below). Your label will appear in the list of available crawl data when you run a scan.

VAddy only used your latest crawl data until now because we designed it to be part of an automated continuous integration workflow, which doesn’t lend itself well to manually choosing crawl data during each scan.
However, some of VAddy’s users go through several iterations of creating sample crawl data and running scans for evaluation purposes before formally incorporating VAddy into their CI workflows. They have been asking for the ability to choose historical crawl data as a convenience for some time, and we’re happy to announce that we have finally made that possible. We think that this new feature will also be useful for re-running prior scans.
We will continue to improve VAddy based on feedback from users like you, so please reach out to us via email at [email protected] or on Twitter @vaddy_support with your ideas and comments! We’d love to hear from you.
0 notes
Text
php[world] 2015
In our continuing efforts to promote VAddy internationally, we travelled to Washington D.C. on November 16 to attend php[world] 2015 as a sponsor. If you, too, have considered attending a conference to promote your service, I hope that this article will provide some useful information for you.
Why php[world]?
We are building VAddy for web application developers around the world. Though we can interact with Japanese developers directly at local meetups and conferences, this approach to explaining how VAddy works and collecting feedback doesn’t scale well to an international audience. There’s only so much information you can glean through social networks and email alone.
From the beginning, we were keenly aware that we would need to actively reach out to developers immediately after we launched VAddy as a service, and that the quickest way to do this is via direct customer conversations.
With web application developers from across the U.S. in attendance, php[world] 2015 was a perfect opportunity for us to meet more developers abroad. The conference brings together a scattered group of regional PHP development communities, regardless of their preferred frameworks or other minor barriers between them.
Being a sponsor
As is common in Japan, php[world] had multiple sponsorship levels. We chose to be an Exhibitor-level sponsor, which entitled us to one conference ticket and a sponsor booth with a table. I won’t reveal exactly how much we paid because sponsorship rates aren’t public, but after purchasing an additional conference ticket we ended up spending somewhere in the ballpark of ¥500,000 for two people.

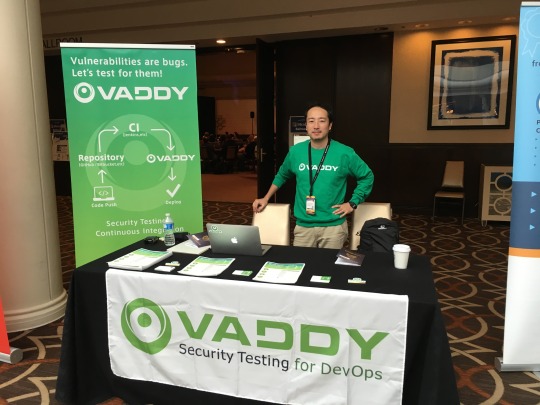
Space was reserved for sponsors in the lobby of the hotel that served as the conference venue. Each booth’s table was approximately six feet long; we also brought our own free-standing banner because there were no available walls for hanging up posters.

We didn’t have to worry about a lack of foot traffic because the sponsor booths were set up between conference rooms; attendees passed by them on their way to and from sessions.
Attendees were also given “passports” that they could use to collect stamps from sponsors for a chance at winning a prize during a drawing at the end of the conference. This was a very thoughtful gesture on the part of the conference organizers to encourage attendees to stop by the sponsor booths!

You can see VAddy’s stamp in the upper-right corner of the photo above. If you look really closely, you may even notice that it contains a small easter egg: “HND” is actually the code for Tokyo’s Haneda Airport.
Scenes from the conference
I hardly attended any sessions because I spent most of the conference at our booth. (We probably didn’t need that second conference pass after all...) If you’re interested, you can find video recordings of some of the sessions on the php[architect] YouTube channel.
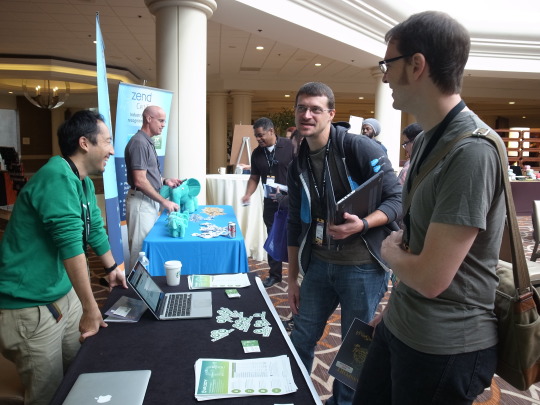
Nearly 100 developers stopped by the VAddy booth during the conference. As far as I could tell with my (admittedly) stilted English, very few of those developers were already running security tests—just like their Japanese counterparts. This leads me to believe that we’re on the right track with VAddy.
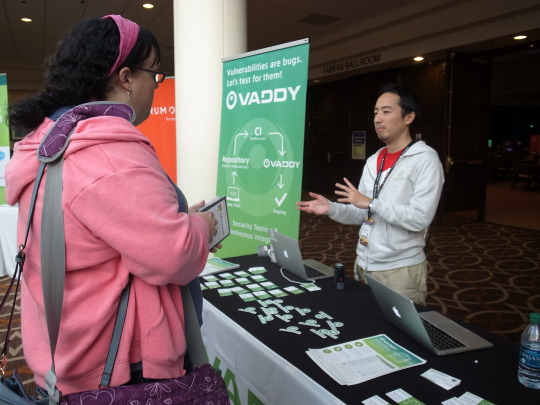
However, many people didn’t appear to understand our service at a glance. Some asked if our company is a security auditing firm; others (not mistakenly) considered VAddy to be a continuous integration tool. We may need to adjust our posters and pamphlets to clear up these misconceptions.
All of these conversations allowed us to come away from the conference with a more concrete impression of how VAddy is being perceived outside of Japan.
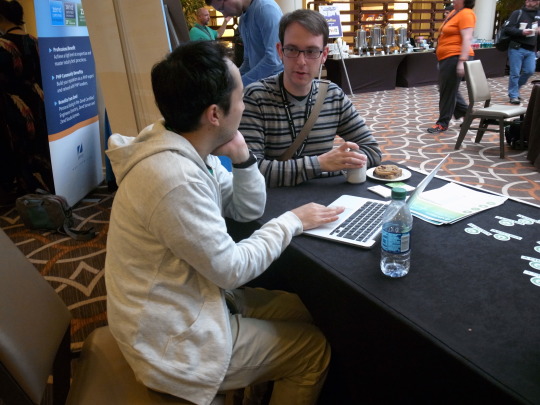
We were delighted to have CakePHP’s lead developer, Mark Story, grace us with his presence. :)

Each day at the conference ended with a party—complete with an open bar! For many attendees this was a rare chance to meet each other in person; the hotel lobby was always abuzz with lively conversations.
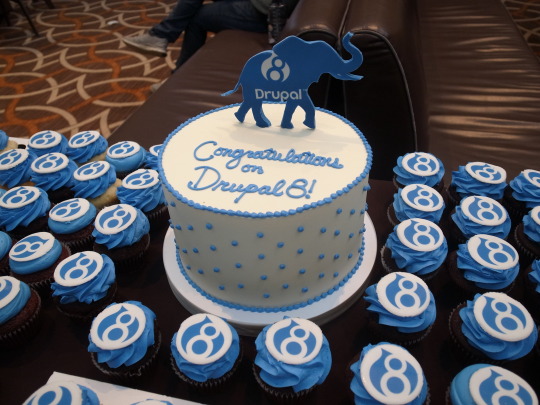
On the evening of Thursday, November 19, a party was held to celebrate the release of Drupal 8 during the conference.
Miscellany

The conference provided complimentary refills of Starbucks coffee for attendees. At some point my stomach told me that I may have had a few cups too many...

Both breakfast and lunch were catered.
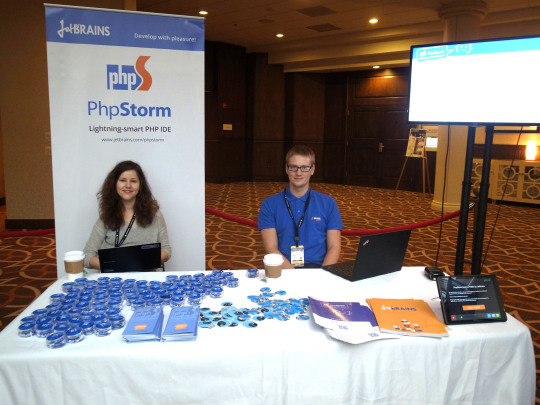
Some employees from JetBrains—whom you may know as the creators of PhpStorm—even came to the conference from Germany.
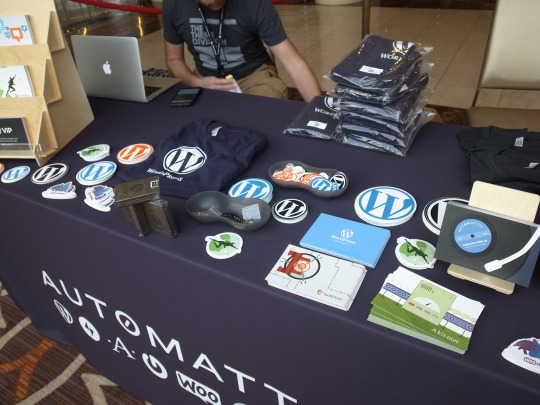
There was no shortage of WordPress swag at the Automattic booth. (I managed to snag a t-shirt!)
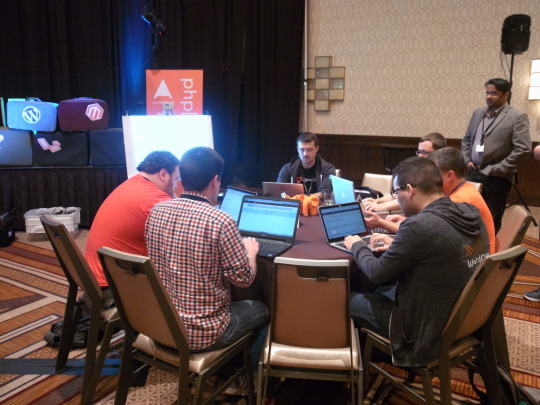
Some attendees focused on Capture the Flag (CTF) contests.
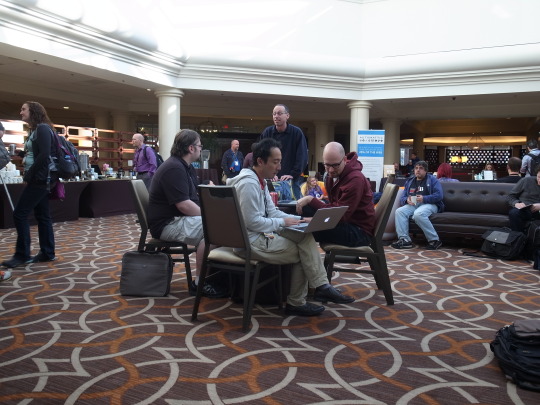
I had a chance to show a friend’s book to Taylor Otwell, the creator of Laravel. All in all, we found php[world] 2015 to be a fun, laid-back event!

While we were in the U.S., we decided to stop by Philadelphia to see Nate Abele! Nate came to Lithium Tokyo in 2013, so he may be somewhat famous in Japan, too?
We showed Nate what we’ve been working on recently and received some advice on how to promote VAddy more effectively. It turned out to be a very fruitful and enjoyable visit!
Conclusion
You need to summon up some courage to attend your first international conference. The trip can be expensive, and it isn’t guaranteed to directly affect your company’s bottom line. That being said, you can’t really understand what people are thinking half a world away just by staring at your computer screen, so I would recommend going abroad to attend a conference if you can. Even though my spoken English still has a lot of room for improvement, all of the php[world] attendees I met were friendly and listened patiently to what I had to say. I’m incredibly thankful to everyone who stopped by the VAddy booth; I may not have always explained myself as well as I would have liked, but I hope that you’ll give VAddy a try!
We’re currently discussing plans to attend our second international conference sometime early next year. Watch this space for more details, and thanks for reading! -- Katsuya Nishino (@vaddy_support)
0 notes
Text
Introducing VAddy’s new team features
In this blog post, I’d like to talk about the new team features we added when we released VAddy’s premium plans on September 7.
VAddy’s Standard and Professional plans implement team features that allow several people to use VAddy together.
A “team” is a collection of user accounts with different access permissions associated with a single domain.
For any given domain, each user has one of the following access permissions:
A domain’s owner (administrator) can add and remove servers; add and remove team members; register and view crawl data; run scans; and view scan results.
A user with write access can register and view crawl data, run scans, and view scan results.
A user with read access can view crawl data and scan results.
To give an example of how these access permissions could be used, we would expect internal developers and continuous integration (CI) operations teams to be given write access to crawl and scan a server while managers and external developers would be given read access to help them plan releases and revise code.
Relationship between domains and team members
I’ll explain the relationship between domains and team members in terms of the following example.

First, Alice registers www.example.com with her VAddy account and is thus automatically given owner permissions for the domain. Alice then invites Bob and Carol to her team, giving write permissions to Bob and read permissions to Carol (as shown on the left in the figure above). If Alice registers multiple domains, she can invite different team members for each one (as shown on the right in the figure above).
Features available to team members
Each domain’s team members can use the same features offered by its owner’s plan.

On the left, Alice is the owner of www.example.com and is signed up for the Professional plan. As a result, her team members (Bob and Carol) have access to all the features on the Professional plan for www.example.com, regardless of what their own plans are.
On the right, Bob is the owner of www.example2.com and is signed up for the Standard plan. As a result, his team members (Alice and Carol) have access to all the features on the Standard plan for www.example2.com, regardless of what their own plans are.
In other words, each user’s permissions are determined by his or her relationship with a domain, and the features available to users for a given domain are determined by its owner’s plan.
So what do you think? You can get started by signing up for the Standard plan to invite up to 5 team members per domain, or by signing up for the Professional plan to invite up to 50 team members per domain.
— Katsuya Nishino
0 notes
Text
Thoughts on Premium Plans and the Difficulty of Pricing Cloud-Based Services
On Monday, September 7, we finally released premium plans for VAddy. We designed these plans based on our experience running a free beta for six months—and all the feedback we received during that time. In this blog post, I’d like to write about all the thoughts and concerns that went into designing and pricing our premium plans.
Our premium plans are primarily differentiated from our free plan in the following four ways:
tests for additional vulnerabilities
longer scan times
new team features
longer scan histories
You can find more details and a full comparison of VAddy’s plans in our recent press release.
While working on VAddy’s free beta, we kept asking ourselves questions: “Is anyone actually going to use this?” “Are we enabling people to solve the problems they want to solve?” The answers to these questions determined what we needed to do—and what we didn’t.
Now that we have released our premium plans, we are going to focus on providing a sustainable long-term service that can easily justify its price through the value it brings to our customers.
How we chose our pricing tiers
Our Standard and Professional plans cost $100 and $300 per month, respectively.
Choosing each plan’s price and feature set was by far the most difficult part of releasing our premium plans. We worried about losing customers if we charged too much even as we worried about being unable to provide a sustainable service if we charged too little. Given those constraints, what prices do you choose?
At first, we considered offering VAddy at 1% the average cost of existing vulnerability testing services. For that price, we assumed that any customer could easily justify the continued use of our service.
When we discussed this idea with our early customers, however, we were surprised to hear that a “cheap” security service would make some people feel uncomfortable using it and could even be difficult for others to get past their companies’ approval processes.
Ultimately, we realized that companies are already spending hundreds of dollars per month on services to manage CI workflows and server metrics—even chat services can cost several hundred dollars per month for large teams! This realization gave us confidence that we have hit reasonable price points with our premium plans.
For example, a five-person team on our Standard plan ($100 per month) would only be paying $20/user per month, which is comparable with other SaaS businesses (such as chat and CRM services). Furthermore, because you can scan up to three servers under the Standard plan, the cost of using VAddy could be as low as $33/project per month.
We hope that this explanation will help to assuage some of the complaints that people may have about VAddy’s pricing tiers.
What are customers paying for?
Of course, we need to make our premium plans attractive enough to be worth paying for. Given that VAddy is a vulnerability testing service, we decided the most valuable feature we could add is support for more vulnerabilities. As a result, all of our premium plans scan for command injection, remote file injection, and directory traversal vulnerabilities in addition to SQL injection and XSS vulnerabilities.
Another point to consider is the value of server resources. To provide a few simple examples, our servers need to spend more time scanning for additional vulnerabilities and our databases need to store more data for past scan results.
We also added team functionality to our premium plans because many of our early customers had requested it for collaborating with large teams and for managing access to individual projects. For example, we’re anticipating situations in which the development and CI operations teams are responsible for running scans, but the managers and external contractors are only allowed to view scan results so they can plan project releases and fix bugs.
Conclusion
We chose our premium plans’ pricing tiers and features based not only on usage statistics but also on all the feedback we’ve received at meetups, workshops, and online since we released our free beta plans. We still don’t know whether our intuitions were right, but for now we feel that we’ve been able to express our decisions through our pricing tiers.
Our real work begins with our first paying customer. We now have an obligation to make VAddy a viable service for many years to come; we will not allow it to simply fail due to neglect.
To honor this commitment, we will continue to have daily team discussions, listen to our customers, and remain steadfast in our endeavors.
— Yasushi Ichikawa, VAddy’s Product Manager
1 note
·
View note