I’m a hobbyist game developer, currently in the process of going pro. This Tumblr will let you follow my journey. Check the first post for more information and my portfolio on https://scheefer.me!
Don't wanna be here? Send us removal request.
Text
Prototype #2 - A post mortem
Hey guys !
That second prototype went on very differently from the previous one. Like last time, let me go into details of what went right and wrong.
On the plus side:
+ I personally think the art style works, game is not awful to look at (as a programmer, I set the expectations maybe a bit low regarding art ^_^), and creating and iterating on maps was very fast. The only thing that could take time was the vegetation (mainly ivy bushes) because they were hand placed, but this can be done in one pass when the level is done so it's not too bad. + The biggest improvement from my last game was the EventManager with C# messaging that replaced UnityEvents hooked in the editor. This was easy to setup, and soooo much easier to manage across the game. I'll never start a game project without it from now on. Also the generic object pool made a lot of things faster to spawn (on the performance side as well as the development side), and I feel it makes you approach the design in a more systemic way. + Substance Painter is an amazing tool, that allowed me to make not too ugly stuff with little to no skill. It's also very fun and satisfying to use. I used a 30 days demo version, but i'll definitely purchase a license in the future, since it's not too expensive. + The game was fun to play, even during my playtests. This is a big deal because most of the time, I get bored of my game pretty fast, and it makes game development much harder (because you lose passion obviously, but also because it makes it much harder to know what's fun and what's not because you're biased).
On the minus side:
- I really struggled with time management. I had a lot of things going on on the personal side, and it took me two months to be able to put in one month of work time in the prototype. I spent too much time figuring out a proper idea for the prototype, then an art direction that would let me iterate fast. Near the end, it was also very difficult for me to stop polishing and just releasing it. I always had something more to fix. - I began my work with the tutorial map, and that's a big mistake. First because my mechanics were not necessarily clearly identified, but mainly because when i asked for feedback to players, they didn't know what my idea for the game would be and they couldn't figure it out based on the level design of the tutorial map. So part of this feedback was wasted, I should have prototyped on a "real" map to get better, more pertinent feedback. - Kind of related to time management, I feel I spent too much time on graphics (either shaders and materials, or modeling and texturing). Even though I have very few models, my art direction means they would need to look "photorealistic" and that took me a big chunk of time. I enjoyed it and learnt a lot, but I think it wasn't wise given the time limit, to include this workload. - The performance is good (I used object pooling, LOD, shared materials as much as possible,...), but the WebGL performance was garbage. I didn't have time to investigate and improve on it, so it made it impossible for me to release it this way, and so players have more work to do (download/execute a binary) to give me feedback, resulting in me having less of it.
I'm now beginning to look for a job. I was supposed to start this after prototype #3, but I don't want to postpone that. But I'll be doing prototype #3 (maybe also Ludum Dare 47) while waiting for answers.
So stay tuned :)
0 notes
Text
How I handled FPS arms and weapons animations
When I determined that my second prototype would be an FPS game, I was thrilled because it's my favorite type of game. It wasn't the first time I was playing around with this type of game, and usually I used UFPS, but usually I find it to be overkill for my needs and I feel the codebase is too big for my prototype. So this time I started created my own FPS system, and one aspect that I'd like to cover here is how to handle the arms and weapons for the character.
Since my character always has a blaster in the left hand, and a grapple in the right hand, I could have simply modeled the arms and gun as a whole, unique model. But I wanted it to be more flexible than that, and hopefully I can reuse it in later prototypes or games.
So here are my constraints for this task: - I need IK on lmy arms to animate easily - I need to be able to change the weapons in game, using the same arms mesh (I don't want to have separate arms for each weapon, because it makes iterating longer as I have to update the arms in several places) - I need to be able to iterate on my arms mesh and texture - I need to be able to iterate on my weapons meshes and textures - I need to animate the arms independently - I need to be able to animate the arm and weapon simultaneously (example: recoil animation) - I need to be able to animate the weapon independently from the arm (example: gunlock, breech blowback,...)
Here's my setup that allowed me to check all this constraints.
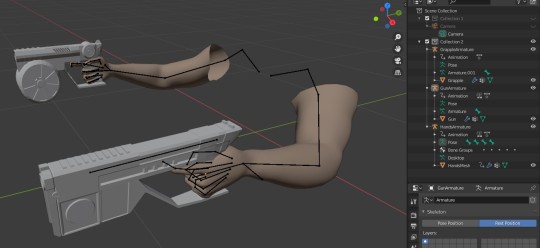
I have a rigged mesh for the arms, with IK constraints to animate the hands easily while having the arms following. I have each weapon as a separate mesh, each having its own rig. As my weapons are static, the rig is really basic and consists of only one bone. If I wanted to animate sub parts of the weapon, I would just need to add bones to this weapon rig. My weapon rig main bone has a constraint to the bone of the corresponding hand from the arms rig. So when i move the hand, the weapon moves with it.

To export to Unity, I have to export separately: [Hands+armature], [Gun+armature], [Grapple+armature], and place manually the weapons in the hands in the editor.
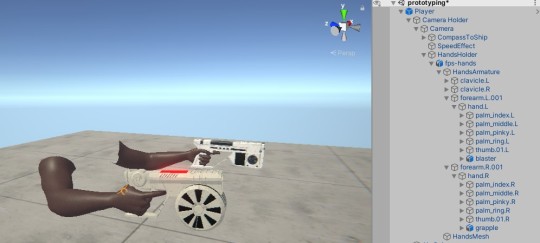
I also have 2 layers in my Animator (one for left arm, one for right arm) so my animations for one side won't interfere with the other (I can shoot while I grapple or do either independently).

At this point, I have a setup that makes it very easy to iterate on meshes or animations.
So here's the process for the main tasks: - If I want to animate, I select the arm and gun armatures in pose mode, and I animate them as if they are a single armature - If i want to iterate on my meshes, I just have to put the corresponding armature in rest mode (so the mesh is properly aligned on axis for editing) and go into edit mode. - To export to Unity, I just export again the mesh and armature that I've iterated on. Nothing needs to be done in the Unity editor.

0 notes
Text
Using triplanar shader to speed up level design
Because I worked with such a constrained and limited artistic direction on the first prototype, I wanted to mix things for the second one. I wanted my game to have photorealistic graphics, but I knew that I wouldn't have the time or skill to model and texture maps, enemies, props,...
So I decided that I would have as few elements as possible, but I must make them as nice as i possibly can. I also wanted to learn a bit more about shaders for this prototype, now that Unity integrates Shader Graph, a tool to make shaders without having to learn a weird form of C and a lot of functions. I looked at a few approaches, and determined that the Triplanar shaders could be working for me.
Basically, triplanar shaders "project" 3 textures on an object, each following an axis (X, Y, Z), without caring about face angle or UV map. Obviously it looks perfect when faces are aligned with X, Y or Z, but will look distorted if faces are at an angle. Check this awesome tutorial to learn how to do a triplanar shader using Unity's Shader Graph.
Thanks to this technique, by limiting myself to non-rotated blocks, I would just end up building levels by duplicating, moving and resizing blocks around that would be automatically textured (and with no seams because the texture projection is based on world coordinates, not object coordinates), and add some vegetation (using Polybrush) when i'm satisfied with my layout. For the background, the Unity skybox and some cloud sprites look decent enough, and going with the "flooded planet" world allows me to not have anything else in view without it looking weird.

Thanks to this shader, i was able to win a lot of time when doing level design or iterating on the level.
0 notes
Text
Prototype #2 - Finding the fun
Hey guys,
When I started working on the second prototype, I wanted to make a fun game based on physics and climbing. I used to play and love Mount your friends with coworkers, and I would see myself enjoying a 3D solo game using similar mechanics.
Idea 1 So I started creating exactly that, a game between Grow Home and Mount your friends. You could move hands with the left stick, camera with the right stick, and grab surfaces by pressing L1 for left hand, or R1 for right hand. The climbing looked stupid but it was on purpose, and it seemed fun to play.

It was basically working, but I wanted a more accurate gameplay that would be stressful and rewarding for the player. Things started to get more difficult, because i needed to be able to place each hand in 3 dimensions, and the stick (or mouse or WASD) only have 2 axis. So i had to either find a way to let the user control the 3rd axis, or to make decisions for the user, based on the environment. Both solutions were not satisfying, and in the process of searching for a solution, i realized this was going to be too complex to control in 3 dimensions to be as fun and fast as i pictured initially.
So i dropped the idea.
Idea 2
During the development of idea 1, I was mainly having fun when the physics worked and made my character swing around his arms. So the idea of swinging to a rope made its way. I've always loved grappling hook in video games, for the sense of freedom they offer and the verticalty in level design that they allow. Usually the grappling hooks are fairly simple, you have predetermined hooking points and the player will be attracted to it and be dropped at a fixed position. I wanted to base my gameplay on the grappling hook, so i wanted something more flexible and that gave more freedom than that. The second idea featured a main character that used a grappling hook (made of physics joints that wrapped around objects, with rope physics and all that), and as a player you had to handle the physics and gravity properly to swing around, unwind or rewind the rope etc... It was fairly simple to implement, but it was a mess. The physics joints are very unstable and after hours/days of trying various parameters (and reading a lot of resources on the matter), I just wasn't able to make something that was both fun and fully functional. Also the physics in itself is not fun, so you have to tweak it a lot to make it faster, more responsive, more swingy,... In the end you end up using less and less physics joints, and more and more manual forces that you apply to rigidbodies. It was just so much work, and I found it to be less and less fun as i was playtesting it.
So I dropped the idea. Unfortunately I deleted the repository recently so I can't show a preview of what i had done.
Idea 3
While searching for how to improve my idea 2, I stumbled upon a simple "pull" grappling hook that was very satisfying to use, so I based my idea 3 on it. It was much simpler, it had no physics and it didn't wrap around objects, but it was easy to setup, it was reliable and it was easy to build on top of it. So i started the prototype for "The Gatherer", a game where you had to collect stuff while you evade or kill enemies. Basic mechanics worked very fast and it was fun to playtest, so I decided to proceed with this one.

In the end, I just went through the first steps of developing the prototype, by following what seemed fun, and going away from what wasn't.
I think it worked ok.
0 notes
Text
Prototype #1 - A post mortem
Hey guys,
After having completed the first prototype (and waited 2 months :x), I'd like to list a few things that I feel worked or didn't work, or that I enjoyed or would like to improve on.
So on the plus side:
+ My art style worked great (for developer made art, obviously) and allowed for super fast iterations on both characters and environments. + Still thanks to the easy and forgiving art style, animating was relatively easy and looked good enough, and mecanim with blending works perfectly with it. + Level design was very fast to produce. Just duplicate and move blocks around with snapping on. Making a level once you have the layout in mind or on papyer, only takes a few minutes. + The sound assets i used were good and didn't require too much work. All the sfx/music pass took like 2 days. + WebGL export worked great and allowed people to try the game very quickly and give me their feedback. + I did respect the amount of time i gave myself to finish it (i spent more than 30 days total, but i moved out this month so i couldn't work on it for a few days)
And the things i should focus on improving:
- I used a lot of UnityEvents, and that doesn't work well with Prefabs once you start having multiple levels. Obviously references to event handlers are not kept accross levels (for instance: player dies -> show UI), so I had to manually set them in each level. There are not lots of them, but it could go out of control very quickly. In the next prototype, I'll use messaging through code. As a rule of thumb, Unity events are good as long they are used to communicate within the same Prefab or GameObject. - The Unity part of Audio wasn't great to work with, probably partly because of my lack of knowledge of it. I had AudioSources on many items, and mixing was hard because volumes have to be adjusted on each. Maybe i should've used a mix of AudioSource for moving objects, and a single instance of an SFX manager for static objects. I hope i can improve on this in the next prototype. - Root motion. My climbing animation is not great, because i wasn't able to use root motion and i still don't know why. Somehow the translation from my root motion was multiplied when my i was using it. My future prototypes shouldn't require that so i'll have to work on it at some point to understand how it works.
Stay tuned for game #2 (Although it's already complete because i'm so late with the Tumblr thing ^_^).
0 notes
Text
Scripted sequence hell
One of the features I wanted to have in Skyline Rider was scripted sequences for intro and outro. Because I wanted my game to have a little bit of story, and because I never did it before and I wanted to learn the ropes. The only time I did something like that, it was mainly scripted UI and it was done through coroutines and WaitForSeconds. This time I wanted to mix scripted UI, camera movements, gameobject movements and 3D models animations.
At the beginning of this Youtube video, you can see the intro sequence :
youtube
From now on I'll only consider the beginning of the storyboard, because the rest is just more of the same. Here is basically the storyboard for the sequence (MC = main character):
1- Splash screen with game title and wait for user input 2- Camera traveling down 3- Scripted gameobject movement (person falling to death) 4- Scripted audio (person crashing on the ground) 5- Scripted 3d model animation starting (MC raising head) 6- Scripted gameobject movement (tin box rolling to MC) 7- Scripted 3d model animation starting (MC looking at tin box) 8- Scripted UI (screens with MC reading the tin box) - ...
I'm really not sure of the best way to handle that, and I didn't find great resources on the internet. Here's how I did it.
I created an animation in Unity, containing as much of the scripted sequence as i could. Namely, i had steps 2, 3, 6 and 8 animated within it. This is the animation. As you can see, the MC does not move at all.

I also created a single animations for the main character in Blender, containing the sequence of actions he takes during the intro (raising head, looking down, standing up, turning around, pushing elevator button..), without any pause between them, animation events within this animation to pause animation between each action (don’t mind the cube. It’s just a visual cue i use for my climb animations).

And i created a dedicated Animator for the scripted sequence which is simply as follows. The animation will play at the speed provided by the parameter AnimSpeed (default 0 = paused).
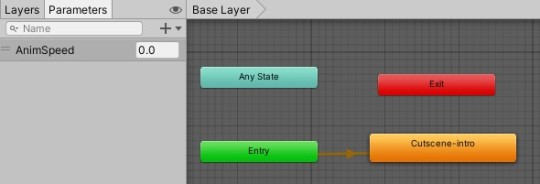
See the little white arrows at the top of the Unity animation screenshot ? They're animation events, and they trigger a C# method when reached at runtime. Here are the required events for the sequence, in chronological order:
- CameraApproachingStreet will raise the volume of cars passing by (so you don't hear them when on splash screen, but then you start hearing them during the intro) - DeadGuyHitsGround will play the smash sound and a dramatic music. As far as i know, you can't trigger sounds to play from within the Unity animation so you have to use events. - PlayerReactFromDeadGuy will set AnimSpeed of the MC to 1, playing the animation. After the player raised his head, the animation itself also has an animation event that will put back the AnimSpeed to 0. - TinCanRollsToPlayer will play the tin can rolling sound - PlayerLooksAtDeadGuywill set AnimSpeed of the MC to 1, continuing the animation, which will again put back the AnimSpeed to 0. - etc...
So the animation events of my main animation will trigger my MC animation to continue, and this one will play then pause automatically at timings defined in the MC animation timeline, waiting for something to resume it.
This is how I synchronize Unity animations with my assets animations. It does work, but I see a few issues with it.
1. The animation preview in Unity, will not execute the animation events, so you can't preview the 3d models animation or hear the sounds. So you have to run the game everytime you want to check the full animation. 2. Because of that, you have to have an estimate of how long it will take to play your 3D models animations when designing your main animation. You can look at timelines and mentally add delays, but it's not really practical. 3. It's kind of a mess to read. A new programmer will have some trouble seeing the animation events, reading the code to understand how it works, how the two animations talk to each other etc... 4. If you change some timings, you'll have to move your animation events around. If for instance, I want to display UI for a longer time, i'll have to move my keyframes and animation events. They are not linked together so you may forget to do so.
For a simple case it was efficient enough. I'd say it took me a full day of work to do all the animation (including all the art, sfx and animation in Blender).
0 notes
Text
Ragdolling a 2D platformer
Hey !
In the previous post, I described how i used 3D models rendered as 2D. The purpose was to have smooth and dynamic animations. Obviously I want the same for when my character dies. It means I had to use ragdolls because nothing is smoother than that when it comes to inanimate characters (Plus, I just can't get enough of them ^_^).
Ragdolls are easy enough to understand: Your 3D model has colliders on every part of the body and joints between them. These colliders will come into contact with the surrounding environment colliders (and other limbs) and the physics engine will handle the rest. Unity has a ragdoll wizard for human characters which is really easy to setup. No difficulty there.
The problem
because of what i described earlier, my player only has a 2D collider. My environment is made of flat sprites with 2D colliders on them. My game uses 2D physics all the way. This is a situation where something that improves your workflow, also makes some features harder to do.
There are several solutions that come to mind: - Give up on the ragdoll. But i want them :'( - Switch to 3D physics and colliders for the game. I don't like this one, because then i have to consider a useless Z axis in all my game, just to handle the specific case of death which may not even occur. - Having ragdolls work on 2D colliders. That would be perfect, but i honestly wouldn't know where to start. Unity ragdoll wizard creates 3D colliders, my characters are animated 3D meshes, I would have to put 2D colliders on top of that. It seems wrong.
The solution
So i came up with this: If/when the player dies, I switch part of the game to 3D physics. - I replace the playable character (with 2D collider and physics) with the ragdoll player; - I select all the 2D colliders around the player within a certain radius, and i replace their 2D colliders with 3D replacements at runtime. I give them a large, fixed dimension on Z axis so i'm sure my player will hit them. I don't have to change anything regarding environment sprites, because even if the player position changes on the Z axis, the orthographic camera will make it appear still on the same plane as the environment. - Then i apply forces to my ragdoll player depending on the death context. If hit by a bullet i'll apply recoil, if hitting the ground i'll make him bounce,...
It may seem overkill but it was actually very easy to do (10 lines of code), performance is great because my levels are simple with not so many colliders, and the end result is fun and satisfying especially with slow motion.
Did i mention i love them ? :D


0 notes
Text
From Blender to pixel art
Hey guys !
Last time, i mentioned that the first game is a 2D pixel art platformer, but it was really important to me that the animations were smooth and fluid. The usual (and to be honest, best looking) way to achieve this is by having a 2D artist working on tons of frames (the more you want fluid animations at 60 fps, the more frames you need).
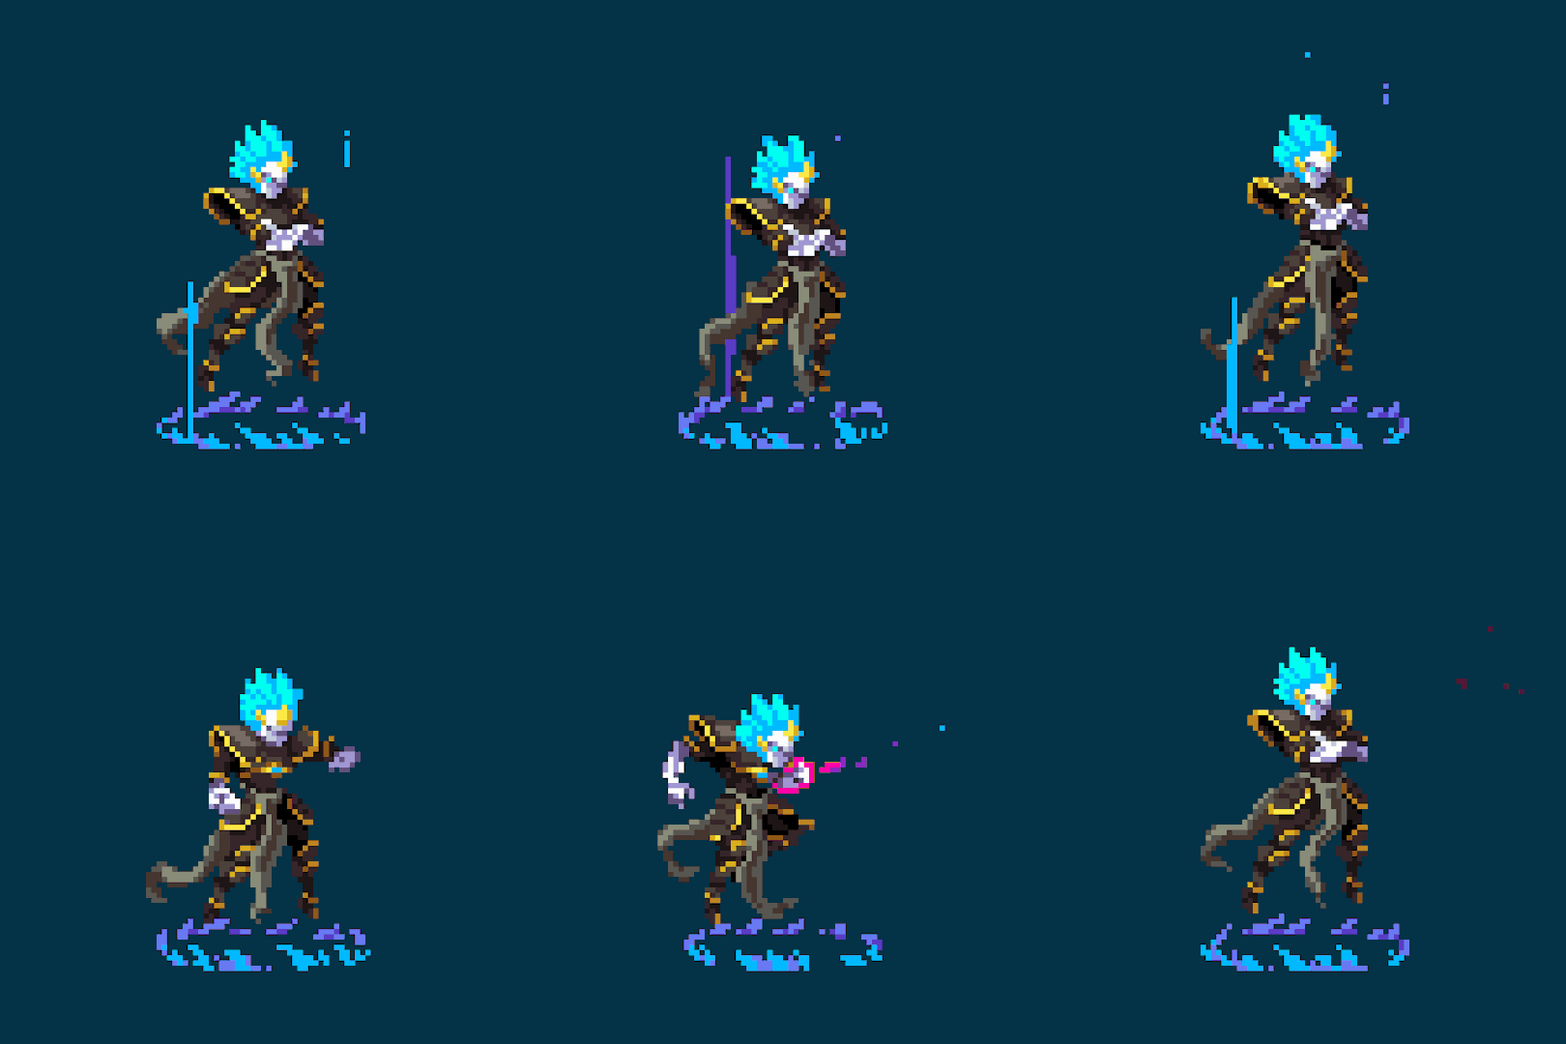
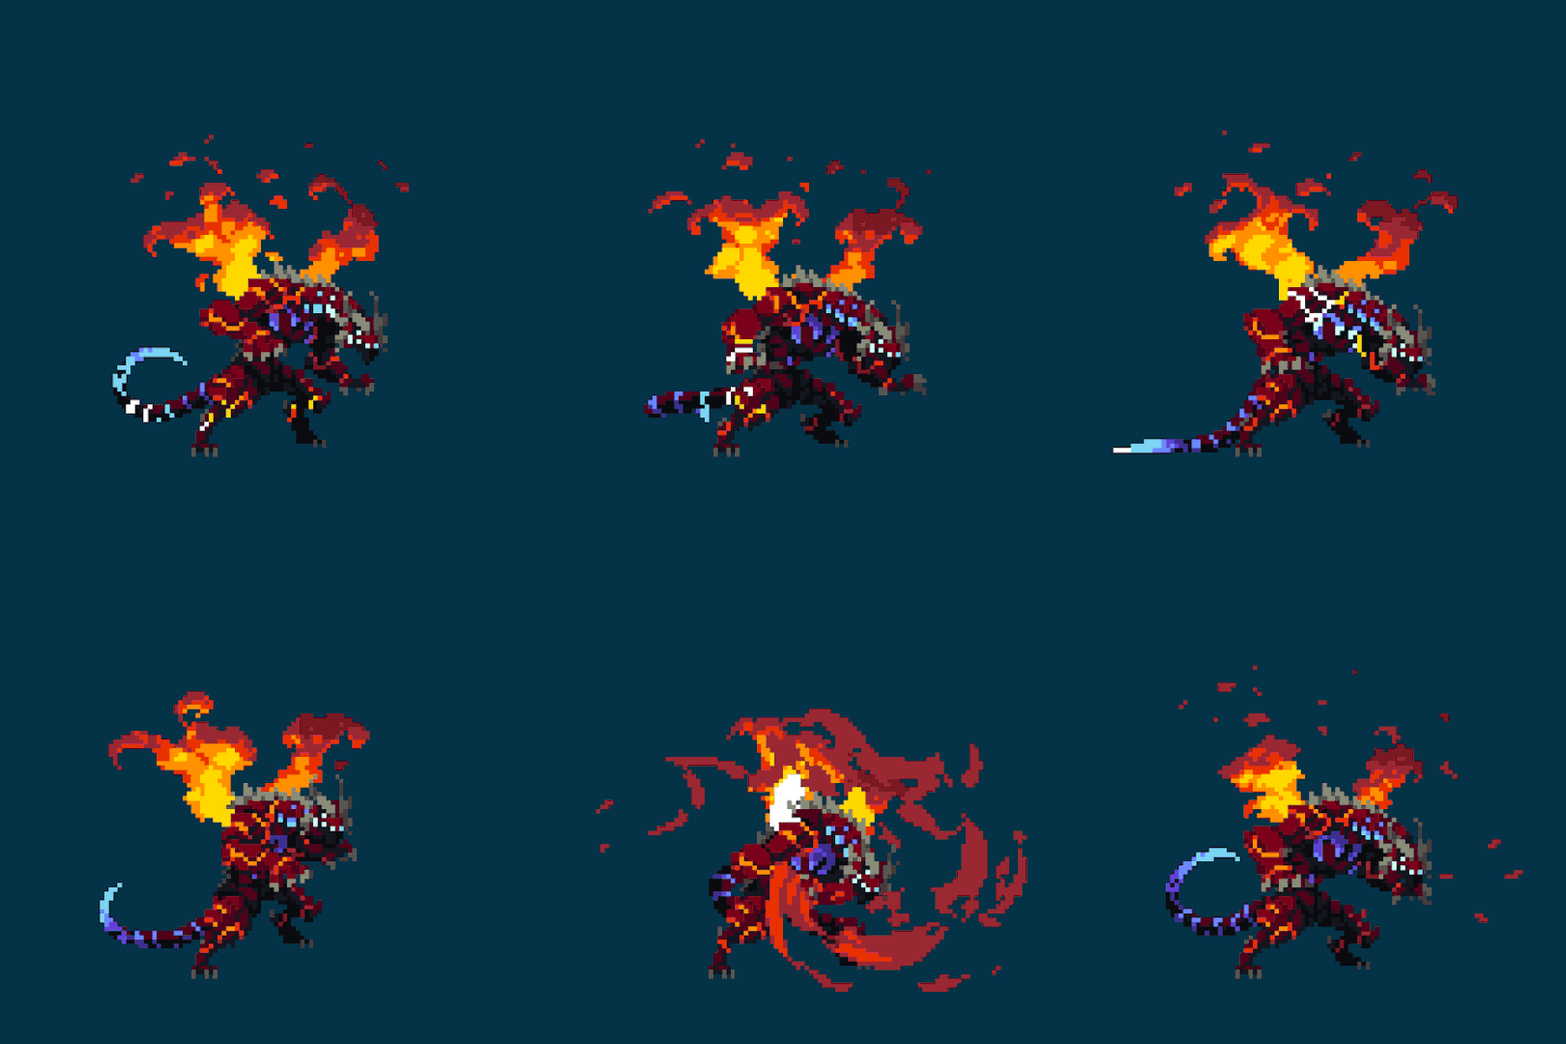
Examples from PixelOutput
The way that i chose, i thought i came up with the ideas myself but it's actually something that has been used many times before in the industry, the most recent example i have in mind being Dead Cells. The idea is to use all the 3D workflow sugar (keyframing, animating, iterating on the mesh without necessarily having to rework the animations, blending between poses or between animations using Mecanim,...), and making it render as pixel art on screen. This article will detail the workflow (actually the main steps of it) i've used to create, animate and render my main character, and i'll be providing very helpful links i've been referring to for most of the steps. Thanks to all of these guys for their great insights.
Step 1 - Create a character MakeHuman is free and very easy to use. I won't elaborate on this, check this tutorial if you need any help.
Step 2 - Customizing the character Once your character is in Blender, you have the opportuniy to customize it as you see fit. Depending on what you want to do, it will require more or less modeling skills. For my game i knew i'd go with the black solid color for characters, so i only needed a silhouette which simplifies a lot this process. I just sculpted a really barebone backpack because i wanted my main character to have one. Remember it will be rendered as pixel art in the end, so no need to be too finicky about the details. You may have noticed that the mesh from MakeHuman has quite a lot of vertices. If you think you may run into performance issues because of that (for instance, if you want to display a large number of characters on screen), you may want to simplify the mesh topology using modifiers or manual retopology. I didn't, my main character appears only once in the game.
Step 3 - Rigging Once you're happy with the mesh, you can rig it. Again this is very standard and straightforward (but not necessarily easy), check this tutorial. For an easier setup, you can also use Rigify (which i did). Get familiar with the rig, but because it's a human character and we will be doing a lot of animations, you absolutely need IK on your rig for arms and legs, or you will quickly feel the urge to kill yourself. Check this out to understand IK and how to set it up in Blender. Feel free to make your rig more personal, it's all about how you will use it to animate. This part is important because you create the tools you'll be using while iterating, so these tools must be as efficient as possible to have you win as much time as possible. For example, i removed a lot of bones that i didn't require because of my art style that will hide details (fingers, toes,..). Make it easy on yourself!
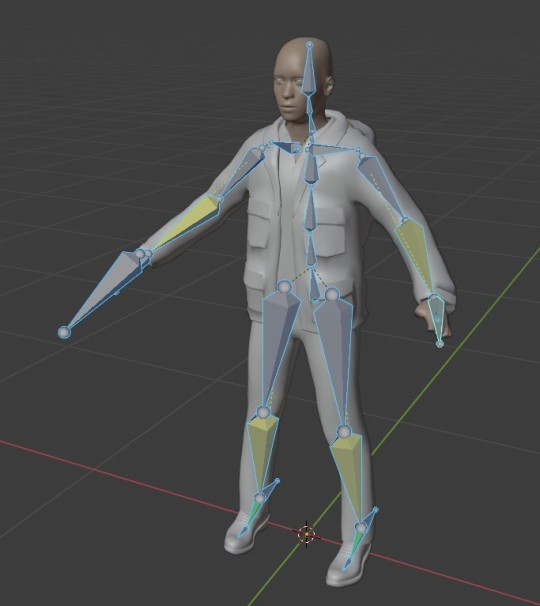
Step 4 - Animation Now that your model is rigged, you can animate it. There is little to know from the technical standpoint (check this tutorial to get you started), but be warned that you will spend A LOT of time on animations. First try to think of the framerate of animations that you'll be using in-game (configured in Unity) so you use the same in Blender. Then for each animation, i usually follow these steps : - If possible, study the movement you want to make by watching videos in slow motion on youtube or whatever. - Think about how you'll use the animation in game. For a 2D platformer, you only need the animation to look good from one side. So put your animation view to the side and work from there. It doesn't matter if the limbs are all wrong when looking the animation from the face: The player will never see that. - Time the animation by doing a rough keyframing of the "big movements" of your animation (ie left foot/right foot for a walk cycle) - If i'm doing a cycle animation, i'll duplicate the first frame to the frame "last+1" (if your animation is 50 frames long, duplicate frame 1 in frame 51). This is so interpolation will make your cycle loop perfectly. - Iterate to improve on these keyframes until you're happy with the overall movement. - Begin to add smaller details (think, sub-animations) and iterate on them. - Remember to focus your efforts on what really matters: Spend more time on the animations you'll be seeing most often. Walk and run cycles are very important for instance, you'll be doing that the whole time in-game.
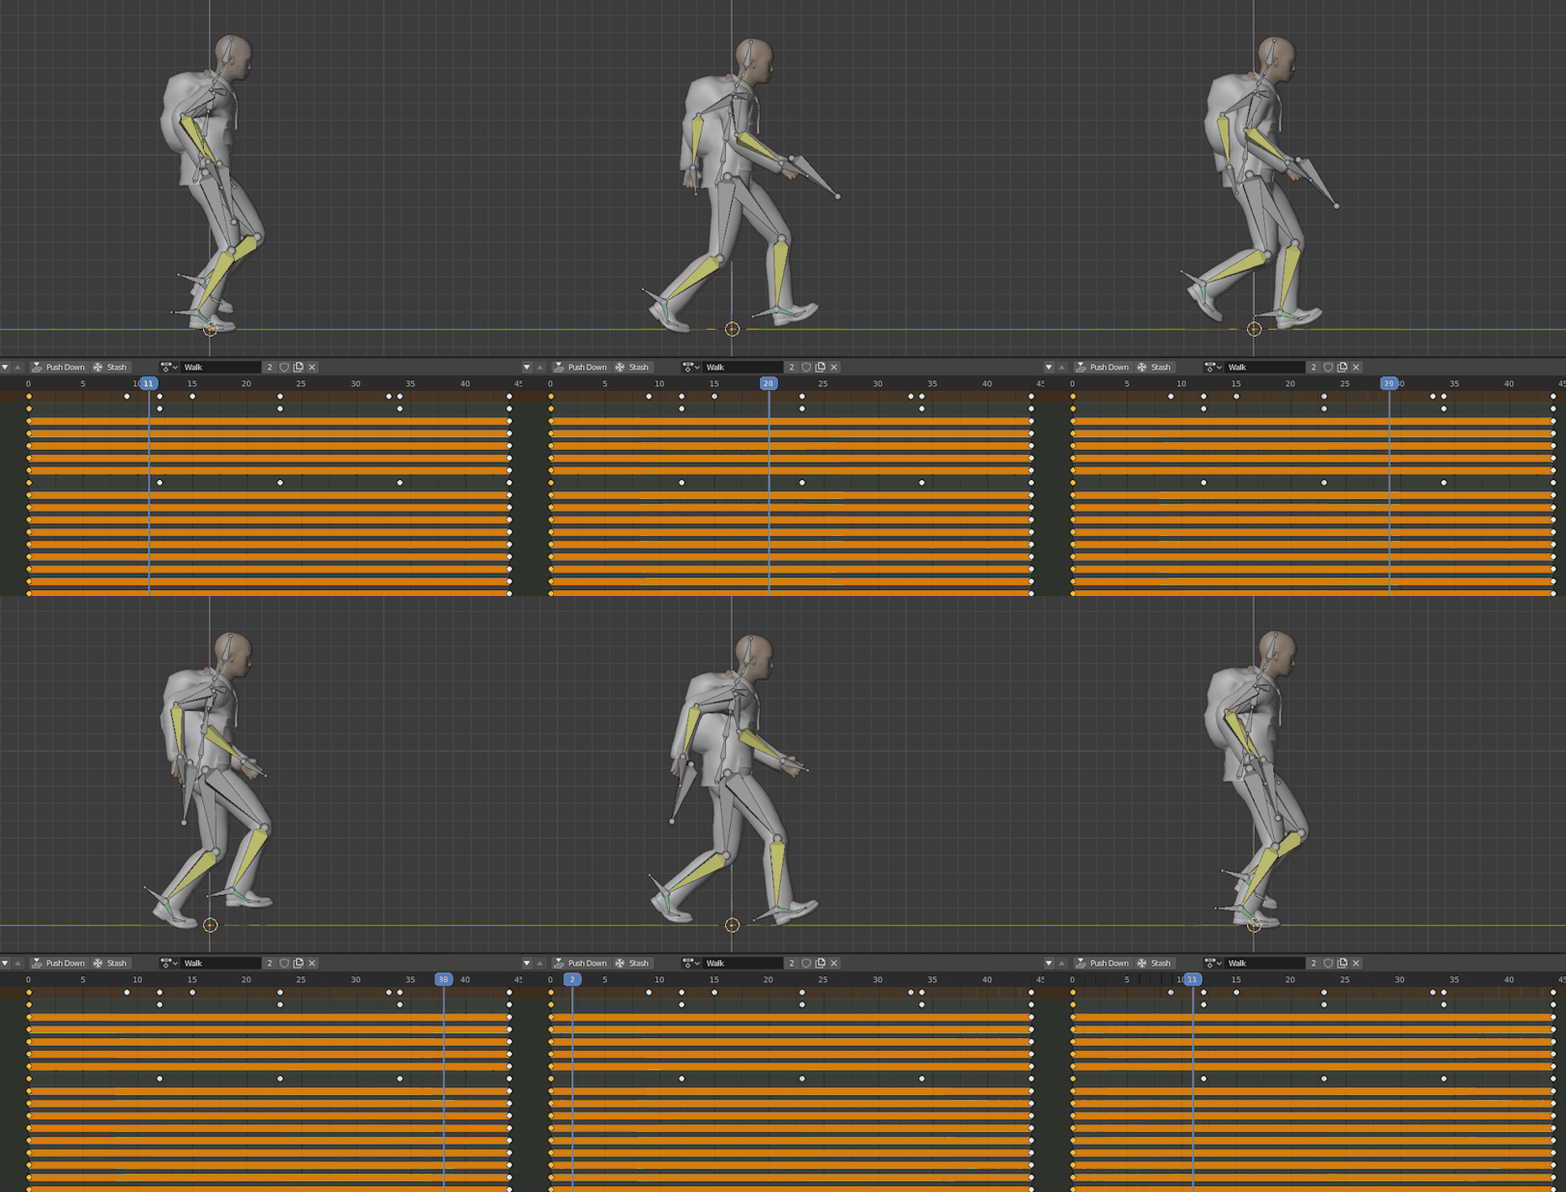
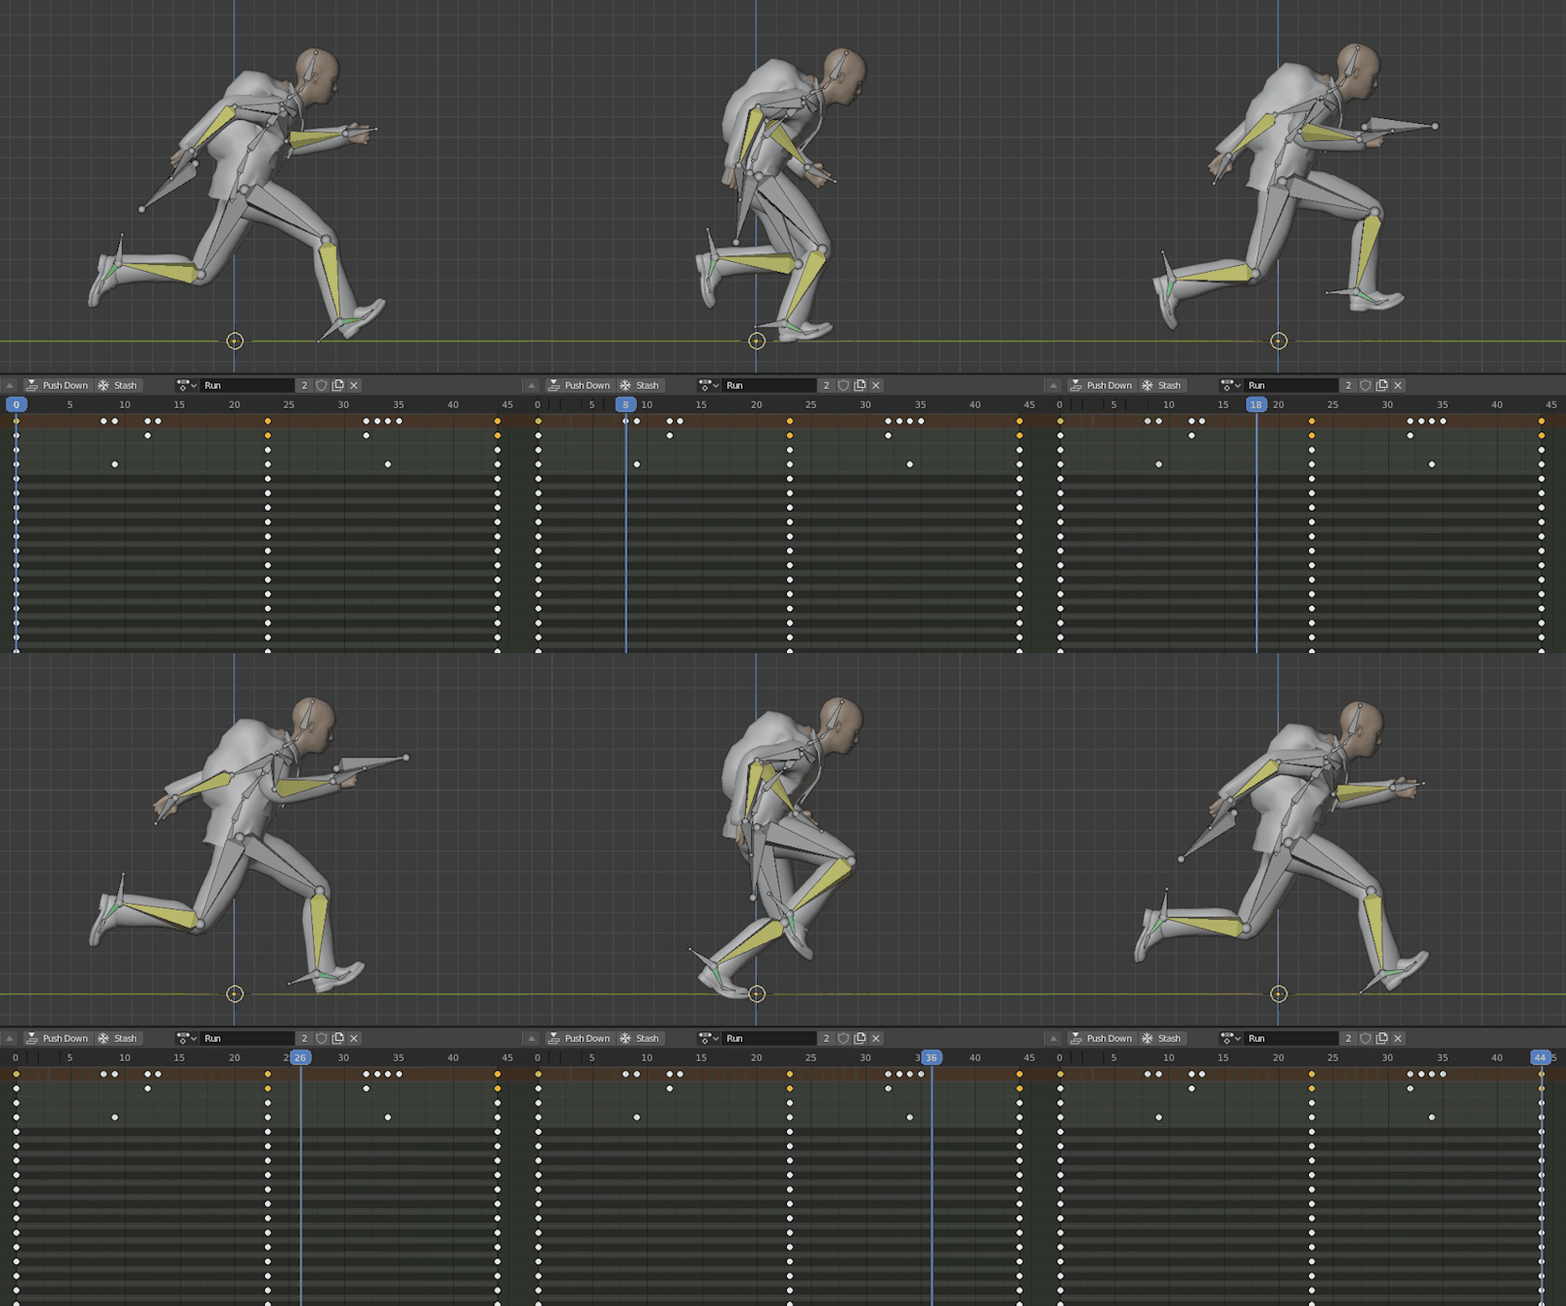
My animations honestly don't look very good, even from the side, but once they are displayed as pixel art and blended with Mecanim, i think the result is good enough, and fits my expectations of fluidity and smmoothness. That's one way of getting around a weakness (ie. my inability to animate properly a human character) to not let it hurt the game idea you have in mind.
Step 5 - From Blender to Unity To export from Blender to Unity is a simple process, but it raise a few issues regarding scaling, rotation, export and import settings,... I've solved all of them using the settings described in this link, but please keep in mind it might change depending on versions of both Blender and Unity.
Step 6 - Setting up the in-game character Having your model show and animate in Unity is usually as simple as a drag and drop. In my case, since i'm doing a 2D game with 3D models, i had to make a prefab that would just add a 2d collider, and set the Z position so the model is displayed above all the sprites (which have Z == 0). Since the camera is orthographic, the bigger scale of the character because of its proximity with the camera won't be an issue.
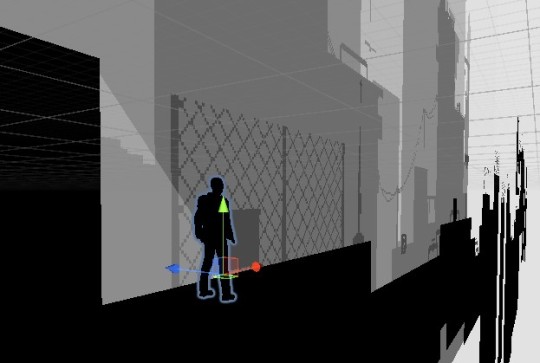
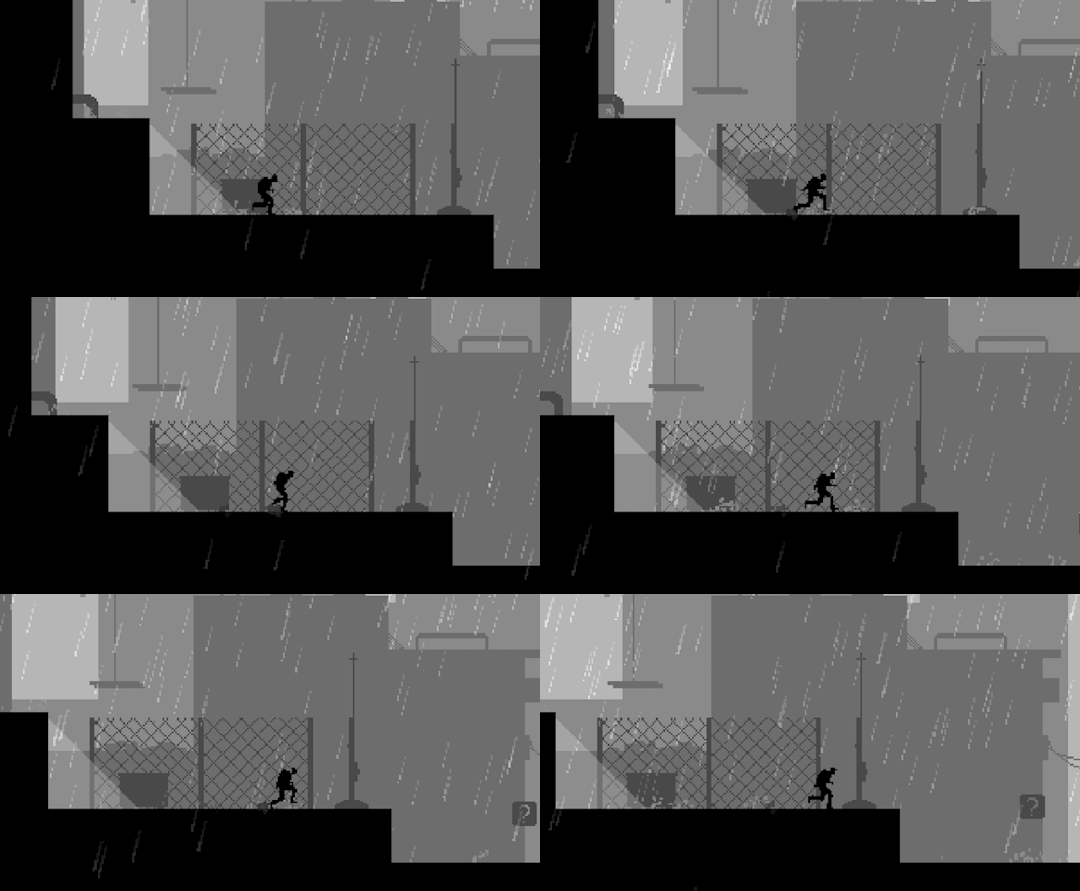
Step 7 - Render as pixel art Unity now provides some tools to render your game with a pixel-perfect camera. This article from Unity explains it very well. You can also set a custom resolution for your game view that matches your render resolution, so you have a good preview even when the game is not running which is very helpful for designing UI or using Unity animation sequence tool.
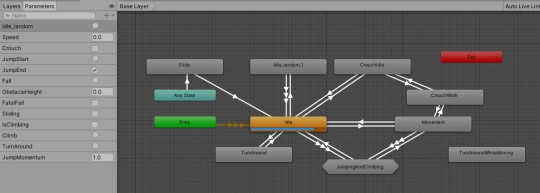
Step 8 - Mecanim I'll skip this step as it's very dependant on the game. For a very simple Mecanim example of a 2D character playing a run animation when moving, check this tutorial. The advantage of using 3d models and animations is that Mecanim will be able to blend bone positions between animations, allowing for smoother transitions. Be careful to keep the Animator clean (These are good tips), as things can quickly go out of control in Mecanim. This is my complete Animator for Skyline Rider :
Step 9+ - Iterating Now that everything is setup, you can start iterating. Try out your game, see how your animation feels, go to Blender to make a few tweaks, then export to fbx again and continue testing. Most of the time you can even remain in play mode and the animation will be updated without the need to restart the game. I think of it as "gameplay driven" design which is only possible with great workflows. If you had to redraw every frame when you want to tweak an animation or the looks of a character, you waste a lot of time and either the budget explodes and the release date is pushed away, or you end up with "animation driven" design where programmers will need to make gameplay fit animation, and my personal opinion is that it can hurt the feeling of the game, which must always remain the top priority (at least, in the kind of game i like). This will probably be less and less of an issue with the continuous progress of procedural animation and animation rigging. Looking forward to working on things like that !
Obviously this whole 2D/3D is kind of a workaround, so in the next article i'll mention something that was actually made less convenient because of this.
Thanks for reading!
If you have questions or want to know more about this workflow, feel free to contact me (check the first post for contact information).
0 notes
Text
How to make a game on your own when you're just a programmer ?
Hey guys
Last time, i introduced you to the goals of what will keep me busy for the next 3 months. To make it happen, i feel the most important thing is to be aware of your strength and weaknesses, so you don't put yourself in a position where you just can't deliver. Fortunately, i've been working for quite a while now and if i still have plenty to learn, i at least know my skills and inclinations well enough, and i can put them at the foundation of my work, obviously getting out of my comfort zone from time to time because i want to learn some new things as well :)
So when it comes to me, these are my strengths:
- I'm very experienced with programming, and i know C# very well after having used it for more than 10 years; - Although i'm by no means an artist, i know how to use Blender to model and animate stuff. 3D modeling has an almost technical/engineering kind of feel which lets you (or at least me) create great stuff even though you know nothing about art. I can totally recommend Blender Guru tutorials. - I've been a hobbyist user of Unity for years now, so i know the engine pretty well. It has evolved a lot as time goes, and some new things are totally unknown to me (such as DOTS or the HDRP), but i am very confident with using the core features.
Now about my weaknesses or things i have to improve on:
- I have really low skill at 2D art. I have actually learnt to draw during the (2020, covid) lockdown, but i'm nowhere near confident enough to use assets i would create in a game. I have never animated 2D things as well, and i really feel the workflow is too painfully slow for the 1 month constraint. Want to update the character ? Please redraw every frame of your animation... I know there are some skeletal animation tools for 2D as well, but i really don't like the way animations look in the end using these techniques. - I'm reallyyyyyyy bad at texturing models. I just hate the UV unwrapping part, and every texture i ever tried to make ended up horrible. Some tools seem great (such as Substance painter) and i would really like to delve into them in the future, but that doesn't look like something i could do in a reasonable timeframe. - Audio is absolutely remote to me. I just know how to use AudioSources in Unity (and probably not in the best way), and i have basic editing skills in Audacity. When you want to design your own sounds, it requires hardware and imagination and other things that i don't have (See this or this for examples), so although it seems like a lot of fun, i don't think i'll spend much time on audio design in my projects. - Not really a weakness on my end but more a weakness of the objectives i set myself up to: 1 month is very short, so i'll have to both have great commitment and make sacrifices to avoid being too ambitious.
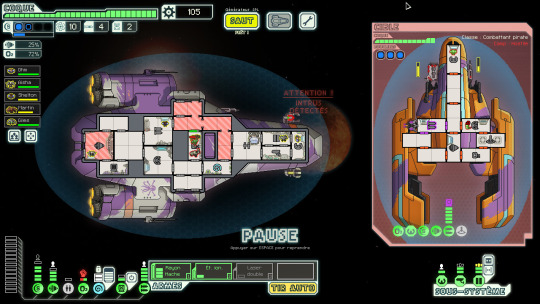
I would like to mention something else, which is neither a strength nor a weakness but it seems relevant. I know game design because i've played and analysed (more or less deeply) my whole life, and i've read a few books about game design and theory of fun. I know how to make a game feel good or fun, but i have never had a greatly original idea, i just inspire from the games i play and love. Even level design is hard for me, because i quickly run out of ideas on how to make the game features or gameplay elements shine, i usually get bored after a few levels because i feel like i'm repeating myself. I really admire people like Lucas Pope, Notch or the FTL/Into the Breach team, because their ideas really push the industry forward.


Taking all this into consideration, the games i'll make in the next few weeks will probably respect the following "rules":
- There won't be any groundbreaking ideas or never-seen before gameplay mechanics, but i can do the execution as best as i can. My games will be short so that i don't run out of ideas regarding level design. - They can be a little complex technically, because i am confident that i can find a solution to (almost) any programming problem - I won't be able to feature complex 3D stuff such as animated living creatures because i can't do that with a good enough fidelity. I can however model and animate machines, and i can also find ways to avoid having to rely on high fidelity. - I can model stuff, but i can't texture. Basically it means i'll have to use styles such as textureless or low-poly. Plus i really like this art style, and with a few post processing i think it looks amazing. - I can't do proper 2D art. - I won't design audio, so i'll have to rely on external SFX and music assets. Fortunately i had purchased some great SFX and music packages in the past during a Humble Bundle offer, and i'll probably be using freesound.org and newsground.com as well. As i doubt i'll find every sound i need that perfectly fit, i'll probably be learning a little bit more of Audacity along the way but that's something i did want to to do anyway. - I can only do a few features per game if i want them to be polished. Remember, the main objective is to use these games to showcase proper skills, and i thing that making prototypes of plenty of "kind of working but not really" features is not a good way to prove that you know how to make games. Less is more and quality over quantity are my mottos :)
Let me give some examples based on the first game i'll be doing (OK, i've written this article a bit late, so it's already done and i'll be able to illustrate). Remember, it's a 2D platformer with emphasis on fluidity of controls and animations.
I've chosen an art style that : - can be done without much skill in 2d art. Colors for instance are hard, so i avoided them, but you can add depth through greyscales and parallax effects. - is really easy to work with, and requires very little work when designing the levels. Basically just drag and dropping and putting on the correct layer. All the level geometry are just stretched black sprites. I've done a few props in a few minutes each to populate the levels. - lighting has no effect on so i can use any asset anywhere in the game without it feeling out of place. - "hides" behind big pixels, most of my the tiny details showing my inability to model very accurate stuff, or making animations that seem really natural (because i feel that good animations are really all about the tiny details).
It's a 2D game using 3D models to make animations more fluid and iteration much faster. The next article will actually focus on that because i really enjoyed this approach.
At first I had in mind a pretty good moveset, with things such as sliding, rolling, grabbing weapons and melee and ranged combat, using ladders and poles and stairs, parkour animations for vaulting over small obstacles automatically to make the general feel more interesting... I cut all that and in the end the character is just running, jumping, climbing.

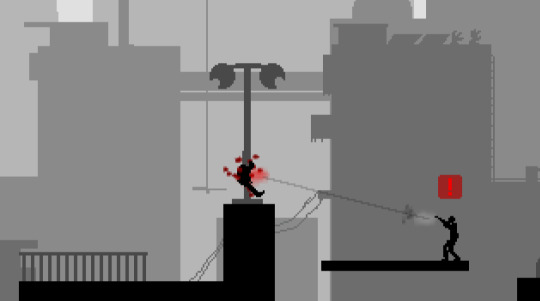
Until next time, take care!
0 notes
Text
So what's the plan ?
Hey guys
Thanks for joining me on my journey to becoming a game developer!
As a 12-years experienced web & mobile developer and a hobbyist gamedev for quite a while now, i do feel comfortable with the tools and languages involved (mainly Unity & C# in my case). I also have published a little game named Jumpy Deer on the app stores, and took part in a few game james which went really great most of the time.


However, i do feel that at my age if you want to have a switch in your career, you need to work a little more to prove your legitimacy as a worker in another industry (especially in some countries like France where your degrees and past experience matter a lot).
So the objectives behind this 3 month experience are:
To acquire or refresh skills.
To be sure i still like it and want to go in this industry (which, from a purely financial point of view, is much less attractive than the previous one i worked in).
To have a basic understanding of workflows of other people involved in the creation of a video game (2D artists, 3D artists, animators, sound designers,...). As a result, i will create myself every asset in the games i will produce (except for audio because it requires hardware that i don't have). It won't look great (trust me) but it will make me understand better how other people work, and help me communicate more efficiently with them when it will be required.
Show a set of skills to recruiters, to let them know that i am capable of working on a wide variety of things, such as 2D, 3D, Mecanim, particle effects, scripted sequences, physics, basic AI, controls, camera, terrain, UI & menus, events, messaging, optimization, object pooling,... That's why the source code for all the games i'll do will be public on Github.
There are however some things that i won't cover because time is limited:
I will only scratch the surface of audio
I will do no or very little graphics and shader programming, and also very little graphics optimization (such as occluding, optimizing batch counts,...). My time being limited, my games will be simple enough so they won't require heavy optimization. Great performance will however always remain a number one priority for me and i will build games with that in mind along the way.
DOTS. This is the new programming paradigm of Unity, and i have yet to work on it. I did take a look at it, and i can't say i liked what i saw, but i need to delve more into it to understand it better. I also feel it's not ready for production yet, like so many "new" things in Unity right now.
I will probably stick with legacy or URP, and probably won't touch HDRP
After thinking about all of these constraints and objectives, the three game prototypes i'll work on are as follows (at least, that's what i plan to do, but the end results may differ vastly depending on what i can/can't do, and it will actually be fun to compare what i hoped to do with what i really did after all the cuts):
The first one will be a 2D platformer, with scripted intro and outro sequences, and an emphasis on fluidity of controls and animations, so probably some parkour with combats. Some inspirations would be:


The second one will be a 3D game with emphasis on physics (i just love them so much in games, and they are really underused because they are hard to work with and can have unexpected results which lead to the creation of weird games such as Goat Simulator or Surgeon simulator). I'm thinking climbing game, grapple, active ragdolls.


The third one will be a 3D game with large environments (using terrain), vehicle combats and enemy AI. I have in mind this super cool game where you can shape shift your vehicle (into a plane/helicopter/mech/submarine) depending on your situation and objectives.


There are two things i find very intimidating:
- Will i be able to limit myself to this 1-month time limit if i'm sure that "just a little bit" of tweaking will make the games better ? That's a real challenge but it's one that video games studios face all the time with release dates. - I love working in teams, the complementarity of people strengths, and the social side of it. And i'm really scared to work alone for 3 months. That's why i will discuss with you guys, have some playtest feedback from players, attend some meetups in my area (Paris) whenever possible, ...
Until next time...
I'm sure it will be plenty of fun !!!
1 note
·
View note
Text
Let’s talk about me :)
Hey guys.
Congrats on finding this Tumblr!
I’m a web & mobile developer since 2008, mostly in C# and Microsoft stack. I’m currently in the process of becoming a video game developer, and i’ve set myself up with the challenge of creating 3 “polished prototypes” in 3 months, that i can use as a portfolio to showcase my technical skills using Unity to studios and recruiters.
As part of the challenge, i need to do everything myself but the audio part (I’ll use assets that i bought from the Unity store a while back for that). The source code for all games will be publicly available on my github.
I will use this tumblr as a devlog, mostly to talk about choices i do as a solo programmer, difficulties i meet along the way, and how i solve them (or avoid them ^_^).
I hope it can be of some use to fellow game developers!
As i don’t want my first post to be just a wall of text, let me tease you the first prototype, i’ll talk about it during the next few posts.

If you want to get in touch (or discuss a job offer :D), feel free to contact me here on tumblr, or by email (in my resume below).
My portfolio: https://scheefer.me
My itch.io page: https://schouffy.itch.io
My github: https://github.com/schouffy
Take care, talk to you soon!
0 notes