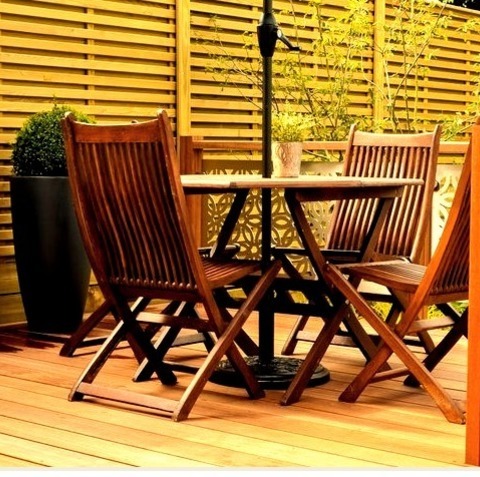
#wooden outdoor table
Explore tagged Tumblr posts
Photo

Rooftop Deck in San Francisco Deck - small contemporary rooftop deck idea with no cover
1 note
·
View note
Text
Deck Uncovered San Francisco

Deck: A small, open-air contemporary rooftop deck design
#outdoor fireplaces#medium wood#glass railing#rooftop pool#outdoor entertaining#rooftop deck#wooden outdoor table
0 notes
Photo

San Francisco Contemporary Deck Small trendy rooftop deck photo with no cover
#wooden outdoor table#ribbon fireplace#rooftop pool#outdoor fireplaces#rooftop deck#artificial turf#medium wood
0 notes
Photo

Deck Uncovered in San Francisco Example of a small, modern rooftop deck without a cover
#rooftop pool#patio furniture#medium wood#artificial turf#white stucco#wooden outdoor table#glass railing
0 notes
Photo

Deck Uncovered San Francisco Without a cover, a small, trendy rooftop deck image
0 notes
Photo

London Decking An example of a mid-sized modern partial sun backyard landscaping with decking in summer.
0 notes
Photo

San Francisco Contemporary Deck Small trendy rooftop deck photo with no cover
#wooden outdoor table#ribbon fireplace#rooftop pool#outdoor fireplaces#rooftop deck#artificial turf#medium wood
0 notes
Text

The true rich life 🌿🌱🍃
#lifestyle#peaceful nature#nature lovers#cabin in the woods#wooden table#outdoor breakfast#lakelife#rich life
47 notes
·
View notes
Text

#Photography#Nov. 2018#Outdoors#Distance#Washington Lake Park#Autumn Leaves#Pile of Leaves#Autumn#Pavillion#Picnic Tables#Benches#Trash Cans#Grills#Stadium#Metal#Rust#Shingles#Roof Tops#Walking Trail#Bike Trail#Pathway#Wooden Signs#Vehicles#Woods#Planted Trees#Pine Trees#Bare Trees#Bare Branches#Sky#Grass
15 notes
·
View notes
Text


Break area for trolls.
Special thanks to @neon_ginger on Instagram for pulling over upon spotting this one and for taking these pictures.
#picnic table#picnic tables#picnictable#picnictables#exploration#outdoors#photography#art#solitude#nature#autumn#fall#trail#bridge#wooden bridge
10 notes
·
View notes
Text
How to Care for Wooden Tables: Maintenance Tips for Australian Homeowners
Caring for wooden tables is essential to maintain their beauty and longevity, especially in the diverse climate of Australia. Here are some valuable maintenance tips tailored for Australian homeowners to keep their wooden table in top condition.
Regular Cleaning: Start by regularly dusting your wooden table with a soft, lint-free cloth to remove surface dust and debris. For deeper cleaning, use a slightly damp cloth or microfiber towel to wipe down the table. Avoid using harsh chemicals or abrasive cleaners, as they can damage the wood finish.
Protect from Sunlight and Humidity: Wooden tables are sensitive to fluctuations in temperature and humidity, which can cause the wood to expand, contract, or warp over time. Place your table away from direct sunlight and heat sources to prevent fading and drying out. Use coasters, placemats, or tablecloths to protect the surface from spills and heat damage.
Maintain the Finish: Regularly apply a high-quality wood polish or wax to nourish and protect the finish of your wooden table. Choose products specifically formulated for wood furniture and follow the manufacturer's instructions for best results. This helps to maintain the natural luster of the wood and provides a protective barrier against moisture and stains.
Address Spills Promptly: Accidents happen, so it's essential to address spills and stains on your wooden table promptly. Blot spills immediately with a clean, dry cloth to prevent them from penetrating the wood. For stubborn stains, use a mild dish soap diluted in water and gently dab the affected area. Avoid rubbing or scrubbing, as this can damage the wood.
Professional Maintenance: Consider professional maintenance for your wooden table periodically to ensure its long-term durability and beauty. Professional furniture cleaners and refinishers can deep-clean, repair, and refinish your table as needed, restoring its original beauty and extending its lifespan.
For premium-quality wooden tables crafted with precision and care, explore TK Tables' collection at www.tktables.com.au. Our range of wooden table features exquisite designs and superior craftsmanship, perfect for elevating any Australian home. Contact us today to find the perfect wooden table for your needs.

#wooden table#wooden table online australia#wooden table in australia#australian wooden table#how to maintain wooden table#wooden table maintenance tips#wooden outdoor table#wooden table furniture#tk tables#tk tables wooden table
0 notes
Text

Two wooden benches and a wooden table. Outdoor furniture.
Photography.
#outdoor furniture#wooden#benches#table#tables#made of wood#wood#photography#photo#photos#picture#pictures#image#images#a photo#a picture#an image#photograph#photographs#a photograph
2 notes
·
View notes
Photo

Nashville Traditional Sunroom Sunroom - large traditional medium tone wood floor and brown floor sunroom idea with no fireplace and a standard ceiling
2 notes
·
View notes
Text
@kittyloveturntup

4K notes
·
View notes
Text
Make Your Event Stand Out with Bar Tables in Sydney
Planning an event in Sydney? Whether it's a casual party, corporate gathering, or wedding, bar table hire Sydney can elevate your event’s style and functionality. Choosing the right bar tables not only enhances the atmosphere but also creates convenient spaces for guests to mingle and relax. Here's a guide to why bar table hire is a must for your next event.
Why Bar Tables Are Essential for Events
Bar tables bring versatility to any setup. These sleek and stylish tables are perfect for standing cocktail events, informal conversations, or simply adding a modern touch to the decor. Bar table hire Sydney offers options that fit all themes, from rustic to contemporary.
Beyond their aesthetic appeal, bar tables are practical. They save space while ensuring your guests have a comfortable spot to place drinks and snacks. Whether you're hosting indoors or outdoors, bar tables are an effortless way to add charm and functionality.
How to Choose the Right Bar Tables
Match the Event Theme: Go for wooden bar tables for a rustic vibe or metal/glass tables for a chic, modern look.
Consider the Guest Count: Ensure enough tables are available to accommodate guests without overcrowding.
Outdoor or Indoor Setting: Select weather-resistant options for outdoor events to avoid last-minute surprises.
With bar table hire Sydney, you’ll find a range of customizable options to suit any occasion.
Add Style and Convenience with Event Hire Sydney
Looking for a trusted provider? Event Hire Sydney has you covered. From elegant bar tables to other essential furniture, they make it easy to create a seamless event setup. Transform your vision into reality by choosing high-quality furniture that enhances the guest experience.
When you select bar tables for your event, you’re investing in comfort, style, and functionality. Make your next party or celebration memorable by choosing the right setup that guests will talk about long after the event.
Bar tables are the perfect addition to any event in Sydney. With their style and versatility, they help create an inviting atmosphere while keeping things practical. Whether you’re organizing a small gathering or a grand celebration, bar table hire Sydney is the key to making your event stand out.
#Planning an event in Sydney? Whether it's a casual party#corporate gathering#or wedding#bar table hire Sydney can elevate your event’s style and functionality. Choosing the right bar tables not only enhances the atmosphere but#Why Bar Tables Are Essential for Events#Bar tables bring versatility to any setup. These sleek and stylish tables are perfect for standing cocktail events#informal conversations#or simply adding a modern touch to the decor. Bar table hire Sydney offers options that fit all themes#from rustic to contemporary.#Beyond their aesthetic appeal#bar tables are practical. They save space while ensuring your guests have a comfortable spot to place drinks and snacks. Whether you're hos#bar tables are an effortless way to add charm and functionality.#How to Choose the Right Bar Tables#Match the Event Theme: Go for wooden bar tables for a rustic vibe or metal/glass tables for a chic#modern look.#Consider the Guest Count: Ensure enough tables are available to accommodate guests without overcrowding.#Outdoor or Indoor Setting: Select weather-resistant options for outdoor events to avoid last-minute surprises.#With bar table hire Sydney#you’ll find a range of customizable options to suit any occasion.#Add Style and Convenience with Event Hire Sydney#Looking for a trusted provider? Event Hire Sydney has you covered. From elegant bar tables to other essential furniture#they make it easy to create a seamless event setup. Transform your vision into reality by choosing high-quality furniture that enhances the#When you select bar tables for your event#style
0 notes
Text
Is It Worth Investing in Music Play Panels?
Music is a great way to make kids learn and grow. With the help of music, children can develop their cognitive skills, boost their creativity and make them emotionally intelligent. Music also helps them become more social by participating in different music activities, making them confident and active. Music also has therapeutic advantages and makes kids culturally aware. Music has divine powers to heal all the chaos that makes us anxious. Most importantly music helps children to learn with fun and keeps them engaged in different learning activities without getting bored. Music also makes them confident and develops imagination power. With the help of music, education becomes interesting and fun-loving for kids. Music can develop social skills, communication, coordination, confidence, mental happiness and many more, which will benefit them throughout their lives. Music Play Panels are interesting and amazing musical equipment which can make children create their music, have fun and learn interactively. In this activity, kids play the music created on their own and they participate in groups or individually. This builds teamwork and coordinative skills among them.
#Rubber mulch#Artificial grass#Play Tables#Picnic Tables#Bike trails#Sports fencing#Music Play Panels#Outdoor Activity Equipment#Wooden Sheds#Daily Mile#Clamber Stacks#Timber Play
0 notes