#tap on the tags below for more options/sections and for easier findings!
Explore tagged Tumblr posts
Text


MASTERLIST & fandoms

#.MAIN-TAGS : ARCHIVES.
all following are tagged by #🔖.chronicles {collection of series} and arranged by fandoms.
[gi.] GENSHIN IMPACT
[hsr.] HONKAI STAR RAIL
[bsd.] BUNGO STRAY DOGS
[jjk.] JUJUTSU KAISEN
[bllk.] BLUE LOCK

requests status currently on-HOLD! although, thirsts are always OPEN!


#.OTHERS—MISC. !
misc. / miscellaneous are the various! MANHWAS & others section, which are not usually updated nor written about; fandoms im currently in.
#.intkot 【IM NOT THAT KIND OF TALENT!】
#.totcf 【TRASH OF THE COUNT'S FAMILY】
THE ONLY ENDING FOR A VILLAINESS / VILLAINS DESERVE TO DIE
#.utot 【UNDER THE OAK TREE】
#.twst 【TWISTED WONDERLAND】
last updated : 2/6/24 | 16:09 — no new updates.
©nhoirr 2024 — DO NOT COPY, TRANSLATE NOR PLAGIARIZE ANY OF MY WORKS!

JST — YOKOHAMA.
#MASTERLIST#NAVIGATION#tap on the tags below for more options/sections and for easier findings!#🔖.chronicles {collection of series}#.🏷.VOGUE {popularly/requested & au's}#🗞.from the wall — headlines. 📰 {fics&works}#💿. albums {musical-based-series&mini-series}#.teasers#📽.FILM : 🎞.omitted-scenes {writings-that-didn't-make-the-cut}
8 notes
·
View notes
Link
0 notes
Link
0 notes
Text
Find The Word Tag (Larger than any word Mary Poppins could come up with)
I let them get away from me and now I have a billion (86!) words :D These words are courtesy of @indecentpause @forlornraven @reeseweston and @riftversus
Basically to make this easier on myself (I say after delaying so bloody long and accumulating so many words) The Games We Play is going to be in bold and Dark Magic will not.
Shall I tag people? I think so! TAGGING: @reeseweston @indecentpause @forlornraven @riftversus @type-writings @westywrites to find: Curse, figure, blunt, ache, flower, worn, clear, melody, music, game. (feel free to pick from the mammoth list below too!)
Words: oven, blanket, lake, wings, candle, cat, comfort, strange, gone, manage, book(s), sculpt, dress, smile, want, hungry, leaf/leaves, hand, night, circle, spun / spin, face, please, handle, palm, cough, inch / inched, edge, habit/habits, teeth, center, eight, refuse/ refused/refusing, between, autumn, fire, round, fence, dusk, close, drop, grip, away, warm, over, score, thunder, growl, throw, slide, faint, dirt, hard, love, proud, round, shake, tower, anchor, next, grasp, fall, year, lost, time, edge, front, above, plant, break, tomorrow, yesterday, hug, end, suffer, year, sun, play, type, strap, swing, crown, beautiful, bright, mother, glass.
oven: Nope
blanket: Nope
lake: The surface of the lake rippled upon impact. Though small, it was one of the larger bodies of water the city had to offer.
wings: Caden sat steadily on the branch, his eyes tracking the tiny bird hovering in front of him. Its wings beating faster than Nathaniel’s heart.
candle: Nope
cat: “You came alone then?” Zachary nodded. “Are you going to come down and talk to me?” Without a word and with a grace Lukas would have expected from the cat, Zachary made his way down the fire escape.
comfort(able): Zach slipped his arms into the jacket properly and tapped Lukas’s knee. He obliged, moving his legs apart and Zach settled between them, leaning against Lukas’s chest. If he was being forced to sit on the ground at least he’d be comfortable.
strange: For the first time in a long time, Zach felt content. With his head on the pillow and Lukas’s fingers tracing strange, and probably random, patterns across his back, the tension of the past six months eased just a little.
gone: [Kayla] kicked a large chunk of porcelain, that looked like it had once belonged to a mug. “You should be thanking me. If I hadn't shown up when I had they'd be gone, and we'd have lost the contract. Then Sevrin really would kill you.”
manage: [Cal] chuckled and dropped their arm. Zach spun around, wrapping them in as tight a hug as he could manage. “Good to see you, Cal.”
book(s): The story was a fair way into the book and only a handful of pages. Zach tried to follow the words as Lukas read them, but each time he turned the page long before Zach reached the end, so he settled for listening to the low melodic hum of Lukas’s voice.
sculpt(ed): Zach wandered down the garden path, gravel crunching underfoot. He stopped by one of Cal’s sculpted shrubs, spotting Axel sitting alone on one of the benches, his ever-present coffee cup nowhere to be seen.
dress: A slight woman in a patchwork dress, picked her way through the wreckage. She knelt in front of him, whispering calming words, wiping the soot from his cheeks. Zach didn't need to hear what she was saying, he simply watched her kiss the fire from his palms without flinching and scoop him up.
smile: She shot him a brief but tense smile and shuffled the papers in front of her, pulling one from the middle. “Are you aware of the charges against you, Mr. Donovan?”
want: Nathaniel sighed. Finding a foothold halfway down the wall, he eased himself back to the ground. “What could my stepfather possibly want at this hour of the morning?”
hungry: “Come on. I know you haven't been eating. You must be hungry?”
leaf/leaves: (cheating a little) Keeping his eyes on the beast before him, Lukas considered his options. He could stay and wait for it to finish him off, or he could run and still risk being mauled to death. Either way, he doubted he’d be able to jump anywhere in time. Instead, Lukas let a thin strand of shadows curl from the palm of his hand, figuring he could bind the panther and leave without hurting it.
hand: “Thomas!” Caden rushed the cell, hand outstretched. Their fingers barely met before something wrapped around Caden's neck and threw him to the ground.
night: Benjamin frowned, handing Nathaniel his discarded jacket. “That boy they caught last night, he's to go in the arena against more than a dozen infected.”
circle(d): “Too many,” Zach muttered. He circled a large cluster of names. They’d been killed relatively close together and Zach was convinced they were connected. The other names, from earlier years, he couldn’t make sense of.
spun/spin: “Wait!” Lukas took a deep breath and held the knife over his hand. He glanced up at Zachary, who'd spun around, watching the shaking tip of the blade. Lukas brought the knife down, hissing as he dragged it across his palm. Blood began to pool in his hand and he watched it, breathing through the sting.
face: Nathaniel groaned and leaned back towards safety. The ground was higher up on the Limbus side of the wall and he could easily see the scowl on Benjamin's face.
please: “Thomas? Thomas, say something.” Caden stretched through the bars his fingers barely grazing Thomas's disheveled hair. “Please …?”
handle: [Caden] welcomed the silence that followed her departure. The dead were so much easier to handle than the living.
palm: “Cut your hand.” Zachary held up his own hand, pointing to a spot just above the center of his palm. “Right here.”
cough(ing): He fumbled through the cupboards for a glass, still coughing.
inch(ed): “No.” Zach inched away. He couldn’t fight back and Lukas knew it. Any spell he cast would render him unconscious and he’d most certainly wake up with that thing clamped tight around his wrist again. This way he had a chance.
edge: Zach took a breath, his eyes stinging at the thought that someone could care this much and go to so much trouble. He sat down on the edge of the bed and buried his head in his hands.
habit(s): His knees buckled and hit the ground. Johnathan’s shadow fell across him. Caden kept his head bowed, whether from habit or exhaustion he wasn’t prepared to know.
teeth: With his teeth, he undid the knot on his bracelet. He didn’t want to use it, but desperate times called for desperate measures. He could fix it later. Undoing just enough of the bracelet he tore a small piece from it and shoved the rest in his pocket.
center: [Caden] pulled on the first draw. For a second he thought they were locked, but he gave it a hard tug and the draw came unstuck, rattling to the end of the tracks. Little letters lined the center of each section. He skimmed the lines and found the letter he was after. Some garbage about renewable energy sources for Limbus, not that any of it would ever be put into action.
eight: “I'll explain later. Just find it. The code is five eight five two seven.” Zach reached for the key around Lukas’s neck. The chain was gone.
refuse(ed)(ing): Nope
between: “What?” Zach looked between the eight council members, none of them prepared to show him any sympathy, or mercy. “No. No you can’t! I’ll die!”
autumn: Nope
fire: [Zach’s] aim sucked but the fire was large enough that if he missed he’d save the wolves the trouble of killing him and die of embarrassment instead. He inched towards the edge of the clearing, making sure he was still concealed by the shadows, and lobbed the pouch into the air.
(a)round: Caden pressed himself against the metal, curling his fingers around the bars. “I promise, I’m gonna get you out of this, okay?”
fence: Nope
dusk: Nope
close: Zach doubled over, whimpering at the pain coursing through his body. Lukas leaned down and scooped Zach up, cradling him close. He turned back to Emily. “Get Sophia set up in the guest room. I’ll be there in a moment.”
drop(ping): “No, I mean me. You're not supposed to be here. Remember?” He held out a hand, eyes dropping to where he knew she'd concealed the gun.
grip: Zach tugged his arm from the Shadow’s grip and moved closer to the bar. “Since I no longer have a place of residence, consider me surprised.”
away: “Hey.” Zach pulled his attention away from the marks. “You don’t need to treat me like I’m fragile, okay? I can take a hell of a beating before I break. These,” he indicated to the bruises, “aren’t the work of someone who hates me.”
warm: Lukas dropped Zach's wrists. One hand moving behind his head, the other snaked under his shirt pressing against the small of his back pulling him closer. The contact sent a shiver up his spine and his body buzzed. For the first time in months, he felt warm.
over: “Mr Abernathy, prompt as usual.” Zach looked for the speaker. All eyes appeared to be on the council woman at the centre of the line. She turned her attention to Zach, peering over the top of her glasses. “And the ever-elusive Mr Donovan. We meet at last.”
score: Nope
thunder: Nope
growl(ed): “Lukas,” Zach growled, “we will die here if you don't unlock this.”
throw(n): “Oh, Zach.” [Sammy] rested a hand atop the monitor, flicking the switch. The screen buzzed to life, static cutting the silence. Zach squinted down at the over-exposed image. In the centre of the screen lay a twitching figure. Their head thrown back in a silent scream. The image darkened, light no longer flooding the screen. Zach lurched forward pressing his hand to the glass. “I found your little friend trying to break in. Seems he’s rather fond of you. Well, almost as fond as I am.”
slide (I got a lot of slid but not slide, so have some slid): Lukas pulled several books halfway off the shelf before finally finding the right one. He slid it across the table. “You sure you’re good to do this now?”
faint: Nope
dirt: He scanned the pack and found his target on the furthest edge of the clearing. On her wrist was the reason he was crouched in the dirt. A thin bracelet woven from thread that shimmered in the firelight, changing colour every time the light hit it. It was all the proof Zach needed of her guilt.
hard: Axel closed his eyes, breathing hard. “You can’t promise that. You don’t … you don’t even remember!” Axel wobbled precariously, his foot slipping before he regained his balance.
love: Sammy ran a hand under Zach’s chin, lifting his head forcing Zach to meet his gaze. “Now, who do you love?”
proud: Johnathan crouched beside the post. “Not so proud now, are we?”
(g)round: Nathaniel groaned and leaned back towards safety. The ground was higher up on the Limbus side of the wall and he could easily see the scowl on Benjamin's face.
shake: Nope
tower(ed): “Not used to healing normally?” Lukas peered over the top of his book. Somehow, the stack in front of him had grown in the last hour and now towered precariously above them both.
anchor: Nope
next: “You so much as bring a spider into this apartment I will kick your ass from here to next Sunday.”
grasp: His skin crackled with the absence of his magic. The more he fought the block, the worse it affected him. But he didn’t care. He just wanted it to stop. Lukas was there, prising his fingers away from the band, holding them tight in his warm grasp.
fall: “Dark Magic is not something you want to fall victim to, by an enemy or a lover.”
year: A year of searching for him and now the only thing that stood in the way was the cold metal bars. Caden longed to close the gap between them. To know he wasn’t hallucinating or in some kind of cruel dream.
lost: Lukas had lost contact with Zachary after their first meeting. He’d begun to suspect the worst when Lyra showed up at his door, closely followed by the young witch himself.
time: The councilwoman held up her hand, silencing them both. “Tragedy aside, it does not excuse your actions. You’ve admitted your guilt and while the council has taken into account all factors, we hereby sentence you to two years imprisonment, during which time your powers will be left under a block.”
edge: “Chasing down another lead. Got stuck on the edge of the Glitch dealing with infected.” Caden nudged the nearest body with his toe. “You leave anyone alive this time?”
front: “Fair point.” Zach knelt in the grass staring straight ahead. If his hunch was right, and he was sure it was, the coven would be somewhere in front of them. He released the mouse and watched it stagger before running forward. Keeping his eyes on the mouse he straightened up and asked, “How many witches have you dealt with?”
above: This facility hadn't been authorised for anything Infected related. Caden reached for the file only to stop, hand hovering above the paper.
plant: Nope
break: No, he was labelled a murderer the second people saw him. He’d naively thought he’d get a break from the accusatory staring with Lukas.
tomorrow: Nope
yesterday: Nope
hug: Lukas dropped his hands and pulled Zach into a hug. Zach tensed.
end: He pulled on the first draw. For a second he thought they were locked, but he gave it a hard tug and the draw came unstuck, rattling to the end of the tracks. Little letters lined the center of each section. He skimmed the lines and found the letter he was after. Some garbage about renewable energy sources for Limbus, not that any of it would ever be put into action.
suffer: “Have you heard the story about the witch and her shadow? Of course, you have. It's the reason your people suffer, after all. She loved her Shadow. Whoever said opposites attract was a fool or a liar.”
year: “What was I supposed to say? That I'm doing her uncle on the regular? I don't think that's really appropriate conversation for a five-year-old.”
sun: “A shadow who loves the sun, who would have thought.”
play: “These are the games we have to play to survive.”
type: Em smiled. It was a kind smile, the type only a mother could give. “Come into the kitchen, we’ll let these two talk a moment.”
strap: Nope
swing(ing): “No. Neither is Sophia.” Emily smiled at her daughter. Sophia was swinging her legs, scribbling across her colouring books, not paying the slightest attention to their conversation. “I’m a telepath. But you already knew that.”
crown: Nope
beautiful: Caden hovered in the door listening to the melody Nathaniel coaxed from the piano. As beautiful as it was he couldn’t let it continue. Caden cleared his throat and the sound faded.
bright(est): “It’s a big one.” Zach had to admit, it wasn’t his brightest moment. Every other book was what anyone would class as ‘big’. To save himself further embarrassment he added, “It chronicles all witch deaths. There’s probably a few volumes.”
mother: “And who do you think taught your mother that recipe?” Mr Abernathy shouted from sitting room.
glass: The cell didn’t offer much in the way of privacy, with four glass walls and constant fluorescent lights shining down on him, his pain became a spectacle for everyone who hated witches.
#Tag games#still the best game#sorry there's not much new content#I don't know how FOUR of you did this much damage#JohnathanMontgomery
10 notes
·
View notes
Text
How To Remove At Post 107
If you’d rather delete all of the posts, however, tap to select the all checkbox. Using web parts on sharepoint online pages.
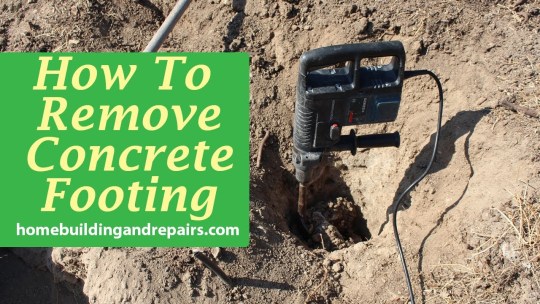
How To Remove Old Concrete Fence Post Footing Greg's
Just try to remember below the key points.
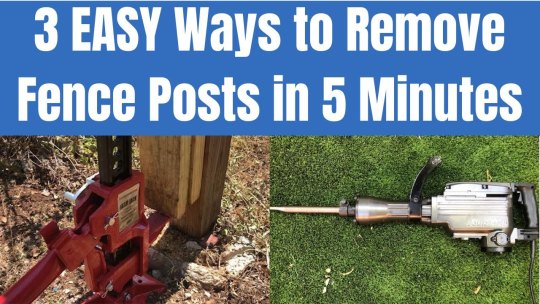
How to remove at post. Then, fill the trench with water to loosen the soil so it's easier to get the post out. Besides, instagram also allows us to hide like count. Ensures any meta/misplaced data gets cleaned up.
Enter your desired default category name in name; Only mods/admins have the ability to delete posts. Luckily, there is a way to remove all the likes from your facebook account.
In the top left, click back , then edit your post. How do i archive or delete this post and thread from the channels feed? Click the see all your jobs link near the top right.
Discover more office training at linkedin learning Deleting posts manually might be fine if you’re only concerned about a few, but it’ll take you forever to go through your entire post history this. If you have multiple locations, open the location you want to manage.
All your saved posts will be selected, you can uncheck the ones you. From delete to archive to share. click edit. scroll down to the edit option and you're well on your way to. Select set date and time.
Actually, there’s a way you can also remove all facebook posts without deleting your account ,. Removes the post from your timeline, not facebook. // use wp_delete_post (via wp_delete_post_revision) again.
To mass delete instagram posts shown on the screen, press the blue ‘select all posts‘ button and hit the red ‘delete. Select delete and then select delete once more to confirm the deletion. If you were instead looking to delete posts and messages only from your end to declutter the channel, you cannot do it.
That tag will no longer appear on the post or photo, but that post or photo is still visible to the audience it's shared with. Go to post → categories in your wordpress dashboard; You have no authority over the content posted by someone else, not even to delete it only from your side.
You can edit or delete a post you've already shared on workplace. If you want to permanently delete the post, need to click on the 'delete' option placed at the bottom of the 'shown on profile' option. To publish your edits, in the top right, click publish.
You can only delete your instagram posts if you’re accessing them from the same account. You can delete any posts you’ve sent in a channel in microsoft teams and no one in the team will be able to see it anymore. If you're looking to get a fresh start on your twitter account without losing your username, the best way to do this is to create another account with a temporary username, and then switch the username between your current account and the new.
When you remove a tag, keep in mind: To remove the post or photo from facebook, you can ask the person who posted it to take it down. Under the name of a blog, click posts the title of the post you want to publish.
Use the news web part on a sharepoint page. Select your desired default category in the list; Here are the steps i could find:
Once both of these are on you should be able to delete all messages on that team assuming you are an owner. I don't want my channel to get cluttered with old information that we no longer need. You can only delete tweets manually, one by one.
Next, rock the post back and forth to start to loosen it in the hole. Click close from the choices in the line under the job information. That needs enabled and slot need to make sure it’s enabled on the specific teams settings tab.
This will bring you to your instagram account. Keep your team updated with news on your team site. Select either archive or recycle bin at the bottom to archive or prepare the posts for deletion.
If you have a post you want deleted, you may contact the moderator of that section to discuss it with them. To make an archived post visible again, simply select the post and tap the three dots in the upper right corner again. Find the post and click in the top right.
Jul 13, 2012 at 9:28 pm. Choose the post you want to remove. This will give you a few options:
How to remove a post using a jackplease subscribe to my channel click the bell icon to be notified when i post a new videoclick on the thumbs up icon to like. To remove a news post on your site, select pages. Click jobs at the top of your homepage.
To delete multiple posts on instagram, select them, and when ready, click on the red ‘ delete selected posts ‘ button. Navigate to add new category; Tap the profile button on the bottom right.
Removes the post from facebook entirely. Select delete post or hide from profile from the dropdown menu. Like the facebook website, you can select individual posts to delete or archive by selecting the checkbox next to each post.
People may be able to view the post or photo in places like news feed or search results. There is an option in messsging policies in the teams admin center that allow owners to delete messages in a team. Go to settings → writings;
Find the job you wish to close. Using the report function will also bring it to their attention.
0 notes
Text
Microsoft Office For Mac Sp3

After releasing their Office 365 subscription service and Office 2013 earlier today, Microsoft has released a critical update for Office for Mac 2011. The Office for Mac Service Pack 3 (14.3) update contains a number of bug fixes, and adds support for Microsoft’s new Office 365 subscription program.
From the release notes:
Start quickly with the most recent versions of Word, Excel, PowerPoint, Outlook, OneNote and OneDrive —combining the familiarity of Office and the unique Mac features you love. Work online or offline, on your own or with others in real time—whatever works for what you’re doing.
Office XP Service Pack 3 (SP3) provides the latest updates to Microsoft Office XP. SP3 contains significant security enhancements, in addition to stability and performance improvements.
Microsoft has released an update for Microsoft Office for Mac 2011. In addition to the application improvements mentioned in this article, Office for Mac 2011 is now available as a subscription offering. For more information about subscription, see the Frequently Asked Questions.
Save On It provides Microsoft software at the cheapest price - complete with 24/7 customer support and advice. We provide you the software you need at the lowest prices, guaranteed!
This update provides the latest fixes to Office for Mac 2011. These include the following:
Meeting invitation times are displayed inaccurately in Outlook for Mac Fixes an issue that causes meeting invitation times from non-Exchange calendar servers to be off by one hour during certain times of the year.
Slides in collapsed sections cover other slides in Slide Sorter view in PowerPoint for Mac Fixes a display issue that involves collapsed sections in Slide Sorter view.
Hash tags (#) in hyperlinks aren’t saved correctly in PowerPoint for Mac Fixes an issue in which hyperlinks that contain hash tags (#) aren’t saved correctly.
Crash occurs when you use Paste Special with a partial table in PowerPoint for Mac Fixes an issue that causes PowerPoint to crash when you use the Paste Special option to copy and paste part of a table.
RTF text that’s saved in PowerPoint for Windows can’t be pasted into PowerPoint for Mac Fixes an issue in which RTF text that’s saved in PowerPoint for Windows can’t be copied and pasted into PowerPoint for Mac.
Microsoft Office 2011 for Mac Service Pack 3 is available now through Microsoft AutoUpdate, as well as direct download from Microsoft’s website.
Make your Mac invincible
Get Setapp, a toolkit with fixes for all Mac problems
Since its initial release nearly 30 years ago, Microsoft Office has become one of the world’s most popular productivity suites. With programs like Word and Excel for Mac, it’s no wonder that the MS Office suite is a must-download on any computer.
Microsoft Office for Mac 2019 includes the most modern versions of Word, Excel, Powerpoint, Outlook, and OneNote. These apps are all available for download at the Mac App Store. Alternatively, with Office 365 for Mac, you can work online or offline and collaborate with others in real time, which is especially useful for any kind of team work.
Get a perfect alternative for MS tools on Mac
Try Setapp, an all-in-one toolkit that covers apps substituting Microsoft’s Visio, Project, and Publisher. All in a single spot on your Mac.
If you’ve been asking yourself questions like “what is Office 365 for Mac” and “how much is Microsoft Office?” — the guide below will help dispel your confusion. Besides, do you know how you can download Microsoft Office?
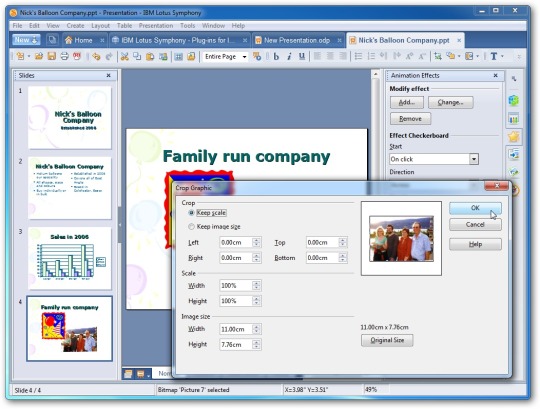
How To Download And Install MS Office For Mac
As mentioned above, Microsoft Office suite and all of its apps — Word, Excel, Powerpoint, Outlook, OneNote, and OneDrive — are now available at the Mac App Store. This makes it easier than ever to get the most current versions of MS Office for Mac (note that you’ll need an Office 365 subscription to use these apps). There is also a Microsoft Office trial available that allows you to use Office 365 free for one month.
To buy Microsoft Office outright, visit office.com. At the Office home page, select Install Office. Then follow the instructions for the installer file that has been downloaded to your computer.
System requirements to download Microsoft Office
Before downloading Office for Mac, make sure you have the fitting system requirements that allow for the best experience with Microsoft apps. For example, Microsoft Office suite always supports the latest three versions of macOS. Currently, it’s 10.14, 10.13, and 10.12.
As new versions of macOS are released, Microsoft shifts its support to the newest ones. While your Office apps might still work on older unsupported versions of macOS, you won’t be able to get security or feature updates.
To run Microsoft Office at the moment, you’ll need macOS 10.12 (Sierra), 4 GB RAM and 10 GB of available disk space.
The difference between Office 2019 and Office 365 for Mac
You can still buy Microsoft Office without getting into a subscription. The downside is not getting continuous feature updates, which will in turn be bundled altogether in the following year’s release.
Office 365, on the other hand, is based purely on a subscription model and powered by Microsoft’s cloud service. It frequently receives updates and provides full access to the whole suite of services.
How much is Microsoft Office?
As MS Office for Mac is available in two versions — a one-time payment and subscription — there are two prices. If you want to buy a license for Office Home and Student 2019 for Mac, which includes Word, Excel, PowerPoint, and OneNote, it will cost you $149.99. If you’d like to use Microsoft Office Outlook, you’ll need to purchase the Office Home and Business 2019 for Mac at $249.99.
For the subscription model, Microsoft Office 365 for Mac, you pay a month-by-month or yearly fee. And as new versions are introduced, you automatically get them as part of your subscription. Office 365 for Home costs $99.99 a year or $9.99 a month.
What about MS Office vs. iWork
Apple’s free iWork has a great price advantage over the MS Office suite, but is it better than all the Microsoft’s popular productivity apps?

iWork includes Keynote, Pages, and Numbers, but is generally best suited for smaller businesses or home use. Additionally, if you already use Microsoft Office extensively at home or work, being able to switch between Macs and PCs gives Microsoft Office Suite a big plus.
Microsoft Office is known for having a slight edge for ease-of-use and is packed with more features. The latest version of the suite also looks brand new compared to iWork’s currently outdated version. As Microsoft Office continues to learn the macOS, it continues to grow.
MS Office Touch Bar features
Trackpad and Touch Bar, unique to MacBooks, have made great new features available on Office for Mac.
In Microsoft Word for Mac, you can use the Touch Bar to insert hyperlinks, comments, or photos right in the text editor. It’s especially great when you’re working in Word Focus Mode without access to the controls on the screen.
In Excel for Mac, using the equal sign on your keyboard will launch most recently used commands on the Touch Bar. Then you can select a range of commands or perform specific actions.
In Microsoft Office Outlook, Touch Bar makes recent files appear when you’re composing an email. From here, you can attach relevant files with a single tap. In Outlook’s Today view, you can use the Touch Bar to get a quick look at your daily calendar events or launch a Skype call.
During slideshow presentations in Powerpoint, you can use the Touch Bar to view specific controls. The function integrates slide thumbnails and includes a timer to make moving through your presentation on time a snap.
Great Substitutes For MS Project, Visio, And Publisher
If you’ve used MS Office tools on Windows before, you may have noticed that some of them aren’t available on Mac, specifically Microsoft Project, Visio, and Publisher.
The good news is you can easily substitute lacking MS Office apps with Setapp.
Take care of your publishing needs
With Microsoft Publisher for Mac currently unavailable, you need an app that is easy to use but, at the same time, delivers professional results when you’re looking to put together greeting cards or self-publish a magazine. Enter Swift Publisher.
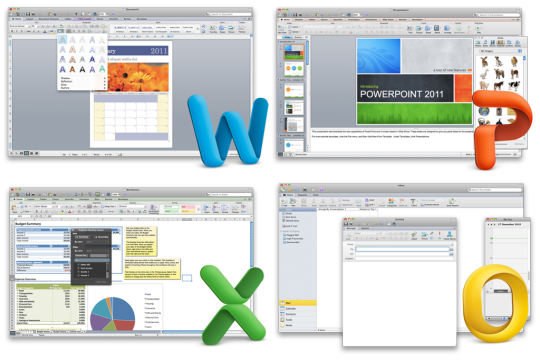
Swift Publisher has a robust set of design tools that allow you to apply gradients, draw freehand shapes, and control different aspects of your design layout at once. The app also features an extensive graphic library with over 2,000 pieces of clip art and 100 image masks.
Make publishing easy with Swift Publisher’s support for exports to a variety of digital formats, including social media. You’ll find that quickly Microsoft Publisher for Mac will become a thing of the past.
The best alternative to Microsoft Visio
With the need to create flowcharts, diagrams, and organizational tables for your projects, you may miss Microsoft Visio. Fear not. You can easily brainstorm and create long-term plans with iThoughtsX instead. Even better, you’ll never lose important information with its built-in cloud integration.
iThoughtsX lets you visualize an idea, track to-dos along with deadlines, and check on the team's progress. You don’t have to interrupt your workflow at all, as this app supports multiple file formats that can store your ideas in .rtf, .txt, Microsoft Word (.docx), .csv, MindGenius (.mgmx), MindNode (.mindnode), .opml, and more.
Plan projects with Merlin Project Express
Merlin Project Express will help you plan both home and professional projects. It’s a great solution for managing budgets and resources available for any endeavour.
Just like Microsoft Project for Mac, Merlin Project Express lets you create tasks, manage dependencies, and track progress with ease. You can also come up with project templates to streamline your workflow, set daily goals, and visualize the timeline. Consolidate all information in one place with project info at hand by attaching emails, images, costs, and notes.
Best of all, three substitute apps: Swift Publisher, iThoughtsX, and Merlin Project Express are available on Setapp, a platform of more than 150 Mac apps and utilities that you can use at home and work to improve all aspects of interacting with your Mac. Get yourself a perfect complement to your Microsoft Office suite purchase and try Setapp free for seven days. Working smart doesn’t have to feel like a trade-off.
Microsoft Office For Mac Sp3 32-bit
Setapp lives on Mac and iOS. Please come back from another device.
Microsoft Office For Mac Sp3 64-bit
Meantime, prepare for all the awesome things you can do with Setapp.
Microsoft Office For Mac Sp3 Iso
Read on
Microsoft Sp3 Update
Sign Up
Microsoft Office For Mac 365
Setapp uses cookies to personalize your experience on our website. By continuing to use this site, you agree to our cookie policy.
Windows Vista Sp3 Download Microsoft

0 notes
Text
Afterparty + Soundtrack Download For Mac

Jul 19,2019 • Filed to: Download Music • Proven solutions
In Afterparty, you play Milo and Lola, recently deceased best buds who suddenly find themselves staring down an eternity in Hell. But there’s a loophole: outdrink Satan and he’ll grant you re-entry to Earth.Milo and Lola are now dead, thirsty, and roaming the streets of Nowhere, the outermost. In AFTERPARTY, you are Milo and Lola, recently deceased best buds who suddenly find themselves staring down an eternity in Hell. But there’s a loophole: outdrink Satan and he’ll grant you re-entry to Earth. What adventures will you stumble through in the underworld? Every step is up to you. IMusic could be the best music downloader working on Windows PC and Mac. This free music downloader is designed for users to download music from the most widely used 3000 music sites (supported music sites are kept increasing).
I'm looking for best free iTunes music download sites, who can help?
If you are looking for best free iTunes music download sites, then keep reading this article since you will know of top sites that you can use. Across the Internet, you will notice that various websites have thousands of music that you can download, but you do not have an idea on which site to exactly use. We are going to review ten sites, which will make it easier to pick and use to download music.
Part 1. Best Free Music Downloader Websites to Download Music to iTunes
SoundCloud is the home of online music streaming sites as well as podcasts. SoundCloud allows you to follow people and explore the content they upload. On this website, you will find latest free music that you can download to your iTunes.
Pros:
It has tones of music libraries.
You can share music with your friends.
Cons:
Its search is not that good.
You can also find free music downloading for itunes on Free Music Archive. The music content is categorized to different genres like Blues, country, jazz, rock, pop and much more. You can also get top charts of all time or weekly and monthly charts.
Pros:
It curates music from other sites like 12Rec, and radio station thus providing huge library of music.
Cons:
It has few music library compared to other music sites.
NoiseTrade is another music site that you can visit and download music to your iTunes. The music files are well listed with song covers and titles.
Pros:
Songs are categorized to different genres.
It displays songs that are trending songs.
Cons:
You may fail to get songs of popular artistes.
Last.fm is another free music downloader for itunes that allows you to get free music downloads. When you click on “Free Music Download” button at the page, you will get a list of free music.
Pros:
You can stream live music.
It has a multilingual interface.
It displays newly released songs.
Cons:
Free music for downloads are limited.
If you want a site that you can explore different music genres as well as radio stations, then visit Jamendo. Its user interface is also very simple. You will also find a number of playlists. Download free palylist to iTunes is also available.
Pros:
Downloads are fast.
It has huge music libraries.
It supports sharing of music files.
Cons:
Not all music are free.
On BeeMP3 website you will be able to downloads tons of free music in MP3 format. Its search button is very responsive and it allows you to enter up to 5 keywords.
Pros:
It has popular music by popular artists.
You can stream music.
It is free to use.
Cons:
You can only download music in MP3 format.
MusOpen is also a free website that you can find free music without copyrights. This site also has free recordings and textbooks. The content is organized alphabetically for easy acess.You could get free iTunes music recorded from this websites.
Pros:
It has royalty free music.
You can browse music according to composer, year, performer and instrument.
Cons:
It just focuses on classical music.
This streaming music site allows you to download music in MP3 format. You can search for songs using keywords or paste URL link from other streaming sites like YouTube, very easy to download free music to iTunes.
Pros:
It displays bitrate of the song you want to download.
It allows one to play music.
It displays the source of the song such YouTube or Vimeo.
Cons:
It has annoying ads.
SoundClick allows you to browse and download music according to genres and top charts. This website has nearly all music genres such as pop, jazz, acoustic, metal, rock urban and much more. This website is not fancy, but trust me you will get nearly all the music that you want.
Pros:
It has a music store.
You can manage your stations.
You can stream music online.
Cons:
It user interface is not appealing.
You can also check on Audio Archive to get free audios and music recording of radios shows, podcasts and programs. On this free music download site, you can also get movies, images, data and concerts.
Pros:
It has thousands of free music.
You can also download podcasts.
It is easy to use.
Cons:
It focuses on old music thus you may fail to get latest music.
Part 2. Best Free Music Downloader for iTunes - iMusic
Having learnt about best websites that you can download music freely, it is essential to learn about a software that allows you to download free music from all these best download websites. An ideal software that not only supports ten websites but more than 3000 sharing sites is iMusic software. From these sites, you will be able to download music directly to your iTunes library. Once you have downloaded them, you will have the liberty to transfer the music files to your iOS device or your Android phone. Furthermore, iMusic allows you to download music as well as playlist from its inbuilt music library.
iMusic - Best Music Downloader to Download Music to iTunes
iMusic supports download of music from more than 3000 music sites including YouTube, Vimeo, Vevo, Hulu, etc.
It records music with ID3 tags being labelled automatically from online sites.
iMusic allows you to manage your iTunes library by deleting duplicates, erasing broken files, adding covers to your music.
It is built with a music toolkit, which enables you to rip CD music, convert music and form car playlist.
iMusic can also import music from your mobile device to iTunes Library.
Backup and recover the iTunes Library automatically.
Fix ID3 tags, like artist name, song title, year and genre automatically.
How to Download Music from Any Site to iTunes using iMusic:
Step 1. Launch iMusic software
On your computer, double-click on iMusic to open it and click on “GET MUSIC” icon.
Step 2. Select Music site
After clicking on “GET MUSIC”, you can then click on “DOWNLOAD” button. You will then see a list of sites below the copy and paste URL button. Scroll through and select any site that you want such Vevo. Next, search for the music file that you want and move to the next step.
Step 3. Select output format and Download Music
After that select the output format of your music and click on “Download” button. Once the file has been downloaded, you can locate them under “Library” icon.
There you go use iMusic software to get any music genre from the ten listed sites above. It is easy to use, and it has fast download speed. From these sites, you can also record music.
Bonus: How to Transfer Music from iPhone/iPod/iPad to iTunes Easily
Video Tutorial: iMusic- Transfer Music from iPhone/iPod/iPad to iTunes
Apple Music allows you to download tracks or entire albums for offline listening on the iPhone, Mac, and PC. But if you're crunched for storage on your device, it's best to stream Apple Music and only download select songs you listen to the most. That said, the Music app or iTunes can put a spanner into the works and automatically download songs and albums whenever you add them to your library. Annoying, right?

Below, we shall look at what you must do to stop Apple Music from downloading music automatically on the iPhone, Mac, and PC. The auto-download setting does not sync between devices over iCloud. So, you'll have to disable the feature on every device you want to stop downloads from happening automatically.
Disable Apple Music Automatic Downloads - iPhone
Apple Music has come a long way since its introduction on the iPhone in 2015. It's vastly improved in terms of navigation, pushes out better recommendations, comes with dark mode support, features a nifty auto-play feature, and more. You can stop automatic downloads in Apple Music on your iPhone by diving into the Settings app.
Step 1: Open the Settings app on your iPhone.
Step 2: Scroll down and tap Music.
Step 3: Turn off the switch next to Automatic Downloads.
Tip: You can also use the Optimize Storage option to impose a limit (4GB, 8GB, 16GB, etc.) on the amount of storage that Apple Music can use. You can use it with or without the Automatic Downloads option enabled.
Additionally, you can tap the Downloaded Music option to bring up a list of all downloaded music arranged by artist and album—you can then delete any listed item by swiping to the right and selecting Delete.
Now that you've disabled automatic downloads in Apple Music, you can tap the Download icon next to the album or track to initiate a download manually. Or, you can long-press an item and select Download on the context menu.
Also on Guiding Tech
What Does Apple Music's Web Player Do Differently And When Should You Use It


Read More
Disable Apple Music Automatic Downloads - Mac
macOS Catalina users need to use the dedicated Music app to stream Apple Music. Yes—Apple pulled the plug on iTunes after macOS Mojave. The new Music app is polished and much smoother to use. You can stop automatic downloads in Apple Music on your Mac by diving into the app's Preferences pane.
Note: If you use macOS Mojave or older on your Mac, skip to the next section to figure out how to disable auto-downloads in Apple Music on iTunes.
Step 1: Open the Music app. Then, tap Music on the menu bar and select Preferences.

After Party + Soundtrack Download For Mac Free
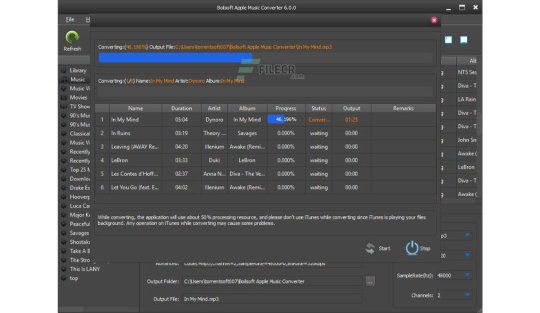
Step 2: Switch to the Downloads tab.
Step 3: Turn off the switch next to Downloads. Click OK to save your changes.
Tip: To remove a previously downloaded track or album, right-click the item and select Remove Download.
You can always download tracks and albums manually by clicking the Download icon next to each item or by right-clicking and selecting Download.
Also on Guiding Tech
#Apple Music='bp-purple>
Click here to see our Apple Music articles page
Disable Apple Music Automatic Downloads in iTunes - PC and Mac
Unlike on the Mac, you are still confined to listening to Apple Music on the PC via iTunes. If you want to disable automatic music downloads, you must head into the iTunes Preferences pane. The following steps apply to both the traditional desktop and the Microsoft Store version of iTunes. You can also use them to turn off auto-downloads in iTunes on macOS Mojave and earlier.
Step 1: Open iTunes.
Step 2: Open the Edit menu and select Preferences. If you use iTunes on the Mac, select iTunes on the menu bar and select Preferences instead.
Step 3: Switch to the Downloads tab. Then, uncheck the box next to Music. Click OK to save your changes.
Tip: If you want to remove a previously downloaded track or album, right-click the item and select Remove Download.
Despite turning off auto-downloads, you can still download tracks manually. To do that, click the 3-dots next to a track or album and click Download. Or, right-click an item and select Download.
Disable Apple Music Automatic Downloads - Android
If you use Apple Music (or plan to install it) on an Android smartphone, you do not have to worry about turning off automatic downloads. The app does not feature the ability to download tracks automatically—you can only do that manually.
Also on Guiding Tech
YouTube Music vs Apple Music vs Spotify: Which Is the Best Music Streaming Service
Read More
Go Manual
Even if storage isn't a concern, turning off auto-downloads in Apple Music gives you the freedom to decide what songs you want to keep on your iPhone, Mac, or PC. Auto-downloads also do not make much sense if you have access to a faster and/or cheaper internet connection.
Next up:Do you have issues while downloading tracks manually on your iPhone? Click on the next link to know how to fix that.
The above article may contain affiliate links which help support Guiding Tech. However, it does not affect our editorial integrity. The content remains unbiased and authentic.Read Next
After Party + Soundtrack Download For Mac Os
13 Best Ways to Fix the Apple Music Not Downloading Songs Issue on iPhone and AndroidAlso See#iphone #macos
Did You Know
MEMS gyroscopes became popular after the launch of the iPhone 4 in 2010.
More in Internet and Social
Top 8 Fixes for Prime Video Picture-in-Picture Not Working on Android and iPhone

0 notes
Text
Agilenano - News: My Favorite Home Gear.
*Heads up: Today (November 12th) only, Boll & Branch is offering 20% off sitewide! Discount is applied at checkout. I mention my beloved sheeting AND bed blanket below — great opportunity to buy for yourself or as a gift.
Like all of you, I have spent far more time at home than I have in my entire life this year, and it has given rise to some intense organization projects as well as a new appreciation for the absolute best gear at home. Below, sharing my favorite items for a comfortable and well-maintained home:
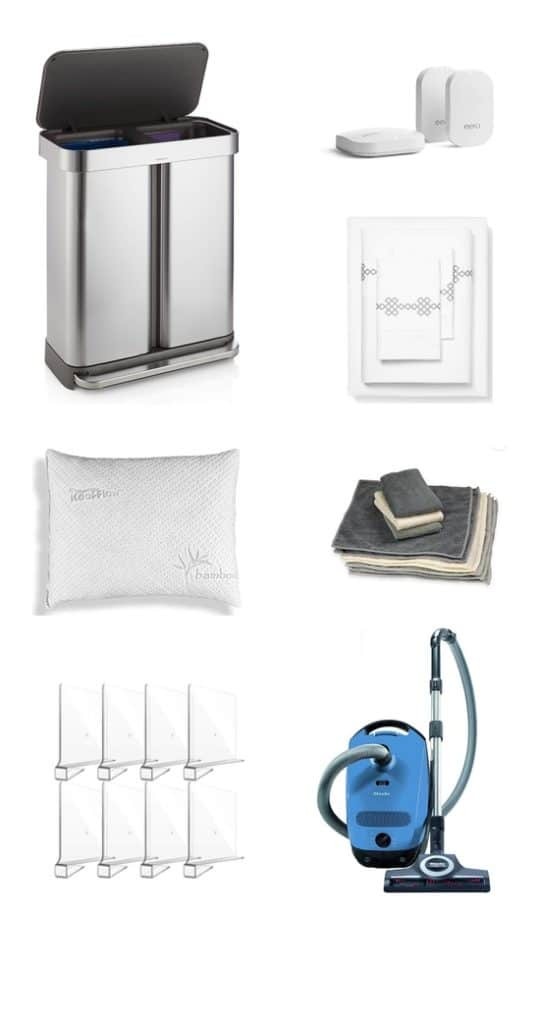
MIELE VACUUM // Trust me when I say this is the place to invest. I had been getting by with a cordless option and with a dog, children, and heavy foot traffic in our tiny apartment, an upgrade to a proper Miele was the absolute best thing I could have done for everyone. It is so powerful, has multiple settings (for rugs, upholstered furniture, hardwood floors), and is brilliantly designed. These are built to last. Absolutely worth every penny. I also remember doing a lot of research to figure out the difference between their various models/lines, which are very confusing and unnecessary in my opinion, and this is the exact model I landed on: the perfect balance between utility/versatility for different floors and price.
SIMPLE HUMAN RECYCLER (ALSO AVAIL ON AMAZON) // A well-designed and sleek-looking divided recycler big enough for all the glassware, plastic, and cardboard we go through in our busy family. I specifically love the plastic “liner” bin that enables me to easily lift that piece out and carry it to the bigger recycling bins in our building. It also opens with the tap of a foot, the lid can be clicked into an upright position when removing the bag/bin, and the brushed stainless steel exterior means that it’s fairly resistant to smudges and fingerprints.
RUG PADS // These extend the life of your rug, protect your floors, add cushioning, and — most importantly — prevent rug slippage/movement. When I finally bought these for all of the rugs in my home, I felt like I’d crossed a new threshold into adulthood. (My favorite rugs here.)
PHILIPS HUE BULBS // We have, over time, as bulbs have died, installed Philips Hue bulbs in most of the lights in our home. These are controlled via our smartphones (and Siri, via our HomePod), where we have them configured to turn on and dim on a schedule that mirrors our lifestyle. It feels like the future to walk into a room and say: “Hey Siri, turn on the lights in the master bedroom,” and suddenly they are on. Or “Hey Siri, dim the dining room lights to 30%” and all of the lights go down to a romantic candlelit effect. You can also change the warmth/color of the lights. Often we like really bright light in the morning, but warm yellow tones in the evening. The starter kit might make a great gift for a new homeowner or a tech-loving friend.
EERO WIFI MESH NETWORK // Has given us the gift of faster, more reliable, and easier-to-monitor Internet. This replaces your old WiFi router and includes an app that enables you to track Internet speed, which has been handy whenever there has been an issue with the provider. (We can just show the discrepancy between the speed they promise and the speed we are getting.). Bonus: it looks good and the beacons double as nightlights.
O-CEDAR SPONGES // These are the best sponges I’ve ever used. They are thick, sturdy, absorbent, non-scratch, and they also bend/give nicely. Can you tell I spend a lot of time washing dishes? (We cook A LOT at home!)
OXO SHOWER CADDY // A strange thing to love, but this is just so well-designed! It never slips/slides around, has shelves at the perfect height (tall enough for most shampoo bottles), a hook for a loofah, and a soap tray.
TOSCA STORAGE BINS // J’adore these (dare I say it?) elegant bins for housing bulkier items in our pantry section.
UNDERBED SHOE STORAGE // Fellow women short on closet space: these have been my saving grace. The thing I love best about them is that they are very shallow in height, and my bed affords the slightest of underbed clearance! This was one of the only models I could find that would actually fit under the bed. I like that they keep all my beloved shoes dust and debris-free!
WHITE UTILITY BINS // Used for countless purposes in every closet I have. Great for organizing spices, holding dog gear, housing “backstock” lightbulbs and batteries, etc. Inexpensive, easy to clean, waterproof. (These are great for under-sink areas for that reason, too.)
MICROFIBER CLEANING TOWELS // I bought these begrudgingly when, after we’d fully moved out of our former apartment, I returned to supervise a crew of housekeepers to conduct a deep clean of the emptied apartment, per our lease. When I arrived, after unpleasantly schlepping a ton of gear and supplies on the Subway, I realized I’d forgotten rags to clean with. I dashed out to the local Bed, Bath, and Beyond, and they only had these. WOW. What a happy accident — these are a fantastic tool to clean with. I love that they dust even delicate surfaces (like porcelain, TV screens, Mr. Magpie’s expensive acoustics equipment) but can also be used with cleaning products on wood, marble, glass, etc. They are also deceptively absorbent without ever becoming sopping wet. I don’t understand where the liquid goes! Anyhow, they are fantastic!
BROTHER LABELMAKER // I use this vigor and joy. So handy for spice jars (label the tops!), drawers of the acrylic cube I use to organize first aid and medicine, and even the white bins above (i.e., LIGHTBULBS, DOG GEAR, etc.). No question about where things belong. (If you’re not a labelmaker kind of gal, these pre-written tags covering many common pantry items might be your ticket.)
DRAWER DIVIDERS AND SHELF DIVIDERS // These empower me to keep clothes super-tidy. This underwear drawer organizer also wins my respect — keeps everything so organized and forces me to properly fold and roll my undies. (My favorite undergarments here.)
ROWENTA IRON // Just the absolute best. I thought I was “bad” at ironing until I bought this iron.
BOLL AND BRANCH SHEETING AND BED BLANKET // I know this feels more “design” than “utility,” but these sheets truly enhanced our sleeping experience. They are cool and ultra-soft, and the blanket is one of my absolute favorite items I’ve bought this year. Ultra-soft and warm and just the perfect weight.
FEATHERED FRIENDS DOWN COMFORTER // Deliciously fluffy with just the right amount of heft. Like sleeping in a cloud.
XTREME COMFORTS MEMORY FOAM PILLOWS // Just try it. It is like heaven! You can remove the fill to your liking, but this pillow never gets hot and always feels like a dream.
STORI PLASTIC ORGANIZERS // Love these in my cabinets and drawers for keeping everything organized/jumble-free.
P.S. My favorite gear for small spaces and little luxuries for even the tiniest of homes.
P.P.S. Recent tabletop and home decor finds for under $100.
P.P.P.S. Thoughts on mom guilt.
The post My Favorite Home Gear. appeared first on The Fashion Magpie.
Agilenano - News from Agilenano from shopsnetwork (4 sites) https://agilenano.com/blogs/news/my-favorite-home-gear
0 notes
Text
How to Use Instagram to Drive Sales Like A Marketer

Instagram has proven itself as a business platform that brings results. It’s no longer about candid pictures or random selfies. Instead, it’s become a space for up and coming brands to make a name for themselves alongside corporate giants.
Gathre, a brand created by two moms, specializes in items for the home like outdoor accessories, yoga tools and leather goods. It used Instagram for a summer campaign and saw a whopping 81% increase in revenue based on Instagram ad spend as a single summer ad campaign.
Instagram knows the potential it holds for businesses. Over the last few years, it has built a community for a global audience, enabled shoppable posts, and checkout features to capture sales without asking potential buyers to switch platforms.
At the same time, anyone who has created a business account knows, just having an account isn’t enough. There’s a lot more than goes into growing your sales with Instagram than most people let on. In this article, I’ll be showing you in five steps to use Instagram to drive sales.
1.Optimize Your Business Instagram Account
Before you start promoting products, you’ll have to optimize your Instagram business account
What you’re doing here is ensuring that when potential buyers search or discover your brand online, your Instagram profile will have the information and contact details to prevent them from turning away.
Add a Recognizable Photo and Username
One of the worst mistakes you can make is to have an unrecognizable username and display photo. If you’ve already got this part down, you can skip to step two, but if there’s the slightest chance that you might want to make a few changes, stick around and let me show you how it’s done.
You’ll want an Instagram username that’s the same as your business name so that searchers can easily find you. That’s what shoe brand Payless did.

Whereas Red Lobster took a creative approach by using two red lobster claws as their profile image, which sums up what and who they are.

Claiming your business name might be easier said than done if you were late to join Instagram. With more than 500 million users on the platform every day, someone might have already taken your Instagram business username.
If your original username is gone, just add a variation to it, and you’re good to go. Take Later, for example: someone else has already taken the username @later, so the marketing team used @latermedia instead.

Need help coming up with an Instagram Username? Check out Plann’s fun guide to creating Unique Usernames for Instagram That Will Get You Noticed.
Include a Link to Boost Traffic to Your Site
There’s no point in getting sales with Instagram if you don’t promote your website link on your Instagram channel. Drop your link your Instagram bio to boost website traffic and sales.
Instagram Example: All Bird

An Interesting Bio That Hooks Followers
People will often scan your bio and photos before deciding whether they should follow you.
Think of your Instagram bio as an elevator pitch to get people hooked on your brand. You can write a simple line or use up the entire bio word limit of 150 characters.
Here are two brands with great Instagram bios:
HUM Nutrition

Nike

2. Create an Instagram Marketing Strategy
If you fail to plan, then you plan to fail. Create an Instagram marketing strategy for your business so that you can set goals and actions that align with your content. A strategy also helps you to measure how effective your Instagram marketing is in terms of the type of engagement, revenue, and the impact you want your brand to have.
Now more than ever, a marketing strategy is critical. With Instagram's changing algorithm working on over 95 million posts every day, you're going to need a plan to push your brand above all that content and noise.
You can use the following to get started on your Instagram marketing strategy:
1. Create a Marketing Goal Why are you marketing on Instagram, and what do you want to accomplish? It's a given that you'd like to increase sales. But how do you intend to do it?
It could be as simple as planning to sell x amount of products per month, get more subscribers, increase repeat shoppers or all of the above. Whatever the case may be, it's wise to start with one goal at a time so you don’t get overwhelmed.
2. Create a Content Marketing Plan Now that you have a goal in mind, you'll need to create a content marketing plan that will complement it. Your content marketing plan is the key to creating amazing content (we'll talk more about that later), and it'll help you to keep your sanity when you're coming up with content ideas to post on Instagram.
Here’s a detailed guide to show you How to Build a More Complete Content Marketing Strategy to start seeing some Insta-famous results come your way.
Pro Tip: If your already have a content marketing strategy but the results are underwhelming, here are 6 reasons your content strategy isn’t working and 25 tips on how to fix it.
3. Social Media Strategy (Checklist) What's a social media checklist?
It's a daily, weekly, and monthly to-do list for your social media accounts. It helps you manage your Instagram account with ease, without feeling overwhelmed with comments, likes, and messages constantly flooding you.
I've created a step-by-step guide on how to make a social media checklist so you'll be handling Instagram like a pro in no time. Get started and download your free social media checklist here (no email required!)
It can seem like a lot to take in, but if you want to start using Instagram to drive sales to your business, you'll need to get serious about how you handle it, or you'll just be posting with little to no results. Take it from me: a well-executed plan pays off in the long run.
3. Boost Engagement on Instagram & Strengthen Customer Relationships.
Engage with Your Instagram Followers
No customer wants to walk into a retail store and be ignored; the same goes for customers going to your Instagram page.
When customers are ignored on social media or notice an inactive brand on Instagram, they'll most likely unfollow you or buy from your competitors.
That’s something no one wants, so start engaging!
Engagement increases your social media presence, builds loyalty, drives ROI, and attracts new followers.
Take a look at 720 Sweets & Etc. answering customer questions about their locations. As simple as it is, it can also drive foot traffic to your brick and mortar store.

Fitness brand Equinox has over 200,000 followers, yet they still take the time to engage with their followers by candidly answering and liking comments.

When you engage with followers, you should naturally promote your product website or store. Try not to make it seem forced. For example, Primark's Instagram account occasionally suggests customers come into their store to buy their products, or they ask customers to share how they style Primark pieces. Here’s an example below:

4 Effortless Ways to Engage with Followers on Instagram
Ask them a question about your products
Answer their questions in the comments
Recommend products they might need or want
Talk with them in the comments section
for feedback about your services or products
Jumpstart Your Instagram Engagement with Contests
Social media contests are a marketer’s growth hack when it comes to getting more followers, more engagement, and generating leads with the serious potential to drive massive sales.
Brands like Hydroflask make giveaways an essential part of their Instagram marketing strategy to gain more followers and increase sales during holidays. They host giveaways every three months and partner with complementing brands to make each giveaway prize even better than the last.
For example, for summer Hydroflask got over 100,000 likes and over 50,000 likes and comments with their partnered giveaway with Pura Vida's Stickers.

4 Most Popular Types of Instagram Contest:
Like-to-Win or Comment-to-Win: USANA Summer Giveaway

Follow To Win: The Beauty Spy

Tag -A-Friend : Tono & Co.

Click The Link In The Bio To Enter : World Photography Organisation

Pro Tip: Just like Facebook, you'll need to follow the contest rules. You don't need a lawyer for this one, but instead use this Complete Instagram Giveaway Rules Guide (With Examples).
Answer Your Instagram DMs
When you're using Instagram for business, managing all of your direct messages, comments, and replies can take up a lot of time! Sometimes you'll have to answer the same question, over and over (and over) again.
But keep at it! Answering direct messages and comments is essential when it comes to maintaining engagement with your new and current followers. Luckily, Instagram now offers saved replies in your direct messages, so you can save yourself the trouble of typing.
How to Use Quick Replies
Open your profile and tap the button with three lines in the top-right corner of the screen. This will open the sidebar menu where you can access your Instagram settings.
Next, tap the settings button and scroll down to Business Settings. Here you should see an option for Quick Replies.
Tap the “+” button in the top-right corner to create a new quick reply.
Once you’re happy with your quick reply, tap the ‘Save’ button in the top-right corner (you can always come back and edit or delete your quick reply later).
When you go into your direct messages to access your replies, you can click on the icon below:

4. Drive Sales with Instagram “Shopping”' Content & Features
Now that you've shaped your Instagram into a lean, mean sales machine, it's time to produce, package and deliver content and features to drive sales on your Instagram.
Promote Your Products with Creative, Professional Photos
Share your products, events, and giveaways on your Instagram profile.
You want to ensure that you promote your products with creative, professional photos. Since most online shoppers can't physically touch the product, they need to see your products in a good light (no pun intended).
Your customers need to see what they’re buying. The product image needs to be professional or placed in a lifestyle setting so that they can imagine a product in their day to day life. One of the reasons most products on Instagram sell so well is the high quality in product photography and display.
No matter how good your product is, without the right pictures, shoppers will still hesitate to click ‘Purchase’.
Everlane's Instagram shows off their products and pieces with fun lifestyle and product shots.

If you're on a budget or need help taking better product images, Hootsuite's got you covered with a step-by-step guide on How to Take Good Instagram Photos on Your Phone.
Sharing content in your Instagram story is an easy and effective way to expand your reach. With Instagram's 'swipe up" feature to drive customers to your website, you can capture a few sales in between.
Write a Killer Caption That Sells
A common mistake that most brands make on Instagram is trying to "hard" sell products to Instagram followers. Instagram was made for connecting first. Business became a part of it later. Try soft selling to appeal to Instagram’s Social Culture.
Think of your captions like mini-movie trailers or sales pitches; you don't start off the bat by saying ‘buy now’, not unless you have a monster of a following of loyal buyers like Nike or Old Navy.
The length of your caption can vary, despite popular belief that it should always be short, that may not be the case. Take Herbivore, for example, when they posted about their discount for their 8th birthday. It's a bit lengthy, but it's engaging:
Instagram Example: Herbivore

You can also use hashtags in your captions. Hashtags help to make your post discoverable for people searching for your brand or the products that you offer.
You can incorporate hashtags to make your captions more actionable. Take Chinese Laundry, they use the hashtag #ChineseLaundry for brand awareness and #TapToShop to let users know they can tap the image for Instagram shoppable posts.
Instagram Example: Chinese Laundry

Use Instagram Ambassadors to Share Your Brand
Using Instagram influencers has been proven to drive to drive sales. Around 49% of consumers depend on influencer recommendations, and 40% purchased something after seeing it on Instagram.
Now major brands like H&M have been known to use influencers for every fashion collection.

According to Mediakix, influencer marketing is expected to grow to a $5 – $10 billion market by 2020. More and more influencers are popping up each day, as more brands begin to take up dedicated influencers for their own.
You don't need an influencer who has millions of followers. You can use micro influencers who have between 5000-200,000 followers. More and more marketers are looking to micro-influencers to deliver affordable, professional and amazing content.
Pro Tip:Here are 7 Reasons to Use Micro-Influencers to Boost E-Commerce Sales.
5 Best Tools To Get More Sales On Instagram
LinkTree: Linktree allows you to turn your tiny Instagram website link into a sales funnel for your business. Take a look at what happens when you click on Wishpond’s Instagram Linktree URL:

Like2Buy: Owned by Curalate, Like2Buy was the first company to offer brands the chance to turn their Instagram posts into shoppable images. Brands like Target and Sephora trust Like2Buy to help drive sales for their Instagram marketing.

Instagram Shoppable Post: Once your business has a product catalog via Facebook connected to your Instagram account, tagging products is as simple as tagging a person in a post. Instagram shoppable posts are marked with a “Tap to View Products” pop-up or small white circle with the shopping bag icon.

Instagram Checkout: March 2019, Instagram dropped the checkout feature vendors had been waiting for. Now, not only can you tap to view a product, but you can offer viewers the chance to use the “Checkout on Instagram” button on the product page, so shoppers can pay for their order without leaving Instagram.
Once the buyer’s first order is complete, the information will be stored securely for convenience the next time they shop.

Instagram Stories Shopping Stickers: Similar to the regular Instagram shoppable posts, you’re able to tag physical products from their inventory or e-commerce platform. When you click on an item in Instagram, you’re able to view the item name, price, and description.
You can use Instagram Stories stickers on both images and videos, and there are four different types of stickers. It is restricted to certain countries, just like a shoppable post.

5. Beat Instagram’s Algorithm & Measure Your Success
So your content game is strong, and your account has taken over the gram. To keep that success coming, you’ll need to watch out for Instagram’s ever-changing algorithm and measure your success so you’re on the right track.
How to Beat Instagram Algorithm
Every year, business owners over the world grumble about Instagram’s algorithm as they try to grow their following, but there are some good intentions behind it all.
At the end of the day, Instagram’s algorithm, like YouTube, rewards content with high engagement. The not-so-secret sauce to beat the algorithm is to stay consistent with your content strategy and online activity. Wolf Software shows it best:

Just like a fish swimming upstream, the moment you stop moving, stop being active, you risk losing your pace.
Don’t fall into the trap of post-it-once-and-forget-it. Keep up with these Important Instagram Algorithm changes, and you’ll be able to use the algorithm to work for you.
How to Measure Your Instagram Success
You’ll need to go beyond how many followers you gain for the month. New followers aren’t always paying customers; they’re new leads you can turn into potential customers. That’s to say that having 10,000 followers isn’t the same as 10,000 orders. Maybe a small fraction of those customers purchase from you, and an even lower percentage become repeat customers. Which is why it’s important to measure your success, and take a close look at the impact your Instagram has on your revenue.
Look at your engagement, how many queries for prices and orders you get along with how many people complete purchases on your website after coming from Instagram. From there, you’ll begin to measure how successful your Instagram is when it comes to driving sales for you.
Summary
Here’s a quick recap on how to use Instagram to drive sales and grow your engagement:
Optimize Your Business Instagram Account
Create an Instagram Marketing Strategy
Boost Engagement on Instagram & Strengthen Customer Relationships.
Drive Sales with Instagram “Shopping”’ Content & Features
Beat Instagram’s Algorithm & Measure Your Success
Whether you’re just starting out or you’ve been on Instagram for a while, you can use these tips to push you in the right direction.
Which tip was your favorite, or which are you trying now? Comment below and let me know. I’d love to hear!
from RSSMix.com Mix ID 8230801 https://ift.tt/2LNXlsI via IFTTT
0 notes
Text
The Tools (And Tricks) You Need To Install An Ikea Kitchen Yourself
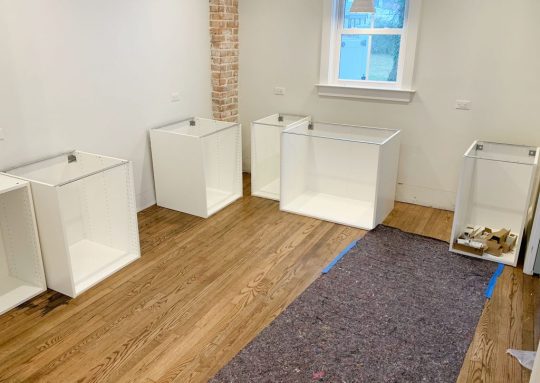
Many of you have asked for tips and tricks to make installing an Ikea kitchen go more smoothly and look (and function) the best it possibly can. And the good news is that after installing three of them in a little over a year and a half (!!!), we have learned A TON about how to make things a little easier and help you end up with a better result. So settle in, I’ve got twenty tools & tips that can make all the difference.
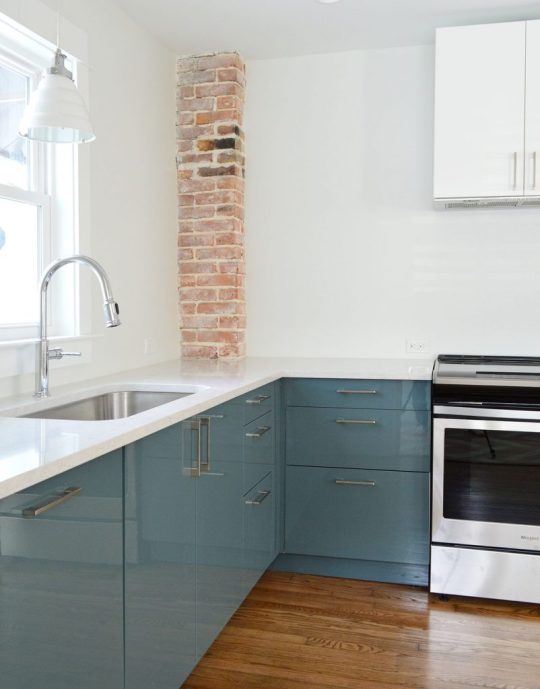
First off, we like Ikea cabinets and have personally installed them in five rooms: our laundry room & bonus room at home, our beach house kitchen, and now these two duplex kitchens. We have lived with the ones in our home for nearly five years and they’re great. Not a single issue. They are smartly made, very durable, and they have a great 25-year warranty and a great price tag (often thousands cheaper than other options). They also come with many thoughtful features like soft close drawers that come standard and tons of customization options. So yeah, some Ikea furniture is known for feeling a little cheap and wobbly, but that has not been our experience with their cabinets AT ALL.
Ok, but back to the point of this post – tips and tools to make your Ikea cabinet install easier. Some of the tools I’m listing here are absolutely necessary and some are optional (they’ll just make the process easier, faster, and less frustrating). And as you read through this list, I think you’ll also get a pretty good sense of the steps (and curveballs) involved too, which I hope will help as well.
I’ll include a short bulleted list of everything at the end of the post too, that way you can use it as a tool checklist. But let’s just get right into it.
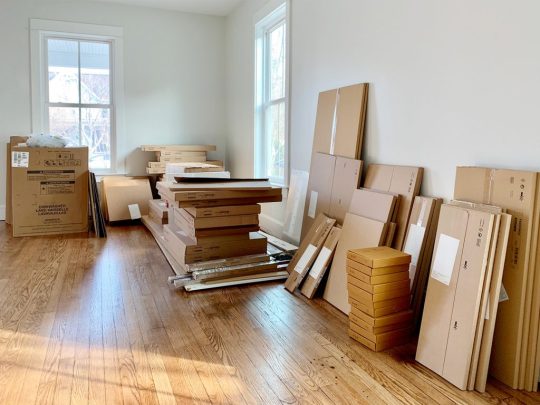
1. Your Itemized Receipt/Order
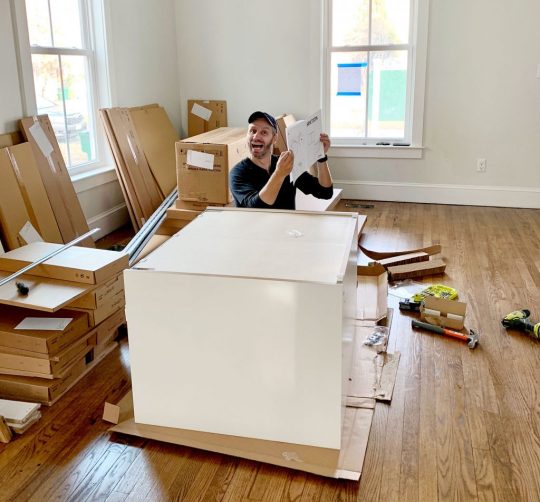
Before you build anything, you’ll want to take time to inventory and organize all of your boxes. We had over 200 boxes (!!!) delivered for our two duplex kitchens, so it helped to sort everything into piles beforehand.

We personally like to sort boxes by item (Sektion boxes over here, Maximera drawers over there, all of our cabinet fronts somewhere else, etc.) but you may find it helpful to sort yours by cabinet instead (ex: the box, drawer, hinges, and front for one cabinet all together in one pile – this is how Ikea breaks them up your order form). Either way you do it, this sorting process will help you identify any missing pieces and also make it faster once you start building.
2. Power driver (with Philips head)
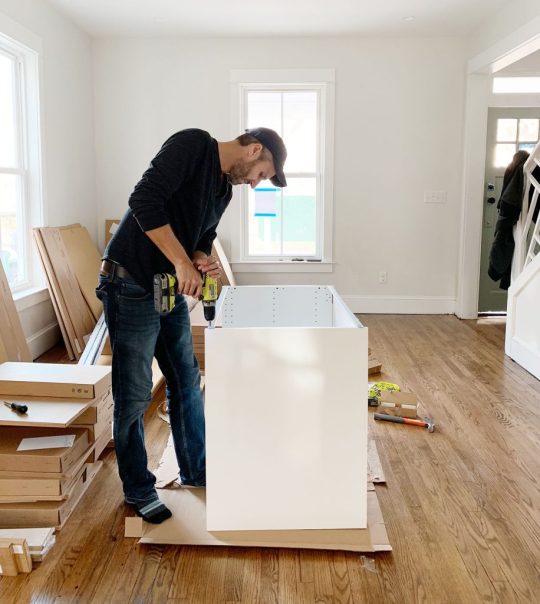
This combo gets a lot of use in this install (especially the power driver/drill) – but they’re needed first to construct your cabinet boxes (Sektion pieces). We love constructing the boxes first because you quickly get to see the shape of your kitchen come to life.
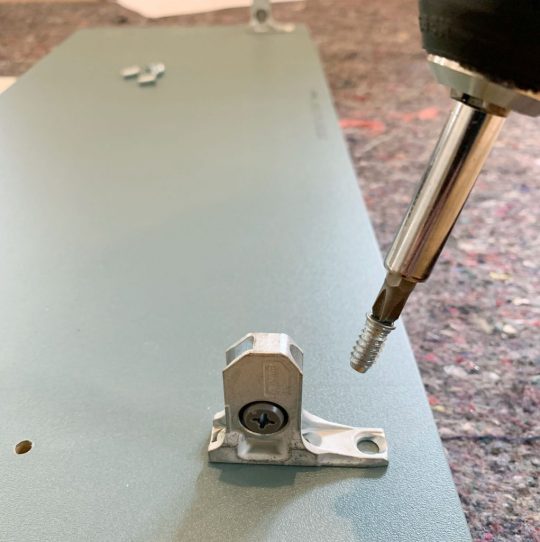
And even though Ikea is known for their allen wrenches, you don’t use them AT ALL during a typical kitchen installation! So don’t worry about having lots of specialty drill bits. You just need a normal Phillips head to screw these puppies together.
3. Hammer
You’ll also need a hammer handy to nail the MDF backings onto the cabinet backs. It may also be useful if you need to tap any anchors into your drywall when it comes time to hang your cabinets.
4. Magnetic Drill Bit Holder
Having one of these on your drill can save you a lot of frustration while building your cabinets and drawers. You can buy one separately for about $2 or it often comes included in drill/driver sets like ours. It’ll magnetize your drill bits, meaning many of the screws that Ikea provides will stick to your drill handsfree (thanks to the magic of magnets). We found this VERY helpful when trying to screw into small spots that were too tight for our fingertips (we couldn’t reach in and hold the screw steady, so having a magnetized drill bit that held it for us was key).
5. Measuring Tape
The next several tools are needed for attaching your cabinets to the wall. Whether you’re doing upper or lower cabinets, Ikea’s system uses a metal track (called the Sektion suspension rail) that you attach to your wall and then the cabinet boxes hang from these. The rail system is extremely handy because if you make sure the rail is level, your cabinets all hang from that and are guaranteed to be level! I know, it’s GREAT. The only time I don’t use their rail is when I don’t have a wall behind my cabinets, like if you’re doing an island. In that case I’ve built my own bases from 2×4″s, but more on that later.
For now, just know the measuring tape will be useful in determining exactly where in your kitchen you’re placing your cabinets – both side-to-side on each wall, and how high the rails need to be hung (Ikea provides guides for this in their instructions). You will probably want to have your kitchen plan/schematic from Ikea handy too.
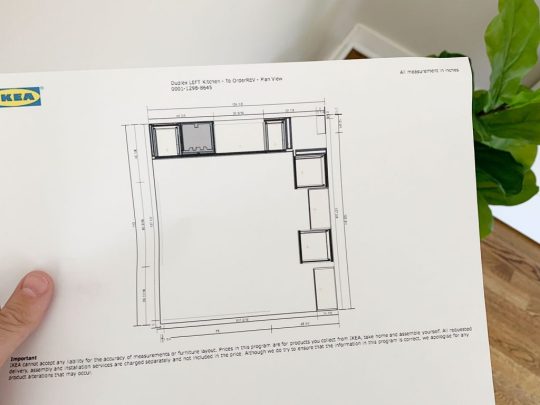
6. Dremel Or Hacksaw
Once you know where each run of cabinets is going, you’ll need to cut your metal suspension rails to size. The rails are sold in 7 foot lengths, but if you only have 4 feet of cabinetry in one area – you only want 4 feet of rail.
You can cut these by hand with a hacksaw, but we find it much faster to use our Dremel Multi-Max with a metal cutting blade.
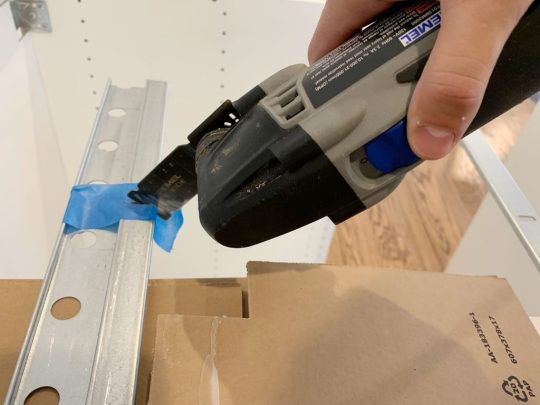
I typically mark my cut on a piece of painters tape and cut across the open top of one of our cabinet boxes (with a piece of cardboard to protect the cabinet underneath).
7. Stud Finder
You want to screw the rail into at least a few studs in your wall for maximum hold. So it’s smart to use a stud finder to locate and mark the studs that fall within the area you’re hanging the rail – that way you can be sure to go into them and get a nice firm hold. Since studs are typically 1.5″ thick, I like to mark the full width that my stud finder indicates, since you may not know exactly where the holes on the Sektion rail will line up.
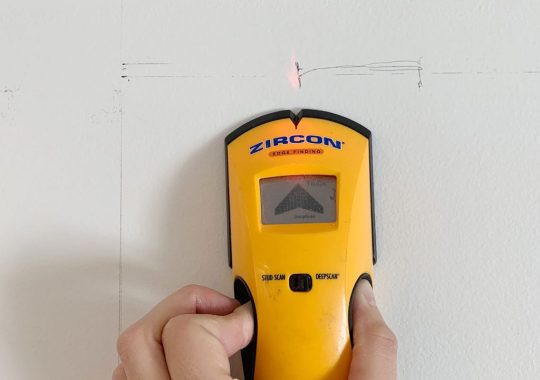
8. Medium-Size Level
Once I know where my studs are, I hold my cut-to-size metal rail and, with a medium sized level (like this 24″ level) held against it, I mark the top line of my rail AND where the holes line up with my studs. I suggest amedium sized level for this just because they’re easier to wrangle during this step.
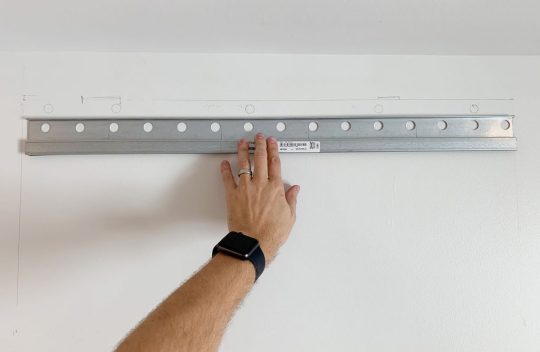
I also mark a few additional holes where I’ll use screws paired with anchors. I believe Ikea suggests at least having a screw every 12″ inches – but for short sections like this, I like to make sure I hit at least 2 studs and then have a screw at either end of the rail that goes into an anchor.
9. Heavy Duty Screws & Anchors
After some trial and error, we found that we like using these GRK Fastener Cabinet Screws to secure our rails into studs. They’re easy to drive, they hold really tight, and they include the star-head bit you need for them. We have tried other, cheaper “cabinet screws” and the heads kept breaking off. It was MADDENING.
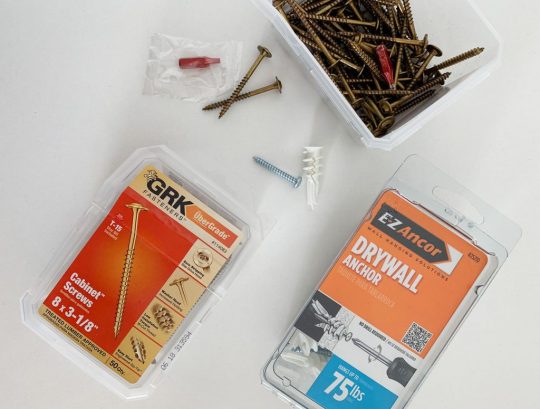
We also like to have some anchors on hand too, like these E-Z Ancor packs that come with screws, for those additional support screws that we add.
10. Long Level
One of the biggest challenges we’ve found in this process is getting things level. Just because you’ve hung your rail level on the wall doesn’t prevent things like slopes in your floor or bows in your wall from chucking some additional curveballs in your direction. So your best defenses are a lot of patience and a nice long level, like this 4ft level we bought specifically for this task (after learning that it’s a lot harder to use a smaller level to solve these issues).
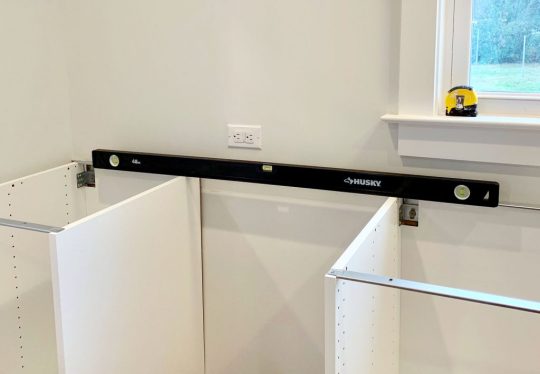
Your medium sized level will help with the process as well (especially in checking that each individual cabinet is level front-to-back) but you’ll want something bigger to check longer spans of cabinets. You could purchase an even longer level if you wanted, but they can start to get pricey, so we found a 4 foot long level to be sufficient, especially for checking across the gaps that you’ll leave for appliances like a 30″ stove or a standard 24″ dishwasher.
11. Shims
A lot of level issues can be corrected by twisting the adjustable plastic feet that come with your base cabinets, or by adjusting the placement of your metal rail. But if you’re dealing with bows in your wall (which you can find by placing your long level against it) you’ll want to have some wood shims on hand to place behind the metal rail. In these old houses, we had to use quite a few in a couple of places!
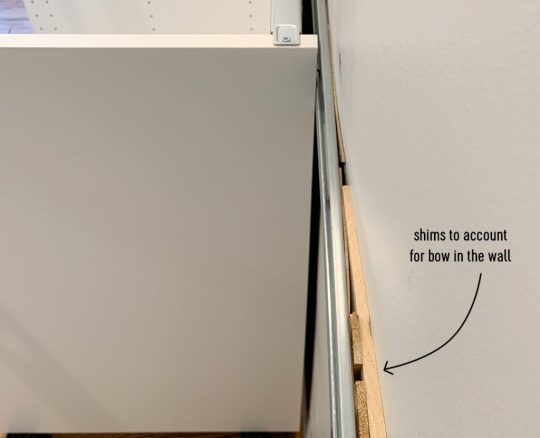
12. Jigsaw
When it comes time to install your sink base cabinet, you’ll need to make some holes for your plumbing. For smaller pipes like your water supply lines, you can just drill holes using a large drill bit (we used the 3/4″ bit in this set). But for things like your large drain pipe, you’ll either need to buy a larger hole bit or break out a jigsaw. Even though we don’t get the cleanest cut with it, the jigsaw gives us a little more wiggle room when placing the cabinet (since the drain pipe isn’t flexible like the supply lines) and we can also use it for other cuts like for exposing the outlets along the wall (the one below powers the garbage disposal under the sink).
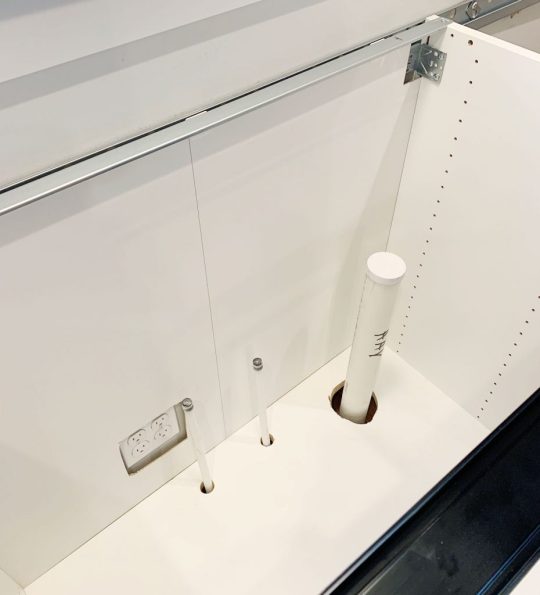
Just be sure to make careful measurements before you cut. We usually put a layer of painters tape around the area we’re cutting. It allows us to mark our cut without marking the cabinet, plus the tape helps keep the white finish from cracking off. Either way, this stuff will all be hidden under the sink so it doesn’t have to look perfect.
13. Clamps
As you start to get your cabinets in place and leveled, you’ll want to secure any adjacent cabinets together. Ikea provides screws for doing this, but you’ll want to use some clamps (we like these 6″ bar clamps) to hold the cabinets tightly together before you begin screwing.
We didn’t get a picture of that process, but the clamps come in handy A LOT as an extra set of hands – like when we were installing this bracket for the exhaust hoods that we hung over the stoves.
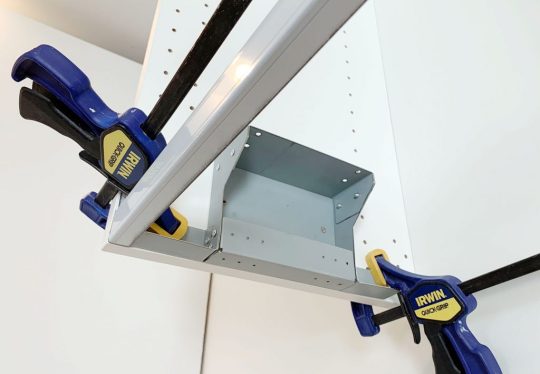
14. Circular Saw and/or Table Saw
In addition to screwing cabinets together, you may find yourself attaching cover panels or filler pieces at some point. Cover panels go on exposed ends of cabinets (so you can’t see the metal rail they hang on) or, in our case, we used some large cover panels to create a box around the fridges at the duplex. So you’ll need some sort of larger saw to make long, straight cuts. Our cover panels were a bit too wide, so I used a circular saw to shave a few inches off one side.
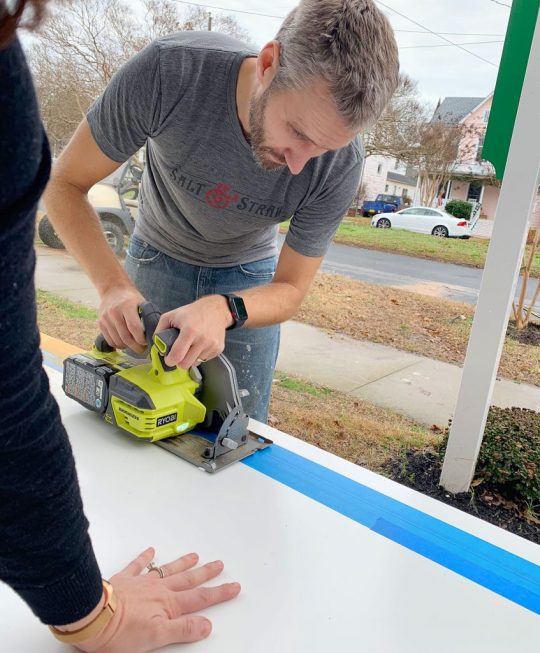
I didn’t use a table saw for that panel because running an 8 foot tall panel that’s this wide across my table saw would’ve been tough. But for smaller pieces (like filler pieces that are only about 3 feet long) a table saw is often easier, especially if you’re only shaving off a little bit. But if that’s too pricey and you’ve got a steady hand, you can get by with the circular saw.
15. 2 x 4″ Boards
Every time we’ve installed an Ikea kitchen we’ve needed some 2×4″s at some point. At the beach house we used them to make some bases for the island cabinets.
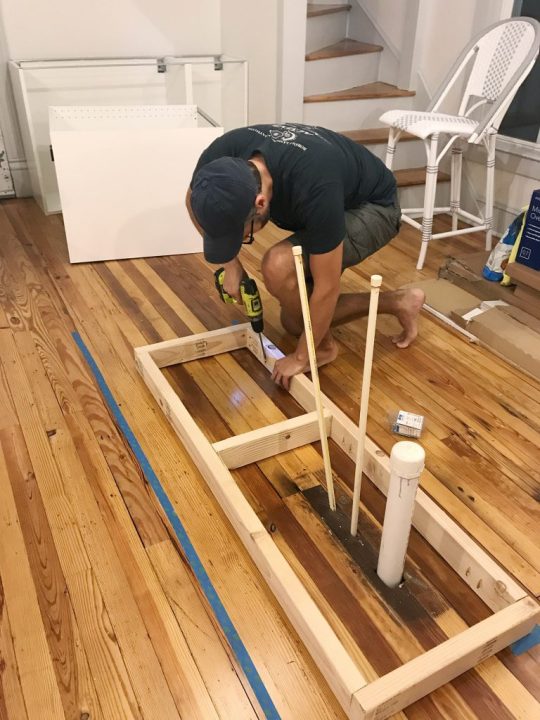
Basically, they were just some boxes we made almost the same size as each cabinet (slightly narrower to account for the toekicks) that we secured to the floor using pocket holes. To drill the pocket holes, you can use something like a…
16. Kreg Jig
Now, a Kreg Jig isn’t absolutely necessary here, but I’ve had one for around nine years now so I’m accustomed to breaking it out for tasks like this. So while I’m a big fan of having one in your arsenal, I understand that you’ve just bought a new kitchen so tacking on another $99 tool to your budget isn’t always practical.
I did use it again for the duplexes to make more 2×4″s into boxes (this time for mounting the above-fridge cabinet away from the wall, so it sat closer to the front of the fridge).
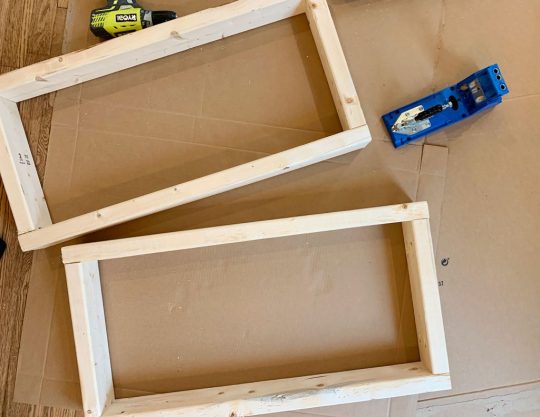
The boxes acted as an extension of the wall. The top one was for mounting the metal rail, and the bottom one gave the base of the cabinet a spot to rest so it didn’t tip back wildly. They also gave us a way to mount that large cover panel to box in the fridge.
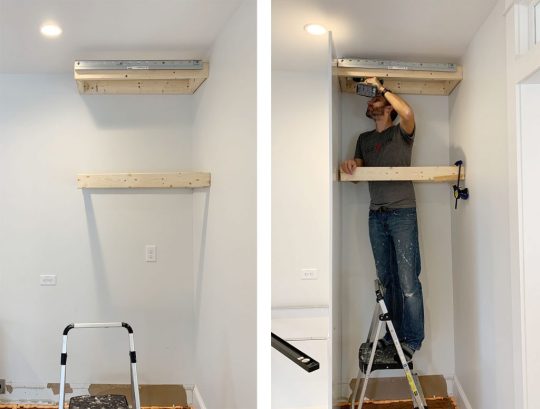
I guess I should add in here that a step ladder is also useful, so let’s officially put that on the list.
17. Manual Screwdriver
Once your cabinets and panels are hung, leveled, and secured to each other, the next part of the process is to add your doors and drawers. The instructions here are pretty self-explanatory and the main tool you need is a power driver to screw everything together. Our main word of warning is to pay close attention to screw placements when you’re assembling drawers! Depending on where each drawer goes in the stack (top, middle, or bottom) there are sliiiiight differences in the instructions. So while we find it most efficient to do multiple drawers at once, we still pay close attention – especially for the first few.
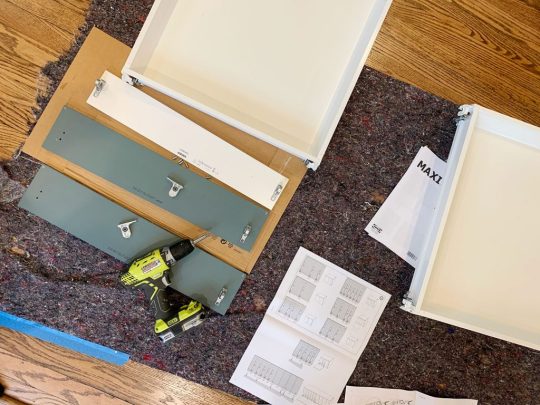
Ok, back to the manual screw drivers. One big part of installing doors and drawers is tweaking and adjusting them for even and level spacing. For this you’ll want to a regular ol‘ manual Philips head screwdriver. It can be kind of tedious and frustrating, but it’s worth taking your time with it. This video shows it in a bit more detail.
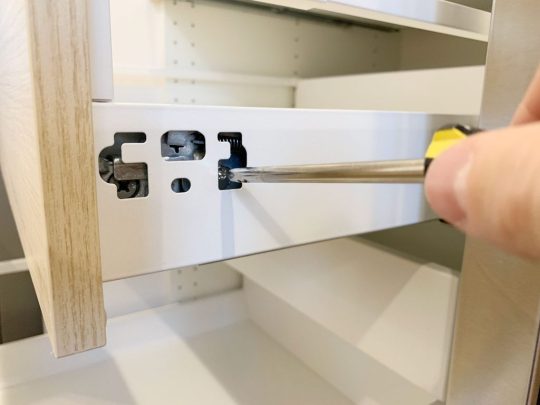
You also will want a flathead screwdriver for twisting the little piece of plastic that locks each cabinet onto the metal rail, which comes up earlier in the process.
18. Miter Saw
Tasks like cutting your 2×4″s or even your filler pieces will be made easier and faster by having a miter saw on hand (we own this miter saw). You’ll also find that it’s helpful when it’s time to cut and install your toekicks. Ikea’s sells toekicks to match your cabinet fronts and they clip on to the plastic feet you will have attached to the bottom of your base cabinets.
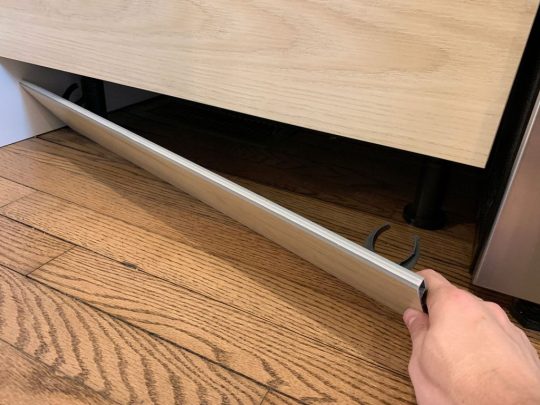
In our beach house kitchen we installed quarter round in front of the Ikea baseboards to help disguise some floor level issues, as well as using quarter round around the island where we built our own base (we used standard wood baseboard trim instead of the Ikea toekicks around the island). Meanwhile, we just used the Ikea toekicks in the duplex kitchens and the floors were more level (and we think the wood and blue cabinets were more forgiving than white ones) so we didn’t need to add quarter round and it looks great.
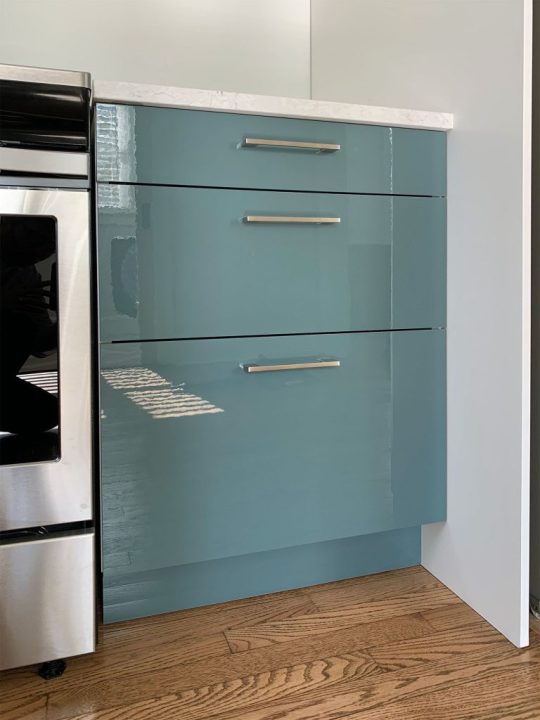
19. Nail Gun
In addition to using a nail gun to attach additional molding like quarter round if you’re adding that (again, the Ikea baseboards just snap on so you won’t need it for that) I also find a nail gun comes in handy sometimes for attaching small filler pieces. Especially in cases where they’re too thin to take a screw.
20. Others Tools
Real quick, here are some other items you may want to have on hand. Some I’ve mentioned or shown already, but haven’t officially listed:
Pen or pencil
Painters tape
Step ladder
Utility knife or scissors (for opening boxes faster!)
Crowbar (if you need to remove any baseboard or molding)
Broom, dustpan, and/or vacuum with a hose (we have this one)
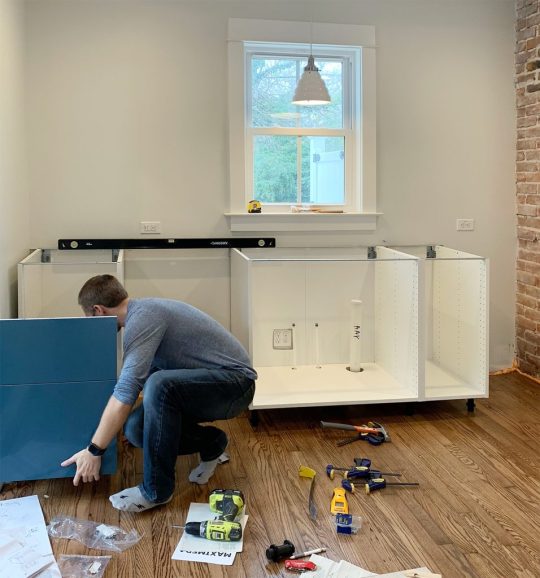
Your Ikea Kitchen Installation Tool Checklist
As promised, here’s all of the items in one place so you can make sure you have everything you need on hand. I’ve organized it a bit differently than above, just to put like items together. You may have special circumstances for your project that require more, less, or other tools – but I’ve found this to be a pretty comprehensive set:
Your itemized receipt / order
Hammer
Manual screwdrivers
Crowbar
Measuring tape
Pen or pencil
Painters tape
Step ladder
Power driver
Drill bit set with magnetic bit holder & 3/4″ bit for plumbing holes
Dremel or Hacksaw
Stud finder
Medium level (24″)
Large level (48″)
Wood shims
Cabinet screws (roughly 4 per cabinet)
Screws with anchors (roughly 2 per cabinet)
Jigsaw
Circular saw and/or table saw
Miter saw
Utility knife or scissors
Nail gun
Clamps
2×4″s (optional)
Kreg Jig (optional)
Broom, dustpan, and/or vacuum with hose
Good luck and happy installing!
P.S. For other posts we’ve written about installing Ikea cabinets, here’s one about installing our laundry room cabinets 5 years ago, and another one about using Ikea cabinets to make a wall of built-ins for our bonus room.
*This post contains affiliate links*
The post The Tools (And Tricks) You Need To Install An Ikea Kitchen Yourself appeared first on Young House Love.
The Tools (And Tricks) You Need To Install An Ikea Kitchen Yourself published first on https://novaformmattressreview.tumblr.com/
0 notes
Photo
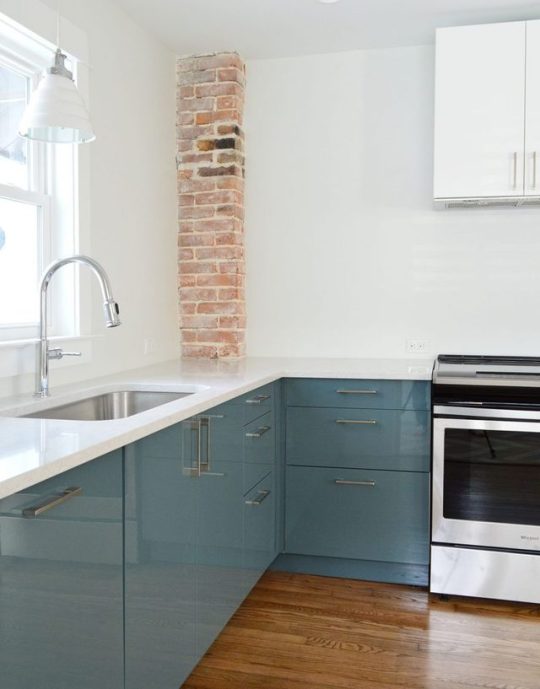
The Tools (And Tricks) You Need To Install An Ikea Kitchen Yourself https://ift.tt/2EWSK2p
Many of you have asked for tips and tricks to make installing an Ikea kitchen go more smoothly and look (and function) the best it possibly can. And the good news is that after installing three of them in a little over a year and a half (!!!), we have learned A TON about how to make things a little easier and help you end up with a better result. So settle in, I’ve got twenty tools & tips that can make all the difference.
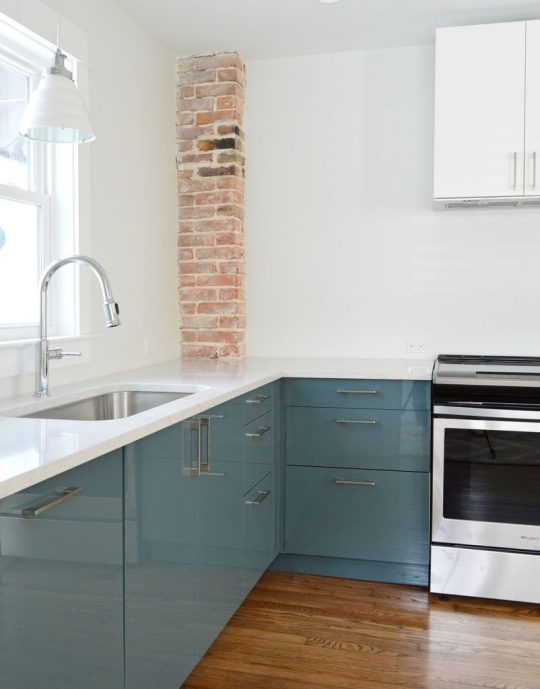
First off, we like Ikea cabinets and have personally installed them in five rooms: our laundry room & bonus room at home, our beach house kitchen, and now these two duplex kitchens. We have lived with the ones in our home for nearly five years and they’re great. Not a single issue. They are smartly made, very durable, and they have a great 25-year warranty and a great price tag (often thousands cheaper than other options). They also come with many thoughtful features like soft close drawers that come standard and tons of customization options. So yeah, some Ikea furniture is known for feeling a little cheap and wobbly, but that has not been our experience with their cabinets AT ALL.
Ok, but back to the point of this post – tips and tools to make your Ikea cabinet install easier. Some of the tools I’m listing here are absolutely necessary and some are optional (they’ll just make the process easier, faster, and less frustrating). And as you read through this list, I think you’ll also get a pretty good sense of the steps (and curveballs) involved too, which I hope will help as well.
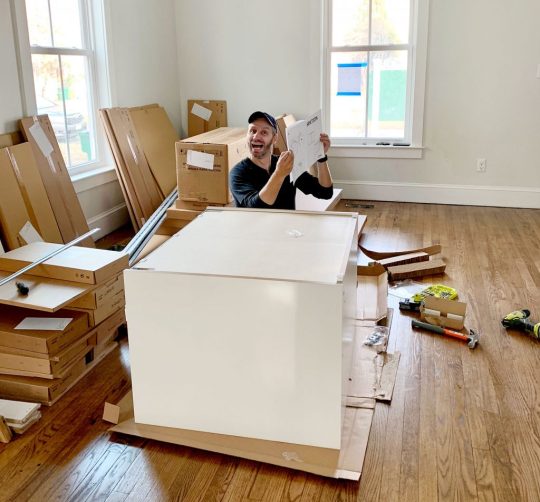
I’ll include a short bulleted list of everything at the end of the post too, that way you can use it as a tool checklist. But let’s just get right into it.
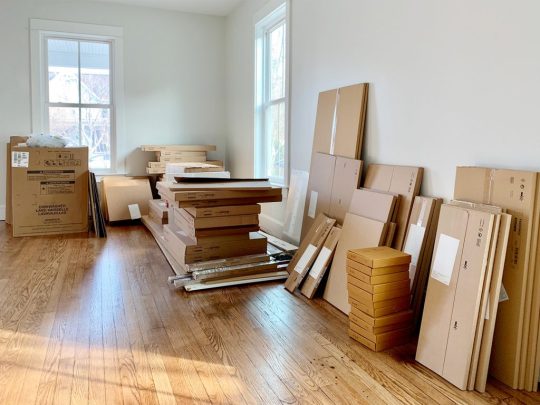
1. Your Itemized Receipt/Order
Before you build anything, you’ll want to take time to inventory and organize all of your boxes. We had over 200 boxes (!!!) delivered for our two duplex kitchens, so it helped to sort everything into piles beforehand.

We personally like to sort boxes by item (Sektion boxes over here, Maximera drawers over there, all of our cabinet fronts somewhere else, etc.) but you may find it helpful to sort yours by cabinet instead (ex: the box, drawer, hinges, and front for one cabinet all together in one pile – this is how Ikea breaks them up your order form). Either way you do it, this sorting process will help you identify any missing pieces and also make it faster once you start building.
2. Power driver (with Philips head)
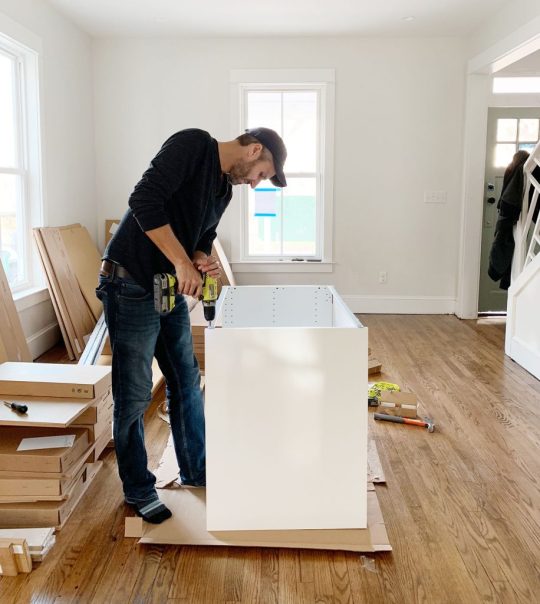
This combo gets a lot of use in this install (especially the power driver/drill) – but they’re needed first to construct your cabinet boxes (Sektion pieces). We love constructing the boxes first because you quickly get to see the shape of your kitchen come to life.
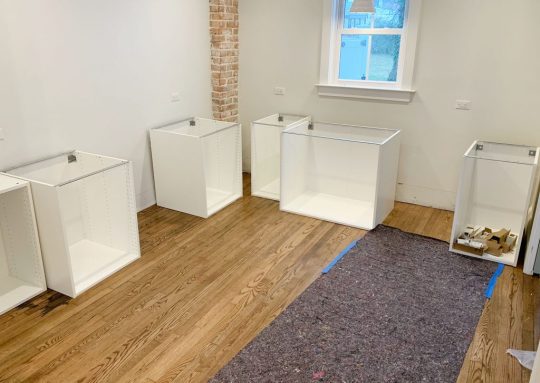
And even though Ikea is known for their allen wrenches, you don’t use them AT ALL during a typical kitchen installation! So don’t worry about having lots of specialty drill bits. You just need a normal Phillips head to screw these puppies together.
3. Hammer
You’ll also need a hammer handy to nail the MDF backings onto the cabinet backs. It may also be useful if you need to tap any anchors into your drywall when it comes time to hang your cabinets.
4. Magnetic Drill Bit Holder
Having one of these on your drill can save you a lot of frustration while building your cabinets and drawers. You can buy one separately for about $2 or it often comes included in drill/driver sets like ours. It’ll magnetize your drill bits, meaning many of the screws that Ikea provides will stick to your drill handsfree (thanks to the magic of magnets). We found this VERY helpful when trying to screw into small spots that were too tight for our fingertips (we couldn’t reach in and hold the screw steady, so having a magnetized drill bit that held it for us was key).
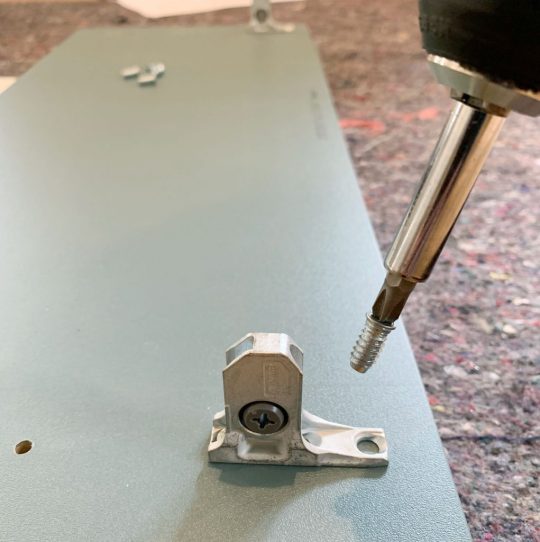
5. Measuring Tape
The next several tools are needed for attaching your cabinets to the wall. Whether you’re doing upper or lower cabinets, Ikea’s system uses a metal track (called the Sektion suspension rail) that you attach to your wall and then the cabinet boxes hang from these. The rail system is extremely handy because if you make sure the rail is level, your cabinets all hang from that and are guaranteed to be level! I know, it’s GREAT. The only time I don’t use their rail is when I don’t have a wall behind my cabinets, like if you’re doing an island. In that case I’ve built my own bases from 2×4″s, but more on that later.
For now, just know the measuring tape will be useful in determining exactly where in your kitchen you’re placing your cabinets – both side-to-side on each wall, and how high the rails need to be hung (Ikea provides guides for this in their instructions). You will probably want to have your kitchen plan/schematic from Ikea handy too.
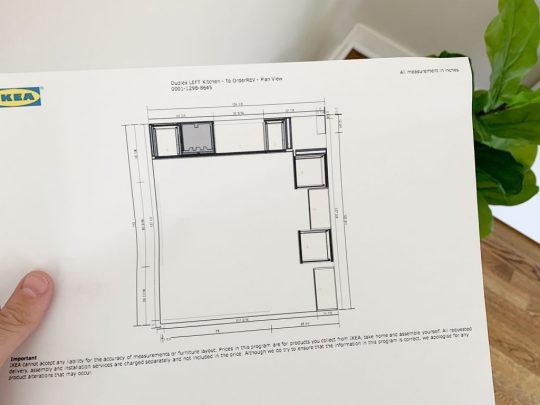
6. Dremel Or Hacksaw
Once you know where each run of cabinets is going, you’ll need to cut your metal suspension rails to size. The rails are sold in 7 foot lengths, but if you only have 4 feet of cabinetry in one area – you only want 4 feet of rail.
You can cut these by hand with a hacksaw, but we find it much faster to use our Dremel Multi-Max with a metal cutting blade.
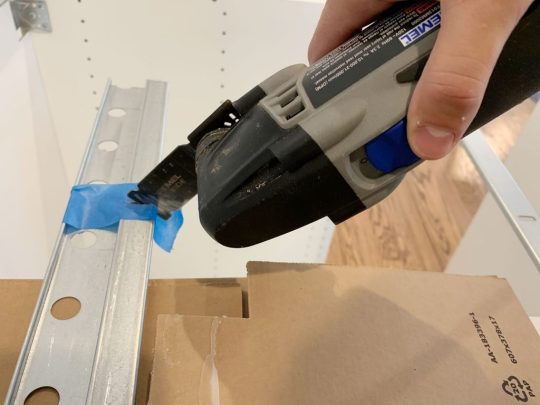
I typically mark my cut on a piece of painters tape and cut across the open top of one of our cabinet boxes (with a piece of cardboard to protect the cabinet underneath).
7. Stud Finder
You want to screw the rail into at least a few studs in your wall for maximum hold. So it’s smart to use a stud finder to locate and mark the studs that fall within the area you’re hanging the rail – that way you can be sure to go into them and get a nice firm hold. Since studs are typically 1.5″ thick, I like to mark the full width that my stud finder indicates, since you may not know exactly where the holes on the Sektion rail will line up.
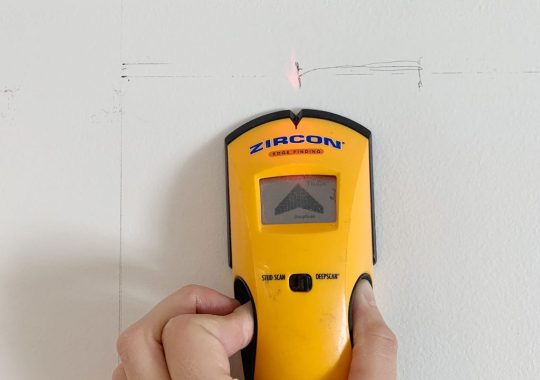
8. Medium-Size Level
Once I know where my studs are, I hold my cut-to-size metal rail and, with a medium sized level (like this 24″ level) held against it, I mark the top line of my rail AND where the holes line up with my studs. I suggest amedium sized level for this just because they’re easier to wrangle during this step.
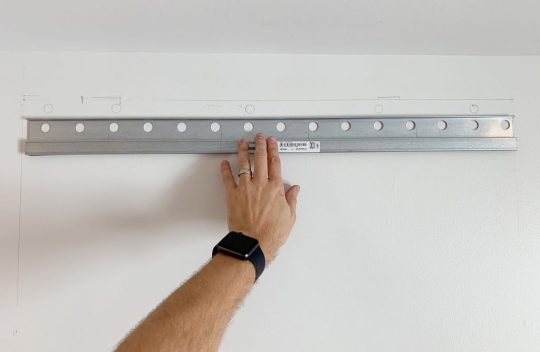
I also mark a few additional holes where I’ll use screws paired with anchors. I believe Ikea suggests at least having a screw every 12″ inches – but for short sections like this, I like to make sure I hit at least 2 studs and then have a screw at either end of the rail that goes into an anchor.
9. Heavy Duty Screws & Anchors
After some trial and error, we found that we like using these GRK Fastener Cabinet Screws to secure our rails into studs. They’re easy to drive, they hold really tight, and they include the star-head bit you need for them. We have tried other, cheaper “cabinet screws” and the heads kept breaking off. It was MADDENING.
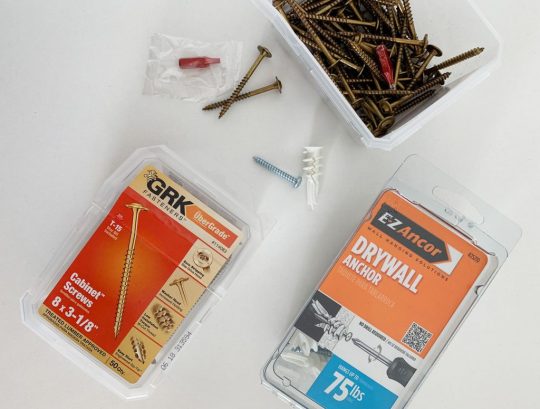
We also like to have some anchors on hand too, like these E-Z Ancor packs that come with screws, for those additional support screws that we add.
10. Long Level
One of the biggest challenges we’ve found in this process is getting things level. Just because you’ve hung your rail level on the wall doesn’t prevent things like slopes in your floor or bows in your wall from chucking some additional curveballs in your direction. So your best defenses are a lot of patience and a nice long level, like this 4ft level we bought specifically for this task (after learning that it’s a lot harder to use a smaller level to solve these issues).
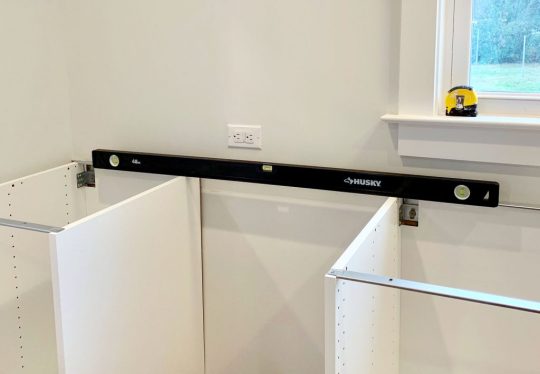
Your medium sized level will help with the process as well (especially in checking that each individual cabinet is level front-to-back) but you’ll want something bigger to check longer spans of cabinets. You could purchase an even longer level if you wanted, but they can start to get pricey, so we found a 4 foot long level to be sufficient, especially for checking across the gaps that you’ll leave for appliances like a 30″ stove or a standard 24″ dishwasher.
11. Shims
A lot of level issues can be corrected by twisting the adjustable plastic feet that come with your base cabinets, or by adjusting the placement of your metal rail. But if you’re dealing with bows in your wall (which you can find by placing your long level against it) you’ll want to have some wood shims on hand to place behind the metal rail. In these old houses, we had to use quite a few in a couple of places!
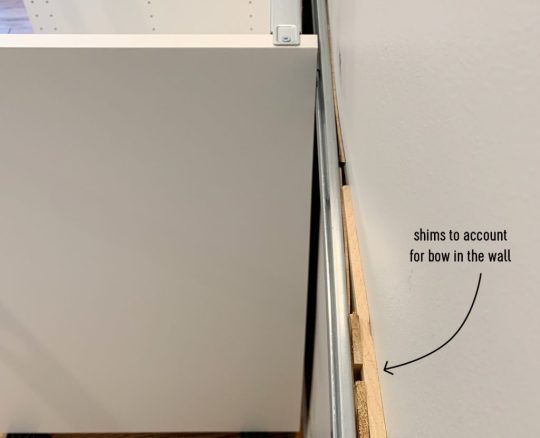
12. Jigsaw
When it comes time to install your sink base cabinet, you’ll need to make some holes for your plumbing. For smaller pipes like your water supply lines, you can just drill holes using a large drill bit (we used the 3/4″ bit in this set). But for things like your large drain pipe, you’ll either need to buy a larger hole bit or break out a jigsaw. Even though we don’t get the cleanest cut with it, the jigsaw gives us a little more wiggle room when placing the cabinet (since the drain pipe isn’t flexible like the supply lines) and we can also use it for other cuts like for exposing the outlets along the wall (the one below powers the garbage disposal under the sink).
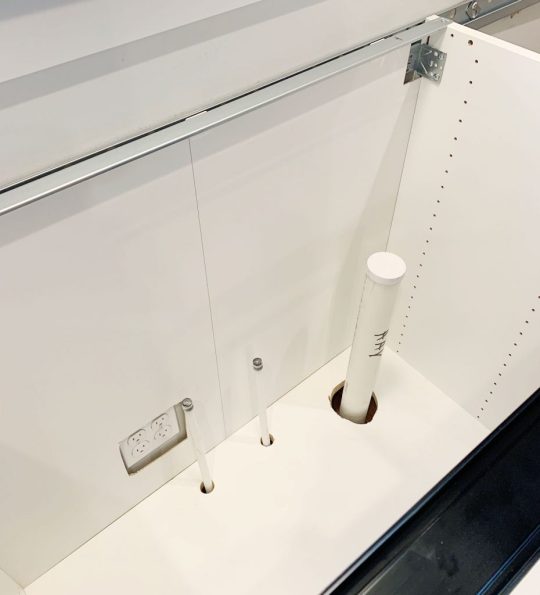
Just be sure to make careful measurements before you cut. We usually put a layer of painters tape around the area we’re cutting. It allows us to mark our cut without marking the cabinet, plus the tape helps keep the white finish from cracking off. Either way, this stuff will all be hidden under the sink so it doesn’t have to look perfect.
13. Clamps
As you start to get your cabinets in place and leveled, you’ll want to secure any adjacent cabinets together. Ikea provides screws for doing this, but you’ll want to use some clamps (we like these 6″ bar clamps) to hold the cabinets tightly together before you begin screwing.
We didn’t get a picture of that process, but the clamps come in handy A LOT as an extra set of hands – like when we were installing this bracket for the exhaust hoods that we hung over the stoves.
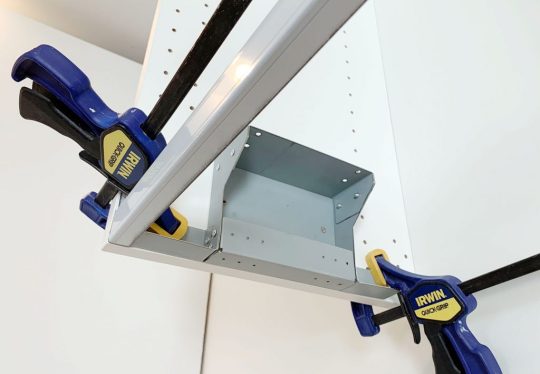
14. Circular Saw and/or Table Saw
In addition to screwing cabinets together, you may find yourself attaching cover panels or filler pieces at some point. Cover panels go on exposed ends of cabinets (so you can’t see the metal rail they hang on) or, in our case, we used some large cover panels to create a box around the fridges at the duplex. So you’ll need some sort of larger saw to make long, straight cuts. Our cover panels were a bit too wide, so I used a circular saw to shave a few inches off one side.
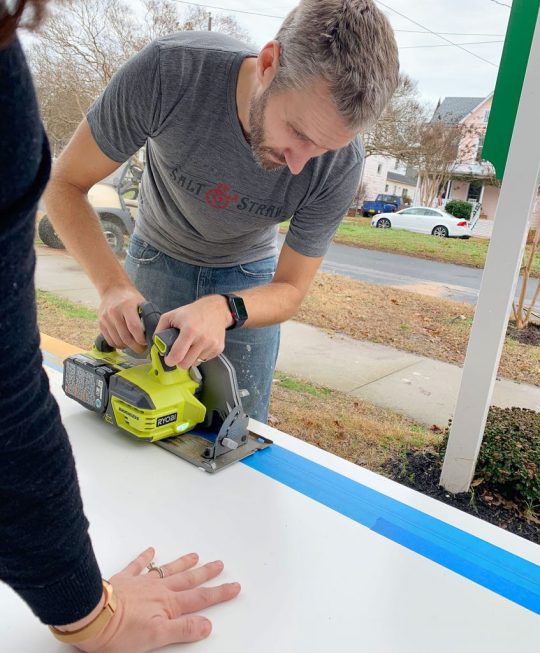
I didn’t use a table saw for that panel because running an 8 foot tall panel that’s this wide across my table saw would’ve been tough. But for smaller pieces (like filler pieces that are only about 3 feet long) a table saw is often easier, especially if you’re only shaving off a little bit. But if that’s too pricey and you’ve got a steady hand, you can get by with the circular saw.
15. 2 x 4″ Boards
Every time we’ve installed an Ikea kitchen we’ve needed some 2×4″s at some point. At the beach house we used them to make some bases for the island cabinets.
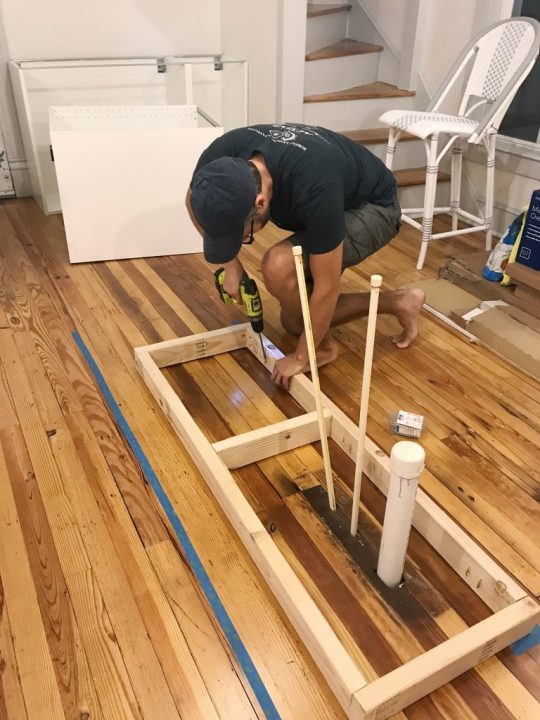
Basically, they were just some boxes we made almost the same size as each cabinet (slightly narrower to account for the toekicks) that we secured to the floor using pocket holes. To drill the pocket holes, you can use something like a…
16. Kreg Jig
Now, a Kreg Jig isn’t absolutely necessary here, but I’ve had one for around nine years now so I’m accustomed to breaking it out for tasks like this. So while I’m a big fan of having one in your arsenal, I understand that you’ve just bought a new kitchen so tacking on another $99 tool to your budget isn’t always practical.
I did use it again for the duplexes to make more 2×4″s into boxes (this time for mounting the above-fridge cabinet away from the wall, so it sat closer to the front of the fridge).
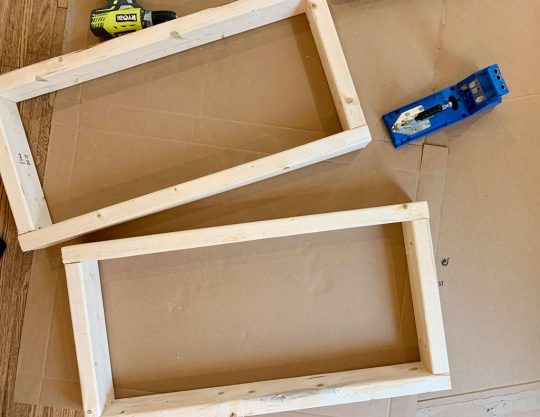
The boxes acted as an extension of the wall. The top one was for mounting the metal rail, and the bottom one gave the base of the cabinet a spot to rest so it didn’t tip back wildly. They also gave us a way to mount that large cover panel to box in the fridge.
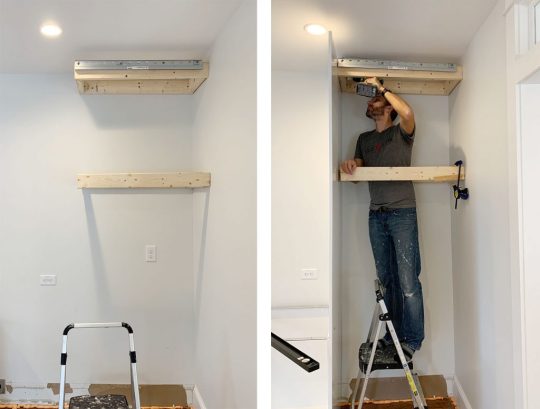
I guess I should add in here that a step ladder is also useful, so let’s officially put that on the list.
17. Manual Screwdriver
Once your cabinets and panels are hung, leveled, and secured to each other, the next part of the process is to add your doors and drawers. The instructions here are pretty self-explanatory and the main tool you need is a power driver to screw everything together. Our main word of warning is to pay close attention to screw placements when you’re assembling drawers! Depending on where each drawer goes in the stack (top, middle, or bottom) there are sliiiiight differences in the instructions. So while we find it most efficient to do multiple drawers at once, we still pay close attention – especially for the first few.
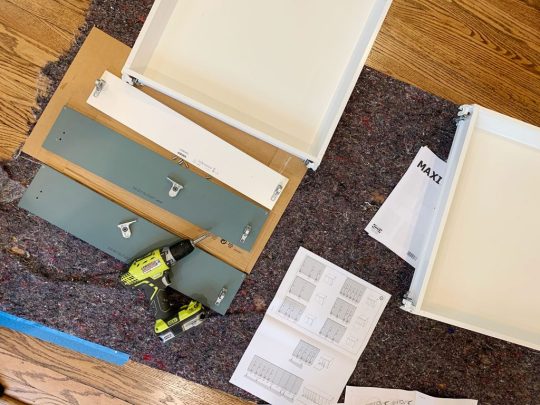
Ok, back to the manual screw drivers. One big part of installing doors and drawers is tweaking and adjusting them for even and level spacing. For this you’ll want to a regular ol‘ manual Philips head screwdriver. It can be kind of tedious and frustrating, but it’s worth taking your time with it. This video shows it in a bit more detail.
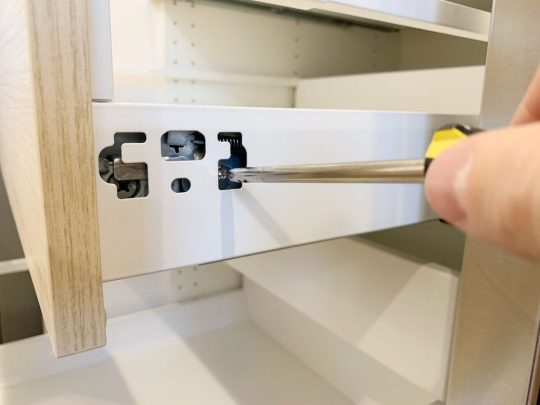
You also will want a flathead screwdriver for twisting the little piece of plastic that locks each cabinet onto the metal rail, which comes up earlier in the process.
18. Miter Saw
Tasks like cutting your 2×4″s or even your filler pieces will be made easier and faster by having a miter saw on hand (we own this miter saw). You’ll also find that it’s helpful when it’s time to cut and install your toekicks. Ikea’s sells toekicks to match your cabinet fronts and they clip on to the plastic feet you will have attached to the bottom of your base cabinets.
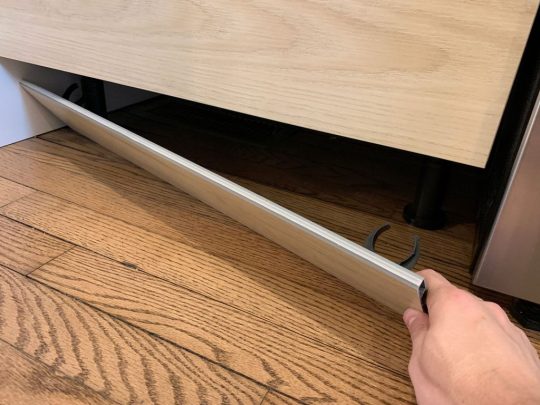
In our beach house kitchen we installed quarter round in front of the Ikea baseboards to help disguise some floor level issues, as well as using quarter round around the island where we built our own base (we used standard wood baseboard trim instead of the Ikea toekicks around the island). Meanwhile, we just used the Ikea toekicks in the duplex kitchens and the floors were more level (and we think the wood and blue cabinets were more forgiving than white ones) so we didn’t need to add quarter round and it looks great.
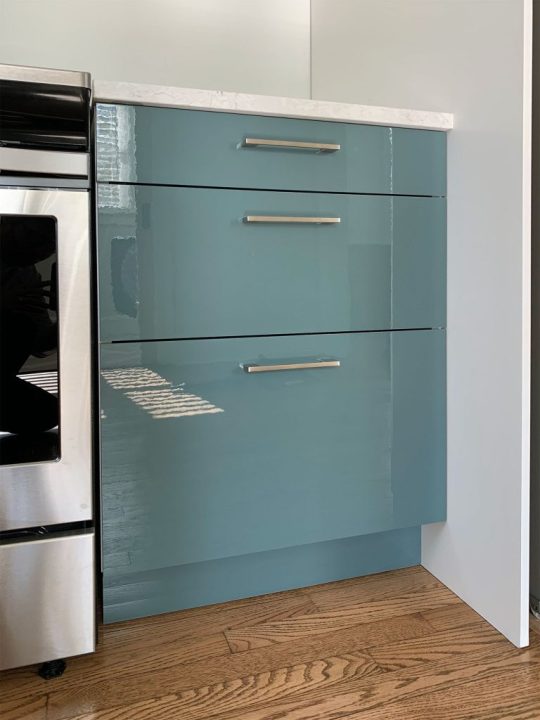
19. Nail Gun
In addition to using a nail gun to attach additional molding like quarter round if you’re adding that (again, the Ikea baseboards just snap on so you won’t need it for that) I also find a nail gun comes in handy sometimes for attaching small filler pieces. Especially in cases where they’re too thin to take a screw.
20. Others Tools
Real quick, here are some other items you may want to have on hand. Some I’ve mentioned or shown already, but haven’t officially listed:
Pen or pencil
Painters tape
Step ladder
Utility knife or scissors (for opening boxes faster!)
Crowbar (if you need to remove any baseboard or molding)
Broom, dustpan, and/or vacuum with a hose (we have this one)
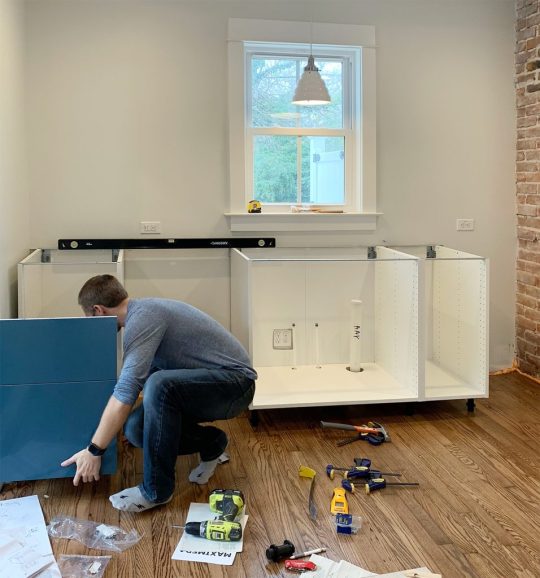
Your Ikea Kitchen Installation Tool Checklist
As promised, here’s all of the items in one place so you can make sure you have everything you need on hand. I’ve organized it a bit differently than above, just to put like items together. You may have special circumstances for your project that require more, less, or other tools – but I’ve found this to be a pretty comprehensive set:
Your itemized receipt / order
Hammer
Manual screwdrivers
Crowbar
Measuring tape
Pen or pencil
Painters tape
Step ladder
Power driver
Drill bit set with magnetic bit holder & 3/4″ bit for plumbing holes
Dremel or Hacksaw
Stud finder
Medium level (24″)
Large level (48″)
Wood shims
Cabinet screws (roughly 4 per cabinet)
Screws with anchors (roughly 2 per cabinet)
Jigsaw
Circular saw and/or table saw
Miter saw
Utility knife or scissors
Nail gun
Clamps
2×4″s (optional)
Kreg Jig (optional)
Broom, dustpan, and/or vacuum with hose
Good luck and happy installing!
P.S. For other posts we’ve written about installing Ikea cabinets, here’s one about installing our laundry room cabinets 5 years ago, and another one about using Ikea cabinets to make a wall of built-ins for our bonus room.
*This post contains affiliate links*
The post The Tools (And Tricks) You Need To Install An Ikea Kitchen Yourself appeared first on Young House Love.


0 notes
Text
The Tools (And Tricks) You Need To Install An Ikea Kitchen Yourself
Many of you have asked for tips and tricks to make installing an Ikea kitchen go more smoothly and look (and function) the best it possibly can. And the good news is that after installing three of them in a little over a year and a half (!!!), we have learned A TON about how to make things a little easier and help you end up with a better result. So settle in, I’ve got twenty tools & tips that can make all the difference.
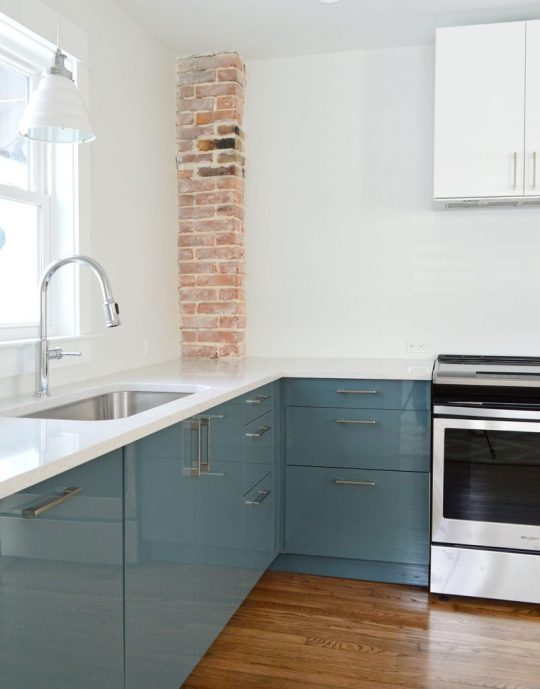
First off, we like Ikea cabinets and have personally installed them in five rooms: our laundry room & bonus room at home, our beach house kitchen, and now these two duplex kitchens. We have lived with the ones in our home for nearly five years and they’re great. Not a single issue. They are smartly made, very durable, and they have a great 25-year warranty and a great price tag (often thousands cheaper than other options). They also come with many thoughtful features like soft close drawers that come standard and tons of customization options. So yeah, some Ikea furniture is known for feeling a little cheap and wobbly, but that has not been our experience with their cabinets AT ALL.
Ok, but back to the point of this post – tips and tools to make your Ikea cabinet install easier. Some of the tools I’m listing here are absolutely necessary and some are optional (they’ll just make the process easier, faster, and less frustrating). And as you read through this list, I think you’ll also get a pretty good sense of the steps (and curveballs) involved too, which I hope will help as well.
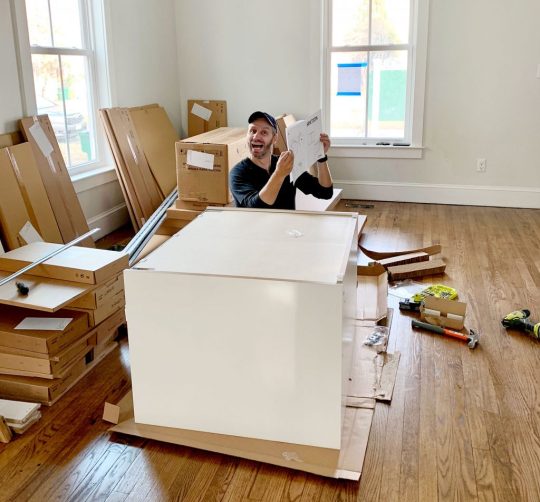
I’ll include a short bulleted list of everything at the end of the post too, that way you can use it as a tool checklist. But let’s just get right into it.
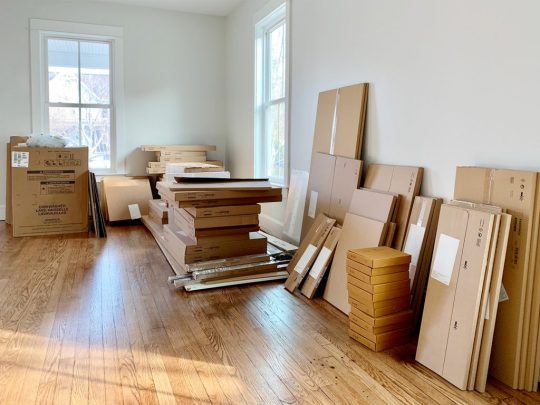
1. Your Itemized Receipt/Order
Before you build anything, you’ll want to take time to inventory and organize all of your boxes. We had over 200 boxes (!!!) delivered for our two duplex kitchens, so it helped to sort everything into piles beforehand.

We personally like to sort boxes by item (Sektion boxes over here, Maximera drawers over there, all of our cabinet fronts somewhere else, etc.) but you may find it helpful to sort yours by cabinet instead (ex: the box, drawer, hinges, and front for one cabinet all together in one pile – this is how Ikea breaks them up your order form). Either way you do it, this sorting process will help you identify any missing pieces and also make it faster once you start building.
2. Power driver (with Philips head)
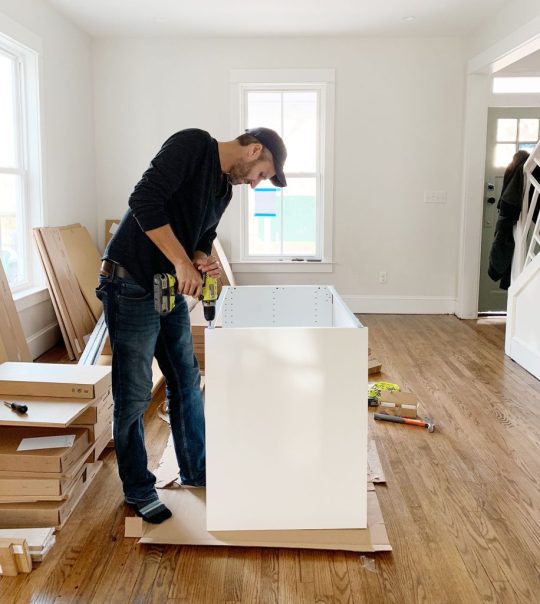
This combo gets a lot of use in this install (especially the power driver/drill) – but they’re needed first to construct your cabinet boxes (Sektion pieces). We love constructing the boxes first because you quickly get to see the shape of your kitchen come to life.
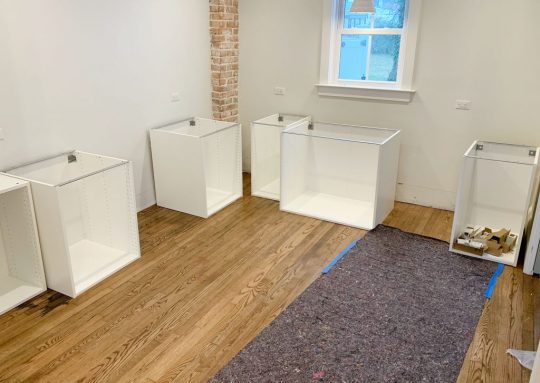
And even though Ikea is known for their allen wrenches, you don’t use them AT ALL during a typical kitchen installation! So don’t worry about having lots of specialty drill bits. You just need a normal Phillips head to screw these puppies together.
3. Hammer
You’ll also need a hammer handy to nail the MDF backings onto the cabinet backs. It may also be useful if you need to tap any anchors into your drywall when it comes time to hang your cabinets.
4. Magnetic Drill Bit Holder
Having one of these on your drill can save you a lot of frustration while building your cabinets and drawers. You can buy one separately for about $2 or it often comes included in drill/driver sets like ours. It’ll magnetize your drill bits, meaning many of the screws that Ikea provides will stick to your drill handsfree (thanks to the magic of magnets). We found this VERY helpful when trying to screw into small spots that were too tight for our fingertips (we couldn’t reach in and hold the screw steady, so having a magnetized drill bit that held it for us was key).
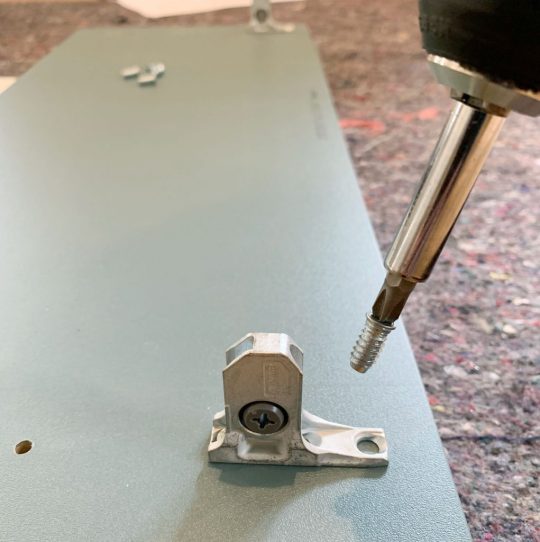
5. Measuring Tape
The next several tools are needed for attaching your cabinets to the wall. Whether you’re doing upper or lower cabinets, Ikea’s system uses a metal track (called the Sektion suspension rail) that you attach to your wall and then the cabinet boxes hang from these. The rail system is extremely handy because if you make sure the rail is level, your cabinets all hang from that and are guaranteed to be level! I know, it’s GREAT. The only time I don’t use their rail is when I don’t have a wall behind my cabinets, like if you’re doing an island. In that case I’ve built my own bases from 2×4″s, but more on that later.
For now, just know the measuring tape will be useful in determining exactly where in your kitchen you’re placing your cabinets – both side-to-side on each wall, and how high the rails need to be hung (Ikea provides guides for this in their instructions). You will probably want to have your kitchen plan/schematic from Ikea handy too.
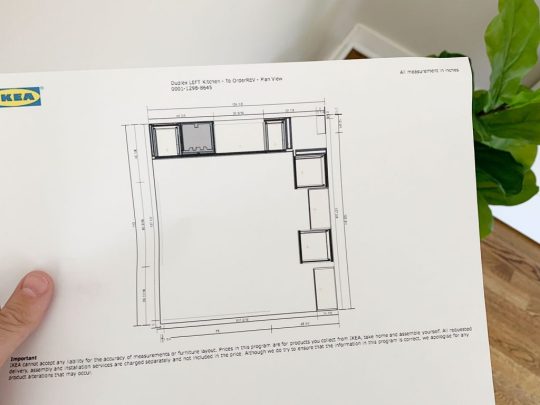
6. Dremel Or Hacksaw
Once you know where each run of cabinets is going, you’ll need to cut your metal suspension rails to size. The rails are sold in 7 foot lengths, but if you only have 4 feet of cabinetry in one area – you only want 4 feet of rail.
You can cut these by hand with a hacksaw, but we find it much faster to use our Dremel Multi-Max with a metal cutting blade.
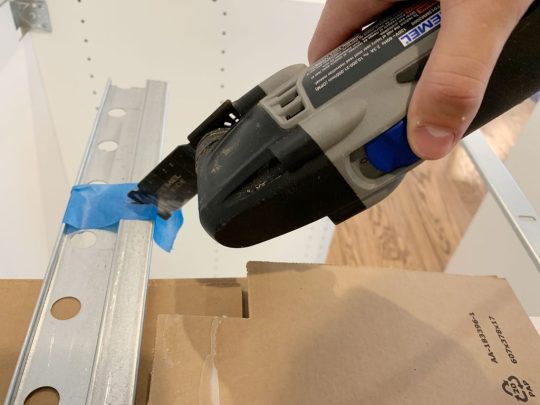
I typically mark my cut on a piece of painters tape and cut across the open top of one of our cabinet boxes (with a piece of cardboard to protect the cabinet underneath).
7. Stud Finder
You want to screw the rail into at least a few studs in your wall for maximum hold. So it’s smart to use a stud finder to locate and mark the studs that fall within the area you’re hanging the rail – that way you can be sure to go into them and get a nice firm hold. Since studs are typically 1.5″ thick, I like to mark the full width that my stud finder indicates, since you may not know exactly where the holes on the Sektion rail will line up.
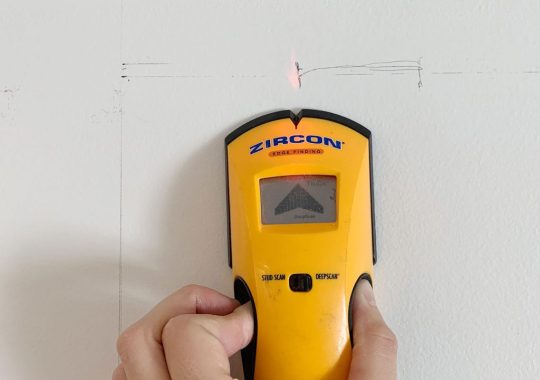
8. Medium-Size Level
Once I know where my studs are, I hold my cut-to-size metal rail and, with a medium sized level (like this 24″ level) held against it, I mark the top line of my rail AND where the holes line up with my studs. I suggest amedium sized level for this just because they’re easier to wrangle during this step.
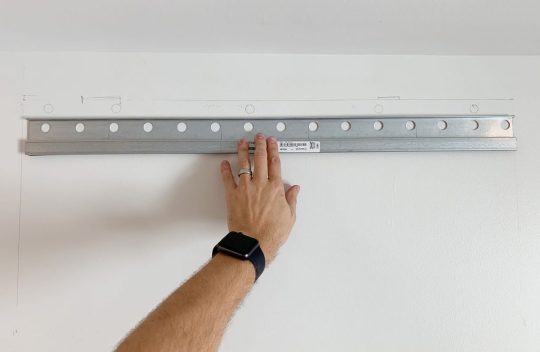
I also mark a few additional holes where I’ll use screws paired with anchors. I believe Ikea suggests at least having a screw every 12″ inches – but for short sections like this, I like to make sure I hit at least 2 studs and then have a screw at either end of the rail that goes into an anchor.
9. Heavy Duty Screws & Anchors
After some trial and error, we found that we like using these GRK Fastener Cabinet Screws to secure our rails into studs. They’re easy to drive, they hold really tight, and they include the star-head bit you need for them. We have tried other, cheaper “cabinet screws” and the heads kept breaking off. It was MADDENING.
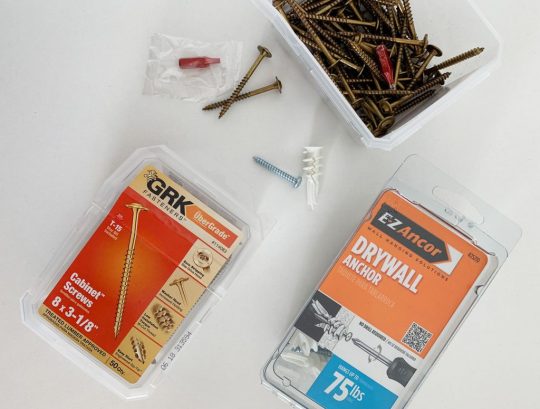
We also like to have some anchors on hand too, like these E-Z Ancor packs that come with screws, for those additional support screws that we add.
10. Long Level
One of the biggest challenges we’ve found in this process is getting things level. Just because you’ve hung your rail level on the wall doesn’t prevent things like slopes in your floor or bows in your wall from chucking some additional curveballs in your direction. So your best defenses are a lot of patience and a nice long level, like this 4ft level we bought specifically for this task (after learning that it’s a lot harder to use a smaller level to solve these issues).
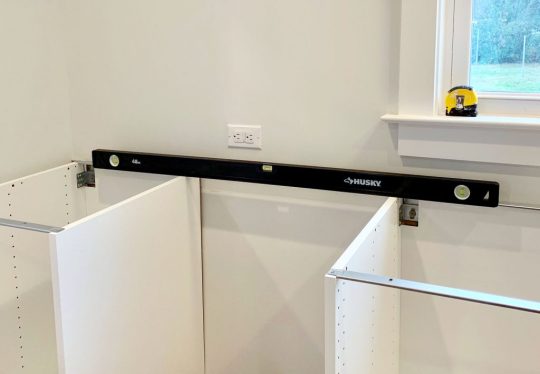
Your medium sized level will help with the process as well (especially in checking that each individual cabinet is level front-to-back) but you’ll want something bigger to check longer spans of cabinets. You could purchase an even longer level if you wanted, but they can start to get pricey, so we found a 4 foot long level to be sufficient, especially for checking across the gaps that you’ll leave for appliances like a 30″ stove or a standard 24″ dishwasher.
11. Shims
A lot of level issues can be corrected by twisting the adjustable plastic feet that come with your base cabinets, or by adjusting the placement of your metal rail. But if you’re dealing with bows in your wall (which you can find by placing your long level against it) you’ll want to have some wood shims on hand to place behind the metal rail. In these old houses, we had to use quite a few in a couple of places!
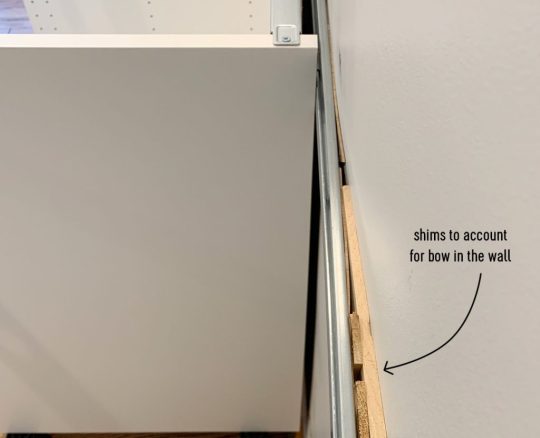
12. Jigsaw
When it comes time to install your sink base cabinet, you’ll need to make some holes for your plumbing. For smaller pipes like your water supply lines, you can just drill holes using a large drill bit (we used the 3/4″ bit in this set). But for things like your large drain pipe, you’ll either need to buy a larger hole bit or break out a jigsaw. Even though we don’t get the cleanest cut with it, the jigsaw gives us a little more wiggle room when placing the cabinet (since the drain pipe isn’t flexible like the supply lines) and we can also use it for other cuts like for exposing the outlets along the wall (the one below powers the garbage disposal under the sink).
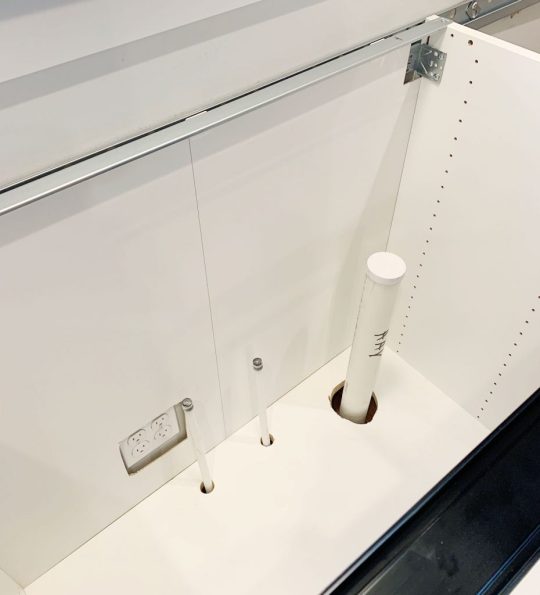
Just be sure to make careful measurements before you cut. We usually put a layer of painters tape around the area we’re cutting. It allows us to mark our cut without marking the cabinet, plus the tape helps keep the white finish from cracking off. Either way, this stuff will all be hidden under the sink so it doesn’t have to look perfect.
13. Clamps
As you start to get your cabinets in place and leveled, you’ll want to secure any adjacent cabinets together. Ikea provides screws for doing this, but you’ll want to use some clamps (we like these 6″ bar clamps) to hold the cabinets tightly together before you begin screwing.
We didn’t get a picture of that process, but the clamps come in handy A LOT as an extra set of hands – like when we were installing this bracket for the exhaust hoods that we hung over the stoves.
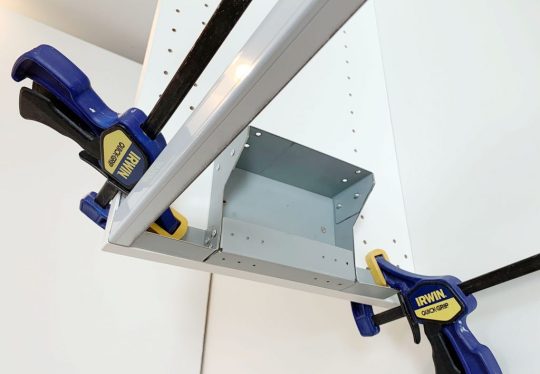
14. Circular Saw and/or Table Saw
In addition to screwing cabinets together, you may find yourself attaching cover panels or filler pieces at some point. Cover panels go on exposed ends of cabinets (so you can’t see the metal rail they hang on) or, in our case, we used some large cover panels to create a box around the fridges at the duplex. So you’ll need some sort of larger saw to make long, straight cuts. Our cover panels were a bit too wide, so I used a circular saw to shave a few inches off one side.
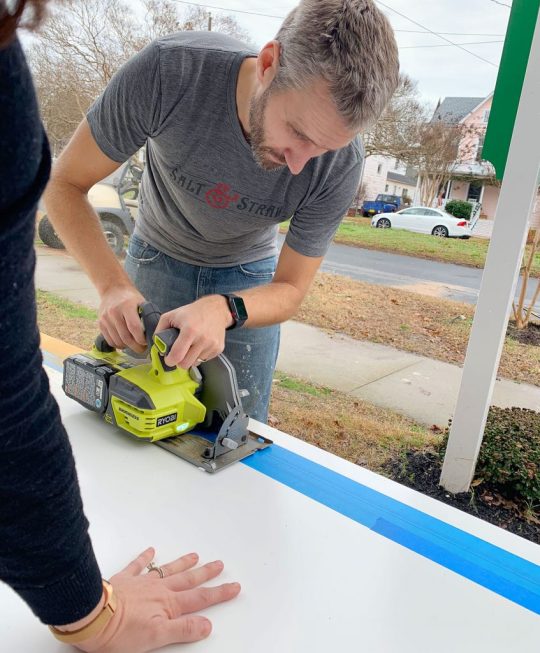
I didn’t use a table saw for that panel because running an 8 foot tall panel that’s this wide across my table saw would’ve been tough. But for smaller pieces (like filler pieces that are only about 3 feet long) a table saw is often easier, especially if you’re only shaving off a little bit. But if that’s too pricey and you’ve got a steady hand, you can get by with the circular saw.
15. 2 x 4″ Boards
Every time we’ve installed an Ikea kitchen we’ve needed some 2×4″s at some point. At the beach house we used them to make some bases for the island cabinets.
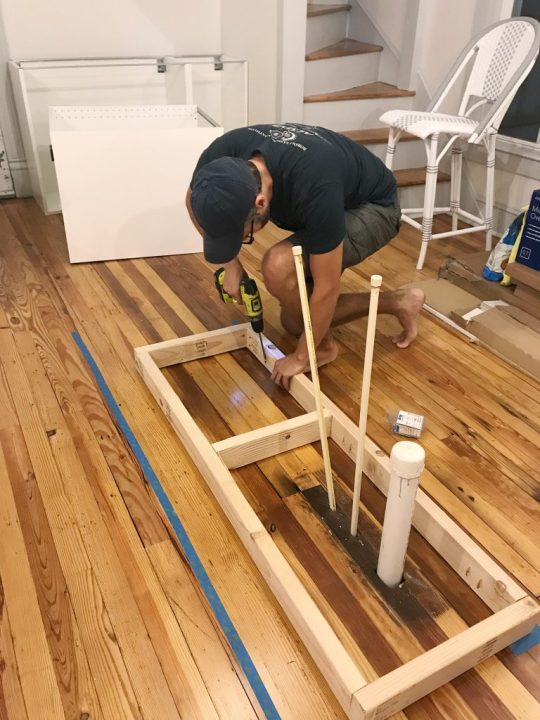
Basically, they were just some boxes we made almost the same size as each cabinet (slightly narrower to account for the toekicks) that we secured to the floor using pocket holes. To drill the pocket holes, you can use something like a…
16. Kreg Jig
Now, a Kreg Jig isn’t absolutely necessary here, but I’ve had one for around nine years now so I’m accustomed to breaking it out for tasks like this. So while I’m a big fan of having one in your arsenal, I understand that you’ve just bought a new kitchen so tacking on another $99 tool to your budget isn’t always practical.
I did use it again for the duplexes to make more 2×4″s into boxes (this time for mounting the above-fridge cabinet away from the wall, so it sat closer to the front of the fridge).
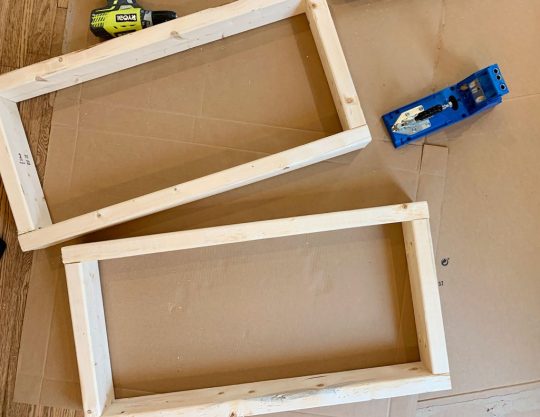
The boxes acted as an extension of the wall. The top one was for mounting the metal rail, and the bottom one gave the base of the cabinet a spot to rest so it didn’t tip back wildly. They also gave us a way to mount that large cover panel to box in the fridge.
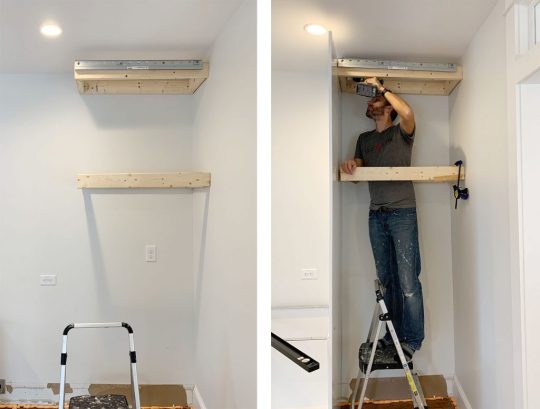
I guess I should add in here that a step ladder is also useful, so let’s officially put that on the list.
17. Manual Screwdriver
Once your cabinets and panels are hung, leveled, and secured to each other, the next part of the process is to add your doors and drawers. The instructions here are pretty self-explanatory and the main tool you need is a power driver to screw everything together. Our main word of warning is to pay close attention to screw placements when you’re assembling drawers! Depending on where each drawer goes in the stack (top, middle, or bottom) there are sliiiiight differences in the instructions. So while we find it most efficient to do multiple drawers at once, we still pay close attention – especially for the first few.
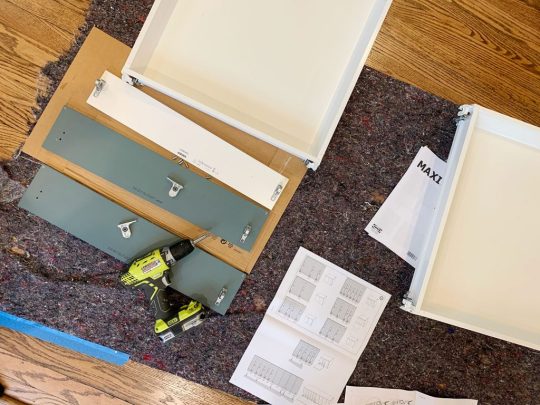
Ok, back to the manual screw drivers. One big part of installing doors and drawers is tweaking and adjusting them for even and level spacing. For this you’ll want to a regular ol‘ manual Philips head screwdriver. It can be kind of tedious and frustrating, but it’s worth taking your time with it. This video shows it in a bit more detail.
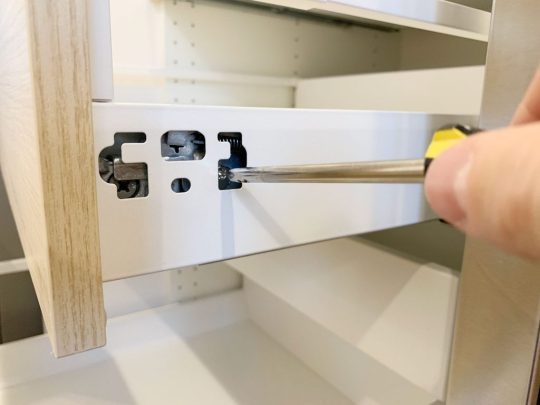
You also will want a flathead screwdriver for twisting the little piece of plastic that locks each cabinet onto the metal rail, which comes up earlier in the process.
18. Miter Saw
Tasks like cutting your 2×4″s or even your filler pieces will be made easier and faster by having a miter saw on hand (we own this miter saw). You’ll also find that it’s helpful when it’s time to cut and install your toekicks. Ikea’s sells toekicks to match your cabinet fronts and they clip on to the plastic feet you will have attached to the bottom of your base cabinets.
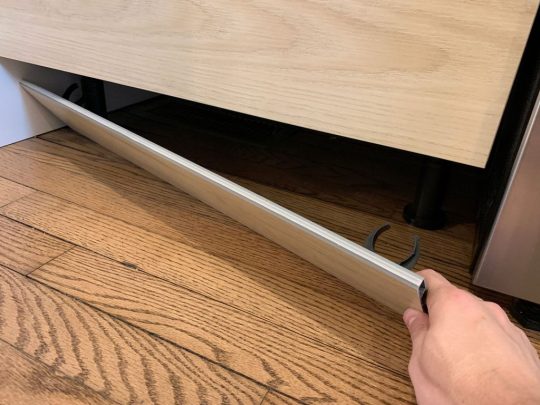
In our beach house kitchen we installed quarter round in front of the Ikea baseboards to help disguise some floor level issues, as well as using quarter round around the island where we built our own base (we used standard wood baseboard trim instead of the Ikea toekicks around the island). Meanwhile, we just used the Ikea toekicks in the duplex kitchens and the floors were more level (and we think the wood and blue cabinets were more forgiving than white ones) so we didn’t need to add quarter round and it looks great.
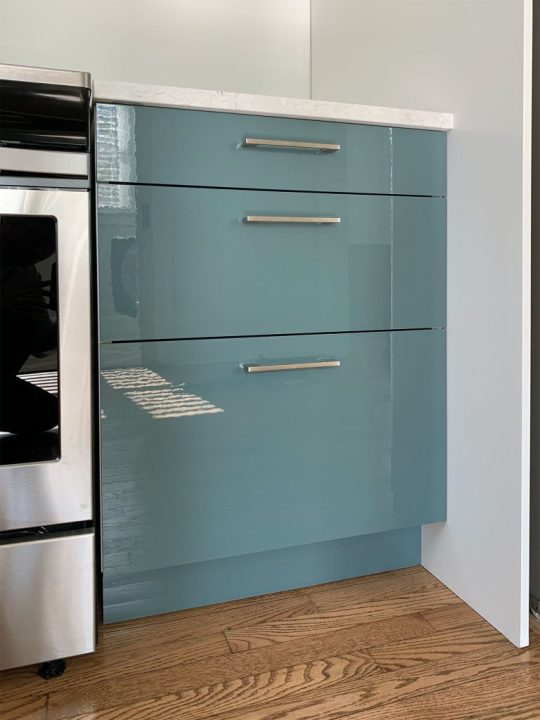
19. Nail Gun
In addition to using a nail gun to attach additional molding like quarter round if you’re adding that (again, the Ikea baseboards just snap on so you won’t need it for that) I also find a nail gun comes in handy sometimes for attaching small filler pieces. Especially in cases where they’re too thin to take a screw.
20. Others Tools
Real quick, here are some other items you may want to have on hand. Some I’ve mentioned or shown already, but haven’t officially listed:
Pen or pencil
Painters tape
Step ladder
Utility knife or scissors (for opening boxes faster!)
Crowbar (if you need to remove any baseboard or molding)
Broom, dustpan, and/or vacuum with a hose (we have this one)
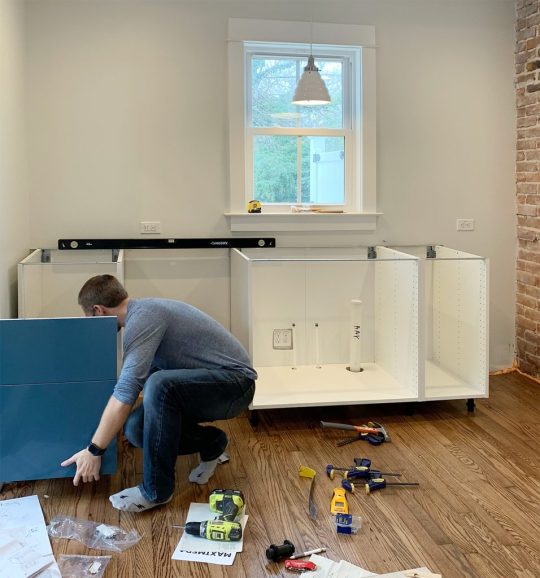
Your Ikea Kitchen Installation Tool Checklist
As promised, here’s all of the items in one place so you can make sure you have everything you need on hand. I’ve organized it a bit differently than above, just to put like items together. You may have special circumstances for your project that require more, less, or other tools – but I’ve found this to be a pretty comprehensive set:
Your itemized receipt / order
Hammer
Manual screwdrivers
Crowbar
Measuring tape
Pen or pencil
Painters tape
Step ladder
Power driver
Drill bit set with magnetic bit holder & 3/4″ bit for plumbing holes
Dremel or Hacksaw
Stud finder
Medium level (24″)
Large level (48″)
Wood shims
Cabinet screws (roughly 4 per cabinet)
Screws with anchors (roughly 2 per cabinet)
Jigsaw
Circular saw and/or table saw
Miter saw
Utility knife or scissors
Nail gun
Clamps
2×4″s (optional)
Kreg Jig (optional)
Broom, dustpan, and/or vacuum with hose
Good luck and happy installing!
P.S. For other posts we’ve written about installing Ikea cabinets, here’s one about installing our laundry room cabinets 5 years ago, and another one about using Ikea cabinets to make a wall of built-ins for our bonus room.
*This post contains affiliate links*
The post The Tools (And Tricks) You Need To Install An Ikea Kitchen Yourself appeared first on Young House Love.
0 notes
Text
The Tools (And Tricks) You Need To Install An Ikea Kitchen Yourself
Many of you have asked for tips and tricks to make installing an Ikea kitchen go more smoothly and look (and function) the best it possibly can. And the good news is that after installing three of them in a little over a year and a half (!!!), we have learned A TON about how to make things a little easier and help you end up with a better result. So settle in, I’ve got twenty tools & tips that can make all the difference.
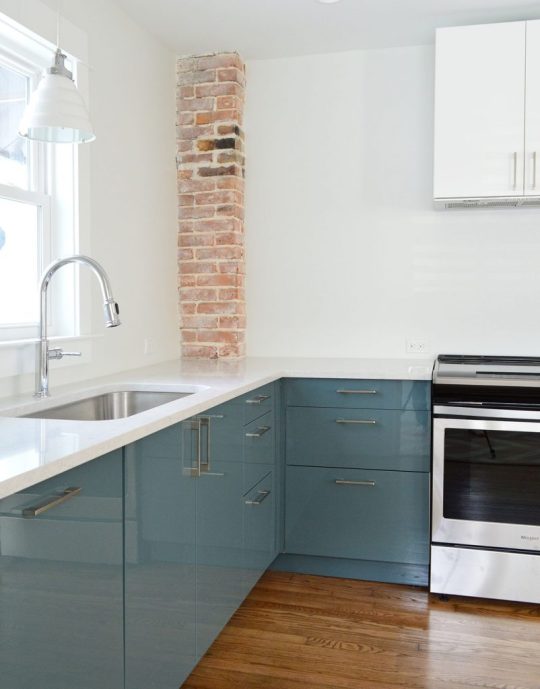
First off, we like Ikea cabinets and have personally installed them in five rooms: our laundry room & bonus room at home, our beach house kitchen, and now these two duplex kitchens. We have lived with the ones in our home for nearly five years and they’re great. Not a single issue. They are smartly made, very durable, and they have a great 25-year warranty and a great price tag (often thousands cheaper than other options). They also come with many thoughtful features like soft close drawers that come standard and tons of customization options. So yeah, some Ikea furniture is known for feeling a little cheap and wobbly, but that has not been our experience with their cabinets AT ALL.
Ok, but back to the point of this post – tips and tools to make your Ikea cabinet install easier. Some of the tools I’m listing here are absolutely necessary and some are optional (they’ll just make the process easier, faster, and less frustrating). And as you read through this list, I think you’ll also get a pretty good sense of the steps (and curveballs) involved too, which I hope will help as well.
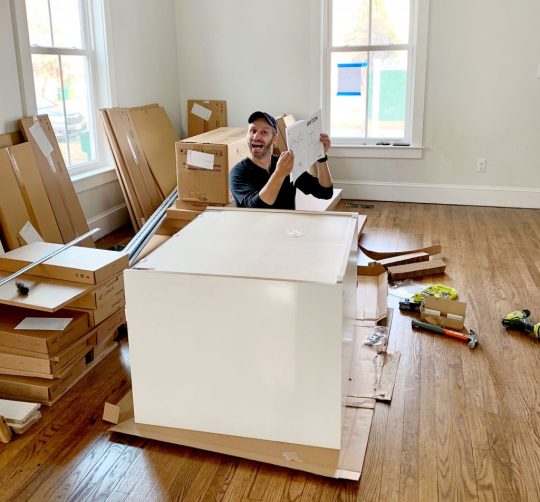
I’ll include a short bulleted list of everything at the end of the post too, that way you can use it as a tool checklist. But let’s just get right into it.
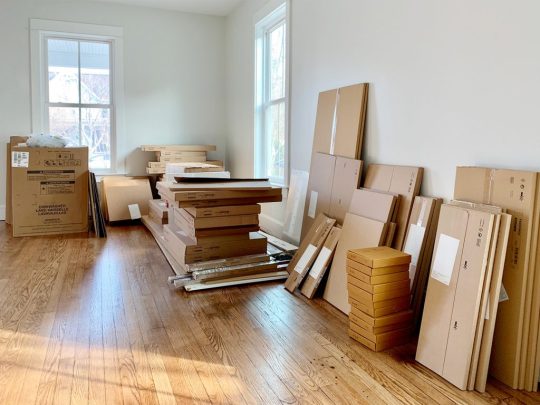
1. Your Itemized Receipt/Order
Before you build anything, you’ll want to take time to inventory and organize all of your boxes. We had over 200 boxes (!!!) delivered for our two duplex kitchens, so it helped to sort everything into piles beforehand.

We personally like to sort boxes by item (Sektion boxes over here, Maximera drawers over there, all of our cabinet fronts somewhere else, etc.) but you may find it helpful to sort yours by cabinet instead (ex: the box, drawer, hinges, and front for one cabinet all together in one pile – this is how Ikea breaks them up your order form). Either way you do it, this sorting process will help you identify any missing pieces and also make it faster once you start building.
2. Power driver (with Philips head)
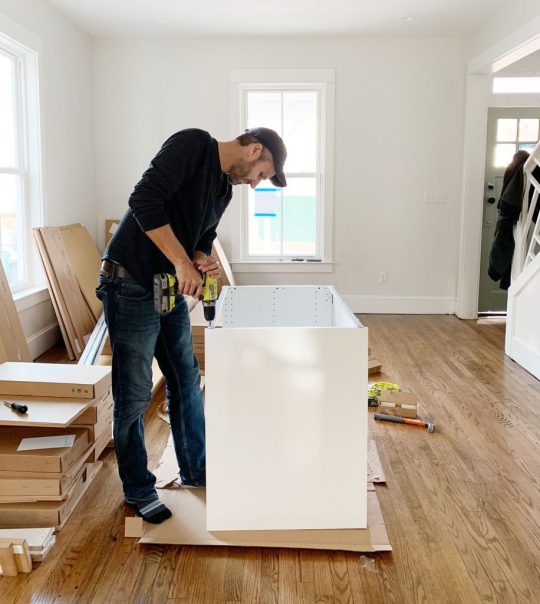
This combo gets a lot of use in this install (especially the power driver/drill) – but they’re needed first to construct your cabinet boxes (Sektion pieces). We love constructing the boxes first because you quickly get to see the shape of your kitchen come to life.
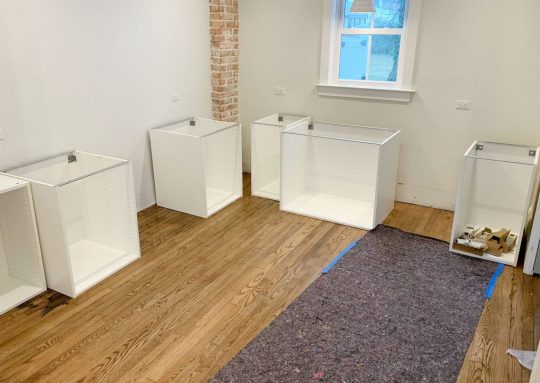
And even though Ikea is known for their allen wrenches, you don’t use them AT ALL during a typical kitchen installation! So don’t worry about having lots of specialty drill bits. You just need a normal Phillips head to screw these puppies together.
3. Hammer
You’ll also need a hammer handy to nail the MDF backings onto the cabinet backs. It may also be useful if you need to tap any anchors into your drywall when it comes time to hang your cabinets.
4. Magnetic Drill Bit Holder
Having one of these on your drill can save you a lot of frustration while building your cabinets and drawers. You can buy one separately for about $2 or it often comes included in drill/driver sets like ours. It’ll magnetize your drill bits, meaning many of the screws that Ikea provides will stick to your drill handsfree (thanks to the magic of magnets). We found this VERY helpful when trying to screw into small spots that were too tight for our fingertips (we couldn’t reach in and hold the screw steady, so having a magnetized drill bit that held it for us was key).
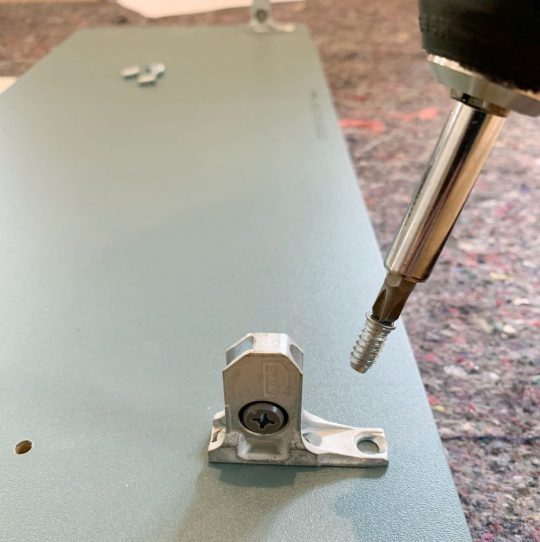
5. Measuring Tape
The next several tools are needed for attaching your cabinets to the wall. Whether you’re doing upper or lower cabinets, Ikea’s system uses a metal track (called the Sektion suspension rail) that you attach to your wall and then the cabinet boxes hang from these. The rail system is extremely handy because if you make sure the rail is level, your cabinets all hang from that and are guaranteed to be level! I know, it’s GREAT. The only time I don’t use their rail is when I don’t have a wall behind my cabinets, like if you’re doing an island. In that case I’ve built my own bases from 2×4″s, but more on that later.
For now, just know the measuring tape will be useful in determining exactly where in your kitchen you’re placing your cabinets – both side-to-side on each wall, and how high the rails need to be hung (Ikea provides guides for this in their instructions). You will probably want to have your kitchen plan/schematic from Ikea handy too.
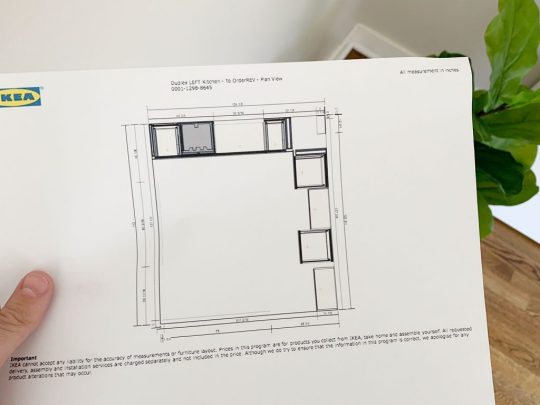
6. Dremel Or Hacksaw
Once you know where each run of cabinets is going, you’ll need to cut your metal suspension rails to size. The rails are sold in 7 foot lengths, but if you only have 4 feet of cabinetry in one area – you only want 4 feet of rail.
You can cut these by hand with a hacksaw, but we find it much faster to use our Dremel Multi-Max with a metal cutting blade.
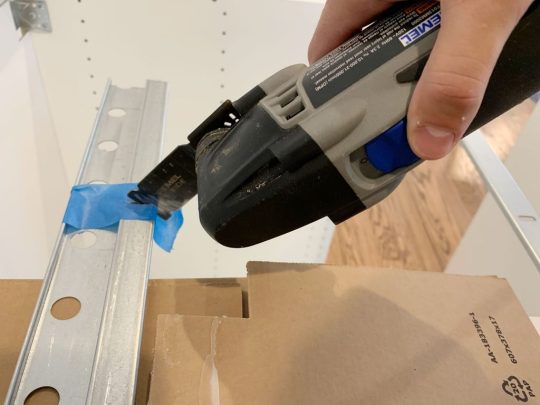
I typically mark my cut on a piece of painters tape and cut across the open top of one of our cabinet boxes (with a piece of cardboard to protect the cabinet underneath).
7. Stud Finder
You want to screw the rail into at least a few studs in your wall for maximum hold. So it’s smart to use a stud finder to locate and mark the studs that fall within the area you’re hanging the rail – that way you can be sure to go into them and get a nice firm hold. Since studs are typically 1.5″ thick, I like to mark the full width that my stud finder indicates, since you may not know exactly where the holes on the Sektion rail will line up.
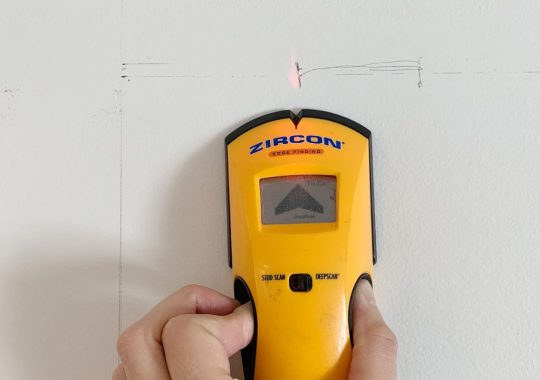
8. Medium-Size Level
Once I know where my studs are, I hold my cut-to-size metal rail and, with a medium sized level (like this 24″ level) held against it, I mark the top line of my rail AND where the holes line up with my studs. I suggest amedium sized level for this just because they’re easier to wrangle during this step.
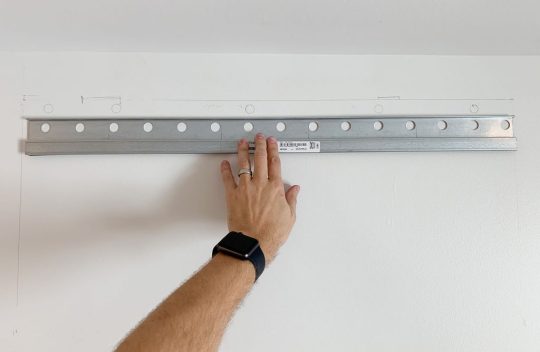
I also mark a few additional holes where I’ll use screws paired with anchors. I believe Ikea suggests at least having a screw every 12″ inches – but for short sections like this, I like to make sure I hit at least 2 studs and then have a screw at either end of the rail that goes into an anchor.
9. Heavy Duty Screws & Anchors
After some trial and error, we found that we like using these GRK Fastener Cabinet Screws to secure our rails into studs. They’re easy to drive, they hold really tight, and they include the star-head bit you need for them. We have tried other, cheaper “cabinet screws” and the heads kept breaking off. It was MADDENING.
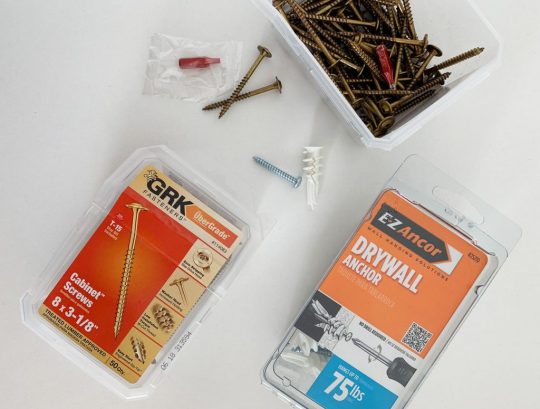
We also like to have some anchors on hand too, like these E-Z Ancor packs that come with screws, for those additional support screws that we add.
10. Long Level
One of the biggest challenges we’ve found in this process is getting things level. Just because you’ve hung your rail level on the wall doesn’t prevent things like slopes in your floor or bows in your wall from chucking some additional curveballs in your direction. So your best defenses are a lot of patience and a nice long level, like this 4ft level we bought specifically for this task (after learning that it’s a lot harder to use a smaller level to solve these issues).
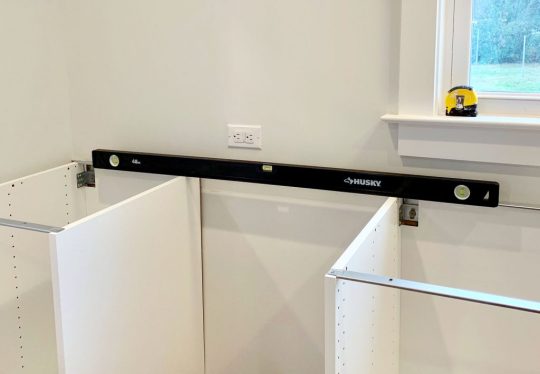
Your medium sized level will help with the process as well (especially in checking that each individual cabinet is level front-to-back) but you’ll want something bigger to check longer spans of cabinets. You could purchase an even longer level if you wanted, but they can start to get pricey, so we found a 4 foot long level to be sufficient, especially for checking across the gaps that you’ll leave for appliances like a 30″ stove or a standard 24″ dishwasher.
11. Shims
A lot of level issues can be corrected by twisting the adjustable plastic feet that come with your base cabinets, or by adjusting the placement of your metal rail. But if you’re dealing with bows in your wall (which you can find by placing your long level against it) you’ll want to have some wood shims on hand to place behind the metal rail. In these old houses, we had to use quite a few in a couple of places!
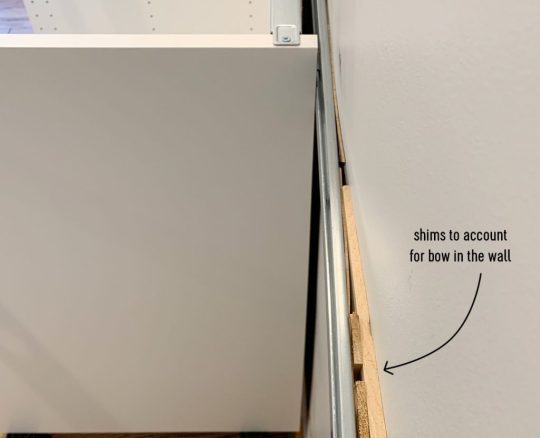
12. Jigsaw
When it comes time to install your sink base cabinet, you’ll need to make some holes for your plumbing. For smaller pipes like your water supply lines, you can just drill holes using a large drill bit (we used the 3/4″ bit in this set). But for things like your large drain pipe, you’ll either need to buy a larger hole bit or break out a jigsaw. Even though we don’t get the cleanest cut with it, the jigsaw gives us a little more wiggle room when placing the cabinet (since the drain pipe isn’t flexible like the supply lines) and we can also use it for other cuts like for exposing the outlets along the wall (the one below powers the garbage disposal under the sink).
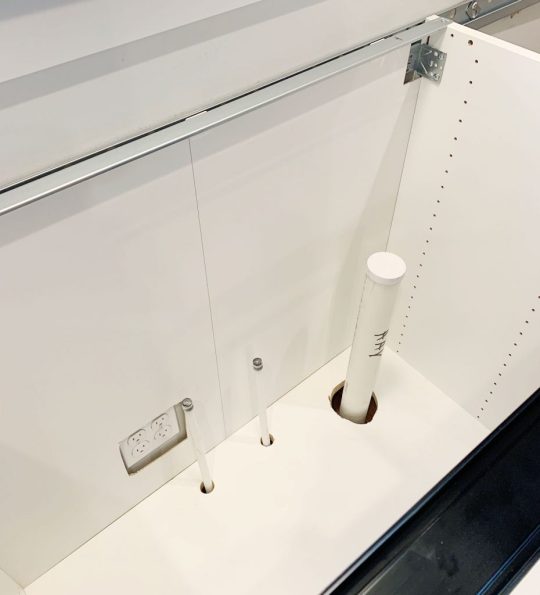
Just be sure to make careful measurements before you cut. We usually put a layer of painters tape around the area we’re cutting. It allows us to mark our cut without marking the cabinet, plus the tape helps keep the white finish from cracking off. Either way, this stuff will all be hidden under the sink so it doesn’t have to look perfect.
13. Clamps
As you start to get your cabinets in place and leveled, you’ll want to secure any adjacent cabinets together. Ikea provides screws for doing this, but you’ll want to use some clamps (we like these 6″ bar clamps) to hold the cabinets tightly together before you begin screwing.
We didn’t get a picture of that process, but the clamps come in handy A LOT as an extra set of hands – like when we were installing this bracket for the exhaust hoods that we hung over the stoves.
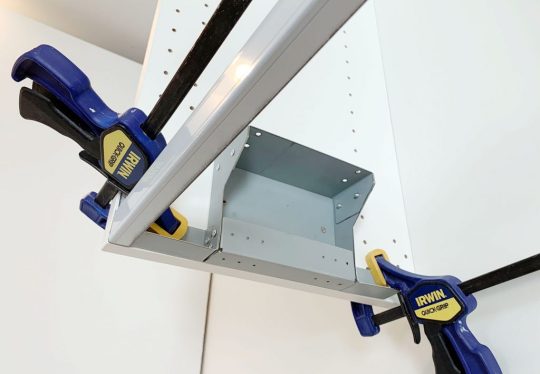
14. Circular Saw and/or Table Saw
In addition to screwing cabinets together, you may find yourself attaching cover panels or filler pieces at some point. Cover panels go on exposed ends of cabinets (so you can’t see the metal rail they hang on) or, in our case, we used some large cover panels to create a box around the fridges at the duplex. So you’ll need some sort of larger saw to make long, straight cuts. Our cover panels were a bit too wide, so I used a circular saw to shave a few inches off one side.
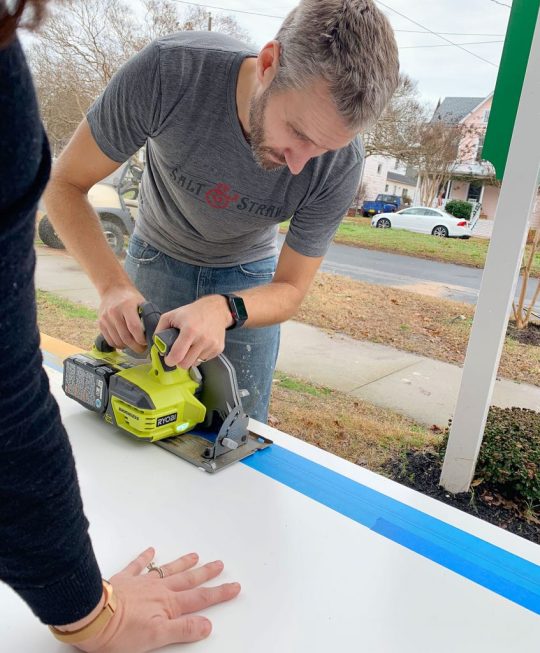
I didn’t use a table saw for that panel because running an 8 foot tall panel that’s this wide across my table saw would’ve been tough. But for smaller pieces (like filler pieces that are only about 3 feet long) a table saw is often easier, especially if you’re only shaving off a little bit. But if that’s too pricey and you’ve got a steady hand, you can get by with the circular saw.
15. 2 x 4″ Boards
Every time we’ve installed an Ikea kitchen we’ve needed some 2×4″s at some point. At the beach house we used them to make some bases for the island cabinets.
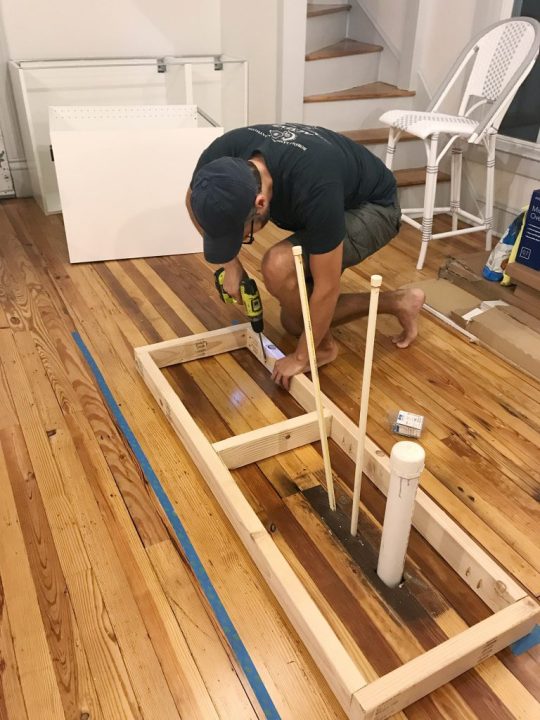
Basically, they were just some boxes we made almost the same size as each cabinet (slightly narrower to account for the toekicks) that we secured to the floor using pocket holes. To drill the pocket holes, you can use something like a…
16. Kreg Jig
Now, a Kreg Jig isn’t absolutely necessary here, but I’ve had one for around nine years now so I’m accustomed to breaking it out for tasks like this. So while I’m a big fan of having one in your arsenal, I understand that you’ve just bought a new kitchen so tacking on another $99 tool to your budget isn’t always practical.
I did use it again for the duplexes to make more 2×4″s into boxes (this time for mounting the above-fridge cabinet away from the wall, so it sat closer to the front of the fridge).
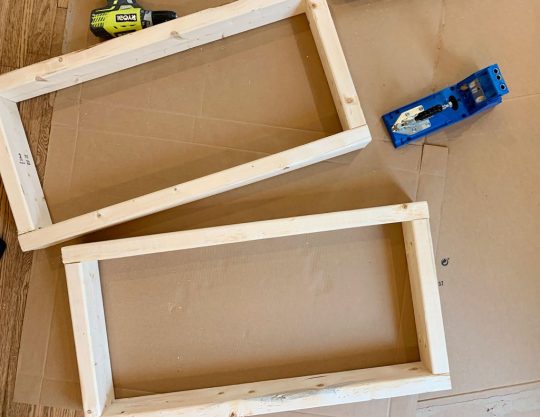
The boxes acted as an extension of the wall. The top one was for mounting the metal rail, and the bottom one gave the base of the cabinet a spot to rest so it didn’t tip back wildly. They also gave us a way to mount that large cover panel to box in the fridge.
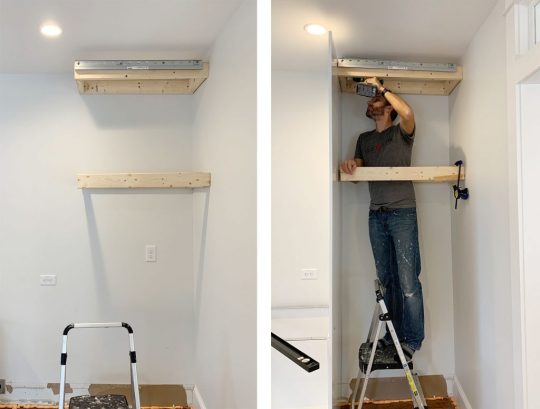
I guess I should add in here that a step ladder is also useful, so let’s officially put that on the list.
17. Manual Screwdriver
Once your cabinets and panels are hung, leveled, and secured to each other, the next part of the process is to add your doors and drawers. The instructions here are pretty self-explanatory and the main tool you need is a power driver to screw everything together. Our main word of warning is to pay close attention to screw placements when you’re assembling drawers! Depending on where each drawer goes in the stack (top, middle, or bottom) there are sliiiiight differences in the instructions. So while we find it most efficient to do multiple drawers at once, we still pay close attention – especially for the first few.
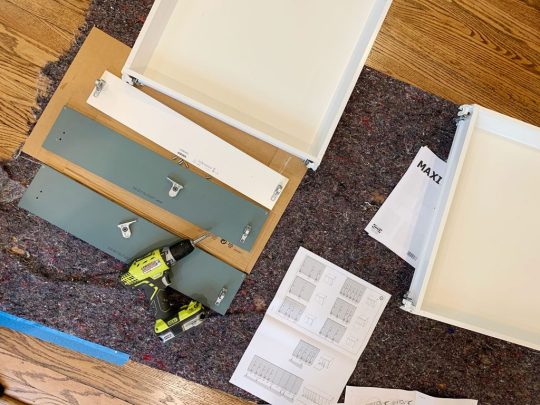
Ok, back to the manual screw drivers. One big part of installing doors and drawers is tweaking and adjusting them for even and level spacing. For this you’ll want to a regular ol‘ manual Philips head screwdriver. It can be kind of tedious and frustrating, but it’s worth taking your time with it. This video shows it in a bit more detail.
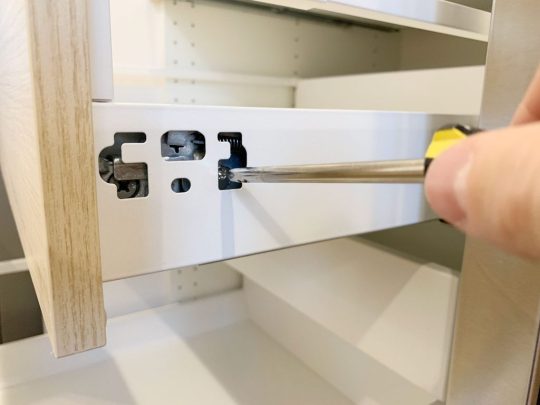
You also will want a flathead screwdriver for twisting the little piece of plastic that locks each cabinet onto the metal rail, which comes up earlier in the process.
18. Miter Saw
Tasks like cutting your 2×4″s or even your filler pieces will be made easier and faster by having a miter saw on hand (we own this miter saw). You’ll also find that it’s helpful when it’s time to cut and install your toekicks. Ikea’s sells toekicks to match your cabinet fronts and they clip on to the plastic feet you will have attached to the bottom of your base cabinets.
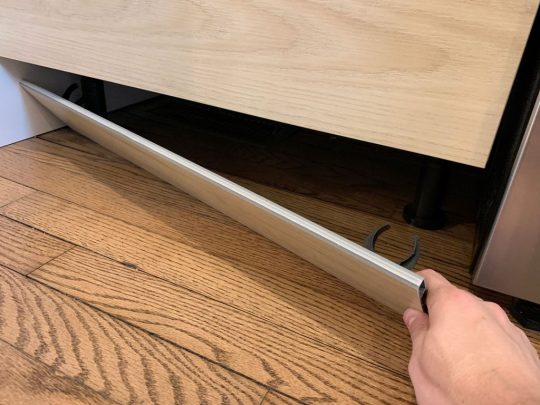
In our beach house kitchen we installed quarter round in front of the Ikea baseboards to help disguise some floor level issues, as well as using quarter round around the island where we built our own base (we used standard wood baseboard trim instead of the Ikea toekicks around the island). Meanwhile, we just used the Ikea toekicks in the duplex kitchens and the floors were more level (and we think the wood and blue cabinets were more forgiving than white ones) so we didn’t need to add quarter round and it looks great.
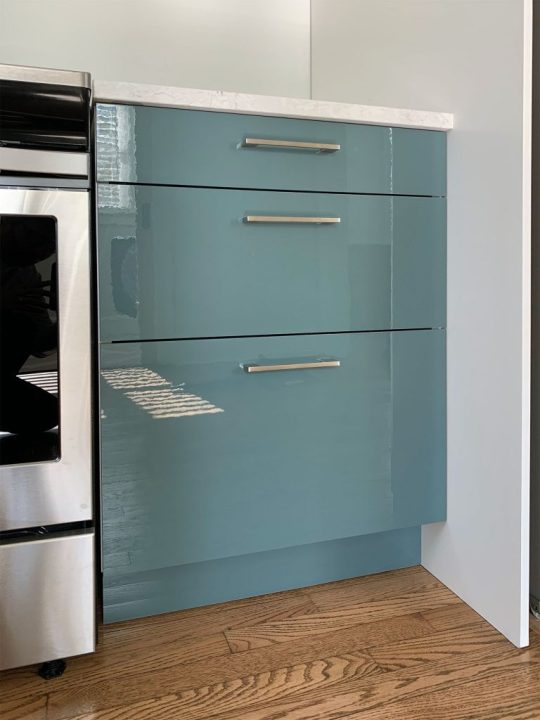
19. Nail Gun
In addition to using a nail gun to attach additional molding like quarter round if you’re adding that (again, the Ikea baseboards just snap on so you won’t need it for that) I also find a nail gun comes in handy sometimes for attaching small filler pieces. Especially in cases where they’re too thin to take a screw.
20. Others Tools
Real quick, here are some other items you may want to have on hand. Some I’ve mentioned or shown already, but haven’t officially listed:
Pen or pencil
Painters tape
Step ladder
Utility knife or scissors (for opening boxes faster!)
Crowbar (if you need to remove any baseboard or molding)
Broom, dustpan, and/or vacuum with a hose (we have this one)
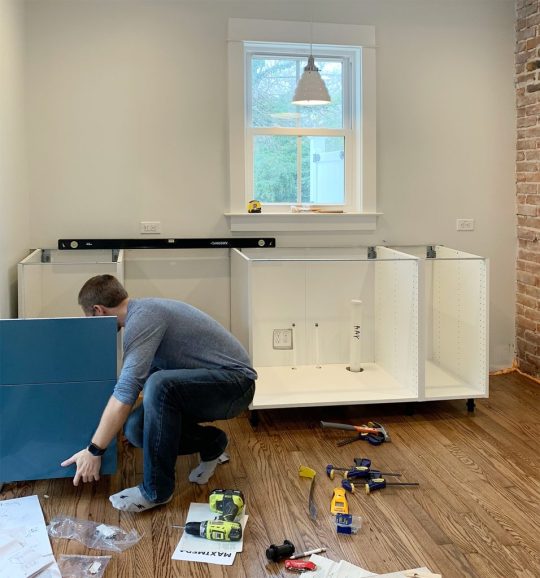
Your Ikea Kitchen Installation Tool Checklist
As promised, here’s all of the items in one place so you can make sure you have everything you need on hand. I’ve organized it a bit differently than above, just to put like items together. You may have special circumstances for your project that require more, less, or other tools – but I’ve found this to be a pretty comprehensive set:
Your itemized receipt / order
Hammer
Manual screwdrivers
Crowbar
Measuring tape
Pen or pencil
Painters tape
Step ladder
Power driver
Drill bit set with magnetic bit holder & 3/4″ bit for plumbing holes
Dremel or Hacksaw
Stud finder
Medium level (24″)
Large level (48″)
Wood shims
Cabinet screws (roughly 4 per cabinet)
Screws with anchors (roughly 2 per cabinet)
Jigsaw
Circular saw and/or table saw
Miter saw
Utility knife or scissors
Nail gun
Clamps
2×4″s (optional)
Kreg Jig (optional)
Broom, dustpan, and/or vacuum with hose
Good luck and happy installing!
P.S. For other posts we’ve written about installing Ikea cabinets, here’s one about installing our laundry room cabinets 5 years ago, and another one about using Ikea cabinets to make a wall of built-ins for our bonus room.
*This post contains affiliate links*
The post The Tools (And Tricks) You Need To Install An Ikea Kitchen Yourself appeared first on Young House Love.


The Tools (And Tricks) You Need To Install An Ikea Kitchen Yourself published first on https://landscapingmates.blogspot.com
0 notes
Text
How to Use Instagram
2020 Statistics found 1 billion monthly active Instagram users. This presents that people are so much connected with Instagram, among these is also included the business users. They use Instagram for marketing and to increase the visibility of their services, products and etc. Now a day’s most people are aware of Instagram’s every feature and Instagram developing day by day. If you are an existing user then you must probably know about Instagram uses, but if you’re new to Instagram, it might be daunting to think about how you can stand out in such a large crowd. But started with Instagram is much easier than it might look.
In this article, we will teach you how to use Instagram from beginning to end. Be ready to explore the world by sitting at one corner of your house.
How to Use Instagram
If you haven’t downloaded the Instagram App so first of all download the app on your phone. You can download the Instagram app from Google Play Store, App Store, or Microsoft Store. When you create your account on Instagram account, the app will guide you through a few basic tips for getting up. Here are two things to take note of:
1. How to Create Your Account
The mobile app will guide you with basic steps to create your profile.
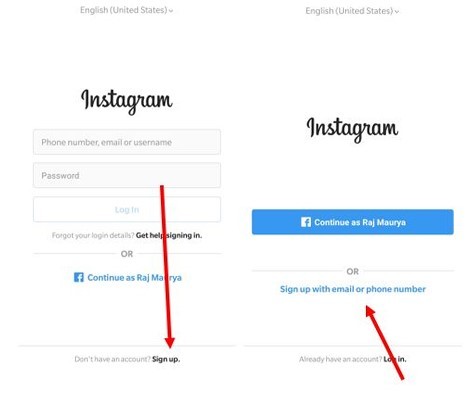
What you need to focus on here is how to stand out in profile. Your Instagram profile photo will be displayed as a circle. Whatever image you are using for the profile photo make sure you keep it in the center of your image.

If you are using it for business purposes and you might want to use a business logo for a profile photo, be sure to keep it in the center of your image. Your profile image will look relatively small in the app; you might want to use a prominent logo mark, instead of a logo with text.
The app won’t prompt you to fill out your profile information but it will good to show your profile plethoric. To fill our profile information, go to your profile in the app, and click on “Edit Profile”. You can set here user name, name, your bio, your location. Bear in mind second stage of judging your profile for visitors is your
bio, so your bio should be so unique and real, exactly what you do. If you using it for business then, the two fields most required to fill out are your website and your bio. If you want to change your Instagram username (i.e. @username), you can also change it.
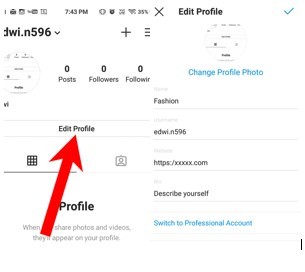
It’s Done! You have just set up your Instagram account!
2. Choose Following and Followers
Now you can follow friends and let follow your friend, family and more. By using the search bar appearing on the down right side of the app, you can search your friends and they can also follow you. To find someone you must know their username or Instagram handle to find them.
If you are using Instagram for business then as you are profile is new you have to start following other users to start and increase the visibility of your business.
Tips
Go in the search bar and type in a keyword that is relevant to your business in the search bar or search your friend with the username.
You can check out the suggested Instagram profiles or hashtags.
You should follow the profiles that are relevant to your business
You can also check out profiles that are recommended to you when you follow a profile.
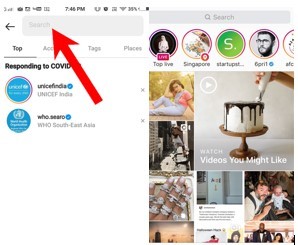
Post Photos or Videos
Now when you want to post a photo or video, you just need to hit the “+” icon at the bottom. Instagram will show you the most recent photos in your photo library. You can also choose to take w new photo or video by tapping on “Photo” or “Video” respectively.

Few tips to select your Media
If you are uploading a photo direct from your library, you can upload it your photo as a portrait or landscape. Select your preferred photo and tap on the icon with two arrows in the lower-left corner of the preview. You can then move and zoom the photo to adjust how you want it to fit within the frame. Instagram also provides some filters; you can use these filters to stand out.
You can upload up to 10 photos and videos into a single Instagram post. Click on the icon with two overlapping squares in the lower-right corner of the preview and select your media you want to post.
If you want to take a video directly from the Instagram, press and hold the record button to record your video. If you want to film a few different things, point your phone camera at something else, and press the record button again to continue with the recording.
Standout in Post Visibility
Instagram provides various tools to stand out among millions. If you selected your media for your post, you can add a filter or edit its orientation, brightness, contrast, and more. These options can be found below the image or in the Edit section. When you are ready with your post, click on “Next” to go ahead.
Write a Caption: You can mention another Instagram account (i.e.@username) and add hashtags. Accounts that you mention will receive a notification about it, and your post will appear when someone searches for the hashtags you used.
Tag People: Just like Facebook you can also tag people with your photo and they will get a notification when the post will be posted successfully.
Share: You can also share your post with other social media platforms. Click on the three-dot right side of the post and you share the post on other social media. Or you can directly share your media when you post your media on Instagram you can find the option to “Share” click on it and if you have connected other social media account so that post will also be upload on another platform which is connected to your Instagram account.
Consistently Post: Whether you’re using it for personal purpose or for business but if you want to increase the visibility of your profile, you must be consistent in the post. If you’re lacking in the post consistently, your followers.

Post Instagram Stories
More than 500 million use Instagram Stories every day, these statistics fluctuate every day. This number has been continuously rising since 2016 when Instagram first launched the Stories format.
To post your Instagram story, just swipe right on your Instagram feed. You will be brought to the camera mode where you can take a photo or video or upload a media takes in the last 24 hours. You can add stickers (including hashtag and location tag stickers), draw, and add text.

How to convert to a business profile:
If you have already an Instagram account and you want to use the same account for your business so you can easily do it but you should convert your personal profile to a business profile. Converting your profile to a business profile can offer you to add additional information about your business on your profile and promote your Instagram post. The best part, you get analytics for your Instagram account.
Here’s what you need to do:
Go to your profile on the mobile app and click on the gear icon. Click on “Switch to Business Profile” and select the Facebook Page that you want to be associated with your Instagram account. Fill out your email address, phone number, and postal address, and click Done!

More Info Click Here:
https://blog.waredot.com/lifestyle/how-to-use-instagram/
0 notes
Text
Agilenano - News: My Favorite Home Gear.
*Heads up: Today (November 12th) only, Boll & Branch is offering 20% off sitewide! Discount is applied at checkout. I mention my beloved sheeting AND bed blanket below — great opportunity to buy for yourself or as a gift.
Like all of you, I have spent far more time at home than I have in my entire life this year, and it has given rise to some intense organization projects as well as a new appreciation for the absolute best gear at home. Below, sharing my favorite items for a comfortable and well-maintained home:
MIELE VACUUM // Trust me when I say this is the place to invest. I had been getting by with a cordless option and with a dog, children, and heavy foot traffic in our tiny apartment, an upgrade to a proper Miele was the absolute best thing I could have done for everyone. It is so powerful, has multiple settings (for rugs, upholstered furniture, hardwood floors), and is brilliantly designed. These are built to last. Absolutely worth every penny. I also remember doing a lot of research to figure out the difference between their various models/lines, which are very confusing and unnecessary in my opinion, and this is the exact model I landed on: the perfect balance between utility/versatility for different floors and price.
SIMPLE HUMAN RECYCLER (ALSO AVAIL ON AMAZON) // A well-designed and sleek-looking divided recycler big enough for all the glassware, plastic, and cardboard we go through in our busy family. I specifically love the plastic “liner” bin that enables me to easily lift that piece out and carry it to the bigger recycling bins in our building. It also opens with the tap of a foot, the lid can be clicked into an upright position when removing the bag/bin, and the brushed stainless steel exterior means that it’s fairly resistant to smudges and fingerprints.
RUG PADS // These extend the life of your rug, protect your floors, add cushioning, and — most importantly — prevent rug slippage/movement. When I finally bought these for all of the rugs in my home, I felt like I’d crossed a new threshold into adulthood. (My favorite rugs here.)
PHILIPS HUE BULBS // We have, over time, as bulbs have died, installed Philips Hue bulbs in most of the lights in our home. These are controlled via our smartphones (and Siri, via our HomePod), where we have them configured to turn on and dim on a schedule that mirrors our lifestyle. It feels like the future to walk into a room and say: “Hey Siri, turn on the lights in the master bedroom,” and suddenly they are on. Or “Hey Siri, dim the dining room lights to 30%” and all of the lights go down to a romantic candlelit effect. You can also change the warmth/color of the lights. Often we like really bright light in the morning, but warm yellow tones in the evening. The starter kit might make a great gift for a new homeowner or a tech-loving friend.
EERO WIFI MESH NETWORK // Has given us the gift of faster, more reliable, and easier-to-monitor Internet. This replaces your old WiFi router and includes an app that enables you to track Internet speed, which has been handy whenever there has been an issue with the provider. (We can just show the discrepancy between the speed they promise and the speed we are getting.). Bonus: it looks good and the beacons double as nightlights.
O-CEDAR SPONGES // These are the best sponges I’ve ever used. They are thick, sturdy, absorbent, non-scratch, and they also bend/give nicely. Can you tell I spend a lot of time washing dishes? (We cook A LOT at home!)
OXO SHOWER CADDY // A strange thing to love, but this is just so well-designed! It never slips/slides around, has shelves at the perfect height (tall enough for most shampoo bottles), a hook for a loofah, and a soap tray.
TOSCA STORAGE BINS // J’adore these (dare I say it?) elegant bins for housing bulkier items in our pantry section.
UNDERBED SHOE STORAGE // Fellow women short on closet space: these have been my saving grace. The thing I love best about them is that they are very shallow in height, and my bed affords the slightest of underbed clearance! This was one of the only models I could find that would actually fit under the bed. I like that they keep all my beloved shoes dust and debris-free!
WHITE UTILITY BINS // Used for countless purposes in every closet I have. Great for organizing spices, holding dog gear, housing “backstock” lightbulbs and batteries, etc. Inexpensive, easy to clean, waterproof. (These are great for under-sink areas for that reason, too.)
MICROFIBER CLEANING TOWELS // I bought these begrudgingly when, after we’d fully moved out of our former apartment, I returned to supervise a crew of housekeepers to conduct a deep clean of the emptied apartment, per our lease. When I arrived, after unpleasantly schlepping a ton of gear and supplies on the Subway, I realized I’d forgotten rags to clean with. I dashed out to the local Bed, Bath, and Beyond, and they only had these. WOW. What a happy accident — these are a fantastic tool to clean with. I love that they dust even delicate surfaces (like porcelain, TV screens, Mr. Magpie’s expensive acoustics equipment) but can also be used with cleaning products on wood, marble, glass, etc. They are also deceptively absorbent without ever becoming sopping wet. I don’t understand where the liquid goes! Anyhow, they are fantastic!
BROTHER LABELMAKER // I use this vigor and joy. So handy for spice jars (label the tops!), drawers of the acrylic cube I use to organize first aid and medicine, and even the white bins above (i.e., LIGHTBULBS, DOG GEAR, etc.). No question about where things belong. (If you’re not a labelmaker kind of gal, these pre-written tags covering many common pantry items might be your ticket.)
DRAWER DIVIDERS AND SHELF DIVIDERS // These empower me to keep clothes super-tidy. This underwear drawer organizer also wins my respect — keeps everything so organized and forces me to properly fold and roll my undies. (My favorite undergarments here.)
ROWENTA IRON // Just the absolute best. I thought I was “bad” at ironing until I bought this iron.
BOLL AND BRANCH SHEETING AND BED BLANKET // I know this feels more “design” than “utility,” but these sheets truly enhanced our sleeping experience. They are cool and ultra-soft, and the blanket is one of my absolute favorite items I’ve bought this year. Ultra-soft and warm and just the perfect weight.
FEATHERED FRIENDS DOWN COMFORTER // Deliciously fluffy with just the right amount of heft. Like sleeping in a cloud.
XTREME COMFORTS MEMORY FOAM PILLOWS // Just try it. It is like heaven! You can remove the fill to your liking, but this pillow never gets hot and always feels like a dream.
STORI PLASTIC ORGANIZERS // Love these in my cabinets and drawers for keeping everything organized/jumble-free.
P.S. My favorite gear for small spaces and little luxuries for even the tiniest of homes.
P.P.S. Recent tabletop and home decor finds for under $100.
P.P.P.S. Thoughts on mom guilt.
The post My Favorite Home Gear. appeared first on The Fashion Magpie.
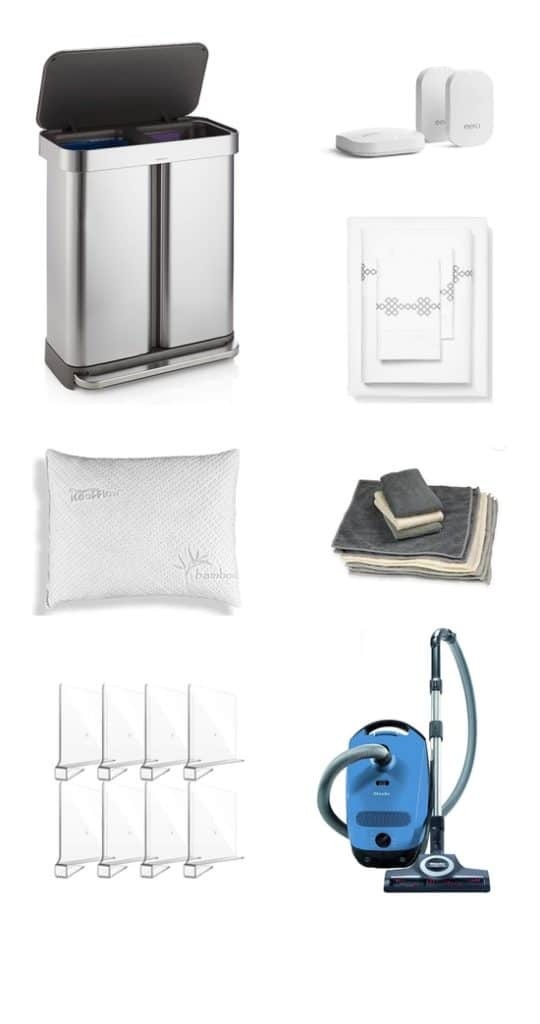
Agilenano - News from Agilenano from shopsnetwork (4 sites) http://feedproxy.google.com/~r/Agilenano-News/~3/9IF4tJrkTno/my-favorite-home-gear
0 notes
Text
The Tools (And Tricks) You Need To Install An Ikea Kitchen Yourself
Many of you have asked for tips and tricks to make installing an Ikea kitchen go more smoothly and look (and function) the best it possibly can. And the good news is that after installing three of them in a little over a year and a half (!!!), we have learned A TON about how to make things a little easier and help you end up with a better result. So settle in, I’ve got twenty tools & tips that can make all the difference.
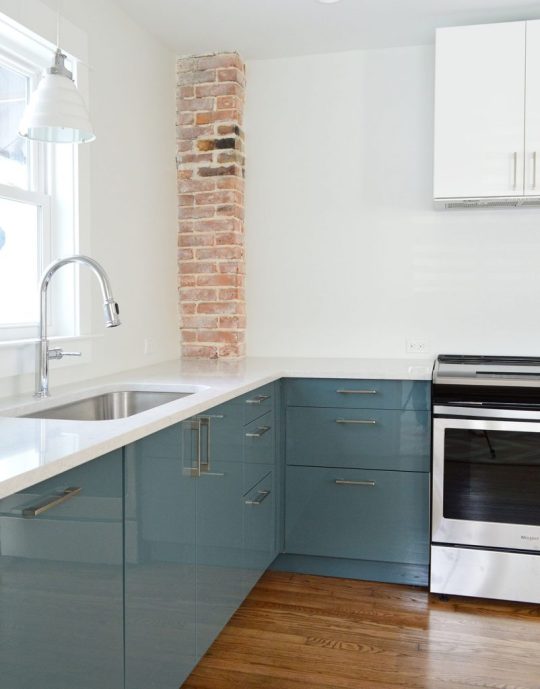
First off, we like Ikea cabinets and have personally installed them in five rooms: our laundry room & bonus room at home, our beach house kitchen, and now these two duplex kitchens. We have lived with the ones in our home for nearly five years and they’re great. Not a single issue. They are smartly made, very durable, and they have a great 25-year warranty and a great price tag (often thousands cheaper than other options). They also come with many thoughtful features like soft close drawers that come standard and tons of customization options. So yeah, some Ikea furniture is known for feeling a little cheap and wobbly, but that has not been our experience with their cabinets AT ALL.
Ok, but back to the point of this post – tips and tools to make your Ikea cabinet install easier. Some of the tools I’m listing here are absolutely necessary and some are optional (they’ll just make the process easier, faster, and less frustrating). And as you read through this list, I think you’ll also get a pretty good sense of the steps (and curveballs) involved too, which I hope will help as well.
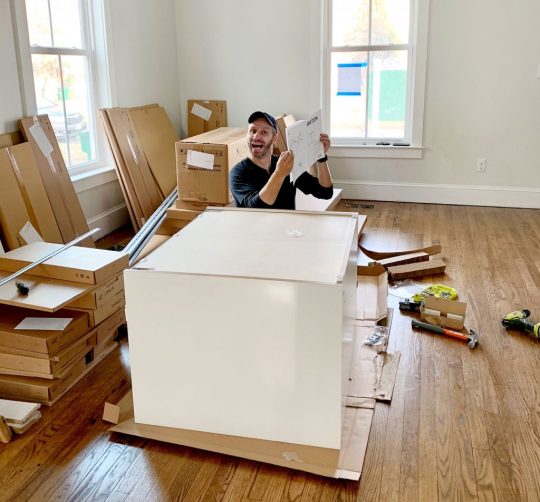
I’ll include a short bulleted list of everything at the end of the post too, that way you can use it as a tool checklist. But let’s just get right into it.
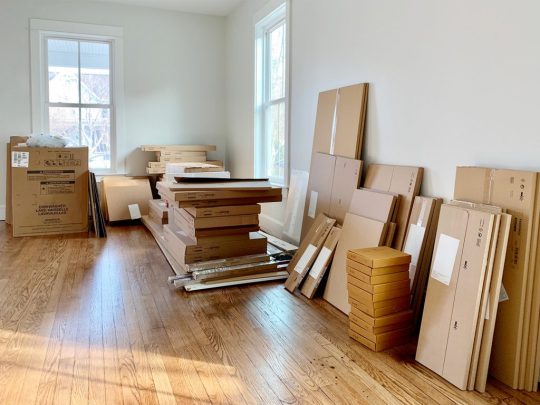
1. Your Itemized Receipt/Order
Before you build anything, you’ll want to take time to inventory and organize all of your boxes. We had over 200 boxes (!!!) delivered for our two duplex kitchens, so it helped to sort everything into piles beforehand.

We personally like to sort boxes by item (Sektion boxes over here, Maximera drawers over there, all of our cabinet fronts somewhere else, etc.) but you may find it helpful to sort yours by cabinet instead (ex: the box, drawer, hinges, and front for one cabinet all together in one pile – this is how Ikea breaks them up your order form). Either way you do it, this sorting process will help you identify any missing pieces and also make it faster once you start building.
2. Power driver (with Philips head)
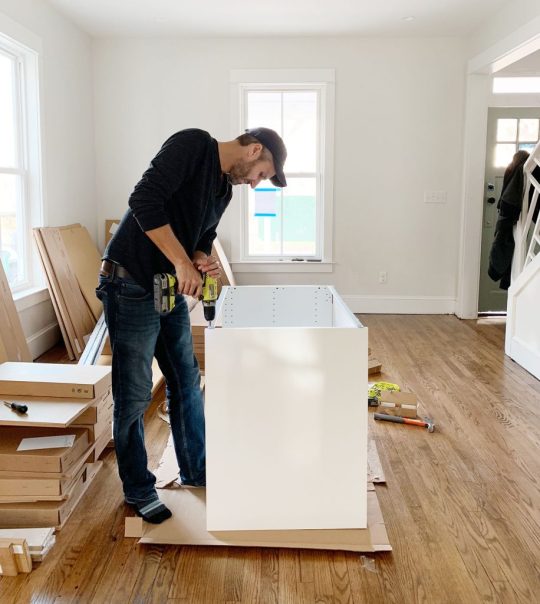
This combo gets a lot of use in this install (especially the power driver/drill) – but they’re needed first to construct your cabinet boxes (Sektion pieces). We love constructing the boxes first because you quickly get to see the shape of your kitchen come to life.
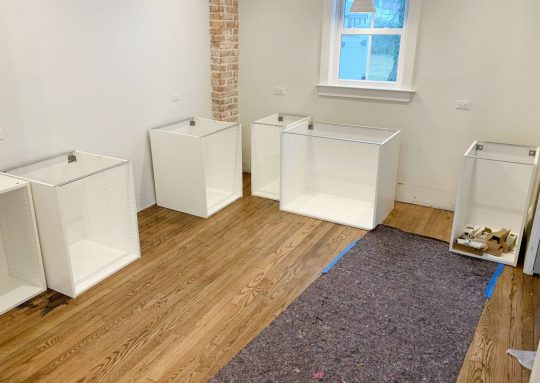
And even though Ikea is known for their allen wrenches, you don’t use them AT ALL during a typical kitchen installation! So don’t worry about having lots of specialty drill bits. You just need a normal Phillips head to screw these puppies together.
3. Hammer
You’ll also need a hammer handy to nail the MDF backings onto the cabinet backs. It may also be useful if you need to tap any anchors into your drywall when it comes time to hang your cabinets.
4. Magnetic Drill Bit Holder
Having one of these on your drill can save you a lot of frustration while building your cabinets and drawers. You can buy one separately for about $2 or it often comes included in drill/driver sets like ours. It’ll magnetize your drill bits, meaning many of the screws that Ikea provides will stick to your drill handsfree (thanks to the magic of magnets). We found this VERY helpful when trying to screw into small spots that were too tight for our fingertips (we couldn’t reach in and hold the screw steady, so having a magnetized drill bit that held it for us was key).
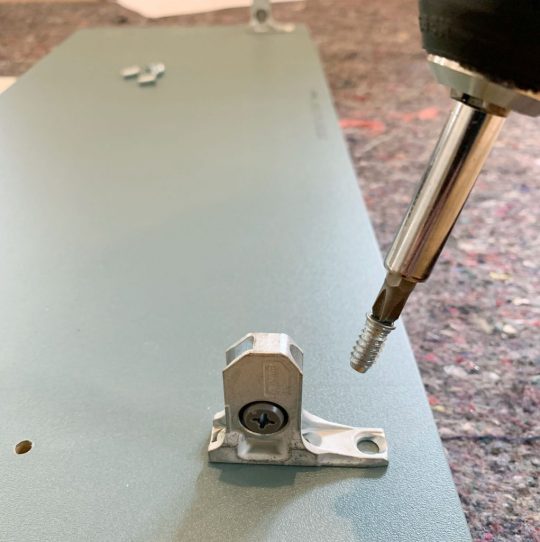
5. Measuring Tape
The next several tools are needed for attaching your cabinets to the wall. Whether you’re doing upper or lower cabinets, Ikea’s system uses a metal track (called the Sektion suspension rail) that you attach to your wall and then the cabinet boxes hang from these. The rail system is extremely handy because if you make sure the rail is level, your cabinets all hang from that and are guaranteed to be level! I know, it’s GREAT. The only time I don’t use their rail is when I don’t have a wall behind my cabinets, like if you’re doing an island. In that case I’ve built my own bases from 2×4″s, but more on that later.
For now, just know the measuring tape will be useful in determining exactly where in your kitchen you’re placing your cabinets – both side-to-side on each wall, and how high the rails need to be hung (Ikea provides guides for this in their instructions). You will probably want to have your kitchen plan/schematic from Ikea handy too.
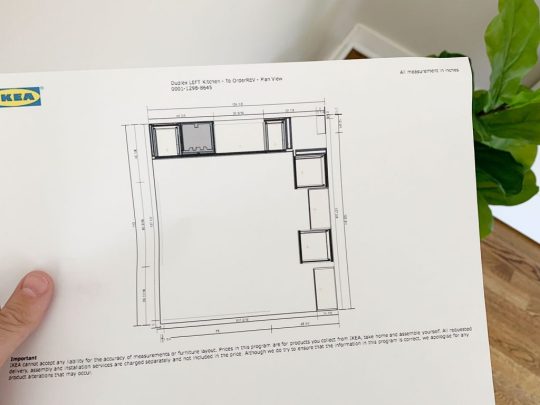
6. Dremel Or Hacksaw
Once you know where each run of cabinets is going, you’ll need to cut your metal suspension rails to size. The rails are sold in 7 foot lengths, but if you only have 4 feet of cabinetry in one area – you only want 4 feet of rail.
You can cut these by hand with a hacksaw, but we find it much faster to use our Dremel Multi-Max with a metal cutting blade.
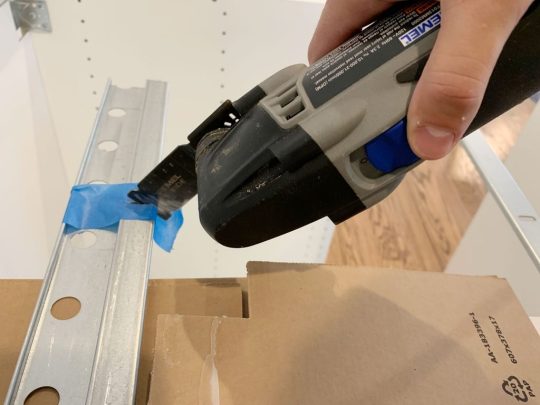
I typically mark my cut on a piece of painters tape and cut across the open top of one of our cabinet boxes (with a piece of cardboard to protect the cabinet underneath).
7. Stud Finder
You want to screw the rail into at least a few studs in your wall for maximum hold. So it’s smart to use a stud finder to locate and mark the studs that fall within the area you’re hanging the rail – that way you can be sure to go into them and get a nice firm hold. Since studs are typically 1.5″ thick, I like to mark the full width that my stud finder indicates, since you may not know exactly where the holes on the Sektion rail will line up.
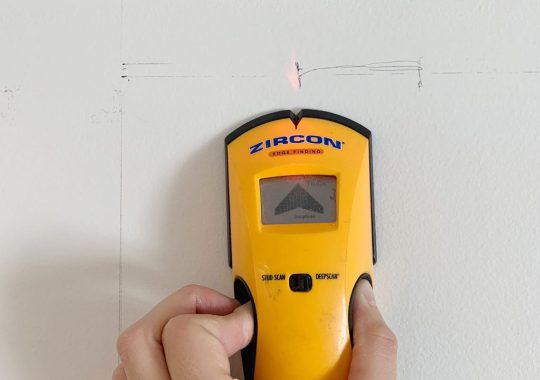
8. Medium-Size Level
Once I know where my studs are, I hold my cut-to-size metal rail and, with a medium sized level (like this 24″ level) held against it, I mark the top line of my rail AND where the holes line up with my studs. I suggest amedium sized level for this just because they’re easier to wrangle during this step.
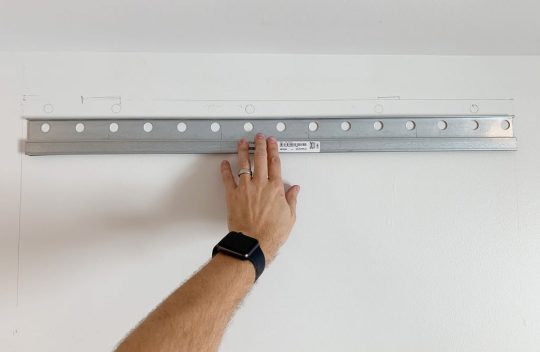
I also mark a few additional holes where I’ll use screws paired with anchors. I believe Ikea suggests at least having a screw every 12″ inches – but for short sections like this, I like to make sure I hit at least 2 studs and then have a screw at either end of the rail that goes into an anchor.
9. Heavy Duty Screws & Anchors
After some trial and error, we found that we like using these GRK Fastener Cabinet Screws to secure our rails into studs. They’re easy to drive, they hold really tight, and they include the star-head bit you need for them. We have tried other, cheaper “cabinet screws” and the heads kept breaking off. It was MADDENING.
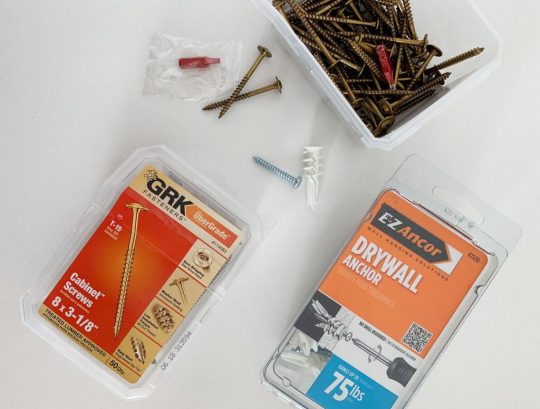
We also like to have some anchors on hand too, like these E-Z Ancor packs that come with screws, for those additional support screws that we add.
10. Long Level
One of the biggest challenges we’ve found in this process is getting things level. Just because you’ve hung your rail level on the wall doesn’t prevent things like slopes in your floor or bows in your wall from chucking some additional curveballs in your direction. So your best defenses are a lot of patience and a nice long level, like this 4ft level we bought specifically for this task (after learning that it’s a lot harder to use a smaller level to solve these issues).
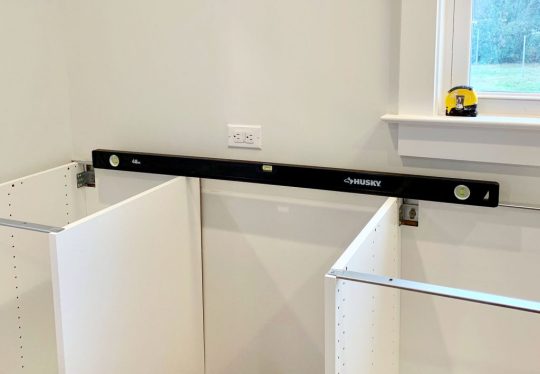
Your medium sized level will help with the process as well (especially in checking that each individual cabinet is level front-to-back) but you’ll want something bigger to check longer spans of cabinets. You could purchase an even longer level if you wanted, but they can start to get pricey, so we found a 4 foot long level to be sufficient, especially for checking across the gaps that you’ll leave for appliances like a 30″ stove or a standard 24″ dishwasher.
11. Shims
A lot of level issues can be corrected by twisting the adjustable plastic feet that come with your base cabinets, or by adjusting the placement of your metal rail. But if you’re dealing with bows in your wall (which you can find by placing your long level against it) you’ll want to have some wood shims on hand to place behind the metal rail. In these old houses, we had to use quite a few in a couple of places!
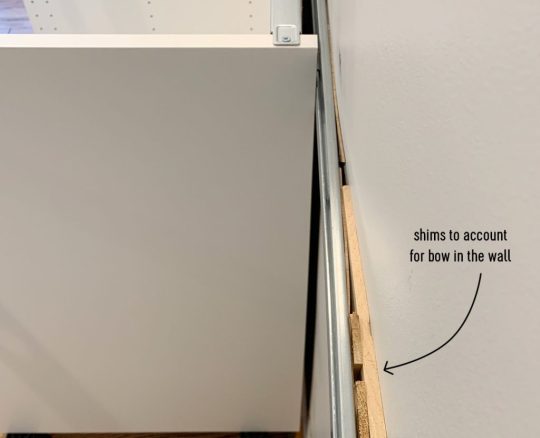
12. Jigsaw
When it comes time to install your sink base cabinet, you’ll need to make some holes for your plumbing. For smaller pipes like your water supply lines, you can just drill holes using a large drill bit (we used the 3/4″ bit in this set). But for things like your large drain pipe, you’ll either need to buy a larger hole bit or break out a jigsaw. Even though we don’t get the cleanest cut with it, the jigsaw gives us a little more wiggle room when placing the cabinet (since the drain pipe isn’t flexible like the supply lines) and we can also use it for other cuts like for exposing the outlets along the wall (the one below powers the garbage disposal under the sink).
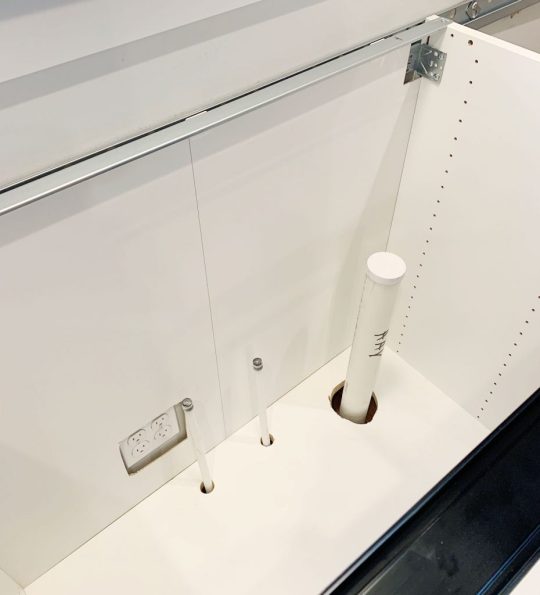
Just be sure to make careful measurements before you cut. We usually put a layer of painters tape around the area we’re cutting. It allows us to mark our cut without marking the cabinet, plus the tape helps keep the white finish from cracking off. Either way, this stuff will all be hidden under the sink so it doesn’t have to look perfect.
13. Clamps
As you start to get your cabinets in place and leveled, you’ll want to secure any adjacent cabinets together. Ikea provides screws for doing this, but you’ll want to use some clamps (we like these 6″ bar clamps) to hold the cabinets tightly together before you begin screwing.
We didn’t get a picture of that process, but the clamps come in handy A LOT as an extra set of hands – like when we were installing this bracket for the exhaust hoods that we hung over the stoves.
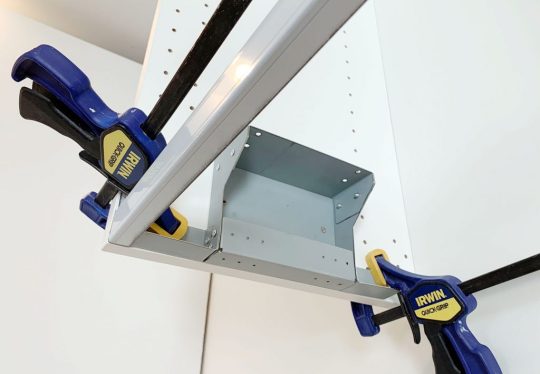
14. Circular Saw and/or Table Saw
In addition to screwing cabinets together, you may find yourself attaching cover panels or filler pieces at some point. Cover panels go on exposed ends of cabinets (so you can’t see the metal rail they hang on) or, in our case, we used some large cover panels to create a box around the fridges at the duplex. So you’ll need some sort of larger saw to make long, straight cuts. Our cover panels were a bit too wide, so I used a circular saw to shave a few inches off one side.
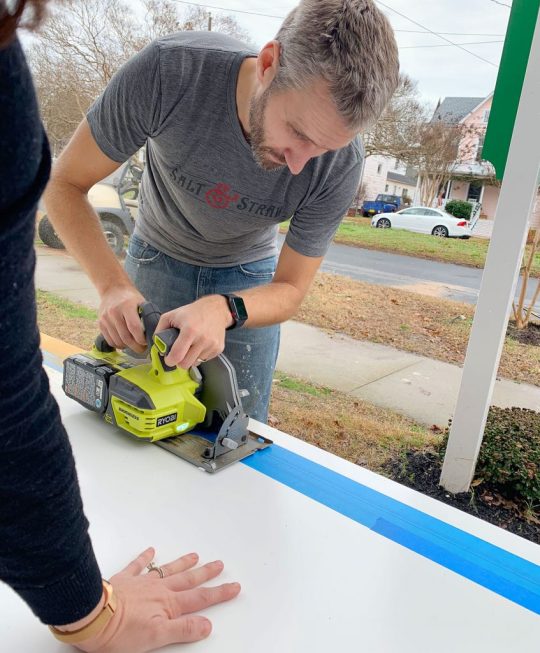
I didn’t use a table saw for that panel because running an 8 foot tall panel that’s this wide across my table saw would’ve been tough. But for smaller pieces (like filler pieces that are only about 3 feet long) a table saw is often easier, especially if you’re only shaving off a little bit. But if that’s too pricey and you’ve got a steady hand, you can get by with the circular saw.
15. 2 x 4″ Boards
Every time we’ve installed an Ikea kitchen we’ve needed some 2×4″s at some point. At the beach house we used them to make some bases for the island cabinets.
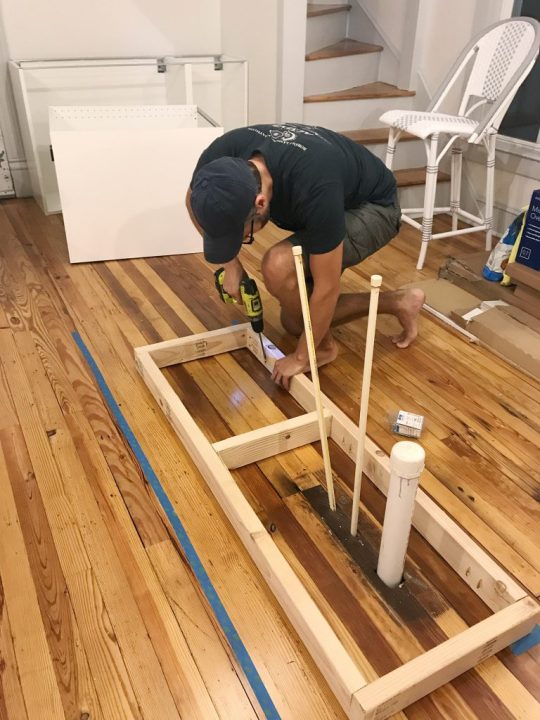
Basically, they were just some boxes we made almost the same size as each cabinet (slightly narrower to account for the toekicks) that we secured to the floor using pocket holes. To drill the pocket holes, you can use something like a…
16. Kreg Jig
Now, a Kreg Jig isn’t absolutely necessary here, but I’ve had one for around nine years now so I’m accustomed to breaking it out for tasks like this. So while I’m a big fan of having one in your arsenal, I understand that you’ve just bought a new kitchen so tacking on another $99 tool to your budget isn’t always practical.
I did use it again for the duplexes to make more 2×4″s into boxes (this time for mounting the above-fridge cabinet away from the wall, so it sat closer to the front of the fridge).
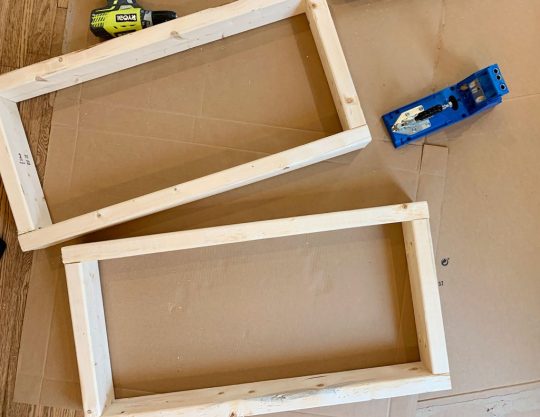
The boxes acted as an extension of the wall. The top one was for mounting the metal rail, and the bottom one gave the base of the cabinet a spot to rest so it didn’t tip back wildly. They also gave us a way to mount that large cover panel to box in the fridge.
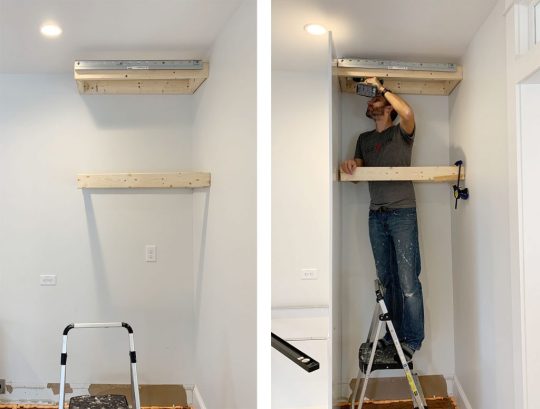
I guess I should add in here that a step ladder is also useful, so let’s officially put that on the list.
17. Manual Screwdriver
Once your cabinets and panels are hung, leveled, and secured to each other, the next part of the process is to add your doors and drawers. The instructions here are pretty self-explanatory and the main tool you need is a power driver to screw everything together. Our main word of warning is to pay close attention to screw placements when you’re assembling drawers! Depending on where each drawer goes in the stack (top, middle, or bottom) there are sliiiiight differences in the instructions. So while we find it most efficient to do multiple drawers at once, we still pay close attention – especially for the first few.
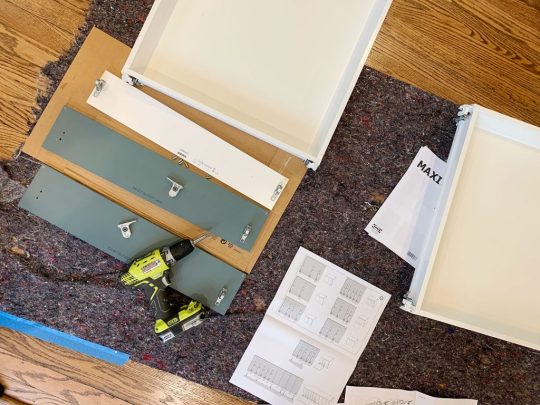
Ok, back to the manual screw drivers. One big part of installing doors and drawers is tweaking and adjusting them for even and level spacing. For this you’ll want to use a regular ol‘ manual Philips head screwdriver. It can be kind of tedious and frustrating, but it’s worth taking your time with it. This video shows it in a bit more detail.
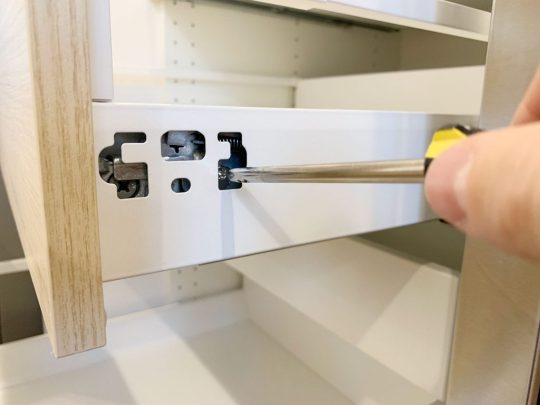
You also will want a flathead screwdriver for twisting the little piece of plastic that locks each cabinet onto the metal rail, which comes up earlier in the process.
18. Miter Saw
Tasks like cutting your 2×4″s or even your filler pieces will be made easier and faster by having a miter saw on hand (we own this miter saw). You’ll also find that it’s helpful when it’s time to cut and install your toekicks. Ikea’s sells toekicks to match your cabinet fronts and they clip on to the plastic feet you will have attached to the bottom of your base cabinets.
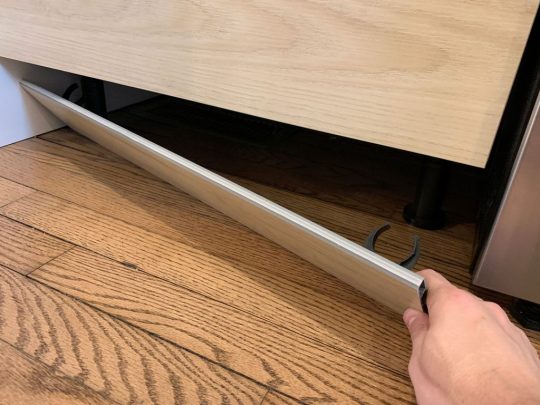
In our beach house kitchen we installed quarter round in front of the Ikea baseboards to help disguise some floor level issues, as well as using quarter round around the island where we built our own base (we used standard wood baseboard trim instead of the Ikea toekicks around the island). Meanwhile, we just used the Ikea toekicks in the duplex kitchens and the floors were more level (and we think the wood and blue cabinets were more forgiving than white ones) so we didn’t need to add quarter round and it looks great.
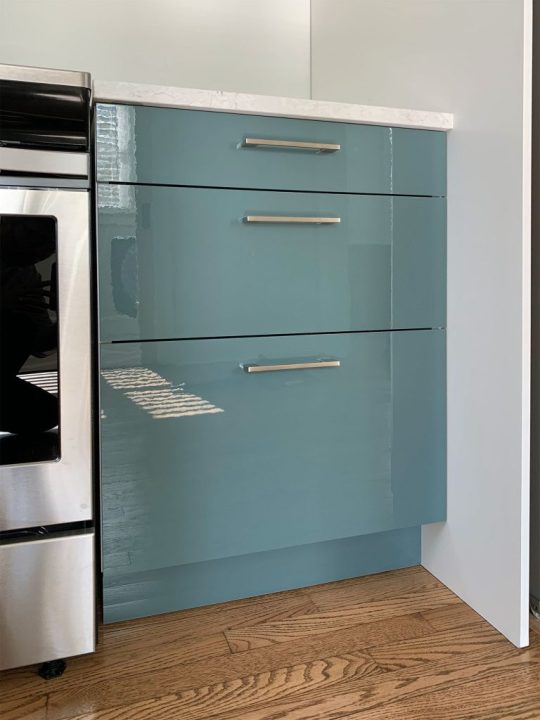
19. Nail Gun
In addition to using a nail gun to attach additional molding like quarter round if you’re adding that (again, the Ikea baseboards just snap on so you won’t need it for that) I also find a nail gun comes in handy sometimes for attaching small filler pieces. Especially in cases where they’re too thin to take a screw.
20. Others Tools
Real quick, here are some other items you may want to have on hand. Some I’ve mentioned or shown already, but haven’t officially listed:
Pen or pencil
Painters tape
Step ladder
Utility knife or scissors (for opening boxes faster!)
Crowbar (if you need to remove any baseboard or molding)
Broom, dustpan, and/or vacuum with a hose (we have this one)
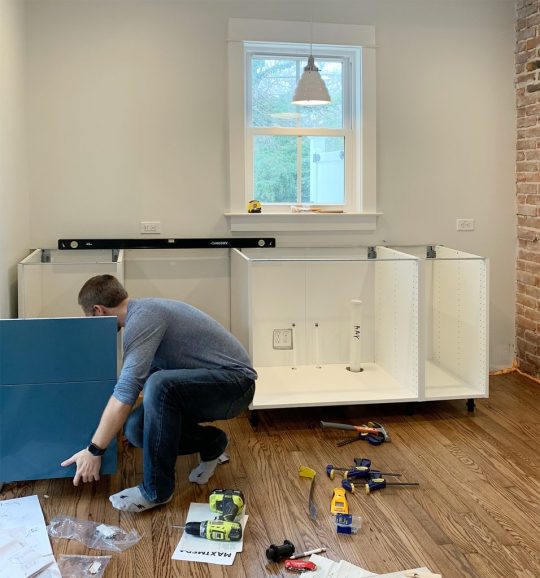
Your Ikea Kitchen Installation Tool Checklist
As promised, here’s all of the items in one place so you can make sure you have everything you need on hand. I’ve organized it a bit differently than above, just to put like items together. You may have special circumstances for your project that require more, less, or other tools – but I’ve found this to be a pretty comprehensive set:
Your itemized receipt / order
Hammer
Manual screwdrivers
Crowbar
Measuring tape
Pen or pencil
Painters tape
Step ladder
Power driver
Drill bit set with magnetic bit holder & 3/4″ bit for plumbing holes
Dremel or Hacksaw
Stud finder
Medium level (24″)
Large level (48″)
Wood shims
Cabinet screws (roughly 4 per cabinet)
Screws with anchors (roughly 2 per cabinet)
Jigsaw
Circular saw and/or table saw
Miter saw
Utility knife or scissors
Nail gun
Clamps
2×4″s (optional)
Kreg Jig (optional)
Broom, dustpan, and/or vacuum with hose
Good luck and happy installing!
P.S. For other posts we’ve written about installing Ikea cabinets, here’s one about installing our laundry room cabinets 5 years ago, and another one about using Ikea cabinets to make a wall of built-ins for our bonus room.
*This post contains affiliate links*
The post The Tools (And Tricks) You Need To Install An Ikea Kitchen Yourself appeared first on Young House Love.
The Tools (And Tricks) You Need To Install An Ikea Kitchen Yourself published first on https://bakerskitchenslimited.tumblr.com/
0 notes