#studioserraphotography
Explore tagged Tumblr posts
Text
A Complete Guide to Landscape Photography
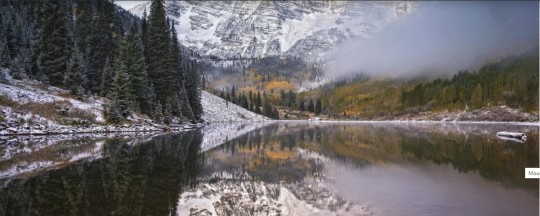
There is little that compares to the grand majesty of nature. The allure of impossible rock formations, the breadth of expansive beaches, and the fairytale feel of canopied forests never ceases to stun even a well-seasoned landscape photographer.
Capturing stunning landscapes is an art in itself. Landscape shots require a deep knowledge of sense of scale, and how best to utilize the right time of day to one’s advantage. Follow the landscape photography tips below to land a great shot.
What Is Landscape Photography?
Landscape photography is photography that occurs in the great outdoors. It is separate from what we know as nature photography. Usually, landscape photography captures an impressive natural scene—an imposing mountain range, a serene, sprawling field, a river roaring by—untouched by human presence (besides the photographer’s, of course).
For all beginner landscape photographers seeking to explore the earth while capturing their own magnificent images, here is a complete guide to get started.
What’s the Best Camera for Landscape Photography?
While it is possible to take photographs with any camera, consider investing in a mirrorless digital camera or DSLR for your landscape photography needs.
Mirrorless and DSLR cameras provide maximum control over camera settings, which means not only is the baseline quality of the image automatically superior, the possibilities of creating professional-looking pictures are endless.
Mirrorless and DSLR cameras also allow the photographer to swap lenses.
For sweeping landscape images, like canyons and caverns, go with a wide-angle lens such as Nikon’s 14-24mm.
For more detailed and close-up images, don’t be afraid to use a zoom lens or telephoto lens, like Canon’s 70-200mm.
Experiment with different focal lengths (the distance in millimeters between the lens and the camera’s sensor) to see how the same vista can render in different ways.
Do You Need a Tripod for Landscape Photography?
A sturdy tripod is a landscape photographer’s best tool. Manfrotto manufactures a professional-grade line at an affordable price point. The basic function of a tripod is to act as an extension of the photographer. The tripod stabilizes the camera so you can take the exact shot you want.
A tripod is ideal in low-light situations or during night photography, as the steadiness allows you to lower the shutter speed without sacrificing ISO, or grain. A tripod is also useful for experimenting with angles and perspective; depending on the landscape, you may choose to photograph shooting up, across, or down to produce the desired effect.
What Are the Best Settings for Landscape Photography?
A competent landscape photographer possesses the fundamentals of good photography: knowing how and when to adjust exposure, aperture, shutter speed, and ISO. It is particularly important to have a good grip on these elements since most landscape photography occurs in the great outdoors, where weather and light can change dramatically—and quickly.
Aperture is the size of the lens opening, which lets in light.
Shutter speed is the duration of time the lens is open; low-light or long exposures depend on lower shutter speed to bring in as much light as possible.
ISO increases brightness, however, depending on the strength of light, ISO might also add grain. Know the difference between a lower ISO and higher ISO and the advantages and disadvantages of each.
Some photographers use grain to their advantage, but for a crisp image, try not to rely too heavily on ISO to compensate for light. All of these elements lead to exposure, which is the combined light that enters the camera sensor after adjusting aperture, shutter speed, and ISO. Manual mode controls each element separately, aperture priority favors the lens opening over other settings, while Automatic mode adjusts all elements automatically.
How to Focus on the Subject in Landscape Photography
Most landscape photography relies on wide-angle lenses and a large depth of field to adequately capture the subject. A high aperture, adjusted with the f-stop, allows most of the subject to come into sharp focus.
Use the gridlines in your viewfinder or screen to find focus.
Begin at either the top or bottom third of the frame, but don’t be afraid to experiment.
While there are some examples of landscape photography that prioritize the foreground, resulting in a blurred background (known as a shallow depth of field, or portrait effect), most landscape photography captures the entire scene at once.
If you have trouble getting clear focus across the entire frame, it is always possible to take a few shots with different areas of focus then layer them together in Photoshop during the editing process.
RAW vs. JPEG: Which Is Better?
There are a variety of file formats, the most popular and familiar of which is JPEG. JPEG files automatically compress details, which results in image quality loss. RAW files, however, retain all data and information.
While the processing time for RAW files is longer, the resulting images are easier to edit and higher in quality. All DSLR and large format cameras offer RAW as a file format. Advances in smartphone technology means your iPhone or Android can also shoot in RAW, with assistance from camera apps like Lightroom or ProShot.
How to Properly Compose a Landscape Photo
An easy tip for beginner landscape photographers is to build your scene around the horizon. Refer to the Rule of Thirds, which is a popular trick for composing perfectly balanced and aesthetically-pleasing photographs.
The Rule of Thirds crosses three horizontal lines with three vertical lines
You can set these up through your viewfinder or on the back screen of your camera
The points where those lines meet are the points of interest; place the most dynamic or compelling parts of your subject here
Take care to keep the horizon along that middle horizontal line, and you should have a foolproof formula for a picture-perfect scene.
How to Find the Best Light
The best light is soft and diffused, with a dreamy quality to it. True tones pop against that subtle light, which makes natural landscapes look all the more breathtaking. Early mornings before sunrise and late evenings, just before sunset, offer this “golden hour” light that photographers chase. When preparing for a shoot, make a note of sunrise and sunset times to plan accordingly.
You can also buy some lens filters to aid when the light is not to your advantage. A neutral density filter, for example, reduces the intensity of light and color coming through the lens, while a polarizing filter can help with things like darkening the sky and suppressing glare from reflective surfaces, like bodies of water.
Once the sun goes down, an entirely unique scene emerges. Experiment with long exposure photography to capture shooting stars, light trails left by passing cars, and other natural phenomena. Long exposure builds upon the basics of photography, but requires a few extra tools along with some additional know-how.
In order to take a proper long exposure photograph, set up your tripod and set the frame.
If the tripod is in a precarious position, weigh it down with a bag filled with rice, sand, or rocks.
Next, you’ll want to set the camera to bulb mode through the DSLR camera settings. Bulb mode manually forces open the shutter past the typical standard of 30 seconds. The longer the shutter is open, the longer the exposure.
A remote shutter release or cable release connects to the camera so you don’t physically have to hold down the shutter button to capture the exposure. Once you’re ready, click down to open the shutter and start the photograph. Once you’re done, click down again, and you will have completed a long exposure photograph.
How to Edit Landscape Photos
Post-processing is an important finishing step for landscape photography. Upload the RAW files into Adobe Photoshop or Lightroom, where you can adjust everything from exposure to contrast.
If the perspective angle is off, use the Edit > Perspective Warp tool to adjust the plane.
Lightroom is good for making quality edits to an image, whereas Photoshop offers a larger variety of options for transforming an image, down to the pixels. This is useful if you need to airbrush, smooth, or add other effects.
How to Become a Better Photographer
Being in nature is a pleasure and a privilege. There is an unspoken rule to leave the environment as you found it. But that being said, exploration is key to landscape photography. For beginners, it may seem daunting to go off the beaten path; this, however, is precisely where you will find the best scenes. Take hundreds, if not thousands, of photos experimenting with different techniques, perspectives, and angles. The best way to become a better landscape photographer is to simply get out there, enjoy the great outdoors, and capture as many images and experiences as possible.
Master photographers like Jimmy Chin honed their craft for decades before embarking on full-time creative careers. With Jimmy Chin’s MasterClass, learn to form the principles of your visual narrative, how to pitch, land, and work with clients, and which gear is essential for shoots--and how you can leverage the editing process to full effect.
Become a better photographer with the MasterClass All-Access Pass. Gain access to exclusive video lessons taught by photography masters, including Jimmy Chin, Annie Leibovitz, and more.
#studioserraphotography#beachscape#landscape photography#professional landscape#fine art photography#portrait fine art photography#commercial photography#scenic photography#san diego photographer#san diego photography
2 notes
·
View notes
Text
Landscape Photography Tips
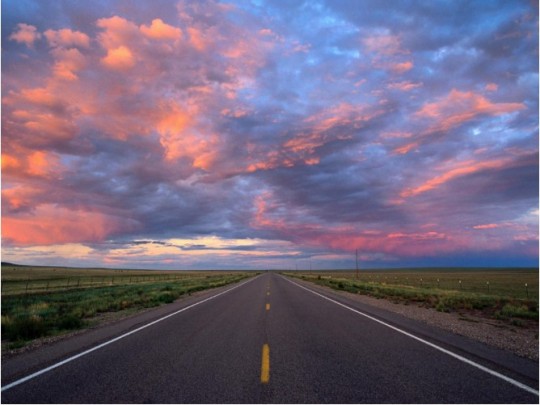
WE'VE ALL HAD the experience: Driving through a beautiful landscape, you stop at every scenic overlook to make photographs sure to capture the grandeur of what you see.
You get home, look at the pictures, and find them flat and boring. All the elements that enthralled you at the time are there, but not the feeling. Why?
When we look at a landscape, our eyes travel over it and selectively focus on the elements that we find appealing. Our field of vision encompasses a great deal of the scene, but our eyes and brains have the ability to ignore all except the most alluring details. Lenses and sensors or film cannot do this by themselves. They need help.
Time is the most important investment you can make in getting good landscape pictures. When you arrive in a place you've never visited before, spend time scouting—driving or hiking to different locations, finding different vantage points. Carry a compass to figure out where the sun will rise and set, and imagine how the place would look in different kinds of light. This can take some practice because you also have to look at where the light will not be falling. Photographing a canyon, for example, you might see that the west wall will be beautifully lit in the early morning, if the canyon is deep, however, the east wall will be in such complete shadow that your camera will be capable of rendering it only as a great black blob. Unless this is the effect you want, you'll either have to modify your composition, shoot it later in the day, or plan to return on an overcast day when both sides will be photographable.
LANDSCAPE SUBJECTS
Flowing Water
If a river or stream flows through the landscape you are shooting, think about the character of it and how to convey that character in the image. A big, slow river looks and feels different from a fast-moving mountain stream. The water can be the center of interest in the image, or it can serve as an element in your composition—as a diagonal or other leading line, as a horizontal line, or as a shape that complements other elements in the frame.
Look carefully for reflections in the water. You can use some reflections to enhance the image—the colors of reflected autumn leaves, for instance—but others may just be distracting. You may have to move around a bit to include or eliminate them, or return when the sun is at a different angle. Use a polarizing filter to eliminate some of the reflection and increase contrast; rotate it until you have the effect you want.
Forests
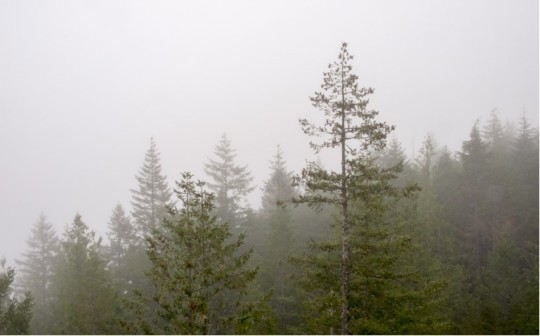
Photographing forests presents a different set of challenges. First, think about the character of the forest you want to shoot and the feeling you want to convey in your image. Should it feel dark and brooding, or light and airy? Are there any special features that will help express how you feel about it?
As with any photograph, find a point of interest. It might be one slightly different tree trunk, a path winding through, or a splash of color on a flowering vine. Whatever it is, compose in such a way to lead the viewer to it. Look for shafts of light penetrating the canopy or one spot on the forest floor directly lit by the sun.
Whether you are shooting toward a forest or shooting from inside it, look for patterns, lines, and other compositional elements you can use. Try both wide and telephoto lenses. A wide lens looking up at the trees will make them soar; a telephoto will compress a row of trunks. Lie down and look straight up through the branches; climb a tree to look down the path.
Plains and Prairies
Wide-open spaces such as plains and prairies are among the hardest landscapes of all to photograph well because often they lack an obvious point of interest. In most cases, the huge scope of the scene is one of the things you're trying to communicate. Even so, remember that viewers need something on which to focus. Look for an element peculiar to that place and use it as a point of interest that says something about the scene and imparts a sense of scale. You don't want the viewer's eyes to wander aimlessly around the frame, so use whatever might be available to lead him into the image—a winding road, a stream, or a fence line, for example.
Like every forest, every plain has its own personality, so hunt around until you have found an angle and composition that reflect it. What is the most important feature of this particular place? Think about the sky. Do you want a lot or a little of it? A clear blue sky might best reflect the character of one plain, a brewing storm another. Remember the rule of thirds. If the sky is important, place the horizon along the bottom third division of the frame. If it is not, put it along the upper third.
Deserts
Look for ways to show the rugged nature and the beauty of deserts. In the middle of the day, find waves caused by the heat. Using a long lens to compress them, you'll get dramatic shots that really say "hot." Deserts are also great places for pictures of stars. There is no humidity, and usually no terrestrial lights to interfere, so stars seem more numerous and are unusually brilliant. Watch the way the color of the sand changes throughout the day with the angle of the sun. Think about ways to capture the characteristics of the desert. A wide shot might best portray one desert, while a close-up of one plant struggling to survive on the side of a dune might best represent another.
Think about including the sun in your photograph—it's one sure way to say hot and harsh. But shooting the sun is tricky. On a clear day, the sun is so bright that your camera's meter will tend to underexpose everything else in the frame. Shoot in manual mode, or take a reading without the sun in frame, depressing the shutter button halfway to hold the exposure, then reframe before you shoot. If you're shooting film, bracket a lot to make sure of getting the exposure you want. With a digital camera, check the images as you shoot. Wide-angle lenses tend to work best because the blown-out sun takes up less of the image, but they are susceptible to lens flare. The advantage of SLRs is that you can see the flare when you frame the image.
Seacoasts
Consider these different scenes: a tranquil tropic isle with turquoise water lapping at a white, sandy beach; storm waves pounding a rocky New England shore; a densely packed vacation beach. What kind of shore are you photographing, and how can you best convey it? What time of day, what kind of weather, and what season is most appropriate for showing its character? These are the kinds of questions to ask yourself while scouting for the right vantage point and composition before shooting. Every shoreline is different in some way. Show the difference in your images.
Once you have thought about the character of the shore, look for elements you can use to reinforce the feeling you're after. Palm trees make a good frame for a tropical beach; a spray of water shooting over rocks adds drama to a rugged coastal scene. As in the desert, be careful about sand. If it's windy, be sure to protect your camera and lenses from blowing sand. Don't open the camera back unless you are in an area that is well sheltered.
Mountains
Are the mountains you're shooting rugged or worn, threatening or enchanting? What feeling do you get from them? Look for elements that will reinforce your feeling and convey it to the viewer. What composition, angle, light, and weather seem most appropriate? Look for the telling details that reflect the spirit of the mountains, too.
#studioserraphotography#landscape photography#commercial photography#portrait fine art photography#professional landscape#beachscape
3 notes
·
View notes
Text
Focus on Lenses
Just about anyone with a camera can and does journey out into nature to photograph "things." So how do we nature photographers see these "things" differently than the countless others when we are photographing the very same subject (s)? Well, what we want to convey with our camera and lens may or may not be what we actually see. This is where knowledge of the camera lens is very valuable information. What we see at the scene is not going to be what goes down on the film. It's the old saying of, "what you see is not what you get" and this applies to photography as well.
So what we are going to do is start to learn how to see more like the lens does? Why do we need to start learning this? Because, if we know what the lens will do to the scene (good or bad), we can make the right lens choice. This will put us in a place of control. We can then employ the lens which will communicate our interpretation of this scene or any scene. Now I am not saying this is a easy thing to do - to see like the lens. And, my little method for learning to see like your lenses see isn't scientific, but it works. It has worked for many photographers who have enrolled in my nature photography workshops.
We have a little exercise you can do if you would like to improve your photographic craft, the part that deals with seeing like your lens.
There are many photographers in history that used successfully only one focal length lens. They were able to do this because of their knowledge of how the particular lens they were using portrayed the subject. Some of these photographers, I’m sure, were limited as to the available funds for equipment, and therefore, due to financial hardship needed to understand their single lens (don't we all). Today, this is a totally different scenario. There are a wide variety of lenses on the market for photographers to use in photography. The different focal lengths available in 35mm alone is more than staggering.
What we will concentrate on are the most widely used and popular lenses. These focal length lenses are the primary choices for landscape photography. Our purpose is to understand how the lens will see our subject so we may use this knowledge when selecting the lens for each image made. The lens you choose is dependent on your knowledge of its use. Do not put one lens on your camera for the day! You will lose so much creativity when doing such a thing, unless of course, you only have the one lens.
20mm-35mm focal length
Using a short focal length lens can cause unwanted distortion. Use care when photographing people. This lens range will give a feeling of place to the image. By this, I mean the viewer will have the feeling of "being there" when looking at the finished picture. You will get the easiest control over depth of field with this choice. The shorter lens is also a good choice for showing a sense of scale. When using filters and/or a lens hood, you must make sure the lens angle of view does not become obstructed. This is very important.
70mm-150mm focal length
This is the lens range I use most. Its use allows for extracting a portion of your scene (tight compositions), which is the intimate portrait in landscape work. You may limit the background coverage with this focal length and it gives more working room (distance) from the subject with some scene compression. Filter use is much easier to work with than the wider focal lengths. The weight of these lenses is still fairly light, unless using very fast lenses (F 2.8). The use of a tripod is now becoming a common occurrence. A tripod should always be in good working order. This means you should maintain your equipment regularly.
The longer lenses are commonly used in wildlife and sports photography. I am not covering them in this article.
At the scene, we have our camera with lens on a tripod, camera loaded with film. We may also have a filter on the lens. From the scene to the film working towards the camera we have the scene, filter, lens, our exposure, film, and lastly, our film processing. In order we have: Processed film, Exposure, Film, Lens, (filter) Subject. The lens is very important when it comes to viewing your subject. It should be the finest piece of glass you can afford. I know quality costs and when it comes to fine optics, don’t cut corners when buying lenses.
To test your lenses to discover how they see your subject, use different focal lengths on the same subject at the same distance. Change your distance and do the same as before. Change the distance one more time and use your lenses again.
As an example: use the following lengths 24mm, 35mm, 70mm, 200mm lenses at a distance of 5 feet, 10 feet, and 25 feet from the subject foreground. Expose three frames with each focal length lens. One at 5 feet, one at 10 feet, one at 25 feet. You should use the focal lengths you have closest to these sizes.
You will begin to see the subject in different perspective (the change in distance always alters the perspective) and you will see a difference in near/far relationships. Near/far relationships are affected as you move closer or farther away from the subject and when you change the focal length of the lens (this is the apparent middle ground and the size of subject matter). Keep the height of your camera constant for evaluation. What you want is an "apples to apples" comparison.
When you have your film processed, mark the slide mounts as to the focal length and distance to subject. You will then place these on the light box and be amazed as the lights come on. Because the Nature Photographers site is of limited space, I didn't post images to show examples with this article. You will have to go out in nature with camera in hand and "see" how your lens sees. Dedicate just one roll of film to this and grow by leaps and bounds.
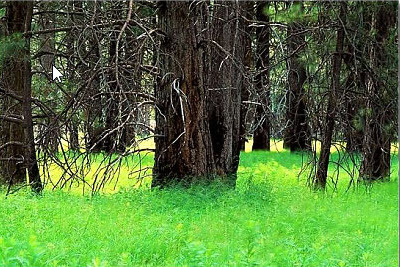
With the image displayed with this article, you can see I had control of the photographic process and knew the look I wanted. I could only do this knowing which lens to choose to give the desired effect, slight compression. This lens choice the 105mm, pulled the furthest trees into the scene by compression.
#studioserraphotography#san diego photographer#San Diego Photography#landscape photography#professional landscape#photo studio san diego#photography san diego#commercial photography#commercial real estate photography#commercial photography service#fine art photography
0 notes
Text
Fine Art Photography: What It is and How to Do It
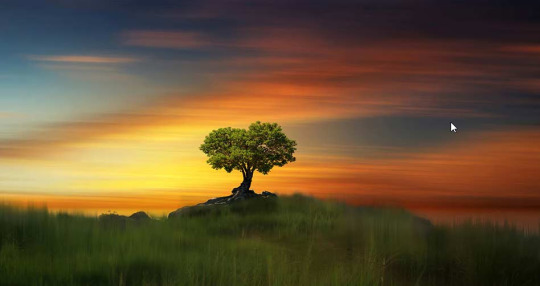
What is fine art photography? How to create fine art photography? Who buys fine art photography? What is considered fine art photography? These are all common questions that people have about the fine art photography space.
One might wonder why it’s important to understand what fine art photography is.
As photography has become more accessible to more people - which is a good thing - more and more people are calling themselves fine art photographers, even if they aren’t - which is a bad thing.
That being the case, it’s necessary for us all to know what makes fine art photography and how it’s different from normal photo-taking.
What is Fine Art Photography?
To be honest, answering the question, “what is fine art photography?” is a lot more difficult than one might think. After all, fine art photography is art, and art is subjective, so how can we define it?
It covers a lot of ground, too, from fine art nude photography to the popular Disney fine art photography to fine art wedding photography and fine art portrait photography. The spectrum it covers is quite vast, so, again, that makes it hard to define it.
But, if we’re in a situation in which our lives depend on a fine art photography definition, here you go:
Fine art photography is about the artist and their interpretation of the scene. The camera is merely a tool to create art - it’s not about what the camera sees, but is instead about what the artist wants to make of the scene.
In other words, where a photojournalist uses their camera to record an accurate representation of their subject, a fine art photographer isn’t necessarily interested in portraying the subject with any accuracy whatsoever.
Instead, a fine art photographer’s camera is used to create art - a piece that expresses the artist's unique vision and aesthetic.
Ansel Adams perhaps said it best when he said, “Art implies control of reality, for reality itself possesses no sense of the aesthetic. Photography becomes art when certain controls are applied.”
So, fine art photography is more about a photographer’s feelings and vision for a subject than the literal representation of that subject.
Fine Art Photography Ideas
Now that we have a working definition of fine art photography, let’s explore some of the underlying ideas that make a photograph fine art.
The Photographer’s Purpose

Fine art is all about the photographer’s purpose - the central emotion, feeling, idea, or message they want to convey with their image.
The purpose of the photo can be virtually anything, from a small concept like “alone in the dark” to a broad-based idea like “what freedom means.”
Think of the photographer’s purpose as a hypothesis - it’s the starting point of their experimentation with their camera.
The Photographer’s Techniques
Fine art photography does not have to stand in isolation. That is, fine art pieces are often part of a series.
To create a cohesive series, you need both a central purpose and common techniques. This might mean you utilize long exposures in each photograph, convert each one to black and white, or incorporate certain elements (i.e., the color red, a windmill, or human forms) into each photo. You might also use the same medium (i.e., printing on canvas) to give the collection consistency.
The Photographer’s Artist's statement
Often, fine art photography needs to have an artist's statment from the photographer, that way their purpose is clear to the audience.
This artist's statment needn’t be a novel - just a short statement of what the photo is of, how you made it, and the purpose behind it - so viewers have a better understanding of your perspective and intentions with the photograph.
Common Types of Fine Art Photography
The ideas noted above can be applied in a wide range of photographic pursuits. Let’s look at a few of the most common types of fine art photography.
Black and White Fine Art Photography
Perhaps more than any other kind of fine art photography, black and white fine art photography is all about focusing on an emotion, portraying it effectively, and evoking that emotion in the viewer.
To do so, you have to strive to find ways to express that emotion in ways that go beyond color - if the emotion you wish to convey is love, don’t rely on using red; instead, consider ways that you can provoke that emotion in the absence of color.
Symbolism is often used in black and white photography to accomplish this.
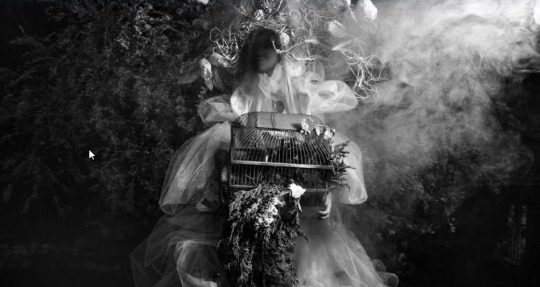
In the image above, the frantic feeling one gets by inspecting this image is achieved by using light and dark as symbols of good and evil, pulling the girl in two opposing directions.
Use contrast, textures, patterns, and shapes to create interest in your shot in the absence of color. Doing so often present opportunities for expressing two diametrically opposed feelings as well, and that conflict is a fantastic subject for black and white photos.
FINE ART NUDE PHOTOGRAPHY
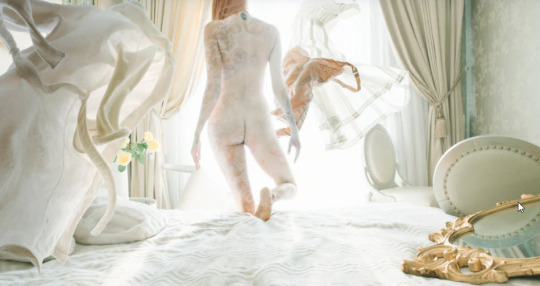
The human form has long been a subject of artists, and photographers are no different.
What sets fine art nude photography apart is that isn’t simply about the model being nude or even being sensual. Instead, it’s about exploring the shapes and features of the body and demonstrating their true beauty.
What’s more, this type of fine art photography is an excellent vehicle for exploring one’s inner feelings. Whether those feelings are good, bad, or otherwise, nude fine art photography literally provides a stripped down canvas upon which you can express your purpose, thoughts, and feelings in any way you wish.
Fine Art Landscape Photography
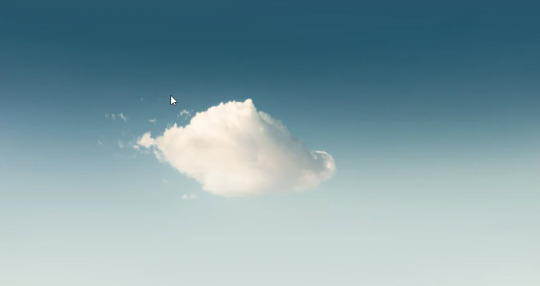
I’m a big landscape guy, so fine art landscape photography is certainly my bread and butter.
To take a normal landscape photo to the realm of fine art, you really have to focus on telling a story with the image. That is, dive deeper than what is merely seen with the lens and discover ways to build a story around what you capture with your lens.
One way of doing this is to show viewers something totally unexpected.
When one mentions “landscape photography,” the images conjured up in people’s heads are often of vast landscapes like those photographed by Ansel Adams. And if that’s what they expect, why not do the opposite?
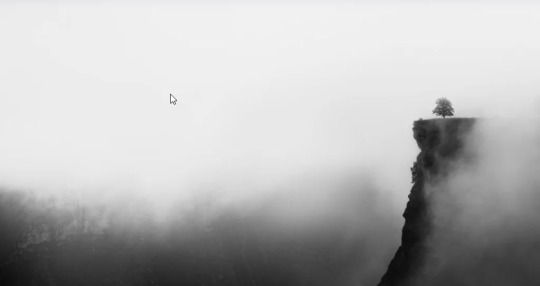
Focus on the details of the landscape. Create a macro shot. Get your telephoto lens out and frame up a shot that highlights just one or two elements of the larger landscape.
What’s more, add elements like people or man-made objects. Doing so often helps facilitate storytelling, and it’s not something you typically see in many landscape photos.
The combination of the story and the unexpected elements can help you create fine art landscape photography with quite a visual punch.
How to Create Fine Art Photography
There are a few steps you need to take if you’re going to find success in creating photographs that are considered fine art.
How to Create Fine Art Photos: Get Your Ideas Together
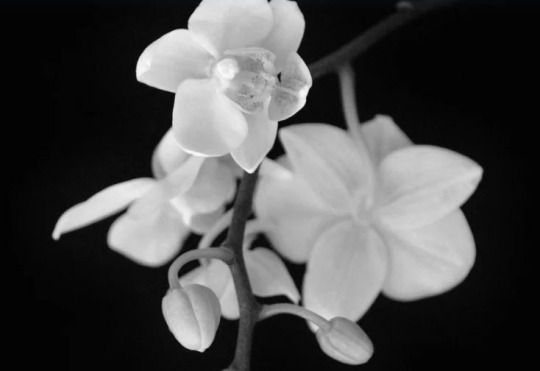
I’m a sticky note kind of guy, so it makes sense for me to brainstorm ideas for a fine art photograph by using sticky notes. You can use whatever medium you want, but the important idea here is to simply get your thoughts out there in a way you can see them.
In particular, focus on considering the following:
The topic of the photo. This should be something about which you have a lot of passion!
The techniques you’ll use. Whether it’s macro, long exposure, or something in between, figure out the photography techniques required to fulfill your vision.
The message you wish to convey. The message is as important as the topic of the photo. It’s the feeling or emotion you want people to walk away with, so you need to nail that down before you press the shutter button a single time.
How to Create Fine Art Photos: Bring Your Ideas to Life
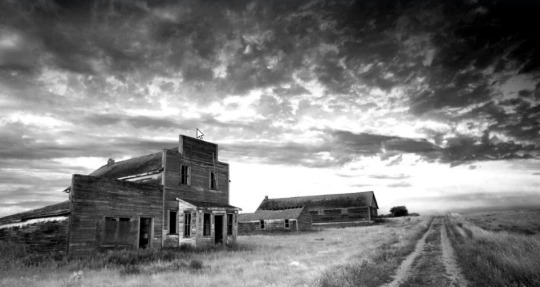
So, if I wanted to create a fine art photo, my topic might be “abandoned” using black and white conversion as a central technique.
When I think of abandoned, I think about things that are vast, empty, and perhaps downtrodden, much like the little ghost town in the photo above.
This image clearly conveys those ideas or messages. The manner in which the image is framed gives us plenty of details to inspect in the abandoned buildings, but the wide-angle view also gives us some indication of the surrounding landscape, which is both vast and empty.
How to Create Fine Art Photos: Remember It’s About Your Vision
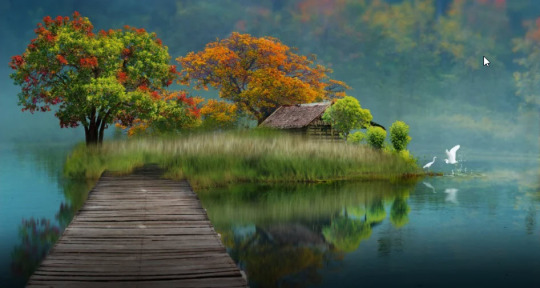
Remember, fine art photography is all about you and your interpretation of a scene. That means there are no right or wrong answers here!
Whether you’re into fine art landscape photography or fine art black and white photography or you want to create fine art photography prints or your fine art photography is just for you, bear in mind that the images you produce are really for you and you alone. What the viewer does with your photos is up to them.
Fine Art Photography: Final Thoughts
As we’ve explored in this article, fine art photography is quite a different animal than normal photography.
This work is about you, your vision, and your technique. This type of photography is not about getting likes or shares on social media - it’s about your expression of your ideas. If people like it, great. If not, too bad for them!
Remember that this is a process and that you need to focus on more than simply what’s in front of your camera.
Define your vision, create a clear message, and convey that through your photos and your photographer’s statement. If you can do those things, you might need to learn how to make fine art photography prints and how to sell fine art photography online, because you’ll have gorgeous photos that should be shared with the world.
#studioserraphotography#real estate photography#commercial photography#commercial real estate photography#commercial photography service#photo studio san diego#photography studio san diego#fine art photography#portrait fine art photography#landscape photography#scenic photography#seascape photography#professional landscape#beachscape photography
0 notes
Text
How to Take Great Landscape Photos

Taking pictures of landscapes may seem simple when you’re surrounded by so much natural beauty in the outdoors. But to really take a great photo, one that you want to share with friends or hang on your wall, there’s more to it than just pulling out your camera and snapping a few pics.
Once you have your fundamental photography concepts down, there are several things you can do to improve your chances of getting a share-worthy landscape shot. Here are seven tips to help you with your landscape photography.
1. Select a Mid-Range Aperture
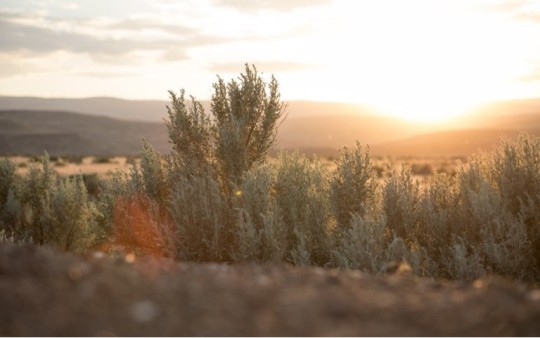
One of the goals when taking landscape pictures is to get an exceptionally sharp, clear image. The exposure settings that you choose have an effect on this, starting with aperture. To get the sharpest, clearest image possible, it’s best to shoot with an f-stop number that’s about two to three stops higher than the lowest possible (a mid-range aperture, like f/8 usually works well). Using an aperture too far toward either end of the spectrum, such as f/2.8 or f/22, can cause a subtle reduction in clarity.
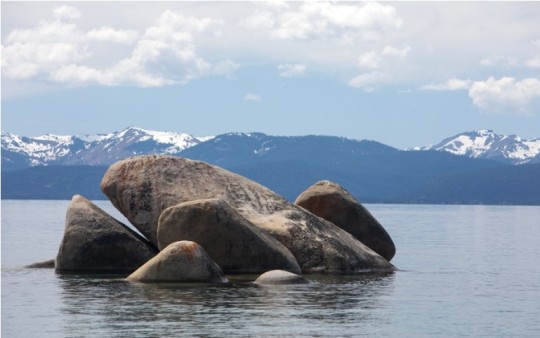
However, if your landscape photo includes visual elements in the foreground, midground and background, then you might want to play with the aperture to achieve a certain creative effect. For instance, to create a high depth of field where elements in the foreground and background are in focus, you’ll want to use a high aperture, something like f/11 or f/16. Or, if you intentionally want to blur something in the foreground of the image, you can set your aperture low, such as f/2.8, for a shallow depth of field.
2. Choose a Low ISO
Another way to ensure the best image quality is to set the ISO as low as you can while still being able to shoot with the aperture and shutter speed that meet your needs. This will help keep the image from getting grainy, which can happen with higher ISO settings. An ISO in the 100 – 400 range usually works well for this. However, keep in mind that you don’t want to miss your shot because you’re determined to shoot with a low ISO in order to maintain image quality. If you need to raise the ISO so you can use a certain aperture and/or shutter speed, then do so.
If you need a quick lesson on ISO and help understanding the relationship between ISO, aperture and shutter speed, see our Understanding Exposure in Photography article.
3. Use a Tripod if You Need One
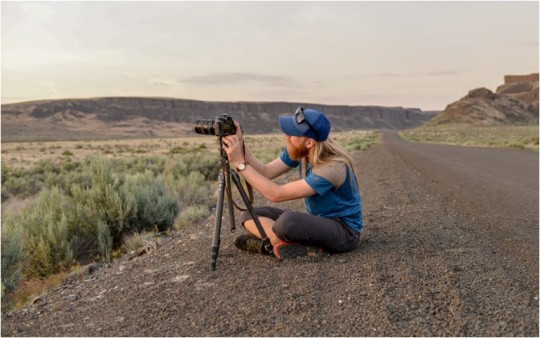
With your ISO and aperture set, choosing a shutter speed can be as simple as selecting whatever shutter speed will give you a proper exposure. To make this really easy, put your camera in aperture priority mode when selecting the aperture and your camera will automatically choose the shutter speed that will work best for a proper exposure. However, if your shutter speed gets too low you may need a tripod to prevent blurring caused by the shake of your hands. The general guideline for determining the lowest usable handheld shutter speed is to look at your lens focal length and use a tripod for any shutter speeds slower than the reciprocal of that number. For example, if your lens has a focal length of 50mm, you may be able to shoot at 1/50 of a second without getting handshake blurring, but you’ll want to use a tripod for speeds slower than that. Learn more about shutter speed.
4. Shoot During the Golden Hour
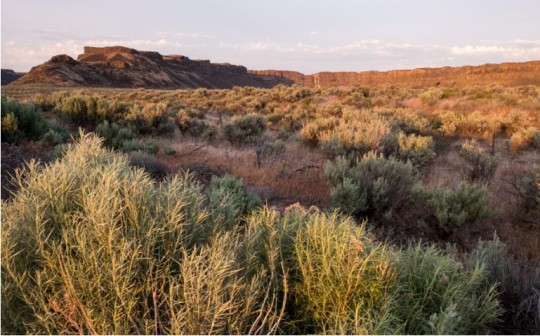
Photographers refer to the time periods just after sunrise or before sunset as the golden hour (also sometimes called magic hour) because of the beautiful, diffused light that is created by the sun being low in the sky. To really get a stunning landscape photo, go out during these times and take lots of pictures. With the sun low on the horizon, the scene will take on a warm glow and you might be able to capture long shadows that will add depth and interest to your images.
Of course, that doesn’t mean you can’t take landscape pictures during other times of the day. If it’s the middle of the day and the sun is high in the sky, you’ll likely have harsh, glaring light that won’t often make for the most attractive picture. In these conditions, look for ways to soften the light. If there are clouds in the sky, try waiting for one to cover the sun so the light will be a bit softer. You can also try positioning yourself under a tree or perhaps you turn your attention away from the vast landscape and try snapping photos of objects closer in, like the leaves on the trees.
5. Use a Polarizing Filter
Using a polarizing filter is something many landscape photographers do to enhance color and contrast and reduce glare in their images. Polarizing filters can be particularly useful when shooting scenes that include water, sky, rich colors and lots of reflections. For example, with a polarizing filter, you can really bring out the vibrant blue of the sky or reduce the shiny glare of water on rocks.
Most polarizing filters screw onto the end of the camera lens and can be rotated by hand to control the amount of the polarizing. An added bonus is that the filter protects the glass of your lens from scratches and other damage.
If you’re using a point-and-shoot camera or a smartphone, you likely won’t be able to attach a polarizing filter. One thing you can try is holding up a pair of polarized sunglasses in front of your lens to achieve a similar result.
6. Compose a Good Landscape Photo
A well-composed landscape photo arranges visual elements, like trees, clouds, mountains or people, so that they catch the eye, tell a story or evoke a certain emotion. Here are a few ways to improve the composition of your landscape photos:
Use the Rule of Thirds
Using the rule of thirds is an easy way to create a balanced and visually interesting picture. To do so, you simply break up your image into thirds vertically and horizontally with imaginary gridlines and position the subject(s) of your photo either along the lines or at the intersection of two lines. Many cameras allow you to display an actual grid in the viewfinder and/or on the LCD screen to help you compose images using the rule of thirds.
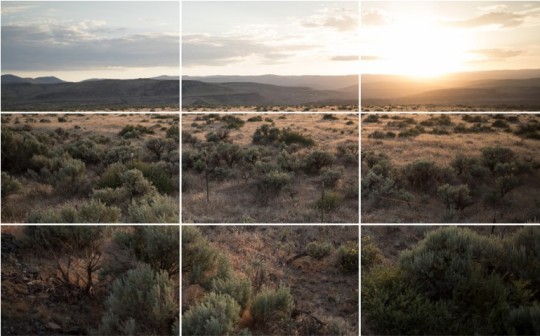
For example, instead of taking a photo of sunrise so that the horizon cuts across the middle of the picture, adjust your framing so the horizon is at the bottom third or top third. And try positioning the brightest or most colorful spot off to the right third or left third.
Make Use of Leading Lines
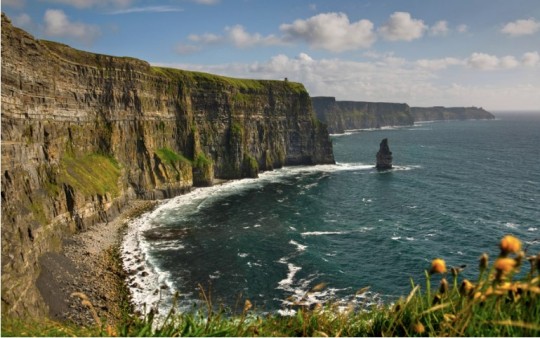
Using lines in your pictures is a powerful way to draw the viewer’s attention to the main subject and create a sense of movement through the image. For example, when you're taking a landscape picture, think about how you can use things like trees, trails, clouds or cliff lines to guide the viewer’s eye through the image.
Change Your Point of View
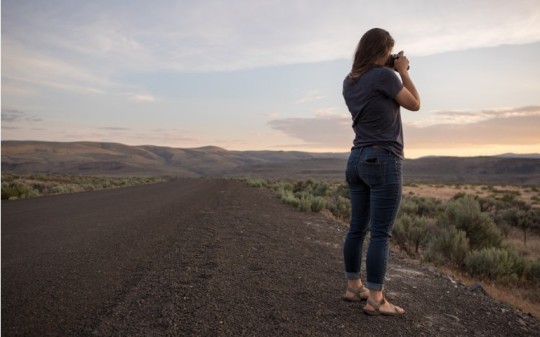
Shooting all your pictures from the same point of view can sometimes make your photos all start to feel the same. Try changing things up to add a new touch to your photos by kneeling or lying down on the ground, or find a way to get up high (can you hike up a nearby hill or safely climb a tree?).
7. Preparation Tips for Taking Great Landscape Photos
Know Your Camera
Whether you’re using a point-and-shoot camera, a smartphone or a DSLR, you need to know how to use your equipment before you get out there. Spend some time at home exploring the functions on your camera. Know how to adjust things like shutter speed, aperture and ISO.
Use the Landscape Auto Scene
If your camera doesn’t allow you to adjust shutter speed, aperture and ISO, look for a pre-programmed landscape scene and use that. This auto setting will adjust the shutter speed and aperture appropriately and optimize to the camera to capture the vivid colors in your shot. Learn more about how cameras work.
Research the Location
If you’re heading somewhere you’ve never been before, hop online before you leave home and do some research. Look for information about good viewpoints and beautiful areas of interest. You can even try using Google Street View to get a preview of what the scenery looks like. With this information, you can begin to dream up what your perfect landscape photo will look like and think about what you need to do to get the shot.
Scout Your Location
To get a really great shot, you’ll want to spend time scouting out your location ahead of time. If you’re able to explore the area several times in different lighting conditions, you’ll get a really good idea of where and when you need to be there in order to nail the shot. But, sometimes you’ll already be out on the trail when you decide you want to snap a landscape photo. In this case, still try to get in position with enough time to come up with a plan for capturing the scene. This can mean hiking up to a ridge or getting to an alpine lake an hour before the golden hour. You’ll use this extra time to determine exactly where you need to set up, what camera settings to use and what you want to include in the photo, like trees, rocks and people.
Click Here for more info.
#studioserraphotography#real estate photography#commercial photography#commercial photography service#commercial real estate photography#landscape photography#scenic photography#beachscape#seascape photography#professional landscape#fine art photography#portrait fine art photography
0 notes
Text
A Complete Guide to Commercial Photography
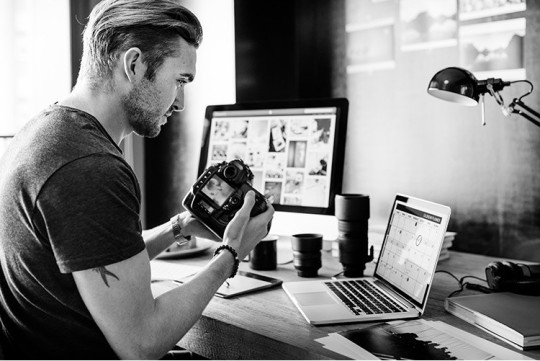
Commercial photography is a genre you may have seen used often as a term, but you might not know precisely what it means or how to get into it. Commercial usually means relating to sales or the process of running a business, and this is precisely what you will expect from this photography genre as well.
Let’s dive into exploring what is commercial photography and what isn’t, as well as what you can expect if you start working in this area.
What is Commercial Photography?
As a commercial photographer, you will be taking photographs of products or individuals, that will be used to sell a product or a service. This could vary greatly: you could be shooting fashion models in designer gear for an advert, someone clicking away on a computer to sell a service or anything else that might appear on a business website, literature, or advert.
It’s actually rather difficult to pin down a commercial photography definition. Some people would say that it only applies to advertising shots, but others would include catalog work and e-commerce shots.
So, how can you tell if you are doing commercial photography? Usually, a commercial photographer is employed by a brand or a company, to promote their product or services. Let’s take the example of Ansel Adams. Most would say that he is a landscape photographer, and this is true. But when he was working for the Department of the Interior to photograph national parks for advertising purposes, it would be more accurate to describe him as a commercial photographer.
The main thing that sets commercial photographs apart from other genres is the intention behind the shot. Adams would normally take images to capture and preserve the beauty of nature in untouched areas. For those national park shots, however, the intention was to sell access tickets to tourists.
Types of Commercial Photography
Now that we know how broad the definition of what is commercial photography can be, it’s time to take a look at some of the types of assignments you might pick up. Commercial photography is one of the fastest-growing genres of photography. The multiple categories of Commercial Photography include, but are not limited to:
Advertising – anywhere that advertising can be seen, including billboards, posters, magazine pages, online adverts, and so on
Website images – such as those used to promote a new product launch, or included with a press release
Catalog and sales images – these will be images of a product in use and are often formulaic (for example, a clothing brand will usually want models wearing the clothes against a white background, showing both the front and back of the garment as well as any pertinent details). Think also of restaurant menus, as well as non-conventional ‘catalogs’ like Etsy or Facebook Marketplace
Product packaging – any images which go on the packaging, including products you may not think of at first: CD and DVD covers, tags, instructional guides, and so on
How can Commercial Photography Grow your Business?
As a photographer, commercial photography can seriously boost your photography business. Potential clients will be all around you, wherever you have a local or national company that you can contact. The work is available all year round, and the profits can be very lucrative. For a photographer, getting into commercial work is an opportunity for great success.
Your photography portfolio website is going to be the single, most important tool that would help you grow your business. Whatever the stage of your career, your website will always be the center of all your marketing strategies to grow your creative business. It is a great way to build your presence in the market. With clients continually looking for creatives who provide specific services, having a presence online will bring you to the forefront and help more customers discover you. Even while engaging and interacting on social media sites, having a dedicated professional portfolio website has more chances and benefits of visibility and growing your business' online. Pixpa is a portfolio website builder platform that is trusted by creative pros around the world. Here are some outstanding photography portfolio websites created on Pixpa to inspire you.
If you are a business owner, commercial photography is essential to growing your business online. If you want to sell your products or services online, you need high value-added content and stunning imagery. Images help us to visualize what we will receive. Without that reassurance, most people won’t buy. So if you are looking at growing your brand online, do read our step-by-step Guide to creating a successful small business website.
The difference between good and great commercial photography can also make a big difference to your sales. Great images make people want to finalize that sale right away. Poor images might actually sabotage the sale. That’s why it’s always worth shelling out for the right photographer who knows what they are doing.
Licenses and their Pricing
Licenses are a huge part of commercial photography, and you have to understand exactly what you are giving away when you sign a contract. If you aren’t aware of the different types of licenses out there, you might end up losing out on a lot of money.
The kinds of licenses you will see are:
Usage – this determines how your images are permitted to be used, for example in a print media campaign
Copyright – this determines who will own the rights to the images after the photoshoot – you, or the client. You may grant a usage license without giving away your copyright. If your client has a usage license for print media but uses the images for an online campaign, you would be within your rights to demand further payment. Many clients will ask for copyright, and you should charge them more for this
Approved uses – this can differ slightly from the usage license. You might sell the images under the stipulation that they are NOT used in a certain way. For example, you might stipulate that your portraits are not used for promotion of pornographic materials – a very real issue that some photographers and models have faced in well-publicized cases
Period of time – how long can your client use the images for? Six months? A year? More?
The number of uses – how many times will the image be reproduced?
Based on the license that you eventually agree on, you will be able to come up with your pricing. You might want to read our Comprehensive Guide on Photography Pricing that will assist you in determining a competitive and winning pricing for your photography services. This isn’t always easy to do, so it’s a good idea to do some research.
Start with the amount of money you would be comfortable to make from the shoot. It’s that simple! There’s no set rule except for a price that you’re willing to work for, and the client is willing to pay. Variance can be massive between bids for the same project. You need confidence in yourself and what you are worth before you can demand it.
You will want to massively increase your fee to give away the copyright, as this limits your ability to make future earnings from the images, and you won’t even be able to use them for your own purposes. You may find that a time or usage-limited contract works best. This gives you the ability to re-charge the client for further uses beyond what you have agreed, meaning that you get paid multiple times from the same shoot. It is a good idea to read in detail about Photography Contracts. Properly drafted contracts set the right expectations and clearly outline deliverables and terms of service so that the client knows what he is paying for. Here are a few critical Things that You Must Include in Your Photography Contracts.
There may even be circumstances in which you lower your fees. For example, if a brand allows you to retain copyright and even includes your name alongside the images everywhere they are produced, you might consider this enough exposure to charge them less.
However, you should never be tempted to work for free in exchange for exposure. This rarely helps you to put any money in your pocket at all. Any brand which is big enough to get your name out there in a helpful way will be big enough to have a budget set aside for photography. Know your worth, and don’t be persuaded into working for free – especially if they want to own the photographs afterward.
Equipment for Commercial Photography
There’s no easy list to churn out for the equipment used in commercial photography because it can differ from job to job. You might be shooting in a studio with all of the necessary lights and backdrops one week, then working out of a luxury hotel resort by the pool the next.
One thing is for sure: you need a good-quality, professional-level camera and lenses to get the job done. The higher the quality sensor, the better. It should be able to capture pin-sharp images across a large frame size, suitable for printing to a potentially huge canvas.
You also need either good retouching skills or a good retoucher on your team. This might not be ‘equipment’ per se, but it is definitely essential for commercial shots. Everything should be polished and clean, and you will often need to smooth skin, change the shape or color of things, remove reflections, and so on. Basic-level Photoshopping skills won’t cut it.
Tips to Get Started
We can’t really go back in time and ask what was the first commercial photography process because it’s not as cut and dried as other photographic genres. In the same way, you might experience a lot of confusion about how to go about entering the industry.
The best way to get started is to build up your experience and portfolio in one specific area. For example, you can work on product photography. This is perhaps the easiest and cheapest type of portfolio to build. You can create your own home studio with a torch, sheets of white paper, and cosmetics items from your bathroom. This will help you to get your first paid clients, which might be more on the personal side (for example, photographing items for insurance purposes). To level up and get commercial jobs, there are two directions to go in. One is to look for mid-level and small businesses which are talking about upcoming launches or whose imagery at the moment is not great, and make them a pitch. Another is to search for job boards and photography sites for available opportunities. Your online portfolio is the key to gaining new clients and growing your business. Do read our comprehensive guide on tips to create a portfolio website. The guide is a step-by-step reference for creating a photography website that would be able to attract and impress potential employers, clients or collaborators. You also need to think out of the box, uncover your creative genius, find your expression and figure out how to present your work in the best way possible. Photography websites need to go beyond just showcasing your talent and images. It needs to present your vision for the future, with respect to the work you want to do, reflect your personality and your style and approach to work.
Make sure that the photography website builder you choose offers the flexibility, features, and ease-of-use you need to put together professional photography websites without requiring any coding knowledge. That's where a bit of inspiration comes in handy.
Pixpa is a website builder platform that is trusted by creative pros around the world. Have a look at these inspiring portfolios of Photographers. These photographers have made excellent use of Pixpa, an easy to use website builder to showcase their photos. You can draw inspiration from these creative professionals and study their portfolios, to get a clearer idea of how you want to showcase your repertoire of work.
Once you have built your portfolio up and worked with a range of clients, including some higher-end businesses, you can consider looking for an agent. Joining an agency will give you new opportunities in terms of getting bigger clients without having to do the pitching yourself, though of course, you will have to split your earnings with your agent. You might have to make a lot of pitches before you actually get a bite. When you are just starting out, rejection is normal. Keep going and persevering.
Commercial Photography Jobs
Most of the photography industry is freelance, but you may be able to get commercial photography jobs as an in-house photographer if you are very lucky. These tend to be few and far between, and are most often in genres such as catalog photography, for brands who put out new products on a very regular basis. These jobs can vary, but will usually be salaried. Be sure to check the industry average – which can fluctuate – before accepting a position so that you know you are being paid fairly.
Cons of the Commercial Photography Industry
One of the downsides of commercial photography jobs is that you are really there to fulfill someone else’s vision. You don’t get the chance to express yourself and come up with your own ideas very often, though it can happen. Instead, you are just there to get the shot that the brand has been dreaming of – even if they haven’t made the right conditions for you to get it. Your job is to make it happen, no matter what, putting your own creative dreams aside.
Another downside might be pricing. There will always be photographers who don’t understand the value of commercial photography jobs, and who end up pitching low. If they are getting all the work that should be yours, this can be frustrating. But you have to stick to your guns and your pricing – otherwise, you will be talking yourself out of being paid what you’re worth.
You might also come across problems with getting paid. While it’s usual to ask for payment within 30 days of the work being done, clients know they can often stretch those terms and pay late because it’s too expensive to take someone to court over a single invoice. Get around this by adding specific terms in your contract about adding on extra fees for late payments. They’ll be sure to pay on time if they know it would be costing them more.
Commercial photography is a viable career path for the majority of photographers who want to make a full-time living. Those who consider themselves to be artists might struggle to give up control, however, and so it might not be best for them. In general, it’s a great way to earn a lot of money across fewer jobs than you might normally.
#commercial photography#commercial photography service#studioserraphotography#real estate photography#landscape photography#beachscape photography#fine art photography#scenic photography
0 notes
Text
Shocking Stats About the Importance of Photography in Real Estate

It might seem obvious—or go without saying—that good photography and videography are critical for your success as a real estate professional.
But when you dig into the numbers, just how much of an impact good visuals make borders on shocking. Check out some of these stats:
Homes with high quality photography sell 32 percent faster.
Homes with more photos sell faster, too. A home with one photo spends an average 70 days on the market, but a home with 20 photos spends 32 days on the market.
For homes in the $200,000 to $1 million range, those that include high-quality photography in their listings sell for $3,000-$11,000 more.
As time goes on, and equipment and tools become better and more sophisticated, online platforms become more robust, and augmented reality (AR) and virtual reality (VR) expand into our industry—skills with visual tools will only become increasingly important over time.
In its resource reference document for members on the topic, the National Association of REALTORS® (NAR) points out that:
Eighty-seven percent of homebuyers who searched for a home on the internet found photos to be among the most useful features of REALTOR® websites, according to the 2018 NAR Profile of Home Buyers & Sellers. Digital photography and virtual tours allow REALTORS® to serve their clients like never before. Digital images can quickly and professionally showcase a listing, and today’s technologically savvy clients appreciate the convenience of a virtual tour for both long distance and local moves.
In addition to this resource—that is curated especially for its members and provided free of charge—NAR’s affiliated organization, the Residential Real Estate Council (RRC) offers three online courses through our platform to help enhance your visual skills. These include:
A Photo Sells a Thousand Homes will help you attract buyers to homes, identify the right photos you should take of every home and understand exactly how to compose the best photos.
How Do I Make My Photos Look Like That? will show you how to leverage the technology available to make photos look more professional. Learn about the software and editing capabilities available at minimal price.
Video Marketing to Enhance Your Business demonstrates video marketing strategies that are crucial for reaching today’s house hunters. Connect with consumers in a fast-paced digital world by setting yourself apart and grabbing their attention instantly.
To obtain these and other great online courses at a fantastic discount, check out our featured products this month at the Center for REALTOR® Development, RRC’s online courses and bundles, which offer a wide variety of educational products that lead to the Certified Residential Specialist (CRS) designation and are all on sale this entire month of December at 25% off.
For more information, please visit RISMedia’s online learning portal from NAR’s Center for REALTOR® Development (CRD) and the Learning Library. Here, real estate professionals can sign up for online professional development courses, industry designations, certifications, CE credits, Code of Ethics programs and more. NAR’s CRD also offers monthly specials and important education updates. New users will need to register for an account.
#studioserraphotography#real estate photography#commercial photography#commercial photography service#landscape photography#scenic photography#seascape photography
0 notes
Text
10 Ways To Get Started in Commercial Photography
If you are a wedding, portrait, pet or generalist photographer and have been wanting to make a change with your business, you may have considered offering your photography services to companies, agencies and small businesses (e.g. ‘commercial photography’).
You may have already been contacted by a potential commercial photography client, either from an ad agency or from the marketing department at the company itself. Or even one of your friends or family members who owns a business.
You may have felt a little lost as to how to move forward, answer questions, and come up with processes and pricing.
It’s exciting to think about doing commercial photography, because the revenue can be so much higher than most other kinds of photography.
But information can be hard to find online, and most of the books and articles out there are old and outdated.
When you think of how to get started in the industry, it can feel really daunting.
The good news is in this article I go over 10 simple steps that will help you get started offering commercial photography to clients on a scale that’s approachable, manageable and scalable.
With this process you’ll start small (the ‘approachable’ part) by working with smaller local companies. You’ll reach out to contacts you already have, in a way that’s simple and direct (‘manageable’), and you’ll scale up with bigger and bigger clients as you learn and build confidence in your abilities.
You’ll also create your ever-important team, which will enable you to do bigger and more challenging shoots with more ease.
Ready to get started? Let’s do it.
1. Decide WHO and WHAT you want to be shooting
This is a critical step that many photographers skip, but it’s also the most important one, and should be the very first decision you make in your commercial photography career.
Ask yourself the following questions:
WHO do I want to be shooting for?
WHAT do I want to photograph?
What kinds of people do I want to be working with?
YOU get to decide all of these, and then allow your decisions to guide your path.
If you think you should be doing things a certain way, consider this: there should never be a ‘should’ in commercial photography. (“I should be shooting for company x/y/z, even if I don’t really want to”, or “I should be shooting this subject matter, because that’s what I’ve been doing all along��.)
What you should do, is decide what you want that to be.
Commercial photography is challenging enough when you are shooting something you really love. You don’t need the added complication of shooting something you don’t really love simply because you think you should.
How to find your ‘people’:
Head to the nearest newsstand and buy a stack of magazines, or make a pile of the ones you already have. Flip through the magazines, looking specifically at full-page ads, and dog-ear or tear out the pages of the ads that really resonate with you.
Then make a list of the local small business and companies that have a style similar to what you love in those ads.
Maybe it’s the muted colors and strong angles in a fashion ad that really resonates with you, and there is a boutique clothing shop in your town that has the same aesthetics.
Or it’s the moody rustic feel of a leather bag ad, and there’s a brewery in your neighborhood that has the same kind of feel.
Or you light up over the bright colors and happy people in an athletics ad and there’s a gym near you that has a similar vibe and similarly energetic and joyful people.
Let your emotions guide you, because it’s your emotions that will be the most invested in doing the work to create awesome photos that your clients really love.
Make a list of:
1. Style/vibe/feel of the brands you’d want to shoot for. 2. The types of people you’d love to work with as far as the company’s customers go. (Digital nomad millennials, retired wealthy people, cat owners, etc.) 3. All the businesses in your area that fit within the previous two.
The reason why #1 is important is because you will invariably stumble upon (or get referred to!) other businesses in the same brand vibe, and you’ll want to remain open to them.
It’s a lot easier to find clients if your criteria is ‘companies that have a beautiful design aesthetic with light, airy pastels’, than ‘a flower shop that sells lots of roses, and uses mint and green in their branding’.
A brand vibe or ‘feel’ is often a lot easier to define than a specific business type, and doing this will really help you hone your photography style too.
You get the idea, right?
Plan to spend at least a few days doing some research and brainstorming your niche, as this work will set the stage of your intentions as a commercial photographer, as well as provide a mental blueprint for your marketing plan.
2) Make a marketing plan
If you already run a photography business, treat your commercial photography service as a whole separate business. Because of this, you’ll want a unique marketing plan to go along with it.
In your new marketing plan, list all of the strategies you plan to put into action in order to acquire your first corporate/business clients, include the costs of each marketing strategy, any timelines and deadlines you have, assets you’ll need for each (ex: new photos for a booklet cover), and anything else that you.
Include the list of businesses you came up with above, and include, in detail, how you plan to get in front of each business.
(More ideas on this later in this article.)
3) Buy and install pricing and bidding software
Have you tried to come up with commercial photography pricing off the top of your head? It’s not easy, is it?
Without using any kind of pricing database that draws on pricing from other photographers, it’s almost impossible to provide accurate pricing for image licenses (the rights-managed ‘leasing fee’ you charge to clients for use of your images), or even know what to charge for a photography fee.
And without bidding software, it’s very hard to pull together a professional estimate that doesn’t leave any important expenses out. You really need both pieces of software in order to provide fair market pricing and appear professional.
The two types of software that the majority of commercial photographers use are BlinkBid, and FotoQuote/FotoBiz X by Cradoc Software.
You can also use Getty Images’ pricing calculator for comparison but those suggested numbers cover every conceivable scenario and are usually way, way more than the vast majority of commercial clients will ever pay.
You may be inclined to ask “how much should I charge for this commercial photography shoot” in the groups you are in, but you’ll rarely get a straight answer. Instead, you’ll get pricing that works for other photographers. Pricing that you won’t be able to explain or justify to your clients.
So become the professional that your commercial clients expect you to be, and pick up the pricing and bidding software.
4) Design and print a portfolio and make a separate website for your commercial work
Ideally you should have two portfolios- one on the web, and one in print.
Your website is what you drive prospective clients to when you meet them in person, and your printed porfolio is what you show them when you meet them in person. Makes sense, right?
Many photographers who already have websites ask me if they should have a separate website for their commercial photography.
My answers is always- absolutely yes.
The reason for this is a website is designed to target and appeal to a specific audience or market. If you are doing wedding photography your market is going to be totally different than when you are targeting cafes in your area and/or doing headshots.
Build a totally separate website with your commercial photography portfolio, your commercial (and editorial) client list, and keep the branding simple and the frills off.
Put only your very best work on there, and don’t overload your galleries with photos. Think quality over quantity.
Don’t be afraid to feature your best commercial photos as a full-screen photo, or one that can be expanded to full screen. Your goal here is to knock the socks off potential clients. You want to be conveying quality, because it’s that quality that’s the biggest component of your success in landing commercial photography clients.
After you’ve done a half dozen or more commercial shoots (for clients of any type and/or size), you will make what’s called a ‘client list’, which is simply a list of companies you have shot for, and include your client list on the about page of your website, underneath your ‘about/bio’ text.
You’ll read more about the client list later in this article.
As far as a printed portfolio goes, you don’t need to worry about making something fancy at all. The key is just to get it made.
It can be a porfolio with prints you slide in and out, or a hardback Blurb book that you design using their software on their website.
You don’t need any text at all in this. Just keep the focus on the photos. White space is good too, so you can make white borders or have margins above and/or beside the photos.
You can either do a cloth cover or printed photo cover. Be sure to have your name somewhere on there.
Simplicity is key here. You just want to be able to show it to the people you meet with in person.
And promise me you won’t allow the overwhelm of making a portfolio to prevent you from doing any marketing.
Give yourself a time limit- like 90-minutes to pick images and design and order the book.
The key is just to get it done.
You can worry about picking the perfect cover and the perfect images after you’ve gotten feedback from prospective clients and have been able to see the looks on their faces when they look through your work.
5) PM all the people you know (friends, family, coworkers, colleagues, etc) and ask for referrals to businesses
You have local friends on Facebook, right? They work places I assume.
Maybe some of those places are companies you’d like to do photography for.
Think of who you already know that would be willing to help you pitch your commercial photography services to the companies they work for.
For example: you could do a corporate headshot or personal branding photo event, and you could ask a family member for a connection with their marketing lead.
Or you mention to a friend that you recently started doing product photography, and would love to talk to someone at their company since they are a product-based company. Ask if you can meet with someone at the company to show them your portfolio.
Take time to go through your pre-existing list of contacts, and see if any of them work at/for companies you’d love to have on your client list as having shot for.
When you are going through your list of contacts, think about who else they know in terms of businesses. Do they have a best friend that owns a children’s boutique? Or a restaurant? Or maybe they are close with the people at their church.
A direct connection is worth its weight in gold, as this can be just the key for getting your foot in the door, and landing that all-elusive ‘book showing’.
You don’t need to get fancy with your message when reaching out to your network. Just a quick personal email or PM will do.
Something like this:
“Hey __name__,
I just wanted to reach out to you and let you know that I’m now offering commercial photography services. If you are evert in need of high quality photography for your business, please keep me in mind. You can see my portfolio here. (<– insert link.)
Thanks and hope you are well!”
Simple, short, easy to read and gets the point across.
They’ll reach out to you if and when they want more info. Don’t freak out if you get a reply. The goal is to merely ‘plant a seed’ in their mind, so that they think of you first when the need arises. It could take months (or even a year or two) before you hear from them to book a shoot, but it doesn’t mean it won’t happen!
(It’s a good idea to reach back out to those folks if and when you plan to raise your prices, before you raise them, to get them to book under your current rates. This can be incentive for them to move forward sooner rather than later too.)
Also, DO NOT be ashamed to promote your work and your successes on your personal social media pages! The people you know want to know what you are up to, and even if they aren’t commenting, you never know when one of them might share your work with someone who will hire you.
Don’t be afraid to leverage the connections you already have when getting started in commercial photography.
In fact, it’s really the best thing you can do. Your success as a commercial photographer will be directly proportionate to your ability to network. #fact
6) Design a multi-page printed promo
When you get to the point where you are ready to work with bigger and more established companies (what I call ‘medium-sized companies’), you are going to need more than just a simple email sent to their marketing department, or your basic Blurb book.
Think:
Multi-page sales flyers
Multi-page booklets
Large fold-out postcard
Any other impressive printed piece that nicely features your work
Because you are going to be investing in the printed pieces, if you aren’t a designer yourself, you’ll want to hire a designer to design a template for you that can include a handful of your very best photos. The piece will be your first impression you give to the client, so you want to make it a good one.
You want them to open it, be impressed and say “huh, nice…”
Make it personal to the companies you are sending it to, and of don’t forget to include all of your contact information and a link to your online portfolio.
Type a sincere, personalized letter to the individual you are contacting, explaining why you want to work with their company (remembering how their brand resonates with you), and how to reach you when they are ready to work together.
Whether or not you include any information on pricing is up to you, and it’s always a tricky call.
I recommend that if you do decide to include anything with a dollar sign, that you keep it simple and somewhat vague, like for example saying that ‘rates start at $850 for a full day shoot’, but don’t mention any kind of licensing or list what expenses that includes. You could write something like ‘get in touch for a customized plan that meets your needs perfectly.’
Your goal in reaching out to these bigger companies is just to get the conversation started, which is always the most challenging part of any new relationship. Honestly IMHO it doesn’t even matter what you are talking about. It could be something totally unrelated to photography. You want them to know you and like you. Once you feel comfortable with each other and they know you, you can start discussing pricing and licensing.
After you have your fancy collateral (printed promo pieces) printed and ready to ship out, place it in a nice envelope (even better if the envelope is branded) and address it to an individual in the marketing department and mail it. (Even better is if you can find the marketing director’s name on LinkedIn.)
Don’t be surprised if you pour some love and effort into making and sending some kick-ass promo pieces and don’t get a response right away if at all. This is totally normal and it does not mean the company isn’t interested. All it means is that it’s not a priority right now. But it certainly can be in the future.
Follow up via email or phone a week or ten days after your mailing and confirm that they received it. Then follow up again every six months or so. Stay top of mind and there is a good chance that you’ll be the first photographer they think of when they need someone.
7) Pitch your photography to local businesses that you already patronize
Think of the businesses that you already go to. What are your favorite restaurants, bars, cafes, shops, etc in your area?
Do you already know any of the servers, employees, managers, etc?
If you answered yes, then pitch your services to them!
Front-of-the-house or back-of-the-counter employees can be some of your biggest advocates, so don’t hesitate to sell yourself to them, even if you know they aren’t the decision-maker.
It could be something as simple as casually throwing in a “hey, do you guys ever work with photographers?” to your conversation, and gauging their reaction.
The next time you go, bring your printed portfolio and show them a few examples of your work if they seem like they have a minute and are interested. (Note- show them a few photos, not allll the photos. Be respectful of the fact that these people are working and have other customers. Unless they don’t and want to see more- in which case- share away!)
Since you are already a regular at the business, you can point out things in their existing marketing strategies that you noticed, and tie them into ideas you have for things you can create for them. “I noticed the fall banner you put up behind the counter. Have you thought about doing something like ____?”
If you come up with a really brilliant marketing idea, they’ll value you for even more than your photography.
If you aren’t a natural salesperson, hustling your photography services in person at a local business can feel intimidating, but if those people already know you (and we assume they like you), you’re already well on your way to winning them over.
Also remember that the service you provide is something they really need if they want to be successful. The benefit is absolutely a two-way street.
8) Network with local producers, digitechs, assistants, and other crew
The most successful commercial photographers are those that have a team. And since you never know when you’ll need one (always for big jobs, and often for medium-sized jobs), it’s best to pull your own team together before you land the shoot where they are needed.
So who will you need on your team?
At minimum:
Producer
Digitech
Assistants
The producer plans and organizes and manages all the little details. They are the project manager.
Your digitech will sit at his/her laptop, with your camera tethered to it, and manage the files as they come into the computer. They may make adjustments to exposure, color, tag photos for deletion, help your client see what a photo might look like ‘darkened a little in this area’, and many other critical photo-related tasks.
Your assistants of course are your ‘right-hand-man’ (or woman). The best assistants will be mind readers, and be able to predict your needs. They’ll adjust your lights, carry your gear, hand you lenses and camera bodies, and all kinds of other things you can’t do because you only have two arms and one body.
Because you are certain to need all these people before any decent-sized shoot (and you’ll need an assistant for many small shoots), definitely plan to nail down your crew before your first big job.
It’s as simple as doing a Google search for those folks in your area, sending a quick email to introduce yourself and let them know you’d like to work together.
Ask them if they attend any industry events, and if they say yes, plan to attend so you can meet them in person.
Shaking hands with your peers, sharing a beer and a story is a great way to start networking in your industry.
Because you never know where the photography opportunities will come from, always make an attempt to connect with all kinds of people in the industry.
9) Add the names of clients you’ve shot for to the client list on your website
Remember I mentioned a client list above?
It’s one of the most valuable tools you have to market yourself. It’s the commercial photography industry’s version of ‘social proofing’. Being able to demonstrate that other clients have hired you and trusted you enough to have you make photos for them.
At the end of each job, always remember to add the name of each company you did photography for to your client list on your website.
When you are trying to build trust with brands that you have never worked with and who don’t know you from Adam, your client list can go a long way in helping them trust you, and most importantly- hire you.
As far as the technical aspects of making a client list, you don’t need to get fancy with it, just make a bulleted list, or place dividers in between each client if your list is short.
Like this:
Rockin Bodies Gym // Kinley’s Kid Space // Hammonds Hamburgers // Steam Cafe // Hotshots Sports
And try as hard as you can to always get ‘tearsheets’ from clients who have used your photos in print, like in printed ads for example. These tearsheets (examples of final ads/brochures/banners/mailers), are worth their weight in gold when you include them on your website. They enable new clients to visualize what your work would look like in their own ad campaigns.
When your are JSO, don’t feel bad about working primarily with smaller companies. As your portfolio and experience grows, so too will the size of the companies you are shooting for.
Pretty soon you’ll have some impressive names on your client list, and ultimately, there’s a strong chance that that’s all you’ll have.
That’s how it goes in the commercial photography industry.
10) Pitch even bigger businesses
When you are at the point where you have proven experience shooting for a variety of small and local businesses, you will be ready to start reaching out to ‘bigger fish’.
What’s exciting about shooting for bigger fish is that you’ll (generally-speaking), earn more revenue, have cooler shooting opportunities, be more challenged, and experience greater artistic rewards.
How do you know you are ready to shoot for ‘bigger fish’? When you feel confident that you are sufficiently educated in all aspects of your commercial photography business, including:
1. Your photography abilities in a variety of different circumstances. (In general with photography, regardless of the environment you feel like ‘I got this’.) 2. Your pricing. (You know the ins-and-outs of your pricing, can explain it well, and aren’t afraid to negotiate with any size client.) 3. Your processes. (You have your pre-and-post shoot processes nailed down, and can work efficiently and quickly.) 4. Your contracts. (You know what’s in your contract and why, and feel confident that it’s protecting you and setting clear expectations with your clients.) 5. Your team. (You trust your team, and you all work well together with the same end goal in mind- to please your clients.)
If you meet all the above criteria, then you are ready to start pitching bigger clients for better and higher-paying ($$$$$) jobs.
All of the work you’ve done up until this point is to that end- to make more money (ideally a lot more money!) and do more fulfilling work.
And what photographer doesn’t want more of both?
Chase after those big clients. Follow them on social. Send them printed marketing pieces. Call them. Email them. Ask for meetings. Rinse and repeat and do it all over again until you land them.
They may be a little more challenging to get in front of, but the payoff is oh-so-worth-it in every respect.
#studioserraphotography#san diego photographer#san diego photography#commercial photography#landscape photography#professional landscape#scenic photography#beachscape photography#fine art photography#commercial photography service
0 notes
Text
Seascape Photography Tips Take Your Nature Photography to the Next Level!
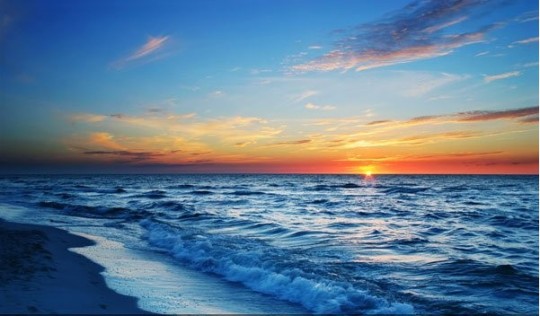
The sea is a place of great drama and moods. A photographer can’t control what will happen when shooting a seascape but can be observant and wait for the right moments. Everything can be taken in consideration; people in the shots, rocks, the beach, the sky.
1. Wait for the Right Time
If you are serious about seascape photography, you need patience. Always be on the lookout for changes in the weather, colors and moods. Central to seascape photography is natural light and how it affects the scene. Light has three basic qualities-intensity, direction and color, and all of them are affected by the time of the day. Composing your scene at the correct time enables you to get the best shot. Remember to protect your equipment from salt water and sand, which can be damaging. To add protection, use a specialized housing or a plastic bag. As usual, use a clear protective lens filter.
2. Use a Wide-Angle Lens
Not every seascape image has to be of crashing waves. On calmer, misty days, use a wide-angle lens to capture a different look. If you are on a beach, you can focus on points of interest like rocks, and people who may be exploring. Use a tripod or monopod since light may be low, and shoot using a small aperture f/16-f/32 to keep the whole picture sharp. On a hazy day the result is a soft focused image.
3. Use a Fast Shutter Speed
Capturing a wave as it curls creates great drama in a shot. Remember you need to use a fast shutter speed to freeze the water (around 1/1000s) and to avoid overexposure due to reflections from the sun. Try to underexpose the image slightly by 1 to 2 stops. You may be able to shoot a wave from a distance using a telephoto lens. With a waterproof housing, you can even be in the water for dramatic or creative photographs.
4. Capture Movement
To capture gentle moving water that gives the photo a soft, smooth whitish feel you must use a long shutter speed. Place your camera on the tripod and set the mode to TV or S (Shutter-Priority). Choose a slow shutter speed and allow the camera to choose the correct aperture. Using a ND filter helps reducing the amount of light reaching your camera fooling it into thinking it needs a longer shutter speed.
5. Dramatic Reflections
The moment the sun bursts though the clouds, when it’s either setting or rising, creates real drama because the action is mirrored on the water. Use a tripod to avoid camera shake and set your camera to AV (Apertue-Priority) mode. Use a small aperture f/16-f/32 for a deeper DOF (depth of field). For a more dramatic effect use a polarizing filter which will improve the color of the sky, bring out the clouds and reduce the reflected glare off the water.
6. Use Lines
Long exposure times create dramatic skies, which look like cloud trails and smooth, foaming water. Use a wide-angle lens and a small aperture of f/16 – f/32 to keep the foreground and background sharp. Always use a tripod to capture controlled movement. Remember to use lines to draw the eye into the image. For example, a pier that begins in the foreground and leads into the water creates a look of infinity.
7. Photograph Lighthouses
Lighthouses are iconic and create excitement in adults and children alike. Remember, to photograph a lighthouse well, you need good composition. Using a wide-angle lens and placing the lighthouse in the far left corner makes the shot instantly different. Using a slow shutter speed captures the soft light beaming out at the top. Choose a wide aperture of around f/16 and place your camera on a tripod to avoid camera shake.
8. Time of the Day is Very Important
If you shoot in the early morning there can be a red hue in your images. As the morning progresses the red hue will turn to yellow. Long shadows are cast along a scene during these early hours. As you approach mid-day, the shadows are gone. Towards evening, the sun casts stronger colors similar to morning.
Recommended Settings
Creating movement in seascape shots add drama. To do so, place the camera on a tripod and choose a slow shutter setting of 1/30s to begin with. You can even lower the shutter speed to a few seconds in low light conditions to create an ethereal soft blur effect. One more option is to choose your depth of field (by using aperture priority) and allow the camera to decide the shutter speed.
Recommended Equipment
Clean cloth: Even if you are shooting on a calm day, you can’t escape the salt spray and the blowing sand. These conditions can play havoc with your camera. When you have completed the photography for the day, wipe the camera with a clean cloth and ensure that there are no grains of sand.
Lens filter: Keep the camera in the bag when not in use to protect it from salt and sand. Always have a filter to cover the lens to ensure that the lens does not get scratched (it is more expensive to replace a lens than a filter).
Lens cleaning kit: Get away from the salt spray. Use lens cleaning fluid, or distilled water, to clean the front element. Protect your camera and always keep the lens cap on until you are ready to shoot. Hopefully this advice eliminates cleaning later.
Conclusion
Seascapes vary widely; even if there are no dramatic waves or skies, you can work with a moderately dull day by looking for aspects of interest in the rocks, the people, and sand. A shot capturing movement is always popular because of the dramatic effect it creates. Reflections are wonderful to use in water photographs. Use polarizers and neutral density filters as necessary; it’s far easier than using Photoshop later. Remember, photographing seascapes will not only produce beautiful images, but is a relaxing way to spend your time!
#studioserraphotography#beachscape photography#landscape photography#professional landscape#scenic photography#fine art photography#san diego photographer#san diego photography#seascape photography
0 notes
Text
Fine Art Photography - as Valuable as Other Types of Art
Fine art photography is related to the question: Is photography art? which is almost 180 years old. Surely, deriving from an even older enigma of What is art at all?, it offers many answers. Photography has always had the advantage in the shape of a camera, and while painters and sculptors use much more elaborated techniques, they also produce very different aesthetics, and therefore their work should not be compared to taking photographs. While photography’s usual aim is to preserve visual memories, accompany news articles or sell a product, there is an aspect of it called fine art photography, also often called artistic photography. It is created in accordance with the photographer’s vision, and it manifests an emotion, a personal impression and a unique vision of a subject the artist has a passion for. It strives to be shown in art galleries or hung at someone’s house, so it can be appreciated for its beauty and be considered - art. The result of fine art photography should be an immediate reaction, an overwhelming sensation caused by a strong visual impact.
The Evolution of Fine Art Photography
Photography’s journey into fine art started in the United States, where many magazines started featuring and promoting it as a new form of visual art. A few prominent camera artists were keen to show that it can be just as creative as other types of art. The most important of those were Alfred Stieglitz and Edward Steichen, who were instrumental in turning photography into fine art. Stieglitz and his wife, painter Georgia O’Keeffe, first introduced it to museum collections. In 1902, they formed an association of creative photographers, called Photo Secession and the Camera Work magazine, which was the reference point not just for photography, but for all arts until 1917. With Steichen, Alfred Stieglitz opened 291 Gallery in New York, exhibiting art and including photographs as an equal part. From then on fine art photography began to flourish and the creative freedom and artistic experiments produced remarkable works and introduced some of the biggest names in arts today - Edward Weston, Man Ray, Ansel Adams, Irving Penn, Duane Michals, Gilbert and George, Jeff Wall, Robert Mapplethorpe, Nan Goldin and many, many other great fine art photographers. Even the pictures of masters in other fields, such as fashion and photojournalism, gave some extraordinary images that overlapped different types of photography and relocated them from a newspaper into a frame and onto the wall.
From Rags to Riches
Like in any art form, there are many elements the artist takes into consideration before making an artwork. In the case of fine art photography, it is the composition, the focus, the lighting, the poses of the figures or the forms of landscape, all put in synchrony to create something unique. Very often, the camera serves merely to capture, while the fine art photographers construct the image in their mind way before looking through the lens. Whatever gear or technique the photographer might have used is disregarded, because the primary mission is to express an original idea. That idea might, or might not, be brought to perfection in post-production, whose usage in the fine art photography is frequent, if not regular. The perfect example of it is Andreas Gursky’s until recently most expensive photograph Rhein II (overtaken by Peter Lik’s Phantom). The artist used digital editing to remove details such as dog-walkers and a factory building. To justify photography’s title of a realistic medium, the software serves to support what is already within the image. Justifying this manipulation of the image, Gursky said:
Paradoxically, this view of the Rhine cannot be obtained in situ, a fictitious construction was required to provide an accurate image of a modern river.
Fine art photography also provided a new way of paying homage to other people’s art. An original approach to the matter was undertaken by Jeff Wall and his photograph titled A Sudden Gust of Wind (after Hokusai), taken in 1993. It is based on a woodcut by the Japanese painter and printmaker Katsushika Hokusai, Travellers Caught in a Sudden breeze at Ejiri. A master of staged photography, Wall photographed actors during similar weather conditions for five months, producing over a hundred photographs. He then collaged elements of the photographs digitally in order to obtain the desired poses, expressions and composition.
The Position of Fine Art Photography in the Art Market
The proper introduction of fine art photography to the audience within museum and gallery walls happened after The Family of Man, an international exhibition of 503 photographs from 273 photographers, put together by Edward Steichen at the Museum of Modern Art in 1955. The show then toured the world for eight years, and fine art photography started receiving a different treatment. From a more curated framing (images were now put behind glass) to specific printing processes and an increase in size, it had reached the point where it was no longer vulgar for it to be exhibited. It is also printed on a specific, fine photographic paper that adds both physical and metaphorical value to it, turning it into a real object and it changes its visual feeling.
Even nowadays, big museums are giving it much more attention, increasing their exposure among collectors as well and putting it on the art market. The confidence in the modern and contemporary photography is going up, causing photographers to produce limited-edition high quality prints and photographic books to be sold at public and private auctions for gradually increasing amounts. Even though strong sales come only from traditionally big names, the buyers are also looking for young talents, whose value will hopefully get higher over time in the art of business. And although it is still much cheaper than the artworks belonging to other art forms, fine art photography continues to offer brilliant and true masterpieces and to form a priceless legacy.
#studioserraphotography#real estate photography#fine art photography#landscape photography#professional landscape#scenic photography#beachscape#commercial photography#san diego photographer#san diego photography
0 notes
Text
What Is Commercial Photography? Great Tips to Get Started
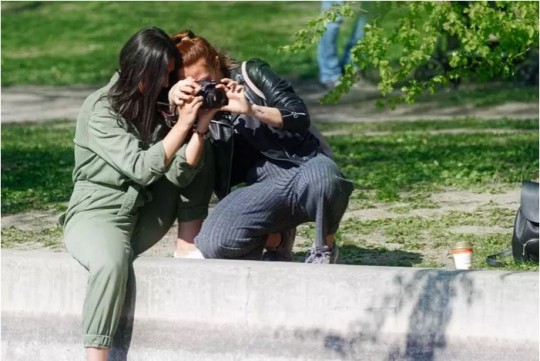
Commercial photography is popular these days. But it’s not all about large teams creating images in a studio for big ad campaigns.
This article will help you understand what commercial photography is and how to get started.
What Is Commercial Photography?
Commercial photography includes a wide range of photography niches. It’s the creation of high-quality images for commercial purposes.
Let’s break down the common types of commercial photography. Then we will get into all the commercial photography tips you need to know to succeed in this industry!
Common Types of Commercial Photography Shoots
Fashion Photography
This is what most people think of when you say “commercial photography”. This type of photography can be in a studio or outdoors. It can involve paid models who are modeling a product.
For fashion photographers, each shoot is unique. Knowing how to pose people and give direction is a huge skill. This is very useful for this type of work.
Product Photography
This is another large category. You can take product photos in a studio or outdoors. Photographers mostly shoot in a studio, so they have a solid backdrop for online use.
Doing this type of work will require that you get familiar with working in a studio. This includes controlling studio lights to get the desired effects on your products.
Food Photography
Yes, this category of commercial photography may remind you of people taking photos of their food for Instagram. But it can be a great niche to do as a professional!
You’ll want to work with a food stylist to get the food looking its best for the camera. This type of work also involves editorial restaurant shots. This means being quick to set up your equipment in a restaurant during a set time frame. At the same time, you need to create lighting that makes the food look enticing yet natural.
Environmental Portraits
This means taking photos of people in their work environment.
For example, you may go to a plant nursery and take photos of some of the employees tending to the plants. You’re showing how the nursery maintains a high level of care for their products.
You’ll be working on-the-go most of the time. And you may need special permissions for some sites.
Headshots
The most common type of commercial photography out there is a headshot. These photos promote the person’s products or services.
Headshot sessions are quick and fun. But they require a connection with your subject and giving them direction on posing in a limited time frame.
Commercial Architectural Photography
This category involves photographing a space for commercial purposes. This can be to showcase the architect’s design or to show the appeal of a retail store.
As with food photography, you’re often working with tight time frames. And you’re shooting around the flow of customers.
With spaces, including a few well-placed people in the shot often helps to give the photo life and context.
Tips for Commercial Photography
Commercial photography is an exciting yet competitive industry. Some of the world’s best known photographers are commercial photographers. Here are 6 commercial photography tips to help you get a leg up in the commercial world.
Keep Your Network Active
As a commercial photographer, having a network of good professional relationships is very helpful. Not only is it good for referrals, but it also serves as a pool of resources.
Don’t own a studio but need one for a shoot? Maybe you know a commercial photographer who has his own studio and can rent it to you by the day. Have a fashion shoot coming up and need help? Maybe you know a stylist or a make-up artist that can come in and create the look the client needs.
Even knowing people with connections to different locations can be helpful. When a certain spot works as the perfect backdrop for your client’s vision, you can ask them.
Having a healthy and active network is essential. You won’t be calling on strangers from an online listing to help in your shoots. You’ll be calling on trusted professional colleagues who you know can do a great job.
Be Professional
Professionalism will get you further in life than you can imagine. As a photographer, bring your A-game to every photo shoot. Build a positive reputation, encourage trust, and help you with your efficiency.
You may be a great photographer, but work ethic, motivation, and ambition will differentiate you from others.
Being professional includes being reliable. Always be punctual (try to be ten minutes early), be well-prepared, and meet deadlines. It is also important to be polite and respectful to everyone, and having a good attitude.
Being reliable will ensure that you are hired again, and again! A good way of making sure that you meet all expected demands is to keep a daily planner and take lots of notes. Consolidate your work schedule so that everything that you do is timely and happens according to your plan.
Keep notes on important information that you may otherwise forget. The key to success as a commercial photographer is organization.
Keep Your Gear Up To Date
It is true that in general, good photography depends on the photographer and not the gear. However, commercial photography is a little different.
In order to compete with the intense and demanding market, you have to make sure your gear is up-to-date. Commercial photography adapts to the latest technological advances. What was once industry-standard a year ago is no longer applicable.
Commercial photography likely involves printing. Having a camera with the highest number of megapixels you can afford is an absolute must. Sharpness is also important, so make sure your lenses are equipped with luxury glass.
Many commercial photography job postings and castings will require a gear list from you. Be ready to send them what you work with. This isn’t exclusive to camera gear. Clients will also probably ask you what editing software and computer you use.
Bonus Tip: If you can’t afford brand new gear, don’t worry! Develop a relationship with a rental shop and rent what you need.
Stay in Tune With Trends
Like being updated with technology, being aware of current photography trends is equally important.
Every year, every season even, brings new aesthetic trends in the photography world. With the social media climate, these trends are even more important than ever.
It is your responsibility to research and be informed on what kind of visual images are popular.
Find Your Distinct Voice
To stand out from your competitors, you need to offer something different. This can be in the form of your personal style, unique concepts, and methodology.
Allow your artistic voice to shine through your work. If you do this, you will attract jobs that compliment your work style. You will get projects that you enjoy and can excel in, which will result in a mutually beneficial outcome.
Creativity Is Important
When working with your distinct style, remember to be creative. No client wants a copy of some other image. So, try something different and create something fresh. Think of how you can depict the product in a completely new way.
It is important to be aware of your client’s needs and vision. A client usually has a specific purpose in mind when requiring photography for commercial use. So keep these in mind, and experiment in moderation so that your work still fits your client’s needs.
No Rookie Mistakes
Commercial photographers can not be amateurs. When a client hires a commercial photographer, they have certain expectations about quality. There is no mercy for hobbyist behaviour in commercial photography. Rookie mistakes will not be forgiven at a certain level. So, make sure you work out all of those kinks.
Education is extremely important. Keep developing your skills. Take seminars, classes, read books, experiment on your own time, and you’ll soon make sense of those photography basics.
How to Get Paying Clients
Once you are ready to start paid projects, how can you get clients? Follow these 3 tips to get your next project!
Have a Solid Portfolio
Portfolios are of the utmost importance in this industry. Ensuring you have a solid body of work should be one of your top concerns if you want to be a photographer.
This is especially true in commercial photography. The industry is so heavily saturated with photographers trying to break in. Having a compelling portfolio will set you apart from other commercial photographers.
But how do you create a portfolio? Include a variety of images in your portfolio that showcase different styles, subjects, and apertures. Don’t be afraid to try some creative portraits. Have some shots from both a studio and natural light.
Also, only include your absolute best work. Don’t add too many similar images or too many photographs of the same subject and arrangement. Your portfolio should be concise and diverse.
Keep Business Cards and Contact Information on Hand
Commercial photography is built on relationships and information. You should carry photography business cards and up-to-date contact information wherever you go.
Pass this around to anyone who seems relevant, because you never know who you might meet on set.
Recommendations Speak Loudly
Photography is a relationship-oriented profession. Recommendations make a huge impact. Be professional, meet expectations, and prove that you are worth recommending.
When choosing between two commercial photographers, a client will always go for the one with a positive recommendation.
Working With the Client
So you found a client. But what next? As a professional commercial photographer, there are some things to keep in mind while in talks with potential clients.
Be Extremely Clear on Your Client’s Needs
Transparent communication is vital in setting up honest expectations. You don’t want to set high expectations and then be unable to meet them.
So, here are some questions you should ask your clients.
Does your client need a set number of photos?
Do they have a hard limit on their budget that may affect how much you can do for them?
Are they working with a tight deadline?
What sort of specific shots do they already have in mind and must get?
Do their requests need any special props, locations, wardrobe, consultants, etc?
Double Check Your Quote to Include All Possible Costs
It’s common for the client of a commercial photography shoot to ask for certain extra things. These can be arrangements, items, or assistance, all of which add to the final cost.
Be sure to think through your quote. Make it clear to your client that if extra costs arise, the final rate may change. This is where open communication becomes vital to avoid unmet expectations.
When creating your initial quote, you may want to include a base rate that assumes certain items. Then show them line items for possible additional costs. These will depend on their needs or requests.
Discuss Intended Photo Use and Usage Rights
The use that commercial photos will get is very different from, say, family portraits. These photos are not going on someone’s wall or being sent to Grandma in a card. They will be for commercial use to generate more income for a company.
This means that your rates will need to be quite different. Be sure to have a discussion with your client about what type of use their photos will get. The different commercial use of your photos should affect the rate and also the shoot process.
For example, a client might use a headshot for social media profiles and a postcard flyer. But, they might use an environmental portrait to promote a new luxury resort.
This can be in a national print magazine, online ads, and the resort’s website. In this case, the headshot client may need lower resolution files. And they will create less profit from the photos. But the resort will require high-resolution images that they’ll use across the country. This will help them to generate a significant amount of income.
Once you understand your client’s needs, get specific. This includes what rights the contract grants them. Adjust your rates depending on these needs.
Conclusion
Commercial photography can seem out of reach. That’s only if you think of it as large, complicated shoots for international corporations.
When taking a closer look, there are lots of needs, big and small, that fall under the umbrella of commercial photography.
One way to get started is to begin with small jobs. As you grow more comfortable with the process, you can then build on them and accept larger requests.
#studioserraphotography#commercial photography#landscape photography#professional landscape#fine art photography#san diego photographer#san diego photography#scenic photography#real estate photography
0 notes
Text
Interview: Professional Photographer Shows Why Light Is Essential in Landscape Photography
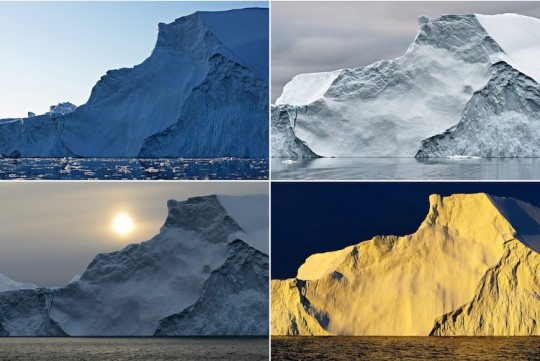
Understanding light is an important part of photography, but do you really know why? Though it’s sometimes more associated with portraiture and studio work, light is a critical part of any type of photography—particularly when it comes to landscapes.
Professional photographer Stephan Fürnrohr, who is known for his aerial and nature photography, counts light as the number one most important element in landscape photography. Why? For him, there’s nothing more essential in setting both the mood of the photograph, as well as the technical parameters needed to capture the image.
Light can take an image to new heights and inspire creative ideas. As photographers, learning to adapt to what’s in front of you is critical and Fürnrohr proves this with a set of four photos of an iceberg. Taken over the course of several days, the photographs clearly show how different lighting can completely transform the outcome of the final image.
Interestingly, Fürnrohr didn’t set out to photograph the same section of the iceberg multiple times. It was only once he was home that he realized he’d done so, as the lighting conditions were so different. You can read extensively about Fürnrohr’s thoughts on lighting on his blog, but read on to get some of his professional tips about light in landscape photography.
What do you think is people’s biggest misconception about how light can change a photograph?
People tend to distinguish between “good” and “bad” light, whereas “good” light means something like postcard-like colorful sunsets and “bad” light refers to the diffuse lighting produced by the overcast sky on dull and cloudy days. But there’s no such thing.
The quality of light should always be evaluated in connection with the intended image effect. For example, if you want to take a photo with soft pastel colors, you don’t need what is often referred to as “hallelujah light.” In the case of a landscape photographer who has to get by with the light he finds in the field, this means either waiting or returning at a time when the light is more suited to his vision.
Alternatively, you can also remain flexible and adapt the choice of your motifs and the image composition to the actual lighting situation. In this case, there is rarely a reason to lament about the light.
What is your top tip for new landscape photographers when it comes to mastering light?
Especially in extreme lighting situations such as strong backlighting, the automatic exposure systems quickly get unreliable. Therefore, you should try to get a camera where you can choose exposure time and aperture completely manually. Then you should think about how the settings can affect the appearance of the light in the image and verify it by taking experimental pictures.
Vary aperture, time, and perspective and observe all changes in the image impression to develop a sense for the basic technical and creative possibilities of mastering light. And, most important—never stop experimenting!
#scenic photography#studioserraphotography#beachscape#professional landscape#landscape photography#commercial photography#fine art photography#san diego photographer
0 notes
Text
Hey Guys! Please follow my Pinterest!
Just click this link : https://www.pinterest.com/studioserraphotography/
#studio serra photography#photo studio san diego#photography studio san diego#commercial real estate photography#commercial photography#fine art photography#professional landscape#landscape photography#real estate photography
0 notes