#struts
Explore tagged Tumblr posts
Text

Last slot order. For the last four days I've been sleeping five hours and some kind of slow...I also sprained my wrist. I'll try to come to my senses and continue working :">
171 notes
·
View notes
Text

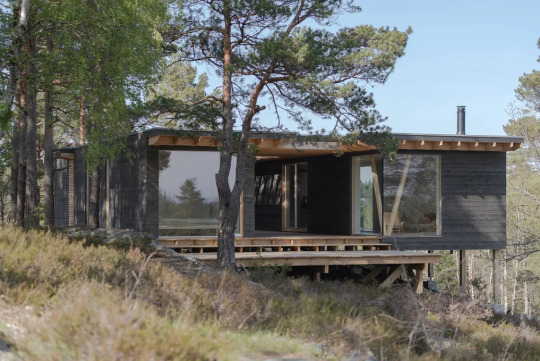
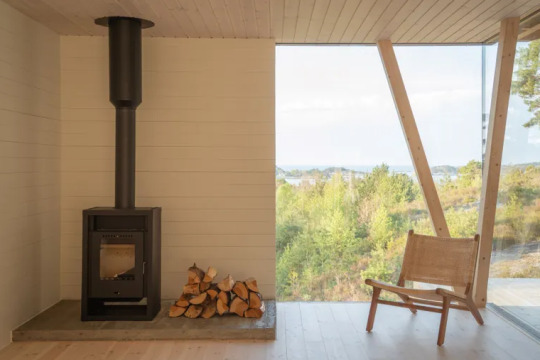
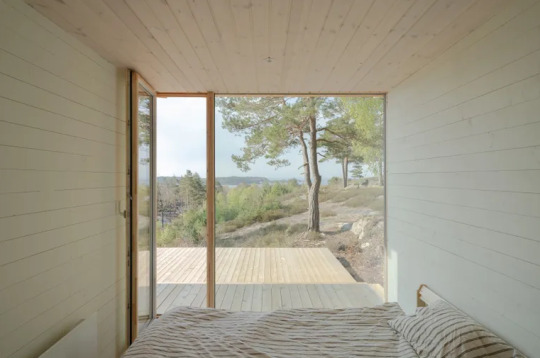
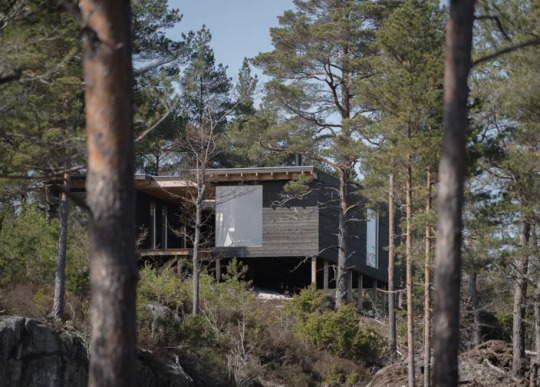
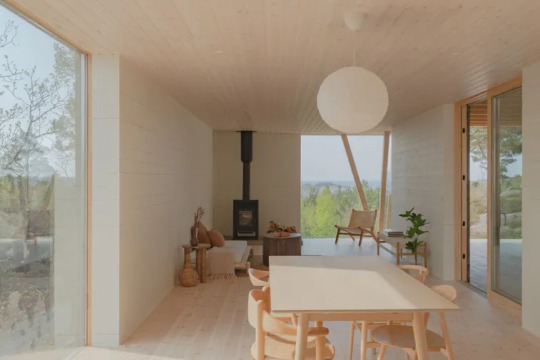
i/o cabin ~ erling berg | photo credit: carlos rollán
#architecture#cabin#cabins#norway#wood#t+g#simple#minimal#inside outside#kitchens#wood stove#struts#knee brace#modern#box
718 notes
·
View notes
Text

#rain world#rain world screenshot#spearmaster#looks to the moon#struts#palette randomizer#modded#downpour#screenshot credit: __solistar
12 notes
·
View notes
Text


A MLP and Struts mashup fakie
4 notes
·
View notes
Text

Spring Persistence 🌼
2 notes
·
View notes
Text


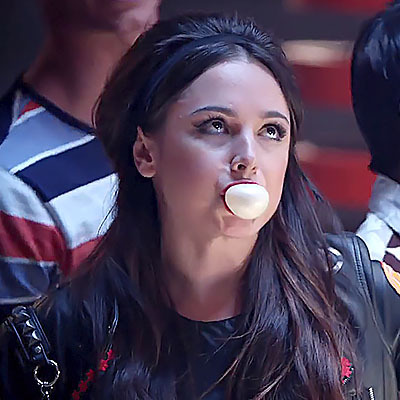


Struts - Teen Beach Movie, 2013
#teen beach movie#disney channel original movie#teen beach movie icons#icons#jessica lee keller#jessica lee keller icons#movies#filmes#films#cinema#movies icons#filmes icons#films icons#cinema icons#cinemaedit#filmedit#movieedit#twitter icons#icon#girls icons#random icons#icons without psd#site model icons#struts#struts icons
11 notes
·
View notes
Text


The Rodents!
2 notes
·
View notes
Text


Sex so good make the neighbours smoke a cigarette 🚬
Too Good at Raising Hell - The Struts (2023)
#new music video dropped and im feral#the struts#struts#luke spiller#gethin davies#jed elliot#adam slack#rock music#bands#new music#aesthetic
25 notes
·
View notes
Note
We're all dying to know, how radical are you exactly?
Baby, i AM the embodiment of radical
7 notes
·
View notes
Text
Van Repairs
We are trying to raise the money needed to get our Ford Windstar fixed. Dave has someone who has offered to help fix it. We just need to buy the parts. That's way cheaper than putting it in a shop.
The van no longer goes into Park. It has to be put into neutral on flat ground in order to "park" it. It has to be started in neutral as well. It will roll if it's on a slight incline.
The power steering pump is about to go. It's freaking loud. Making turns is beyond difficult.
The van also needs to have a motor mount repaired, shocks and struts, brakes all around, and the steering column needs to be fixed as well. There is a long list of things that need to be repaired.
The van is the only transportation. It also doubles as our home. Without it, we would be in even bigger trouble which is hard to understand since we are in deep trouble as it is.
@helly-watermelonsmellinfellon @mister-tom-a-dildo-lover


#Ford#2000 Windstar#help#van repairs#fix#poor#poverty#van life#power steering#gfm#Go Fund Me#gofundme#brakes#shocks#struts#motor mounts#donate#please help#dontation#paypal#cashapp#venmo
5 notes
·
View notes
Video
youtube
New #agileoffroad rip kit for #sprintervans . The upgraded #suspensionsystems now at #HawkesOutdoors in San Antonio, TX. Quick free quotes at 210-251-2882.
#youtube#agile offroad#sprintervan#rip kit#suspension system#shocks#struts#lift kit#offroad#4x4#awd#adventure vans#autoshop#mods#upgrades#repairs#travel#explore#overlanding#camping#adventure#hawkes outdoors#san antonio#texas
0 notes
Text


1/16/2025 - installing the door opening mechanism
0 notes
Text

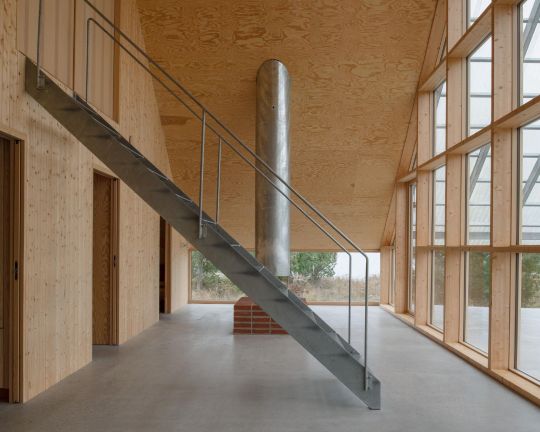


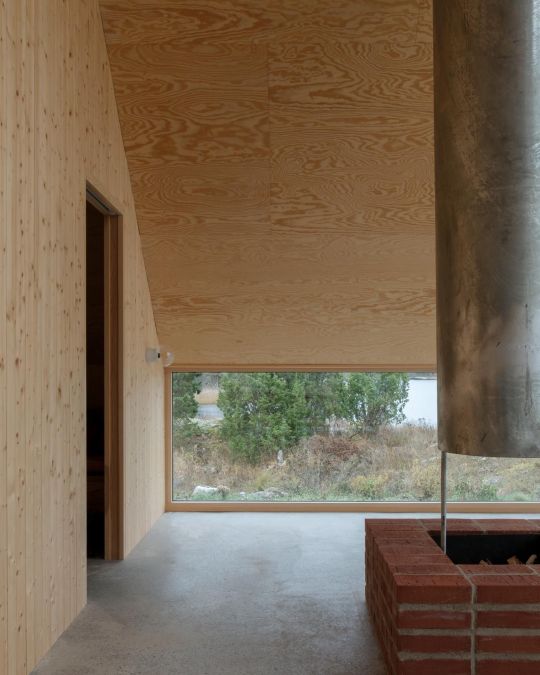

bredören ~ arrhov frick | photos © mikael olsson
#architecture#houses#cabins#cabin#simple#minimal#corrugated#translucent#roofing#fireplace#structure#struts#knee brace#sweden#plywood
293 notes
·
View notes
Text

#rain world#rain world screenshot#spearmaster#looks to the moon#struts#palette randomizer#modded#downpour#screenshot credit: __solistar
5 notes
·
View notes
Text
Gallus Derlux Camera
I can still remember when my wife and I visited Paris about 10-12 years ago and went to a small flea market in one of the arrondissements we were staying near and seeing for the first time the Gallus Derlux camera. My first impression was the camera needed the leather coverings that usually adorn cameras. Still, upon further inspection of the camera, it was made to have a silverish metal body as its covering. This was a camera I needed to have since its appearance was so different from any camera I had seen in the past.
That was the first Gallus Derlux I've owned over the years. I sold that camera at the Paris flea market a couple of years after purchasing it, and I have bought and sold a couple of other Gallus Derlux cameras over the years. Recently, I had the bug to purchase it again to add to my collection.
I talked to a fellow camera collector, and he told me he had one and would sell it to me for a reasonable price, as I know he's downsizing his collection. I need to do the same thing but I purchased it from him. This camera has a working shutter and a nice pouch case. At this point, since I've had a few of these in my life, it's time to put some film in the camera, take it for a spin around the neighborhood, and write a post on it.
The Company:
To discuss the camera company, Gallus, we need to include the German company Foth in this discussion. After WWII, Gallus, which was in Paris, was either licensed by Foth or Foth moved their operation to Pari and renamed the company Gallus due to what was going on in Germany after the war. Let's start with a bit of information on Foth and work our way forward.
The C.F. Foth Company, established in 1930 in Berlin, Germany, gained recognition for its innovative design and engineering of compact cameras. The Foth Derby series stands out as a celebrated line of cameras known for their portability, affordability, and reliability. The original models were a less expensive alternative to the more expensive Leica and Contax cameras of their time, but they utilized 127 film as opposed to 35mm from Leica and Contax. These cameras catered to the needs of amateur photographers and gained a reputation for their high-quality performance in a compact form.
The Foth Derby cameras were introduced in the 1930s and remained in production through the late 1940s. They were designed with portability in mind, featuring a folding bellows system and compact dimensions that made them a popular choice for travelers and casual photographers. The cameras used 127 roll film, producing images in 4x6.5 cm format, a size well-suited for personal and artistic photography.
One of the defining features of the Foth Derby was its focal-plane shutter, which was uncommon in compact cameras of its time. This shutter system allowed for faster shutter speeds, up to 1/500th of a second, allowing photographers to capture motion and shoot in bright lighting conditions. The Derby series was also equipped with high-quality lenses, such as the Foth Anastigmat, or later upgraded models like the Foth Derby Anastigmat f/3.5, ensuring sharp and well-resolved images.
The Foth Derby evolved through several iterations, each offering incremental improvements and adaptations to meet changing photographic trends. Here are some general differences:
Foth Derby I (1930): The original model featured a basic lens and a simple shutter mechanism. It utilized a 24x36mm format on 127 film and was praised for its ease of use and portability, making it accessible to novice photographers.
Foth Derby II (1931-): This version introduced the 3x4 (30x40mm) film format. The camera's build quality was also refined for greater durability, and several different lens options were offered.
Foth Derby III (1935-39): This model had several different viewfinder and lens options. Some models had interchangeable mounts that allowed the use of some Zeiss and Dallmeyer lenses.
Foth Derby IV (1936-40): This model had an aluminum front standard that housed an integrated rangefinder for focus. It also offered a choice of different lens options.
Somewhere around 1937, the combination of both Foth and Gallus became intertwined because in 1937, Foth came out with:
Derby V: Made by C.F. Foth & Cie in Paris. It still has the 30x40 film format on 127 film, but the build quality was a bit rougher coming out of the French factory.
Gallus Derby (1937-) was the start of the Gallus line of cameras, taken from the Foth Derby. The build quality was rougher than that of the German-made cameras and about 10% heavier.
As a collector, you can see the progression of design and features from the Foth Derby and how it morphed into the Gallus Derlux, using part of the Derby and Delux naming and wanting to separate from the originating company.
My Camera:
My Gallus Derlux camera is 5" wide by 3" tall by 2" deep with the lens retracted and 3" with the lens extended in the usual picture-taking position. My camera weighs just under 15 oz, at 14.9 oz. and has a Gallus 50mm f3.5 lens built into the camera. The camera is a fundamental one without an integrated focusing system, but rather a simple viewfinder on top of the camera for general framing of the photo you desire. The Gallus Derlux has a vertical focal plane shutter and takes 16 30x40mm exposures on a roll of 127 film.
To take a photo, you must pull the front lens section from the body. The lens plate has a small "hump: on the top and bottom to grip onto to pull the lens plate away from the camera body. The lens plate is on a strut on either side of the plate, which exposes the internal bellows built into the camera. After taking photos, you push the lens plate back into the body, where it stays for transportation. This makes the camera slimmer and more manageable to slip into the case or pocket for transportation.
The lens and focus system are located on the lens plate. To focus the lens, hold onto the larger focus arm, which is very similar to what's used on the Leica system, and rotate the helicoid lens to the desired guessed distance to the subject. There is a stop arm, so you cannot unscrew the lens from the body. The minimum focus distance is 1 meter to infinity. The aperture settings are on the lens. The aperture goes from f3.5 to F18. To adjust the aperture, turn the lens to the desired aperture settings, which is the same indicator that tells the focus distance. This makes it easy to use because you can set aperture and focus in the same area.
The shutter speeds are set on the camera's top. The shutter speeds go from 1/500 down to 1/25, along with "B" for timed exposures. To set the different shutter speeds, you need to lift the shutter speed dial and rotate the dial to the desired speed, which is indicated by a small dot. You also need to wind the shutter to cock the shutter as it's not incorporated in the winding process, which is what most current cameras have. To cock the shutter, just turn the knob on top of the camera, which have the shutter speed on it in the clockwise direction until it stops. The shutter is now cocked and ready for the subsequent exposure. The shutter release is located on the front of the camera on the right side and just next to the film plate.
The Gallus Derlux utilizes two red (and green) windows on the back of the camera. These two windows are inside an immense depth-of-field scale on the back of the camera. Two windows allow the photographer to get 16 images on 127-size film.
The film doors release is located on the right side of the camera to load the camera with film. Pull down the release button and swing the door open, which exposes the film chamber. Take the blank 127 reels from the right side of the film chamber by pulling up the knob above it and taking out the blank reel. Put the blank 127 film reel into the left side where the film transport knob is located. Lift the winding knob to insert the blank reel. Put your fresh and unexposed roll in the right chamber and press down the knob that holds it into place. Put the paper from the unexposed toll into the blank reel and wind it, ensuring the film moves. Stop when you see "start" and close the back of the camera.
To get 16 exposures on your roll of 127 film, wind the roll of film in the camera to frame number 1 to the first window, which on this camera is the window on the right-hand side of the backdoor. After you take that photo, wind the film until you see frame number 1 in the other window or the one on the left side of the backdoor. After you take that photo, frame number 2 will appear on the right side of the red window. Continue this process until frame number 8 is taken on the left side of the window. Wind until the film is all the way onto the take-up spool, open the back, and take the film out for processing.
My Results:
I put a roll of 400 ISO film in the camera and wandered around my backyard and the neighborhood streets. I used 400 ISO because the fall and winter in my neck of the woods are usually overcast. During my walk, the sun just so happened to come out, so I was forced to use the faster speeds on the camera.
After I took the photos and processed the film, I also noticed a gap between the two shutter curtains when winding the shutter to the next photo, causing a light leak on many of the images. I must have pointed the camera down or had the lens in a darker area several times because there were a few good images, but many were terrible. I also don't have a lens cap for this camera, so the next time I use the camera, I'll need to cover the lens when cocking the shutter so I don't expose the film to light before or after exposure.
If you have this or similar cameras and are mechanically inclined, I found a great article on someone overhauling the shutter on his Gallus Derby Lux camera.
Conclusion:
This was a fun camera to use. It's very simple, takes a nice larger image, and is small and compact. I'll need to find a lens cap for the one before I shoot again or just place my hand over the lens when cocking the shutter.
Thank you for taking a few minutes from your day to look over this post.
Until next week, please be safe.
#127 film#127 roll film#127 film camera#aluminum camera#french camera#Gallus#Gallus Durlux#Foth#Foth Derby#german camera#Film#film camera collector#film camera#film cassettes#cameras you should own#Camera#struts#struts camera#pop out camera#Fun Camera#cameras from france#odd camera#film through old camera#film in camera#shooting film#photographing with film#film photography#film shooter#vintage camera#antique camera
0 notes
Text

Sluts (We know it's Struts)
1 note
·
View note