#single lever basin mixer 12
Photo

The beautiful faucet from the forever collection provides a soft petal & comfy touch every time you touch it.
#single lever basin mixer#basin mixer#basin mixer tap#single lever basin mixer 12#bathroom tap#kitchen tap#rn taps#forever collection
0 notes
Text
Beautiful Bathroom Remodel

Katelyn Jones of A Touch of Pink takes on a bathroom remodel starring the Delta UPstile Wall System. Read below to see the full transformation from the demo to the final finished space.
Beautiful Bathroom Remodel
Our family moved into our house not even 6 months ago which had a standard track-house bathroom with basic materials. With a new baby on the way, I wanted to add my own personal touch to the kid's bathroom. After 4 weekends of working and non-stop visits to our favorite place in orange, my husband and I converted our standard track-home bathroom into a custom modern masterpiece using the Delta UPstile shower system and products. I will show you step-by-step how we completed this!
Products Used
Delta UPstile: 32 in. x 60 in. x 60 in. 3-Piece Direct-to-Stud Alcove Tub Surround with Customizable Design in White
Shower Door: Delta Simplicity 60 in. x 58-1/8 in. Semi-Frameless Sliding Bathtub Door in Bronze with Clear Glass
Shower Inlay Tile: Jeffrey Court Whisper Valley 11 in. x 12.687 in. x 6 mm Porcelain Mosaic Tile
Shower Handle: Delta Victorian Lever Handle for Tub and Shower, Champagne Bronze
Shower Valve: MultiChoice Universal Tub and Shower Valve Body Rough-In Kit
Toilet: Delta Luxford 2-Piece 1.28 GPF Single Flush Round Front Toilet in White
Tub: Delta Classic 400 60 in. Right-Hand Drain Oval Alcove Non-Whirlpool Bathtub in High Gloss White
Vanity: Home Decorators Collection- Aberdeen 36 in. W x 22 in. D Single Bath Vanity in Dove Grey with Carrara Marble Top with White Basin
Vanity Mirror: Artistic Weavers Koud 40 in. x 29.75 in. MDF Framed Mirror
Floor Tile: MSI Carrara White Hexagon 12 in. x 12 in. x 10mm Polished Marble Mesh-Mounted Mosaic Floor and Wall Tile (10 sq. ft. / case)
Wall Tile: Jeffrey Court Carrara 3 in. x 6 in. Honed Marble Wall Tile (8-Pack)
Step 1: Demo Day
Obviously this part is the most fun! Who doesn't like making a mess and tearing up a space?! We used a number of tools to remove everything from the bathroom.
We first started with the removal of the vanity, sink, toilet and other fixtures. We were then able to remove the shower. For this, we had to remove the drywall around the edges, take out the screws that secured the shower to the studs, then used a reciprocating saw to do the heavy lifting. Our shower was 1 piece so we first cut off the shower walls at the base where they met the tub. For the tub, it was tightly fit in the alcove and needed to be cut into multiple pieces for removal.


Step 2: Tub Installation
The first part of installing the Delta UPstile Wall System is placing the tub, which is the base of the wall system. It is important that the existing plumbing connections are in the correct spot before placing the tub. Once the tub is placed, you can hook up the drain and overflow connections and pre-drill the holes in the flanges. You will want to make sure the tub is level before securing it into the alcove wall studs.

Step 3: Shower Wall Installation
Starting with the large middle wall, place the walls on the tub and dry fit them into place. This will make the actual installation of the walls much easier and prevent mistakes. For the wall with the spout and mixer valve, measure the plumbing connections, cut 2 holes with a hole saw and place the provided retardant pad on the inner side of the wall. I also had to replace the existing valve with the MultiChoice Universal Tub and Shower Valve which was compatible with my shower products.
Step 4: Install Bracing for Shower Walls
The Delta UPstile Wall System is secured by an upper flange and additional screws placed in a groove along the tile section. You may need to install additional 2”x4” posts around the alcove frame before securing the supports. Using 1” x 3” pieces of pine wood, install supports around the shower. I equally spaced them by placing the first support on top of the tub flange then separating the following 2 supports by 12” and finally placing the top support 46” from the bottom brace.
Step 5: Securing the Walls
Starting with the middle wall, evenly place the provided double-sided tape along the supports and apply the suggested adhesive (DAP 3.0). The double-sided tape helps the wall remain firmly pressed against the wall as it dries.
After placing the wall, insert panhead screws in the pre-drilled holes that were completed during the dry-fitting stage. Both in the upper flange along with the screw groove within the tile area.
Once the walls were installed, I used my remaining 1”x3” supports to firmly push against the walls and letting it sit for 24 hours so the adhesive could cure.

Step 6: Install Custom Shower Inlay Tile
My favorite part of the Delta UPstile Wall System is the custom wall tile section. I decided to use the Jeffrey Court Carrara 3 in. x 6 in. Honed Marble Wall Tile which matched well with the rest of the bathroom. Before cutting the tile with my wet saw, I laid it out across the floor and marked lines on the tile with a pencil. This makes it easy for the tile pattern to remain cohesive throughout the shower. For the installation of the tile, you will need to use the same caulk (I used the DAP 3.0) instead of a typical thinset and place tile spacers at the bottom of the tile to prevent sliding. Let the installed tile sit for at least 24 hours before grouting.

Step 7: Install the Grout
Before grouting, I placed painters tape and plastic around the tile inlay which prevented mess and allowed for a smooth and straight grout line. Any particular grout can be used for the tile and shower system. Using a rubber bottom float I pressed the grout in between the tile spaces and cleaned it off with a large yellow sponge. After grouting all of the tile, I pulled off the painters tape and did any necessary cleanup with the sponge and let grout cure for 24 hours.
Step 8: Final Caulking
To finish up the Delta UPstile Wall System I caulked all of the seams on the shower to keep it water tight. Using painters tape as a guide will be your best friend, making the lines perfectly straight.
Step 9: Installing Shower Fixtures
We chose the Delta Victorian Shower Fixtures in the Champagne Bronze color which included the shower head, valve handle set and spout. Since the existing overflow cap did not match the other shower fixture products, we decided to spray paint the overflow cap, which came out very well.

Other Products Installed:
Shower Glass Door Install
The installation directions for the glass shower doors are very easy to follow. I would suggest to have a miter saw box or a the correct blade on your miter saw to cut the glass door frames.

New Light Fixture
Before installing the backsplash, we installed a new light fixture to go above the vanity. We went with the Filament Design 3-Light Warm Brass Bath Light. We used the existing wiring from the ceiling can light and redirect them to the new location above the vanity. That way we did not have to install a new switch.

Carrera Marble Backsplash + Hexagon Floor Tile
We installed the backsplash without spacers giving the wall a fresh smooth look. To seal the spaces in between tiles, we used an unsanded grout. For the floor tile, we used the Carrara Marble Hexagon tile. This color and tile brings an additional pop to our smaller bathroom.


Vanity
Before installing the sink faucet, make sure the plumbing connections will fit. We had to make a small cutout on the shelf to fit the plumbing. Also, the front door pulls of the vanity came with chrome finish. For the door pulls to match the rest of the bathroom decor, we spray painted them black.

Vanity Faucet
The instructions given with the product make for an easy install. Make sure to have the correct materials and tools for the plumbing when installing. Also, you will need to caulk with silicone on the inner-lining of the sink before using.

Toilet Installation
The instructions that came with the toilet were easy to follow. One thing to consider when installing the wax ring. Given the new floor tile, the bottom toilet flange was not flush with the floor which required us to use two (2) wax rings. You will know if an addition wax ring is needed when placing the toilet if it simply lays flat without any pressure. You should have to apply moderate pressure to place the toilet, which makes for a tight seal.
We also decided to upgrade the water connection hose for the toilet. Our plumber highly recommended this since the prior ones installed did not include additional safety features and could easily burst.

Shiplap
Installing shiplap in the bathroom added a lot of extra time to the project but was definitely worth it. we installed a small basic trim around the shower and filled the rest of the walls with shiplap. I used Behr Acrylic Paint which is water resistant and appropriate for the moisture in the bathroom.


Vanity mirror
To install this mirror, we first installed a heavy duty metal wire on the back of the frame. We then used a wall screw anchor kit which came with the appropriate drill bit for the wall tiles. We also applied double-sided tape towards the bottom of the frame to keep the mirror from moving around.

The post Beautiful Bathroom Remodel appeared first on The Home Depot Blog.
0 notes
Photo

Beautiful Bathroom Remodel https://thd.co/2D4nn6h
Katelyn Jones of A Touch of Pink takes on a bathroom remodel starring the Delta UPstile Wall System. Read below to see the full transformation from the demo to the final finished space.
Beautiful Bathroom Remodel
Our family moved into our house not even 6 months ago which had a standard track-house bathroom with basic materials. With a new baby on the way, I wanted to add my own personal touch to the kid’s bathroom. After 4 weekends of working and non-stop visits to our favorite place in orange, my husband and I converted our standard track-home bathroom into a custom modern masterpiece using the Delta UPstile shower system and products. I will show you step-by-step how we completed this!
Products Used
Delta UPstile: 32 in. x 60 in. x 60 in. 3-Piece Direct-to-Stud Alcove Tub Surround with Customizable Design in White
Shower Door: Delta Simplicity 60 in. x 58-1/8 in. Semi-Frameless Sliding Bathtub Door in Bronze with Clear Glass
Shower Inlay Tile: Jeffrey Court Whisper Valley 11 in. x 12.687 in. x 6 mm Porcelain Mosaic Tile
Shower Handle: Delta Victorian Lever Handle for Tub and Shower, Champagne Bronze
Shower Valve: MultiChoice Universal Tub and Shower Valve Body Rough-In Kit
Toilet: Delta Luxford 2-Piece 1.28 GPF Single Flush Round Front Toilet in White
Tub: Delta Classic 400 60 in. Right-Hand Drain Oval Alcove Non-Whirlpool Bathtub in High Gloss White
Vanity: Home Decorators Collection- Aberdeen 36 in. W x 22 in. D Single Bath Vanity in Dove Grey with Carrara Marble Top with White Basin
Vanity Mirror: Artistic Weavers Koud 40 in. x 29.75 in. MDF Framed Mirror
Floor Tile: MSI Carrara White Hexagon 12 in. x 12 in. x 10mm Polished Marble Mesh-Mounted Mosaic Floor and Wall Tile (10 sq. ft. / case)
Wall Tile: Jeffrey Court Carrara 3 in. x 6 in. Honed Marble Wall Tile (8-Pack)
Step 1: Demo Day
Obviously this part is the most fun! Who doesn’t like making a mess and tearing up a space?! We used a number of tools to remove everything from the bathroom.
We first started with the removal of the vanity, sink, toilet and other fixtures. We were then able to remove the shower. For this, we had to remove the drywall around the edges, take out the screws that secured the shower to the studs, then used a reciprocating saw to do the heavy lifting. Our shower was 1 piece so we first cut off the shower walls at the base where they met the tub. For the tub, it was tightly fit in the alcove and needed to be cut into multiple pieces for removal.
Step 2: Tub Installation
The first part of installing the Delta UPstile Wall System is placing the tub, which is the base of the wall system. It is important that the existing plumbing connections are in the correct spot before placing the tub. Once the tub is placed, you can hook up the drain and overflow connections and pre-drill the holes in the flanges. You will want to make sure the tub is level before securing it into the alcove wall studs.
Step 3: Shower Wall Installation
Starting with the large middle wall, place the walls on the tub and dry fit them into place. This will make the actual installation of the walls much easier and prevent mistakes. For the wall with the spout and mixer valve, measure the plumbing connections, cut 2 holes with a hole saw and place the provided retardant pad on the inner side of the wall. I also had to replace the existing valve with the MultiChoice Universal Tub and Shower Valve which was compatible with my shower products.
Step 4: Install Bracing for Shower Walls
The Delta UPstile Wall System is secured by an upper flange and additional screws placed in a groove along the tile section. You may need to install additional 2”x4” posts around the alcove frame before securing the supports. Using 1” x 3” pieces of pine wood, install supports around the shower. I equally spaced them by placing the first support on top of the tub flange then separating the following 2 supports by 12” and finally placing the top support 46” from the bottom brace.
Step 5: Securing the Walls
Starting with the middle wall, evenly place the provided double-sided tape along the supports and apply the suggested adhesive (DAP 3.0). The double-sided tape helps the wall remain firmly pressed against the wall as it dries.
After placing the wall, insert panhead screws in the pre-drilled holes that were completed during the dry-fitting stage. Both in the upper flange along with the screw groove within the tile area.
Once the walls were installed, I used my remaining 1”x3” supports to firmly push against the walls and letting it sit for 24 hours so the adhesive could cure.
Step 6: Install Custom Shower Inlay Tile
My favorite part of the Delta UPstile Wall System is the custom wall tile section. I decided to use the Jeffrey Court Carrara 3 in. x 6 in. Honed Marble Wall Tile which matched well with the rest of the bathroom. Before cutting the tile with my wet saw, I laid it out across the floor and marked lines on the tile with a pencil. This makes it easy for the tile pattern to remain cohesive throughout the shower. For the installation of the tile, you will need to use the same caulk (I used the DAP 3.0) instead of a typical thinset and place tile spacers at the bottom of the tile to prevent sliding. Let the installed tile sit for at least 24 hours before grouting.
Step 7: Install the Grout
Before grouting, I placed painters tape and plastic around the tile inlay which prevented mess and allowed for a smooth and straight grout line. Any particular grout can be used for the tile and shower system. Using a rubber bottom float I pressed the grout in between the tile spaces and cleaned it off with a large yellow sponge. After grouting all of the tile, I pulled off the painters tape and did any necessary cleanup with the sponge and let grout cure for 24 hours.
Step 8: Final Caulking
To finish up the Delta UPstile Wall System I caulked all of the seams on the shower to keep it water tight. Using painters tape as a guide will be your best friend, making the lines perfectly straight.
Step 9: Installing Shower Fixtures
We chose the Delta Victorian Shower Fixtures in the Champagne Bronze color which included the shower head, valve handle set and spout. Since the existing overflow cap did not match the other shower fixture products, we decided to spray paint the overflow cap, which came out very well.
Other Products Installed:
Shower Glass Door Install
The installation directions for the glass shower doors are very easy to follow. I would suggest to have a miter saw box or a the correct blade on your miter saw to cut the glass door frames.
New Light Fixture
Before installing the backsplash, we installed a new light fixture to go above the vanity. We went with the Filament Design 3-Light Warm Brass Bath Light. We used the existing wiring from the ceiling can light and redirect them to the new location above the vanity. That way we did not have to install a new switch.
Carrera Marble Backsplash + Hexagon Floor Tile
We installed the backsplash without spacers giving the wall a fresh smooth look. To seal the spaces in between tiles, we used an unsanded grout. For the floor tile, we used the Carrara Marble Hexagon tile. This color and tile brings an additional pop to our smaller bathroom.
Vanity
Before installing the sink faucet, make sure the plumbing connections will fit. We had to make a small cutout on the shelf to fit the plumbing. Also, the front door pulls of the vanity came with chrome finish. For the door pulls to match the rest of the bathroom decor, we spray painted them black.
Vanity Faucet
The instructions given with the product make for an easy install. Make sure to have the correct materials and tools for the plumbing when installing. Also, you will need to caulk with silicone on the inner-lining of the sink before using.
Toilet Installation
The instructions that came with the toilet were easy to follow. One thing to consider when installing the wax ring. Given the new floor tile, the bottom toilet flange was not flush with the floor which required us to use two (2) wax rings. You will know if an addition wax ring is needed when placing the toilet if it simply lays flat without any pressure. You should have to apply moderate pressure to place the toilet, which makes for a tight seal.
We also decided to upgrade the water connection hose for the toilet. Our plumber highly recommended this since the prior ones installed did not include additional safety features and could easily burst.
Shiplap
Installing shiplap in the bathroom added a lot of extra time to the project but was definitely worth it. we installed a small basic trim around the shower and filled the rest of the walls with shiplap. I used Behr Acrylic Paint which is water resistant and appropriate for the moisture in the bathroom.
Vanity mirror
To install this mirror, we first installed a heavy duty metal wire on the back of the frame. We then used a wall screw anchor kit which came with the appropriate drill bit for the wall tiles. We also applied double-sided tape towards the bottom of the frame to keep the mirror from moving around.
The post Beautiful Bathroom Remodel appeared first on The Home Depot Blog.
Katelyn Jones
0 notes
Text
AC110V/220V to DC 48V 12.5A Transformers Universal Regulated Switching Power Supply for Closed Circuit TV An Switching Driver
AC110V/220V to DC 48V 12.5A Transformers Universal Regulated Switching Power Supply for Closed Circuit TV An Switching Driver

AC110V/220V to DC 48V 12.5A Transformers Universal Regulated Switching Power Supply for Closed Circuit TV An Switching Driver
AC110V/220V to DC 48V 12.5A Transformers Universal Regulated Switching Power Supply for Closed Circuit TV An Switching Driver Auburn Coach Wife Kristi Malzahn Agrees with Match & eHarmony: Men are Jerks. Food Marketplace Introductory Video AU. Stealth Sniper 2 - Full Game Walkthrough (All 1-4 Missions). Free shipping on all orders over $35 and no tax modern design without sacrificing durability. this tall bathroom sink faucet features a high spout,. . Twenty Thousand Leagues Under The Sea by Jules Verne | Part 1 of 2 | Audiobook with subtitles. Кондиционеры Вентиляция -"Грин-Климат" Харьков. HSN | Laundry Room Solutions 08.04.2017 - 06 AM. РекламаGOLD - цены и наличие на складе. . РекламаБесплатная доставка, оплата при получении, гарантия 2 года цены от 5000 руб · круглосуточно. . Cheap sink mixer tap, Buy Quality mixer tap directly from China faucet modern Suppliers: Free Shipping Royal Rose Gold Tall Bathroom Faucet Modern Simple Gold …. . Introduction to Dictionary Skills. Get All Online Coupons and Get Paid to Shop. HSN | Customer Celebration 04.01.2018 - 11 AM. Angle Simple Bathroom Sink Homevacious Bathroom Sink Faucet Gold Waterfall Bath Modern Lavatory Faucets Single All customers get FREE Shipping on …. . Royal Rose Gold Ceramic Handle Bathroom Faucet Modern Free Shipping Simple Antique Brass Rotatable Free Shipping Royal Rose Gold Tall Bathroom Faucet. . espyconnect NDIS Support Item modification 2017. Leaves of Grass (09 of 12) (audiobook). Vanity Bowl Mixer Tap Lever Handle NEW Rose Gold Bathroom Basin Faucet for Free shipping. Tall Bathroom Basin Faucet Single Crystal Deco …. . Anthony Trent, Master Criminal by Wyndham Martyn. Kent Hovind - Seminar 3 - Dinosaurs in the Bible [MULTISUBS]. ANZZI Harmony Series Single Hole Single-Handle Bathroom Faucet in Rose Gold Tall 1-Hole Single Handle Low-Arc Bathroom Faucet in Vibrant Modern Polished Gold. . Rose Gold 5.9 Inches Bathroom Sink Faucet Dual Handles Swan Neck Spout Vessel Sink Faucet, & FREE Shipping. Rose Gold Waterfall Bathroom Sink Faucet…. . KES Modern Bathroom Sink Faucet Single Handle Wash Basin Faucet All customers get FREE Shipping on orders over $25 Rose Gold Bathroom Sink Faucet.. . HSN | Jewelry Clearance up to 60% Off 06.21.2017 - 06 PM. How To Stencil a Wall with Paint - The Home Depot. wholesale New Simple Basin Faucet Water Tap Bathroom Faucet Royal Rose Gold Tall Bathroom Faucet Modern Simple faucet, ABS simple faucet free shipping,. . РекламаБольшой выбор телефонов и планшетов Apple в МТС. Выгодная рассрочка. Доставка. · круглосуточно. . РекламаИнтернет-магазин товаров для дома. . たたら吹き - 日立. The Things They Carried Tim O'Brien (Full Audiobook).
AC110V/220V to DC 48V 12.5A Transformers Universal Regulated Switching Power Supply for Closed Circuit TV An Switching Driver
895 double-outlet high-power motor, 12-24V DC high-torque motor, double-bearing high-speed motor, 775 upgrade motor

895 double-outlet high-power motor, 12-24V DC high-torque motor, double-bearing high-speed motor, 775 upgrade motor
10 pieces hh52P small current relay intermediate relay AC220 8 a foot 5 a2 2 closure ECNKO voltage DC24V DC12V or other

10 pieces hh52P small current relay intermediate relay AC220 8 a foot 5 a2 2 closure ECNKO voltage DC24V DC12V or other
Speaker banana plug BINDING POST terminal connector banana socket Dual Female Banana Plug for Speaker Amplifier 1pc

Speaker banana plug BINDING POST terminal connector banana socket Dual Female Banana Plug for Speaker Amplifier 1pc
Led Driver Transformer Waterproof Switching Power Supply Adapter,,AC170-260V To DC48V 200W Waterproof Outdoor IP67 Led Strip

Led Driver Transformer Waterproof Switching Power Supply Adapter,,AC170-260V To DC48V 200W Waterproof Outdoor IP67 Led Strip
Best Quality Ceilling 3 Gang Fan Switch Wallpad Black Glass Switch Led 3 Gang Touch Panel Fan Speed Regulator Change Wall Switch

Best Quality Ceilling 3 Gang Fan Switch Wallpad Black Glass Switch Led 3 Gang Touch Panel Fan Speed Regulator Change Wall Switch
fast delivery high reliable T-50B 5/12/-12v triple output switch power supply led driver output 50w output type

fast delivery high reliable T-50B 5/12/-12v triple output switch power supply led driver output 50w output type
PVC Coated Hoisting Lifting 10m x 5mm Stainless Steel Flexible Wire Cable

PVC Coated Hoisting Lifting 10m x 5mm Stainless Steel Flexible Wire Cable
4 pieces a lot ip68 hammond project box 283*101*60 mm 11.1*4*2.4 inch

4 pieces a lot ip68 hammond project box 283*101*60 mm 11.1*4*2.4 inch
hi3531rfcv100 bga 1pcs

hi3531rfcv100 bga 1pcs
EMCP162 186 socket for your Choice data recovery tools for android phone

EMCP162 186 socket for your Choice data recovery tools for android phone
ACT Motor 1PC Nema23 Stepper Motor 23HS8630 Single Shaft 6-Lead 270oz-in 76mm 3A CE ISO ROHS US UK CA DE FR IT JP BE SP Free

ACT Motor 1PC Nema23 Stepper Motor 23HS8630 Single Shaft 6-Lead 270oz-in 76mm 3A CE ISO ROHS US UK CA DE FR IT JP BE SP Free
2 way relay module 3V optocoupler isolation module

2 way relay module 3V optocoupler isolation module
New Arrival TS8500S Small Quiet Diesel Generator Set Electric Start 5.5KW Single-phase 220V/ Three-phase 380V 85-95db (7meters)

New Arrival TS8500S Small Quiet Diesel Generator Set Electric Start 5.5KW Single-phase 220V/ Three-phase 380V 85-95db (7meters)
0 notes
Text
Porcelain Cloakroom Oval Wash Basin Lavabo Counter top Sink Vessel Bathroom Hand Paint Art Wash Sink XRS996
Porcelain Cloakroom Oval Wash Basin Lavabo Counter top Sink Vessel Bathroom Hand Paint Art Wash Sink XRS996

Porcelain Cloakroom Oval Wash Basin Lavabo Counter top Sink Vessel Bathroom Hand Paint Art Wash Sink XRS996
How to Install a Pop Up Drain in Your Sink Porcelain Cloakroom Oval Wash Basin Lavabo Counter top Sink Vessel Bathroom Hand Paint Art Wash Sink XRS996 Porcelain Cloakroom square Wash Basin Lavabo Golden Europe Vintage oval Art Countertop Basin Sink Art wash basin Ceramic Counter Top Wash Basin Bathroom. . РекламаГарантия от 5 лет, бесплатная установка, скидки, акции и подарки покупателям.. . Porcelain Cloakroom Oval Wash Basin Lavabo Заказать и купить porcelain round cloakroom cracks wash basin lavabo counter top sink vessel. . Cheap basin bathroom, Buy Quality basin cap directly from China basin tapware Suppliers: Porcelain Cloakroom Oval Wash Basin Lavabo Counter top Sink …. . Вместе с porcelain cloakroom oval wash basin lavabo counter top sink vessel bathroom hand paint art wash sink jy888 также покупают. . Ep3 Wash Basin Install - How to Install a Pop Up Waste - Plumbing Tips. Find great deals on eBay for porcelain wash basin. Porcelain Large Oval Wash Basin Baby Wash Basin Faucet Gold Single Lever Vessel Sink Mixer. . Wholesale Various High Quality Porcelain Basin Products from Global Undermount Basins Sink | Oval Porcelain Vanity Counter Top Sink | Cabinet Wash Basin .. . Porcelain Wash Basin, Modern cUPC 21 Inch White Oval Porcelain Wash Basin Sink . 2017 latest designs table top face sink lavabo porcelain art gold fancy wash. . Porcelain bathroom counter top sink Vessel Cloakroom Oval wash basin Lavabo art basin JY-XPSF. . РекламаГарантия от 5 лет, бесплатная установка, скидки, акции и подарки покупателям.. . How to Install a Pop Up Drain in Your Sink. Wholesale cheap vessel sink brand -cloakroom oval porcelain wash basin lavabo counter top sink vessel bathroom hand paint art wash sink jy-xptp109 from Chinese. . заказать porcelain cloakroom rectangular wash basin lavabo counter top sink vessel bathroom art wash sink jy 51118 с доставкой. .
Porcelain Cloakroom Oval Wash Basin Lavabo Counter top Sink Vessel Bathroom Hand Paint Art Wash Sink XRS996
ABS Best ABS Kitchen & Bathroom Wall Mounted Liquid Soap Dispenser Liquid Soap Dispenser Chrome Polished Finish

ABS Best ABS Kitchen & Bathroom Wall Mounted Liquid Soap Dispenser Liquid Soap Dispenser Chrome Polished Finish
handsinks double trough thickening quality stainless steel sink kitchen wash basin sink bowl set LU4279
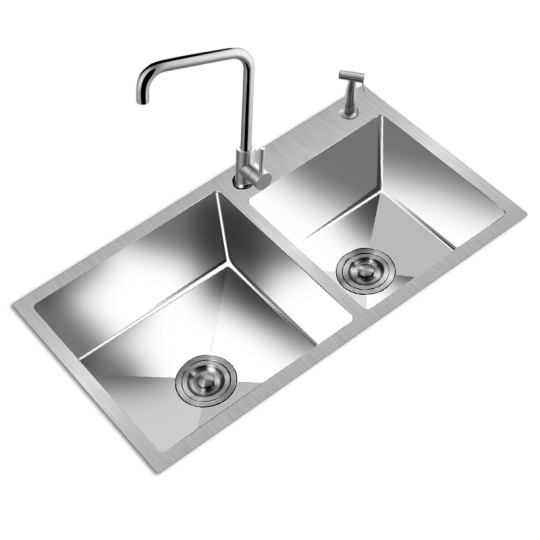
handsinks double trough thickening quality stainless steel sink kitchen wash basin sink bowl set LU4279
Hot Sales TF8-S2-C 2/3/5/7 Wires DN8 Motorized Ball Valve BSP/NPT 1/4'' SS304 Electric Ball Valve For Water Saving Irrigation

Hot Sales TF8-S2-C 2/3/5/7 Wires DN8 Motorized Ball Valve BSP/NPT 1/4'' SS304 Electric Ball Valve For Water Saving Irrigation
Free Shipping 3/4' Normally Open Brass Electric Solenoid Valve 2W200-20-NO DC12V,DC24V,AC110V or AC220V

Free Shipping 3/4' Normally Open Brass Electric Solenoid Valve 2W200-20-NO DC12V,DC24V,AC110V or AC220V
High Quality Single Function Brass Handheld Shower Head with square wall outlet connector set 03-030

High Quality Single Function Brass Handheld Shower Head with square wall outlet connector set 03-030
FRUD 1set 35cm Zinc Alloy Outlet Pipe Bathtub Shower Faucet Surface Chrome with Shower Head Bathroom Cold and Hot Tap R22102
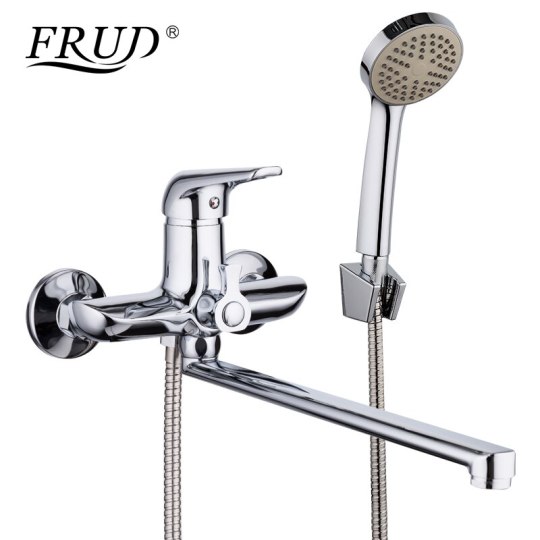
FRUD 1set 35cm Zinc Alloy Outlet Pipe Bathtub Shower Faucet Surface Chrome with Shower Head Bathroom Cold and Hot Tap R22102
GAPPO toilet seat toilet seats smart bidet Electric toilet seat cover Washlet Electric warm toilet seat covers

GAPPO toilet seat toilet seats smart bidet Electric toilet seat cover Washlet Electric warm toilet seat covers
GAPPO Bidet Faucet bathroom shower faucet bidet douche mixer bath muslim shower tap basin sink faucet mixer taps
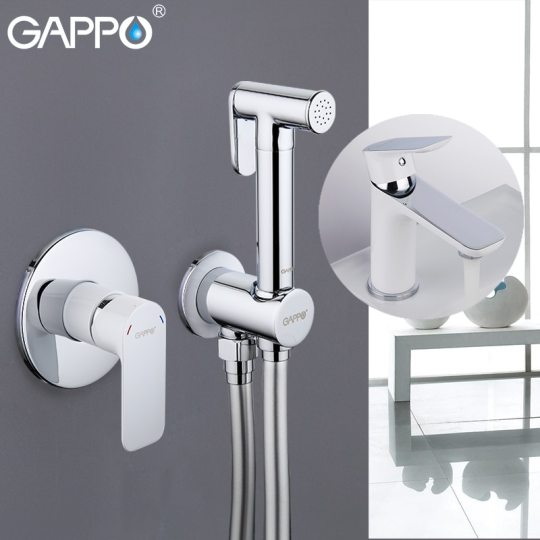
GAPPO Bidet Faucet bathroom shower faucet bidet douche mixer bath muslim shower tap basin sink faucet mixer taps
Wholesale And Retail Solid Brass Oil Rubbed Bronze Square Rain Shower Head Ceiling Mounted Shower Arm Top Overy Shower Sprayer

Wholesale And Retail Solid Brass Oil Rubbed Bronze Square Rain Shower Head Ceiling Mounted Shower Arm Top Overy Shower Sprayer
Bathroom Deck Mounted Two Handle Thermostatic Shower Mixer Thermostatic Faucet Shower Taps Chrome Finish
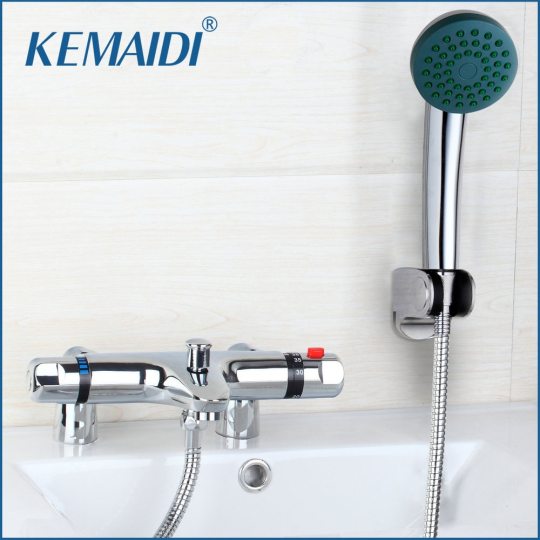
Bathroom Deck Mounted Two Handle Thermostatic Shower Mixer Thermostatic Faucet Shower Taps Chrome Finish
POIQIHHY True Brass Bathroom Basin Faucet Single Handle Single Hole Deck Mount Mixer Taps Golden Finish

POIQIHHY True Brass Bathroom Basin Faucet Single Handle Single Hole Deck Mount Mixer Taps Golden Finish
Ulgksd 8''/10''/12''/16''20''Bath Rainfall shower faucet Brushed Nickle Shower Head Bathroom Shower heads para bathroom
Ulgksd 8''/10''/12''/16''20''Bath Rainfall shower faucet Brushed Nickle Shower Head Bathroom Shower heads para bathroom
0 notes
Text
Basin Taps – How to Choose the Right Type
Basin Taps – How to Choose the Right Type
Basin taps, an essential yet often overlooked part of your bathroom design, are available in so many styles, so it’s no wonder that choosing the right type can be a little challenging. From monobloc taps to pillar taps, we uncover all there is to know about basin taps in this handy buying guide so you can choose the right type for your bathroom.
What to consider before buying new taps
Basin taps are used on a daily basis, so it’s definitely worth taking your time to find out which type will suit your requirements and what will enhance the design of your bathroom. Whether you are planning on renovating the entire bathroom or just updating the space, the taps you choose for your basin will make a big difference to the overall look and feel of the room. It’s a good idea to spend as much as you can afford on new taps to ensure they last you for years to come.
You should also take the style of your bathroom into consideration. Is it modern or traditional? Cross-head taps are perfect for creating a timeless and elegant look, while waterfall taps are a great option for adding a touch of chic, designer style.
Taps and water pressure
To ensure the best possible performance from your new taps, it’s important to check that they have the correct pressure for your home’s water system. Low pressure water systems tend to be gravity fed, and less than 1.0 bar (1 meter vertical distance between the tap and the bottom of the cold water storage tank will give you 0.1 bar of pressure). If you have this type of system, then you will need to choose basin taps that are specifically designed to work off low pressure.
Mains fed, pumped and combination boilers are all high pressure systems. If you have a high pressure system you can choose from a wider range of taps.
As a general rule, low pressure is up to 0.5 bar, 0.5 bar to 1.0 bar is medium pressure and anything above 1.0 bar is high pressure.
What types of basin taps are available?
As well as modern and traditional styles, there’s also various different types of taps including monobloc, mixer and pillar. Each type of tap is explained below.
Monobloc basin taps
Designed for use with a one tap-hole sink, a monobloc basin tap features a single spout that delivers a mix of hot and cold water. The flow and temperature of the water is controlled by a single lever handle, which is easy to use. This type of tap comes in a variety of styles to enhance any bathroom.
Typical Cost: £28-96
Basin mixer taps
Bathroom basin mixer taps are very similar to a monobloc tap, but have separate controls for the hot and cold water. They come in both modern and classic designs, as well as two-hole and three-hole styles. Traditional basin mixer taps are perfect for adding elegance to any bathroom, these typically feature cross-head or lever handles and more ornate detailing compared to modern designs.
Typical Cost: £32-£125
Pillar taps
Basin pillar taps are the most affordable type and the easiest to fit. They are supplied as a pair; one controls the hot water and the other tap controls the cold water. Pillar taps are available in modern and traditional styles, and are a great budget option. If you are choosing pillar taps, then you will need to ensure your basin has two tap-holes.
Typical Cost: £15-£71
Wall mounted basin taps
Wall mounted taps as the names suggests, are designed to be fitted to the wall, but can be more challenging to fit as the pipework is concealed within the wall itself. This type of tap is a great option for creating a neat, streamlined finish and is suited to contemporary bathrooms. A wall mounted tap is typically teamed with a countertop basin that doesn’t have any tap holes.
Typical Cost: £84
High rise basin taps
Available in various styles, a high rise basin tap mimics a monobloc tap but is much taller in design, which makes this type ideal for mounting to a worktop so it can be used with a countertop sink. For an ultra-chic look, opt for a waterfall design.
Typical cost: £37-£85
What are ceramic disc taps?
The majority of bathroom taps incorporate ceramic disc cartridges rather than rubber washers. This ensures no leaks, and only a 90 degree turn of the handle is required to switch the tap on or off.
Years back, taps and shower fittings used to use rubber washers to prevent dripping, and although this is a simple method that worked well, the washer would eventually wear out and the dripping would start.
Ceramic disc technology is the solution to this problem, and it has various benefits. Ceramic discs are more hardwearing than rubber, and more resistant to erosion caused by water seepage; this means they have a long lifespan before they need replacing. Plus, as the water flows between the two discs, the discs erode rather than the valve metal.
A ceramic disc cartridge is made with two ceramic discs, each one featuring two holes for mixer taps or one hole for a pillar tap. One disc is fixed in position, and the other disc moves with the tap handle. When the discs are aligned, the water flows through the tap, and when they are no longer aligned, the water will stop.
What finishes are available?
At BigBathroomShop basin taps come in a range of finishes including chrome, white and black. Chrome is the most popular choice as it blends seamlessly in with other chrome fixtures within a bathroom such as accessories and the shower. If you’re after something a little different, then why not opt for a matt white or matt black finish? White is perfect for creating a cool, chic look, while black adds a bold, designer touch. You could even coordinate your black or white taps with a black or white framed shower enclosure.
What basin waste do I need?
The type of waste you need will depend upon the type of basin you have. If your basin has an overflow, then you will require a slotted waste, and if it doesn’t have an overflow, you will need an unslotted waste.
Update your bathroom with new taps
If you’re looking for ways to give your bathroom an upgrade without having a complete overhaul and spending too much cash, replacing the sink taps is a fantastic solution. It’s surprising how new taps can breathe a new lease of life into your bathroom or en-suite. If you want to add a timeless elegance to the space, then consider cross-head taps in a black and chrome finish. For something more contemporary, choose a basin tap with an open spout or one with clean, geometric lines.
How to keep taps sparkling clean
Keeping your basin taps sparkling clean isn’t as difficult as you may think, but make sure to avoid harsh cleaning products, as they could damage the surface of the tap.
For a quick, everyday polish, use a soft mircofibre cloth and water or a mild cleaning solution.
Lemon juice is a great natural cleaning solution. Take some cotton wool and soak in lemon juice, and then place around the base of the tap where limescale builds up. Leave to soak for an hour, then scrub with an old toothbrush and rinse clean. Vinegar also works well.
The tap spout tends to attract a lot of limescale too. Again, soak cotton wool in vinegar or a special limescale remover, wrap around the tap spout and secure with an elastic band. Let it work its magic, then remove and rinse.
Warm soapy water provides a simple yet effective way to clean your taps too.
Basin Taps - How to Choose the Right Type
http://ift.tt/2zSGu3d 1000 1000 Liz Tabron http://ift.tt/2ArpNsx Liz Tabron2017-11-30 09:12:512017-11-30 09:14:00Basin Taps - How to Choose the Right Type
The Back to Wall Toilets Buyer’s Guide
http://ift.tt/2zsVPHy 1137 1493 Liz Tabron http://ift.tt/2ArpNsx Liz Tabron2017-11-22 14:53:482017-11-30 09:15:06The Back to Wall Toilets Buyer’s Guide
Bathroom Sinks - Top Tips for Choosing the Best One
http://ift.tt/2zKykZT 966 1500 Liz Tabron http://ift.tt/2ArpNsx Liz Tabron2017-11-17 15:31:292017-11-22 14:56:05Bathroom Sinks - Top Tips for Choosing the Best One
The post Basin Taps – How to Choose the Right Type written by Liz Tabron appeared first on Big Bathroom Shop.
from WordPress http://ift.tt/2AIm5xX
0 notes
Photo

Aruga Resort and Residences - Mactan
[vc_row][vc_column][vc_single_image image="29124" img_size="medium" alignment="center"][vc_column_text]
Aruga Resort and Residences
Mactan - Cebu
by Rockwell Land
[/vc_column_text][vc_separator][vc_single_image image="29871" img_size="full" alignment="center"][vc_column_text]
FEATURES & AMENITIES
[/vc_column_text][vc_separator color="turquoise" border_width="2"][vc_column_text]
200meters Beachfront Four high-speed elevators Residential Lobby Automatic fire alarm Sea-Facing Swimming Pools 100% standby emergency power Pool Deck and Lounge Security system with electronic access control Residents’ Lounge Closed circuit TV monitoring Gym and Yoga Studio Basement parking Function Rooms Exclusive drop-off bay Children’s Play Area Pre-assigned parking spaces Open Grounds
[/vc_column_text][vc_column_text]
UNIT FINISHES
[/vc_column_text][vc_separator color="turquoise" border_width="2"][vc_single_image image="29872" img_size="full" alignment="center"][vc_column_text]LIVING & DINING AREAS
Floor - Porcelain Tiles
Wall - Paint with wooden base board
ALL BEDROOMS
Floor - Porcelain Tiles
Wall - Paint with wooden base board
Closets - Laminated closet doors with white interiors
KITCHEN
Floor - Porcelain Tiles
Wall - Paint
Cabinetry - Laminated Finish
Countertop - Quartz Countertop
TOILET & BATH
Single bowl sink with single-lever basin mixer (3-hole basin mixer for Master T&B)
Floor - 300 x 600 homogeneous tiles
Wall - Full-height 600x600mm Porcelain Tiles, Accent Mosaic Tiles for Shower Area
Countertop - Natural Stone or approved equivalent
Mirror - Included
PLUMBING FIXTURED & FITTINGS
Duravit under-counter lavatory or approved equalGessi mixer or approved equal
Gessi exposed bath and shower mixer or approved equal
Gessi exposed rainshower and hand shower or approved equal
Duravit Water Closet or approved equal
WINDOWS
Living, Dining Room & Bedrooms - 2400mm high windows with 100mm upstand wall
[/vc_column_text][vc_separator color="custom" accent_color="#ffffff"][vc_single_image image="29873" img_size="full" alignment="center"][vc_column_text]
CONSTRUCTION PROGRESS
[/vc_column_text][vc_separator color="turquoise" border_width="2"][vc_row_inner gap="10"][vc_column_inner width="1/2" css=".vc_custom_1562138251903background-color: #add1d8 !important;"][vc_column_text]
Status Under Construction
[/vc_column_text][/vc_column_inner][vc_column_inner width="1/2" css=".vc_custom_1562138258068background-color: #add1d8 !important;"][vc_column_text]
Turn Over Q4 2023[/vc_column_text][/vc_column_inner][/vc_row_inner][vc_separator color="custom" accent_color="#ffffff"][vc_column_text]
CONDOMINIUM UNIT TYPES
[/vc_column_text][vc_gallery interval="3" images="29874,29875,29876" img_size="full"][vc_tta_tabs][vc_tta_section title="1 Bedroom" tab_id="1-bedroom"][vc_column_text]Bedroom: 1 Bathroom: 1 Includes: Living Room with Dining Area, Kitchen Area, Utility Room, Foyer Floor Area: 67 SqM Indicative Price: PHP 15,700,000 Sample Payment Schedule
Reservation Fee: PHP 100,000
10% Downpayment: PHP1,570,000 (15 days after reservation)
20% Amortized for 51 months: PHP61,569
20% Lumpsum on Month 12,24,36,48: PHP785,000 every 12 months
50% Upon Turn over: PHP 7,850,000
[/vc_column_text][/vc_tta_section][vc_tta_section title="2 Bedroom" tab_id="2-bedroom"][vc_column_text]Bedroom: 2 Bathroom: 2 Includes: Living Room with Dining Area, Kitchen Area, Utility Room, Foyer Floor Area: 99 SqM Indicative Price: PHP 24,700,000 Sample Payment Schedule
Reservation Fee: PHP 100,000
10% Downpayment: PHP2,470,000 (15 days after reservation)
20% Amortized for 51 months: PHP96,863
20% Lumpsum on Month 12,24,36,48: PHP1,235,000 every 12 months
50% Upon Turn over: PHP12,350,000
[/vc_column_text][/vc_tta_section][vc_tta_section title="2 Bedroom with Deck" tab_id="2-bedroom-deck"][vc_column_text]Bedroom: 2 Bathroom: 2 Includes: Living Room with Dining Area, Kitchen Area, Utility Room, Foyer, Deck Floor Area: 142 SqM Indicative Price: PHP 36,300,000 Sample Payment Schedule
Reservation Fee: PHP 100,000
10% Downpayment: PHP3,630,000 (15 days after reservation)
20% Amortized for 51 months: PHP142,363
20% Lumpsum on Month 12,24,36,48: PHP1,815,000 every 12 months
50% Upon Turn over: PHP18,150,000
[/vc_column_text][/vc_tta_section][vc_tta_section title="3 Bedroom" tab_id="3-bedroom"][vc_column_text]Bedroom: 3 Bathroom: 3 Includes: Living Room with Dining Area, Kitchen Area, Utility Room, Foyer Floor Area: 161 SqM Indicative Price: PHP 60,900,000 Sample Payment Schedule
Reservation Fee: PHP 100,000
10% Downpayment: PHP6,090,000 (15 days after reservation)
20% Amortized for 51 months: PHP238,824
20% Lumpsum on Month 12,24,36,48: PHP3,045,000 every 12 months
50% Upon Turn over: PHP 30,450,000
[/vc_column_text][/vc_tta_section][/vc_tta_tabs][vc_separator color="custom" accent_color="#ffffff"][/vc_column][/vc_row]
For more information, click here https://cebugrandrealty.com/property/aruga-resort-and-residences-mactan/
0 notes
Last Seen Blogs

tojiperef
Untitled

arichii98
Arichii

sfhedbc
제목 없음

imlostinmy20s
i dont have a nickname bruh

sexsexsexnahyun
제목 없음