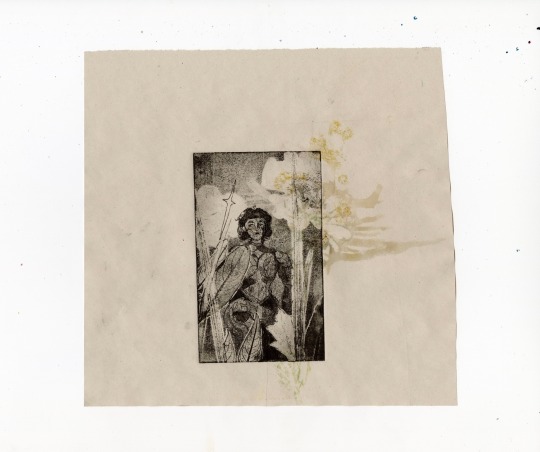
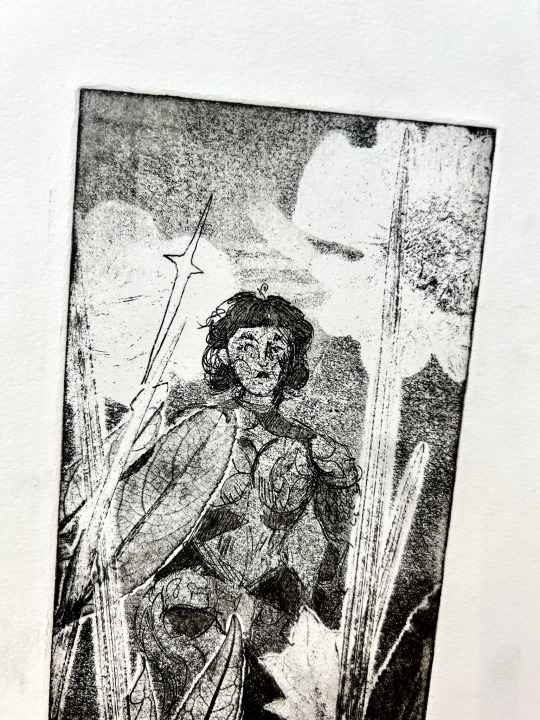
#pressed flowers on a soft ground etching plate with aquatint
Explore tagged Tumblr posts
theftshrubbery · 8 months ago
Text
Tumblr media Tumblr media
In Hiding, Joan of Arc 🌷💗🌿🌼
limited etching prints here!
3 notes · View notes
caveartfair · 6 years ago
Text
9 Types of Printmaking You Need to Know
Printmaking is believed to have originated as early as the 6th or 7th century in Egypt, when woodblocks were used to print patterns on textiles. And since its start, the medium’s ability to reproduce images and create unique visual qualities has influenced everyone from book publishers to graphic designers. Artists in particular have driven the medium forward by experimenting with its various processes, in which ink is moved from one surface to another. Below, we outline nine of the most widely used printmaking techniques, and how they work.
Woodcut
Tumblr media
The Great Wave off Kanagawa (Kanagawa oki nami ura), from the series "Thirty-six Views of Mount Fuji" ("Fugaku Sanjurokkei"), 1830 -1833. Katsushika Hokusai Art Institute of Chicago
Woodcuts became one “of the great forces which were to transform mediaeval into modern life,” as George E. Woodberry wrote in his 1883 book History of the Wood Engraving. As the author noted, woodcuts not only revolutionized printmaking processes, but also people’s ability to access literature and art.
By the 15th century, people had started using the technique to print multiples of texts and images. The process of carving out every letter of a book from a block of wood, however, was a grueling task, so only popular works, such as the Bible and Buddhist sutras, were chosen for this type of reproduction. Prior to these woodcuts, books were almost exclusively available to wealthy and royal individuals––so once texts and images hit the printing press, they became more common goods.
While the woodcut technique first became popular for its practical uses, such as printing books and decorating textiles, it eventually became an art form of its own. Woodcuts are a subset of relief printmaking—where you carve out negative space from a surface, leaving only the lines and shapes that you want to appear in the print. For example, an artist making a woodcut will carve into the surface of a piece of wood, then coat the remaining surface with ink. Next, they’ll typically place the inked surface on a piece of paper, and finally, they’ll create their print by placing pressure on the back of their block––with a roller, printing press, or other tool––to transfer the ink onto the page.
To alter the surface of a block of wood, many artists use special knives and other tools, such as gauges, to carve in the direction of the wood’s grain. One feature that sets woodcuts apart from other printmaking techniques is the residual wood grain texture the block leaves behind.
Woodblock printing utilizes a similar process; the main difference between woodblock prints and woodcuts is that the former uses water-based inks, which allow for more sensitive washes of color, and the latter uses oil-based inks. In the mid-17th century, Japanese artists began using woodblocks to create ukiyo-e prints. Ukiyo translates to “floating world” in Japanese, and in these prints, flowers, wrestlers, women, mountains, and other subjects were rendered with flattened planes of color, hovering in the composition.
Linocut
Tumblr media
Vasco Da Gama, 2016. Soeren Behncke V1 Gallery
Tumblr media
Teeny, 1938. Henri Matisse Masterworks Fine Art
Woodcuts and linocuts share a graphic quality because the relief process forces you to create images with flat planes of color and fluid lines. Linocuts, which emerged in the 20th century, also fall under the category of relief printmaking, but instead of carving from a block of wood, linocuts are made by cutting into a sheet of linoleum.
This smooth material has no directional grain, so you are free to carve in any direction you like, and can use woodcut or engraving tools. Since linoleum’s surface is smooth, it only leaves a slightly spongy, grainy texture behind. One thing to note about its materiality is that while the surface’s soft quality can make carving much easier, it often hinders the ability to create fine lines.
This technique is frequently introduced to printmaking beginners because it’s easy to learn, and its low-cost materials make it relatively accessible. And since linoleum is relatively thin and tender, you can press the print onto a piece of paper by hand with a tool––like the back of a spoon or a baren––or with a printing press.
Collagraph
Tumblr media
Second Born, 2013. Wangechi Mutu Pace Prints
Collagraphs are another kind of relief print that can be completed without a printing press. Rather than cutting away from a surface, however, this technique involves adding to the surface of a printing plate. To accomplish this, you begin by collaging thin items––such as fabrics, plants, or plastic––onto the plate. The objects will create the elevated surface needed for a relief print, but usually, the items will not exceed a quarter of an inch in height; otherwise, you risk tearing the paper you’re printing onto.
Once the collage is complete, the whole plate is coated with a substance known as a medium. Then, after it dries, you can roll ink onto the plate and press it onto paper by hand with the help of a tool, or with a printing press. When the paper is peeled back from the plate, an impression will appear with textures that vary according to the collaged items. As opposed to linocuts and woodcuts, which tend to emphasize bold lines and shapes, collagraph prints offer more opportunities for complicated textures and subtle marks.
Engraving
Tumblr media
Battle of the Nudes, ca. 1470/1475. Antonio Pollaiuolo National Gallery of Art, Washington D.C.
Engraving is the oldest form of intaglio printmaking, and one of the most difficult to execute. Unlike relief printmaking (where the ink is placed onto the uppermost surface), intaglio involves making incisions or grooves in a plate, covering the plate with ink, and wiping the surface, so that the ink remains in the grooves. Then, the plate is placed in a printing press, which forces the paper into the plate’s grooves to pick up the ink. When the paper and plate are peeled apart, you’ll see that the ink has adhered to the paper. To keep the two processes straight, it’s helpful to remember that with intaglio, anything you carve into the plate will show up in ink, whereas in relief printmaking, it’s the parts that you don’t carve that will show up in ink.
The term “intaglio” comes from the Italian word intagliare, which means “to cut in.” The various intaglio techniques––engraving, etching, drypoint, mezzotint, and aquatint, among others––are largely differentiated by how the incisions are made.
The incisions in an engraving are entirely produced by carving into the plate by hand, which is why it’s one of the most challenging printmaking methods to master. The technique typically calls for the use a burin––a steel rod with a sharp, oblique tip attached to a rounded top for the hand to firmly grasp onto––to draw into a metal plate. As you dig the burin across the surface, curls of metal will peel back as a V-shaped groove is created.
Don’t be fooled by how simple this technique may sound; using a burin to accurately incise a metal surface is no easy feat. In addition to the great dexterity it requires, mistakes can only be repaired by expertly hammering the back of the plate to push the metal back into place, then smoothing it back down with a scraper and burnisher.
Etching
Tumblr media
Three Crosses (First State), 1653. Rembrandt van Rijn Rijksmuseum, Amsterdam
Etching is one of the most commonly used intaglio techniques. Unlike engraving, where you gauge out lines with a burin, etching involves incising marks into a plate through a process called “biting.” First, you cover a metal plate with a thin wax-like layer called the “ground.” Then, you draw your design onto the plate with a needle; you don’t have to press hard when making these marks, as you only need to scratch through the surface of the ground. When the drawing is finished, you coat the back of the plate with a varnish, then immerse the plate in a bath of acid.
Since the ground and varnish are impermeable to acid, the acidic bath will only affect the metal where lines are drawn. As the plate lays in the bath, the acid will eat away at the marks you made, creating fine incisions.
Artists have been known to render delicate effects on these plates by playing with the bath’s level of acidity, the amount of time it bathes, and a technique called “stopping out.” To stop out, you bathe the plate until the lightest parts of the print are properly incised, then remove it from the bath and cover those areas with varnish before placing the plate back into the bath. This technique allows you to achieve a range of shallow and deep grooves; where an incision is shallow, the ink will be more faint, and where the incision is deeper, the ink will be more prominent.
Aquatint
Tumblr media
Cuff, 2018. Patricia Treib Crown Point Press
Tumblr media
RM, 2007. Elizabeth Peyton Two Palms
The process of an aquatint is similar to that of an etching, but the results of an aquatint are focused less on line, and more on shapes. This technique originated in the late 1800s and became a popular form of printmaking because its visual qualities mimic that of watercolor, hence the name aquatint.
Aquatints are accomplished through a version of biting, where the plate (usually made of copper or zinc) is covered with tiny particles of rosin (a type of resin derived from pine) that act as stop out. After sprinkling the white powder evenly over the plate, you should inspect the surface to verify that about half of the plate is covered with the particles. Then, you place the plate on top of a hot ring until the rosin begins to melt onto the plate. Once the plate is heated, it can be placed into an acid bath; as the plate sits in the bath, the acid will eat away at the tiny areas of exposed metal between the specks of rosin. This version of biting creates large areas of incision, so when the plate is inked and printed, planes of color emerge. To incise specific shapes onto the plate, an artist can use liquid stop out to block out areas of the composition. When the plate is placed into the bath, the acid will eat away at the areas that are still exposed.
Liquid stop out can also be used to create different tones. The artist can remove the plate and coat areas with liquid stop out multiple times, so the areas bathed for the least amount of time will be the lightest parts of the print, and the areas bathed for the longest amount of time will be the darkest.
Monotype
Tumblr media
Untitled , 2014. Cecily Brown Two Palms
In relief printmaking, the surface is carved away to make lines, and in intaglio printmaking, the surface is incised to create grooves. But in planographic printmaking, the surface’s depth is not altered. Instead, images are made on a flat surface. One commonly used planographic technique is the monotype.
Each print pulled from a plate or block is called an “impression,” and for many artists, one of the advantages of printmaking is having the ability to create multiple impressions of the same artwork. But unlike the rest of the printmaking techniques on this list, monotypes only produce one impression. Typically, they are created with a piece of glass, but can also be made with another piece of smooth, non-absorbent material.
Along with linocuts, monotypes are another printmaking technique favored by beginners, due to its simple process and the fact that it does not require a printing press. While there are many methods for creating a monotype, one commonly used technique is to coat the glass in printing ink with a roller. Once the surface is covered, you wipe away ink to create an image. Next, you place the inked side of the glass onto a piece of paper, then firmly rub the back. When you peel the paper and glass apart, the image you designed on the glass will be printed in reverse.
Another popular method is to coat the glass with ink using a roller. Then, you can lay the piece of paper on top of the inked surface, and use a tool––like a pencil or knitting needle––to draw on the back of the paper. When you separate the glass and the page, you’ll see that the ink adhered to the paper wherever you drew a mark. Depending on the tool you use to draw, this style of monotype can create strong or delicate lines, and often has a light, atmospheric texture.
Lithography
Tumblr media
Bond of Union, 1956. Maurits Cornelis Escher Christie's
Lithography, like the monotype, is a subset of planographic printmaking––but their similarities all but end there. Lithographs, which were created in 1798 in Munich, are made with a large slab of limestone or metal plate, and require an intensive process of developing an image on the stone or plate.
The basic principle that guides the lithography process is the fact that water and oil don’t mix. To begin making a lithograph, you prep the surface of the stone with grit, a sand-like dust, and a levigator, which is a heavy circle of steel attached to a handle. With a fair share of elbow grease, you start spinning the steel across the surface to grind it down a millimeter at a time. This step is crucial for leveling the surface of the stone, which will provide even prints, and removes the previous drawing from the stone. (If the previous drawing is not completely ground off, a faint ghost image will appear when the new drawing is printed.)
Next, you sensitize the stone by dampening it and applying an acidic liquid across the entire surface. Then, the solution is rinsed off; when the stone is dry, you apply a substance called “gum arabic” around the edges of the stone to create a border for the image area. Now, you may begin drawing your image onto the stone with greasy tools such as lithographic crayons or ink.
Once the drawing is complete, you begin transferring the image onto the stone through an intensive process that involves layering talcum powder, resin, liquid-etch solution, gum arabic, and mineral spirits. Each of these steps plays a role in transforming the surface of the stone, so that wherever a mark with greasy material was made, ink will stick to the surface of the stone. Finally, the artist will ink up their stone and print their image with the help of a press.
Screen print
Tumblr media
Faits Memorables III, 1978. Jean Dubuffet Pace Prints
Screen printing (also known as silkscreen printing) is a unique medium because the print isn’t made directly from the surface of a block or plate; instead, images are printed through a screen mesh using stenciling techniques.
People who are new to screen printing often begin by learning how to create hand-cut stencils. In this method, you use a knife (typically an X-acto blade) to cut out a design from a sheet of self-adhesive plastic film. Then, you adhere the film to the bottom of a mesh screen and place it on top of a piece of paper. Using a squeegee, you pull ink across the top of the screen, and wherever you cut out a shape from the film, ink will slide onto the page.
Another popular way of creating a screen print is to coat the entire screen with light-sensitive emulsion. This liquid material will harden and fill in all of the screen’s holes; then, you can use a computer to print the negative of your design onto a piece of transparent plastic. Next, you place the design onto the surface of an exposure unit and lay the emulsion-covered screen on top. When you turn the exposure unit on, bright light will pass through any place where there is no design, subsequently exposing the emulsion. Light will only pass through the negative space of your design (which is why you print your design in negative onto the plastic).
Once your screen is exposed, you’ll use a high-power washer to blow out the emulsion that the light exposed. This method allows artists and designers to quickly achieve finely detailed screens, and has long been used in creating clothing and advertising. The technique’s ties with commercial signage was one of the reasons Pop artists like Andy Warhol and Roy Lichtenstein favored the medium.
from Artsy News
0 notes