#pip install tkinter
Text
Fehlerfreie Installation von Thonny auf Linux: Schritt-für-Schritt-Anleitung
In diesem Beitrag möchte ich dir zeigen, wie du eine fehlerfreie Installation von Thonny auf einem Linux System durchführst. Dazu zeige ich dir dieses in eine Schritt-für-Schritt-Anleitung und wenn es besonders schnell gehen muss, dann biete ich dir das Shellscript an, welches diese Schritte automatisiert ausführt.

Fehlerfreie Installation von Thonny auf Linux: Schritt-für-Schritt-Anleitung
Hintergrund: Zur Vorbereitung auf meinen MicroPython-Kurs im Jugendfreizeitzentrum Schöningen habe ich einige Laptops mit Linux Mint erhalten. Auf diesen Systemen musste ich zunächst ein Update durchführen, bevor ich Thonny installieren konnte. Dabei sind mir einige Fallstricke aufgefallen, die ich hier gerne inklusive der Lösungen vorstellen möchte.
Im Beitrag Thonny IDE auf Linux einrichten für den Raspberry Pi Pico W habe ich dir bereits gezeigt wie du Thonny installierst, jedoch verlief dort die Installation sauber durch ohne irgendwelche Fehler.
Für die nachfolgenden Schritte benötigst du root Rechte bzw. das Passwort für den Benutzer!
Schritt 1 - Aktualisieren des Linux Systems
Bevor wir Thonny installieren, aktualisieren wir das System. Damit stellen wir sicher das alle benötigten Pakete aktuell sind.
sudo apt-get update
sudo apt-get upgrade
Schritt 2 - Installieren vom Python Paketmanager pip
Damit wir die Python Pakete später installieren können, müssen wir pip installieren. (Ggf. wird dieses bei Thonny auch installiert, weil dort Python3 mit installiert wird.)
sudo apt install pip
Schritt 3 - Installieren von Thonny
Das Tool Thonny kannst du im Anschluss mit dem nachfolgenden Befehl installieren.
sudo apt install thonny
Auf einem System musste ich das Modul tkinter manuell mit nachfolgendem Befehl installieren.
sudo apt-get install python3-tk
Schritt 4 - Benutzer der Gruppe dialout hinzufügen
Damit der aktuelle Benutzer auf den seriellen Port zugreifen kann, muss dieser der Gruppe dialout hinzugefügt werden.
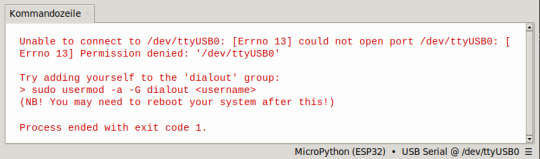
sudo usermod -a -G dialout $USER
Im Anschluss muss der Rechner neu gestartet werden, erst damit werden diese Berechtigungen final gesetzt.
Mit dem Befehl groups kann man sich die zugewiesenen Gruppen zum Benutzer anzeigen lassen.
groups $USER

Schritt 5 - Entfernen von BRLTTY
In meinem Fall wurde kein Port in Thonny aufgeführt und ich musste zusätzlich noch das Dienstprogramm BRLTTY entfernen.
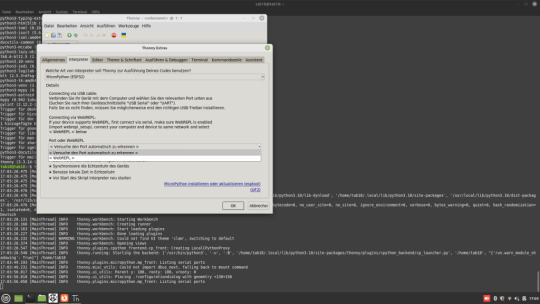
sudo apt remove brltty

BRLTTY ist ein Dienstprogramm im Hintergrund, das es blinden Personen ermöglicht, über eine Braillezeile auf die Textkonsole von Linux/Unix zuzugreifen. Es steuert die Braillezeile und bietet umfassende Funktionen zur Bildschirmüberprüfung.
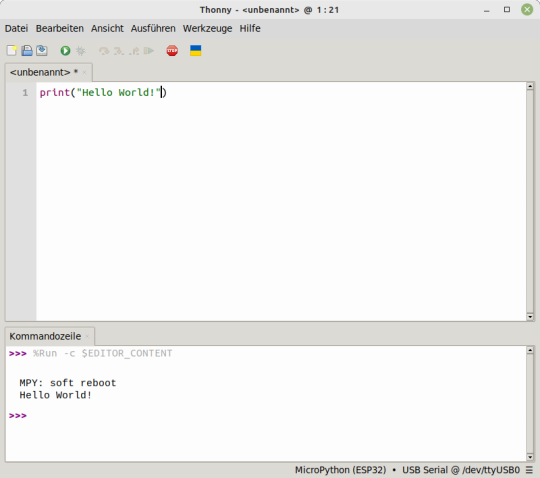
Schritt 7 - Testen der Installation
Wenn alle Schritte ausgeführt wurden, dann müssen wir noch kurz die Installation testen. Dazu stellen wir eine Verbindung her und geben im Editor ein kleines Script ein, welches "Hello World!" ausgibt.
print("Hello World!")
Wenn die grüne Playtaste aus der Toolbar betätigt wird, dann wird das kleine Programm ausgeführt und es sollte der Text "Hello World!" auf der Kommandozeile angezeigt werden.
Thonny fehlerfreie installation mit Shellyscript
Nachfolgend nun das kleine Shellyscript zum automatischen Installieren von Thonny.
Shellscript zum automatischen installieren von ThonnyHerunterladen
Die SH-Datei musst du auf der Konsole jedoch ausführbar machen, dazu gibst du nachfolgenden Befehl im Terminal ein:
chmod +x install_thonny.sh
Im Anschluss kannst du dieses Script dann mit dem nachfolgenden Befehl starten:
./install_thonny.sh
Hier nun das kleine Shellscript zum automatischen Installieren von Thonny:
#!/bin/bash
sudo apt-get update
sudo apt-get upgrade
sudo apt install pip
sudo apt install thonny
sudo usermod -a -G dialout $USER
sudo apt remove brltty
groups $USER
sleep 6
sudo reboot
Read the full article
0 notes
Text
"UserWarning: Matplotlib is currently using agg, which is a non-GUI backend, so cannot show the figure." when plotting figure with pyplot on Pycharm
I am trying to plot a simple graph using pyplot, e.g.:
import matplotlib.pyplot as pltplt.plot([1,2,3],[5,7,4])plt.show()
but the figure does not appear and I get the following message:
UserWarning: Matplotlib is currently using agg, which is a non-GUI backend, so cannot show the figure.
I saw in several places that one had to change the configuration of matplotlib using the following:
import matplotlibmatplotlib.use('TkAgg')import matplotlib.pyplot as plt
I did this, but then got an error message because it cannot find a module:
ModuleNotFoundError: No module named 'tkinter'
Then, I tried to install "tkinter" using pip install tkinter (inside the virtual environment), but it does not find it:
Collecting tkinter Could not find a version that satisfies the requirement tkinter (from versions: )No matching distribution found for tkinter
I should also mention that I am running all this on Pycharm Community Edition IDE using a virtual environment, and that my operating system is Linux/Ubuntu 18.04.
I would like to know how I can solve this problem in order to be able to display the graph.
https://codehunter.cc/a/python/userwarning-matplotlib-is-currently-using-agg-which-is-a-non-gui-backend-so-cannot-show-the-figure-when-plotting-figure-with-pyplot-on-pycharm
0 notes
Text
Linux memory monitor

#Linux memory monitor install
most useful 3 groups (CPU, memory and disk) contain: %usr, %system, %guest, %CPU, minflt/s, majflt/s, VSZ, RSS, %MEM, kB_rd/s, kB_wr/s, kB_ccwr/s. It's useful in case when you need extra metrics from the process(es), e.g. Pidstat (part of sysstat package) can produce output that can be easily parsed. Grafana part is the same, except metrics names. Minimal telegraf configuration looks like: Instead of Python script sending the metrics to Statsd, telegraf (and procstat input plugin) can be used to send the metrics to Graphite directly. Then opening Grafana at authentication as admin:admin, setting up datasource you can plot a chart like: $ python procmon.py -s localhost -f chromium -r 'chromium.*'
#Linux memory monitor install
Then in another terminal, after starting target process: $ sudo apt-get install python-statsd python-psutil # or via pip A handy all-in-one raintank/graphite-stack (from Grafana's authors) image and psutil and statsd client. It may seem an overkill for a simple one-off test, but for something like a several-day debugging it's, for sure, reasonable. pip install memory_profilerīy default this pops up a Tkinter-based ( python-tk may be needed) chart explorer which can be exported: It can also record process with its children processes (see mprof -help). The package provides RSS-only sampling (plus some Python-specific options). Psrecord $(pgrep proc-name2) -interval 1 -duration 60 -plot plot2.png & Psrecord $(pgrep proc-name1) -interval 1 -duration 60 -plot plot1.png & Sudo apt-get install python-matplotlib python-tk # for plotting or via pipįor single process it's the following (stopped by Ctrl+C): psrecord $(pgrep proc-name1) -interval 1 -plot plot1.pngįor several processes the following script is helpful to synchronise the charts: #!/bin/bash pip install psrecord # local user install Python psrecord package does exactly this. The following addresses history graph of some sort. Procpath plot -d ff.sqlite -q rss -p 123 -f rss.svgĬharts look like this (they are actually interactive Pygal SVGs): procpath record -i 1 -r 120 -d ff.sqlite '$.children[?("firefox" in RSS and CPU usage of a single process (or several) out of all recorded would look like: procpath plot -d ff.sqlite -q cpu -p 123 -f cpu.svg This records all processes with "firefox" in their cmdline (query by a PID would look like = 42)]') 120 times one time per second. It's a pure-Python CLI package including its couple of dependencies (no heavy Matplotlib), can potentially plot many metrics from procfs, JSONPath queries to the process tree, has basic decimation/aggregation (Ramer-Douglas-Peucker and moving average), filtering by time ranges and PIDs, and a couple of other things. Returning to the problem of process analysis frequently enough and not being satisfied with the solutions I described below originally, I decided to write my own.
0 notes
Text
Windows xp minesweeper download

WINDOWS XP MINESWEEPER DOWNLOAD HOW TO
WINDOWS XP MINESWEEPER DOWNLOAD INSTALL
WINDOWS XP MINESWEEPER DOWNLOAD SERIAL
WINDOWS XP MINESWEEPER DOWNLOAD MANUAL
WINDOWS XP MINESWEEPER DOWNLOAD SOFTWARE
A string is just a sequence of string enclosed inside single or double quotes. In our case, the print() function prints the argument (i.e "Big Python") it is given to the console. Screenshot Copy Code """ PyPortal MineSweeper Adafruit invests time and resources providing this open source code. perf_counter() measures the time in seconds from some unspecified moment in time, which means that the return value of a single call to the function isn’t useful. Let’s add a bare-bones Python timer to the example with time.perf_counter().Again, this is a performance counter that’s well-suited for timing parts of your code. It is designed to run on server as javascript game in browser or as javagame on desktop. So, here are a few Python Projects for beginners can work on. The goal of the player is to clear a rectangular board containing hidden "mines" or bombs without detonating any of them, with help from clues about the number of neighboring mines in each cell. For example, a cell normally opens when you press and release the left mouse button but "Elmar Technique" is a NF method where you change the mouse to open cells on both pressing and releasing. Today, we are sharing details about Pysa, an open source static analysis tool we’ve built to detect and prevent security and privacy issues in Python code.
WINDOWS XP MINESWEEPER DOWNLOAD SOFTWARE
Minesweeper.js is free software: you can redistribute it and/or modify it under the terms of the GNU General Public License as published by the Free Software Foundation, either **version 3** of the License, or (at your option) any later version. Typing the operator in the python console and using autocomplete CrtlSpace exposes the parameters (Same as those in the UI). In order to avoid repetition, the coordinates corresponding to a block are repeatedly added to the queue, so it needs to be marked here. Game details: Minesweeper is a one player game, played on a rectangular board. You can not select more than 25 topics Topics must start with a letter or number, can include dashes ('-') and can be up to 35 characters long. The board is divided into cells, with mines randomly distributed. You’ll get a coding exercise in Python and Java for each problem, so you can get feedback on your solution right away. The python code logic and running minesweeper are not problems.
WINDOWS XP MINESWEEPER DOWNLOAD HOW TO
The motivation of these minesweeper projects is to learn the tooling around python projects, how to create CI/CD pipelines for python projects, and distributing python eggs. In this blog post we will work on the classic game of Minesweeper. It is very simple as it was almost a year ago last time when I wrote a long python script. Python code for processing arrays can take many forms. You can already create, start and debug Python scripts and addons from VS Code with it.
WINDOWS XP MINESWEEPER DOWNLOAD INSTALL
pip install tkinter To hack MineSweeper at the binary level. In this example, Rectangle is the superclass, and Square is the subclass.
WINDOWS XP MINESWEEPER DOWNLOAD MANUAL
See chapter 14 of the org-mode manual for all of the details. Minesweeper made in Processing.py by ChrisB (Source Code) Python implementation with PyGame by Sayan Goswami (Source Code) Mine Sweeper by Bruce Chen (Source Code) MineSweeper by Po Mauguet (Source Code) Minesweeper! This Is How To Create A Simple MineSweeper Game In Python! Remember the old Minesweeper ? A much shorter example is below, but this example uses some odd parts of Python that I don't bother to explain in this book: grid = for y in range(10)] Use one of these two examples and place the code to create our array ahead of your main program loop. C++ is a general purpose, object-oriented, middle-level programming language and is an extension of C language, which makes it possible to code C++ in a “C style”. by loading them onto cloud hosted citrix xendesktop with add-ons such as Office 365 Enterprise E5 suite for enhanced team productivity. First game is being marked '? Create a tic-tac-toe game using open source code.
WINDOWS XP MINESWEEPER DOWNLOAD SERIAL
I want to send 4 float numbers from Python code to an Arduino I was trying to send it via serial and I have some problems. It should be noted here, because a block may be extended to other blocks. Assume that we have to comply with the original version and count the mined neighbours of a clear cell now in 8 directions including the north-west, north-east, south-east, and south-west. Building and visualizing Sudoku Game Using Pygame. Python programming language (latest Python 3) is being used in web development, Machine Learning applications, along with all cutting edge technology in Software Industry. _mesh.off( Simply pass the filepath of an OFF file to the operator in your own code.
0 notes
Text
Tools button in thonny

#TOOLS BUTTON IN THONNY INSTALL#
#TOOLS BUTTON IN THONNY WINDOWS#
“Special virtual environment” backend may be removed in future versions. This makes deployment easier in classroom setting and it is simpler scheme in general. CHANGED: Default back-end is now “Same as front-end” (was “A special virtual environment”).All bundles (including Mac’s) now come with Tk 8.6.8 CHANGED: Dropped support for Python 3.4 (both for front-end and back-end).CHANGED: Upgraded Python to version 3.7.0 in Thonny+Python bundles.NEW: Thonny now includes basic support for MicroPython (former thonny_microbit plug-in).
#TOOLS BUTTON IN THONNY INSTALL#
If the backend is not a virtual environment it installs to user site packages (with pip install –user)
NEW: “Tools => Manage packages” now allows installing new packages with all CPython backends, not only virtual environments.
NEW: “Tools => Options => Backend => Custom Python interpreter” now allows creating virtual environments.
NEW: “View => Program arguments” opens a box where you can write the argument string for your program.
This allows tweaking your turtle programs while looking at current output.
#TOOLS BUTTON IN THONNY WINDOWS#
NEW: Checking “Run => Dock user windows” makes your Tkinter windows stay on top and appear always on the same location.
NEW: You can re-run your changed program without closing it first (relevant for graphical programs).
NEW: Clicking on the links in stacktrace now shows the variables of those frames.
NEW: Alternative presentation for call stack (in single window, just like in most debuggers see Tools => Options => Debugger).
NEW: Both debug modes now support breakpoints (switch on line numbers and double-click on the margin).
NEW: Thonny now has two debug modes: beside original AST based debug mode (the “nicer” one, Ctrl+F5) there is now also line-based mode (the “faster” one, Shift+F5), which is not so intuitive but much more efficient.
If you are using Thonny+Python bundle, then 3.0 will start by creating new virtual environment, because the one created for Python 3.6 does not work with Python 3.7. “A special virtual environment” back-end is still available and if you used it with your older Thonny, then Thonny 3.0 will use it as well. As a new feature, Thonny 3.0 offers an easy way for creating and using virtual environments (Tools → Options → Back-end → Alternative Python 3 interpreter or virtual environment). This change does not mean that I now consider virtual environments unimportant. Instructors can now install extra packages to the central interpreter and students will see the packages without any hassle. This means your programs will see all Python packages that are installed to this interpreter. In version 3.0 the default back-end is “The same interpreter which runs Thonny” (by the way, this was already the default setting on Raspberry Pi). It turned out that many instructors did not like this scheme as it often made things more complex and confusing, especially in classroom setting. The idea was to allow students start from clean slate and add packages later without worrying about the integrity of whole system. Thonny 2.1 introduced automatically managed virtual environment as default back-end. Note that you don’t need to use breakpoints – if you start the debugger without breakpoints, Thonny stops before the first statement, just like it used to. This gives you the margin, where you can add or remove breakpoints with double-clicks. For using them, you need to switch on line numbers (Tools → Options → Editor). Last, but not least, Thonny finally supports breakpoints. Note that both styles can be used with both debugging modes. In “Tools → Options → Debugger” you can switch to more traditional style with a separate view for presenting and switching call frames. Therefore in 3.0 one can choose between two different styles for presenting call stack. This gives good intuition about the concept, but it may become cumbersome to use. We expect that most students start with the nicer debuger and move on to the faster one when their programs grow bigger.īy default the new debugging mode still uses stacked windows for presenting the call stack. The new mode is not as intuitive but much more efficient. Beside the original AST-based debug mode – the “nicer” one (Ctrl+F5), there is new, traditional line-based mode – the “faster” one (Shift+F5). Although the performance has been greatly improved in 3.0 beta, larger programs would still benefit from a more efficient solution. The original debugger has been very useful for explaining the meaning of Python constructs, but its memory and time overhead became noticeable when making bigger steps in some programs (especially after the introduction of stepping back in time). Thanks to the support from Raspberry Pi Foundation, Thonny now has several new debugger-related features.
0 notes
Text
Pycharm for mac download python 3.7

#Pycharm for mac download python 3.7 how to
#Pycharm for mac download python 3.7 for mac
#Pycharm for mac download python 3.7 mac osx
#Pycharm for mac download python 3.7 update
#Pycharm for mac download python 3.7 archive
While Javascript is not essential for this website, your interaction with the content will be limited. The official home of the Python Programming Language. Python is a free, open-source interpreted language that stands out for its versatility in supporting several programming paradigms, whether utilizing object-oriented language or imperative syntax, or using its command line to work in a functional way, as with languages like Haskell. The InfoZIP unzip program can be used to handle the ZIP archives if desired. tar.bz2 archives these are bzipped tar archives and can be handled in the usual way using tar and the bzip2 program.
#Pycharm for mac download python 3.7 for mac
Perform these steps to download and install Python, IDLE, Tkinter, NumPy, and PyGame: Browse to the Python for Mac download page. HTML Help (.chm) files are made available in the 'Windows' section on the Python download page. We recommend that you download and install Python 3, and use Python 3 exclusively when running programs associated with this booksite. Learning to code is hugely popular at the moment, and Python is a great coding language to learn.
#Pycharm for mac download python 3.7 mac osx
Next, run the Python Installer to install Python 3 onto your Mac. Installation instructions for Windows, Linux and Mac OSX Determine if your copy of Python is 32bit or 64bit Download the appropriate version of IfcOpenShell.
#Pycharm for mac download python 3.7 how to
Here’s how to install Python 3 on your macOS: Jump into downloads page and simply just download the latest Python version. as well: you can install a number of tools such as Cygwin, Visual Studio, or P圜harm. Kite is a free AI-powered autocomplete for Python developers. If you are on a Mac, you can use the Terminal app found inside the. On macOS and Windows it installs a pre-built wheel for the following configurations: Python 2.7. Download P圜harm Open your favorite browser, and head to the Pycharm download section, which will detect your OS. On Linux this command will build and install the source package. However, the issue is most modern macOS versions come with rather with Python 2.7.x installed and not the newer, modern version like Python 3.6.5 or. Sh For Python 2.7, open the Terminal.app or iTerm2 terminal application and then enter the following. Download the latest Python 3 and Python 2 source. For Python 3.7 enter the following: bash / Downloads / Anaconda3 - 2020.02 - MacOSX - x8664. The following features are available as part of. Python 3: from the version 3.6 up to the version 3.11. If you are a Windows user, we recommend that you install Python for Windows. Configure at least one Python interpreter.
#Pycharm for mac download python 3.7 archive
Download the latest version of Educational Products by JetBrains: for Windows, macOS or Linux. The same source code archive can also be used to build the Windows and Mac versions, and is the starting point for ports to all other platforms. To develop Python scripts in P圜harm: Download and install Python. a download, or one that comes with your OS), then on Windows, MacOS/OSX, and Linux on Intel. For example, here are the Ray 3.0.0.dev0 wheels for Python 3.7, MacOS for. If you have an existing Python installation (e.g. Result: The installer checks for and upgrades any dependencies, and gives you the latest version of the pyATS and pyATS Library core and library packages.Download Python for Mac - A free, open source and high-level programming language that can be used for web, Internet and software development, desktop GUIs, science, education and more. Download the latest Python 3 and Python 2 source. pip install -U raytune installs Ray + dependencies for Ray Tune pip. P圜harm 2022.1.2 for Mac is free to download from our application library. Work with web development options, run simple integrity rests, access imported data. Access a set of programming and monitoring tools for comprehensive management and optimization of any started project. First, download and install the community version of P圜harm: Mac Download (Open the downloaded. Pyats.robot package (contains pyATS-specific keywords)Įnables the use of the template command, which prompts you for input at runtime Develop products based on the Python language. Can I install Python on Windows 7 32 bit. Optional extras (templates and the Robot Framework plug-in) PyATS Library network automation packages
#Pycharm for mac download python 3.7 update
Otherwise, you can also update the packages manually using Pip: Pip upgrade options ¶Īll pyATS and pyATS Library infrastructure # to update version (pyats )$ pyats version update # to check if any packages are out-dated (pyats )$ pyats version check -outdated # to check your current pyats version (pyats )$ pyats version check
0 notes
Text
How to Install Tkinter in Python - with Example - in Windows 10 - Code Jana
How to Install Tkinter in Python – with Example – in Windows 10 – Code Jana
Hi there, wonderful coders. This article will serve as a transcript for my install tkinter in python video on Code Jana channel. It will also help you copy & paste the code directly to your code editor.
If you haven’t yet subscribed to Code Jana, then please do so by following this subscribe now link.
Here are the steps to Install Tkinter in Python:
Tkinter is already included with Python…
youtube
View On WordPress
#code jana#codejana#how to install tkinter#how to install tkinter in python#install tkinter in python#install tkinter in python windows 10#Learn Python Codes#Learn Python Programming#pip install tkinter#python#Python for Beginners#python tutorial#Python Tutorial for Beginners#tkinter#Youtube
0 notes
Text
top 10 free python programming books pdf online download
link :https://t.co/4a4yPuVZuI?amp=1
python download
python dictionary
python for loop
python snake
python tutorial
python list
python range
python coding
python programming
python array
python append
python argparse
python assert
python absolute value
python append to list
python add to list
python anaconda
a python keyword
a python snake
a python keyword quizlet
a python interpreter is
a python code
a python spirit
a python eating a human
a python ate the president's neighbor
python break
python basics
python bytes to string
python boolean
python block comment
python black
python beautifulsoup
python built in functions
b python regex
b python datetime
b python to dictionary
b python string prefix
b' python remove
b' python to json
b python print
b python time
python class
python certification
python compiler
python command line arguments
python check if file exists
python csv
python comment
c python interface
c python extension
c python api
c python tutor
c python.h
c python ipc
c python download
c python difference
python datetime
python documentation
python defaultdict
python delete file
python data types
python decorator
d python format
d python regex
d python meaning
d python string formatting
d python adalah
d python float
d python 2
d python date format
python enumerate
python else if
python enum
python exit
python exception
python editor
python elif
python environment variables
e python numpy
e python for everyone 3rd edition
e python import
e python int
e python variable
e python float
python e constant
python e-10
python format
python function
python flask
python format string
python filter
python f string
python for beginners
f python print
f python meaning
f python string format
f python float
f python decimal
f python datetime
python global
python global variables
python gui
python glob
python generator
python get current directory
python getattr
python get current time
g python string format
g python sleep
g python regex
g python print
g python 3
g python dictionary
g python set
g python random
python hello world
python heapq
python hash
python histogram
python http server
python hashmap
python heap
python http request
h python string
python.h not found
python.h' file not found
python.h c++
python.h windows
python.h download
python.h ubuntu
python.h not found mac
python if
python ide
python install
python input
python interview questions
python interpreter
python isinstance
python int to string
in python
in python 3
in python string
in python meaning
in python is the exponentiation operator
in python list
in python what is the result of 2 5
in python what does mean
python json
python join
python join list
python jobs
python json parser
python join list to string
python json to dict
python json pretty print
python j complex
python j is not defined
python l after number
python j imaginary
jdoodle python
python j-link
python j+=1
python j_security_check
python kwargs
python keyerror
python keywords
python keyboard
python keyword arguments
python kafka
python keyboard input
python kwargs example
k python regex
python k means
python k means clustering
python k means example
python k nearest neighbor
python k fold cross validation
python k medoids
python k means clustering code
python lambda
python list comprehension
python logging
python language
python list append
python list methods
python logo
l python number
l python array
python l-bfgs-b
python l.append
python l system
python l strip
python l 1
python map
python main
python multiprocessing
python modules
python modulo
python max
python main function
python multithreading
m python datetime
m python time
python m flag
python m option
python m pip install
python m pip
python m venv
python m http server
python not equal
python null
python not
python numpy
python namedtuple
python next
python new line
python nan
n python 3
n python meaning
n python print
n python string
n python example
in python what is the input() feature best described as
n python not working
in python what is a database cursor most like
python online
python open
python or
python open file
python online compiler
python operator
python os
python ordereddict
no python interpreter configured for the project
no python interpreter configured for the module
no python at
no python 3.8 installation was detected
no python frame
no python documentation found for
no python application found
no python at '/usr/bin python.exe'
python print
python pandas
python projects
python print format
python pickle
python pass
python print without newline
p python re
p python datetime
p python string
while loop in python
python p value
python p value from z score
python p value calculation
python p.map
python queue
python queue example
python quit
python qt
python quiz
python questions
python quicksort
python quantile
qpython 3l
q python download
qpython apk
qpython 3l download for pc
q python 3 apk
qpython ol
q python 3 download for pc
q python 3 download
python random
python regex
python requests
python read file
python round
python replace
python re
r python string
r python sql
r python package
r python print
r python reticulate
r python format
r python meaning
r python integration
python string
python set
python sort
python split
python sleep
python substring
python string replace
s python 3
s python string
s python regex
s python meaning
s python format
s python sql
s python string replacement
s python case sensitive
python try except
python tuple
python time
python ternary
python threading
python tutor
python throw exception
t python 3
t python print
.t python numpy
t python regex
python to_csv
t python scipy
t python path
t python function
python unittest
python uuid
python user input
python uppercase
python unzip
python update
python unique
python urllib
u python string
u' python remove
u' python json
u python3
u python decode
u' python unicode
u python regex
u' python 2
python version
python virtualenv
python venv
python virtual environment
python vs java
python visualizer
python version command
python variables
vpython download
vpython tutorial
vpython examples
vpython documentation
vpython colors
vpython vector
vpython arrow
vpython glowscript
python while loop
python write to file
python with
python wait
python with open
python web scraping
python write to text file
python write to csv
w+ python file
w+ python open
w+ python write
w+ python open file
w3 python
w pythonie
python w vs wb
python w r a
python xml
python xor
python xrange
python xml parser
python xlrd
python xml to dict
python xlsxwriter
python xgboost
x python string
x-python 2
python.3
x python decode
x python 3
x python byte
x python remove
python x range
python yield
python yaml
python youtube
python yaml parser
python yield vs return
python yfinance
python yaml module
python yaml load
python y axis range
python y/n prompt
python y limit
python y m d
python y axis log
python y axis label
python y axis ticks
python y label
python zip
python zipfile
python zip function
python zfill
python zip two lists
python zlib
python zeros
python zip lists
z python regex
z python datetime
z python strftime
python z score
python z test
python z transform
python z score to p value
python z table
python 0x
python 02d
python 0 index
python 0 is false
python 0.2f
python 02x
python 0 pad number
python 0b
0 python meaning
0 python array
0 python list
0 python string
0 python numpy
0 python matrix
0 python index
0 python float
python 101
python 1 line if
python 1d array
python 1 line for loop
python 101 pdf
python 1.0
python 10 to the power
python 101 youtube
1 python path osprey florida
1 python meaning
1 python regex
1 python not found
1 python slicing
1 python 1 cat
1 python list
1 python 3
python 2.7
python 2d array
python 2 vs 3
python 2.7 download
python 2d list
python 2.7 end of life
python 2to3
python 2 download
2 python meaning
2 pythons fighting
2 pythons collapse ceiling
2 python versions on windows
2 pythons fall through ceiling
2 python versions on mac
2 pythons australia
2 python list
python 3.8
python 3.7
python 3.6
python 3 download
python 3.9
python 3.7 download
python 3 math module
python 3 print
3 python libraries
3 python ide
python3 online
3 python functions
3 python matrix
3 python tkinter
3 python dictionary
3 python time
python 4.0
python 4 release date
python 4k
python 4 everyone
python 44 mag
python 4 loop
python 474p remote start instructions
python 460hp
4 python colt
4 python automl library
python 4 missile
python 4 download
python 4 roadmap
python 4 hours
python 5706p
python 5e
python 50 ft water changer
python 5105p
python 5305p
python 5000
python 5706p manual
python 5760p
5 python data types
5 python projects for beginners
5 python libraries
5 python projects
5 python ide with icons
5 python program with output
5 python programs
5 python keywords
python 64 bit
python 64 bit windows
python 64 bit download
python 64 bit vs 32 bit
python 64 bit integer
python 64 bit float
python 6 decimal places
python 660xp
6 python projects for beginners
6 python holster
6 python modules
6 python 357
python 6 missile
python 6 malware encryption
python 6 hours
python 7zip
python 7145p
python 7754p
python 7756p
python 7145p manual
python 7145p remote start
python 7756p manual
python 7154p programming
7 python tricks
python3 7 tensorflow
python 7 days ago
python 7 segment display
python 7-zip
python2 7
python3 7 ssl certificate_verify_failed
python3 7 install pip ubuntu
python 8 bit integer
python 881xp
python 8601
python 80 character limit
python 8 ball
python 871xp
python 837 parser
python 8.0.20
8 python iteration skills
8 python street dakabin
python3 8 tensorflow
python 8 puzzle
python 8 download
python 8 queens
python 95 confidence interval
python 95 percentile
python 990
python 991
python 99 bottles of beer
python 90th percentile
python 98-381
python 9mm
python 9//2
python 9 to 09
python 3 9
python 9 subplots
pythonrdd 9 at rdd at pythonrdd.scala
python 9 line neural network
python 2.9
killed 9 python
#pythonprogramming #pythoncode #pythonlearning #pythons #pythona #pythonadvanceprojects #pythonarms #pythonautomation #pythonanchietae #apython #apythonisforever #apythonpc #apythonskin #apythons #pythonbrasil #bpython #bpythons #bpython8 #bpythonshed #pythoncodesnippets #pythoncowboy #pythoncurtus #cpython #cpythonian #cpythons #cpython3 #pythondjango #pythondev #pythondevelopers #pythondatascience #pythone #pythonexhaust #pythoneğitimi #pythoneggs #pythonessgrp #epython #epythonguru #pythonflask #pythonfordatascience #pythonforbeginners #pythonforkids #pythonfloripa #fpython #fpythons #fpythondeveloper #pythongui #pythongreen #pythongame #pythongang #pythong #gpython #pythonhub #pythonhackers #pythonhacking #pythonhd #hpythonn #hpythonn✔️ #hpython #pythonista #pythoninterview #pythoninterviewquestion #pythoninternship #ipython #ipythonnotebook #ipython_notebook #ipythonblocks #ipythondeveloper #pythonjobs #pythonjokes #pythonjobsupport #pythonjackets #jpython #jpythonreptiles #pythonkivy #pythonkeeper #pythonkz #pythonkodlama #pythonkeywords #pythonlanguage #pythonlipkit #lpython #lpythonlaque #lpythonbags #lpythonbag #lpythonprint #pythonmemes #pythonmolurusbivittatus #pythonmorphs #mpython #mpythonprogramming #mpythonrefftw #mpythontotherescue #mpython09 #pythonnalchik #pythonnotlari #pythonnails #pythonnetworking #pythonnation #pythonopencv #pythonoop #pythononline #pythononlinecourse #pythonprogrammers #ppython #ppythonwallet #ppython😘😘 #ppython3 #pythonquiz #pythonquestions #pythonquizzes #pythonquestion #pythonquizapp #qpython3 #qpython #qpythonconsole #pythonregiusmorphs #rpython #rpythonstudio #rpythonsql #pythonshawl #spython #spythoniade #spythonred #spythonredbackpack #spythonblack #pythontutorial #pythontricks #pythontips #pythontraining #pythontattoo #tpythoncreationz #tpython #pythonukraine #pythonusa #pythonuser #pythonuz #pythonurbex #üpython #upython #upythontf #pythonvl #pythonvert #pythonvertarboricole #pythonvsjava #pythonvideo #vpython #vpythonart #vpythony #pythonworld #pythonwebdevelopment #pythonweb #pythonworkshop #pythonx #pythonxmen #pythonxlanayrct #pythonxmathindo #pythonxmath #xpython #xpython2 #xpythonx #xpythonwarriorx #xpythonshq #pythonyazılım #pythonyellow #pythonyacht #pythony #pythonyerevan #ypython #ypythonproject #pythonz #pythonzena #pythonzucht #pythonzen #pythonzbasketball #python0 #python001 #python079 #python0007 #python08 #python101 #python1 #python1k #python1krc #python129 #1python #python2 #python2020 #python2018 #python2019 #python27 #2python #2pythons #2pythonsescapedfromthezoo #2pythons1gardensnake #2pythons👀 #python357 #python357magnum #python38 #python36 #3pythons #3pythonsinatree #python4kdtiys #python4 #python4climate #python4you #python4life #4python #4pythons #python50 #python5 #python500 #python500contest #python5k #5pythons #5pythonsnow #5pythonprojects #python6 #python6s #python69 #python609 #python6ft #6python #6pythonmassage #python7 #python734 #python72 #python777 #python79 #python8 #python823 #python8s #python823it #python800cc #8python #python99 #python9 #python90 #python90s #python9798
1 note
·
View note
Text
Install Python And Pip Mac

This article will help you to set up a Python virtual environment on Mac OS or your Macbook. If you are a Mac user, you should know that Python 2.7.x comes pre-installed in your Macbook, but as that is required by your operating system, so you cannot modify it or update it and I would recommend that you don't use it at all.
Install Python And Pip Macro
Install Python Pip Mac
Install Python And Pip Machinery
Mac Pip Install Python 3

Instead, you should set up a virtual environment for your development purpose. You must be thinking about why we need a virtual environment? So here are a few points in its favor:
Download Tetris Games. Free and safe download. Download the latest version of the top software, games, programs and apps in 2021. Free tetris for mac.
Pip Installs Packages (pip) is the default package manager that’s used in Python. It allows users to easily install third-party packages that aren’t included in the standard Python library. Modern Mac systems come with Python and PIP already installed. However, this version of Python tends to be outdated and not the best choice for serious Python development. It's highly recommended that you install a more current version of Python and PIP.
When we have a virtual environment, then we can install new packages inside the virtual environment which will not affect the operating system's python modules.
We can have different versions of Python installed inside the virtual environment.
You can set up a different virtual environment for each project for example if you are working on one project based on Tkinter module, some other projects based on Numpy module, then you can easily do this.
So to set up a virtual environment, we won't be using virtualenv or virtualenvwrapper module, which are most popular to set up a virtual environment.
But we will be using the venv module which comes as a default with Python 3.x version and is recommended to use for virtual environment creation.

$ brew switch python 3.7 Error: python does not have a version '3.7' in the Cellar. Python's installed versions: 3.7.61 and restarted the computer, but without success. So how to install python 3.7 as the standard-python-installation on a mac? In either case, make sure that pip/pip3 is upgraded to the latest version: To get pip installed and updated in Python 2.7.18, use the following: python -m ensurepip -upgrade To upgrade the existing pip3 in the Python 3.8.4 or earlier Python3.x: pip3 install -U pip and for Pygments, you probably want the following (or pip3 if in Python 3.8.4).
Installing Python 3.8 on Mac OSX
We will use Homebrew to install Python 3.8 and will then move on to creating a virtual environment. If you don't have Homebrew installed on your Macbook, you can install Homebrew on your MacOSX and then use it to install Python 3.8 on your machine.
Once you have Homebrew set up, run the following command to install the latest version of Python:
Homebrew will also install pip for you which you can verify by running the pip3 command.
To verify the successful installation of Python 3.x version, run the python3 command and the IDLE should start in your terminal.
Use venv to create Virtual Environment
Start docker in ubuntu linux. As per the official documentation of venv module,
The venv module provides support for creating lightweight “virtual environments” with their own site directories, optionally isolated from system site directories. Each virtual environment has its own Python binary (which matches the version of the binary that was used to create this environment) and can have its own independent set of installed Python packages in its site directories.
We can run the following command to create a virtual environment:
This will create a virtual environment for you with the following files in the virtual environment directory my_env:
bin
include
lib
pip-selfcheck.json
pyvenv.cfg
To activate the virtual environment, run the following command:
This will start the virtual environment and you should see the name of the virtual environment added before the directory name as shown in the image below:

Now you can install anything in it, by running the pip3 install command, for example to install the requests module, run the following command:
Install Python And Pip Macro
To get out of the virtual environment, run the exit command.
Conclusion:
With this you have the complete virtual environment setup, now create any .py script and try running it in the virtual environment. Also, you can install as many modules as you want in the virtual environment.
Getting started with JupyterLab
The installation guide contains more detailed instructions
Install with conda
If you use conda, you can install it with:
Install with pip
If you use pip, you can install it with:
If installing using pip install --user, you must add the user-level bin directory to your PATH environment variable in order to launch jupyter lab. If you are using a Unix derivative (FreeBSD, GNU / Linux, OS X), you can achieve this by using export PATH='$HOME/.local/bin:$PATH' command.
Run JupyterLab
Once installed, launch JupyterLab with:
Getting started with the classic Jupyter Notebook
conda
We recommend installing the classic Jupyter Notebook using the conda package manager. Either the miniconda or the miniforge conda distributions include a minimal conda installation.
Then you can install the notebook with:
pip
If you use pip, you can install it with:
Congratulations, you have installed Jupyter Notebook! To run the notebook, run the following command at the Terminal (Mac/Linux) or Command Prompt (Windows):
See Running the Notebook for more details.
Getting started with Voilà
Install Python Pip Mac

Installation
Voilà can be installed using conda or pip. For more detailed instructions, consult the installation guide.
conda
Install Python And Pip Machinery
If you use conda, you can install it with:
Mac Pip Install Python 3
pip
If you use pip, you can install it with:
0 notes
Text
I made a program which gonna show four time zones......
pip install pytz
from datetime import datetime
import pytz
from tkinter import *
import time
root=Tk()
root.geometry("500x250")
def times():
home=pytz.timezone('Asia/Kolkata')
local_time=datetime.now(home)
current_time=local_time.strftime("%H:%M:%S")
clock.config(text=current_time)
name.config(text="India")
home=pytz.timezone('US/Eastern')
local_time = datetime.now(home)
current_time = local_time.strftime("%H:%M:%S")
clock1.config(text=current_time)
name1.config(text="Boston")
home=pytz.timezone('Europe/Moscow')
local_time = datetime.now(home)
current_time = local_time.strftime("%H:%M:%S")
clock2.config(text=current_time)
name2.config(text="Kazan")
home=pytz.timezone('Australia/Victoria')
local_time = datetime.now(home)
current_time = local_time.strftime("%H:%M:%S")
clock3.config(text=current_time)
name3.config(text="Australia")
clock.after(200, times)
name=Label(root,font=("time",20,"bold"))
name.place(x=30,y=5)
clock=Label(root,font=("times",25,"bold"))
clock.place(x=10,y=40)
nota=Label(root,text="Hours Minutes Seconds",font="times 10 bold")
nota.place(x=10,y=80)
name1=Label(root,font=("time",20,"bold"))
name1.place(x=330,y=5)
clock1=Label(root,font=("times",25,"bold"))
clock1.place(x=310,y=40)
nota1=Label(root,text="Hours Minutes Seconds",font="times 10 bold")
nota1.place(x=310,y=80)
name2=Label(root,font=("time",20,"bold"))
name2.place(x=30,y=105)
clock2=Label(root,font=("times",25,"bold"))
clock2.place(x=10,y=140)
nota2=Label(root,text="Hours Minutes Seconds",font="times 10 bold")
nota2.place(x=10,y=180)
name3=Label(root,font=("time",20,"bold"))
name3.place(x=330,y=105)
clock3=Label(root,font=("times",25,"bold"))
clock3.place(x=310,y=140)
nota3=Label(root,text="Hours Minutes Seconds",font="times 10 bold")
nota3.place(x=310,y=180)
times()
root.mainloop()
0 notes
Video
youtube
In this video, I demonstrate the process of downloading, installing, and verifying Python 3.7, pip, and tkinter on Microsoft Windows 10 Please like and share this video https://youtu.be/GwCZ2KElNdw by TubeMint
0 notes
Text
Pip Install Python 3.7 Mac

Pip Install Python 3.7 Mac Os
Pip Install Requests Python 3.7 Mac
FROM ubuntu:14.04 # Install dependencies RUN apt-get update && apt-get install -y php5-mcrypt python-pip However, according to this answer you should think about installing the python3-pip package instead of the python-pip package when using Python 3.x. Mac, issue 5 Fix sitedatadir on Mac. Mac Drop use of ‘Carbon’ module in favour of hardcoded paths; supports Python3 now. Windows Append “Cache” to usercachedir on Windows by default. Use opinion=False option to disable this. Add appdirs.AppDirs convenience class.
Author
Bob Savage <[email protected]>
Python on a Macintosh running Mac OS X is in principle very similar to Python onany other Unix platform, but there are a number of additional features such asthe IDE and the Package Manager that are worth pointing out.
4.1. Getting and Installing MacPython
Mac OS X 10.8 comes with Python 2.7 pre-installed by Apple. If you wish, youare invited to install the most recent version of Python 3 from the Pythonwebsite (https://www.python.org). A current “universal binary” build of Python,which runs natively on the Mac’s new Intel and legacy PPC CPU’s, is availablethere.
What you get after installing is a number of things:
A Python3.9 folder in your Applications folder. In hereyou find IDLE, the development environment that is a standard part of officialPython distributions; and PythonLauncher, which handles double-clicking Pythonscripts from the Finder.
A framework /Library/Frameworks/Python.framework, which includes thePython executable and libraries. The installer adds this location to your shellpath. To uninstall MacPython, you can simply remove these three things. Asymlink to the Python executable is placed in /usr/local/bin/.
The Apple-provided build of Python is installed in/System/Library/Frameworks/Python.framework and /usr/bin/python,respectively. You should never modify or delete these, as they areApple-controlled and are used by Apple- or third-party software. Remember thatif you choose to install a newer Python version from python.org, you will havetwo different but functional Python installations on your computer, so it willbe important that your paths and usages are consistent with what you want to do.
IDLE includes a help menu that allows you to access Python documentation. If youare completely new to Python you should start reading the tutorial introductionin that document.
If you are familiar with Python on other Unix platforms you should read thesection on running Python scripts from the Unix shell.
4.1.1. How to run a Python script
Your best way to get started with Python on Mac OS X is through the IDLEintegrated development environment, see section The IDE and use the Help menuwhen the IDE is running.
If you want to run Python scripts from the Terminal window command line or fromthe Finder you first need an editor to create your script. Mac OS X comes with anumber of standard Unix command line editors, vim andemacs among them. If you want a more Mac-like editor,BBEdit or TextWrangler from Bare Bones Software (seehttp://www.barebones.com/products/bbedit/index.html) are good choices, as isTextMate (see https://macromates.com/). Other editors includeGvim (http://macvim-dev.github.io/macvim/) and Aquamacs(http://aquamacs.org/).
To run your script from the Terminal window you must make sure that/usr/local/bin is in your shell search path.
To run your script from the Finder you have two options:
Drag it to PythonLauncher
Select PythonLauncher as the default application to open yourscript (or any .py script) through the finder Info window and double-click it.PythonLauncher has various preferences to control how your script islaunched. Option-dragging allows you to change these for one invocation, or useits Preferences menu to change things globally.
4.1.2. Running scripts with a GUI
With older versions of Python, there is one Mac OS X quirk that you need to beaware of: programs that talk to the Aqua window manager (in other words,anything that has a GUI) need to be run in a special way. Use pythonwinstead of python to start such scripts.
With Python 3.9, you can use either python or pythonw.
4.1.3. Configuration
Python on OS X honors all standard Unix environment variables such asPYTHONPATH, but setting these variables for programs started from theFinder is non-standard as the Finder does not read your .profile or.cshrc at startup. You need to create a file~/.MacOSX/environment.plist. See Apple’s Technical Document QA1067 fordetails.
For more information on installation Python packages in MacPython, see sectionInstalling Additional Python Packages.
4.2. The IDE
MacPython ships with the standard IDLE development environment. A goodintroduction to using IDLE can be found athttp://www.hashcollision.org/hkn/python/idle_intro/index.html.
4.3. Installing Additional Python Packages
Pip Install Python 3.7 Mac Os
There are several methods to install additional Python packages:
Packages can be installed via the standard Python distutils mode (pythonsetup.pyinstall).
Many packages can also be installed via the setuptools extensionor pip wrapper, see https://pip.pypa.io/.
4.4. GUI Programming on the Mac
There are several options for building GUI applications on the Mac with Python.
PyObjC is a Python binding to Apple’s Objective-C/Cocoa framework, which isthe foundation of most modern Mac development. Information on PyObjC isavailable from https://pypi.org/project/pyobjc/.
The standard Python GUI toolkit is tkinter, based on the cross-platformTk toolkit (https://www.tcl.tk). An Aqua-native version of Tk is bundled with OSX by Apple, and the latest version can be downloaded and installed fromhttps://www.activestate.com; it can also be built from source.
wxPython is another popular cross-platform GUI toolkit that runs natively onMac OS X. Packages and documentation are available from https://www.wxpython.org.
PyQt is another popular cross-platform GUI toolkit that runs natively on MacOS X. More information can be found athttps://riverbankcomputing.com/software/pyqt/intro.
4.5. Distributing Python Applications on the Mac
The standard tool for deploying standalone Python applications on the Mac ispy2app. More information on installing and using py2app can be foundat http://undefined.org/python/#py2app.
4.6. Other Resources
The MacPython mailing list is an excellent support resource for Python users anddevelopers on the Mac:
Pip Install Requests Python 3.7 Mac
Another useful resource is the MacPython wiki:
0 notes
Text
Django Download Mac


Django Download File From Server
Django Download Multiple Files
Django Download Zip File
Download Django For Windows 10
Python comes pre installed in Mac as it is a UNIX based system. So, you will not need to install it. However to install Django, below are the steps to be executed from the terminal. Check the “Add Python 3.8 to PATH” box before installing. Once Python is installed, restart Windows.
Python for Mac OS X

Python comes pre-installed on Mac OS X so it is easy to startusing. However, to take advantage of the latest versions ofPython, you will need to download and install newer versionsalongside the system ones. The easiest way to do that is toinstall one of the binary installers for OS X from thePython Download page. Installers areavailable for the latest Python 3 and Python 2 releases thatwill work on all Macs that run Mac OS X 10.5 and later.

Python releases include IDLE, Python's built-in interactivedevelopment environment. If you download and install Pythonfrom the release page, you may also need to download and installa newer version of Tcl/Tk for OS X. See theIDLE and Tkinter on OS X page formore information.
You can run a Python interpreter by double-clicking onApplications / Utilities / Terminal and typing python3 (if you'veinstalled a version of Python 3) or python (to use Python 2) inthe window that opens up. You can also launch IDLE for the Pythonversion you have installed by double-clicking its icon inthe appropriate Python version folder in the Applications folderor you can also just type idle3 or idle in a terminal window.
There are many thousands of additional Python software packagesavailable through PyPI, the PythonPackage Index. We recommend you use thepip tool to simplifyinstalling and managing additional packages. pip is includedwith Python 3.4 releases; for earlier releases, follow the pipinstall instructions.
Among the packages available through PyPI are some that arespecifically for OS X environments. Among these are:
pyobjc which providesa bridge between Python and Objective-C, allowing you to writefull-featured native Cocoa applications in pure Python.
py2app which allowsyou to make standalone OS X double-clickable application bundlesand plugins from Python scripts.
For more information about Python on OS X, see the mailing list and archivesfor thePython-Macintosh Special Interest Group.
Alternative Packages for Mac OS X.
ActiveState ActivePython(commercial and community versions, including scientific computing modules).
Enthought Python DistributionThe Enthought Python Distribution provides scientists with a comprehensive setof tools to perform rigorous data analysis and visualization.
Python and a comprehensive set of third-party packages and libraries are alsoavailable from several open source package manager projects for OS X,including:
This chapter covers how to properly configure your computer to work on Django projects. We start with an overview of the command line and how to install the latest version of Django and Python. Then we discuss virtual environments, git, and working with a text editor. By the end of this chapter you’ll be ready to create and modify new Django projects in just a few keystrokes.
The Command Line
The command line is a powerful, text-only view of your computer. As developers we will use it extensively throughout this book to install and configure each Django project.
On a Mac, the command line is found in a program called Terminal. To find it, open a new Finder window, open the Applications directory, scroll down to open the Utilities directory, and double-click the application called Terminal.
On Windows machines there are actually two built-in command shells: the Command shell and PowerShell. You should use PowerShell, which is the more powerful of the two.
Going forward when the book refers to the “command line” it means to open a new console on your computer, using either Terminal or PowerShell.
While there are many possible commands we can use, in practice there are six used most frequently in Django development:
cd (change down a directory)
cd . (change up a directory)
ls (list files in your current directory on Mac)
dir (list files in your current directory on Windows)
pwd (print working directory)
mkdir (make directory)
touch (create a new file on Mac)
Open your command line and try them out. The dollar sign ($) is our command line prompt: all commands in this book are intended to be typed after the $ prompt.
For example, assuming you’re on a Mac, let’s change into our Desktop directory.
Note that our current location, ~/Desktop, is automatically added before our command line prompt. To confirm we’re in the proper location we can use pwd which will print out the path of our current directory.
On my Mac computer this shows that I’m using the user wsv and on the desktop for that account.
Now let’s create a new directory with mkdir, cd into it, and add a new file index.html with the touch command. Note that Windows machines unfortunately do not support a native touch command. In future chapters when instructed to create a new file, do so within your text editor of choice.
Now use ls to list all current files in our directory. You’ll see there’s just the newly created index.html.
As a final step, return to the Desktop directory with cd . and use pwd to confirm the location.
Advanced developers can use their keyboard and command line to navigate through their computer with ease. With practice this approach is much faster than using a mouse.
In this book I’ll give you the exact instructions to run–you don’t need to be an expert on the command line–but over time it’s a good skill for any professional software developer to develop. A good free resource for further study is the Command Line Crash Course.
Install Python 3
It takes some configuration to properly install Python 3 on a Mac, Windows, Linux, or Chromebook computer and there are multiple approaches. Many developers–especially beginners–follow the advice on the official Python website to download distinct versions of Python directly onto their computer and then adjust the PATH variable accordingly.
The problem with this approach is that updating the PATH variable correctly is tricky, by downloading Python directly updates are harder to maintain, and there are now much easier ways to install and start using Python quickly.
I host a dedicated website, InstallPython3.com, with up-to-date guides for installing Python 3 on Mac, Windows, or Linux computers. Please refer there to install Python correctly on your local machine.
Virtual Environments
Virtual environments are an indispensable part of Python programming. They are an isolated container containing all the software dependencies for a given project. This is important because by default software like Python and Django is installed in the same directory. This causes a problem when you want to work on multiple projects on the same computer. What if ProjectA uses Django 3.1 but ProjectB from last year is still on Django 2.2? Without virtual environments this becomes very difficult; with virtual environments it’s no problem at all.
There are many areas of software development that are hotly debated, but using virtual environments for Python development is not one. You should use a dedicated virtual environment for each new Python project.
In this book we will use Pipenv to manage virtual environments. Pipenv is similar to npm and yarn from the JavaScript/Node ecosystem: it creates a Pipfile containing software dependencies and a Pipfile.lock for ensuring deterministic builds. “Determinism” means that each and every time you download the software in a new virtual environment, you will have exactly the same configuration.
Sebastian McKenzie, the creator of Yarn which first introduced this concept to JavaScript packaging, has a concise blog post explaining what determinism is and why it matters. The end result is that we will create a new virtual environment with Pipenv for each new Django Project.
To install Pipenv we can use pip3 which Homebrew automatically installed for us alongside Python 3.
Install Django
To see Pipenv in action, let’s create a new directory and install Django. First navigate to the Desktop, create a new directory django, and enter it with cd.
Now use Pipenv to install Django. Note the use of ~= which will ensure security updates for Django, such as 3.1.1, 3.1.2, and so on.
If you look within our directory there are now two new files: Pipfile and Pipfile.lock. We have the information we need for a new virtual environment but we have not activated it yet. Let’s do that with pipenv shell.
If you are on a Mac you should now see parentheses around the name of your current directory on your command line which indicates the virtual environment is activated. Since we’re in a django directory that means we should see (django) at the beginning of the command line prompt. Windows users will not see the shell prompt. If you can run django-admin startproject in the next section then you know your virtual environment has Django installed properly.
This means it’s working! Create a new Django project called config with the following command. Don’t forget that period . at the end.
It’s worth pausing here to explain why you should add a period (.) to the command. If you just run django-admin startproject config then by default Django will create this directory structure:
See how it creates a new directory config and then within it a manage.py file and a config directory? That feels redundant to me since we already created and navigated into a django directory on our Desktop. By running django-admin startproject config . with the period at the end–which says, install in the current directory–the result is instead this:
The takeaway is that it doesn’t really matter if you include the period or not at the end of the command, but I prefer to include the period and so that’s how we’ll do it in this book.
As you progress in your journey learning Django, you’ll start to bump up more and more into similar situations where there are different opinions within the Django community on the correct best practice. Django is eminently customizable, which is a great strength, however the tradeoff is that this flexibility comes at the cost of seeming complexity. Generally speaking it’s a good idea to research any such issues that arise, make a decision, and then stick with it!
Now let’s confirm everything is working by running Django’s local web server.
Don’t worry about the text in red about “18 unapplied migrations.” We’ll get to that shortly but the important part, for now, is to visit http://127.0.0.1:8000/ and make sure the following image is visible:
Django Download File From Server
To stop our local server type Control+c. Then exit our virtual environment using the command exit.
We can always reactivate the virtual environment again using pipenv shell at any time.
We’ll get lots of practice with virtual environments in this book so don’t worry if it’s a little confusing right now. The basic pattern is to install new packages with pipenv, activate them with pipenv shell, and then exit when done.
It’s worth noting that only one virtual environment can be active in a command line tab at a time. In future chapters we will be creating a brand new virtual environment for each new project so either make sure to exit your current environment or open up a new tab for new projects.
Install Git
Git is an indispensable part of modern software development. It is a version control system which can be thought of as an extremely powerful version of track changes in Microsoft Word or Google Docs. With git, you can collaborate with other developers, track all your work via commits, and revert to any previous version of your code even if you accidentally delete something important!
On a Mac, because HomeBrew is already installed we can simply type brew install git on the command line:
Avira free download mac. On Windows you should download Git from Git for Windows. Click the “Download” button and follow the prompts for installation.
Once installed, we need to do a one-time system set up to configure it by declaring the name and email address you want associated with all your Git commits. Within the command line console type the following two lines. Make sure to update them your name and email address.
You can always change these configs later if you desire by retyping the same commands with a new name or email address.
Text Editors
The final step is our text editor. While the command line is where we execute commands for our programs, a text editor is where the actual code is written. The computer doesn’t care what text editor you use–the end result is just code–but a good text editor can provide helpful hints and catch typos for you.
Experienced developers often prefer using either Vim or Emacs, both decades-old, text-only editors with loyal followings. However each has a steep learning curve and requires memorizing many different keystroke combinations. I don’t recommend them for newcomers.
Modern text editors combine the same powerful features with an appealing visual interface. My current favorite is Visual Studio Code which is free, easy to install, and enjoys widespread popularity. If you’re not already using a text editor, download and install Visual Studio Code now.
Django Download Multiple Files
Conclusion
Django Download Zip File
Phew! Nobody really likes configuring a local development environment but fortunately it’s a one-time pain. We have now learned how to work with virtual environments and installed the latest version of Python and git. Everything is ready for our first Django app.
Download Django For Windows 10
Continue on to Chapter 2: Hello World app.
0 notes
Link
How to create Pie Chart in Python with Tkinter GUI? For beginners - Part 2 No Matplotlib. Easiest way to create cross platform Pie Chart application in python without any pip install This video will show you how to create Pie Chart using python's built in GUI framework Tkinter, no plugins.
Please subscribe for more tutorials.
Blog: Source code is in this link:
http://aarlangdi.blogspot.com/2020/06/how-to-create-pie-chart-in-python-with.html
Github: https://github.com/Aarlangdi
Twitter: https://twitter.com/katusProduction
Instagram: https://www.instagram.com/katusproduction/
0 notes
Text
Python Tutorial for Beginners | How to Quickly Learn Python?

What is Python?
The Python programming language is an object-oriented language, which means that it can model real-world entities. It is also dynamically-typed because it carries out type-checking at runtime. It does so to make sure that the type of a construct matches what we expect it to be. The distinctive feature about Python is that it is an interpreted language. The Python IDLE (Integrated Development Environment) executes instructions one line at a time. This also lets us use it as a calculator.
i. Why is it called Python?
Going into etymology, Guido van Rossum named it after the comedy group Monty Python. That is why the metasyntactic variables (those we will often use to explain code syntax) used here are ‘spam’ and ‘eggs’ instead of ‘foo’ and ‘bar’. A lot of implementations today run version 2.x, but the future belongs to Python 3.x. It is also called ‘Python 3000’ or ‘Py3K’. CPython, written in C, is the most common implementation of Python.
ii. What makes Python so powerful?
Apart from the constructs that Python provides, you can use the PyPI (Python Package Index). It is a repository of third-party Python modules and you can install it using a program called pip. Run the following command in Command Prompt:
pip install library_name
Python or R: To learn the difference between Python and R, please follow Python vs R. For now let us move ahead with the current Python tutorial.
How was Python Born?
The Python programming language was conceived in the late 1980s and was named after the BBC TV show Monty Python’s Flying Circus. Guido van Rossum started implementing Python at CWI in the Netherlands in December of 1989. This was a successor to the ABC programming language which was capable ofexception handling and interfacing with the Amoeba operating system.
On October 16 of 2000, Python 2.0 released and it had many major new features including cycle-detecting garbage collector for memory management and support for Unicode.
The next version of Python 3.0 released on December 3, 2008.
Now we know how Python came into the picture. So, moving ahead in this Python tutorial, let us jump to Python Architecture.
Python Architecture
Let’s now talk about Python architecture and its usual flow –
i. Parser
It uses the source code to generate an abstract syntax tree.
ii. Compiler
It turns the abstract syntax tree into Python bytecode.
iii. Interpreter
It executes the code line by line in a REPL (Read-Evaluate-Print-Loop) fashion. On Windows, when you want to run the Python interpreter in the shell, you can type the following:
$python
Next in Python tutorial, we discuss some useful Python Constructs to give you a better idea of the structure of Python code.
Python Constructs

Python Tutorial – Python Constructs
i. Functions
A function in Python is a collection of statements grouped under a name. You can use it whenever you want to execute all those statements at a time. You can call it wherever you want and as many times as you want in a program. A function may return a value.
ii. Classes
As we discussed earlier, Python is an object-oriented language. It supports classes and objects. A class is an abstract data type. In other words, it is a blueprint for an object of a certain kind. It holds no values. An object is a real-world entity and an instance of a class.
iii. Modules
A Python module is a collection of related classes and functions. We have modules for mathematical calculations, string manipulations, web programming, and many more. We will discuss Python Module in detail in a later lesson.
iv. Packages
Python package is a collection of related modules. You can either import a package or create your own.
v. List
You can think of a list as a collection of values. Declared in the CSV (Comma-Separated Values) format and delimit using square brackets:
life = [‘love’, ‘wisdom’, ‘anxiety’];
arity = [1,2,3];
Notice that we do not declare the type for the list either. A list may also contain elements of different types, and the indexing begins at 0:
person = [‘firstname’, 21];
print(person[1])
Output: 21
You can also slice lists; slicing is a way of retrieving some values from it. We will learn more about it in further lessons.
vi. Tuple
A tuple is like a list, but it is immutable (you cannot change its values).
pizza = (‘base’, ‘sauce’, ‘cheese’, ‘mushroom’);
pizza[3] = ‘jalapeno’
This raises a TypeError.
vii. Dictionary
A dictionary is a collection of key-value pairs. Declare it using curly braces, and commas to separate key-value pairs. Also, separate values from keys using a colon (:).
student = {‘Name’: ‘Abc’, ‘Age’: 21}
print(student[‘Age’])
Output: 21
viii. Comments and Docstrings
Declare comments using an octothorpe (#). However, Python does not support multiline comments. Also, docstrings are documentation strings that help explain the code.
#This is a comment
“““
This is a docstring
”””
Python has a lot of other constructs. These include control structures, functions, exceptions, etc. We will discuss these in further tutorials.
Now let us learn about the features of Python. Based on these features, you will be able to choose a programming language for your next project.
Features of Python
The Python programming language is one of the richest languages. In this Python tutorial, we will discuss several features of Python:

Python Tutorial – Features of Python Programming Language
i. Easy
Python is very easy to learn and understand; using this Python tutorial, any beginner can understand the basics of Python.
ii. Interpreted
It is interpreted(executed) line by line. This makes it easy to test and debug.
iii. Object-Oriented
The Python programming language supports classes and objects. We discussed these above.
iv. Free and Open Source
The language and its source code are available to the public for free; there is no need to buy a costly license.
v. Portable
Since it is open-source, you can run Python on Windows, Mac, Linux or any other platform. Your programs will work without needing to the changed for every machine.
vi. GUI Programming
You can use it to develop a GUI (Graphical User Interface). One way to do this is through Tkinter.
vii. Large Library
Python provides you with a large standard library. You can use it to implement a variety of functions without needing to reinvent the wheel every time. Just pick the code you need and continue. This lets you focus on other important tasks.
Now, let us see the frameworks available in Python.
Python Frameworks
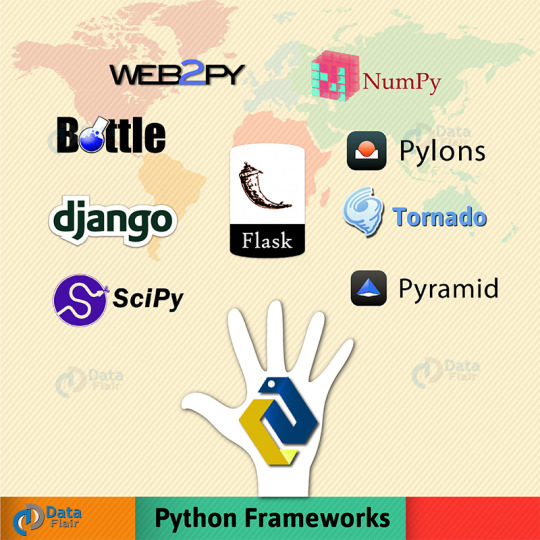
Python tutorial – Frameworks in Python Programming Langauge
i. Django
Python Django is a free and open-source framework written in Python and is the most common framework for Python. It allows you to create database-driven websites. It follows the DRY Principle (Don’t Repeat Yourself). This is a design philosophy that keeps code simple and eloquent.
Popular websites like Instagram, Mozilla, and Disqus make use of it.
ii. Flask
Like Django, Flask is a web framework written in Python itself. It is a micro framework because it does not need certain libraries and tools. It also does not have form validation or a database abstraction layer. However, you can make use of extensions to add extra features.
iii. Pyramid
Pyramid is another web framework. It is neither a mega-framework that would make decisions for you nor a micro-framework that wouldn’t force decisions. It gives you optimal liberty of your project.
iv. Tornado
Another open-source web framework, Tornado is written in Python Language. It is noted for its excellent performance and scalability.
v. Bottle
Like Flask, it is a micro-framework for Python. It is used for web development. Bottle is known for its speed, simplicity, and lightweight. A single file can run both Python 2.5+ and 3.x.
vi. web2py
Written in Python, web2py is another open source web framework. It emphasizes on rapid development and follows an MVC architecture. MVC stands for Model View Controller.
vii. NumPy
NumPy is an open-source framework for Python. We use it for scientific computing. It supports large multidimensional arrays and matrices, and functions to operate on them.
viii. SciPy
SciPy is a Python library that you can use for scientific computing. It has modules for linear algebra, interpolation, fast Fourier transform(FFT), image processing, and many more. It uses multidimensional arrays from the NumPy module.
ix. Pylons
This is a deprecated framework, which means it is no longer recommended. It is a web framework and is open source as well. It makes extensive use of third-party tools.
Flavors of Python
Now, let’s take a look at major Python implementations –
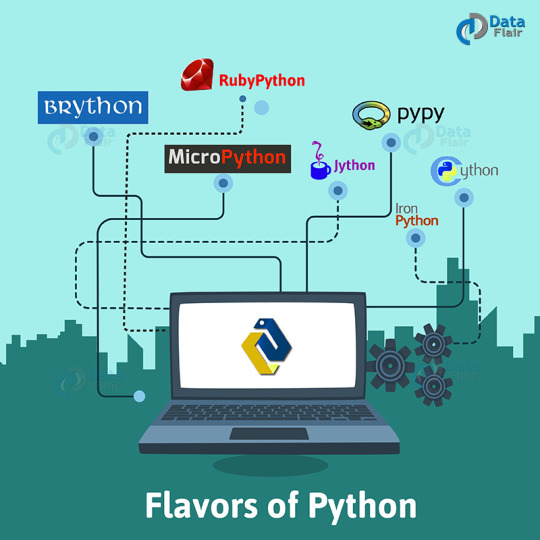
Python Tutorial – Flavors of Python Programming Langauge
i. CPython
This is the most widely accepted implementation of Python. It is written in the language C, and is an interpreter.
ii. Jython
Jython is a Python implementation written in Java. A Jython program can import any Java class. It compiles to Java bytecode.
iii. IronPython
IronPython is implemented in C#. It can function as an extensibility layer to application frameworks written in a .NET language.
iv. Brython
Brython stands for Browser Python. It is an implementation of Python that runs in the browser.
v. RubyPython
It acts as a bridge between the Python and Ruby interpreters. It marshals data between Python and Ruby virtual machines.
vi. PyPy
Interesting to know how PyPy is Python implemented in Python. This makes it faster and easier to experiment with. However, the standard implementation is CPython.
vii. MicroPython
This is an implementation of Python meant to run on a microcontroller. It uses a MicroPython board that runs MicroPython on bare metal.
Let’s move ahead in this Python tutorial and learn file extensions of Python.
File Extensions in Python
.py –The normal extension for a Python source file
.pyc- The compiled bytecode
.pyd- A Windows DLL file
.pyo- A file created with optimizations
.pyw- A Python script for Windows
.pyz- A Python script archive
Python Applications
Python is easy to pick-up even if you come from a non-programming background. You can look at the code and tell what’s going on. Talking of Python applications, some of the cool things that you can do with Python are –
Build a website
Develop a game
Perform Computer Vision (Facilities like face-detection and color-detection)
Implement Machine Learning (Give a computer the ability to learn)
Enable Robotics
Perform Web Scraping (Harvest data from websites)
Perform Data Analysis
Automate a web browser
Perform Scripting
Perform Scientific Computing
Build Artificial Intelligence
Python isn’t limited to these applications. If you’ve ever used services from brands like YouTube, Dropbox, and Netflix, then you’ve been a consumer of Python. The search-engine Google also made great use of the language in its initial stages.
When writing code in Python, you need fewer lines of code compared to languages like Java. This high-level language is also open-source and free. Going by the TIOBE Index, it is among the major programming languages with the fastest growth. This makes a career in Python a great choice.
To make it clearer about Python, we have covered how it is different from other programming languages like Java or C++.
Python vs Java vs C++
Python uses whitespace indentation to delimit code, you don’t need to use curly braces for that. Also, semicolons are optional. It has two correct syntaxes :
a = 7
print(a)
a = 7;
print(a)
While Java and C++ are statically-typed, Python is dynamically-typed. You also don’t need to declare the type of a variable; you assign it:
life=42
Java is faster by a few seconds, but the difference does not invalidate Python’s advantages over it. Since you can interpret Python, the code is easier to test and debug.
So, this was all about Python. Hope you liked our explanation.
Summary: Python Tutorial
Let’s conclude this Python Tutorial with a quick revision. Today, we discussed Python and how it came to be. We also took a brief look at its architecture and various constructs. Moreover, we learned about Python frameworks, and its flavors and file extensions. We then discussed a few Python applications and enquired about how it is different from Java. Well, Python is a beautiful language and we wish to empower you to create.
Python certainly is here for the long run. Are you?
Furthermore, if you have any query, feel free to ask in the comment section.
0 notes
Text
Sigil una excelente aplicación para crear y editar libros electrónicos Epub en Linux
Hoy en dia el uso de los libros en formato electrónico se ha vuelto bastante popular y es que, por el simple hecho de tener tus títulos preferidos en tu ordenador, smartphone, Tablet o cualquier medio electrónico que te permita leerlos, es sumamente cómodo.
Si lo ves desde el punto de vista practico evitaras tener que destinar espacio o un peso adicional a tu maleta o incluso en tu recamara. Lo que vuelve a este tipo de cosas baste atractivo y popular.
googletag.cmd.push(function() { googletag.display('div-gpt-ad-1456225598129-3'); });
Generalmente lo libros suelen encontrados en el popular formato PDF, aunque también la gran mayoría de estos se pueden encontrar en el formato EPUB, el cual podemos abrir en nuestro sistema con la siguiente aplicación de la que hablaremos.
Sigil es una aplicación la cual nos va a permitir poder abrir, editar e incluso crear archivos de formato EPUB.
Sigil es una aplicación gratuita y de código abierto publicada bajo licencia GNU GPL v3, tiene un enfoque WYSIWYG para este proceso.
googletag.cmd.push(function() { googletag.display('div-gpt-ad-1495016988643-3'); });
Sobre Sigil
Sus desarrolladores incluyen un completo manual de usuario en el formato de archivo Epub que sirve como un excelente ejemplo práctico de cómo utilizar el editor de libros electrónicos.
Con la función de edición WYSIWYG, se puede crear o editar el texto de la misma forma que lo haría trabajar en un procesador de texto editor de gama alta.
Sigil incorpora los códigos de formato requerido, pero los oculta mientras se trabaja. A modo de edición de código directa está disponible para los usuarios avanzados.
Sigil puede no ser la mejor opción para crear un libro electrónico desde cero. No digo que como una crítica. Se puede utilizar para empezar a escribir un libro electrónico. Sin embargo, no es el propósito de sigilo.
Esta aplicación es principalmente un programa de edición de contenidos ya que está escrito en un procesador de textos.
Idealmente, se crea el contenido primero y luego exportar a formato HTML, que es la base del formato de archivo EPUB.
Dicho esto, Sigil sirve para crear desde cero pequeños libros electrónicos para algunos proyectos, en lugar de mantenerlos en formatos .doc o .PDF.
Dependiendo del dispositivo el método de visualización o e-book se podrán apreciar los resultados de la creación de Sigil los cuales son aceptables si tomo el tiempo para ver cómo el archivo se muestra en varios dispositivos y realizar ajustes.
Como una herramienta de edición de libros electrónicos, Sigil realmente sobresale, pues podemos destacar que cuenta con un corrector de errores incorporado.
En el menú Herramientas de Sigil, se puede seleccionar la opción para validar el formato EPUB. También se nos proporciona una lista de errores para corregir ya que en el menú “Herramientas “también tiene una opción para validar las hojas de estilo.
¿Cómo instalar Sigil en Linux?
Si quieren instalar esta aplicación en sus sistemas, deben de seguir las instrucciones que compartimos acorde a la distribución de Linux que estén utilizando.
Para el caso de los que son usuarios de Ubuntu, Linux Mint o cualquier distribución derivada de estas deben de teclear lo siguiente en una terminal:
sudo apt install git python3-tk python3-pyqt5 python3-html5lib python3-regex python3-pillow python3-cssselect python3-cssutils python3-chardet python3-dev python3-pip python3-lxml python3-six build-essential libhunspell-dev libpcre3-dev libminizip-dev git cmake qtbase5-dev qttools5-dev qttools5-dev-tools libqt5webkit5-dev libqt5svg5-dev libqt5xmlpatterns5-dev
Ahora añadimos el siguiente repositorio al sistema:
sudo add-apt-repository ppa:ubuntuhandbook1/sigil
Actualizamos los paquetes:
sudo apt-get update
E instalamos con:
sudo apt-get install sigil
Mientras que para los que son usuarios de Arch Linux, Manjaro, Antergos o cualquier distribución derivada de estas pueden instalar la aplicación desde los repositorios oficiales con el siguiente comando:
sudo pacman -S sigil
Para los que sean usuarios de Fedora, deben de teclear en la terminal:
sudo dnf install git python3-tkinter cmake qt5-qtbase-devel qt5-qtwebkit-devel qt5-qtsvg-devel qt5-qttools-devel qt5-qtxmlpatterns-devel zlib-devel hunspell-devel pcre-devel minizip-devel pkgconfig python3-devel desktop-file-utils libappstream-glib python3-pillow python3-cssselect python3-cssutils python3-html5lib python3-lxml python3-qt5 python3-regex python3-chardet python3-six hicolor-icon-theme sudo dnf install sigil
Finalmente, para los que sean usuarios de openSUSE instalan con:
sudo zypper install git boost-devel pkgconfig cmake dos2unix fdupes make hunspell-devel libqt5-qtbase-devel gcc-c++ libqt5-qtlocation-devel libstdc++-devel libxerces-c-devel libxml2-devel libxslt-devel make pcre-devel python3-devel unzip python3-html5lib python3-lxml python3-six python3-tk python3-Pillow python3-cssselect python3-cssutils sudo zypper install sigil
El artículo Sigil una excelente aplicación para crear y editar libros electrónicos Epub en Linux ha sido originalmente publicado en Linux Adictos.
Fuente: Linux Adictos https://www.linuxadictos.com/sigil-una-excelente-aplicacion-para-crear-y-editar-libros-electronicos-epub-en-linux.html
0 notes
Last Seen Blogs

gexjeanette-blog
Gex

n7u3c
N7U3C

heavenbelongstoyou
Untitled

mantraarogya
Untitled

maunhell-blog
maunhell