#physicalprototype
Explore tagged Tumblr posts
Text
Platformer Development - Physical Prototype

A physical prototype was created before developing a digital prototype. This was because creating a physical prototype is a critical step in the design of a videogame concept. Creating a physical prototype is extremely beneficial because it can reduce the time spent interpreting as it is more simple to understand. it also enables the creator to focus on game mechanics without the distraction of the programming process and also gives the user the freedom to experiment and further improve on the game.
The physical prototype consisted on a rough drawing and the character on a pencil. This was to emulate how the level were to look like thus giving a general idea of how the game would be played to game testers. This led most of the focus on the game mechanics without having to deal with the distractions that would occur if the game were programmed. The physical prototype included separate segments of the score, the time accumulated and the lives left that the character has. This was done so that the tester can visualize how the game would look like in its final form.
0 notes
Text
Week 9 (15 - 19.03)
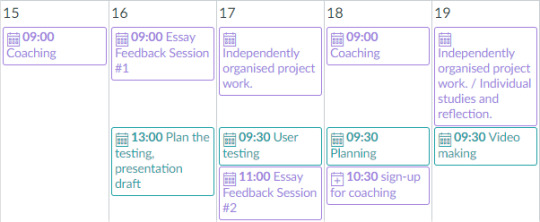
This week we finish our work on this project. We got some good feedback on Monday coaching session. We also obtained answers to the questions that were bothering us and we are getting back to work. We planned our week in detail, hoping for the best outcome.

Wednesday, 17.03
Oh, what a day! We met at the uni with a few other groups to cross-test our prototypes and concepts. This was so much fun. This time, we prepared very well for the user testing and we got very decent and detailed results. It turned out, that testers are very hesitant when it comes to the meaning of our plant’s movements - whether it needs water or not. When the plant was launching the alert mode, meaning starting interaction with shaking to show that it urgently needs watering, testers tended to more hear the shaking plant than see it, so this is definitely the thing that requires more research. Last but not least, the short movement while watering, seemed as a clear indication to stop watering and all the testers agreed on this one.

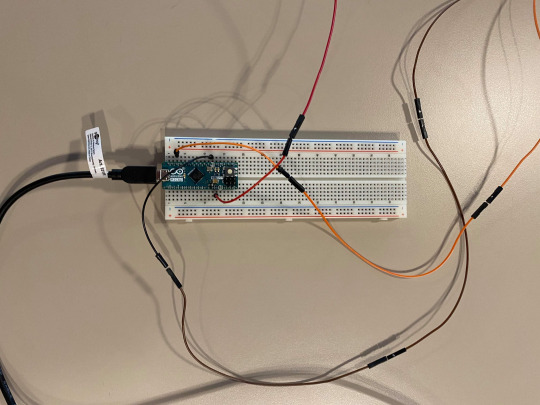
This time, we chose a nicer pot to care about our testers’ experience and we arranged the circumstances properly. I was launching proper plant’s movements on my computer, using the interface with buttons, that Sanna created just for user testing. As previously, we connected everything using Johnny Five and Arduino.


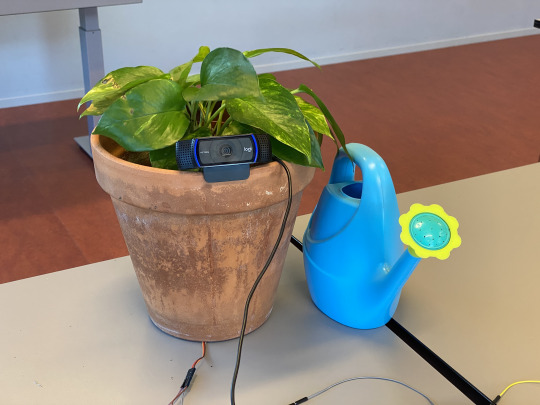
Just for fun, we also managed to use our handtrack.js API exactly as the last time, except this time, we connected a portable computer camera and placed it on the rim of the pot. This solution allowed to track hand movements of anyone who comes up to the plant and also created a nicer and more efficient experience prototyping possibilities.

Friday, 19.03
Today we were recording videos for our final presentation. Our inspiration was the video prototype we did before, except we instead of fishing lines, we used our Arduino/Johnny Five prototype and decided to divide our concept and create a single video for each aspect of it:
Person starting an interaction
To check on how the plant is doing, the person starts the interaction by waving their hand.
Plant replying
As a feedback, a plant shows its state regarding its water needs, using two different optional movements.
Feedback when watering
While a user is watering a plant, it will make a short shaking motion to show that it has gotten enough water.
Plant starting an interaction
The plant starts an interaction by moving itself to alert a user that it urgently needs water.

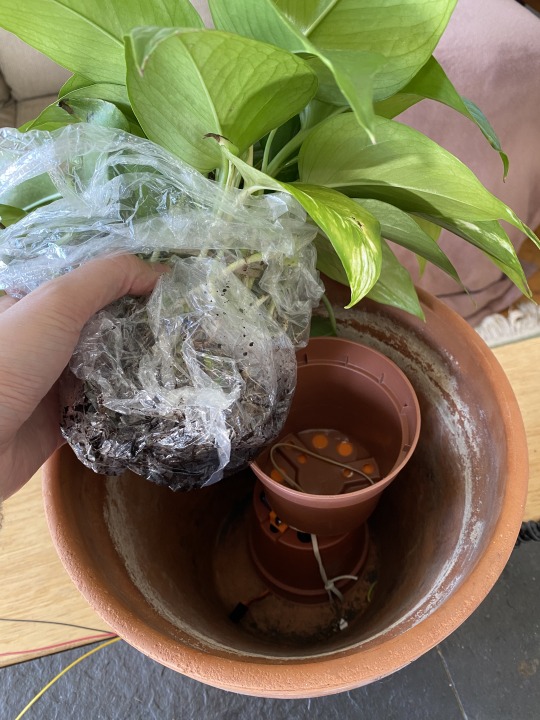


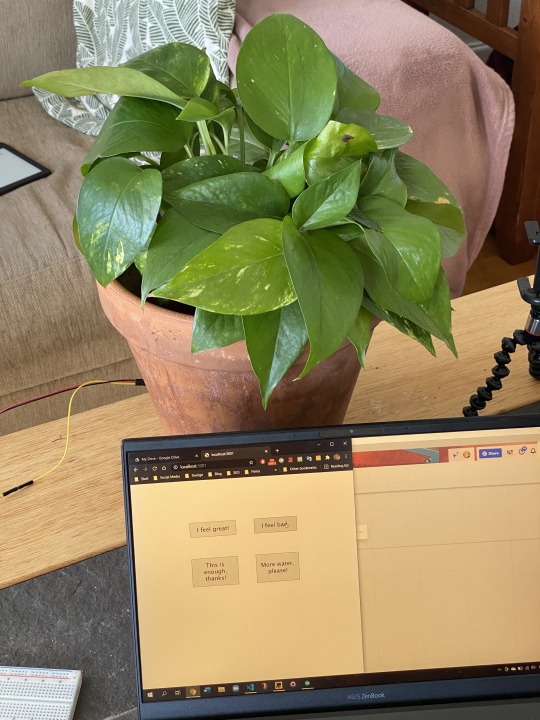
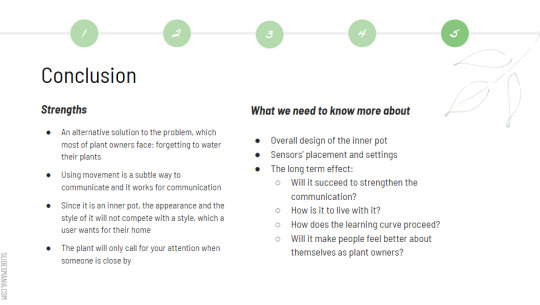
While me and Patrycja were recording videos, Sanna and Carlo were working on our final presentation. We also had coaching with Johannes and we got some good feedback. We know that we are on the right tracks and we keep it simple: we show how it works, what was the process, what insights we got and what we need to know more about.
Link to final presentation videos.
0 notes
Text
2nd workshop (Monday)
On Monday’s workshop we had a couple of hours time to finish up our projects. I have been working on our Arduino code throughout the weekend, to fix the loop and add the spacebar. Apparently the reference to spacebar was missing in the keyboard library documentation, but I did some research on the community forums and found the right substitute. However, we needed some help from David to fix the code, as I didn’t realise that every if-condition needed to be separated in curly brackets, that’s why my loop was failing, but I am happy I put several hours into coding on the weekend as I found different solutions and could easier understand David’s explanations as well, so yay to that. This is how our final project looked like:


The weight of the ball (clayball wrapped in copper tape) resonated with the metaphor of throwing it, but only later I realised we could have built a tube with the insides of it covered in copper, so that one could put the ball in the tube thus closing the circuit and bringing the prototype closer to the pinball metaphor.
Also, I was absolutely amazed and inspired by all the other prototypes that other groups have created: they we’re all so different, creative and unique:


Looking forward to another prototyping marathon on Wednesday!
0 notes
Text
REFLECTIVE JOURNAL
today Friday the 25th of January 2019 we were taught on digital prototyping which was quite fun and educating, i learnt to make use of some component of the adrino kit and make an interaction which meant for us to use the component of the kit to build something like a keyboard and this was a positive experience to learn about because i didn’t know that several interactions could be made from an arduino board and components and learning about it was a great start for the cause because it opened my eyes to making prototypes and gave me a whole new perspective of physical prototyping. i also worked with students from a different course in order to build objects that could be used for a game in which several could play at the same time along side keyboards created with adrino.
0 notes
Text
Week 8 (8 - 12.03)
I really liked the coaching this week. We had some time alone wit our teachers and could focus 100% on our project and their feedback. It seems like we have everything sorted out and we are definitely on the right tracks with our project.
Next step is to find a way to connect handtrack.js, Johnny Five and Arduino. Sanna is figuring it out as one of her API examples, since she is the best at programming. She also wrote down some scenarios, situations and questions for our user testing session, which me, Carlo and Patrycja, will be conducting on Wednesday.

Wednesday, 10.03
Today in the school workshop, we managed to successfully launch our prototype, using the handtrack.js API. We connected it through Johnny Five and Arduino, so if you wave at the laptop and camera detects your hand, the plant would start moving. We had three optional movements and if we wanted to use of those, we had to comment our the other two in the code. We were very proud of ourselves, however, the API didn’t work as well as we expected it to. It couldn’t detect hands effectively and sometimes it detected hands in other objects, so it launched movements randomly. We asked three people to try out our prototype and asked them about their feelings and experience, but we felt like it was not going in the right direction. We figured out that we have a lot to think through before the final user testing and also, we started wondering if we really should use the API to conduct the tests.
Video from user testing


API examples
This week, I also finished with my API examples. My first example, which I extended to prototype, is based on Victor Dibia's code: https://codepen.io/victordibia/pen/RdWbEY. I misunderstood the assignments directives and didn't copy it before extending it to the Prototype, so I added the Prototype folder afterwards and made some slight changes. I added a video of a shaking plant and made it play when a hand is detected by the API.
I had a lot of doubts about it. I didn’t know if the thing I would do, could even be called a prototype. But after reading “The anatomy of prototypes” by Lim, Stolterman and Teneberg, I learned a lot about what we can actually call a prototype and that prototypes differ when it comes to material, resolution and scope. And since I am not aiming to actually test anything with it, I can definitely call it a prototype and... it is my call ;)

My second example detects the hand position and logs it in the right column. I made some changes to the original code: https://codepen.io/md-azeem/pen/xxEZbrz.

I had fun with the API assignment and I didn’t find it very hard. We had time and strength to focus on our project too and I have an impression that other groups kind of ditched the main project for the sake of API Lab.
Link to our GitHub
The rest of the week went quick and it was all about our API presentation. During coaching, we showed Peter what we had and he was very excited about the hand tracking we used and the physical prototype we have built. We know that we are on the right track with the API assignment, but still, we doubt we are going to use it in our final prototype and user testing.
API Presentation


0 notes
Text
1st workshop with David (Friday)
The first workshop in physical prototyping focused on some interesting design examples using data and processing to create interactive art as well as David showed the possibilities that Arduino boards open for easily creating different kinds of interactive devices. I will come back to his slides later as I got inspired by several of the projects. We got our Arduino Micro set up and tested a few short codes with LED lamps and a button.

Later we were working in groups with product design students to create our own keyboards that are programmed with Arduino libraries and then use those keyboards to create interactive games. Our group took the very simple old school game Pinball and managed to connect two controllers (via left and right arrow keys) as well as a way to release the ball (a space bar) using two Arduino micro boards.

We used a cardboard surface with copper cover as connectors to the left and right controller, having in mind that two different players would control each side. The surfaces are meant to be hit by a cardboard “drumstick” to close the circuit and call the left and right keys to work. A new ball is released to the game by touching a physical ball (with copper tape) on another surface that would help close the circuit and act as the space-key. We are very excited to present our finished prototype on Monday.

I was, in fact, very much positively surprised by how easy it is to prototype in Arduino, especially as there are libraries with simplified code for countless of functions, so its easy to make things come to life without having to spend many hours on coding.
0 notes
Text
Introduction to Physical Prototyping

Today was an exciting introduction by Johannes to our Physical Prototyping course. He encouraged us to take notes, pictures and videos as well as sketch during the lectures/workshops and upload them to this journal to keep track of our design practise. Johannes stressed that we should dare to fail and fail a lot, learn by doing and be bold.
0 notes