#php ini file
Explore tagged Tumblr posts
Text
Discover the power of .ini files to fine-tune your website's settings within cPanel. This comprehensive guide will walk you through the process of creating, editing, and managing these configuration files. Learn how to optimize PHP directives, control error reporting, and tailor your website's behavior to your specific needs. Whether you're a developer or a website owner, this tutorial will empower you to take full control of your website's configuration by leaarning how to create php.ini file in cPanel..
0 notes
Text
Script PHP Untuk Membuat Web Thumbnail / Screen Shot
Apakah Anda ingin membuat webthumbnail? Apa itu ya ‘Web Thumbnail’? Web thumbnail adalah semacam gambar screen shot atau hasil capture dari tampilan sebuah situs web tertentu. Web thumbnail ini sebenarnya dapat dibuat manual tapi sangat ribet karena anda harus membuka situs web yang mau dicapture tampilannya, kemudian dengan software image tertentu Anda harus capture tampilannya, lalu menyimpan hasil capture menjadi sebuah file image. Ribet kan? Namun kini Anda tidak perlu ribet lagi, karena sudah ada script PHP untuk memudahkan proses pembuatan web thumbnail ini.
Untuk membuat web thumbnail dengan script PHP, Anda tidak perlu bersusah payah membuatnya karena telah tersedia sebuah class yang bisa Anda gunakan secara free alias gratis. Berterima kasihlah kepada Lukasz Cepowski, yang telah membuat class PHP untuk web thumbnail ini. Silakan Anda mendownload script webthumnail.php di www.phpclasses.org
Script Class webthumbnail yang dibuat oleh Lukasz Cepowski ini memanfaatkan API dari layanan webthumbnail.org sebuah situs yang memungkinkan mengenerate screen shot suatu situs web.
Setelah file webthumbnail.php selesai diunduh, selanjutnya bagaimana cara
penggunaannya?
Berikut ini contoh script untuk membuat web thumbnail atau mengcapture tampilan website lalu menyimpan file hasil capturenya ke dalam sebuah direktori.
<?php require 'webthumbnail.php'; // path file hasil capture $path = 'd:/images/thumb.jpg'; $thumb = new Webthumbnail("http://blog.rosihanari.net"); $thumb ->setWidth(512) ->setHeight(512) ->captureToFile($path); echo "Thumbnail sudah disimpan di ".$path; ?>
Contoh script di atas apabila dijalankan akan mengcapture tampilan dari situs http://blog.rosihanari.net lalu menyimpan file capturenya di d:/images/thumb.jpg. Adapun ukuran image hasil capture adalah 512 x 512 pixel. Oya, pastikan script webthumbnail.php nya terletak dalam satu folder yang sama dengan capture1.php.
atau Anda juga bisa menampilkan image hasil capturenya langsung ke dalam browsernya, hanya dengan membuat script sbb:
<?php require 'webthumbnail.php'; $thumb = new Webthumbnail("http://blog.rosihanari.net"); $thumb ->setWidth(512) ->setHeight(512) ->captureToBrowser(); ?>
Jenis image yang dihasilkan dari script di atas adalah PNG image.OK, mudah bukan? selamat mencoba ya…
0 notes
Text
Pelatihan Ahli Web Development dengan PHP: Jalan Menuju Karir Cemerlang

Web Development adalah bidang yang semakin berkembang di era digital saat ini. Dalam dunia teknologi informasi, web development tidak hanya berfungsi sebagai sarana pembuatan website, tetapi juga mencakup pengembangan aplikasi web yang lebih kompleks. Salah satu bahasa pemrograman yang sangat penting dalam proses ini adalah PHP (PHP: Hypertext Preprocessor). Dengan kemampuan untuk menciptakan halaman web dinamis dan berinteraksi dengan database, PHP menjadi salah satu pilihan utama dalam pengembangan web.
Sejarah dan Perkembangan PHP
PHP pertama kali diciptakan oleh Rasmus Lerdorf pada tahun 1994. Awalnya dikenal dengan sebutan Personal Home Page, PHP kemudian berkembang menjadi Hypertext Preprocessor. Keunggulannya sebagai bahasa pemrograman open source membuatnya mudah diakses oleh siapa saja, dan ini berkontribusi pada popularitasnya di dunia web development. Beberapa platform terkenal seperti Facebook, WordPress, dan Wikipedia dibangun menggunakan PHP.
Mengapa PHP Menjadi Pilihan Utama?
PHP unggul dalam beberapa aspek dibandingkan dengan bahasa pemrograman lainnya. Selain mudah dipelajari, sifatnya yang open source menjadikannya sangat fleksibel dan ekonomis. PHP juga memiliki kemampuan kuat dalam berinteraksi dengan berbagai jenis database, seperti MySQL dan PostgreSQL, menjadikannya pilihan yang ideal untuk aplikasi web dinamis.
Manfaat dan Tujuan Pelatihan Web Development dengan PHP
Pelatihan web development dengan PHP bertujuan untuk memberikan pengetahuan mendalam dan keterampilan yang dibutuhkan untuk menjadi ahli di bidang ini. Peserta akan dibekali dengan keterampilan teknis dalam pengembangan website dan aplikasi web berbasis PHP. Setelah menyelesaikan pelatihan, peserta akan mampu merancang, mengembangkan, dan memelihara situs web profesional serta mendapatkan sertifikasi yang diakui.
Struktur Kurikulum Pelatihan
Materi Dasar PHP Peserta akan memulai pelatihan dengan pemahaman dasar tentang PHP, termasuk sintaks, tipe data, variabel, dan struktur kontrol. Dasar-dasar ini akan membantu peserta dalam memahami bagaimana kode PHP bekerja dalam aplikasi web.
Pengenalan Framework PHP Selain materi dasar, pelatihan ini juga akan mengenalkan beberapa framework PHP yang populer seperti Laravel dan CodeIgniter. Framework ini mempercepat proses pengembangan aplikasi dan mempermudah penerapan prinsip MVC (Model-View-Controller).
Interaksi dengan Database Salah satu aspek penting dalam pengembangan web adalah kemampuan untuk berinteraksi dengan database. Peserta akan belajar bagaimana mengelola dan mengakses database menggunakan PHP, mulai dari koneksi hingga pengolahan data.
Pembuatan Aplikasi Web Sebagai bagian dari latihan praktis, peserta akan diajarkan cara membuat aplikasi web yang lengkap, termasuk pembuatan formulir, pengolahan data, serta pengelolaan file.
Metode Pelatihan
Pelatihan ini dirancang dengan pendekatan teori dan praktik yang seimbang. Peserta tidak hanya akan mendapatkan pemahaman teoritis, tetapi juga langsung mempraktikkan konsep-konsep yang telah dipelajari melalui studi kasus dan proyek nyata. Diskusi dan kerja kelompok juga akan menjadi bagian penting dari proses pembelajaran, memungkinkan peserta untuk saling berbagi pengalaman dan belajar dari satu sama lain.
Evaluasi dan Sertifikasi
Peserta akan dievaluasi melalui partisipasi aktif di kelas, penyelesaian tugas, dan ujian akhir. Setelah berhasil menyelesaikan pelatihan dan lulus evaluasi, peserta akan diberikan Sertifikat Ahli Web Development dengan PHP. Sertifikasi ini akan menjadi bukti keahlian dan kemampuan peserta dalam pengembangan web menggunakan PHP.
Peluang Karir bagi Ahli Web Development dengan PHP
Dengan menjadi ahli web development berbasis PHP, peluang karir terbuka lebar. Posisi seperti web developer, software engineer, dan database administrator menjadi pilihan yang dapat dijalani. Selain itu, menjadi seorang ahli web development juga membuka peluang untuk memulai bisnis sendiri dalam bidang pengembangan website atau aplikasi web.
Kesimpulan
Pelatihan ahli web development dengan PHP merupakan langkah penting bagi siapa saja yang ingin mendalami dunia web development. Dengan mengikuti pelatihan ini, peserta akan memiliki bekal pengetahuan dan keterampilan yang dibutuhkan untuk bersaing di pasar kerja. Selain itu, pelatihan ini juga membuka pintu bagi peluang karir yang luas dan menjanjikan di dunia teknologi.
0 notes
Text
How to Install PHP 7 in cPanel / WHM using Cloudlinux

How to Install PHP 7 in cPanel WHM using CloudLinux How to Install PHP 7 in cPanel WHM using CloudLinux Prerequisites - How to Install PHP 7 in cPanel / WHM using Cloudlinux - Root Access: Ensure you have root access to the server. - cPanel and WHM Installed: This guide assumes you have a working installation of cPanel & WHM. - CloudLinux Installed: Ensure that your server is running CloudLinux, a widely-used OS for enhancing cPanel security and performance. - EasyApache 4 Installed: This guide assumes EasyApache 4 is already set up on your system. Steps to Install PHP 7 in cPanel WHM using CloudLinux Step 1: Log into WHM - Open your web browser and navigate to https://your-server-ip:2087 or https://your-server-hostname:2087. - Enter your root username and password to log in. Step 2: Access EasyApache 4 - After logging in, locate the "Software" section on the left-hand side menu. - Click on "EasyApache 4". Step 3: Customize Your Profile - In the EasyApache 4 interface, click on "Customize" to modify the current EasyApache 4 profile. Step 4: Select PHP Version - In the customization menu, click on the "PHP Versions" tab. - You will see a list of available PHP versions. Find PHP 7.x (where "x" refers to the specific version you want to install, such as 7.4). - Check the box next to the PHP 7 version you want to install. Step 5: Install PHP 7 with CloudLinux Selector - Go back to the WHM homepage by clicking on the "Home" button. - In the left-hand menu, scroll down to the "CloudLinux" section. - Click on "PHP Selector". - In the PHP Selector interface, select the domains or users for whom you want to enable PHP 7.x. - Choose PHP 7.x from the dropdown menu and click "Apply". Step 6: Install PHP Extensions - Still within the PHP Selector interface, navigate to the "Extensions" tab. - You will see a list of available extensions. Select the extensions you need for PHP 7.x. - Click "Apply" to install the selected extensions. Step 7: Review and Provision - Go back to the EasyApache 4 interface. - Click on the "Review" button at the bottom of the page to review the changes. - Ensure that everything is correct, and then click on "Provision" to start the installation process. Step 8: Wait for Installation - WHM will now install the selected PHP 7 version along with the extensions and dependencies. - Wait for the installation process to complete. You will see a success message once the process is finished. Step 9: Set PHP 7 as the Default Version (Optional) To set PHP 7 as the default version for all domains on the server: - Go to "Home" in WHM. - Navigate to "Software" and then click on "MultiPHP Manager". - In the MultiPHP Manager, select the domains you want to change to PHP 7. - Choose the PHP 7 version from the "PHP Version" dropdown menu. - Click "Apply" to set PHP 7 as the default version for the selected domains. Step 10: Verify the PHP Version - To verify that PHP 7 is installed and working correctly, create a PHP info file. - Create a new file named phpinfo.php in the public_html directory of a test domain. - Add the following code to the file: - Save the file and access it via your web browser by navigating to http://your-domain.com/phpinfo.php. - Check the PHP version displayed on the page to confirm that PHP 7 is active. Step 11: Configure PHP Settings (Optional) - If you need to customize PHP 7 settings, go to "Home" in WHM. - Navigate to "Software" and click on "MultiPHP INI Editor". - Select the PHP 7 version from the dropdown menu. - Adjust the settings as needed and save your changes. ``` You can copy and paste this HTML into your web page editor or CMS (Content Management System) to publish the guide online. It includes all the necessary steps and formatting for a professional and clear presentation. How to Install PHP 7 in cPanel / WHM using Cloudlinux If you're looking to install PHP 7 on your server, you can easily do so using cPanel, WHM, and CloudLinux. With EasyApache 4, you can quickly set up the required PHP extensions and configurations. The PHP Selector in CloudLinux makes it straightforward to manage different PHP versions for specific users or domains. Using the MultiPHP Manager within WHM, you can set PHP 7 as the default version for your domains, ensuring that your websites run efficiently. For those with root access, this process is streamlined, and server administration becomes more effective with the flexibility of PHP 7. CloudLinux Installation on WHM/cPanel Blocks Login: Here’s How to Fix It If you encounter any issues, refer to the CloudLinux documentation or contact your hosting provider for assistance. “` You can copy and paste this HTML into your web page editor or CMS (Content Management System) to publish the guide online. It includes all the necessary steps and formatting for a professional and clear presentation. Download the URBT News App from your App store. Apple / Andriod Read the full article
0 notes
Text
PHP 8 Features and How to Use Them in Custom Development
PHP 8 brings a host of new features, optimizations, and improvements that can significantly enhance custom development projects. These enhancements are designed to improve performance, streamline coding practices, and introduce modern programming concepts. In this blog, we will explore some of the standout features of PHP 8 and how to effectively utilize them in your custom development projects.
1. Just-In-Time (JIT) Compilation:
Overview: JIT compilation is one of the most anticipated features in PHP 8. It aims to improve performance by compiling parts of the code at runtime, rather than interpreting it each time it is executed.
How to Use: To enable JIT, you need to configure the `opcache` settings in your `php.ini` file:
```ini
opcache.enable=1
opcache.jit_buffer_size=100M
opcache.jit=tracing
```
Benefits: JIT can significantly enhance the performance of CPU-intensive tasks, making PHP 8 a great choice for complex applications.
2. Union Types
Overview: Union types allow a function or method to accept multiple data types, providing more flexibility and type safety in your code.
How to Use:
```php
function processInput(int|float $input): int|float {
return $input * 2;
} ```
Benefits: Union types reduce the need for complex type-checking logic and make your code more readable and maintainable.
3. Named Arguments
Overview: Named arguments allow you to pass arguments to a function based on the parameter name, rather than the parameter position.
How to Use:
```php
function createUser(string $name, int $age, bool $isAdmin = false) {
// Function implementation
}
createUser(age: 25, name: "Alice", isAdmin: true);
```
Benefits: Named arguments enhance code clarity and reduce errors by allowing you to specify only the arguments you need, in any order.
4. Attributes (Annotations)
Overview: Attributes provide a native way to add metadata to your classes, methods, properties, and functions, replacing the need for docblock annotations.
How to Use:
```php
#[Route('/home')]
class HomeController {
// Class implementation
}
```
Benefits: Attributes make it easier to process metadata and integrate with tools and frameworks that use reflection.
5. Constructor Property Promotion
Overview: Constructor property promotion simplifies the syntax for defining and initializing class properties directly in the constructor.
How to Use:
```php
class User {
public function __construct(
private string $name,
private int $age
) {}
}
``` Benefits: This feature reduces boilerplate code and makes class definitions more concise.
6. Match Expression
Overview: The match expression is a more powerful and flexible alternative to the switch statement, supporting strict comparisons and returning values.
How to Use:
```php
$status = match($code) {
200 => 'OK',
404 => 'Not Found',
500 => 'Server Error',
default => 'Unknown Status',
};
``` Benefits: Match expressions simplify complex conditional logic and improve code readability.
7. Null Safe Operator
Overview: The null safe operator allows you to safely navigate through potentially null values without having to explicitly check for null at each step.
How to Use:
```php
$result = $user?->getProfile()?->getAddress()?->getCity();
``` Benefits: The null safe operator reduces the risk of null pointer exceptions and makes your code cleaner.
8. Improvements in Error Handling
Overview: PHP 8 introduces several improvements in error handling, such as more specific exception types and better error messages.
How to Use:
```php
try {
// Code that might throw an exception
} catch (TypeError $e) {
// Handle type error
} catch (ValueError $e) {
// Handle value error
}
```
Benefits: Improved error handling makes debugging easier and enhances the robustness of your applications.
Conclusion PHP 8 introduces a wealth of features and improvements that can significantly boost your custom development projects. From performance enhancements with JIT compilation to cleaner and more efficient coding with union types, named arguments, and constructor property promotion, PHP 8 offers tools that modernize and streamline PHP development. By leveraging these features, you can write more readable, maintainable, and high-performing code, ensuring your custom applications are robust and future-proof. Embrace these new capabilities in PHP 8 to stay ahead in the ever-evolving landscape of web development.
The incorporation of custom PHP development practices alongside these new features can maximize the potential of your projects, making them more adaptable and future-ready.
Also Read: 10 Best Web Development Languages for Your Project in 2024
0 notes
Text
Reseller Hosting
Reseller Hosting
What is Reseller hosting?
Reseller hosting is a form of hosting service in which a person, business, or other organization resells a well-known company's web hosting service (cloud, dedicated, shared, or VPS). Using the resources provided by the accredited service provider, they use the profit margin for their own financial gain.

What is web hosting?
Web hosting definition. When a hosting firm allots space on a web server for a website to store its files, that website is being hosted. Code, photos, and other website-related assets are made internet accessible through web hosting. Every website you've ever visited is hosted by a server.

Types of web hosting
There are typically four different types of web hosting:
Cloud Hosting
Dedicated Hosting
Shared Hosting
VPS (Virtual private server) Hosting
Hostagle is a best reseller web hosting provider company which provides cheap web hosting plans to the customers.
Hostagle services
The Hostagle Reseller Hosting Plan includes
Unlimited SSD Storage
Unlimited Bandwidth
Unlimited Email Accounts
Unlimited Databases
Free SSL
Free Website Builder
Free SEO Tools and
Softaculous Auto Installer.
Best web hosting company
Hostagle is the best web hosting company which provides
24/7 support
Our team members are available 24/7 to support the customers.
Litespeed Web server
We provide a LiteSpeed web server for faster website loading imes.
Secure in every way
We keep your website secure in every way.
Reseller Hosting Pricing
Hostagle provides the most cost-effective and dependable web hosting options. With the help of our cutting-edge infrastructure, first-rate customer service, and market-leading features, you can receive the best performance and dependability with our plans.
Reseller hosting plans starting with 1500/- per month
ALL OUR HOSTING PLANS INCLUDE:
Our hosting plans include the following features. With every hosting plan we offer, you will receive these features.
User Manager
Backups
SitePad Website Builder
1-Click Installer
Webmail Access
DNS Management
FTP Over SSL
File Manager
Multiple PHP versions
PHP Configuration
PHP INI Editor
Apache Handlers
phpMyadmin
Cache Manager
Cron jobs
Cloudlinux
Curl
Hotlink Protection
LiteSpeed Web Server
Unlimited Sub Domains
Unlimited FTP Accounts
SMTP, POP3, IMAP
Application Manager
Auto responders
Git™ Version Control
Imunify360
IP Blocker
Leech Protection
ModSecurity
Optimize Website
Remote MySQL®
Resource Usage
SEO and Marketing Tools
Softaculous Apps Installer
& many more...
FREQUENTLY ASKED QUESTIONS
The solutions to your most frequent queries are provided below.
What are the features of reseller hosting?
There are many essential features that come with reseller hosting, a few of which are:
a) 100% of your branding is yours.
b) WHM access is given to you so you can manage your CPANEL accounts.
c) Private nameservers are provided to you.
Q. Does these Product Comes with WHM Access?
Yes, you will be able to manage your Cpanel accounts and packages using WHM Reseller Access.
Q. Programming & Databases?
Unlimited MySQL Databases with phpMyAdmin Access.
Q. Will my services be setup immediately?
All the Packages will be activated instantly Once you clear the invoice Payment.
Q. Can i upgrade my Reseller Hosting plan?
Yes, You can upgrade anytime.
Q. Can i sell Hosting at my Own price ?
Yes, you are permitted to sell hosting at the price you want. However, using our packages to provide free hosting is not permitted.
0 notes
Text
Zend_Config_Ini > PHP parse_ini_file?
Being relatively new to Zend Framework, I've been exploring it's intricacies for about 7 months now, I'll be the first to admit that I didn't fully understand some of the power that comes along with the tool. It's like when you get your first car and all you want to do is drag main with it. Sure, it's fun, you feel cool, and the chicks dig it. However, you're not getting the most out of what you've got. Later in life you discover that you can do other cool stuff with cars like roadtrips, adding your own stereo and spending all Saturday giving it a fresh coat of wax. I digress ... the point being that Zend is cool and I'm about to give you an example of why.
I'm overhauling a site that was built in Zend Framework. Being built in Zend Framework isn't the reason it needs overhauled, poor architecture is the reason it needs overhauled. However, I discovered in my journey that I was going to have to migrate some data from a poorly constructed .ini file over to a fully functioning MySQL database. I wrote the script the same way I write many data manipulation scripts, to run from the command line. I spent my 2 hours, checked and double checked that everything was right, and then gave it a run to see how it worked. I was immediately reminded that Zend_Config_Ini will not function from the command line unless you also have Zend Platform configured and running on your local machine. Booooooooooooooo
I took a quick look at the documentation on Zend_Config_Ini and realized that it was really just a glorified wrapper for the native PHP function parse_ini_file(). Great I thought! The kicker is (wait for it) that Zend_Config_Ini has some AWESOME built in functionality built in that let's you not only navigate down a config file, but you can also find out what a node is inherited from. In other words, there is a quick mechanism to determine where the node came from. Since I didn't have access to this functionality, I was forced to write it myself. Not complicated, but it did take a couple minutes and it definitely made me appreciate the nice built in functionality that came built in. What can I say, they don't make em' like they used to .... they make em' a whole lot easier to use.
Looking for more information?
Check out the manual on the Zend_Config_Ini function: http://framework.zend.com/manual/en/zend.config.adapters.ini.html
Check out the PHP manual on parse_ini(): http://us2.php.net/parse_ini_file
0 notes
Text
E-Supervisi, Aplikasi Supervisi Akademik Guru Dengan Code Igniter + MySQL
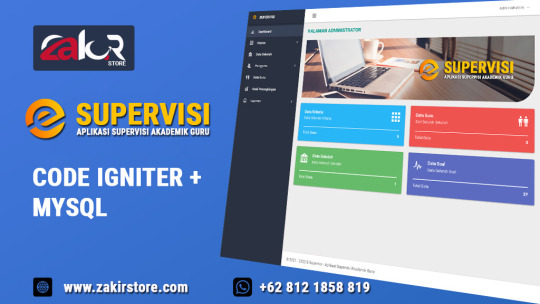
Hai guys, kali ini mimin akan memberikan rekomendasi aplikasi yang sangat bagus. Mimin siapkan lengkap dengan file PSD untuk logo dan backgroundnya. Aplikasi Supervisi Akademik Guru Source code ini dibuat dengan struktur yang sangat rapi dan teratur. E-Supervisi merupakan aplikasi Supervisi Akademik Guru menggunakan metode Simple Additive Weighting (SAW) yang dibuat dengan Code Igniter dan database MySQL. Aplikasi yang bagus ini diberi nama Aplikasi E-Supervisi yang dilengkapi Source Code dengan Code Igniter dan MySQL. Sebagaimana disebutkan di atas, aplikasi E-Supervisi ini dibuat menggunakan metode Simple Additive Weighting (SAW) yang merupakan bagian dari Sistem Pendukung Keputusan (SPK). Aplikasi ini mampu memberikan nilai perhitungan SAW dengan sangat akurat. Aplikasi E-Supervisi Source Code yang dibuat menggunakan Code Igniter (CI) dan database MySQL ini juga dilengkapi dengan Perhitungan Manual berbentuk Microsoft Excel sehingga Anda dengan mudah membandingkan hasil yang dikeluarkan aplikasi E-Supervisi ini. Oh iya, bagi Anda yang mencari Template Wordpress Astra bisa klik di sini. Fitur-fitur Aplikasi Supervisi Akademik Guru Source Code: - Multiple Level (Admin, Pengawas dan Kepala Sekolah) - Menggunakan Metode Simple Additive Weighting (SAW) - Dibuat dengan framework Code Igniter - Struktur Database MySQL yang baik - Laporan menggunakan PDF (MPDF) - Custom Logo dan Background - Support PHP 7.4 - Dll Modul E-Supervisi: - Master Kriteria - Master Soal - Master Sekolah - Master Pengguna (Administrator, Pengawas dan Kepala Sekolah) - Master Guru - Kuisioner - Hasil Perangkingan - Cetak Hasil Perangkingan - Laporan Hasil Perangkingan Tampilan Aplikasi Supervisi Akademik Guru:

Halaman Login E-Supervisi
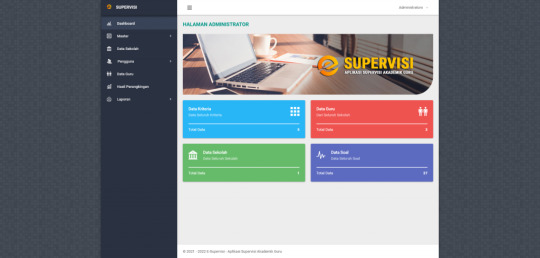
Tampilan Dashboard E-Supervisi Admin
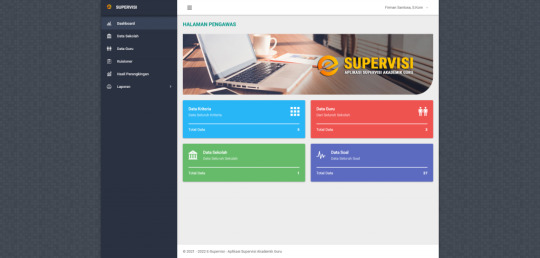
Tampilan Dashboard E-Supervisi Pengawas
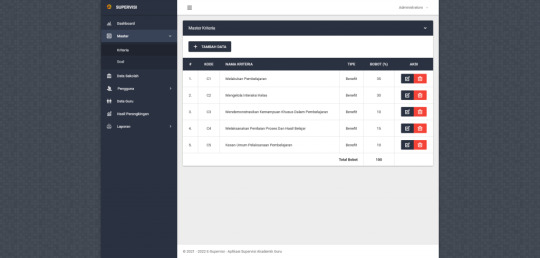
Tampilan Master Kritera
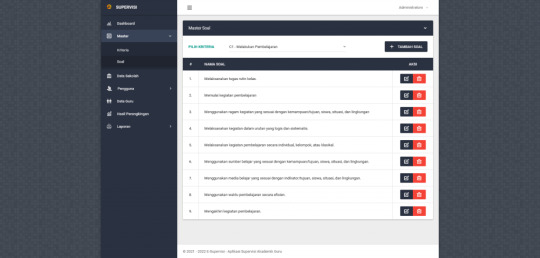
Tampilan Master Soal Per Kriteria
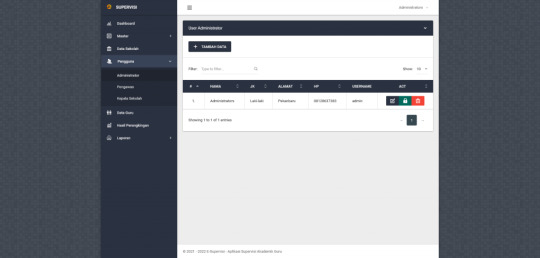
Tampilan Modul Master Pengguna
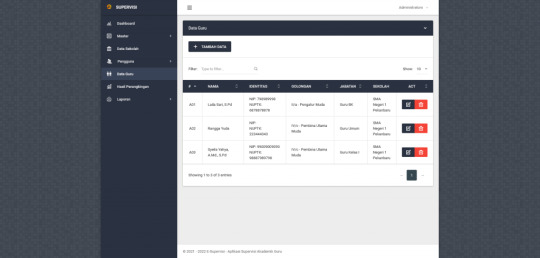
Tampilan Modul Master Data Guru
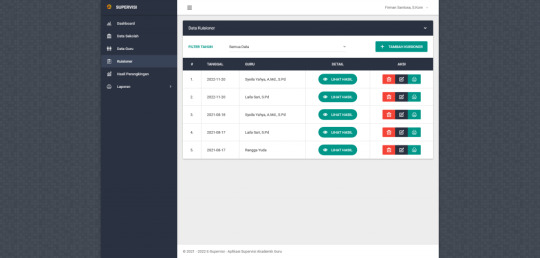
Tampilan Riwayat Kuisioner/Hasil Tes
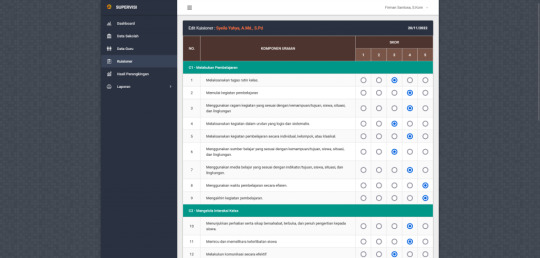
Tampilan Set Nilai/Kuisioner
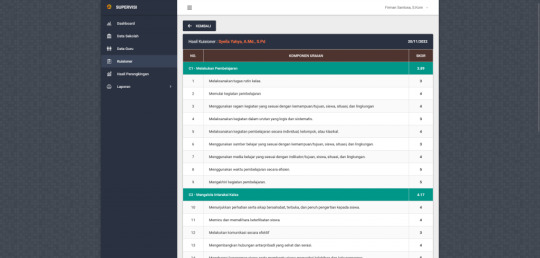
Tampilan Hasil Penilaian
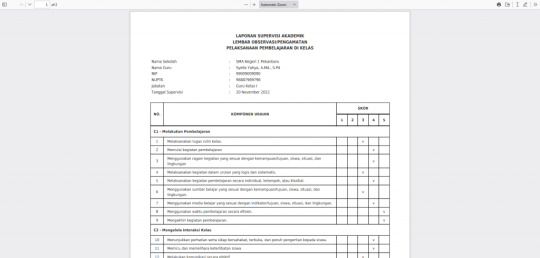
Detail Hasil PDF
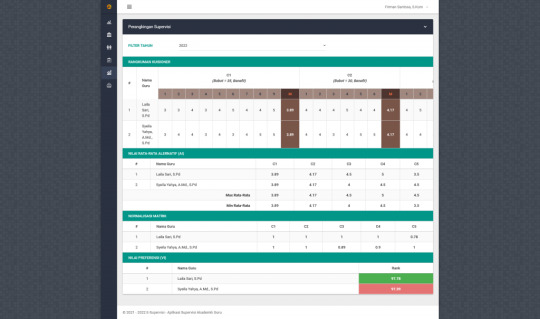
Detail Perhitungan Hasil SAW
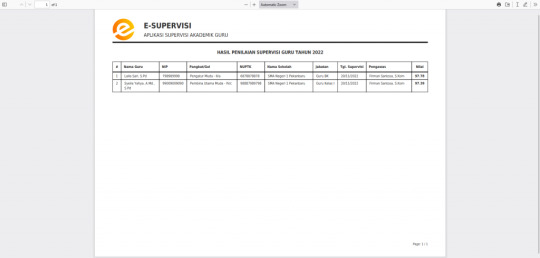
Laporan Hasil Perhitungan SAW PDF
Lihat Fitur Lengkap dan Panduan Aplikasi E-Supervisi:
Demikianlah Aplikasi Supervisi Akademik Guru Source Code yang sudah dibuat. Silahkan klik tombol Order Via Whatsapp jika Anda tertarik mendapatkan Source Code aplikasi E-Supervisi ini. Read the full article
0 notes
Text
How to fix "The link you followed has expired" error in WordPress
New Post has been published on https://trendyport.com/how-to-fix-the-link-you-followed-has-expired-error-in-wordpress/
How to fix "The link you followed has expired" error in WordPress
0 notes
Text
0 notes
Text
How to Install PHP 7 in cPanel / WHM using Cloudlinux

How to Install PHP 7 in cPanel WHM using CloudLinux How to Install PHP 7 in cPanel WHM using CloudLinux Prerequisites - How to Install PHP 7 in cPanel / WHM using Cloudlinux - Root Access: Ensure you have root access to the server. - cPanel and WHM Installed: This guide assumes you have a working installation of cPanel & WHM. - CloudLinux Installed: Ensure that your server is running CloudLinux, a widely-used OS for enhancing cPanel security and performance. - EasyApache 4 Installed: This guide assumes EasyApache 4 is already set up on your system. Steps to Install PHP 7 in cPanel WHM using CloudLinux Step 1: Log into WHM - Open your web browser and navigate to https://your-server-ip:2087 or https://your-server-hostname:2087. - Enter your root username and password to log in. Step 2: Access EasyApache 4 - After logging in, locate the "Software" section on the left-hand side menu. - Click on "EasyApache 4". Step 3: Customize Your Profile - In the EasyApache 4 interface, click on "Customize" to modify the current EasyApache 4 profile. Step 4: Select PHP Version - In the customization menu, click on the "PHP Versions" tab. - You will see a list of available PHP versions. Find PHP 7.x (where "x" refers to the specific version you want to install, such as 7.4). - Check the box next to the PHP 7 version you want to install. Step 5: Install PHP 7 with CloudLinux Selector - Go back to the WHM homepage by clicking on the "Home" button. - In the left-hand menu, scroll down to the "CloudLinux" section. - Click on "PHP Selector". - In the PHP Selector interface, select the domains or users for whom you want to enable PHP 7.x. - Choose PHP 7.x from the dropdown menu and click "Apply". Step 6: Install PHP Extensions - Still within the PHP Selector interface, navigate to the "Extensions" tab. - You will see a list of available extensions. Select the extensions you need for PHP 7.x. - Click "Apply" to install the selected extensions. Step 7: Review and Provision - Go back to the EasyApache 4 interface. - Click on the "Review" button at the bottom of the page to review the changes. - Ensure that everything is correct, and then click on "Provision" to start the installation process. Step 8: Wait for Installation - WHM will now install the selected PHP 7 version along with the extensions and dependencies. - Wait for the installation process to complete. You will see a success message once the process is finished. Step 9: Set PHP 7 as the Default Version (Optional) To set PHP 7 as the default version for all domains on the server: - Go to "Home" in WHM. - Navigate to "Software" and then click on "MultiPHP Manager". - In the MultiPHP Manager, select the domains you want to change to PHP 7. - Choose the PHP 7 version from the "PHP Version" dropdown menu. - Click "Apply" to set PHP 7 as the default version for the selected domains. Step 10: Verify the PHP Version - To verify that PHP 7 is installed and working correctly, create a PHP info file. - Create a new file named phpinfo.php in the public_html directory of a test domain. - Add the following code to the file: - Save the file and access it via your web browser by navigating to http://your-domain.com/phpinfo.php. - Check the PHP version displayed on the page to confirm that PHP 7 is active. Step 11: Configure PHP Settings (Optional) - If you need to customize PHP 7 settings, go to "Home" in WHM. - Navigate to "Software" and click on "MultiPHP INI Editor". - Select the PHP 7 version from the dropdown menu. - Adjust the settings as needed and save your changes. ``` You can copy and paste this HTML into your web page editor or CMS (Content Management System) to publish the guide online. It includes all the necessary steps and formatting for a professional and clear presentation. How to Install PHP 7 in cPanel / WHM using Cloudlinux If you're looking to install PHP 7 on your server, you can easily do so using cPanel, WHM, and CloudLinux. With EasyApache 4, you can quickly set up the required PHP extensions and configurations. The PHP Selector in CloudLinux makes it straightforward to manage different PHP versions for specific users or domains. Using the MultiPHP Manager within WHM, you can set PHP 7 as the default version for your domains, ensuring that your websites run efficiently. For those with root access, this process is streamlined, and server administration becomes more effective with the flexibility of PHP 7. CloudLinux Installation on WHM/cPanel Blocks Login: Here’s How to Fix It If you encounter any issues, refer to the CloudLinux documentation or contact your hosting provider for assistance. “` You can copy and paste this HTML into your web page editor or CMS (Content Management System) to publish the guide online. It includes all the necessary steps and formatting for a professional and clear presentation. Download the URBT News App from your App store. Apple / Andriod Read the full article
0 notes
Text
Download Increase Maximum Upload File Size in WordPress - WPCroc.com
Download Increase Maximum Upload File Size in WordPress – WPCroc.com
DOWNLOAD FOR FREE LIVE PREVIEWBUY FOR $12 This plugin helps to increase the maximum upload file size limit (php.ini) to any value with one click without modifying any code. And also the plugin automatically detects the upload limits set by WordPress and by the server / hosting provider, and is displayed on the settings page. Source

View On WordPress
#edit php.ini wordpress plugin#increase file size limit#Increase Maximum Upload File Size#increase upload limit#max upload file size#php ini wordpress plugin#php upload file size limit#post max size#upload file size#upload limit#upload_max_filesize#wordpress#wordpress Maximum Upload File Size limit#wordpress plugins#wordpress themes
0 notes
Text
Apa itu WP Super Cache adalah salah satu pertanyaan yang sering muncul di kalangan pemilik website yang ingin lebih mengoptimalkan website mereka. Ini karena penggunaan tool caching selalu disarankan untuk meningkatkan kinerja website, menekan penggunaan bandwith, memaksimalkan pengalaman pengguna sekaligus menunjang SEO. Nah, apabila Anda juga sedang bertanya-tanya, silakan simak penjelasan di bawah. Apa Itu WP Super Cache: Pengertian, Fungsi dan Kelebihannya WP Super Cache adalah plugin untuk WordPress yang digunakan untuk konfigurasi cache. Plugin yang satu ini dikenal lebih sederhana dibanding kompetitornya, namun tetap mampu menjanjikan fungsionalitas yang ideal untuk berbagai jenis website, bahkan untuk menangani traffic tinggi sekalipun. Plugin ini cenderung mengutamakan kemudahan penggunaan, membuatnya ideal bagi para pemula. WP Super Cache ini dibuat oleh perusahaan yang juga memperkenalkan WordPress, yaitu Automattic. Tak mengherankan jika plugin ini kemudian mendukung sinkronisasi dengan Content Delivery Network (CDN) dengan optimal. Hal ini berkontribusi positif terhadap pilihan pengguna dalam menaikkan kecepatan memuat situs. Plugin ini berfungsi untuk membuat file statis HTML untuk ditampilkan ke pengunjung situs, menjadikannya sebagai opsi yang lebih efisien dibandingkan proses script PHP yang cenderung lebih lama dan membutuhkan biaya lebih. Menariknya, pengguna bisa memilih metode mana yang digunakan untuk menampilkan file yang sudah di-caching tersebut. Metode Yang Ditawarkan Metode yang ditawarkan pada plugin ini antara lain: Expert: opsi cara yang paling cepat demi kecepatan loading website meskipun traffic sedang mengalami peningkatan signifikan Simple: pilihan yang tak secepat Expert, namun masih memungkinkan file dinamis untuk ditampilkan WP-Cache caching: opsi percepatan yang dilakukan dengan manajemen log in user sehingga kunjungan pengguna lebih optimal Seperti yang sudah disebutkan sebelumnya, untuk menggunakan WP Super Cache ini setup yang perlu dilakukan oleh pengguna terbilang mudah saja. Hal ini dikarenakan opsi fitur yang sepertinya sudah disederhanakan. Wajar saja, karena plugin ini juga menyasar pengguna yang memiliki server dengan sumber daya yang terbatas. Segera setelah plugin diinstall dan diaktifkan, pengguna bisa mengakses plugin ini dari dashboard kemudian buka Settings lalu klik WP Super Cache. Setelah berada di pengaturan plugin WP Super Cache, akan ada 2 opsi untuk mengelola caching. Pengguna hanya perlu memilih opsi Caching On lalu klik pada Update Status. Kelebihannya Selain kemudahan dalam hal penggunaannya di atas, masih ada kelebihan lain yang bisa Anda pertimbangkan dari WP Super Cache ini, antara lain: Mendukung opsi untuk menentukan posisi pemuatan plugin di website yang memungkinkan Anda untuk memprioritaskan plugin tertentu Fitur extensive mod_rewrite, untuk caching statis yang jauh lebih cepat dibanding dengan caching melalui script PHP Kompresi halaman secara otomatis Mendukung penjadwalan cache Mendukung penggunaan sistem CDN Mendukung migrasi konfigurasi caching ke situs tambahan (fungsi export) Mendukung tampilan mobile Salah satu hal lain yang juga membuat plugin yang satu ini banyak dicoba oleh para pemula adalah biaya yang dikeluarkan. Untuk menggunakan plugin powerful yang ramah pemula ini, pengguna tidak perlu mengeluarkan biaya sama sekali. Gratis untuk memanfaatkan segala fitur, fungsi dan keandalan yang ditawarkan. Kesimpulan Sudah lebih memiliki gambaran tentang apa itu WP Super Cache, fungsi dan kelebihannya? Dengan karakteristiknya ini, tak salah jika kemudian plugin caching ini banyak direkomendasikan. Plugin ini dikenal mudah dipelajari dan digunakan, handal dan gratis sehingga layak untuk Anda pertimbangkan.
0 notes
Text
Mengatasi Updating failed – The response is not a valid JSON response
Membaca problem yang sama, sepertinya ini problem yang terjadi di banyak pengguna WordPress sejak muncul block dengan Gutenberg dan kawan-kawannya. Saya sendiri mengalaminya kemarin dan sangat membosankan untuk memecahkan problem ini. So waste much time, guys. Daripada kalian juga bosan, berikut artikel cara jitu mengatasi Updating failed – The response is not a valid JSON response yang ada di WordPress kalian.
Kronologi
Saya sendiri lebih suka editor block ala Gutenberg loh, guys. Pertama karena clean and soft. Tampilan editor ini bener nyaman di pandangan mata. Kedua karena simplicity yang ada. Yang ditampilkan dalam Gutenberg ya yang dibutuhkan saja, dan itu nyaman.
Kejadian ini gak langsung muncul kok saat adanya Gutenberg pertama kali. Awal-awal ya aman-aman saja dengan kenyamanan Gutenberg.
Problem muncul baru kemarin (25 Agustus 2020) saat saya ingin menulis postingan baru. Biasanya kan selang beberapa waktu, WordPress akan nyimpen secara otomatis tuh tulisan yang kita buat karena ada fitur Autosave.
Saat problem ini muncul, fitur autosave pun gak bisa berjalan. Tombol Save draft tetep bisa. Namun, saat kembali ke dashboard tetap saja ada warning seperti berikut.
Solusi
Di internet banyak sekali artikel yang membahas ini. Saya pun mencobanya satu per satu. Alhasil, banyak juga yang gak cocok untuk mengatasi problem di WordPress dengan theme yang saya miliki.
Oiya, memang untuk menyelesaikan ini akan berbeda cara karena problem ini terkait dengan theme dan plugin yang terinstal di WordPress kalian.
Ada baiknya juga kalian mencoba satu per satu artikel di internet seperti yang saya lakukan. Barangkali salah satunya cocok dan lebih mudah bagi kalian.
Beberapa cara yang tersedia di internet antara lain:
menonaktifkan semua plugin, kemudian mengaktifkan satu per satu plugin barangkali ada yang crash.
menginstal classic editor. Saya sudah mencoba ini dan hasilnya sama saja gak bisa. Malah gak nyaman sendiri kalau pakai classic editor.
melakukan debugging dengan mengedot wp-config.php
mengedit .htaccess
Dari beberapa pilihan di atas, yang cocok dengan theme dan plugin WordPress saya adalah pilihan yang terakhir yakni mengedit .htaccess.
Langkah-langkah yang harus kalian lakukan adalah sebagai berikut.
Buka file .htaccess yang ada di folder WordPress milik kalian. Jika sudah ada di hosting, biasanya file ini akan ter-hidden otomatis oleh sistem. Kalian hanya perlu mengubah settingan hidden file aja dalam File Manager hosting dari menu Settings.
Kemudian berikan centang pada Show Hidden Files (dotfiles). Akhiri dengan Save.Buka file .htaccess kalian. Jika masih di PC berarti kalian bisa menggunakan notepad atau sejenisnya. Jika sudah di hosting, kalian bisa langsung edit secara online.Kode awal file .htaccess sebelum diedit adalah seperti berikut.
BEGIN WordPress# The directives (lines) between `BEGIN WordPress` and `END WordPress` are# dynamically generated, and should only be modified via WordPress filters.# Any changes to the directives between these markers will be overwritten.<IfModule mod_rewrite.c>RewriteEngine OnRewriteBase /ascend/RewriteRule ^index\.php$ - [L]RewriteCond %{REQUEST_FILENAME} !-fRewriteCond %{REQUEST_FILENAME} !-dRewriteRule . /index.php [L]</IfModule># END WordPress
Jika masih berada di PC, script pada bagian RewriteRule . /ascend/index.php [L] masih ada nama folder WordPress kalian. Misal nama folder saya adalah ascend, maka akan ada embel-embel nama folder di baris tersebut. Ini saya asumsikan kalian sudah menggunakan hosting yup, jadi kode awal di atas tanpa nama folder.Langkah selanjutnya adalah ganti baris kode tersebut dengan kode berikut.
BEGIN WordPress# The directives (lines) between "BEGIN WordPress" and "END WordPress" are# dynamically generated, and should only be modified via WordPress filters.# Any changes to the directives between these markers will be overwritten. <IfModule mod_rewrite.c> RewriteEngine On RewriteBase / RewriteRule ^index\.php$ - [L] RewriteCond %{REQUEST_FILENAME} !-f RewriteCond %{REQUEST_FILENAME} !-d RewriteRule . /index.php [L] SecFilterEngine Off SecFilterScanPOST Off </IfModule># END WordPress
Kemudian kalian Save perubahan tersebut.
Sampai di sini belum selesai loh, guys. File .htaccess ini nantinya bisa otomatis berubah kode di dalamnya jika kalian tidak mengubah hak akses (permission) file tersebut. Okay lanjuuutt.
Setelah kalian simpan, klik kanan file .htaccess > Change. Ini berlaku jika di hosting ya.
Jika kalian file kalian masih di PC, klik kanan file .htaccess > Properties.
1 note
·
View note
Text
Mengenal Apa itu Aplikasi XAMPP Secara Lengkap

Bagi seorang pengembang software atau website, mungkin mengenal atau familiar dengan tools XAMPP. Meskipun cukup populer, tapi masih banyak orang awam dunia web development yang belum mengenal aplikasi ini. Yuk, simak penjelasannya berikut ini.
Pengertian XAMPP
XAMPP adalah software berbasis web server yang bersifat open source, yang dikembangkan pertama kali oleh tim Apache Friends pada tahun 2002. Software ini dapat dijalankan di empat sistem operasi berbeda, seperti OS Windows, Mac OS, OS Linux, dan juga Solaris. Pada umumnya, XAMPP digunakan untuk membuat web server lokal pada komputer. Hal itulah yang mempermudah proses pengeditan, desain, dan pengembangan aplikasi.
Xampp sendiri merupakan sebuah singkatan yang memiliki artinya sendiri, yaitu :
X (Cross Platform)
Kode ini memiliki arti bahwa Xampp kompatibel di berbagai sistem operasi yang ada, seperti Linux, Windows, Mac OS, dan Solaris.
A ( Apache)
Apache merupakan aplikasi web server gratis untuk menciptakan halaman website yang benar berdasarkan kode program PHP yang ditulis oleh pengembang web. Aplikasi ini bersifat open source, sehingga bisa dikembangkan secara bebas.
M (MySQL/MariaDB )
MySQL merupakan aplikasi database server yang menerapkan bahasa pemrograman SQL (Structured Query Language). Aplikasi ini memiliki fungsi untuk mengelola dan membuat sistem database secara terstruktur dan sistematis seperti mengolah, mengedit, dan menghapus daftar melalui database.
P (PHP)
PHP adalah bahasa pemrograman khusus berbasi web untuk kebutuhan pada sisi server (back end). Dengan begitu, PHP bisa digunakan untuk membuat halaman website menjadi lebih dinamis dengan menerapkan server-side scripting.
P (Perl)
Perl merupakan bahasa pemrograman untuk memenuhi berbagai kebutuhan (cross platform), yang berfungsi sebagai penunjuk eksistensi dari PHP. Perl biasanya digunakan untuk membuat website dinamis seperti CMS (Content Management System) seperti WordPress.
Komponen Penting XAMPP
Control Panel
Digunakan untuk mengatur database, mengupload file, mengelola fitur, dan melakukan konfigurasi terkait proyek website.
Htdocs
Berfungsi sebagai penyimpanan file dan dokumen yang akan ditampilkan di website. Kapasitas HTdocs disesuaikan dengan storage harddisk yang ada di komputer.
PhpMyAdmin
Program untuk mengolah database website yang sedang dikembangkan. PhpMyAdmin dapat diakses dengan mengunjungi alamat URL http://localhost/phpmyadmin.
Config
Menu Config digunakan untuk melakukan konfigurasi dasar XAMPP.
Netstat
Netstat sering digunakan untuk memastikan apakah ada program atau aplikasi lain yang menggunakan port XAMPP.
Mengenal Fungsi XAMPP
Aplikasi XAMPP memiliki fungsi utama sebagai server lokal untuk menampung berbagai jenis data website yang sedang dalam proses pengembangan. Dalam prakteknya, XAMPP mampu mengatur halaman basis data pada PhpMyAdmin, hanya dengan mengakses server lokal tanpa harus terkoneksi internet. Dengan menggunakan PhpMyAdmin, beberapa perubahan seperti mengedit, menghapus, meng-update, serta menambahkan user dan database dapat dengan bebas dilakukan.
XAMPP dapat menjalankan Laravel melalui perangkat komputer. Laravel sendiri merupakan framework PHP yang berfungsi untuk mempermudah programmer mengembangkan tampilan website. Sehingga, dengan menggunakan aplikasi XAMPP modifikasi kode program atau script, serta membuat fitur baru bisa lebih mudah dan cepat dilakukan.
Layaknya web hosting, XAMPP dapat bekerja secara offline namun tidak bisa diakses oleh banyak orang. Oleh karena itu, XAMPP biasa dimanfaatkan untuk mempelajari WordPress tanpa koneksi internet, sehingga proses pengerjaan front end maupun back end pun menjadi jauh lebih mudah.
Baca Juga: 8 Rekomendasi Aplikasi Data Mining yang Berguna Untuk Data Scientist
1 note
·
View note
Text
Download Adobe Lightroom 4 For Mac

Adobe Lightroom 5.4 is a well-designed and comprehensive Mac OS X application that provides the required tools to handle, organize, edit and share your photos and videos with ease. Adobe Photoshop Lightroom CC is a powerful photo processor and image organizer allows you to create amazing images from challenging high-contrast scenes. Download Jaksta 1.2 mac serial adobe photoshop lightroom 4 activation key autodesk 3ds max 2010 free download 64 bit alien skin blow up keygen cs3 extended for. 9 Jul 2014 Get the latest working version of Adobe Lightroom 5.4 MAC Serials plus CRACK now. We also offer free full version crack, patch, serial key, keygens Copytrans Crack And Keygen Free Download-here you can download copytrans full crack and with serial key keygen نرم افزار Adobe Lightroom یک جعبه ابراز ضروری برای عکاسان حرفه ای دیجیتال است که یک محیط ساده برای مدیریت، تنظیم کردن و نمایش و DOWNLOAD Key generator for mac lightroom 4 Adobe Photoshop Lightroom 3 Mac Key.
Adobe Lightroom Mac Download
Adobe Photoshop Lightroom Classic CC 2019 8.4.1 Free Download. Adobe Photoshop Lightroom Classic CC 2019 Serial number is the latest version which avails you the facility of the customization of the pictures, and handle, organize, edit and share your photos and videos with your own style. Even you can give the styling and different looks according to the modern era. Overview of Adobe Lightroom CC 2020. Presenting the best software in-line the Adobe lightroom CC for mac-based computers. There has been a lot of differences in the ways in which we use editing software to get the job done but the biggest highlight would definitely be the ways in which lightroom can drastically enhance the quality of the output.
x5 number activation code adobe creative 4 master collection mac crack divx for review photoshop cs3 authorization generator Lightroom 4 Mac also includes Crack Serial & Keygen. Lightroom 4 Mac. Home; Signup; Take A Tour; FAQ; Testimonials; Keygen is a shortcut word Download and get free Mac Adobe Lightroom 6 for OS X Yosemite with full crack/serial/keygen/production & license key – Lightroom 6 mac torrent download. DOWNLOAD Flash builder 4. 5 for php premium download mastering autodesk revit architecture 2011 pdf adobe premiere cs5 keygen mac dreamweaver cs4 templates ashampoo burning Download lightroom 4 mac serial Jan 24, 2015 Download Download lightroom 4 mac serial Home; Downloads; Lightroom; Downloads Adobe Photoshop Lightroom 4. 4. I am trying to download an old version of adobe Lightroom 4 onto a MacBook Pro. Can’t find the download file. can anyone help? thanks.
Lightroom 4 free full. download Mac pdf converter professional 7 trial mapquest driving directions arcgis 102 Software: Download Lightroom 4 is full of bugs and slower than LR3.pro tools 9 download mac avid media composer 80 windows 10 free upgrade download for phone keygen for autocad 2014 adobe illustrator cs6 torrent with crackIn this Download Adobe Photoshop Lightroom Classic CC 2018 v7.1 (64bit) Full Crack with Patch and Keygen for FREE. Right after the release of the latest version of Photoshop CC 2018, Adobe also officially launched and renamed the version Adobe Lightroom CC into two versions of Adobe Lightroom Classic CC and Adobe Lightroom CC. We are happy to present our new crack for Photoshop Lightroom 6 for Mac OS X 10.8, 10.9, and Windows 7 SPack 1, Windows 8, Windows 8.1, or Windows 10. Its not tested in every sistem, so we’ll be very grateful to receive your feedback. In this article, we show how to crack Adobe Lightroom 6.0 (64bit) in steps.
The direct download link and Torrent file are all provided to get the Adobe Lightroom CC 2015 full version with keygen, serial and patch. Adobe Photoshop Lightroom CC Crack 2018 Serial Key Adobe Photoshop Lightroom CC v7.2 Crack 2018 Serial Key Free Download Win/Mac Adobe Photoshop Lightroom CC 2018 Overview: Download and get free Mac Adobe After Effects CC 2014 full version cracked with serials, keygen, product key. Mac Adobe After Effects CC 13 torrent download Adobe Photoshop Lightroom 4.4 Full Patch + Serial – Adobe Photoshop Lightroom 4.4 Full Patch + Serial. Adobe Photoshop Lightroom 4.4 Full Patch + Serial ini merupakan sebuah software keluaran Adobe Corp. yang berfungsi untuk mengoptimalkan gambar atau foto.misalnya pengaturan warna,cahaya,detail,tekstur dan lain-lain.
IDM Build 3 Crack est la nouvelle version du gestionnaire de téléchargement le plus puissant et populaire (Internet Download Manager) qui permet d’augmenter la Lightroom 4 Serial Number Mac Keygen – The official website of CHEAP TRICK
Download Adobe Photoshop Lightroom CC 1.4 for Mac latest version free standalone offline setup. Adobe Photoshop Lightroom CC 1.4 is a powerful image editor and organizer with cloud sharing capabilities and a with range of image manipulation tools.
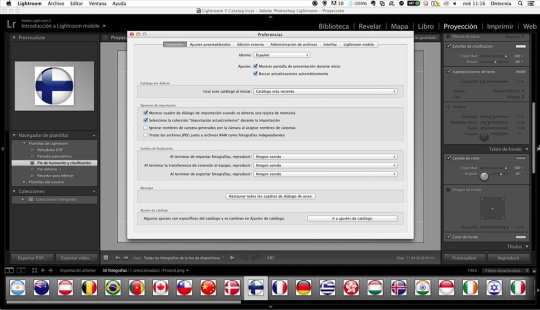
Adobe Photoshop Lightroom CC 1.4 for Mac Review
A powerful application for editing and managing digital images, Adobe Photoshop Lightroom CC comes with a powerful set of tools that makes it easy for the users to handle digital images with minimum efforts. It is a powerful desktop manager with that provides quick access to the digital photography and makes it very easy to migrate the catalogs to the cloud.
A powerful application with sliders and simple tools to enhance the photos and get better results. Sort images with different preferences and apply various filters to the images. Adjust light, color, tint, saturation, and vibrancy of the images. There are different geometry and optics tools as well as a wide range of options that provide easy accessibility and more control over the digital media. All in all, it is a complete environment to enhance the digital images and share on the cloud.
Features of Adobe Photoshop Lightroom CC 1.4 for Mac
A powerful image editor with graphics manipulation tools
A wide range of professional tools and cloud sharing features
Desktop photo editor with a powerful photo manager
Make various adjustments to the images using simple sliders
Built-in tips to provide a better understanding of the application
Sort images with better searching capabilities and keywords association
Use different filters, effects as well as sharpening and noise reduction features
Rotate, crop, and flip images with a wide range of other tools
Cloud support to provide mobility and quick access to the images
Built-in presets to perform quick adjustments and much more
Technical Details of Adobe Photoshop Lightroom CC 1.4 for Mac
File Name: Adobe_Photoshop_Lightroom_CC_1.4.0.0_Multilingual_macOS.zip
File Size: 1.15 GB
Developer: Adobe
System Requirements for Adobe Photoshop Lightroom CC 1.4 for Mac
Mac OS X
2 GB free HDD
1 GB RAM
Intel Processor
Adobe Photoshop Lightroom CC 1.4 for Mac Free Download
Adobe Lightroom Mac Download
Download Adobe Photoshop Lightroom CC 1.4 latest version free standalone offline setup for Mac OS X by clicking the below button.

1 note
·
View note