#photoshop portfolio website template
Explore tagged Tumblr posts
Visit Tumblr Blog
Explore Tumblr blogs with no restrictions, modern design and the best experience.
Last Seen Tumblr Blogs


Fun Fact
Tumblr has been providing a Korean-language service since 2013.
Text
The Best Tools for Designing Your Own WordPress Theme
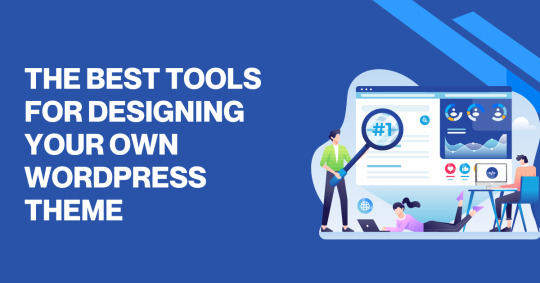
Designing your own WordPress theme can seem like a daunting task, especially if you're not a professional web developer. But what if I told you that with the right tools, it could be a lot more enjoyable and accessible?
Whether you’re creating a personal blog, portfolio, or online store, designing a custom WordPress theme can help your site stand out from the crowd. So, what tools should you use to build a theme that’s as unique as your ideas?
In this post, we’ll explore some of the best tools for the job. By the end, you’ll feel more confident and ready to dive in!
Why Design Your Own WordPress Theme?
Before we talk about tools, let’s take a step back. You might be wondering: Why bother designing my own WordPress theme? After all, there are thousands of free themes out there that are easy to use, right?
Here’s the catch – when you design your own WordPress theme, you’re in complete control. You can tailor everything from the colors and fonts to the layout and functionality. This is a great option if you’re looking for something unique that aligns perfectly with your brand or personal style.
Plus, it helps you avoid the cookie-cutter look that many free themes can have.
1. WordPress Theme Development Frameworks
So, where do you start? Frameworks are a great way to kick off your theme development. These pre-built templates offer a solid foundation, saving you from starting from scratch. Popular frameworks like Genesis Framework and Underscores are flexible, SEO-friendly, and responsive, ensuring your theme works well on any device.
Quick Tip: If you're working with a WordPress theme development agency, using a framework can significantly speed up the process, making it easier to deliver high-quality themes in less time.
2. The Right Code Editor
Once you’ve chosen your framework (or if you’re starting from scratch), you’ll need a good code editor. A code editor makes writing and editing code much easier. Without one, it’s like trying to write a book on a napkin – not very efficient, right?
Two of the best code editors for WordPress development are Visual Studio Code (VS Code) and Sublime Text. Both are lightweight, fast, and packed with features, including syntax highlighting, error checking, and auto-completion.
3. Designing Before Development
Before you dive into coding, it’s a good idea to design your theme. Tools like Adobe XD and Figma allow you to create high-fidelity prototypes of your theme, experimenting with layout, color schemes, and typography without touching a line of code. These tools also make it easy to collaborate with others, get feedback, and adjust your designs before you start coding.
4. CSS Preprocessors
When it comes to styling your WordPress theme, a CSS preprocessor like Sass or LESS can save you a lot of headaches. These tools add features to CSS that make your code more organized, easier to maintain, and more powerful.
For instance, Sass lets you use variables, nested rules, and mixins, which makes styling your theme much more efficient. If you're tired of repeating the same styles over and over again, preprocessors are a real lifesaver.
5. Image Editing Tools
Let’s face it, no website is complete without stunning visuals. So, how can you make sure the images in your WordPress theme are just perfect? Tools like Photoshop and Canva are perfect for editing and optimizing images.
Whether you're designing custom banners or tweaking logos, these tools allow you to ensure your visuals are crisp and professional. Plus, if you're short on time, Canva offers easy templates to help you create beautiful designs in no time.
6. Debugging Tools
So, you’ve developed your theme, but is it bug-free? Testing is crucial. Luckily, WordPress has plenty of debugging tools that can help you catch any issues before your theme goes live. Plugins like Query Monitor and Theme Check allow you to run tests on your theme to check for compatibility issues, errors, and even performance problems.
Before you launch, make sure your theme works well across all browsers and devices. You don't want your visitors to have a poor experience just because of a small mistake, right?
7. Theme Customizer
Once you’ve developed your theme, it’s time to make it live. But here’s the catch – you don’t need to write a single line of code to tweak certain settings like colors, fonts, and site layouts. With the WordPress Customizer, you can change things in real-time, allowing you to see the effects as you make them.
This tool is great for fine-tuning your theme's appearance without diving back into code, making the process smoother and more enjoyable.
8. Plugins to Extend Your Theme’s Functionality
Lastly, let’s talk about plugins. Plugins are important for adding extra functionality to your theme without having to write complex code. Whether it’s adding a contact form, improving SEO, or boosting site speed, there’s a plugin for nearly every need.
Some must-have plugins for theme developers include Yoast SEO (for SEO optimization), Advanced Custom Fields (ACF) (for adding custom fields), and Elementor (for building custom page layouts).
Conclusion
Designing your own WordPress theme might seem overwhelming at first, but with the right tools and a bit of creativity, you can develop a custom theme that perfectly fits your needs.
Remember, it’s about creating an experience that resonates with your audience. So, take your time, use the right tools, and enjoy the process. If you need assistance, don’t hesitate to reach out to a WordPress theme development agency. Our team of professionals can guide you through every step, ensuring your vision comes to life exactly as you imagined.
Visit our website today to learn more about services.
0 notes
Text
How to Sell Custom Sticker Mockups Online
Custom sticker mockups have become a growing niche in the design world, thanks to their versatility and ability to showcase sticker designs professionally. Whether you’re a graphic designer looking to monetize your skills or a business aiming to diversify your offerings, selling custom sticker mockups online can be a lucrative venture. In this blog, we’ll walk you through the step-by-step process of creating, marketing, and selling your sticker mockups effectively.
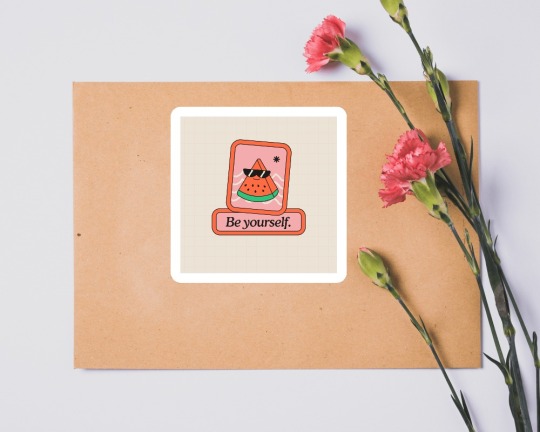
What Is Custom Sticker Mockup?
Custom sticker mockups are high-quality digital templates that allow users to visualize their sticker designs in a realistic setting. These mockups are highly customizable and can showcase stickers in various shapes, sizes, and finishes (like matte, glossy, or holographic). From laptops and water bottles to packaging and notebooks, sticker mockups can fit a wide range of applications, making them popular among designers and businesses alike.
Why Sell Custom Sticker Mockups Online?
Selling sticker mockups online can be a profitable business for several reasons:
High Demand: Designers, businesses, and marketers are always looking for professional mockups to present their designs.
Passive Income: Once you create and list your mockups, they can generate sales repeatedly without additional effort.
Low Startup Cost: You only need a good design tool and creativity to get started.
Scalability: You can expand your portfolio by adding new mockups over time to attract a wider audience.
Step 1: Create High-Quality Sticker Mockups
1. Choose Your Design Tools
To create professional mockups, you’ll need reliable design software. Popular options include Adobe Photoshop, Affinity Designer, or online tools like Canva. If you’re new to mockup creation, consider starting with a sticker mockup generator to simplify the process.
2. Decide on Mockup Styles
Think about the types of stickers your audience might want to showcase. Here are some ideas:
Die-cut sticker mockups
Round or rectangular sticker mockups
Matte, glossy, or holographic finishes
Stickers on surfaces like laptops, water bottles, or product packaging
3. Focus on Realism
Ensure your mockups include realistic lighting, shadows, and textures to make them visually appealing. High-resolution images are a must to attract professional designers and businesses.
4. Save in Editable Formats
Provide your mockups in editable formats like PSD (Photoshop) files with smart object layers. This makes it easy for buyers to customize the design with their own artwork.
Step 2: Choose an Online Platform to Sell Your Mockups
There are many platforms where you can sell custom sticker mockups. Here are some of the most popular options:
1. Marketplaces
Etsy: A great platform for creative products like digital mockups. It’s beginner-friendly and has a large audience.
Creative Market: Ideal for selling professional design assets like mockups and templates.
Design Bundles: Perfect for selling bundles of mockups to attract budget-conscious buyers.
2. Your Own Website
Creating your own website using platforms like Shopify or WordPress allows you to have full control over your sales and branding. You can also avoid marketplace fees.
3. Stock Websites
Submit your mockups to stock photo and design websites like Adobe Stock, Shutterstock, or Envato Elements to reach a global audience.
Step 3: Price Your Sticker Mockups
Pricing is a critical aspect of selling mockups online. Here’s how to determine the right price:
Research competitors to see what similar mockups are priced at.
Offer different pricing tiers, such as individual mockups and bundles.
Consider the time and effort you’ve put into creating the mockup. For high-quality, unique designs, don’t hesitate to charge a premium.
Step 4: Market Your Mockups Effectively
1. Use Social Media
Platforms like Instagram, Pinterest, and TikTok are perfect for showcasing your mockups. Share high-quality visuals and behind-the-scenes content to attract designers and businesses.
2. Create a Portfolio
Platforms like Behance and Dribbble allow you to build a portfolio and connect with potential buyers. Include multiple examples of your mockups in use.
3. Leverage SEO
Optimize your product listings and website with keywords like “sticker mockups,” “custom sticker mockups,” or “die-cut sticker mockups.” This will help you rank higher on search engines and attract organic traffic.
4. Offer Discounts and Bundles
Encourage more sales by offering discounts for first-time buyers or bundling multiple mockups at a lower price.
Step 5: Provide Excellent Customer Support
To build trust and retain customers, offer top-notch support. Respond to inquiries quickly, provide clear usage instructions, and ensure that your mockups are easy to use. Positive reviews can go a long way in boosting your sales.
Conclusion
Selling custom sticker mockups online is a rewarding venture that combines creativity with business opportunities. By creating high-quality designs, leveraging platforms like Etsy or Creative Market, and marketing your products effectively, you can tap into a growing market and generate a steady income. Tools like a sticker mockup generator can help streamline the process, making it easier to produce professional-looking mockups. Start building your portfolio today and take the first step toward establishing yourself in this exciting industry!
#sticker mockup#sticker collection#stickers#mockupgenerator#mockupdesign#productmockup#free mockup#creativedesign#3dmockups#mockup
0 notes
Text
Mastering Graphic Design: From Basics to Professional Excellence
Course Structure:
This course is divided into 8 modules to take learners from the fundamentals to advanced-level expertise in graphic design.
Module 1: Introduction to Graphic Design
Duration: 1 week
What is Graphic Design?
Understanding the Role of a Graphic Designer
Tools of the Trade: Overview of Design Software (Adobe Photoshop, Illustrator, Canva, etc.)
Basics of Visual Communication and Design Principles
Module 2: Fundamentals of Design
Duration: 2 weeks
Elements of Design: Line, Shape, Color, Texture, Space
Principles of Design: Balance, Contrast, Hierarchy, Repetition, Alignment, Proximity
Typography Basics: Fonts, Pairing, and Readability
Understanding Color Theory and Psychology
Module 3: Adobe Photoshop Essentials
Duration: 2 weeks
Navigating the Interface and Tools
Working with Layers and Masks
Photo Editing and Retouching
Creating Simple Designs: Posters, Social Media Posts
Module 4: Adobe Illustrator Essentials
Duration: 2 weeks
Introduction to Vector Graphics
Creating Logos and Icons
Working with Shapes, Paths, and Pen Tool
Designing Business Cards and Flyers
Module 5: Branding and Identity Design
Duration: 3 weeks
What is Branding?
Designing Logos: Concept to Final Design
Creating Brand Guidelines: Colors, Typography, and Style
Developing Stationery and Marketing Materials
Module 6: Advanced Design Techniques
Duration: 3 weeks
Designing for Web vs. Print
Introduction to UI/UX Design
Motion Graphics Basics (using Adobe After Effects)
Advanced Photoshop and Illustrator Techniques
Module 7: Portfolio Building
Duration: 2 weeks
Choosing Your Best Work
Structuring a Professional Portfolio
Creating Mockups and Case Studies
Building an Online Presence: Behance, Dribbble, Personal Website
Module 8: Starting a Career in Graphic Design
Duration: 1 week
Freelancing vs. Working for a Company
Finding Clients and Networking
Pricing Your Services and Contracts
Staying Updated with Design Trends
Course Materials and Resources
Video tutorials and downloadable resources
Practice files and design templates
Access to a private community for peer reviews and support
Assessment and Certification
Quizzes and Assignments after each module
Final Project: Design a complete brand identity
Upon completion, students will receive a Professional Graphic Design Certificate.
Course Outcome:
By the end of the course, learners will have the skills to:
Create professional designs for print and digital media.
Build a strong portfolio and start a career in graphic design.
Confidently use industry-standard tools like Photoshop and Illustrator
#graphic design#graphic art#graphic novel#graphic source#design#graphic tee#Graphic#trending now#viral#trending shorts#trending on tumblr#trending news#trending video#instagood#follow#market#safaris
1 note
·
View note
Text
Understanding the Largest Size Options Available in Canva
Image editing in canva: Key Questions Explained
1.What is the weakness of Canva?
One weakness of Canva is its limited design flexibility compared to professional software like Adobe Illustrator. While it offers user-friendly templates, advanced users may find it restrictive for creating custom designs. Additionally, some features are only accessible through the paid subscription, which may deter casual users. The reliance on an internet connection can also be a drawback for those who prefer offline design work. Lastly, collaboration can be cumbersome when multiple users edit a design simultaneously, potentially leading to confusion or loss of original elements.
2.What is the largest size in Canva?
In Canva, the largest size for custom designs typically reaches up to 8000 x 8000 pixels, allowing users to create high-resolution graphics suitable for a variety of applications, including print and digital media. This expansive canvas size facilitates detailed artwork and intricate designs, making it ideal for projects that require significant visual impact. Users can also leverage Canva's predefined dimensions for specific formats, ensuring that their designs meet the necessary specifications for posters, banners, and social media graphics. By providing this flexibility, Canva empowers creators to produce professional-quality visuals that effectively communicate their intended message.
3. What is CMYK in Canva?
CMYK stands for Cyan, Magenta, Yellow, and Key (Black), which are the primary colours used in colour printing. In Canva, CMYK is important for ensuring that designs appear accurately when printed, as it provides a colour model optimized for print rather than digital displays. While Canva primarily operates in RGB (Red, Green, Blue) for digital designs, users can export their projects in CMYK for print purposes, ensuring colours remain true to the intended design when transferred to physical media.
4. Does Canva export RGB or CMYK?
Canva primarily exports designs in RGB format, which is suitable for digital use. However, it does not natively support CMYK, the colour mode used for print. For print purposes, users are advised to convert their designs to CMYK using other software like Adobe Photoshop or Illustrator after exporting from Canva. This ensures better colour accuracy for printed materials.
5. What is 4x6 in Canva?
In Canva, "4x6" typically refers to the dimensions of a design or image, specifically 4 inches by 6 inches. This size is commonly used for photographs, postcards, and flyers. To create a 4x6 design in Canva, you can select a custom size when starting a new project, inputting 4 inches for width and 6 inches for height. This allows you to design graphics tailored for printing or digital use at those specific dimensions.

Visit: VS Website See: VS Portfolio
0 notes
Text
Final Project (Final)
When grading your final project, I will assess the following aspects.
Analyze your statement about your final work.
Examine the use of the tools, techniques, and resources used in the creation process.
Evaluate the application of chosen tools and techniques both technically and conceptually.
Examine your media blogs/online sketchbook for completeness.
Verify that you provided a link to your online display/presentation.
Assess how the display and layout enhance the overall concept.
Determine if the project reflects several weeks' worth of effort.
Evaluate the level of innovation and problem-solving demonstrated (Note: this work should be the strongest you have created all term).
Ensure the work is easily accessible.
Final Project link: https://snnphotographyy.mypixieset.com/Links to an external site.
For my final project, I have chosen to develop a professional website and portfolio that showcases my skills and expertise as a freelance photographer. This platform will serve as both a storytelling tool and an online portfolio, allowing me to present my work in a visually compelling way. My goal is to create content that not only highlights my photography, but also establishes a strong, cohesive brand identity that resonates with my audience.
Initially, I considered creating a celebrity documentary, but I've decided to incorporate this idea into my website by featuring images of celebrities to showcase my work in that genre. In doing so, the website will not only serve as a space for creative expression, but also offer a convenient way for potential clients to view my portfolio and get in touch with me. Through this project, I aim to create a platform that effectively communicates my capabilities as a successful freelance photographer and builds a connection with my audience.
The use of tools, techniques, and resources in the creation process of developing a professional website and portfolio as a freelance photographer, breaks down into several key components.
For my final project, I used the Wix platform, which is widely recognized for its user-friendly design interface and customizable templates, making it an ideal choice for creating photography portfolios. In addition to a reliable website platform, having high-quality camera equipment and a selection of lenses is crucial for capturing the images featured on my site. I use Adobe Lightroom and Photoshop for image editing, as these tools are essential for enhancing image quality, adjusting colors, and maintaining a consistent style throughout my portfolio.
During the creation process, I chose to prioritize a minimalist design, which is essential for photography websites as it allows the images to take center stage. This approach involves using clean layouts, straightforward navigation, and high-quality visuals.
I really appreciated the feedback from my peers—it gave me a lot more confidence in my website. One photographer suggested changing up some of the wording to make it feel a bit more professional instead of so casual. I took her advice and adjusted a few phrases to sound more professional, but I made sure to keep the personal touch that makes it feel more like me.
I showcased examples of my photography and highlighted my niche, using white and minimal design elements to create a clean, simple look that keeps the focus on the information and my images.
I took another peer's advice and experimented with various typography layouts to further elevate my website and ensure the design matched the quality and style of my photographs. While I didn’t find an alternative that aligned with my vision, I’m confident that the current layout provides a clean and professional presentation. It’s also highly accessible, making it easy for both clients and potential clients to navigate.
This project represents several weeks of hard work because, as any photographer knows, creating and presenting a photography website is no quick or easy task. It requires a great deal of patience, constructive feedback, and dedication.
I took thoughtful steps to refine my website by incorporating feedback, adjusting my design elements, and experimenting with typography to better match the style and quality of my photography. This shows a proactive approach to enhancing both the functionality and aesthetic of my website. Additionally, my ability to balance professional advice with my personal touch reflects creative problem-solving, as I aimed to meet the needs of potential clients while staying true to my own brand and vision. The effort I put into making the site accessible and user-friendly demonstrates a clear focus on improving the client experience, which is an essential aspect of problem-solving in web design.
My final project is not only highly accessible but also reflects my dedication to capturing authentic and creative moments. It successfully combines the dynamic energy of live events with the understated elegance of candid portraits, creating a cohesive and compelling showcase of my work.
0 notes
Text
25+ Essential Event Stationery Templates for InDesign & Photoshop – Speckyboy
New Post has been published on https://thedigitalinsider.com/25-essential-event-stationery-templates-for-indesign-photoshop-speckyboy/
25+ Essential Event Stationery Templates for InDesign & Photoshop – Speckyboy
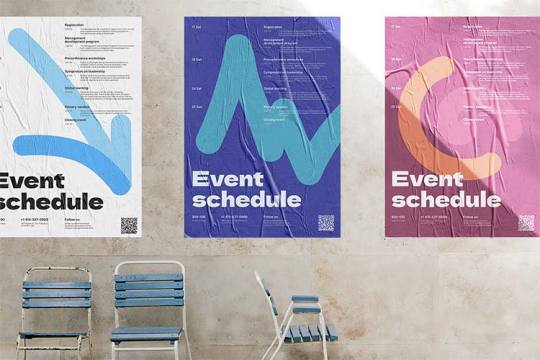
Putting together an in-person event can be a huge job. For example, consider all the printed stationery you’ll need.
First, you’ll need materials to promote the event like posters and brochures. They’re important tools for spreading the word and attracting attendees.
From there, it’s all about giving attendees the materials they need to enjoy the event. Think of tickets, badges, and name cards. These items are essential for getting in the door and helping guests get to know each other.
Then there are event calendars and programs. They serve as a guide to what’s happening and are a place to showcase sponsors.
That’s a lot of materials to put together. Using a high-quality InDesign or Photoshop template can help make quick work of the task. They already include great design and beautiful typography. Customize them to match your needs and have them printed. Just think of the time you’ll save!
We’ve put together a collection of outstanding event stationery templates. You’ll find everything you need to promote your get-together and inform guests. Look through the options and find the one that works for you.
Event Calendar & Program Templates
Calendars and programs are sure to be used a lot. Attendees will carry them around and frequently check to see what’s happening. As such, you’ll want this stationery to be easy to read and informative.
Event Pass & Ticket Templates
Tickets and passes serve a functional purpose by allowing attendees to enter your event. There’s also a promotional side, though. A well-designed ticket will reflect your brand and help generate anticipation. Their look should complement the rest of your print materials.
Name Card Templates
Help attendees get to know each other with an attractive and informative name card template. You might go the extra mile by adding attendee photos, website URLs, and social media handles. It’s a simple way for people to connect.
Lanyard & Badge Templates
Use a matching lanyard and badge template to create a cohesive branding experience. These items can sometimes be an afterthought. However, going the extra mile here says a lot about your professionalism and attention to detail.
Event Poster & Brochure Templates
An attention-getting poster or brochure is a great way to educate people about your event. Use these templates to highlight special guests and provide all the relevant details. Print plenty of flyers so that those interested can grab one.
Make Your Next Event a Hit
The right stationery can go a long way in promoting your event and satisfying your guests. But starting from scratch can also be a long and expensive proposition.
Thankfully, the templates above can save you time and money. They already feature breathtaking designs. Plus, they’re easy to customize. That means you can have a print-ready document within minutes.
So, download your favorite templates and fire up InDesign or Photoshop. You’ll be well on your way to a successful production!
More Print Design Templates
Browse our curated collections of InDesign and Photoshop Templates, including brochures, flyers, proposals, stationery, resumes, portfolios, lookbooks, magazine layouts, and more.
InDesign Templates Photoshop Templates
Related Topics
Top
#Adobe InDesign#amp#attention#badge#badges#Branding#Brochure Templates#Calendar#Collections#Design#details#easy#event#Flyer Templates#Giving#Indesign Templates#it#materials#media#money#One#Other#photos#Photoshop#Poster Templates#Print Design#Print Templates#Production#PSD Templates#Read
0 notes
Text
Web Designing Course in Delhi.
https://picklesanimation.in/best-web-designing-institute-in-delhi/
Pickles Animation offers a comprehensive Web Designing course designed to equip students with the skills and knowledge needed to create effective, visually appealing, and functional websites. This course covers a broad range of topics from the fundamentals of web design to advanced techniques and tools used in the industry.
Course Duration:
6 Months (Certificate Course)
12 Months (Diploma Course)
24 Months (Advanced Diploma Course)
Course Overview:
The Web Designing course at Pickles Animation focuses on providing students with a solid foundation in web design principles and hands-on experience with the latest tools and technologies. The curriculum is structured to progressively build skills in designing and developing websites that are both aesthetically pleasing and technically sound.
Key Modules:
Introduction to Web Design
Overview of the web design industry and career opportunities.
Understanding the role of a web designer.
Basics of how the web works (servers, browsers, URLs).
HTML (HyperText Markup Language)
Introduction to HTML and its role in web design.
Writing and structuring content with HTML5.
Semantic elements and accessibility considerations.
CSS (Cascading Style Sheets)
Basics of CSS and how it styles HTML elements.
Techniques for creating responsive designs using CSS3.
Advanced CSS features like animations, transitions, and grid layout.
JavaScript and jQuery
Fundamentals of JavaScript for web interactivity.
Manipulating the Document Object Model (DOM).
Introduction to jQuery and its applications in simplifying JavaScript code.
Responsive Web Design
Principles of responsive design and mobile-first development.
Using media queries to create adaptive layouts.
Best practices for designing for different screen sizes and devices.
UI/UX Design Principles
Introduction to User Interface (UI) and User Experience (UX) design.
Techniques for creating intuitive and user-friendly interfaces.
Tools for prototyping and wireframing (Adobe XD, Figma).
Web Graphics and Media
Creating and optimizing web graphics using tools like Adobe Photoshop and Illustrator.
Incorporating images, icons, and videos into web pages.
Techniques for responsive image handling and media queries.
Frameworks and Libraries
Introduction to popular frameworks like Bootstrap for rapid web development.
Understanding the use of CSS frameworks and JavaScript libraries.
Building and customizing responsive websites using frameworks.
Content Management Systems (CMS)
Overview of CMS platforms like WordPress.
Basics of setting up and managing a CMS.
Customizing themes and templates to meet design needs.
SEO (Search Engine Optimization)
Basics of SEO and its importance in web design.
Techniques for optimizing web pages for search engines.
Understanding meta tags, keywords, and on-page SEO practices.
Web Hosting and Domain Management
Fundamentals of web hosting and domain registration.
Setting up hosting environments and managing domain names.
Deploying websites to live servers and troubleshooting common issues.
Project Management and Collaboration
Introduction to project management tools and methodologies.
Techniques for effective collaboration and version control using tools like Git.
Best practices for working in teams and managing client projects.
Web Security Essentials
Understanding common web security threats and vulnerabilities.
Implementing basic security measures to protect websites.
Best practices for secure coding and maintaining website security.
Final Project and Portfolio Development
Applying learned skills to develop a comprehensive web design project.
Creating a portfolio website to showcase your work.
Preparing for job interviews and presenting your projects to potential employers.
Software and Tools:
HTML/CSS Editors: Visual Studio Code, Sublime Text, Brackets.
Graphics Tools: Adobe Photoshop, Adobe Illustrator.
Prototyping Tools: Adobe XD, Figma.
Frameworks: Bootstrap, Foundation.
CMS Platforms: WordPress.
Version Control: Git, GitHub.
Career Opportunities:
Graduates of the Web Designing course can pursue various roles in the digital and creative industry, including:
Web Designer
UI/UX Designer
Front-End Developer
WordPress Developer
Graphic/Web Artist
Additional Benefits:
Expert Instructors: Learn from professionals with extensive industry experience.
Practical Learning: Engage in real-world projects and hands-on assignments.
Modern Facilities: Access the latest software and hardware used in the industry.
Industry Exposure: Opportunities to connect with industry professionals and attend workshops.
Career Support: Assistance with job placements and career advancement.
How to Enroll:
To enroll in the Web Designing course at Pickles Animation, follow these steps:
Visit the Official Website: Navigate to the Pickles Animation Web Designing Course page.
Submit Your Application: Complete the online application form with your details and submit it.
Consultation and Admission: Schedule a meeting with the admissions advisor to discuss your goals and finalize your enrollment.
Complete Payment: Make the necessary payment to confirm your spot in the course.
Begin Classes: Start your journey in web design with classes commencing on the scheduled date.
Contact Information:
For more information or assistance, contact Pickles Animation at:
Phone: +91-XXXX-XXXXXX
Email: [email protected]
Website: www.picklesanimation.com
Visit the campus or arrange a virtual tour to explore the facilities and meet the instructors.
Embark on your web designing career with Pickles Animation. Enroll now to master the skills needed to create stunning and functional websites for a digital world.
0 notes
Text

Welcome to March Graphics ! A graphics, resources and designs kind of blog. A blog dedicated to my journey in design and graphics, and hopefully creating some cute and beautiful templates for you to use ! I don't have a permanent brand or brand style yet, but I thought I would change the vibe and colour scheme with every holiday or season: Spring/Summer, Halloween/Autumn, Christmas/Winter. That way I, hopefully, will be able to give you a sort of brand-new look every so often while still using the same theme ! I'll be trying to share everything I create, and make sure you guys can follow my journey as I grow and learn.

As much as I love to create without a degree, I know I can expand my knowledge as a graphic designer by actually getting a degree that will allow me to either self-employ myself or work for a company.
Meaning, this blog will most likely be used as a side project once I do work for someone else. Or, be used as a portfolio to showcase what I do and use social media as a whole to make sure my work gets out there. Which would mean I would probably need a website at one point too.
But !
Before we get to that point, I'm mostly planning on taking commissions, learning to hone my skills and simply create for fun and showcase to you guys ! If I do showcase it to you guys ? What can you expect to see ?
As said before I want to hone my skills so that means, at times, I'll be challenging myself. But for now, you can definitely expect the following to be shown on this blog:
IMVU product Icons for shop/creators
Banners, Headers, Icons (Tumblr)
Font Styles
Role-play Resources (Tumblr)
Icon Banners (Tumblr)
Dividers (Tumblr)
What do I use to make these ?
Well... Since upgrading my Computer to a gaming one from a laptop, I can now be active in Photoshop CC ! So I can use Photopea for minor edits, use GIMP as well, but mostly I will be using Photoshop CC.
My processor is an AMD Ryzen 7, so I'm hoping it'll all go smoothly ! Until my processor or storage (RAM I think) needs an upgrade !
Where else can you find me ? Well... You can find more information on my work in the links below, once I have set them up ! But until then, you can find most of my work on Tumblr.
Carrd Website
Portfolio Website
Ko-Fi
Gumroad / Payhip
Currently, however, I do NOT take commissions !
My inbox is open for questions and just to hang out, but I don't take requests or commissions at this moment.
0 notes
Text
#uxjobs | Graphic and UI/UX Designer https://www.behance.net/joblist/301267/Graphic-and-UIUX-Designer?utm_source=dlvr.it&utm_medium=tumblr
0 notes
Text
Mastering the Web: 7 Top Web App Development Companies Redefining Online Experiences
Mastering the Web: 7 Top Web App Development Companies Redefining Online Experiences
Hey there, web enthusiasts! Are you ready to embark on a journey through the digital frontier? Today, I'm thrilled to shine a spotlight on the trailblazing web app development companies that are revolutionizing online experiences. From e-commerce giants to innovative startups, these companies are mastering the web like never before. Let's dive in and discover the seven top players reshaping the digital landscape:
1. Shopify
Shopify has emerged as a powerhouse in the e-commerce realm, empowering businesses of all sizes to launch and scale online stores with ease. With its intuitive platform and robust features, Shopify is redefining the way entrepreneurs approach online retail. From customizable themes to seamless payment integration, Shopify offers everything you need to thrive in the competitive world of e-commerce.
2. Wix
Wix is synonymous with user-friendly website building, offering a comprehensive suite of tools for creating stunning websites without any coding knowledge. With its drag-and-drop interface and vast library of templates, Wix empowers individuals and businesses to bring their online visions to life effortlessly. Whether you're a freelancer showcasing your portfolio or a small business promoting your services, Wix has you covered.
3. Squarespace
Squarespace is renowned for its elegant design and powerful website building capabilities. With its intuitive interface and customizable templates, Squarespace enables users to create visually striking websites that stand out from the crowd. From blogs to online stores, Squarespace offers a versatile platform for expressing your creativity and engaging with your audience.
4. WordPress
WordPress needs no introduction, serving as the foundation for millions of websites worldwide. With its vast ecosystem of themes and plugins, WordPress offers unparalleled flexibility and scalability for businesses and bloggers alike. Whether you're launching a personal blog or a corporate website, WordPress provides the tools you need to succeed in the digital realm.
5. Adobe
Adobe is synonymous with creativity, offering a suite of tools for designers, developers, and content creators. From Photoshop to Illustrator, Adobe's software products enable users to bring their creative visions to life with precision and flair. With its focus on innovation and user experience, Adobe continues to set the standard for digital design and development.
6. WebFX
WebFX is a leading digital marketing agency that specializes in web design and development. With its team of talented designers and developers, WebFX helps businesses elevate their online presence and drive results. From responsive websites to custom web applications, WebFX delivers tailored solutions that align with clients' goals and objectives.
7. Toptal
Toptal is a global network of top freelance talent, including web developers, designers, and engineers. With its rigorous screening process and curated pool of experts, Toptal connects businesses with the best-in-class talent they need to execute their projects successfully. Whether you're looking for a full-stack developer or a UI/UX designer, Toptal delivers excellence on demand.
So there you have it, folks! These seven top web app development companies are setting the bar high and redefining online experiences in the digital age. Whether you're a business owner, a developer, or simply a digital enthusiast, keep an eye on these industry leaders as they continue to shape the future of the web.
0 notes
Text
I will guide you on how to transform designs from PSD to HTML, WordPress, and Shopify.
Are you someone with a cool design that is saved in a Photoshop file? Or maybe you're a business owner with creative ideas for a website and you want to turn your design into a real website. So don't worry about that. I am here for your help in changing your Photoshop file into something websites can use, like HTML, WordPress, or Shopify themes. Let's break down this process and see how it works.
Understanding the PSD to HTML, WordPress, and Shopify Conversion:
PSD to HTML Conversion: This process turns your Photoshop design into HTML, which is the language used to make web pages. Every part of your Photoshop file, like pictures and text, gets carefully turned into HTML code. This makes sure your website looks perfect on different browsers and devices. After that, CSS is added to make your design look even better and work well on all screens.
2. PSD to WordPress Conversion: WordPress is a widely-used tool for managing website content. It's famous for being flexible and easy to use. Converting a PSD design into a WordPress theme means taking the design from Photoshop and fitting it into WordPress. This is how you can manage your website's content dynamically, making it easy for you to update and change things on your site.
3. PSD to Shopify Conversion: For e-commerce ventures, Shopify offers a robust platform to build online stores with seamless user experiences. Converting a PSD design into a Shopify theme requires slicing the PSD file and coding it into Liquid, Shopify's templating language. This transformation ensures that your online store not only reflects your design vision but also provides intuitive navigation and secure transaction capabilities.
Benefits of Converting PSD to HTML, WordPress, and Shopify
Customization: Turning PSD designs into HTML, WordPress, or Shopify themes lets you customize your website a lot. Whether you're a designer who wants every pixel to be perfect or a business owner who wants your website to match your brand perfectly, this process helps you make your online presence exactly how you want it to be.
Scalability: HTML, WordPress, and Shopify provide scalable solutions suitable for projects of all sizes. Whether you're launching a personal portfolio, a corporate website, or an e-commerce store, the versatility of these platforms ensures that your website can grow alongside your business.
SEO-Friendliness: By converting PSD designs into HTML, WordPress, or Shopify themes, you can optimize your website for search engines. From semantic HTML markup to SEO plugins and built-in features, these platforms offer robust tools to enhance your site's visibility and rankings in search engine results.
Converting PSD designs into HTML, WordPress, or Shopify themes is a valuable skill that bridges the gap between design and development. with this experience I am able to bring your creative visions to life and deliver engaging, user-friendly websites to your clients or audience.
#PSDtoHTML#PSDtoWordPress#PSDtoShopify#WebDesign#WebsiteDevelopment#HTML#WordPress#Shopify#DesignTransformation
0 notes
Text
Blog Post 4 - Self-Audit
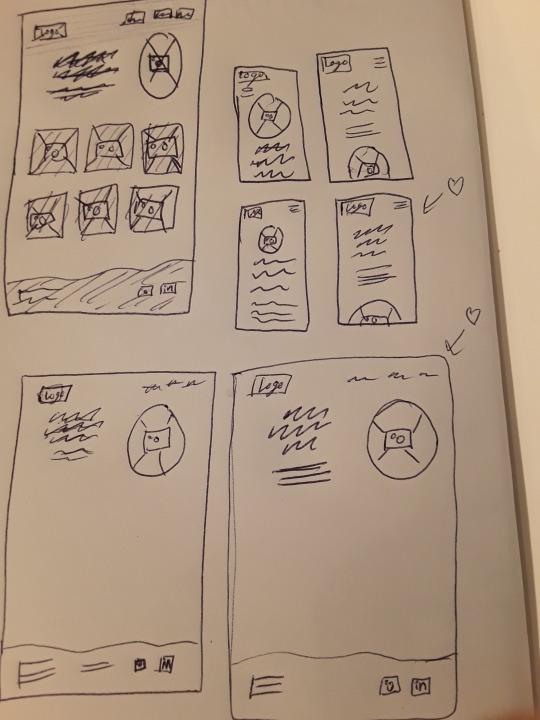
The image above is my low-fidelity home page website sketches and some mobile homepage website sketches. My main navigation bar links on my website will be About Me, Work and Play. The projects to showcase in the portfolio include Dyslexia BC Logo and Branding Collateral Freelance Project, Biggest Trees of BC Infographic, Alcatraz Island Website, BC Ferries Logo & Branding Guidelines, Document Design (if approved by two companies) and Learning Dyslexia Branding and print collateral.
There are some gaps in content I need for my portfolio. For the Dyslexia BC Logo project, I will need to write a Rationale and take photos of physically printed merchandise. For the Alcatraz Island Website, I will need to write a Rationale and make mockups of the website on a computer. The BC Ferries Logo & Branding Guidelines will need to have reformatted images and a logo photoshopped onto a ferry boat and a revised rationale. Document Design from work will need a rationale with a clear description of the role I played in the project and imagery from the document. I will need to update my Linkedin banner to reflect my branding Revision on my portfolio website. I will need to update my work experience with Fairwind Creative and add my green graphic design course that I took in the summer. I am going to use the Twenty Twenty Three template found on Wordpress.
My potential domain names include catearnold.com, CateArnoldDesign.com and CateRainyArnold.com. Catearnold.com will be the easiest way for someone to quickly look up my website URL even if they hear my name through word of mouth and they know I spell my name with a C! However this Url might be taken. CateArnoldDesign.com will give me a direct hint at the type of work I do. However, the longer URL is a bit harder for someone to spell out. CateRainyArnold.com adds my unique and memorable middle name that works well and this likely is a URL that’s available. This URL also connects well with the logo I’ve created. When saying my Url to someone, they may have to rewrite the K for Kate as a C and they might spell Rainy with an E instead of a Y. I think to catearnold.com or catearnold.ca if the first isn’t available is my best option as a straightforward way of finding my portfolio.
0 notes
Text
Web Design Institute

We believe in a practical approach to learning rather than theory. Their training aims towards shaping students to build corporate, B2C, B2B, and E-commerce websites. The course covers all the major aspects required to become a certified professional in web design. Our modules covering concepts such as Illustrations and web imaging, Core web design and connectivity, Interactive Multimedia, and Web Marketing can be observed in the course. Along with these, portfolio designs, for example, Java script templates, Design showcases, and creating a portfolio template are also covered in the training - web designing institutes in delhi.
Our Institute is one of the best training institutes with a prime focus on training students and making them professionals. Training will start from basic to advanced level and software like Adobe Photoshop, Page Maker & Illustrator and Dream weaver can be learned. They are giving placement assistance which means that students enrolled in courses have good chances of getting placed in companies. Our high-end website development services aim to strengthen a business’ online presence and boost its prospects. Our hallmark is adherence to best quality standards and coding guidelines to redefine development for clients - website development courses in delhi.
The web design field offers a wide variety of job opportunities in both the public and private sectors. You can become a user experience designer, web developer, graphic designer, or applications developer. Web Design courses are part of the Computer Science and IT domain. They help you to build your design skills and advance your career. A web design course can be taken up by web developers, programmers, and graphic designers looking to dramatically improve their design skills. You can also take up a web design course if you are a beginner and want to learn how to plan, design, and code great websites and applications. For more information, please visit our site http://www.computer-classes.in/
0 notes
Text
Achieving High-Quality Prints in Canva: The Importance of 300 DPI Resolution
Image editing using graphic design:Frequently Asked Inquiries Explained
1.What is the best quality image for Canva?
The best quality image for Canva is typically a PNG or JPG format with a resolution of at least 300 DPI (dots per inch) for print and 72 DPI for digital use. Images should ideally be at least 1,000 pixels wide for clear visibility. For best results, use images that are free of compression artifacts and have a transparent background if needed. Additionally, ensure the image fits Canva’s recommended dimensions for your specific design type to maintain clarity and quality.
2. How do I get 300 dpi in Canva?
To achieve 300 DPI in Canva, ensure your design's dimensions are set correctly. Start with a high-resolution template (e.g., for print, use inches and set size accordingly). After creating your design, download it as a PDF Print, which maintains higher quality. If you need a PNG or JPG, remember that Canva automatically adjusts DPI based on pixel dimensions. For best results, aim for larger pixel sizes (e.g., 3000 x 2400 pixels) to meet the 300 DPI standard when printing. Always check the final resolution before printing.
3. What is more professional than Canva?
More professional alternatives to Canva include Adobe Creative Cloud (like Photoshop and Illustrator), Affinity Designer, and Sketch. These tools offer advanced features, greater customization, and superior design capabilities, making them suitable for professional designers and businesses. Additionally, platforms like Figma and InVision are excellent for collaborative design and prototyping. While Canva is user-friendly and great for quick designs, these alternatives cater to more complex and high-quality design needs.
4. Is Canva good for resizing images?
Yes, Canva is excellent for resizing images. It offers a user-friendly interface that allows you to easily adjust image dimensions for various formats, such as social media posts, presentations, or print materials. You can simply select a template, upload your image, and use the resizing tools to fit your needs. Additionally, Canva supports custom dimensions, ensuring flexibility for any project. Overall, it’s a practical choice for anyone needing to resize images quickly and effectively.
5. How do I make my Canva designs look better?
To enhance your Canva designs, use high-quality images and maintain a consistent color palette. Choose complementary fonts for readability and visual appeal, and ensure proper alignment and spacing for a clean layout. Utilize white space effectively to avoid clutter. Incorporate elements like shapes and lines for structure, and consider using templates for inspiration. Experiment with layering and transparency for depth. Lastly, seek feedback and review design principles, such as contrast and hierarchy, to refine your work. Regular practice will also improve your skills over time.

Visit: VS Website See: VS Portfolio
0 notes
Text
Creative Box I Nitin Pathak I Graphic Designer I Printing
Professional Profile Creative Box is a total service provider based in Indore. Experts in graphic design, branding, printing services, and digital marketing. I am a versatile and innovative graphic designer with 15+ years of experience working in the commercial design industry. Proficient in Adobe Photoshop, CorelDRAW branding, and identity design packages, with demonstrated expertise in driving social media engagement. I am experienced in managing design projects from start to finish, including client communication, and have a keen eye for detail. will provide you with sure high-quality and fast service.
Career Summary Self-employed: Creative Box Freelance Graphic Designer Deliver comprehensive design solutions on a freelance basis.
We Have Our Hands Well Versed on: Corel Draw, Adobe Photoshop, MS Word and PowerPoint.
Available: 24 hours/7 days
What we specialise in: Logo, Infographic, UI Design, Thumbnails Design, Brochure, Flyers, Leaflets, Pamphlet, Paper Ad, Magazine Ad, Business Cards, Bill Book, Letterhead, Envelope, Product Packaging, Sweet Box, Cake Box, Docter File, Line Art Design, Photo Editing, Photo Retouching, Background Remove, Background Change, Crop/Resize, Image to text Convert, JPG to PDF Convert, Animated GIF Maker, Template Design, Icon Design, Paper Bag, D-Cut Bag, Tag Cards, Label Print, Booklets, Sticker Print, Menu Cards, Catalogue Design, Book Cover, Annual Report, Book Cover Design, Poster Design, Certificate, Invitation, Customised Wedding Cards, Wedding Branding, Biodata, Social Media Post, Facebook Banner, Instagram Post Design, PPT Presentation, Dangler Design, Calendar Design, Customised Diary, Planner, T-Shirt Printing, Cap and Pan Printing, ID Cards, Canopy Design, Standee Design, Glow Sign Board, LED Board, Flex, Vinyal, One-way Vision, Sunpack Sheet, Iron or Wooden Frame, Forex Sheet, Outdoor Branding, Event Branding, Shop Branding, Backdrop Design, Offset Printing, Screen Printing, Lamination, Foil, Digital Marketing, Photo & Videography, Cinematography, Pre & Post Wedding, Wedding Photography, Candid & Traditional, Portfolio, WhatsApp Video, Promotional Video, Invitation Video, Product Photography, Documentary Films, Commercial & Corporate Films, Maternity Shoot, Album Songs, Youtube Video Making, Image & Film Editing, All Solutions for Video & Photography, Web Design, Social Media Marketing and much more.
Why choose us?
We understand your requirements precisely to deliver creative designs.
100% client satisfaction is guaranteed.
Provide help even after the project has been marked as closed.
Work six days a week and be available online on CHAT 24x7 for any queries.
Proper understanding of projects to ensure delivery within the desired time frame.
Conceptualise and design digital and print-based assets such as websites, logos, brochures, and social media graphics.
Manage projects from concept to delivery, ensuring they are completed on time and within budget. Collaborate with clients and internal teams to understand their needs and develop design solutions that meet those needs. •Incorporating feedback and making revisions as necessary. Collaborate with clients and stakeholders to understand their needs and deliver design solutions that meet their requirements.
Build and maintain an active client base, managing multiple projects at once while attracting new clients.
1 note
·
View note
Text
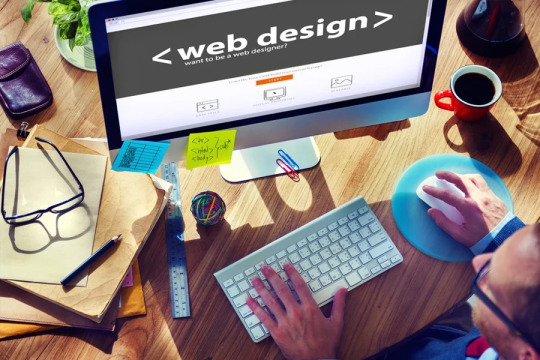
A Guide to Choosing the Right Web Design Tools and Technologies
In the ever-evolving landscape of web design, web designers in Melbourne understand that staying up-to-date with the latest tools and technologies is crucial to creating websites that are not only visually appealing but also functional and user-friendly. The right web design tools and technologies can significantly impact your workflow, productivity, and the quality of your final product.
In this blog post, we’ll guide you through the process of selecting the most suitable web design tools and technologies for your projects.
Understand Your Project Requirements
Before you dive into the world of web design tools and technologies, it’s essential to have a clear understanding of your project’s requirements. Consider factors such as:
Project Type: Is it a personal blog, an e-commerce site, a portfolio, or a corporate website? Each type may require different tools and technologies.
Budget: Determine your budget constraints. While certain tools come at no cost, others may necessitate a subscription or a single upfront payment
Timeline: Are you working on a tight deadline? Some tools can speed up the design process, while others might require more time for customisation.
Technical Expertise: Assess your technical skills. Some technologies may be more accessible to beginners, while others are geared towards advanced users.
Client Needs: If you’re working for a client, consider their specific needs and preferences.
Selecting the Right Web Design Tools
Graphic Design Software
Graphic design software is the backbone of affordable web design. Some popular choices include:
Adobe Photoshop: A versatile tool for creating and editing images.
Sketch: Especially popular among Mac users, it’s known for its user interface (UI) and user experience (UX) design capabilities.
Adobe XD: A prototyping tool for designing and testing user interfaces and experiences.
Figma: A cloud-based collaborative design tool for creating interactive prototypes.
Choose a graphic design tool that aligns with your design preferences and workflow. Many of these tools offer free trials, so you can test them before committing.
Content Management Systems (CMS)
When it comes to web development, CMS platforms simplify content creation and management. Three of the popular CMS tools include:
WordPress: The most widely used CMS globally, known for its flexibility and extensive plugin library.
Joomla: It strikes a commendable balance between flexibility and user-friendliness.
Drupal: Ideal for complex, enterprise-level websites, though it has a steeper learning curve.
Select a CMS that suits the project’s requirements and your familiarity with the platform. WordPress, for instance, is an excellent choice for bloggers and small to medium-sized businesses.
Code Editors and Integrated Development Environments (IDEs)
If you prefer coding your affordable web design from scratch or customising templates, you’ll need a reliable code editor or IDE. Popular options include:
Visual Studio Code (VS Code): A free, highly customizable code editor with a vast library of extensions.
Sublime Text: It is renowned for its exceptional speed and straightforwardness.
Atom: An open-source code editor with a strong community and plugin support.
Experiment with different code editors to find the one that matches your coding style and project needs.
Prototyping and Wireframing Tools
Prototyping and wireframing tools help you create mockups and prototypes of your website’s layout and functionality. Web designers in Melbourne suggest tools like:
Balsamiq: A simple wireframing tool that focuses on sketch-style wireframes.
Axure RP: A comprehensive prototyping tool for complex interactions.
Adobe XD: As mentioned earlier, it also offers prototyping capabilities.
Select a prototyping tool that aligns with your project’s complexity and your proficiency in creating prototypes.
Version Control Systems (VCS)
Collaboration and code management represent pivotal facets of the web development process. Version Control Systems help you track changes and collaborate seamlessly. Some popular choices include:
Git: Widely used and renowned for its branching and merging capabilities.
GitHub: A web-based platform built around Git, offering additional collaboration features.
Bitbucket: Offers both Git and Mercurial support, along with integration options.
Choose a VCS that suits your collaboration needs and the preferences of your team.
Assessing Web Development Technologies
Web development technologies include programming languages, frameworks, and libraries. The choice of technology stack depends on the complexity of your project and your familiarity with these tools. Here are some considerations:
Front-end Technologies
Front-end development is what users interact with directly. Common front-end technologies include:
HTML5: The latest version of HTML for structuring content.
CSS3: For styling web pages and creating responsive designs.
JavaScript: A versatile scripting language for interactive web elements.
Additionally, front-end frameworks like React, Angular, and Vue.js can enhance your web development capabilities.
Back-end Technologies
The back-end of an affordable web design manages data and performs various server-side functions. Some popular back-end technologies include:
Node.js: serves as a JavaScript runtime designed for the construction of scalable network applications.
Ruby on Rails: Known for its simplicity and convention over configuration (CoC) approach.
Python with Django: A powerful and high-level framework for rapid development.
Consider your project’s requirements and your familiarity with these technologies when making your choice.
Final Words
Choosing the right web design tools and technologies requires a deep understanding of your project’s requirements, your own skills, and your team’s preferences. Regularly updating your knowledge and staying flexible in your approach will help you create exceptional web experiences for your clients or users. Whether you’re a designer, developer, or both, the right tools and technologies can make all the difference in delivering successful web projects.
Remember, collaboration and networking among web design in Geelong play a crucial role in sharing insights and experiences regarding the most effective web design tools and technologies.
#web design melbourne#Best Web Designers Melbourne#Web Design Truganina#Website Development Truganina#seo melbourne#seo geelong#web design perth
0 notes