#photo editor for Windows 10
Explore tagged Tumblr posts
Text
maru doesn't pay taxes
#planes maru#planes fire and rescue#animation#maru#my art#mine#sillyposting#give it up for Windows 10 Photos Legacy Video Editor#audio source from dan vs
105 notes
·
View notes
Text

Seriously. It's 14 seconds long. What the fuck is wrong with Windows.
My favorite thing is when I record a seconds long video and the default apps on Windows to view it tell me it's 2600 hours long.
#its really irritating because on windows 10 this 1. wasnt an issue#and 2 i could both crop and trim it in the photo editor. but now since all my videos are a 26 thousand hours long i cant do that#its. annoying
2 notes
·
View notes
Text
i made steve in spore a long time ago.
this was back when windows 10 had a built in video editor attached to the photos app. thats how the fart sound was added. i miss how things were before tha
20 notes
·
View notes
Note
Since you don't see many edits here, and i am a dumbass in editing, could you make a tutorial on it? Like: what apps should we use, what should or shouldn't do, devices, etc. Since i personally worship your editing prowess, i couldn't help myself but ask for your guidance sensei. 🙇♀️
I don't use a "special device" to make my edits, just a computer which can run a videoediting software and Wallpaper Engine correctly (in my case it's an Apple Mac Pro 4,1 from 2009 with upgraded RAM and GPU, and also with Windows 10 installed on it, but that's not important). My server pc build out of my spare parts, and it's serves as a network bridge, and a file storge (like a NAS, or something) to store my personal files, like the assets for the edits on HPP. The way I make my edits, is a different story. I like to put the charaters in different scenarios to make the edit more enjoyable. I usually chose one image from my pre-granarated ones, or I use (if i see a, as i call an edit "suspicious" image here on Tumblr or X) an image from my "Likes", or if I can't find any which is good for the scanario in my head I generate one using PixAI's Ebora Pony XL AI model. Than if I have an image, I put together a static version of the edit in Paint.NET (PaintdotNET). Here I cut down the unnecessary and the broken (weirdly generated hands, .etc) parts of the image, and I remove the background if I'd like to use a different one. Than I chose a stethoscope png what are suitable for the edit, but I recently using the hand with stethoscope one which you can see in my recent edits. I also make some barely visble changes to the main image and the stething image. If it's done, and looks good I save them (the base image, the background, and the steting png separately) in a folder. After that it's time to "animate" the edit, which is just using the Wallpaper Engine's built in Shake effect, if that part is done, I record the animated soundless edit using OBS, which is usually a 5-6 minutes raw mp4 file. Than I put the raw recording into the video editor which is my case is the Wondershare Filmora X. I chose one of the heartbeat and bearthing audios from my server (if it's needed I modify it a bit in Audacity), and speed them up to mach with the animation. I make the breathing way quieter to have the heartbeat in focus, also i duplicate the hb sound to make a stereo effect, which means the I make the left side a bit louder and add more bass to it than the right side, which make a really good heart pulse effect (ROLL CREDITS). Also in here I add some video effects, cut down the unnecessary parts, I cut down the video to 2 minutes to become uploadable for X, than it's time to export it. After I exported the final edit, i check it for mistakes and I fix them if i find any, and the fixed version gonna be uploaded to Tumblr and X. This whole process is 2+ hours usually, but it's could be more for longer and more complex edits. But you doesn't need to follow my way to make edits, if you ever used a photo editor and a video editor before, and you know how put a transparent png on an image, and a greenscreen video on another one, you good to go. There is a lot of ways you can make an edit, so you can chose one which are suitable for you. If you still need help, you can join the Cardio Editor's Hub, there are lot of other people who gladly gives you some tips and tricks. Good luck, have fun! :D
11 notes
·
View notes
Note
Hi there ! I absolutely love your photos (I only just realized that a bunch of studyblr photos I've recently fallen in love with were yours!)
I was curious if you had any tips for taking good photos/editing them? I find that my photos don't seem to quite have the same good lighting as others' and would truly appreciate any advice you might have on the matter.
Thank you and have a great day!!!!
Thank you!! 🤩 (have to say, I’m a big fan of your blog)
I actually don’t edit my photos that much! Sometimes I might blur or crop out identifying information, but I rarely mess with the colors or shadows of a pic, and if I do, it’s just with the limited tools in the Apple Photos editor. I mostly curate my posts really heavily — for every posted picture, there are 24+ blurry bad ones that didn’t make the cut. Besides that, I do have a couple of general tips:
Prioritize light colored notebooks, papers, pens, etc. since they reflect more light and make an image seem brighter. Select matte over shiny. Photographing shiny black objects is very hard!
Pay attention to shadow and contrast. Hard, flat light (like full sun at an acute angle) in the warm spectrum photographs really well. Most of my favorite pics have been taken between 7-10 am or 4-7 pm. It can be helpful to haunt a handful of study spaces so that you can predict how the light will behave.
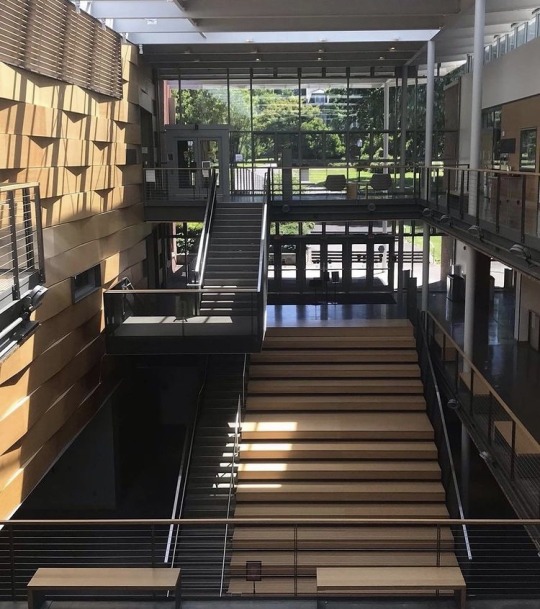

It really is about what you’re photographing. I like the way that paper, ceramic, leather, and glass refract light so I tend to have more of those objects around. I have a hard time photographing cloth, so I don’t do bed-spreads or carpet/floor layouts.
Be careful with blue light! Snapping pics of computer screens sucks because it adds a hard, blue square to an image that can be really jarring. Put f.lux or some other color filter on your laptop and take the pic from an angle to limit the amount of blue. Likewise, I try to avoid taking pics in the very early morning or under fluorescents.
Be careful with dappled or fractionated light. It can look very cool but depends on what’s being photographed (ex: left is fun, right is disorganized even though they have the same lighting situation).
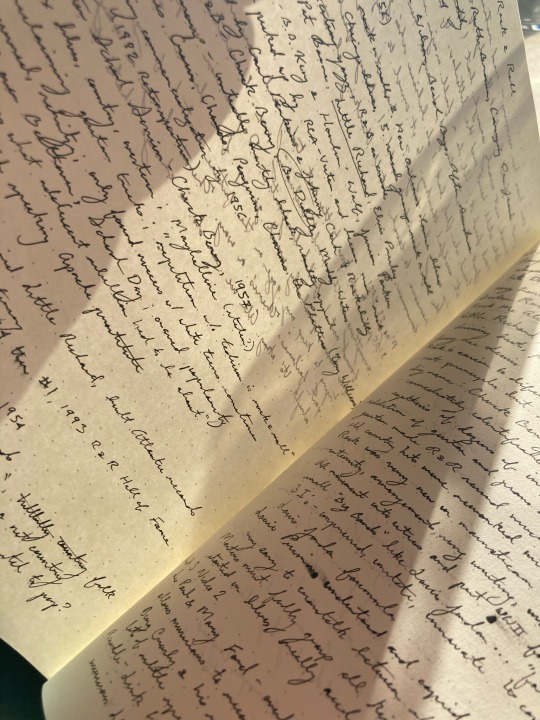
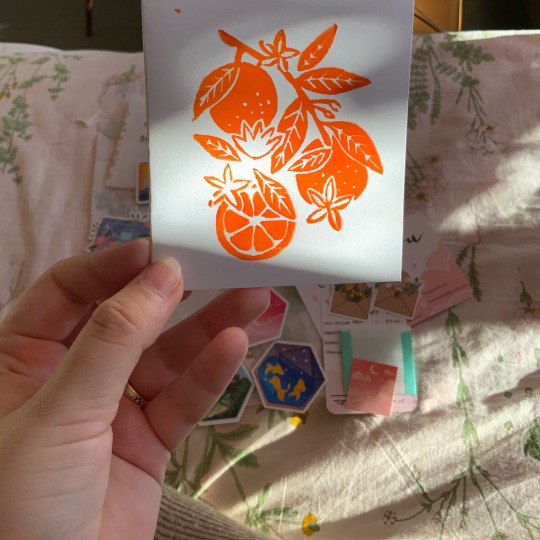
It can be helpful to have a tiny guide/reference photo for each batch, or even a HEX code that you aim for. Honestly, I use the avatar thumbnail for this blog. If I put a picture next to it and squint, do they seem consistent? If they do, post! It helps with getting that warm luminous quality that I particularly like.
And lastly, always give yourself permission NOT to take a pic! My worst pictures come when I force them and the best ones are when I’m busy studying only to look up and go “woah, pretty!” You can boost your chances by sitting alone near a window & using all your favorite supplies, but it really is somewhat up to the Fates!
34 notes
·
View notes
Text
HUgE July 2012
This Charming Man
MORRISSEY Landed in Japan

As soon as I heard that Morrissey was going to hold his first Japan tour in 10 years,
I contacted them for an interview without any expectations.
A month passed, and God's answer was "Yes."

The Ritz-Carlton Hotel in Roppongi. We were sneaking around the lobby of this luxury hotel. Even though it was 3pm on a weekday, the lounge was packed with people, and smiles and soft laughter echoed around. Behind the glass wall, we could see the town of Roppongi beneath the blue sky. We hadn't come to this hotel lounge for our customary afternoon tea, nor for a secret rendezvous with a married woman. Unfortunately. There was an editor with shaggy hair and a photographer sweating and carrying a load of equipment, and we were in such an out-of-place place.
I had only one reason to come: to meet the legendary Morrissey, interview him, and take a photograph with him.
It is difficult to explain Morrissey and his former band, The Smiths. This is because Morrissey and The Smiths are artists who cannot be categorized by genre or style. Morrissey is called "the only artist who has achieved the cult status that only dead rock stars can achieve while still alive." His presence is unique.
It is one of a kind, and it is unmistakable. With his distinctive baritone voice and falsetto singing style, lyrics expressing loneliness and frustration in his own way, and melodic cutting guitar strummed by virtuoso Johnny Marr, the song, along with its pop sound, captured the feelings of young people under the Thatcher government who were suffering from the recession, and won enthusiastic support. (Levi's) jeans, bouquets of gladioli, and a ducktail. Everyone loved Morrissey, from punks to fans of new wave. He exuded a gay vibe, but made his gender clear.
While living a mysterious private life, Morrissey was a staunch vegetarian and often made aggressive statements that caused controversy. After his legendary days with The Smiths, Morrissey became more and more isolated. After the 1980s, when he was only a cult hero in the UK, in the 1990s his presence created passionate followers all over the world. Despite his sentimental lyrics and pop-like melodies, he was accepted by hardcore fans, avant-garde fans, and rappers alike. A CD of The Smiths hidden behind a CD rack in his room. It was just like the CD of Yutaka Ozaki hidden in the CD rack of a senior who said he only listened to 1960s soul and was a hardcore fan. The number of secret fans who criticized his music as gay and pop but actually loved it grew all over the world. People in the art world such as Ryan McGinley and Harmony Korine also began to publicly declare themselves fans. British Prime Minister Cameron, who was a big fan of The Smiths and tried to gain support from young people, was severely criticized by Morrissey, which also became a newspaper story. In New York, Morrissey Night was held every week, and clubs filled with people playing Morrissey and The Smiths songs all night long. Morrissey is certainly the last living rock star, poet, religion, and god.
"Well, you know, we can't just take pictures here without permission. After all, it's a hotel lobby, and in a room or something..." "I've already spoken to the hotel manager. He said it's okay."
Of course he wouldn't tell us. We replied, muttering under our breath, that we understood.
"If you don't want to, then let's not talk today. What should we do? We don't have time."
That's right. This isn't an album launch tour or anything. They have no obligation to allow us to cover the event. A shadow of despair crosses the photographer's face. How can we take a photo here? In a corner of the bar, in front of a window, we suddenly split up and desperately searched for a place to cover the event. Then,
"It's here!"
Before I could even confirm who the voice was, I turned around and saw God standing there. A man wears a suit, my father had told me when I was little, but for the first time I understood the true meaning of that. God was in a flawless suit. His hunched, skinny body and bouquet of flowers in hand, the shouting figure of the champion of youth, was no longer there. He had good posture and a broad chest.
"I have a tendency to keep anything I like that I've seen from the past. For example, the photos on the covers of some of the early 12-inch records were blown up magazine clippings."
I want to meet God someday. I want to meet him and interview him. But God hates people. There are almost no chances to interview him. The moment I heard the news that God was going to hold his first Japan tour in 10 years without any prior notice, I contacted him for an interview. I had no expectations. A month passed. God's answer was "Yes." Creativeman, who invited God, said that God was in a good mood. This is the only time he will be interviewed by a general magazine, and our excitement rose when he said that. The photographer, who said he was glad to be doing this job and was a genuine fan, was breathing heavily. The photographer happened to encounter God in the elevator going up to the lobby, and had already managed to shake hands with God by calling out, "Long time no see!". An aura of the overlord's color rose from his head, as he was going to take a masterpiece not for the magazine but also as his own work. Then, standing in a corner of the lobby, I noticed a Caucasian man with a shaved head and a suit, holding a cell phone, exuding a not-so-scrupulous air. He had a bold tattoo elegantly peeking out from under his collar. I had a bad feeling about this. When he noticed me, he came stalking over to me. It was the tour manager. Just as I was about to introduce myself with a big smile, he started firing rapid-fire jabs at me.
"Hey. Where should I go?"
Kami's voice was low and quiet. The photographer hurriedly led him to a seat by the window. Kami nodded and sat down on a nearby sofa. I explained the purpose of this special feature. It was a music feature, with the theme being "vinyl" - records. Kami had spent his impressionable childhood as an introverted rock boy, and had been writing album reviews for magazines since his teens. There was no one more suited to talking about records. Then, next to me, the editor began fumbling around with Kami's records that he had borrowed from the art director. Kami gave this a sidelong glance, and said,
"You have 30 minutes. Finish it quickly. I understand that the interview will be done standing up and photographs will be taken. No sitting down."
"Ah, yes. Where is...?"
“Take a photo here!”
"Is that yours?"
He asks in a low voice.
"Oh, that's not true."
"Hmph"
"Ah, but I like it too, so of course I have it."
I was flattered.
"I hope so."
Here comes a sarcastic retort in the British style. My tension rises to a massive level. God certainly seems to be in a good mood. First, I decided to ask about his visit to Japan. Why did God, who hates flying, suddenly come to Japan this year without even releasing an album?
"I haven't been here for a long time, maybe ten years."
"Yes, I think it's been since Summer Sonic. Why did you decide to tour in small venues this time?"
"It had been so long since we last saw it that we thought no one would come to see it. That would be a problem, so we decided to make it a smaller venue." "No, no, everyone was eagerly waiting!"
"I hope so (smiles). I don't know what I mean to people. Or if I even had any meaning in the first place."
He grins, as if testing us. The photographer approaches and clicks the shutter. Then God sits back down and puts away his smile. There's no excuse. He reaches into the bag of records he's brought with him, picks each one up and looks at them. Early Smiths albums, 12-inch records, and solo records. The use of photography on all of God's record jackets is superb. I can't count how many Zoot T-shirts I've worn. I ask who designed the records.
"I came up with most of the jacket designs. It was me, me, me (laughs)."
A God who speaks with pride and a hint of pride. Narcissism, along with pessimism, are keywords when talking about God.
"There was minimal involvement. The source of the cover image? Inspiration, it's just an idea that pops into my head."
Then he laughed and continued.
"I've always had the habit of keeping anything I like that I see from the past. For example, there used to be a magazine called 'Films and Filming' that had all these amazing photos. If I saw something I liked, I'd cut it out and keep it. For example, the photo on the cover of an early 12-inch record was a blown-up version of that clipping."
"What, did you just use the clipping that you cut yourself?"
"Yeah, that's why the resolution of the photos is so low (laughs). I used clippings from German magazines, clippings of TV actresses, and all sorts of things."
I was careless. I was a self-proclaimed fan, but I didn't know such a fact.
While I was admiring the sight, the photographer was busy taking pictures.
He makes one move. God's face turns serious again. There is no opening.
"Back in the day, there was a proper budget for album covers and stuff. Now labels only pay for studio time. Art is not important anymore. If there's a good label, I'll definitely put out a record."
Kami said as he stroked the record nostalgically.
"The important thing is that it's something you can feel. You don't just listen to the sound, you see it, touch it, pick it up and confirm it. I'm the kind of person who doesn't think that data is sound. I would still buy records if I could, but how many record stores are left on this planet? They've all disappeared. Now I buy CDs. I also want to listen to new sounds.

But I think a lot of it is just repurchasing old things."
It turns out that God loved records. He loved the feel of them, the texture, the feel of them, everything about them.
"Do you remember the first record you bought?"
"Marianne Faithfull's 'COME STAY WITH ME.' It was a 7-inch single. I still have it."
"What was the first record you bought back then?"
"Yeah (laughs). I bought them when I was six years old. I told you, I kept them all."
"It's amazing. Marianne was so cool. Leather
"A jumpsuit." I remember Fujiko Mine in my mind. "Yeah (nods). I met Marianne in Belgium last year, and I told her the story of how the first record I bought as a child was yours."
"I bet she was very happy about that."
"My only reaction was, "Wow!" (laughs)"
At that moment, I fell in love with Marianne all over again.
"She's a bit like Nico (Velvet Underground), although Nico didn't live long enough. I like records from the '60s, '70s and '80s. They're pop and powerful and still sound great today." God looks as if he's looking at his record collection at home.
"How many records do you still have in total?"
「50 million」
"Eh!"
"Hehehe"
God was joking, which I take to mean he has that many records.
"What's your favourite single and album?"
"Jet Boy"
The answer came back without a moment's hesitation.
"New York Dolls"
"Of course," laughs God.
“What about the album?”
"The New York Dolls' first album. It's a black and white photo of the members sitting on a sofa. I'm pretty sure it was taken by a Japanese photographer (note: Toshi Matsuo). I've forgotten his name, but I'm pretty sure."
As expected of a former journalist and music nerd, God is also the man who is said to have founded the New York Dolls fan club in the UK, so it may be only natural that he knows so much about the Dolls.
"So it was a Japanese person who took the photos. I didn't know that. The only Japanese person I knew who took the photos for such classic covers was Kishin Shinoyama, who took the covers for John Lennon." I share this little bit of trivia with him. "A Japanese person? Hmm. Really?"
God listens with interest.
"Speaking of Japanese people, the cover of JOBRIATH is also great. It's a photo of a mannequin's body, front and back, with its legs smashed to pieces, and it's amazing. It was also taken by a Japanese person (Sig Ikeda)."
A few years ago, Kami himself was so fond of this 70s cartogram rocker that he had it resold. Naturally, he knows a lot about it. "I still have the original print, by the way. I collect art. I'd like to have the New York Dolls cover photo, but unfortunately I don't have it anymore, as all my contacts and the original prints have disappeared."
God's love for the Dolls is real. Could it be that he actually created the fan club? God laughed with glee.
"That's a complete lie, but for some reason it's been written down as official. Do you think I could have started a fan club when I was 13? It's the same with The Cramps. I didn't start it. I was a fan, though." "But you were writing articles around that time, weren't you? Album reviews and stuff."
"Yeah. When I was little I wanted to be a journalist."
“When did you start writing?”
"12 years old"
God proudly replies:
"Iggy Pop, New York Dolls. I wrote all kinds of reviews and sent them off. I wanted to work in magazines."

"I never got hired, but then I started writing poetry." And that's when he ended up fronting The Smiths as the band's lead singer.
"It's strange."
“What is it?”
"That I became a rock singer."
"I've always loved Pando and I've even written about them, so it seemed like a natural choice for me to lead the band."
"When you think of a singer in a rock band, you think of a macho, skinny front man, right? I was shy and it didn't seem possible to me. When I started, I really felt like I was going to jump off a building."
"Are you still nervous?"
"I'm having fun on stage now, and with love I don't get so nervous."
The god smiled with genuine amusement.
"This year marks my 30th year as a singer."
"It's been 30 years since you decided to jump off a building?"
"Yeah (laughs). I thought I'd only last 30 minutes."
When I laughed along with him, the tour manager pointed at the clock with a demonic look on his face. It seemed as if God still had more to say, but the demon didn't seem likely to allow it.
"It's going to be a waste of time."
The god laughed and stood up.
"That can't be! This is the concert I've been waiting for. I wonder when I'll get a chance to see it again..."
"My contract with the label expired a long time ago, and they wouldn't sign me, so I didn't do anything.
That’s it.”
"Oh, is that so?"
"I still haven't signed with anyone. The album was made over a year ago, but I haven't decided where to release it. I don't have a manager or a publisher." "Still?"
"I do everything myself. So if I want to tour, I can just do it when I want. That's fine.
Yo, I am.”
With that, God stood at the wall and took out some photos.
Then, as if being pulled by his demonic tour manager, he disappeared from the lounge. The hand he shook at the end was not just a poet's hand, but a big, warm one.
The interview lasted exactly 30 minutes, and there was nothing added.
was excited. They had met God. It would definitely be a good page. They laughed and said, "If only the demons hadn't been there, we could have talked more and taken more pictures."
"Oh, thank you. I'll see the show tonight. Looking forward to it!
was in a good mood and not as difficult as he'd like to open up.
I got a call from Oni later. The photo is from the official site.
We were told to use only the 100% authentic Japanese. We don't know if it's the demon's fault or the god's fault. It could be a change of heart from the god known as Tenya-no-Yasha. Or it could just be that the demon is as it seems. In the first place, almost all interviews with anyone other than us have been refused. The only thing we can say is that it was a bad omen.
7 notes
·
View notes
Text
riverdale 5x10 one for the books. certainly .
context: hiram arranges a collective prison break from his own prison. jughead has to write a story. archie's general visits him with dubious intentions. betty is dealing with the usual cooper family craziness. veronica has to handle her manipulative husband.
I need to see the gc after this episode.
veronica: promises archie that he's going to NY strictly to divorce chad. because chad is lowkey blackmailing veronica with photos of her kissing archie. which at that point is insensible because chad&her are separated and it's none of his business. anyway she goes and chad is like let's have chinese takeout dinner and drink wine. which she could've said no to easily. then chad is like I wanted to have one last night with you. they dance to their wedding song (OK) and kiss (I've lost the plot). GET A JOB LEAVE HER ALONE. then chad is like I signed the divorce papers before you walked in and all I wanted was to make you happy as you made me one last time 💗 and veronica is written gullible as hell I would've been like OK cut the cameras and give me the papers. then as if it isn't enough that veronica cheated by kissing him they sleep together or something(? I don't think so but left vague). then veronica finds out he didn't sign the damn papers. and chad is like wait im in severe debt and it's all in your name so you can't leave me. IS THIS THE SAME SHE WOLF OF WALL STREET WHO IS BEING PLAYED LIKE A FIDDLE RN.
betty: finds out her fbi partner slash superior who she's entertaining the advances of so there's no trouble (?) is doing his dissertation on her serial killer family bc it's the perfect investigation into nature vs nurture. then her serial killer half-brothers (one real one fake) escape from prison and visit her family residence so betty's mother can marry them. they have guns btw and also there are two nine year olds in the house. and bettys mother happily obliges because she has been visiting the real half brother and got her license for them. then betty's fbi partner crashes the residence and turns out he had beef with the ex-fbi real half brother so the serial killer couple/brothers are like OK let's make a nine year old stab him. betty's rightfully like no! thats a literal child. OK then you do it betty! then betty stabs him while whispering "trust me" in his ear. after she does there's a window of opportunity where she throws the knife at the fake half brother (strike in the heart) and her mom lunges at the real one, and shoots him with the gun he had. and the two children are upstairs while these are happening which felt like an important thing to note. so long, chic and charles. glen is rushed to the hospital etc (payoff of "trust me" I guess?)
archie: beats up 10 people on his own who are armed convicts (tuesday for archie) they're all in the school btw at "teacher parent night". gets cheated on. declines a medal of honor. uncle frank comeback.
jughead: the single person in town who's unscathed by the whole "convicts escape prison and somehow they are all armed" situation because he's in the sex bunker trying to write his alien story on shrooms and he has to produce something on par with stephen king as per his editor's remarks. and shrooms are the only way. tabitha is a tripsitter but then jughead tries to make a move on her and accuses her of being prissy when she declines ("don't be like betty" is crazy work). tabitha then cuffs him to the table (MEEEEE). he then has hallucination sex with his exes jessica/betty and h!betty apologizes to him for fucking him over/cheating seven years ago. we got wish fulfillment before an actual apology 🔥🔥 meanwhile betty: dinner at gunpoint and sister's been missing for 4 weeks dsjnfodndkd. anyhow he passes out. he wakes up and he has written the chapter somehow. to say the least.
3 notes
·
View notes
Text
I feel like people don't understand this. like, people do not get how much abuse you get working in motorsport.
I still get hundreds of emails a week - my email was shared via a forum a few years back and people use it all the time. they range between succinct 'go die' messages and long, rambling things detailedly explaining how they'll dismember me. they often have guesses at where I live. I didn't say who my flatmate was for a long time on twitter and neither of us can post photos anywhere near our house or with the windows in the background if it's of the cat, etc. people have come up to me in pubs and screamed at me in my face. my editors used to receive between 10 and 70 emails a week asking me to be removed from my (outrageously junior) position because people hated that I had any platform whatsoever that much.
people will literally cheerfully eat up every straight white man in motorsport media and then shit themselves stupid when anyone else is in it. there is not just a longstanding but recent hire at Autosport with credible sexual harassment claims against them and yet no one gives a fucking shit about that do they.
I get hundreds of asks a week on here. I get DMs on every social media platform. people make up abjectly insane shit about me ("Hazel claims she experiences slavphobia" what the fuck I am not slavic you insane pieces of shit) and lie and lie and lie and I can do nothing about it. and this has ruined my life. I will never get away from it. it doesn't matter that I lost my job, it will continue forever. I hate it.
and people like Barstool were key to this.
if you want a career in motorsport: don't! fuck this whole shit off. never touch it. get out before this happens to you.
44 notes
·
View notes
Text
DES303 Week 10 + 11 - No regrets, no regrets
My journey of arduous walks had been a full, hands-on couple of days, and my prototyping had been stalled due to my hectic schedule and some personal circumstances I won't get into; I had a week's worth of coursework to catch up on. A few days had passed since the window for completing my prototyping for the ninth week had closed, and due to unforeseen circumstances, this blog will cover both weeks 10 and 11.
There will be no new explorations this time around; I will just dedicate myself to refining my prototypes to a better state. No time will be wasted on the clock, as I am deep into finalising my prototyping, ready for what comes next. As an old teacher once told me, when you enter your final weeks, you'd better have no regrets, because what's done is done, and there's no turning back. So, no regrets.
A [even more] simplified visual explainer of the game:
Speaking of potential grievances, my grave concern is that my work appears too convoluted to audiences, so I have done another round of chipping away at what is clutter and getting to the core of the structure. Here is the updated system diagram, now without the clutter. It reads and follows up better than the last, at least this time around.

Because of how vital a good mechanics explainer is to a game of my scale, I want to take the time to get it right, even if it feels repetitive. I hope this works better than the intricate systems diagram. Meanwhile, I will put my skills to the test to improve my visual communication skills.
Simple explainer
In this version, I repurposed my images from the previous upload and added captions to help viewers grasp the basic principles of the game without being overly complicated. I focused on removing clutter and showing only what is essential and concise.

The visuals are still under the realm of RPG or tabletop board-game RPG, but localised to Aotearoa from a Tauiwi stance. It shows that by the end of the game, each player should have taken turns rolling the dice and collected at least one card. To be fully functional, group sizes ideally range from 3 to 4, but playing between two people can also be a fun and exciting activity, even in the most ideal of outcomes. After all, who doesn't love a 'multiplayer' session?
Teamwork visual representation:
Recently, I realised I hadn't found a method of communicating how multiple people could join in on a table to play the card game. So, another element was added from a tough Photoshop session. Here is one way of laying the cards out on a table when you are playing with a group of three people.

It looked pleasing to the eye, but the crafting table mat didn't quite fit the design presentation aesthetic for a higher-fidelity visual output, so I went back into Canva and created some templates to use for my photomanipulation.


For the near-final stage, I inserted this template onto my PSD concept design, and here was the result. As a hobbyist photo editor, it always bugs me whenever something is off in the picture. An element of mise-en-scène consistency was what I found lacking, and this was my attempt to rectify that.


Huzzah! What manner of wizardry is this? Cooperation? Blasphemous! This more balanced image explains how the game is played between a group. Think of it as one of the final visual representations of what I want to achieve and its scale.
Reflection:
As I mentioned, schedule imbalances and other outside factors limited my time to complete my prototypes in higher fidelity. I acknowledge the limitations of this prototype, as it is constrained by a time window. I have put in many hours trying to put the final touches on it, and I am still doing so, attempting to make this iteration as close as possible to the final result at the finish line. If I am again, putting on the hat of being critical of my own work, it is far from perfect.
For example, one point is that I am not 100 per cent decided on the curated topics of discussion and whether they are relevant to narrative creations. Given the factored-in circumstances, it's still rudimentary, but I hope there is that element found in the games we love that keeps people engaged and connected. On the positive side, I believe tailoring this proto-game for a younger audience is a more suitable choice.
Aside from those challenges, introducing Te Reo Māori in my card content as an English-dominant language is difficult, not because of language preferences per se. It has to do with my positionality and how my past education has taught me to see systems and patterns through the dominant lens of my country. This pathway is a lifelong process of unlearning to loosen my rigid worldviews, or, as many people would call it, decolonising oneself. I see it as not something that should've reduced lifestyle choices, but a commitment to values and beliefs that benefit all of this land.
Theory:
After a careful evaluation of my work, I concluded that this stage of my prototype would be in better condition if I considered the degree of autonomy that is layered and more profound than just the surface-level addition of having multiple choices of cards. Looking back at last week's article and text, I'll add a revised note that a game's autonomy is defined by the freedom of an autonomous player, which hinges on the intersection of players' freedom, measured by the spatial or systematic openness of the game's rules (Cheung & Ng, 2021).
In basic terms, would I feel I have room to breathe, or would this game suffocate my agency to the point that I have to urge myself to quit and play something else? For my card game, I intentionally used vague language with open-ended questions on each to create room for open interpretation between collaborative partners. It is what many successful games struggle to accomplish, let alone amateur student designers like me. Linking back to the design concepts we have been learning, it is also considered a wicked problem because games not aligning with players' values and expectations, which confines them, is a complex issue caused by more than one variable or system of derailment.
What's next? What remains to be addressed is the dissonance between this prototype and its relevance to the placemaking stream brief. This was due to my time constraints, and I also wanted to take a reasonable amount of time to polish and refine my designs for the final presentation week. So my work didn't look rushed or incomplete. Before presenting my case to the entire class, I need to continue my research and carefully explore how a prototype like this might impact the world. Hypothetically, in addressing wicked problems and the implications of designs, a designer must engage in critical self-reflection. I need to consider complex issues such as public infrastructure, poverty, education, and the climate crisis, and examine how these issues intersect with our daily lives. Additionally, I recognise that my primary demographic for the card game is younger Gen Z. Therefore, my approach has been to focus on their interests without overly catering to broader audiences beyond our core demographic.
References:
Canva. (n.d.). Canva Visual Suite. Retrieved from Canva: https://www.canva.com/
Cheung, S. Y. and Ng, K. Y. (2021). Application of the Educational Game to Enhance Student Learning. Front. Educ. 6:623793. doi: 10.3389/feduc.2021.623793
3 notes
·
View notes
Text
There Is No Safe Word (Part 5 of 10)
(Source) (Part 1) (Part 2) (Part 3) (Part 4) (Part 6) (Part 7) (Part 8) (Part 9) (Part 10) (Prewarning)

Cover of Gaiman's novel, The Ocean at the End of the Lane (2013).
Editor’s note: This story contains content that readers may find disturbing, including graphic allegations of sexual assault & child abuse.
Throughout his career, Gaiman has written about terror from the point of view of a child. His most recent novel, The Ocean at the End of the Lane, tells the story of a quiet and bookish 7-year-old boy. Through various unfortunate events, he ends up with a hole in his heart that can never be healed, a doorway through which nightmares from distant realms enter our world. Over the course of the tale, the boy suffers terribly, sometimes at the hands of his own family. At dinner one night, the boy refuses to eat the food his nanny has prepared. The nanny, the boy knows, isn’t really a human but a nightmare creature from another world. When his father demands to know why he won’t eat, the boy explains, “She’s a monster.” His father becomes enraged. To punish him, he fills the tub, then picks up the child, plunges him into the bath, and pushes his shoulders and head beneath the chilly water. “I had read many books in that bath,” the boy says. “It was one of my safe places. And now, I had no doubt, I was going to die there.” Later that night, the boy runs away from home; on his way out, he glimpses his father having sex with the monstrous nanny through the drawing-room window.
In various interviews over the years, Gaiman has called The Ocean at the End of the Lane his most personal book. While much of it is fantastical, Gaiman has said “that kid is me.” The book is set in Sussex, where Gaiman grew up. In the story, the narrator survives otherworldly evil with the help of a family of magical women. As a child, Gaiman had no such friends to call on. “I was going back to the 7-year-old me and giving myself a peculiar kind of love that I didn’t have,” he told an interviewer in 2017. “I never feel the past is dead or young Neil isn’t around anymore. He’s still there, hiding in a library somewhere, looking for a doorway that will lead him to somewhere safe where everything works.”

Head of the UK branch of Church of Scientology David Gaiman (1933 - 2009), UK, 23rd December 1971. Photo by Victor Blackman/Daily Express/Hulton Archive/Getty Images.
While Gaiman has identified the boy in the book as himself, he has also claimed that none of the things that happen to the boy happened to him. Yet there is reason to believe that some of the most horrifying events of the novel did occur. Gaiman has rarely spoken about a core fact of his childhood. In 1965, when Neil was 5 years old, his parents, David and Sheila, left their jobs as a business executive and a pharmacist and bought a house in East Grinstead, a mile away from what was at that time the worldwide headquarters for the Church of Scientology. Its founder, the former science-fiction writer L. Ron Hubbard, lived down the road from them from 1965 until 1967, when he fled the country and began directing the church from international waters, pursued by the CIA, FBI, and a handful of foreign governments and maritime agencies.
David and Sheila were among England’s earliest adherents to Scientology. They began studying Dianetics in 1956 and eventually took positions in the Guardian’s Office, a special department of the organization dedicated to handling the church’s growing number of legal cases, public communications, and intelligence operations. The mission of this office, as Hubbard wrote, was its “covert use in destroying the repute of individuals and groups.” On the side, the Gaimans ran the church’s canteen, lodged foreign Scientologists in their home, and opened a vitamin company in town, where they supplied courses of supplements for Scientology’s “detoxification” programs, a business that grew exponentially alongside the expansion of the church. By the late ’60s, David was the church’s public face and chief spokesperson in the U.K.
It was a challenging job, to say the least. The U.K., following the example of a handful of other governments, had issued a report declaring Scientology’s methods “a serious danger to the health of those who submit to them.” Hubbard would routinely punish members of the organization who committed minor infractions by binding them, blindfolding them, and throwing them overboard into icy waters. Back in England, David gave interviews to the press to smooth over such troubling accounts. The church was under particular pressure to assure the public it was not harming children. In his bulletins to members, Hubbard had made it clear that children were not to be exempt from the punishments to which adults were subjected. If a child laughed inappropriately or failed to remember a Scientology term, they could be sent to the ship’s hold and made to chip rust for days or confined in a chain locker for weeks at a time without blankets or a bathroom. In his book Going Clear, Lawrence Wright recounts the story of a 4-year-old boy named Derek Greene, an adopted Black child who stole a Rolex and dropped it overboard. He was confined to the locker for two days and nights. When his mother pleaded with Hubbard to let him out, he “reminded her of the Scientology axiom that children are actually adults in small bodies, and equally responsible for their behavior.” (A representative for the Church of Scientology said it does not speak about members past or present but denies that this event occurred.)

David, Sheila, and Lizzy (Neil Gaiman's sister) in 1967. Photo: Courtesy of G&G Vitamins.
David used Neil as an exhibit in his case to the public. In 1968, he arranged for Neil to give an interview to the BBC. When the reporter asked the child if Scientology made him “a better boy,” Neil replied, “Not exactly that, but when you make a release, you feel absolutely great.” (A release, in Scientology lingo, is what happens when you complete one of the lower levels of coursework.) What was happening away from the cameras is difficult to know, in part because Gaiman has avoided talking about it, changing the subject whenever an interviewer, or a friend, brings it up. But it seems unlikely that he would have been spared the disciplinary measures inflicted on adults and children as a standard practice at that time. According to someone who knew the Gaimans, David and Sheila did apply Scientology’s methods at home. When Neil was around the age of the child in The Ocean at the End of the Lane, the person said, David took him up to the bathtub, ran a cold bath, and “drowned him to the point where Neil was screaming for air.”
As a teenager, Neil worked for the Church of Scientology for three years as an auditor, a minister of the church who conducts a process some have likened to hypnosis. One former member of the church who worked with Gaiman’s parents and was audited by Gaiman recalls him as precocious and ambitious. It was unusual for a teenager to have completed such a high level of training, he tells me. But the Gaimans were like “royalty,” he says. In 1981, David was promoted to lead the Guardian’s Office, making him one of the most powerful people in the church. But the same year, he fell from grace. A new generation of Scientologists, led by David Miscavige, who eventually succeeded Hubbard as the church’s leader, had Hubbard’s ear, and David was “caught in that grinder,” as his former colleague puts it. A document declaring David a “Suppressive person” was released a few years later. It accused him of a range of offenses, including sexual misconduct. David, the document claims, put on a “front” of being “mild mannered and quite sociable,” adding that his actions “belie this.” His greatest offense, it seemed, was hubris. “Gaiman required others to look up to him instead of to Source,” it reads, referring to Hubbard.
In the ’80s, David was sent off to a sort of rehabilitation camp. It was around this time that Gaiman set out to make a living as a writer. Charming and strategic, he used the contacts he developed as a journalist to break into the business of genre writing, endearing himself to the giants of that world at the time: Douglas Adams, Arthur C. Clarke, Clive Barker, Terry Pratchett, Alan Moore. “When I was young, I had unbelievable chutzpah,” Gaiman says in the documentary Neil Gaiman: Dream Dangerously. “The kind of monstrous self-certainty that you only get normally in people who then go on to conquer half the civilized world.”
Back to: Part 4, next: Part 6
#tw: sa#tw sa mention#neil gaiman#neil gaimen allegations#good omens#good omens fandom#tw child abuse#tw childhood trauma#neil gaiman accusations#neil gaiman abuse#the sandman#lila saphiro
4 notes
·
View notes
Text
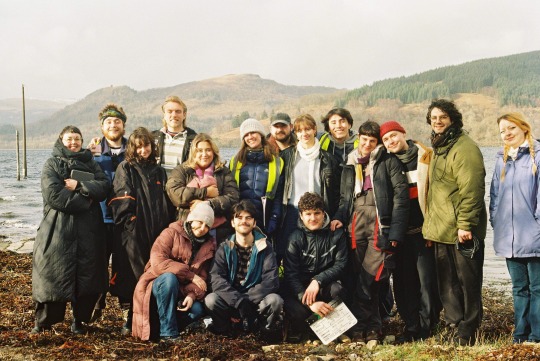
Saint Catherines THE SHOOT
The shoot for Saint Catherines was a very heartwarming experience.
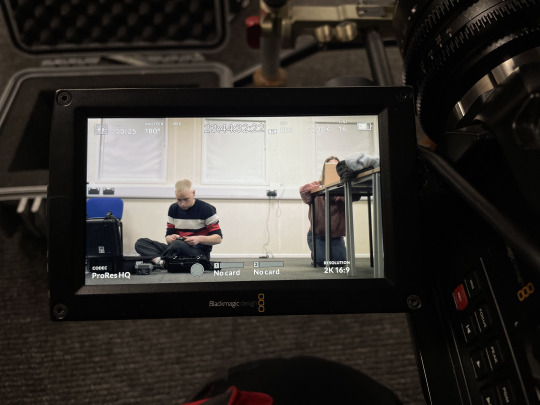
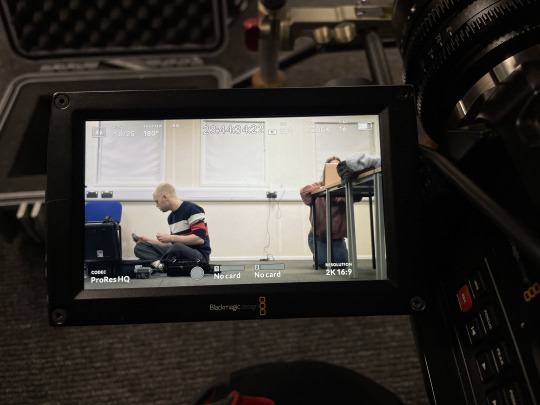
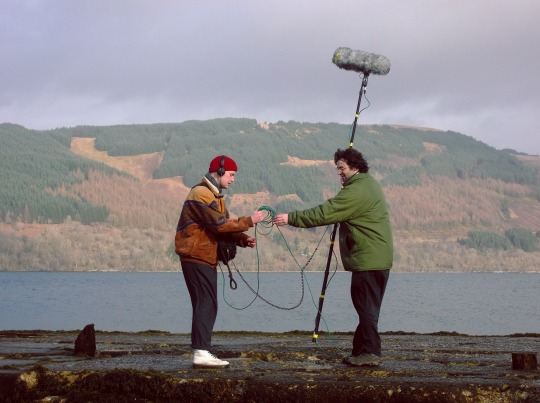
We started out checking the equipment at Craglockhart Kit Stores where I colour-coded every character's lavalier microphone so that I could quickly and easily differentiate between transmitters and receivers on set and also know immediately whose was whose and thus where to connect it on my MixPre 10 on which I gave each character a channel each. The boom was 1, Phoebe 2, Harry 3, Jo 4 and Sara 5. The colour choices were Phoebe blue, Harry red, Jo yellow and Sara green. I also in a previous session where I had booked out the MixPre 10 to go over settings, learned how to use the WingMan App's reports (using a Youtube video), which is a log of the notes you make on each take on set, which is super helpful for post-production. This was the first time I used the MixPre 10 on set with so many channels and the first time I recorded a 4 people simultaneous setup.
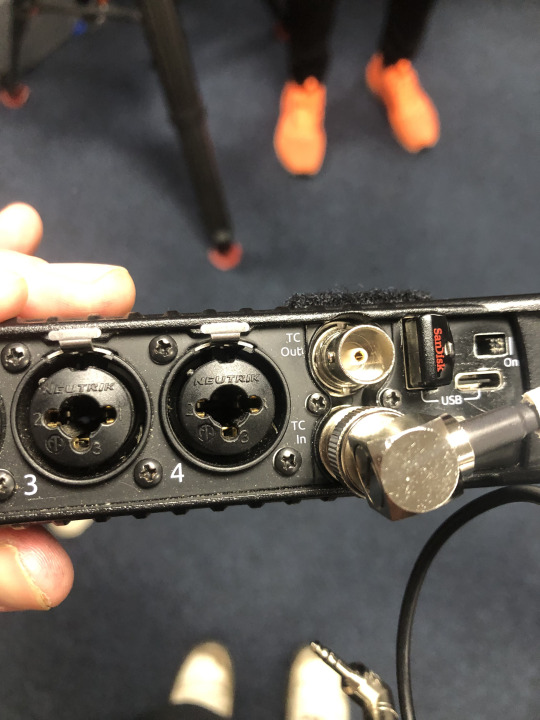
We had also been introduced to the Tenacle Sync which syncs the timecode for camera and sound and saves time in the edit. I took it upon myself to set this up every day and coordinate with camera because they had so many other things to worry about. We had had a brief previous session going over how to use it and I messed up because I had put a cable in the wrong port of the MixPre I did not realise this until the last day, so the tentacles were synced but the MixPre was not receiving the timecode, but the camera was. So we only had the last day synced automatically, which took away time from our editor, Alyssa, but she had factored this into her edit window anyway. I still felt guilty and this was a massive learning curve for me. It will never happen again!
Here is a photo from the session of how it should have been and I forgot to double-check the photo, rookie mistake:
Back to Craiglockhart Campus, after checking all of the equipment, Katie, Eva and I helped Orla load up a van with the equipment and once we had done this she drove off to Saint Catherines. I then drove myself and some of our crew (Katie, Eva, Alex and Sophie, our continuity supervisor) to Saint Catherines.
From here I won't go entirely in chronological order because so many things happened, so I will just give some key highlights and summaries of what happened. Every day we would shoot from about 9 to 5 and in the evenings we would relax and play werewolf which became a proper daily ritual.
Before the shoot, I had been quite nervous about being in charge of sound mixing and recording because I usually find this very hard and run into many issues. After all, there are always issues when recording sound that in some instances are out of your control. But on the shoot, I fell in love with sound recording and found myself getting into the groove and getting more and more comfortable with it. Something I have to say is that when I listen back to my recordings and see photos of me on set I hear and see how serious I am! I think this will be my nerves coming out and me wanting to do my best, it must be the German in me or something because I am never so to the point and sharp. With the expressions, I am not as worried because I know I have a bit of a resting bitch face.
As we were recording both inside and outside I found the struggles for these were very different. Inside the mics were more sensitive in the smaller space and the lighting setups created lots of whirring sounds. Outside cars were extremely loud as we were situated right next to a main road, something I had been aware of on the location recce, but it had seemed like a much quieter road at the time. There was also a construction site where someone was building a house, but somehow this did not interfere with dialogue too much.
Something I learned about dialogue was to do with recording overlapping dialogue. When so many people are on set it is very hard to avoid having actors not interrupt each other during takes. Usually, they will and this will be what is used in the final picture edit because it is a natural performance and what is required of them but in sound, this means the different character's dialogue are not separable from each other which means it is less manipulatable and hard to get rid of. Usually, dialogue is separated into each character but when there are interruptions this is harder. However, overall my dialogue was mostly very clear and I had fewer problems with it than I expected. While on set I was most nervous about scenes 8 and 11, which are the confrontation scene and the support and reconciliation with a friend scene. These are arguably the two most important scenes of the film. Sadly when I got to the sound design I found these were the hardest to work on and contained the most affected dialogue due to loud wind, waves, and traffic.
On this project I learned a lot about micing up the cast, I looked into it and found that placing the mic between the dip in their chest proved to provide the best and smoothest audio. For women, this dip is in between their breasts and I found this was a very new situation for me to navigate. I was told by friends that on their sets women had to lav themselves up, but the actresses had no idea how to do this and I did not find it fair to ask this of them, nor did I want to risk having bad dialogue. But we were lucky, who knew being gay can pay off in the workplace. I would lav up the actresses while my boom op George would lav up the only actor. I would navigate this by ensuring actresses felt comfortable and most of this involved them moving the microphone through their clothes themselves and even holding it in place in the necessary dip. My main point of contact was applying the mic to their chest with medical tape that I had procured before the shoot. What I also had to take into consideration was costume. Different costumes required different lav positioning and these also required different housings made out of tape, something that I learned from Tom in the test shoot and then adapted to fit my own needs. These housings lessened contact between the lav and the costume. Laving up the actresses would get quicker each day and we quickly found our rhythm and a way to make this work for each of them. From the second day after having a noisy necklace on our lead I would speak to costume and as much as possible ask for changes if they were detrimental to sound. This of course did not always happen, but I found solutions along the way.
I was absolutely blessed with Orla, I feel we worked really well together and she always left space for sound. This was something we had spoken about previously and I had requested extra room for not only time for room tone but also wildtrack sound takes of actions and sometimes even dialogue, especially where there had been interruptions previously. This meant I had many options in the design for when things had gone wrong in the actual takes. As Orla is a sound person as well as a director this is something she pushed for so I got nearly every sound recorded in the space where we shot it. They would call wrap for camera and then me, George and the actors would record whatever was on my sound shopping list for that scene. Every afternoon after shooting George and I would go over what we were shooting the next day to make sure we had everything on the shopping list that was needed. Overall I was super happy with clear dialogue and production sound. I know the actors had also never taken part in wildtracks before and I am aware I was in a very lucky position and I am very thankful for it, I think it really paid off in the sound design edit.
I felt we worked incredibly well as a team and built some close working relationships and friendships. Everyone put in so much and without each and every person we would not have been able to make the film that we made. Katie and her camera department were incredible, I have described them as a well-oiled machine and they were just that. Also working with Katie has been a creative experience that I really enjoyed because I feel we connected really well and worked hard together. Having Eva on set was such a relief, she is so near and dear to my heart and it was nice to see her excel and be such a strong support for the camera team. She was also a big support for me as sets can be stressful and having her presence around meant I had something and someone from home and it was nice to also work on a grad film together. George as my boom op was my saviour coming on board very last minute and being an incredible boom op, he has his own separate post coming up. One day as a treat I let him sound record because I was going to do on set folley footsteps to the water's edge to replicate Phoebe's steps towards the water. He again excelled. Orla was an incredible director and made an incredible space for everyone on set, she looked after all of us so well and kept us on the right path. We all felt we were in safe hands and we definitely were. The cast was really well picked and as the days went on they fell deeper into their characters and we all very quickly believed who they were. The whole crew was great to work with and helped provide a positive atmosphere on set.
My one issue on set was the bathroom and shower issues that we had, but this was unavoidable as we were so many people and our lodgings were not used to this. As an IBS girlie, I had multiple evenings and mornings where I would run to the car drive from the lodge to the caravan carefully to then barge in and use the toilet. Cold showers were not an issue as this is something I do regularly. I was a bit cheeky and had these every day as I am unbearable to be around when I am unshowered so it was best for everyone that I broke this rule. Or at least that's what I am telling myself, but I know I get insufferably grumpy when I feel unclean.
I did find I had to manage my stress and my resting bitch face, but with time both eased and by the end I felt completely in my element as if this was something I had been doing for a long time.
So at the end of the shoot, I found myself as a happy sound girl, as we say, I fell in love with sound recording and felt comfortable and in my element. We all made it back to Edinburgh in one piece and so did our equipment, which myself Orla and the camera department helped unload.
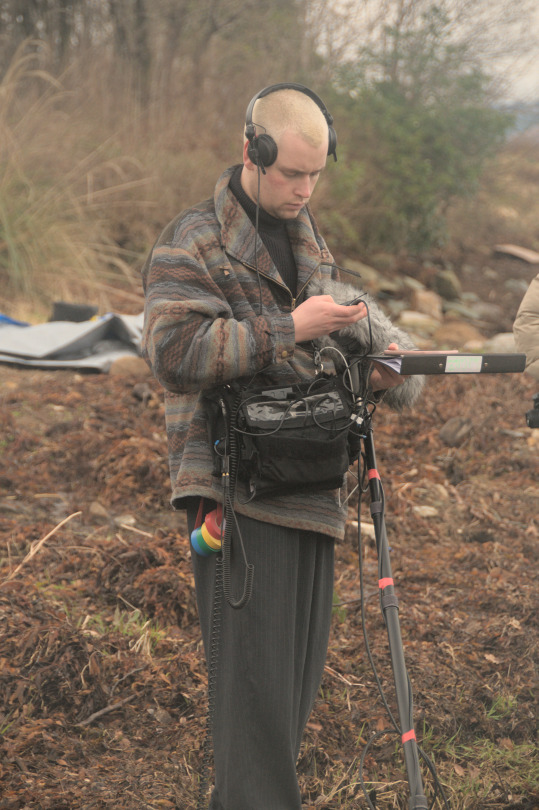
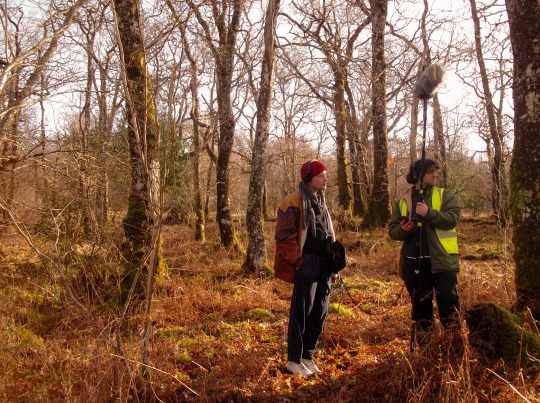
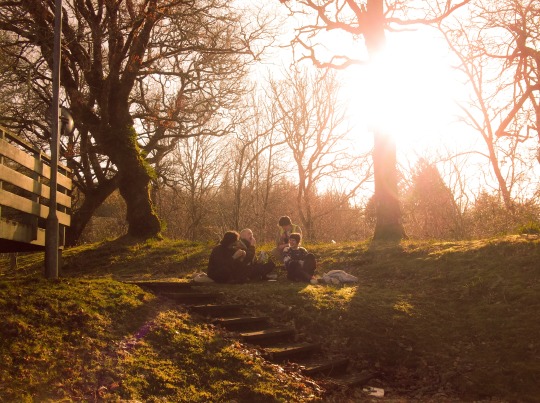
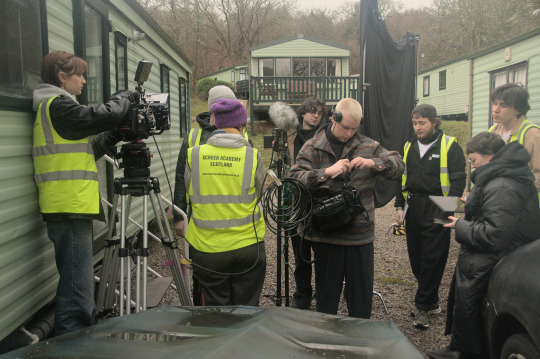
Here are some shots and even a little video from all of our days on set, as you can see we had a blast:
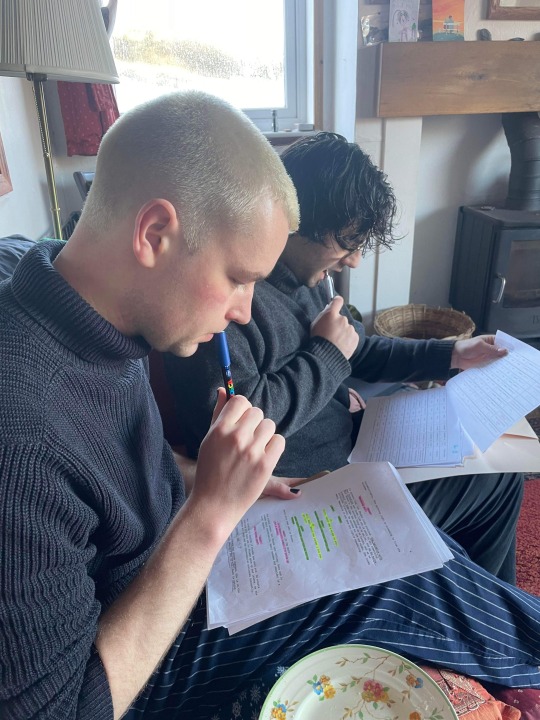
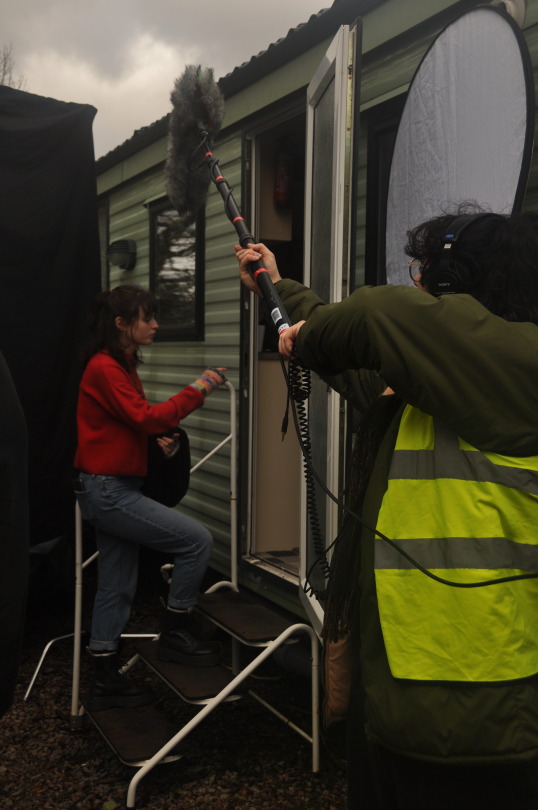
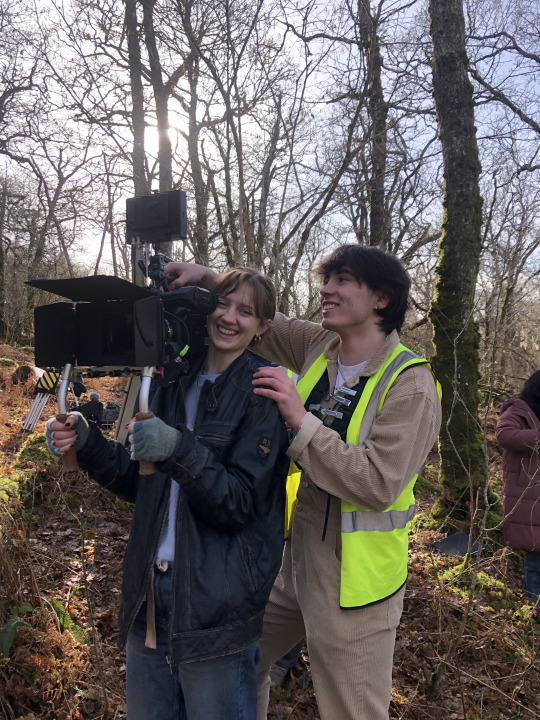
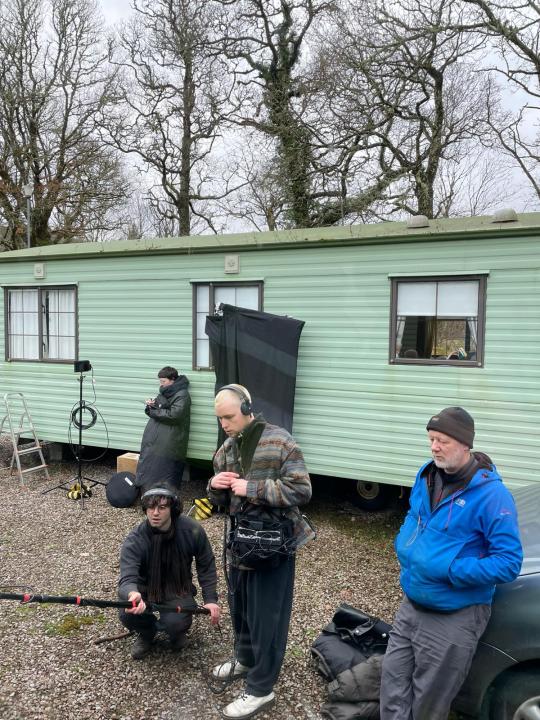
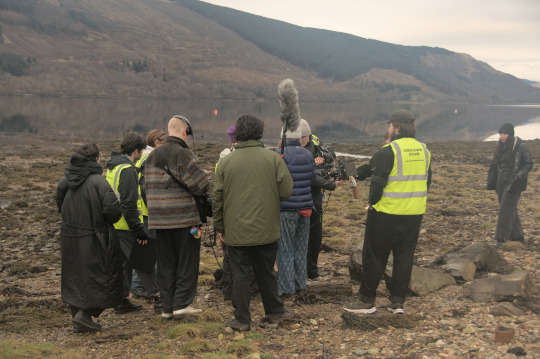
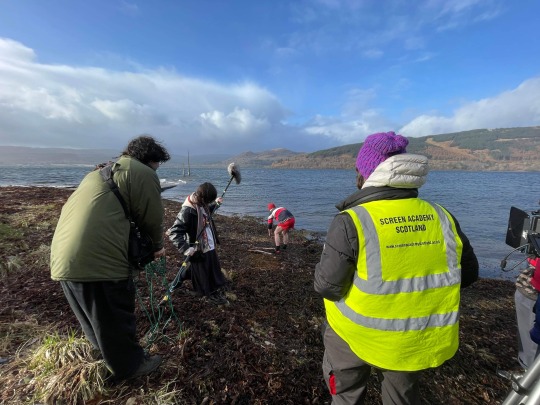
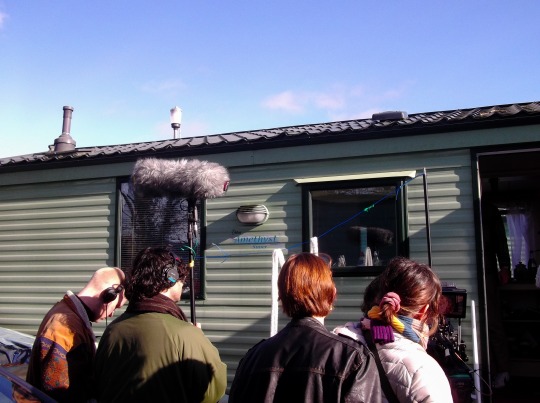
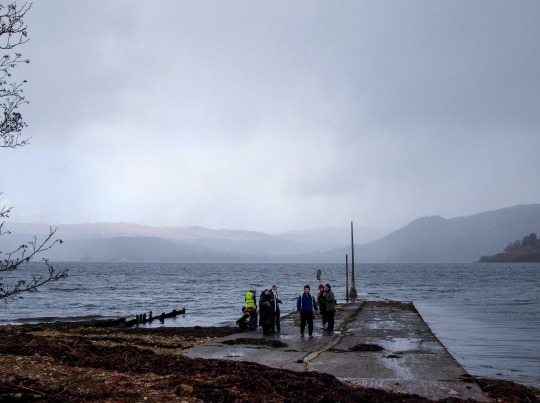
4 notes
·
View notes
Text

Did you know the SR-71 Blackbird sonic booms shattered the windows of Kelly Johnson, Zsa Zsa Gabor and President Nixon’s houses?
What do Zsa Zsa Gabor, President Nixon, and Kelly Johnson all have in common?
Sonic booms!
‘Obviously the SR 71 broke the sound barrier to get up to 85,000 feet and a speed of 3.2 Mach,’ explains Linda Sheffield Miller (Col Richard (Butch) Sheffield’s daughter, Col. Sheffield was an SR-71 Reconnaissance Systems Officer) on her Facebook Page Habubrats. ‘Often, I would look at the windows of our house at Beale [Air Force Base, AFB] and watched them shake so hard I thought they would break!
‘The SR-71 tried to stay away from major cities, but occasionally it would happen over a large city like Los Angeles.
‘Zsa Zsa Gabor called the police to complain after the London to Los Angeles speed run. Her windows were (supposedly) shattered in her Hollywood hills home. She was appeased when pilot Buck Adams and RSO Bill Machoreck went to her house and gave her personal autograph
Did you know the SR-71 Blackbird sonic booms shattered the windows of Kelly Johnson, Zsa Zsa Gabor and President Nixon’s houses?

Zsa Zsa Gabor
‘President Nixon called the Air Force to complain when the sonic booms broke the windows in his home in Southern California. Even though it was himself who ordered sonic booms 15 seconds apart to be delivered by the SR-71 over the Hanoi Hilton.’
Did you know the SR-71 Blackbird sonic booms shattered the windows of Kelly Johnson, Zsa Zsa Gabor and President Nixon’s houses?

President Nixon on the phone in the oval office
Sonic Booms
Sheffield Miller continues;
‘With aircraft, this phenomenon is caused by bow and stern waves — traveling at the speed of sound — getting forced together (or compressed) because they can’t get out of the way of the faster moving plane. In “smooth flight” the united wave — now a shock wave — starts at the nose of the aircraft and ends at the tail. As the plane passes through, the wave attains a pressure imbalance (called an “N” wave due to its shape) and that’s when the boom happens.
‘The following video features the Audio Recording of SR-71 Blackbird Sonic Booms. Listen here to hear what a double sonic boom sounds like!
youtube
‘In reality, there are two booms that happen. One when that reaches the observer and one when the pressure returns to normal.’
Sheffield Miller concludes;
Did you know the SR-71 Blackbird sonic booms shattered the windows of Kelly Johnson, Zaza Gabor and President Nixon’s houses?

Kelly Johnson
‘Kelly Johnson [The head of Lockheed’s Vaunted Skunk Works, the division that developed the SR-71 Blackbird itself] had a busy life outside Lockheed. He and his wife Althea Louise Young built a house in Encino, in the San Fernando Valley, 10 miles west of Lockheed’s facilities. They kept horses, and eventually acquired a working ranch, Star Lane, in the Santa Ynez Valley, north of Santa Barbara. Johnson maintained his own farm machinery in a 4,800-square-foot shop that he had built, and whose huge size and strong construction were a source of pride for him. The rumor is… that a test flight SR-71 flew over Johnson’s ranch and broke several of his large windows. But he didn’t have the nerve to make a complaint.’
Photo credit: CIA, News release by Rogers & Cowan talent agents, U.S. National Archives and Records Administration and U.S. Air Force

SR-71 print
Dario Leone
Dario Leone is an aviation, defense and military writer. He is the Founder and Editor of “The Aviation Geek Club” one of the world’s most read military aviation blogs. His writing has appeared in The National Interest and other news media. He has reported from Europe and flown Super Puma and Cougar helicopters with the Swiss Air Force.

3 notes
·
View notes
Text
VCHANCE 13.3 Inch OLED Portable Monitor Review: The Ultimate Travel Companion for Professionals

VCHANCE 13.3 Inch OLED Portable Monitor Touchscreen 1920x1080 1ms 10bit 100% DCI-P3 Office Travel Display Extender for Laptop Mac
👍👍Buy now: https://youtu.be/gALti9IGoDA
🔥🔥 DISCOUNT: 55% 🔥🔥
In today’s fast-paced digital world, having a reliable secondary display can significantly boost productivity, whether you're working remotely, traveling, or simply need extra screen real estate. The VCHANCE 13.3 Inch OLED Portable Monitor is a sleek, high-performance display designed for professionals who demand vibrant visuals, fast response times, and portability.
In this in-depth review, we’ll explore its key features, performance, and why it might be the perfect travel companion for your laptop or Mac.
Key Features of the VCHANCE 13.3 Inch OLED Portable Monitor
Stunning OLED Display with 100% DCI-P3 Color Accuracy One of the standout features of this monitor is its OLED panel, which delivers deep blacks, vibrant colors, and exceptional contrast ratios. Unlike traditional LCD screens, OLED technology allows for true blacks since each pixel emits its own light.
1920x1080 Full HD Resolution – Crisp and clear visuals for work and entertainment.
100% DCI-P3 Color Gamut – Ideal for designers, photographers, and video editors who need accurate color reproduction.
10-bit Color Depth – Smoother gradients and reduced banding in professional applications.
Ultra-Fast 1ms Response Time for Smooth Performance Whether you're gaming, editing videos, or simply scrolling through documents, a slow response time can cause annoying ghosting or blurring. The 1ms response time ensures:
Smooth cursor movements when working with multiple windows.
No motion blur in fast-paced games or videos.
Better overall responsiveness compared to standard portable monitors.
Touchscreen Functionality for Enhanced Productivity The 10-point capacitive touchscreen adds versatility, making it ideal for:
Drawing & Design Work – Use a stylus for precise input (compatible with most active pens).
Touch-Based Apps – Navigate Windows or macOS with intuitive touch controls.
Interactive Presentations – Great for business professionals on the go.
Lightweight & Portable Design for Travelers Weighing just under 2 pounds and with a slim profile, this monitor is perfect for:
Digital Nomads – Fits easily in a backpack alongside a laptop.
Business Travelers – Set up a dual-screen workstation in hotel rooms or coffee shops.
Students – Great for multitasking between research and note-taking.
Plug-and-Play Compatibility with Laptops, Macs, and More The VCHANCE monitor supports multiple connectivity options:
USB-C (DisplayPort Alt Mode) – Single-cable solution for power and video (ideal for MacBooks and modern laptops).
Mini HDMI – Connect to gaming consoles, cameras, or older devices.
Built-in Speakers – Decent audio for casual use (though external speakers or headphones are recommended for better sound).
Performance & Real-World Use Cases
Office & Productivity For professionals working with spreadsheets, coding, or multitasking, the extra screen space is a game-changer. The matte anti-glare coating reduces reflections, making it usable even in bright environments.
✅ Best for:
Excel/Data Analysts – Compare datasets side by side.
Programmers – Code on one screen, documentation on the other.
Content Creators – Edit videos while keeping timelines and previews separate.
Creative Work (Photo & Video Editing) The 100% DCI-P3 coverage ensures that colors remain accurate, which is crucial for:
Photographers – Retouching images with true-to-life colors.
Video Editors – Previewing footage without color shifts.
Graphic Designers – Working on illustrations with precise color grading.
Gaming & Entertainment While not marketed as a gaming monitor, the 1ms response time and OLED contrast make it surprisingly good for:
Casual Gaming – Play indie games or older titles with vibrant visuals.
Cloud Gaming – Stream Xbox Game Pass or GeForce Now with minimal input lag.
Media Consumption – Watch movies with deep blacks and rich colors.
On-the-Go Use (Travel & Remote Work) The included smart cover doubles as a stand, allowing for multiple viewing angles:
Landscape Mode – Ideal for productivity and movies.
Portrait Mode – Useful for coding or reading long documents.
Since it’s powered via USB-C, you can even run it from a power bank if no outlet is available.
Pros & Cons ��� Pros: ✔ Stunning OLED display with perfect blacks and vibrant colors. ✔ Ultra-thin and lightweight – Easy to carry anywhere. ✔ Touchscreen functionality adds versatility. ✔ Wide compatibility with laptops, Macs, and gaming devices. ✔ Fast 1ms response time reduces motion blur.
❌ Cons: ✖ No built-in battery – Requires external power (USB-C or adapter). ✖ Speakers are average – External audio is recommended. ✖ Limited to 60Hz refresh rate – Not ideal for competitive gaming.
Who Should Buy This Monitor? This portable monitor is ideal for:
Professionals who need a second screen for work.
Digital Nomads & Travelers looking for a lightweight display.
Creatives who require color-accurate panels.
Students who want extra screen space for research and assignments.
Final Verdict: Is the VCHANCE 13.3" OLED Portable Monitor Worth It? If you're looking for a high-quality, portable secondary display with OLED brilliance, touch functionality, and excellent color accuracy, the VCHANCE 13.3 Inch OLED Portable Monitor is a fantastic choice. While it lacks a built-in battery and high refresh rate, its sleek design, vibrant visuals, and fast response time make it one of the best portable monitors for professionals on the go.
Where to Buy? Available on Amazon, Best Buy, and the official VCHANCE website (prices may vary based on promotions).
Would you consider adding a portable OLED monitor to your setup? Let us know in the comments!
#gaming_monitor#portable_monitor#monitor_pc#monitor_screen#display_monitor#desktop_monitor#laptop_monitor#pc#laptop#phone#xbox#ps4#ps5#gaming_display#monitor#youtube#video#home
0 notes
Text
PhotoScape X - Free Photo Editor for Mac and Windows 10
Everything you need to edit photos
PhotoScape X is an all-in-one photo editing software which provides photo-related features
such as Photo Viewer, Editor, Cut Out, Batch, Collage, Combine, Create GIF, Color Picker, Screen Capture, RAW images and More
#photo #editor
0 notes
Text
Fotor for Windows 5.0.6 Free Full Activated
Fotor for Windows is a desktop-based free photo editing software developed by Everimaging. It offers a simple yet robust platform for editing photos, creating collages, and designing graphic content. It’s ideal for users who need quick photo enhancement tools without the steep learning curve of Photoshop.
Available for Windows 10 and Windows 11, Fotor has become a go-to solution for anyone who wants a fast, beautiful, and efficient photo editor on their PC.
0 notes