#oconnect app
Explore tagged Tumblr posts
Visit Tumblr Blog
Explore Tumblr blogs with no restrictions, modern design and the best experience.
Last Seen Tumblr Blogs


Fun Fact
Tumblr has been banned in Indonesia for providing people with access to pornographic content.
Text
Unleashing the Future of Virtual Communication: O-Connect by ONPASSIVE
In today’s rapidly evolving digital landscape, virtual communication has become an integral part of our daily lives. With the advancement of technology, businesses and individuals alike are constantly seeking innovative ways to connect and engage with others remotely. One such groundbreaking solution that is revolutionizing the way we communicate is O-Connect by ONPASSIVE. In this article, we…

View On WordPress
#best online meeting tools#best online meeting tools than zoom#best online tools#best online webinar#best online webinar platform#best web conference tools#best webinar tools#c-connect app download#o-connect#O-Connect best video confrtence tools#o-connect launch date#o-connect onpassive products#O-Connect Review#O-Connect: Connecting The World In An Instant – Powered By AI Technology#ocademy onpassive#oconnect#oconnect app#oconnect features#oconnect online webinar tools#oconnect onpassive#oconnect review#oconnect update#oconnect update today#onpassive o-connect#onpassive products#oproducts#oproducts O-Connect#Virtual Communication#when o-connect launch#why o-connect best
0 notes
Text
Creating an OConnect Webinar: A Step-by-Step Guide

Creating an OCONNECT Webinar: A Step-by-Step Guide
Hey there, in this blog post, we're diving into how to create an OCONNECT WEBINAR Link or join a webinar effortlessly. While many know how to create an Oconnect Webinar link, some might not be familiar with the process specific to OCONNECT. Don’t worry; we’ve got you covered. By the end of this blog, you’ll have a clear understanding of creating and joining an Oconnect webinar using OCONNECT, right from your Laptop.
Get The Oconnect App Now
Google Play
Getting Started: Logging In
The first step is to log in to your OCONNECT account within the ecosystem.

Getting Started Logging In Once you’re logged in, navigate to the OCONNECT section.

Click Oconnect
Creating a New Event
Click on ‘New Event’ to start the process. Here, you'll input the title of your webinar and its agenda, specifying the topic or purpose of your event.

Creating a New Event
Setting Up Time and Duration
Scroll down to set the time, date, and duration of your Oconnect webinar. Make sure to adjust the timings according to your time zone, especially Pakistan Standard Time (PST).

Setting Up Time and Duration
Generating the Oconnect Webinar Link
After setting up the details, click on the ‘Create’ button. Upon successful creation, you’ll see a green confirmation stating 'Webinar Successfully Created.'

Generating the Oconnect Webinar Link
Obtaining the Attendee Link
Navigate to the event details page where you’ll find options like Event ID, Title, Date and Time, and the all-important Invite Link. Click on the 'Attach symbol' next to the Invite Link to access the Attendee URL and Speaker URL. Copy the link as needed to share it with your participants.

Obtaining the Attendee Link
Starting the Oconnect Webinar
Back on the event page, you’ll find a 'Start' button. Click on it when you’re ready to begin your webinar.

Starting the Oconnect Webinar Oconnect Webinar Controls and Features Inside the webinar interface, you'll find various options such as Screen Capture, Recording, Emojis, Mic, Camera, Participant List, and more. Familiarize yourself with these tools to manage your webinar effectively.

Engaging Participants Encourage participants to interact using features like Chat, Emojis, and Hand Raise. You can also manage requests from attendees who wish to speak during the webinar. Taking Breaks and Managing Settings Utilize features like 'Be Right Back' for breaks during the meeting. You can also adjust settings for video and audio quality in the Settings menu. Ending the Oconnect Webinar Once your webinar concludes, use the 'End Meeting' button to wrap up the session.

Providing Feedback After exiting the webinar, you may be prompted to rate your experience with OCONNECT. Share your feedback to help improve the platform for future Oconnect webinars.

By following these steps and utilizing OCONNECT’s features, you can host engaging and successful webinars, connecting with your audience seamlessly. Happy webinar hosting! Read the full article
#Ecosystemonpassivelogin#HowdoIcreateawebinaronOCONNECT?#HowtocreateawebinarinOconnect?#IsOConnectlaunched?#IsOCONNECTbetterthanZoom?#IsOCONNECTlaunched?#OconnectWebinar#onpassive#onpassive360updates#WhatisonpassiveOCONNECT?
0 notes
Text
OCONNECT APP IS LIVE.
Hey Guys. If anyone or company using zoom or any other webinar platform STOP. Oconnect has a 3month subscription with a 10,000 seat capacity 25 speakers feature, a sound reduction feature plus about 50 more features AI technology all for only $375 for 3 months. Including a massive commission rate. Click the link for more info. https://o-trim.co/SupremeSuiteOfDigitalProducts 🥳🥳🥳
0 notes
Text
ONPASSIVE Products’ O-Connect Review: The Best Way to Manage Online Meetings
ONPASSIVE Products’ O-Connect is a cutting-edge online meeting management platform that allows individuals and businesses to host and manage virtual meetings with ease. O-Connect is part of the OnPassive suite of products, which is designed to provide a comprehensive solution to all of your online business neOnPassive Products’ O-Connect is an excellent online meeting management platform that…

View On WordPress
#best online meeting tools#best online meeting tools than zoom#best online tools#best online webinar#best online webinar platform#best web conference tools#best webinar tools#c-connect app download#o-connect#O-Connect best video confrtence tools#o-connect launch date#o-connect onpassive products#O-Connect Review#O-Connect: Connecting The World In An Instant – Powered By AI Technology#ocademy onpassive#oconnect#oconnect app#oconnect features#oconnect online webinar tools#oconnect onpassive#oconnect review#oconnect update#oconnect update today#onpassive o-connect#onpassive products#oproducts#oproducts O-Connect#when o-connect launch#why o-connect best#zoom alternative
0 notes
Text
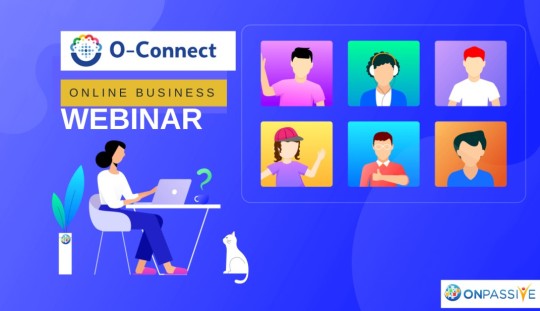
Utilize Onpassive Products To Get The Best Online Webinar platform Experience With O-Connect
Utilize Onpassive Products To Get The Best Online Webinar platform Experience With O-Connect
Are you looking for the best online webinar platform to host your next meeting? With O-Connect, you can get the best online meeting experience without any hassle. O-Connect is an AI-powered platform created by Onpassive Products, to make all your online meetings stress-free and secure. With features such as video conferencing, screen sharing, live chatting, and file management, O-Connect has…
View On WordPress
#ai online meeting software#ai webinar online#alternative to zoom#best ai online meeting services#best free online meeting platform#best free online video conference#best online meeting app than zoom#best online meeting platforms free#best online webinar platform#free online meeting apps#o-connect app#o-connect onpassive peoducts#o-conneect#online meeting app#onpassive oconnect#onpassive products#zoom#zoom app
0 notes