#need to work on my paintovers in the future
Explore tagged Tumblr posts
Visit Tumblr Blog
Explore Tumblr blogs with no restrictions, modern design and the best experience.
Last Seen Tumblr Blogs


Fun Fact
69% of Tumblr users are millennials.
Text
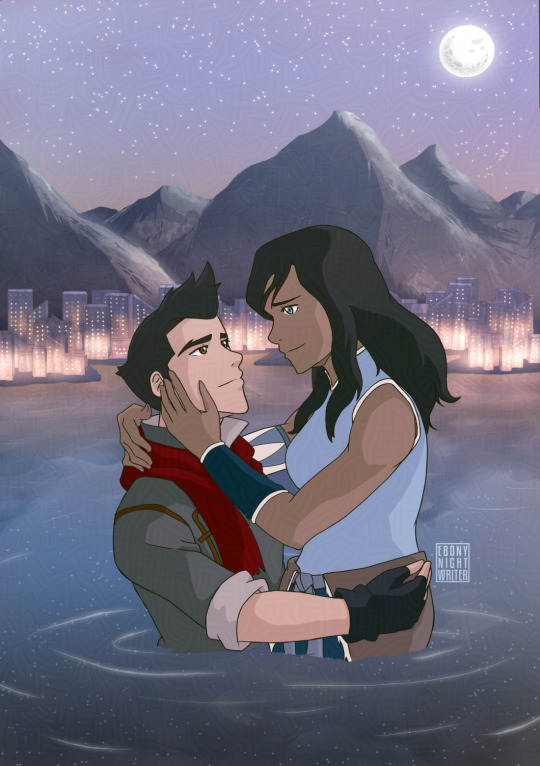
makorra request for @girlwiththeglow
it was fun to revisit these two after all these years 🥰
#lok#makorra#makorra 2.0#do people even use the 2.0 tag anymore lol its been so long#my stuff#my art#this got to 'i've been working on this too long i hate its guts' near the end but overall this was a blast to work on#especially the bg! the mountains were fun to render :D#also i once again learned a bit of blender to create the city#need to work on my paintovers in the future
98 notes
·
View notes
Text
As you can probably tell I've been inactive here for quite a while! I still love tumblr, but Instagram has always been my main platform, and tumblr threads get reposted there all the time. Im not as much if a fan of Tumblr's layout either wich was the main reason for me going off both my accounts.
I think it's time to make a new account. I will only post my art there (and I'll make 2 other accounts for my DI comic series and nsfwart... Is nsfw art even allowed anymore? Idk maybe I wont make one here- I already post that on twitter and instagram). I will still reblog anything non-art related here though. And of course I'll keep my free asset master list up. :)
I thought of going back here for art because I never really have the chance to post sketches or anything. For aesthetics purposes I keep my twitter and main instagram with big finished pieces only and my sketch account never gets used because I hate it lol. Tumblr seems like a platform (to me) that will be fine with sketches and finished works on the same account. For Instagram and Artfol, I want to keep my feed looking nice and clean. And while Twitters accounts are similar scrollers like Tumblr, the space just feels more daunting in general.
Thank you all for your support throughout this account! I hope my future endeavors here stick, and wish you all the best of luck with yours. 💌
Also to give an example, since I havent posted any drawing on here since about- 2020? I haven't really posted anything on Instagram either because my feed needs to be very specific to me idk why. I rarley finish works but I love drawing in general! Here's a current wip of my favorite oc from my comic, Maximillian. He is a demon and the painting is of 2 possible outcomes to his life. It is a paintover TypeONegative's Peter Steele and Johnny Kelly. Peter is part of Max's voice claim, though Johnny's face is slightly more accurate to Max's own lol. It is based on this paintover-real-faces-with-ocs trend I saw. Idk the name of it, but I thought it would be a nice way to practice my digital painting. ^^
I hope you enjoy! I look forward to posting more art on this website in the future. ^^


5 notes
·
View notes
Text
08/01/2025 Reflection of My Extended Project (Light and Shadow 01)
Besides the Nostalgia and Memory project, the other extended project I chose to work on is Light and Shadow. In my previous assignment, I used the 3D tools in Clip Studio Paint, including buildings and human bodies, to create basic light and shadow effects and then did a paintover. For this extended project, I decided to complete the character in the illustration and enhance her design.
Character Design Process
I started by redrawing the character from a previous sketch using a pose that showed her equipment more clearly. I created five views, including side, back, and a 45-degree angle. I chose to color the front view while keeping the other angles in black and white. I also added facial expressions to show her emotions and personality. To give more context to her character, I designed action poses, such as jumping (to represent her adventurous nature) and licking blood (to show her animal-like wildness).


When painting the front view, I decided to skip line art to try a different style and to distinguish this project from Nostalgia and Memory. My inspiration came from the art style of the animated series Arcane, which impressed me with its bold, structured approach to light and shadow. Arcane’s style uses simple blocks of color to create depth and atmosphere. Although I only applied this technique to the character and expressions, it pushed me to think more critically and improve my understanding of objects and anatomy. I hope to refine my brushwork further in the future and create more in this style.
Incorporating Props and Tools
I included the knives I modeled in my previous 3D project in the character design layout. I added text descriptions to explain the materials of the knives and how they suit the character’s world exploration. Another key prop was a fishing rod, which I designed as a multi-purpose tool. It can hold various items, serve as a weapon, and is easy to find or make, making it a fitting weapon for her early adventures. To further support the character’s survival story, I added a gas mask, which ties into the setting of a world plagued by bacteria and viruses that thrived after a great flood. This tool reflects the practical challenges of the environment and the need for protection in her exploration.


Character Development Stages
I created two versions of the character:
Early Stage: When she is still inexperienced and lacks professional equipment.
Later Stage: When she becomes more skilled and gathers or crafts different tools.
For the later stage, I also drew front, side, and back views, with the 45-degree angle used for action poses. Before finalizing, I explored three outfit designs with "patchwork, natural, and asymmetry" concepts. I experimented with different shadow placements and overlayed cloaks or layered clothing, mixing my favorite elements to create three iterations.


Refining the Design
During discussions with my professor, he pointed out that many parts of my design, such as towels, decorative items, and leather straps, were more ornamental than practical. These didn’t align with the character’s motivation as a world explorer. In the final version, I removed unnecessary decorations while keeping the core design elements and ensuring the outfit remained functional.


Reference
80.lv. (2022). A Closer Look at Texturing in Arcane. [online] Available at: https://80.lv/articles/a-closer-look-at-texturing-in-arcane/.
ArtStation. (2025). ARCANE - Firelight Leader - Textures, Gilles Roman. [online] Available at: https://www.artstation.com/artwork/RnqYXy [Accessed 8 Jan. 2025].
1 note
·
View note
Text
Draw a bad-ass geisha
In this geisha illustration I wanted to capture a grungy, dark, urban vibe, laced with elegant traditional Japanese elements. The idea that kept coming up again and again was to make her ‘bad-ass’. That’s the core essence of Geiko – she’s a geisha turned self-serving samurai, a vigilante within a dangerous cyberpunk universe. I got the idea from a competition to design a geisha or samurai character.
Here, I’ll explain how I developed this Geiko illustration, and my whole thought process and approach to the design. You’ll pick up tips on how to push your ideas forward and craft the final details. I want to leave you with concepts and methods you can adapt and use in your own work. So let’s start with the most crucial bit…
How to draw and paint – 100 pro tips and tutorials
1. Visualise the big idea
Geiko is a young geisha doll, driven by anger and revenge, roaming the streets as she takes down all the bad men that hurt people like her (Click the icon in the top-right of the image to enlarge the picture)
The very first step is deciding the look and feel of the character and capturing it all with a rough sketch. The most important thing is knowing exactly how you want your audience to feel about your character, because this will drive your whole thought process from start to finish. My core idea was to design Geiko so that people’s gut reaction to seeing her is: “That’s bad-ass!”
2. Generate thumbnails
Develop initial rough ideas that fit in with the big idea (Click the icon in the top-right of the image to enlarge the picture)
With that clear goal in mind, I jump into SketchBook Pro and use the Triangle brush to sketch my ideas out, exploring and pushing them further while staying true to the original Geiko essence. I keep it loose and gestural at this point, making notes on the ideas that I’d like to take forward. Throughout this process I keep asking myself, “Is she bad-ass enough?”
3. Finalise the idea
Play with your favourite ideas to try out variations (Click the icon in the top-right of the image to enlarge the picture)
This is where I take all my favourite ideas that came out of the thumbnail process and explore how they can better capture Geiko’s essence. I duplicate my favourite thumbnail several times and try out those ideas, mixing more Japanese cultural elements back in with an urban cyberpunk twist. Don’t add too many details just yet. All you want to do here is finalise your big idea.
4. Polish and craft the design
Refine the final character more (Click the icon in the top-right of the image to enlarge the picture)
Everything from this point on is just polishing up. You’ll still be making some design choices, but the core essence shouldn’t change. I usually start with the face, because it’s the most important part of any character. If I get it right, the rest falls into place. There are no secrets here. I sketch with the Triangle brush and Eraser, pressing S to quickly flip between the two brushes.
5. Refine the clothing
Use references to draw realistic clothes (Click the icon in the top-right of the image to enlarge the picture)
The next major element to get right is her kimono. I start by grabbing some references. (But remember: references are just guides, so don’t feel bound by them.) Then I create a new layer and make a rough sketch, focusing on the design and flow of the wrinkles. For the final look, I use the Eraser to follow my initial line work on the black kimono and create the white-on-black effect.
6. Accessories and props
You can build the character’s personality through accessories (Click the icon in the top-right of the image to enlarge the picture)
Using references, I work on the swords on her back, making a quick sketch in red to explore the function of the strap, while also playing with the idea of adding kunai knives. I also try to add clues about her personality, like a Totoro charm at the end of one of her swords. It’s subtle, but it helps make the character seem more well-rounded.
7. Bring in detail on her boots
White highlights create the impression of glossy leather-like fabric (Click the icon in the top-right of the image to enlarge the picture)
Next I start cleaning up Geiko’s boots. In a similar way to how I did the clothing, I use the Eraser to create the line work, which is consistent with the style of the image. Her footwear is inspired by a mixture of high-heeled boots with a sporty twist and Japanese ninja sandals. I want to create a glossy type of material for her legs, so I add white highlights to achieve that look.
8. Create the mechanical gauntlet
Tweaking details like this can bring them to life (Click the icon in the top-right of the image to enlarge the picture)
I want to keep the essence of my sketch, so I use the base silhouette of the gauntlet and start cleaning it up, erasing panel lines in, and drawing exposed wires to make it feel more customised instead of being built in a factory. I flick back and forth with the S key throughout, drawing lines in and erasing where necessary. I realise that the silhouetted gauntlet is blending in too much with her kimono, so I opt for a lighter version that helps to create a better read.
9. Stop… it’s paintover time!
A quick paintover puts the character in context (Click the icon in the top-right of the image to enlarge the picture)
Now that I’m almost done with the design, I take a step back and look for any bits I can push further. A quick paintover enables me to explore how I can exaggerate Geiko’s bad-assery. I add a more well-rounded toolset of weapons including samurai gun-swords and a traditional Japanese umbrella. Then I push the storytelling with dripping blood and bullet holes, along with a smoke trail that adds movement, mystery and depth.
10. Detail Geiko’s primary weapon
Build up details that add to the character’s story (Click the icon in the top-right of the image to enlarge the picture)
From the loose sketch done in the paintover stage, I begin to finalise the main sword design. I don’t want her weapon to be elegant or well-crafted, but to feel more imposing and threatening, so I choose to go with an exaggerated butcher’s knife. I use the Ruler and Lazy Mouse features in SketchBook Pro to create the long, sweeping arcs in the blade, ensuring the line work feels rough and grungy.
11. Add the finishing touches
Even discreet Japanese writing needs to be accurate (Click the icon in the top-right of the image to enlarge the picture)
Before finishing up the design, I take the time to polish it up. I decide to add more details to her mask and sword, tweak the design of her cross-body strap and give her some branding and tattoos, making sure I use the correct Japanese phrases. Details like these count. I also include a shadow pass to add more depth, as well as the juxtaposition of her red demon eyes and rosy red cheeks.
12. Establish the background
The story becomes more believable with a background for your character (Click the icon in the top-right of the image to enlarge the picture)
With the character done, I jump into Photoshop to create the background and atmosphere to round off the piece. I imagine Geiko in a back alley, fresh from a fight. So I add a floor and wall pattern, making these more sci-fi and grungy looking to enhance the cyberpunk feel. I add a quick gradient to them, which helps pop the character from the background and add more depth to the image.
13. Build background details
Custom brushes and textures push the realism (Click the icon in the top-right of the image to enlarge the picture)
I now add extra details and textures to the environment. Bullet holes, dust particles and dripping blood help tell more of Geiko’s story and push the final illustration. I use masks to blend some of the line work out, and use texture on the background and character with custom brushes to help it appear less digital.
14. Bring in action cues to push the mood
Use quick movements to draw puffs of smoke (Click the icon in the top-right of the image to enlarge the picture)
For even more depth and mood, I add action cues like smoke at Geiko’s feet. I use the Lasso tool to create the shape of the smoke, taking into account the wind direction that may tilt it slightly. I do this quickly to capture the motion, instead of lingering on it too long and making it too refined. Once I fill in my selection, to make it appear more like smoke I reduce the Opacity and use a mask to blend out specific parts even more, letting the background elements pop through.
15. Add a brand to your work
Identify your work as yours (Click the icon in the top-right of the image to enlarge the picture)
Branding, like your logo or signature and website URL, helps make your illustration yours wherever it ends up. People will always know whom to credit and future clients can contact you easily. Don’t forget to give it a title, too. It’ll help finish it off and make the piece feel more considered and complete.
This article originally appeared in ImagineFX issue 149. Buy it here!
Related articles:
How to create a comic page
How to draw manga
Draw a figure in under five minutes
This post comes from the RSS feed of CreativeBlog, you can find more here!
The post Draw a bad-ass geisha appeared first on Brenda Gilliam.
from Brenda Gilliam http://brendagilliam.com/draw-a-bad-ass-geisha/
0 notes
Text
BA3a: Evaluation
Through this unit I developed my programming skills in two game engines and designed multiple games.
Admittedly, I spent a lot of time working on the tasks - far more than I should have. I found an idea I liked with Task 1 and spent a lot of time developing the idea. I struggle a lot with blueprints in Unreal Engine 4, and so it took a while to create the pushable doors and crouch mechanics. I was able to get a death and checkpoint system working, but only for the first sliding door and crouch area. Blueprinting the other areas was a little complicated, and so I ended up not implementing death areas past these parts. I could improve on the gameplay a lot - there are no ‘puzzles’ and traversing through the level is mainly timing based. If I had more time I would have included shadow enemies that the player had to avoid. I realise that this task was not about gameplay, but immersing the player. I implemented sounds and tried to block out the level effectively, but I feel that it could be improved by adding more NPC interaction with the clones. For example, one was supposed to appear at the start and walk into the light, but that wasn’t implemented. Additionally, the game was going to be 2D. I did a rough paintover but decided it would take too much time to do all of them, so opted for a 2.5D game for the prototype. Ultimately, I spent too much time on this task when I should have focused more on the creative project.

Exposure rough paintover
Task 2 was really enjoyable. I decided to make my weapon an ordinary banana because I found the idea funny. Through this task I learnt about projectile properties in UE4. I created a throwable weapon with the ability to peel the banana and throw the skin on the groun, and created respawnable ammo to refill the ammunition. I feel like I was successful with this task, but there were a few problems, such as the banana not disappearing when the player runs out. To improve I would add damage blueprints to the banana so it could be used to cause damage to health.
After task 2, I switched to GameMaker to make games. Learning the coding language took a while, but I was able to create a few games with it, and I now feel more confident creating games using this program. I created the background for the treasure game in Marmoset Hexels 2.5. The coding proved a little difficult, but I was able to create a weighted randomness system, with the gems appearing at different frequencies. This is the task I am most proud of, and there isn’t much I would do to improve it.

Weighted Randomness code. The code chooses a number between 1 and 100. Green gems have the highest chance of appearing, and Orange gems have the least chance of appearing.

Task 3 Treasure game
For Task 4 I created twitter accounts for myself and the game Atelo, but I am yet to use them regularly as I haven’t got very far in developing Atelo. I will be using these accounts more in the future when I get further in the development stage.
https://twitter.com/carlgdmn
https://twitter.com/AteloGame
For the creative project, I began designing the game in UE4. I spent some time figuring out how to implement scoreboards and the mechanics I failed to programme the first time I did a prototype for the game. The blueprints were much easier to understand this time, and I’m surprised I didn’t figure them out in BA2a. On the other hand, I wanted to switch to a different engine as I found the visual scripting can get messy, and in my opinion Unreal Engine isn’t suited too well for 2D games. I switched to Game maker in December and began learning to code games. I created an Asteroids and Helicopter game to help me understand the basic code functions, and was able to implement most of them into my game prototype.
However, the lot of things I could improve on. At the moment, the gliding mechanics feel clunky. I will need to work on the code more to perfect them. Furthermore, I failed to do the level art iterations or programme a cutscene. I will need to do these in the future. I will begin by spending a week or so improving on the prototype and ensuring all the mechanics are in place, and then I will work on designing the levels for the game.
In addition, I wasn’t very consistent in updating my blog. I should have taken time to at least reflect on what I had done that week, and planned out what I was going to do the week after.
Overall, this project has been really fun and I’ve enjoyed making and designing different games. Although I decided to switch to GameMaker, I’m sure the blueprints knowledge will come in handy in the future if I decide to make a 3D game. I will continue learning GameMaker and working towards creating Atelo in it.
0 notes