#multi tool grout removal blade
Text
Tile grout remover multi tool | Cut Defective Tile Joints and Plaster Grooves with Precision.
#multi tool tile blade#cutting tiles with multi tool#cutting tile with a multi tool#multi tool diamond blade#multi tool grout removal blade#multi tool grout blade#oscillating grout removal tool#grout removal blade for oscillating tool#oscillating tool grout blade#grout removal blade for multi tool#grout multi tool blade#multitool grout#multitool grout removal#cutting tile with oscillating tool#oscillating tool tile blade#tile cutting blade for oscillating tool#oscillating tile blade#tile multi tool blade#multi tool tile cutting blade#oscillating tool diamond blade for tile#diamond oscillating blade#oscillating tool diamond blade#best grout removal blade for oscillating tool#grout remover multi tool blade
0 notes
Text
Reciprocating Saw Vs Oscillating Saw: The Ultimate Power Showdown

The main difference between a reciprocating saw and an oscillating saw is that the reciprocating saw moves back and forth, while the oscillating saw moves in a small swinging motion. Reciprocating saws are ideal for rough cutting and demolition tasks, while oscillating saws are versatile and can handle precise cutting and detail work.
Reciprocating saws and oscillating saws are two types of power tools that are commonly used in various construction and renovation projects. Understanding their differences and capabilities is essential for choosing the right tool for the job. Reciprocating saws, also known as sawzalls, feature a straight blade that moves back and forth, creating a reciprocating motion.
This makes them great for demolitions and rough cutting tasks, such as cutting through lumber, pipes, or metal. Reciprocating saws are known for their power, versatility, and ability to cut through tough materials quickly. On the other hand, oscillating saws are designed with a small swinging motion, using a multi-purpose blade that moves side to side. This makes them ideal for precise cutting and detail work, making clean cuts in various materials like wood, metal, or plastic. Oscillating saws are popular due to their versatility, as they can also be used for sanding, scraping, and grout removal. While reciprocating saws excel in rough cutting and demolition tasks, oscillating saws are more versatile, making them better suited for precise cutting and detail work.
Reciprocating Saw
A reciprocating saw, also known as a saber saw or a recip saw, is a versatile power tool that can make your cutting tasks easier and more efficient. This handheld saw uses a push and pull motion to saw through various materials, making it ideal for demolition and remodeling projects.
Features And Benefits Of A Reciprocating Saw
A reciprocating saw comes with a range of features that make it a valuable addition to your toolbox. Here are some key features and the benefits they offer:
- Variable Speed Control: Reciprocating saws are equipped with variable speed settings, allowing you to adjust the cutting speed to suit different materials. This feature ensures precision and control, reducing the risk of damaging the workpiece.
- Quick Blade Change: One of the standout features of a reciprocating saw is its tool-less blade change system. This makes swapping blades fast and effortless, saving you time and effort during projects.
- Orbital Action: Some reciprocating saw models come with orbital action settings, which add a circular motion to the standard back-and-forth motion. This feature enhances cutting speed and can tackle tougher materials with ease.
- Versatility: Whether you're cutting through wood, metal, plastic, or drywall, a reciprocating saw can handle the task. Its ability to make flush cuts and reach tight spaces makes it a go-to tool for many professionals.
- Portability: Reciprocating saws are portable and handheld, giving you the freedom to move around your workspace without the need for cords or additional equipment. This makes them an excellent choice for both indoor and outdoor projects.

Common Uses Of A Reciprocating Saw
The versatility of a reciprocating saw translates into a wide range of applications. Here are some common uses for this powerful tool:
- Demolition: Whether you're tearing down walls or removing damaged structures, a reciprocating saw can make quick work of the task. It excels at cutting through nails, screws, and other fasteners, making it an essential tool for demolition projects.
- Pruning and Trimming: With the right blade attachment, a reciprocating saw can be used for pruning trees, cutting branches, and trimming shrubs. Its power and maneuverability make it an efficient tool for outdoor landscaping tasks.
- Pipe and Metal Cutting: When it comes to cutting through pipes, metal rods, or old metal structures, a reciprocating saw is a reliable choice. Its ability to cut through various metals makes it indispensable for plumbing and metalworking projects.
- Home Remodeling: From removing old tile to cutting through drywall, a reciprocating saw can assist in various home remodeling tasks. Its versatility allows you to tackle multiple materials, making it a handy tool for DIY enthusiasts and professionals alike.
Pros And Cons Of A Reciprocating Saw
Like any power tool, a reciprocating saw has its advantages and disadvantages:
Pros
Cons
- Versatile and can cut through various materials
- May produce more vibrations compared to other saws
- Portable and easy to maneuver
- Can be noisy during operation
- Quick and tool-less blade changes
- Limited precision compared to other saws
- Ideal for demolition and remodeling tasks
- Requires the use of specific blades for optimal performance on different materials
- Can reach tight spaces and make flush cuts
- Not suited for fine woodworking projects
Despite its drawbacks, a reciprocating saw remains an invaluable tool in many construction and renovation projects. Its versatility, power, and ability to tackle tough materials make it a must-have tool for any DIY enthusiast or professional.
Oscillating Saw
When it comes to power tools, having the right tool for the job can make all the difference. In the world of saws, two popular options are the reciprocating saw and the oscillating saw. In this blog post, we will focus on the oscillating saw, exploring its features and benefits, common uses, as well as its pros and cons.
Features And Benefits Of An Oscillating Saw
One of the key features of an oscillating saw is its versatility. Unlike other power saws that move in a back-and-forth motion, the oscillating saw blade moves in a rapid side-to-side oscillating motion. This unique cutting action allows for more precision and control, making it a valuable tool for a variety of applications.
Additionally, an oscillating saw provides you with the ability to cut through different materials such as wood, metal, plastics, and even nails or screws embedded in the material. Its interchangeable blades further enhance its versatility, allowing you to tackle various cutting tasks with ease.
Another notable benefit of an oscillating saw is its compact size and ergonomic design. It is lightweight and easy to maneuver, making it ideal for tight spaces or overhead work. Whether you're working on a construction site, doing DIY projects at home, or engaging in delicate tasks like trimming baseboards or removing grout, an oscillating saw offers enhanced control and precision.
Common Uses Of An Oscillating Saw
An oscillating saw finds its applications in a wide range of projects, making it a staple tool for both professionals and DIY enthusiasts. Here are some common uses of an oscillating saw:
Task
Benefits
Cutting through pipes and nails
- Oscillating saws can cut through various materials, including metal pipes and embedded nails, thanks to their powerful blades.
- The small size and maneuverability of the saw make it ideal for tight spaces.
Trimming wood and baseboards
- The oscillating saw's precise cutting action allows for accurate trimming of wood and baseboards without damaging the surrounding area.
- The small blades can reach into corners and tight spaces, ensuring a clean and professional finish.
Removing grout
- The oscillating saw's rapid back-and-forth motion with a specialized grout removal blade makes it an efficient tool for removing grout from tiles or masonry surfaces.
- The controlled cutting action minimizes the risk of damaging the tiles.
Pros And Cons Of An Oscillating Saw
As with any tool, an oscillating saw comes with its own set of advantages and disadvantages. Here are some pros and cons to consider:
Pros:
- Offers precise cutting for delicate tasks.
- Versatile and can cut through a variety of materials.
- Compact and easy to handle, especially in tight spaces.
- Interchangeable blades provide flexibility for different cutting applications.
Cons:
- May not be suitable for heavy-duty cutting tasks.
- Requires the purchase of additional blades for specific tasks.
- May produce more vibration compared to other saws.
- Not suitable for long, continuous cutting sessions due to potential overheating.
Overall, an oscillating saw is an invaluable addition to any toolbox. Its versatility and precision make it a go-to tool for a wide range of tasks, from DIY projects to professional construction work. Consider your specific needs and the nature of your projects to determine whether an oscillating saw is the right choice for you.

Reciprocating Saw Vs Oscillating Saw
When it comes to power tools, two of the most popular options among DIY enthusiasts and professionals are the Reciprocating Saw and the Oscillating Saw. Both tools have their unique features and benefits, making them suitable for various cutting tasks. In this blog post, we will compare the Reciprocating Saw and the Oscillating Saw in terms of power and cutting capabilities, versatility and range of applications, ease of use and maneuverability, safety considerations, and cost and value for money.
Power And Cutting Capabilities
Power is an essential factor to consider when choosing between a Reciprocating Saw and an Oscillating Saw. The Reciprocating Saw, also known as a recip saw or a sabre saw, is a highly powerful tool designed for heavy-duty cutting tasks. It operates with a back-and-forth motion of the blade, making it ideal for cutting through thick materials such as branches, metal pipes, and even demolition work. On the other hand, an Oscillating Saw, also known as a multi-tool, offers more precision and control. It uses a small, oscillating blade that moves side to side, allowing for precise cutting in tight spaces and delicate materials like wood trim, drywall, and plastic.
Versatility And Range Of Applications
When it comes to versatility, the Oscillating Saw takes the lead. It is a jack-of-all-trades tool, capable of performing various tasks such as cutting, sanding, scraping, and grout removal. With the right blade attachment, an Oscillating Saw can tackle almost any project, from home renovations to crafts and repairs. On the other hand, the Reciprocating Saw, although less versatile, excels in specific applications like demolition, pruning, and cutting through heavy materials. Its power and aggressive cutting motion make it perfect for heavy-duty tasks that require speed and strength.
Ease Of Use And Maneuverability
Both the Reciprocating Saw and the Oscillating Saw are relatively easy to use, but they differ in terms of maneuverability. The Reciprocating Saw has a larger and bulkier design, which can make it challenging to maneuver in tight spaces or overhead positions. However, it compensates with its brute power and efficiency. On the other hand, the Oscillating Saw is compact and lightweight, allowing for better control, especially in confined areas. Its slim profile and versatility make it an excellent choice for precision cutting and handling.
Safety Considerations
When working with any power tool, safety should always be a top priority. Both the Reciprocating Saw and the Oscillating Saw come with their own safety considerations. The Reciprocating Saw's aggressive cutting action requires caution, as it can easily kick back or cause the blade to bind. It is important to wear protective gloves, and eyewear, and ensure a firm grip on the tool. On the other hand, the Oscillating Saw's small and precise blade poses a lower risk of kickback or blade-related injuries. However, proper safety precautions like wearing protective gear and using the right blade for the task at hand should still be observed.
Cost And Value For Money
When it comes to cost and value for money, the choice between a Reciprocating Saw and an Oscillating Saw largely depends on the specific needs of the user. Reciprocating Saws are generally more affordable, with a wide range of options available to fit various budgets. They offer excellent value for money, especially if you require the power and versatility for heavy-duty tasks. Oscillating Saws, on the other hand, tend to be more expensive due to their versatility and precision cutting capabilities. They are an investment worth considering if you require a tool that can handle multiple applications with ease.
Frequently Asked Questions For Reciprocating Saw Vs Oscillating Saw
When Should You Not Use A Reciprocating Saw?
Avoid using a reciprocating saw when working with delicate materials like veneer or trim, as it may cause damage. Similarly, avoid using it for precision cuts or in situations where control is important. Additionally, refrain from using it for overhead work or in confined spaces where maneuverability is limited.
What Is The Difference Between Reciprocating And Oscillating Saw Surgery?
Reciprocating saw surgery uses back-and-forth motion while oscillating saw surgery moves side-to-side.
What Is A Reciprocating Saw Best Suited For?
A reciprocating saw is best suited for cutting through materials like wood, metal, and plastic. It's ideal for demolition work, pruning tree branches, and making rough cuts in construction projects. With its back-and-forth motion, it provides versatility and power for various applications.
What Is The Difference Between A Saw And A Reciprocating Saw?
A saw and a reciprocating saw are different tools. A saw is a general term for cutting tools with a blade, while a reciprocating saw is a type of saw that has a back-and-forth cutting motion. Reciprocating saws are commonly used for demolition work and cutting in tight spaces.
Conclusion
To conclude, both reciprocating saws and oscillating saws have their own unique benefits and applications. The reciprocating saw is ideal for demolition work and rough cuts, while the oscillating saw excels in precision tasks and delicate cuts. Ultimately, the choice between the two depends on the specific project requirements and personal preferences.
By understanding the differences and strengths of each tool, you can make an informed decision and achieve the best results for your cutting needs.
Read the full article
0 notes
Text
WORX Home and Landscape Holiday Gift Ideas
WORX Home and Landscape Holiday Gift Ideas
Carry On Throughout the Season
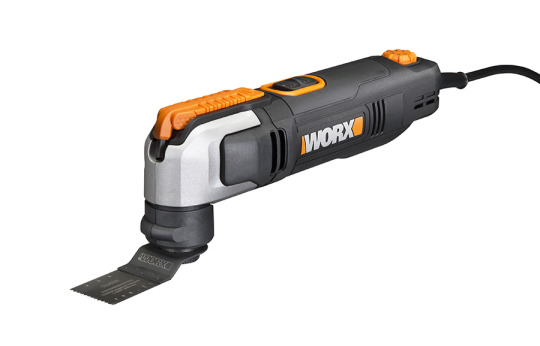
Toronto, ONT – This holiday season, consider a gift that lasts like the WORX® 2.5 Amp .’’..’Oscillating Multi-Tool, the 4V 3-Speed Screwdriver or the Trivac Blower/Mulcher/Vac. These tool gifts are helpful project solvers from home repairs and enhancements to managing the home landscape.
A multi-tool that’s capable of handling multiple tasks both indoors and out is the WORX 2.5 Amp Oscillating Multi-Tool. This versatile, user-friendly oscillating multi-tool with the right accessory attached can tackle a wide range of home projects and repairs that call for cutting, sawing, sanding, scraping, rasping, polishing, shaping and removal of grout or adhesives and more.
The tool’s top-mounted blade wrench features Universal Fit™ that accepts most other brands’ oscillating tool accessories. Universal Fit accessories can be used with all competitors’ oscillating tools without sacrificing fit or performance. The tool’s built-in blade wrench is thicker and provides a more comfortable grip than an Allen key. This allows the operator to apply up to one-ton of clamping force to prevent blade slippage during use.
The WORX multi-tool also features variable speed control and a comfortable, slimmed-down body style. Oscillating speed is set according to the accessory being used and job at hand. Variable oscillating speeds range from 11,000 to 20,000 OPM (oscillations per minute). The tool’s oscillating angle is 3.2o.
For example, using an end-cut blade, the oscillating multi-tool quickly trims door casings and jambs when installing new wood or tile flooring. It’s also handy for cutting PVC or copper plumbing pipes. A semicircle saw blade can be used to make plunge cuts in walls and ceilings for installing electrical boxes and vents, or cutting drywall.
The WORX 2.5 Amp Oscillating Multi-Tool (WX686L) comes with a standard wood end-cut blade, sanding pad, three sanding sheets and clip-in wrench. It is available at CanadianTire.ca. The oscillating multi-tool is covered by the WORX three-year limited warranty.
The new WORX 4V Screwdriver has three, digital, pushbutton settings that enable the user to match the cordless tool’s torque, or turning force, to the job at hand. A lighted display provides a choice of three torque levels: one light indicates 22 in-lbs., two lights indicate 33 in-lbs. and three lights 44 in-lbs.
The cordless driver weighs only 1.5 lbs. and has a compact, circular, lean body. It makes short work of installing blinds and drapes, kitchen and bathroom hardware, door sets and hinges, lighting fixtures, electric cover plates and other everyday home projects.
The nylon-composite power screwdriver features an overmold rubber handle for a sure, comfortable grip and dual LED lights to illuminate the work area. Twelve ¼-in, hex-shanked bits are included with the tool, along with a blow-molded, plastic storage case.
The WORX 4V Max Lithium Screwdriver (WX240L) is available at CanadianTire.ca. The tool is covered by the WORX three-year limited warranty.
For the gardener on the holiday list, a time-saving WORX Trivac® 12-Amp 3-in-1 Blower/Mulcher/Vac may be the answer. Consider this: If 16 collection bags were stuffed with leaves, they’d all fit into a single bag if they were picked up by this versatile blower/mulcher/vac, which has a 16 to 1 ratio.
This vac’s patented articulating motor provides one-touch, conversion from blower to vacuum. There are no tools required. The yard vac generates high-capacity air volume due to its motor and air siphon design. In fact, with air speeds reaching 70 mph and 600 cubic-feet-per-minute (cfm), the vac virtually eliminates bending over to pick up leaves.
With Trivac, all blowing, mulching and vacuuming applications are managed through a single tube. Converting from blower to mulcher/vac is a matter of turning a switch and connecting the 1.4 bushel collection bag.
The wide-mouth, unobstructed circular tube design makes it ideal for vacuuming leaves and other yard debris throughout the property, even in hard-to-reach areas, such as under decks, between shrubs and fence lines. The single-stage Trivac features a metal impeller to shred leaves and twigs into fine mulch, which can be used in beds or collected for curbside pickup.
The Trivac features a two-speed motor. Level one is best when entering sensitive areas, while the more powerful and aggressive level two is for more demanding blowing and vacuuming/mulching tasks.
The combination vac is well-balanced and easy to use. To improve weight distribution, a shoulder strap is provided. Trivac weighs 9.1 lbs. in blower mode and 9.5 lbs. in vac mode with the collection bag.
The WORX Trivac 12-Amp, 3-in-1 Blower/Mulcher/Vac (WG522) is available at CanadianTire.ca. The Trivac is covered by WORX three-year limited warranty.
Reach out to WORX social media links by visiting: Facebook: https://www.facebook.com/worxus?ref=hl; Twitter: https://twitter.com/WORXTools; Pinterest: http://pinterest.com/worxtools and Instagram: @WORXTools
Read the full article
0 notes
Text
Oscillating Multi Tool Guide: 10 Uses for Your Multi-Tool
Looking for a versatile tool that can handle a multitude of tasks? Look no further than the oscillating multi-tool! 🛠️ Whether you're a DIY enthusiast or a professional tradesperson, this handy device is a game-changer. Here's a comprehensive guide on 10 fantastic uses for your multi-tool: 1️⃣ Cutting: With the right blade attachment, you can effortlessly cut through various materials like wood, plastic, drywall, and even metal. It's perfect for trimming door frames or making precise cuts in tight spaces. 2️⃣ Sanding: Transform your multi-tool into a powerful sander by attaching sandpaper. Smooth out rough surfaces, remove paint, or prepare surfaces for painting or refinishing. 3️⃣ Scraping: Say goodbye to stubborn adhesive residue or old paint with the scraping attachment. It easily removes grout, caulk, and even tile adhesive. 4️⃣ Grinding: Need to sharpen your gardening tools or remove rust? The grinding accessor - p9zsow95xx

0 notes
Text
Power Tool Accessories: Unleashing the Full Potential of Your Tools

Power tools have revolutionized how tackle various projects, offering efficiency, precision, and versatility. However, investing in the right power equipment accessories is essential to harness these tools' full potential truly. From specialized blades and bits to innovative attachments and enhancements, these accessories can enhance performance, expand capabilities, and make your work more efficient. The post will explore the world of power tool accessories, uncovering their benefits, popular options, and how they can elevate your DIY or professional projects to new heights.
Precision Unleashed: Upgrading with Specialized Blades
One of the most impactful power tool accessories is the selection of specialized blades for different applications. Using the appropriate blade can significantly improve cutting precision and efficiency, whether you're working with wood, metal, or masonry. From fine-toothed blades for clean cuts to carbide-tipped options for durability, investing in high-quality blades ensures smooth operation and outstanding results.
Drill Deftly: Enhancing Efficiency with Drill Bits
Drill bits are vital accessories that determine holes' quality and suitability for specific materials. Upgrading to high-performance drill bits can improve drilling speed, accuracy, and longevity. From multipurpose bits to those designed for specific materials such as concrete, metal, or wood, having a diverse set of drill bits in your arsenal allows you to tackle various projects easily.
Sanding Solutions: Achieving Flawless Finishes.
Power tool accessories like sanding discs and pads transform your tools into efficient sanding machines. With different grit options, these accessories enable you to achieve smooth surfaces, remove imperfections, and prepare materials for painting or staining. Additionally, innovative sanding attachments can make reaching tight corners and intricate details easier, saving time and effort during the sanding process.
Versatility Amplified: Exploring Multi-Tool Attachments
Multi-tools are incredibly versatile, and their capabilities expand even further with the right attachments. Attachments such as cutting blades, scrapers, sanding pads, and grout removers allow you to tackle a wide range of tasks with a single tool. Whether you're renovating, remodeling, or engaged in detailed craftsmanship, these accessories enhance the versatility and functionality of your multi-tool.
Efficiency in Dust Control: Embracing Extraction Attachments.
Dust and debris are inevitable byproducts of power tool use, but extraction attachments can effectively manage them. Dust collection attachments, vacuum adapters, and shrouds help minimize airborne particles, creating a cleaner and healthier work environment. By reducing the cleanup time and protecting your lungs, these accessories enhance efficiency and contribute to your overall safety.
Conclusion:
Power tool accessories are game-changers when it comes to maximizing the potential of your tools. By investing in specialized blades, drill bits, sanding attachments, multi-tool accessories, dust extraction solutions, and lighting enhancements, you can take your DIY or professional projects to new heights of efficiency and precision. Whether a seasoned professional or a dedicated hobbyist, these accessories empower you to tackle various tasks and achieve outstanding results efficiently. So, upgrade your power tool arsenal with the right accessories and unlock a world of possibilities for your next project.
0 notes
Text
Dremel multi tool

#DREMEL MULTI TOOL INSTALL#
#DREMEL MULTI TOOL PRO#
#DREMEL MULTI TOOL FREE#
It has 10 settings to cover its 10,000–21,000 OPM no-load speed. Best Selling Dremel MM50-DR-RT Multi-Max 5Amp Tool-Less Oscillating Tool Kit (25)Total Ratings 25. Dremel Multi-Max 3.5 Amp Oscillating DIY Tool Kit with Tool-LESS Accessory Change- Multi Tool with 12 Accessories- Compact Head & Angled Body- Drywall, Nails, Remove Grout & Sanding- MM35-01 4. The Dremel Multi-Max MM50 uses a variable speed dial and power switch rather than a trigger system to control its speed. If you find other types that don’t fit, leave us a comment so other readers can know about it. I’ve seen other comments about different blades not fitting, so check your favorites on one in the store to know for sure.
#DREMEL MULTI TOOL FREE#
We didn’t have that issue with the Dremel MM45 and its level-action clamp system. Shop Target for Power Tools you will love at great low prices Choose from Same Day Delivery Drive Up or Order Pickup Free standard shipping with 35 orders. the tool-less innovative design for quick and secure accessory. The clamp is just a millimeter or two too small and doesn’t fully engage the blade even though the hole pattern fits. The dremel multi-max mm35 features 3.5 a of power to easily tackle the toughest applications. Our Made in the USA One-Fit Imperial Blades don’t quite fit the new system. The issue I ran into was my blade choice. I really like the design and the star-shaped dial is easy to use with or without gloves.
#DREMEL MULTI TOOL PRO#
With how often this part has to function for you, it’s the one place I’m concerned on long-term durability for DIY and occasional Pro use. The knob seems to be a lighter tool plastic construction. It’s still a lot easier than several of the Pro brands we’ve used. New 9Pcs ROTARY TOOL GRINDING WHEEL SET Dremel 20mm Grinding Disc Sanding UK. A more aggressive thread pattern would make it quicker, but I’m not complaining. 20x Oscillating Multi Tool Saw Blades Set Carbide Blade Metal For Dewalt. It takes quite a few, meaning the threads are pretty close together with a shallow angle. One thing that pops up is how many times you have to turn the knob. Slide your blade or accessory in place and reverse the process.
#DREMEL MULTI TOOL INSTALL#
To install an accessory, unscrew the knob at the top and press down on it. Easy Blade Changesīlade changes are super-simple, though the system isn’t as advanced as Starlock. I don’t know if any of the Pro brands will make try a similar design. It does take a little getting used to when you’re cutting boxes in drywall or making other vertical cuts. The removable cushioned jaws of the mini vise help. It’s a steep enough angle to offer some relief, but not so much that it feels burdensome when I’m making other cuts. Dremels Multi-Vise helps you secure your project or free up a hand when using your Dremel rotary tool. The Dremel Multi-Max MM50 angles its head, getting the motor housing out of the way when you’re flush cutting baseboard. If you like to leave your thumb in front of the switch as your natural grip, it’s easy to accidentally flip off. It’s easier to turn on and off than I expected. The power switch is in easy reach of your thumb during use.
Fast and precise cuts: extra-wide 3.Without the cord, you’re looking at 2.8 pounds of tool, making it one of the more reasonable options available.
Unlike conventional power tools, Dremel products rely on higher speed rather than high torque.
Tool-less accessory change: innovative design for quick, secure accessory change without a wrench WORKPRO 24-Piece Oscillating Multi Tool Accessories Kit.
Compact front end: gets into tight, hard to reach areas Dremel Dremel Multi-Max MM30 Tool Kit features 3.3 A of power ranking it as among the most powerful oscillating tool available.
Angled body for more comfort and improved ergonomics.
Powerful: 5.0 Amp motor easily tackles the toughest applications.
The provided soft bag is a great value added to store tool and accessories. Quick-release on-tool integrated wrench 3.2 oscillation angle provides faster cutting and performance Quick-hold magnetic accessory interface makes. The variable speed 10,000 OPM to 21,000 OPM allows for optimal performance and control with a variety of materials. The extra-wide 3.2 degree angle of oscillation delivers fast and precise cuts. The tool-less innovative design for quick and secure accessory change solves the pain point of needing a wrench to perform the same operation. The Dremel Multi-Max MM50 Oscillating Tool features 5.0 Amp of power to easily tackle the toughest applications with a more compact front and a unique angled body that provides enhanced ergonomics, especially for flush cutting.
0 notes
Text
M12 multi tool

#M12 multi tool full#
#M12 multi tool plus#
The M18 FUEL Oscillating Multi-Tool has a 10-Setting Dial with an additional Auto-Load Feature, allowing users to adjust the speed to the application. The M18 REDLITHIUM XC5.0 battery delivers more work per charge than competitive batteries on the market when used with the multitool.
#M12 multi tool plus#
REDLINK PLUS Intelligence ensures users achieve unmatched levels of performance, protection, and compatibility.
#M12 multi tool full#
Vibration dampening technology delivers the lowest full tool vibration, letting users make cuts more comfortably with less fatigue. The cordless multi-tool also gives users the power to complete many demanding applications with ease, such as large cuts through hardwoods and nail embedded wood, pushing the limits of what a multi-purpose oscillating tool can do. The POWERSTATE Brushless Motor delivers 10,000 OPM to 20,000 OPM with an aggressive 4.2° oscillation angle to deliver the fastest cuts over the competition. M18 FUEL 18V Lithium-Ion Cordless Brushless Oscillating Multi-Tool Kit with one 5.0 Ah Battery, Charger and Tool Bag The Milwaukee M18 FUEL Oscillating Multi-Tool The Milwaukee M18 FUEL Oscillating Multi-Tool Kit generates the fastest cuts, the power for demolition, and the lowest full tool vibration. The cordless multi-tool kit includes one M12 REDLITHIUM battery packs, a charger, 5 assorted sanding sheets, a sanding pad and a wood cutting blade. The included universal adapter allows the M12 Multi-Tool to be used with most competitor accessories for even greater versatility. An all-metal gear case provides added durability, while the over-molded, ergonomic handle allows for extra control. It operates from 5,000 to 20,000 OPM, matching the speed to the application. The oscillating multi-tool can make flush or plunge cuts, remove grout, sand and tackle other awkward jobs. The cordless multi-tool is powered by the M12 REDLITHIUM Battery, providing up to 25% more runtime. It performs cuts, grinds, sands and scrapes at odd angles and in difficult work areas. The multi-tool is ideal for remodelers, flooring contractors, maintenance repair technicians and electricians. M12 12V Lithium-Ion Cordless Oscillating Multi-Tool Kit with One 1.5 Ah Battery, Accessories, Charger and Tool Bag The MILWAUKEE M12 Multi-Tool Kit has the The MILWAUKEE M12 Multi-Tool Kit has the versatility, power and control to complete problematic job site applications.
0 notes
Text
How to Easily Remove Grout from Tile: Your 5-Step Guide

To remove grout from tile, follow this 5-step guide. It explains the exact process in a concise and accurate manner.
Grout can accumulate on tiles over time, leading to a dull and dirty appearance. Whether you're renovating your bathroom or simply wanting to refresh its look, knowing how to remove grout from tile is essential. While the task may seem daunting at first, with the right steps and tools, it can be easily accomplished.
In this guide, we will provide you with a step-by-step process to effectively remove grout from your tiles, restoring their original shine and cleanliness. By following these simple instructions, you'll be able to tackle this common household chore and achieve professional-looking results. Let's get started!
Step 1: Prepare The Area
Prepare your work area by gathering the necessary tools and materials for removing grout from tile in this comprehensive step-by-step guide.
Before diving into the grout removal process, it's crucial to prepare the area properly. By taking a few necessary precautions, you can ensure a smooth and efficient task ahead.
Clearing The Tile Surface
The first step in preparing the area is to clear the tile surface of any loose debris. Use a broom or vacuum cleaner to remove dirt, dust, and any other particles that could interfere with the grout removal process. This will help create a clean and even surface for better access to the grout.
Protecting Surrounding Areas
While removing grout, it's important to protect the surrounding areas from potential damage. To safeguard adjacent surfaces, cover them with tape or plastic sheets. This will prevent accidental scratches or stains during the grout removal process.
You should also protect yourself during the task. Wear safety goggles to shield your eyes from flying debris, and use gloves to protect your hands from any potential irritation.

Step 2: Choose The Right Grout Removal Method
After assessing the condition of your tile and grout, it's time to choose the most suitable grout removal method. Here are two popular options:
Manual Grout Removal
If you prefer a hands-on approach, manual grout removal is the way to go. While it requires more effort, it allows for better control and precision. Here's how to do it:
- Carefully inspect the grout lines and identify any loose or damaged grout.
- Prepare a grout removal tool such as a grout saw or grout scraper.
- Hold the tool at a 45-degree angle against the grout line.
- Apply gentle pressure and start scraping away the grout.
- Work in small sections to avoid damaging the surrounding tiles.
- Repeat the process until all the old grout has been removed.
- Clean the area with a damp cloth to remove any residue.
Power Tool Grout Removal
If you're dealing with a large area or stubborn grout, power tool grout removal can save you time and effort. Here's how to use a power tool for grout removal:
- Ensure you have the appropriate safety gear, including goggles and a dust mask.
- Select a grout removal attachment for your power tool, such as a grout removal bit or oscillating multi-tool blade.
- Set the power tool to the appropriate speed and power settings.
- Hold the tool at a slight angle against the grout line.
- Turn on the power tool and gently guide it along the grout line, allowing the tool to do the work.
- Be cautious not to apply too much pressure, as it may damage the tiles.
- Continue the process until all the grout has been removed.
- Take breaks to avoid overheating the power tool.
- Afterward, clean the area thoroughly to remove any dust or debris.
Choosing the right grout removal method is crucial for achieving the best results. Consider the size of the project, the condition of the grout, and your comfort level with the chosen method. Whichever option you choose, be patient and methodical to ensure successful grout removal.
Step 3: Start Removing The Grout
Easily remove grout from tiles with this step-by-step guide. Follow step 3 to start the grout removal process.
Once you have prepared the tools and protected the surrounding area, it's time to start removing the grout from your tiles. This step requires careful attention and precision to avoid damaging your tiles. There are two main methods you can use: using a grout saw or knife and using a grout removal tool or oscillating multi-tool.
Using a Grout Saw or Knife
Using a grout saw or knife is one of the most common methods for removing grout. It is a manual process that requires patience and a steady hand. Here's how you can do it:
1. Hold the grout saw or knife at a 45-degree angle to the grout line. This will allow the saw or knife to dig into the grout without scratching the surrounding tiles. Make sure to wear protective goggles and gloves before you begin.
2. Start by making a shallow cut along the grout line. Be careful not to press too hard to avoid damaging the tiles. Take it slow and steady, focusing on one grout line at a time.
3. Once you have made the initial cut, go back and deepen the groove. Use the saw or knife to dig into the grout, gradually removing it from the tile surface. Work in small sections, making sure to clear the grout debris as you go.
4. Continue this process along the entire length of the grout line. Take breaks if needed to rest your hand and maintain accuracy. Remember, it's important to be patient and take your time to achieve the best results.
5. After removing the grout, clean the tiles with a damp cloth to remove any remaining grout dust or debris. This will help reveal the clean surface of the tiles.
Using a Grout Removal Tool or Oscillating Multi-Tool
Another effective method for grout removal is using a grout removal tool or oscillating multi-tool. This power tool makes the process quicker and easier, especially for larger areas or tough grout. Here's how you can use it:
1. Insert the appropriate grout removal blade or attachment into your grout removal tool or oscillating multi-tool. Make sure it is securely in place before you begin.
2. Hold the tool at a 45-degree angle to the grout line, just like you would with a grout saw or knife. Always remember to wear protective goggles and gloves for safety.
3. Turn on the power tool and slowly guide it along the grout line. Let the tool do the work, allowing the blade or attachment to vibrate and break apart the grout. Keep a firm grip on the tool but avoid applying excessive pressure, as it may damage the tiles.
4. Work in small sections and move methodically across the grout lines. Take breaks if needed to prevent overheating the tool or straining your hand.
5. Once you have removed the grout, use a damp cloth to clean the tiles. Wipe away any remaining grout dust or debris to reveal the clean surface of the tiles.
By following these step-by-step instructions, you can successfully remove grout from your tiles using either a grout saw or knife, or a grout removal tool or oscillating multi-tool. Pick the method that suits your preference and needs, and remember to work with caution and patience to achieve the best results.

Step 4: Clean Up The Area
To complete the grout removal process, the fourth step involves thoroughly cleaning the area. This ensures a smooth and tidy finish, leaving the tile looking good as new.
Cleaning Out Removed Grout
Once you have successfully removed the grout from your tiles using the appropriate tool, it's time to move on to the next important step - cleaning up the area. This step is crucial to ensure that you don't leave behind any loose grout or debris that could potentially cause damage to your tiles or affect the appearance of your newly cleaned tiles. Here's what you need to do to effectively clean out the removed grout:
1. Start by using a soft-bristled brush or a damp cloth to carefully sweep away any loose grout particles from the tile surface. Make sure to reach into the grout lines and corners to remove every last bit of debris.
2. If you notice any lingering grout haze or residue on the tiles, you can use a grout haze remover specifically designed for tile surfaces. Apply the remover according to the manufacturer's instructions, and gently scrub the affected areas with a sponge or soft cloth. This will help you achieve a clean, streak-free finish.
Removing Residual Dust And Debris
After clearing out the removed grout, you may still have some residual dust and debris to deal with. To ensure a thorough clean-up, follow these additional steps:
- Use a vacuum cleaner with a brush attachment or a dry microfiber cloth to remove any remaining dust or loose particles from the tile surface. Work your way across the entire area, paying special attention to the grout lines and corners.
- For stubborn dirt or stains, consider using a mild detergent solution or a tile cleaner specifically formulated for your tile type. Apply the cleaner to the affected areas, and gently scrub with a soft brush or sponge. Rinse thoroughly with clean water to remove any cleaning residue.
- Finally, wipe down the entire tile surface with a clean, dry cloth to ensure it is completely dry and free from any cleaning solution residue. This will prevent any water spots or streaks from forming as the surface dries.
By following these steps and taking the time to clean up the area properly, you can ensure that your newly cleaned tiles look their best and last for years to come. Now that the cleaning process is complete, you can move on to the final step - sealing the grout to protect it from future stains and damage.
Step 5: Apply New Grout
To apply new grout, follow step 5 of this comprehensive guide on how to remove grout from tiles. This easy-to-follow process ensures a seamless and professional-looking finish for your tile project.
Once you have successfully removed the old grout from your tiles using the previous steps, it's time to apply the new grout. This step will give your tiles a fresh and clean look, enhancing the overall appearance of your space.
Preparing The Grout Mixture
Before you start applying the new grout, you need to prepare the grout mixture. Follow these simple steps:
- Gather the necessary materials: a clean bucket, a mixing stick, and unsanded grout powder.
- Pour the desired amount of unsanded grout powder into the clean bucket. Make sure to read the manufacturer's instructions for the correct water-to-grout ratio.
- Add water to the bucket gradually, while stirring the mixture with the mixing stick. Continue adding small amounts of water until the grout reaches a smooth and creamy consistency, similar to toothpaste.
Applying The New Grout
Now that your grout mixture is ready, it's time to apply it to the tile joints. Follow these steps for a smooth and successful application:
- Dip a grout float into the prepared grout mixture, making sure the float is coated evenly.
- Hold the float at a 45-degree angle and apply the grout diagonally across the tile joints, ensuring complete coverage.
- Use the float to press the grout into the joints, filling them completely and removing any excess grout on the tile surface.
- Continue this process until all the tile joints are filled with the new grout, taking care not to apply too much pressure.
- Allow the newly applied grout to set for the recommended time period mentioned on the grout packaging. This usually takes about 15 to 30 minutes.
By following these simple steps, you can easily apply new grout to your tiles, giving them a fresh and attractive appearance. Remember to take your time and work carefully to achieve professional-looking results. In the next step, we will talk about the final and important step of the grouting process - cleaning excess grout from the tile surface. So, stay tuned!
Conclusion
Removing grout from tile can be a simple process if you follow these step-by-step instructions. By using a grout removal tool, protecting the surrounding areas, applying the right technique, and being patient, your tiles can look brand new again. Remember to take safety precautions and consult a professional if needed.
With these tips, you can tackle grout removal like a pro and achieve the results you desire. Happy cleaning!
Read the full article
0 notes
Text
Brilliant Ways to Use a Handheld Steam Cleaner
You might remember the debut of the handheld steamer’s commercial, advertising the benefit of its use for just about everything back in 2007: Ahem, “cleaning the toilet, the range and so much more.” Since then, the handheld steamer has made a quiet entrance into American households around the country.
Portable handheld steam cleaner are a multi-functional tool for cleaning the home. They not only help to wash and clean surfaces but also remove textiles and remove those pesky odors and stains quickly and easily.
Here are the 6 ways that a steamer could come in handy in your household.

Ceiling Fan
The dirt and debris covering the surface of the blades look very unattractive. It’s not just unhygienic but the dir could become the reason for several ailments. Cleaning it with a damp cloth or a brush might not give desired results.
You can use the handheld steam cleaner off the dirt from the fan. It’s best if the steamer comes with a longhand attachment.
BBQ Grills
BBQ night is a great way to enjoy yourself with your family or friends. But sadly cleaning up the BBQ is a harrowing task. The stubborn food and grease stain are almost impossible to clean. However, you can clean the BBQ using the steamer in a few minutes with minimum effort. As well as surprising ways to use a steam cleaner in your kitchen.
Patio Furniture
On a sunny day, there’s nothing better than chilling on your balcony on patio furniture. But it can catch up with all the dirt and debris. Maintaining the patio furniture is tough and it takes plenty of effort to keep it clean.
With the help of the steamer, you can now easily clean the furniture without any hassle.

Kitchen
With all the cooking, the kitchen gets dirty all the time. Cleaning the walls and counter tops can take hours. Using a damp cloth to clean the surface is not a good idea as it does not affect the greasy oil.
Using a handled steamer is the best option to get the best results.
Pet Cages and Crates
If you have a pet at home then cleaning their home is also crucial. The cage or a crate gets easily dirty as it’s not cleaned on the regular basis. It can affect the health of your pet. A handled steam cleaner can help you to clean the surface of a cage or crate.
Tiles
The grout area is the home of endless bacteria and germs. It gets easily dirty and the efforts to clean it can make you all tired. But with a handled steamer, you can easily clean the tiles and grout area.
0 notes
Last Seen Blogs

ovacikdogalurunleri
ovacık Doğal ürünleri

alagalala
How You Doin' ?

aintjesusperiod
Untitled

pinteressay
Pinteressay by WR 121-23

sailorrrvenus
The Nerd Photographer