#mathcats
Explore tagged Tumblr posts
Visit Tumblr Blog
Explore Tumblr blogs with no restrictions, modern design and the best experience.
Last Seen Tumblr Blogs


Fun Fact
Premium Tumblr themes are available from anywhere between $9 to $49.
Text

A dakimakura-style commission for Mathcat featuring Mozu!
102 notes
·
View notes
Note
12 :^) and 25
new friend: i am Well Aware of what you're vagueing about with 12 but i did technically know her before this year even if we weren't nearly as close, so i'm gonna go with someone i saw for the first time irl this year as well as someone i first met at the same time and name you & merry, since that visit was a lot of fun (and it's a shame we Just Missed another one 😔)
did i create any characters: ...come to think of it, have i ever made any oc's? if so i don't remember, and i certainly haven't made any this year since this hasn't exactly been a particularly creative one for me, though i did finally finish the nom support which is the most creative writing i've done pretty much ever, unless you count every school assignment combined or something.
3 notes
·
View notes
Text
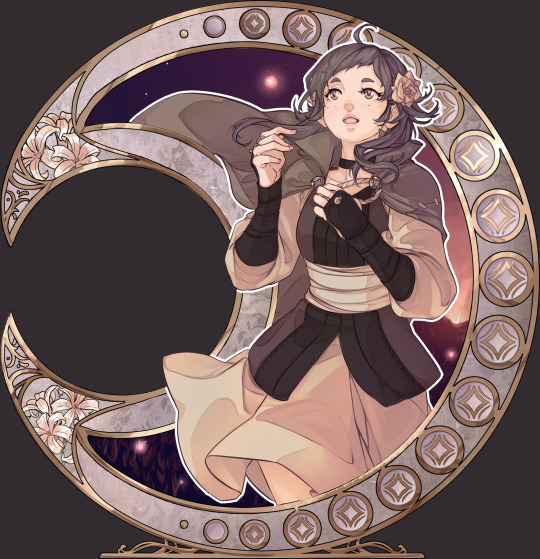
mozu comm for mathcat! thank u for working with me!
Up on Etsy!
510 notes
·
View notes
Text


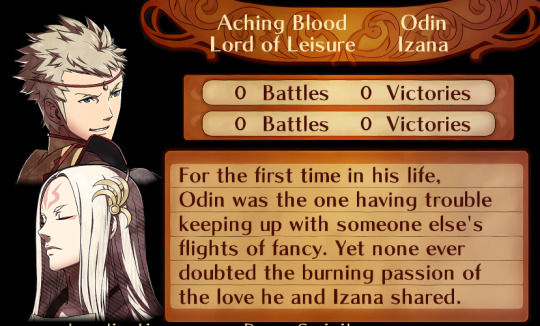
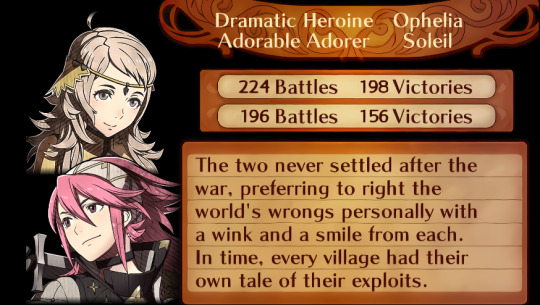
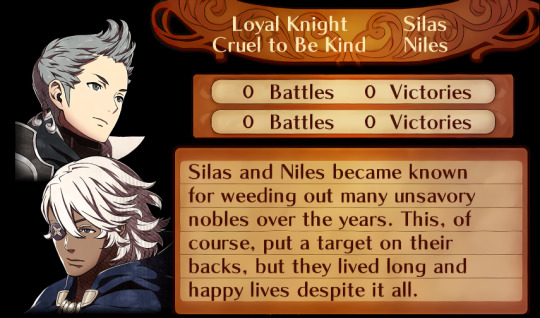
Unofficial Gay Fates 2.1.0 Is here! This update adds in 64 new supports, as well as implemented the new Custom Endings I showed off before! This release features 105 custom endings.
Big thanks to sketchi, who not only commissioned the code patch for the endings from Tildehat, but also wrote quite a few of the ones in this update! Also shoutouts to Tru and Tsunny, who wrote most of the other endings implemented, as well as their usual help coding supports.
Speaking of coding supports, this update would not have remotely as many new supports were it not for Cherrycrow, Mathcat, and Sylvie, who did the bulk of the coding work this update!
As for supports added:
ROMANTIC: Nyx x Azura, Hinoka x Anna, Izana x Yukimura, Selena x Shura, Mozu x Rinkah, Odin x Xander, Kaden x Saizo, Izana x Gunter, Benny x Subaki, Effie x Felicia, Rinkah x Nyx, Jakob x Ryoma, Keaton x Leo, Mozu x Charlotte, Odin x Keaton, Saizo x Izana, Mozu x Setsuna, Jakob x Kaden, Takumi x Hayato, Gunter x Fuga, Hayato x Leo, Izana x Kaze, Izana x Fuga, Mozu x Orochi, Mozu x Kagero, Izana x Odin, Izana x Shura, Nina x Mitama, Fuga x Peri (Platonic S)
PLATONIC: Sakura/Anna, Sakura/Orochi, Elise/Siegbert, Elise/Nyx, Oboro/Elise, Beruka/Rhajat
PARENT/CHILD: Hayato/Forrest PC, Leo/Rhajat PC, Kaden/Dwyer PC, Jakob/Selkie PC, Benny/Caledori PC, Subaki/Ignatius PC, Xander/Ophelia PC, Saizo/Selkie PC, Kaden/Asugi PC, Leo/Velouria PC, Jakob/Shiro PC, Keaton/Forrest PC, Ryoma/Dwyer PC, Kaze/Soleil PC, Shura/Percy PC, Mozu/Kana(M) PC, Izana/Shigure PC, Benny/Percy PC, Leo/Nina PC, Arthur/Ignatius PC, Niles/Forrest PC
SIBLING: Dwyer/Selkie SIB, Siegbert/Ophelia SIB, Ignatius/Caeldori SIB, Dwyer/Shiro SIB, Asugi/Selkie SIB, Velouria/Forrest SIB, Siegbert/Asugi SIB, Forrest/Nina SIB
If you'd like to see what endings are implemented, I'd recommend checking out our new spreadsheet page, which has all the implemented ones marked off in green, in addition to listing their text!
As per usual, the update can be found on our gamebanana page!
45 notes
·
View notes
Text
remember the art challenge i did with my friends? so, it's been a while since TIME theme ended and here goes my not so impressive result...
so for my slugcat i ended up reading about spacetime and getting like 0.009% of info and then went okay
this is mathcat, or The Analyst

ngl i hate this design kind of...but... it can predict where creatures are on minimap after observing them enough or dying to them specifically. the more they die the more accurate their prediction is! (you would know where the predator that KEEPS killing you lives if that kept happening at the same spot...right)
i also felt really bad about how raw the idea and design were during the presentation so i tried to make them some kind of cool artwork in an hour and i failed miserablyyyyyy


anyways that's it!
16 notes
·
View notes
Text
A beginner's guide to Dr. Robotnik's Ring Racers any%
(Mirror to the speedrun.com guide post)A written companion for the commentary by Mathcat and Eve's Plate
youtube
Disclaimers:
This and the video guide are both presuming some beginner-tier knowledge with the game, i.e. knowledge but not necessarily mastery over the game's mechanics and courses. The author of this written companion (Mathcat) themself is only a fledging runner for the category at time of writing.
This guide is written around and for a run performed on Gear 2 speed (A.K.A. Intense difficulty) with version 2.3 of Dr. Robotnik's Ring Racers. This run will look significantly different on a different version (i.e. v2.2 bubble smuggling to 1st place to abuse bunnyhop strats) and/or on Gear 3 speed.
This written companion, unlike the commentary, draws information directly from both Mathcat's run and the current WR run performed by troy236. As such, any different strategies performed in the video by the former may or may not be inferior to optimal play either due to opting for safer strategies, or from gaps in skill/knowledge, and strategies here will speak more on what is ideal whereas the commentary focuses more on moment-to-moment actions taken and solutions to problems faced.
Pre-run setup
Currently, the any% rules on speedrun.com require we start from a clean game data file and as such, video proof of the run starts with deletion of our saves. Obviously backup those files if you wish to play casually elsewhere, but there is one optimization prior to the run itself that can be done: our game profile character selection. The profile settings allow a preset character choice, so by selecting our character here we save some time fumbling in the menus once the run begins. As for the characters itself, the only choices we've seen used in any% (in recent time) are Sonic and Metal Sonic, the class C and I characters respectively. Why we've picked these two up to this point is quite self-evident: more top speed means we can clear through courses as fast as is possible in the moment. Moreover, the more time we can stay frontrunning is less volatility from having to deal with items being used by CPUs in the pack. As for the differences between the two hedgehogs:
Sonic turns faster and gains more relative benefit from frontrunning ring use due to a lesser known mechanic known as metabolism. Riskier, but ultimately the supreme choice for any% and what this guide will mostly center strategy around.
Metal Sonic is heavier (better for the more finicky position moments), gains ring sting resist, and gets better exchanges out of drifting, especially during triangle boosts. Safer option, especially if you aren't used to looking for clean lines or are approaching this run from the perspective of more casual kart games.
Once you've made your choice and reset the file, the clock begins as soon as you enter "gaster" in the password prompt (to skip tutorial). Mash through the challenge unlocks, character select, and menus to get to Ring Cup in GP. (The menus have memory so make sure you weren't on any unnecessary selections to save a little more time.)
Important Universal Tech and Terms
First Blood - The First Blood boost you get after Position is tantamount to every course in this run. This advice is self-evident, but there are some strategies for extending our frontrunning that are only possible when this is used in tandem with:
First Blood Tripwire Skips (Abbreviated to FBTS later in this companion) - Several of these courses have tripwires so close to the starting line, that a First Blood boost can let us cross and gain a powerful shortcut very early into the race. Knowledge of where these are and if additional prep/resources are required is important.
Roulette Choices - As rings are our main resource to build and maintain momentum and speed, we will want to focus on getting the super ring item (a.k.a. 20 ring refill) from our roulettes as often as possible. If you're frontrunning, super rings will always show at the 13th slot, and you can easily tell when to time for regardless of if you have the normal roulette or a shield-less one (press after the three orbis on normal, orbi-mine-orbi on shield-less). Alternatively, if you open an item box at an empty ring count, every other item will be a super ring, so timing for a pull during those is rather easy. If fishing for rings is too inopportune, your next best choice is the hyudoro, as these won't add more volatility to your driving lines and can be helpful if a boosting item is stolen from the CPUs. This will be the 1st, 2nd (hold your item button before selection to override mash protection on these), and 7th slots on the standard roulette, or 6th, 8th, and 14th (after super rings!) slots on the shield-less roulette. If you're not frontunning, item choice starts to become more dependent on gamestate and it will be on your best judgement on what item to pick, though avoiding trapping items will usually be best for avoiding extra clutter for your driving lines. A full list of the roulette item orders can be found on the SRB2 forums.
Sliptiding and Wavedashing - It's unfortunate this information was omitted from the tutorial and there aren't any other ways to intuit this mechanic in game, but a key mechanical piece in our toolset is the ability to sliptide and wavedash. ArcadeStriker has a well constructed video on the matter I would refer you to for learning how to use them, but this written companion will be more focused on the where of that equation as we get into the courses.
Triangle Dash - Another (albeit more forgivable) omission from the tutorial, a triangle dash is performed by expending drift charge into a boost while midair, sending the kart at a downward angle whilst inheriting momentum from airtime. This is usually much more preferable to gravity drops as a fast falling option, as some speed is usually lost from both the bounce and additional airtime resulting from a gravity drop. Another very context-important mechanic to keep in the pocket.
Extra Stage Quit Outs - be prepared for the button combination of [start]-[up]-[a]-[a] after the 2nd and 4th races of each cup. Any% does not require us to handle the extra stages (and getting access to the special stages would especially slow us down), so you'll want not to waste any excess time by being fast with menuing.
Burning a Continue Early - Grand Prix mode has difficulty scaling built into it; the more successful you are in a race, the more bonuses and aggression is given to the CPUs. This can be dangerous, as one misstep can result in failing to place 4th or higher, and thusly requiring you to use a continue and effectively lose the run (most races are 2+ minutes and that's an unaffordable amount of time loss in most scenarios.) You can however, opt to reset this on your own terms by using "Try Again" in the menu at the start of the race. This will lose you a few seconds in time, but if you're making good pace it may be worth doing this to add more safety to your run. (Please note that in the event of doing any% on Master Mode, this does not work as the CPU difficulty will already be at the maximum level.)
Ring Cup - ~13 minutes
Robotnik Coaster
Collect 10+ rings during position and line yourself up so you can see the first tripwire in the course. FBTS to it immediately after the start of the race, but be ready to steer/sliptide to the right upon passing it. Drift for the sneaker panels around the long curve, but drive cleanly for almost everything else and sliptide to correct angles as necessary. For the 2nd/3rd laps, use the first sneaker panel to sliptide the bend.
Northern District
First Blood lets you cut the first turn. Don't burn all your rings before the bend, you'll want a few for the turn since its too deep to not drift. Always take the downhill path to restock on rings + get the sneaker panels to make the upcoming sharp turn easier to handle with a sliptide. Final turn can also be sliptided using the right-hand panel, as you won't lose too much speed cutting the ensuing chicanes.
Panic City
The second sneaker panels (the ones not around the jumps) can be used to sliptide-cut the sharp turn, and help adjust your angle for the incoming chicane. Try to hit all 4 sneaker panels in the final stretch (if you know how to snake sliptide to hit the second, all the better for you), and be ready for a very sharp sliptide for the hook of the turn (let off the gas if you find yourself overshooting into the wall).
Sonic Speedway
You'll want to aim yourself at an almost right degree angle towards the water during position to hit the FBTS in this course. Otherwise most of this course is balancing ring collection with clean lines, though the last sneaker panel can be sliptided to avoid having to drift the entire turn.
Green Hills
Use a drift around the corkscrew to land a triangle dash over the spring jump (use rings as needed to maintain momentum). Drift deep into the hairpin turn to hit the sneaker panel, and then sliptide to course correct your angle as needed. The bottom of the halfpipe can be drifted to triangle dash once you're through the zig-zag springs. How you handle the last jump mostly comes down to your momentum, the state of the ring, and the gamestate in general in that moment; if you're already moving fast (or if the ring is set to the weak Yellow), aim away from the springs to get on the ground as soon as possible, but if you need a bit of a momentum boost, and the ring is currently set to Blue or Red, aim for the boost ring to get your speed back. (Note that while under the influence of this ring, you will not be able to gravity drop to end your airtime early.)
Sneaker Cup - ~14 minutes (~27m total)
Emerald Coast
Be careful with your first turns while under the influence of first blood; many springs around that will ruin all momentum/force a respawn should your steering be poor. If an SPB is on the field, a free lightning shield is available in the small ramp jump towards the end of the course.
Storm Rig
With perfect steering and ring use it should be possible to drift every single panel in this course. Failing that, making sure to use sliptides to adjust angle and get a little boost off is serviceable. Final straightaway has sneaker panels structured in a way to incentivize a snake-sliptide, but this is particularly tricky to execute with Sonic.
Lucid Pass
First Blood lets you cut the first turn and sliptide the first hairpin. The sneaker panel before the second hairpin allows for a sliptide, but you'll want to exit the turn wide to let the sliptide boost push you through a longer cut. Burn some rings before the following turn to push through another cut, instead of taking the very awkward road.
Autumn Ring
For the big jump you should only stay in the air as long as it is necessary to collect the aerial ring boxes. The second sneaker panel can be sliptided to avoid drifting the corner, but Sonic's turning radius is a bit too tight to utilize and further beyond that. The jump before the dash rings can be avoid if you're going fast enough to triangle drift the nonexistent corner (most likely with rocket sneakers/invincibility), but otherwise take the jump near to the right hand side and add a gravity drop to be pushed out the red dash ring; this will ensure another ring box and a really smooth transition back to the ground. Last straight and chicane has some potentially snake-sliptide-able panels, but taking them normally will also be serviceable.
Withering Chateau
There's a potential FBTS here, but is inadvisable to take as the normal road will have back to back sneaker panels to use instead (not to mention position here means no time to properly charge/angle a spindash). The corkscrew is the only turn in the course worth truly drifting, as every other turn is shallow enough to be steered around normally (or sliptided in the case of the sneaker panels near the start).
Spring Cup - ~15 minutes (~42m total)
Popcorn Workshop
Keep the conveyor belts on the left position for all turns, as your 2nd turn adjustments will be a lot shallower in this configuration. Try to use the sneaker panel to lock a wavedash, and keep it stored by drifting the corkscrew. You have barely just enough time to charge yellow drift sparks before the jump to the downhill portion, so a triangle dash to get down fast plus a wavedash boost once your on the popcorn will get your momentum building very fast.
Sundae Drive
Collect the rings boxes in the back close to the end of position, as using these plus your reserves should get net you a FBTS for the first bend. Try to avoid the jump on the right side of the course split (cut near the mound), and use the sneaker panels following it to sliptide the final turn of the course.
Cadillac Cascade
After the first switchback, either of the steel uphill sections allow to jump over the tripwire and onto the super panel. Be careful about how you land this jump, as the rest of the area of this "island" is offroad, and is small enough to fall of it with a poorly aimed gravity drop. A zipper panels further in this section, but won't be super strong unless you were already going fast from the first panel. The uphill sections are not kind for C class as the rings are spaced around the wide turns; the first one you'll want to use the rings/boxes as you get them to maintain your speed as much as possible. If you're falling behind before the big jump, it is imperative you grab something capable of clearing the tripwires there, as the ensuing shortcut has several sneaker panels and collectible rocket sneakers that will trivialize the final switchback of the lap and make the following one very fast, conserving time.
Rumble Ridge
This course has no tech related to base driving moveset at this time, however it was recently discovered by Wil_12 that a drop target is capable of skipping the split path section of the course if aimed at the wall and rebounded into the player.
Opulence
Max out your ring supply during position, and cash it out in its entirety during position for the FBTS at the end of the straight. In the spike ball area, the ring boxes end up a bit overkill, and it'll be faster to swing from the left end of the road to the right end on the turn. Gravity drop just before you past the first pair of islands on the water skimming section to collect a Bubble Shield, which can be spent at the start of the coin slide switchback to clear a tripwire and skip it entirely. (The timing for this is tricky without slowing down due to the sharp turn prior.) Laps 2 and 3 will have to contend with the opening bend, but there are half a dozen sneaker panels to wavedash on before you need to turn the other way.
Barrier Cup - ~15 minutes (~57m total)
Angel Island
The curve near the rocks hides a sneaker panel. Due to it being uphill, it's tricky to land without some good speed, but can be sliptided for a nice burst of extra speed (and sliptiding is the only way to get a turn that also avoids the following spikes. Similar to Autumn Ring, both jumps only need to be as long as needed to get rings/on the ground, respectively. Use rings to drift the first corkscrew and the momentum from the boost to handle the descent.
Roasted Ruins
FBTS straight ahead, you'll already be going downhill so not much else to do to make it. The 3 bends following this section all have bunches of rings and a sneaker panel, but really only the last of the 3 is worth going out of your way for. Use sliptides as needed for line corrections, but otherwise the course is purely execution.
Obsidian Oasis
The water skimming section near the boardwalk can be triangle dashed with tight timing to force the wheels under the water (there's ground underneath) and keep momentum. (If this fails, just aim for the lilypad sneaker panel instead.) Sliptide the sneaker panels on the boardwalk itself instead of drifting the corner.
Mirage Saloon
The only corners that should be drifted are first (as you'll have downhill momentum helping you), and last (for reasons that will be apparent in a moment). This is a course where staying in the front is upmost priority, as the turn with the sand bridge will collapse for all other players and leads to a trick jump whose voltage bonuses are really good for tackling the final corner.
Regal Ruin
FBTS is only possible here if the ring boxes (30 total) near the position area are collected before the race, as the leftover ring boost combined with a full cashout is just enough to barely clear the tripwire. Only take the lower split path; the higher one has a really awkward wide turn to make. Sliptiding the last sneaker panel can be helpful if there isn't enough momentum for the final curve's drift.
Invincible Cup - ~15 minutes (~1h 12m total)
Isolated Island
FBTS mostly straight ahead, just do some light steering to avoid the dirt, and gravity drop after the grey springs in the shortcut to get the wheels planted as soon as possible. The sneaker panels on the slight incline following the first quarterpipe should be sliptided to make the incoming chicane easy pickings. The dash ring following the zipper panel should also be immediately gravity dropped, as hitting the incline there normally will kill a lot of speed instantly. The quarterpipe drop near the course's end should be triangle dashed (somewhat tight timing), as regaining ground control will make maneuvering the kart around the quarterpipe a lot easier.
Gigapolis
Triangle dash the jump following the first corkscrew. You'll need to make some split-second decision making during the second on if you'll have enough speed to make the first wall climb: If so, gun for it and be ready to gravity drop once you're on the platform; if not, be ready to kill the throttle and let the spring carry you up. The upper balance beam area is optimal at the path split, as the large ring capacity there and potential triangle dash off of the springs will let you brute force the other steep climb.
Darkville Castle 1
First blood will let you cut the first corner and the first few instances of split pathing. In all other cases, take the right path, as the second turn has a driving line you can take with little course-correction, and the second split will have an easy collection of rings to restock with. Chain the two sneaker panels near the end, as sliptiding the second will let you cut the final corner and avoid the awkwardly placed ramp.
Bronze Lake
Triangle dashing into the wall in the underwater section is ideal, as you'll be able to hug the quaterpipe behind you afterwards and regain momentum very easily. Ideally you'll want to wait a little to unleash the trick following the switchbacks, as you'll want voltage going into the starts of lap 2 and 3 to boost the kart to the outer edge of the 2nd turn for the sneaker panels. (Waiting for the trick on lap 3 itself is not required, as there is no lap 4 here, of course.) Also resist the urge to drift the final corners, most of all because too many early drift boosts will also dissipate the voltage.
Collision Chaos
Be ready to null boost and gravity drop after the first wall climb, as you won't have enough momentum to get to the upper section initially. After the second wall climb dumps you in front of the balloons, you can barely thread the needle between them and the center wall from the right side if your steering is precise. Immediately gravity drop through the balloon pit, and be quick to do it again on the red springs, as it will be faster to have the sneaker panel pull you through the turn than to course correct from a larger jump, and will let you retain momentum for the smaller yellow spring jump.
Emerald Cup - ~13 minutes, (~1h, 25 min total)
Emerald Hill
While it may not look like it, you can go slightly off the main path near the incline before the final corkscrew to avoid the awkward first jump entirely.
Azure City
FBTS is entirely possible at the path split, but requires you cash out all rings and get a super ring from the item roulette that must also be cashed out. Otherwise, take the right hand path; the sneakers can be sliptided, but an especially good racer will store a wavedash just long enough to redirect that boost around the lengthy corner. Right after the route convergence, you'll want to go wide to reach the sneaker panel, but keep in mind chaining into the second on the boardwalk will be awkward as stairjank terrain has little-to-no traction, meaning your angle will have to be correct before you drive over the whole thing.
Gust Planet
Sliptide central. Don't go for the very first pair, as they'll likely be overkill; focus on clean lines early into the lap, and use easier to get sliptides to correct your angles as needed. The sliptide boost before the corkscrew will let you power through the tight cornering there. Lastly, sliptide the final hairpin since the long line of sneaker panels will throw you into the wall otherwise.
Mystic Cave
Always take right hand split, the alternate path takes to long to get any benefit from the sneaker panels there. Swing wide before the set of jumps as, there is a sneaker panel leading into them there (as well as the ring rewards not in the center being better). Try to stay near the center between the pairs of crush traps to make it easier to avoid death (or to correct your turning with less effort).
Joypolis
Just don't forget to take the silver ring box before the elevator in Position. There isn't much specific track tech otherwise, and there is no benefit in using the blue conveyor belts.
Extra Cup ~18 minutes (~1h 43m total)
Hill Top
Always take the left path at the split, it's the most normal to drive through with little-to-no driving line correction required. Triangle dash should be prepared at the hairpin inbetween the two spring jumps to hasten airtime. Sneaker panels on the second-to-last turn can be sliptided, and the ensuing boost will help power through the final curve.
Marble Garden
At the cost of a few frames snatching the lightning shield and using it on the entire crowd during position will help make frontrunning a little easier. Gravity drop during the big jump to get the kart planted as soon as possible. Generally, the safe option is to approach the spike balls from the left, in their direction of rotation, as it will be easier to adjust for being caught on the wrong cycle of their movement. During the mud climb, jump the first ramp, and then gravity drop to bounce into the mud; this will likely land your kart back on or near solid ground at minimal speed loss. Similarly to Isolated Island/Bronze Lake, a triangle dash before the final drop will get the kart planted and make getting through the drop slightly quicker.
Silvercloud Island
The sneaker panels on the switchback should be sliptided to make the cornering fast. Further in, the timing is strict and bumping a wall beforehand will lose so much speed and time, but the sharp turn before the spring jump can be triangle dashed with some tricky timing. Always take the right path split, as the sneaker panels can be wavedashed to burst through the ensuing straightaway. After that, either swing wide at the final turn to restock on rings, or snake-sliptide the final sneaker panel to build some speed.
Sub-Zero Peak
First Blood lets us take the uphill route at the start and skip most of the opening switchback. The first pair of sneaker panels can have snake-sliptided into a wavedash, which can then be spent to regain momentum through the following corkscrew. Similarly the last readily available sneaker panel can have a wavedash stored to power through the final hairpin turn as well. Otherwise, this course especially demands attention for ring usage as the ice physics and wide turns will make keeping speeds up difficult.
Launch Base
You'll want to max out your rings and then cash them out for the opening stretch, as you'll want to be fast enough the beat the flamethrower cycles, as the first set guards a sneaker panel. (Ideally, the flames are disengaged around ~X'07"XX and ~X'12"XX timing where relevant to that portion of the course.)Otherwise, this track is very straightforward; the balance beam paths are obviously good. Just make sure not to cash out rings right before any of the pole sections, as these reset any ongoing ring boost while traveling through them.
Credits - <1 min (~1h 43m total)
Just hold [A] at this point, lol. Timing ends when the Extra Cup Results screen is cleared and fades to the game credits.
Universal Time Losses to be Mindful of:
Beyond issues in general execution, there are two big factors that will result in time loss that are hard to play against or around:
SPBs: Beyond the direct disruptiveness of the Self-Propelled Bomb, it's passive ability to block ring collection both limits our maximum speed output and our ability to play aggressively until the the bomb is resolved, neutralized, or the race is over. Popping the bomb on purpose is situational at best; it takes 30 or so seconds while the bomb is locked onto you (the siren and SPB icon over rings) before the ring loss and spinout time start to fall more in line with the damage taken from a proximity mine for example. (If the SPB lasts over a minute on you, then it'll just harmlessly tumble you at that point.) Other times taking the hit is inevitable and your play may need to adjust to recover from that, such as during Troy236's Gigapolis in the current WR run. Roulette'd Lightning Shields aren't easily made part of this equation either, as them being removed from the frontrunner pool upon an SPB deployment means there is little in the way of reactive play against the bomb.
Shrink: Obviously, being struck by a shrink laser cuts top speed greatly while in effect, and while nowhere near as troublesome as an SPB, there is no form of proper counterplay outside of a lucky Hyudoro steal. The erratic nature of the laser placement also prevents any real strategy to drive around hot zones when the item is in effect.
----
With that, that should cover the basics of what to watch out for specifically when running any%. Best of luck to any future runners!
Special Thanks
Eve's Plate - For commentary assistance and being a loose "rival" of sorts before I started taking this game on as a speedgame. The Stray Banana and Ring Racers Speedrunning Communities - Obviously without the resources from both groups, running and writing for this game in a speedrun context would not be possible.
3 notes
·
View notes
Text
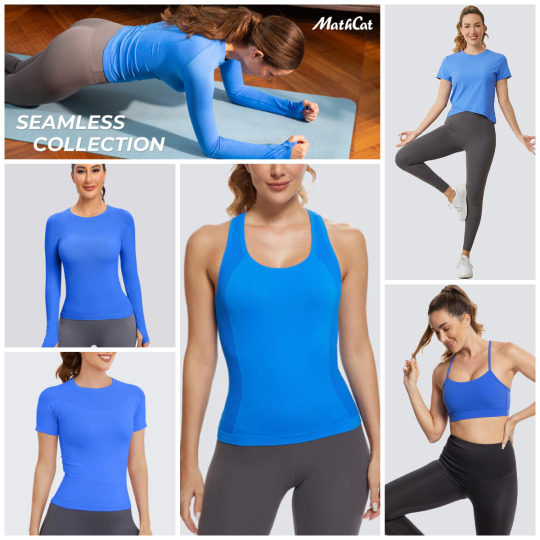
What color workout top do you prefer to wear for sports in summer?
Choosing the right color for your summer workout tops comes with personal preference and practical considerations. Here are some tips to help you choose the perfect color:
White or light colors such as lake blue and pink are ideal for summer. They reflect sunlight and don't absorb as much heat, helping you stay cool while exercising outdoors. The lake blue color is bright and vibrant and can add a fun and energetic vibe to your activewear. They also increase visibility, which is great when exercising outdoors, especially in low-light conditions.
Like Mathcat workout tops. #Mathcat
We also need to consider the fabric. If your sweatshirt is made from a moisture-wicking fabric, then the color may not matter as much, as the properties of the fabric will help keep you dry and comfortable regardless of the color. However, if the shirt is made of cotton or another material that retains moisture easily, choosing a lighter color can help minimize the appearance of sweat stains.

Avoid dark colors such as black and deep purple, which absorb more of the sun's heat and make you feel hotter during your summer workouts. If you'll be exercising outdoors in the sun, it's best to avoid these colors. By considering factors like heat absorption, visibility, moisture-wicking properties, personal preference, and versatility, you can choose a summer sweatshirt color that will keep you cool, comfortable, and stylish while working out.
0 notes
Text
Mathcat Jogging long-sleeved quick-dry shirts

Jogging long-sleeved quick-dry shirts are designed to provide comfort and moisture-wicking properties during physical activities like jogging. Choose a shirt with a comfortable and athletic fit. It should not be too tight or too loose, allowing for freedom of movement. Flatlock seams can prevent chafing and irritation, especially during longer runs. If you plan to jog outdoors, consider shirts with built-in UPF (Ultraviolet Protection Factor) to protect your skin from harmful UV rays. If you jog in low-light conditions, having reflective elements on the shirt can enhance visibility and safety.

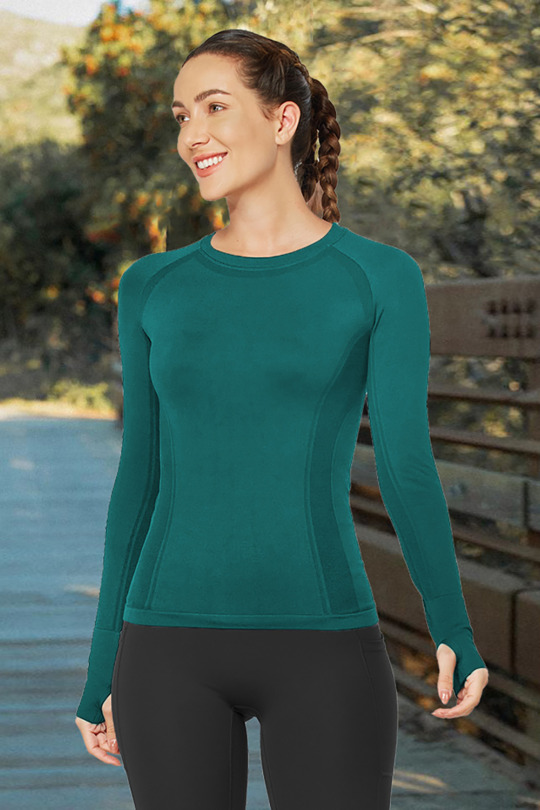


#shirt #running #sports #workout shirt #mathcat
0 notes
Link
0 notes
Text
Cats vs reality
1 note
·
View note
Photo
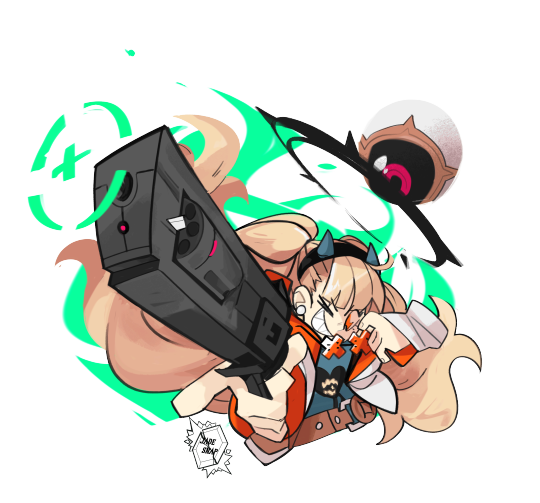
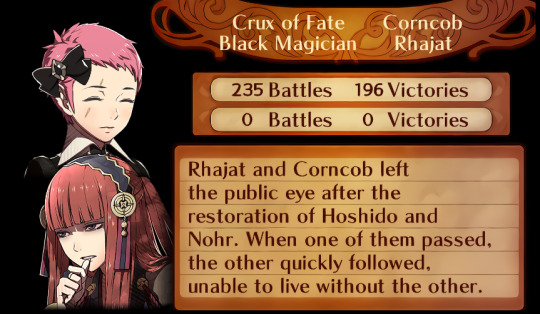
"Your weapon is a miracle only one of the great dragons could produce... Do you mind if I take a closer look?"
Thank you @The_Mathcat for commissioning this Fire Emblem Heroes Eitri dressed as Guilty Gear’s Happy Chaos! a chaotic combo indeed 👁🗨😈
#fire emblem#feheroes#eitri#eitri fire emblem#happy chaos#guilty gear#guilty gear strive#character illustration#fan art#commission#mathcat
88 notes
·
View notes
Text
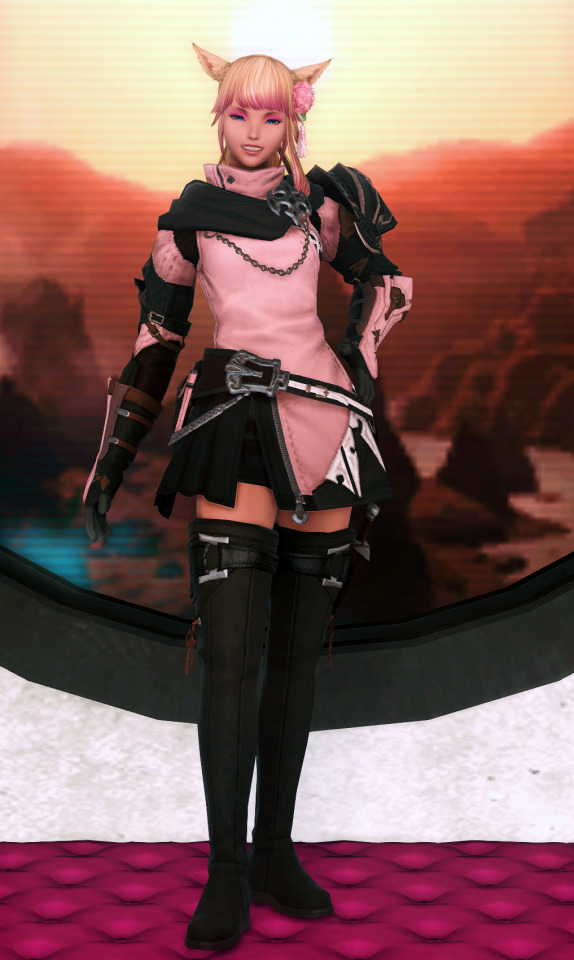
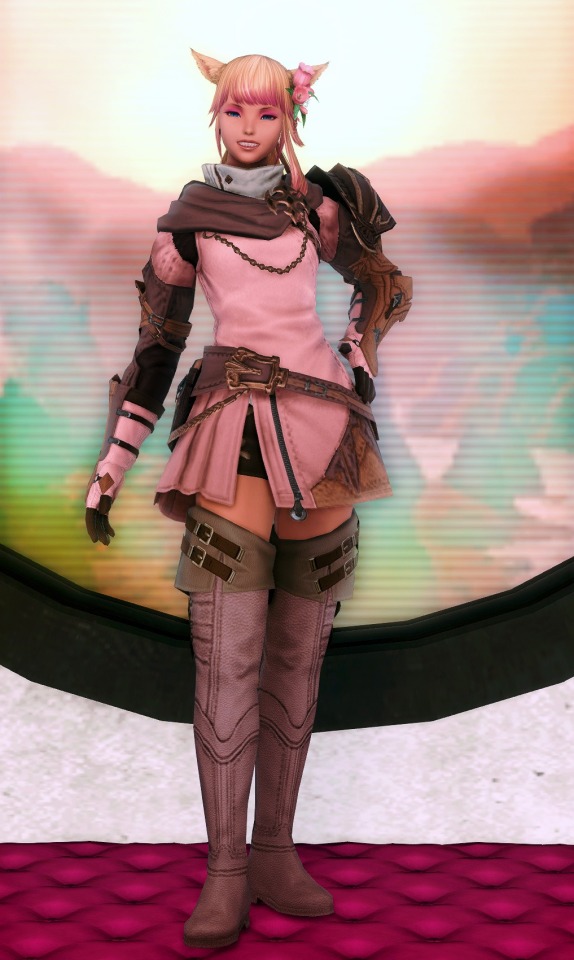
Stormblood Caster/Healer
Nearly have her in ShB levels. She's the one I've properly leveled Arcanist jobs on, as Aeryn & Dark both ended up boosting to 70.
Someday I may even learn how to play Scholar...
#Final Fantasy XIV#Arcanist#Summoner#Scholar#Miqo'te#Seeker of the Sun#C'oretta Khell#MathCat#HealCat
13 notes
·
View notes
Text

#error 0#im sorry i lvoe searching ''super saiyan [arbitrary larger number] its so funny#i love what an absurd number of 0s that is#and i love seeing the Spaghetti Hair Goku image just get applied to any really really big number#according to mathcats that is super saiyan one duovigintillion. good to know if ur ever fighting goku and he does wahtever thefuck that is
8 notes
·
View notes
Text


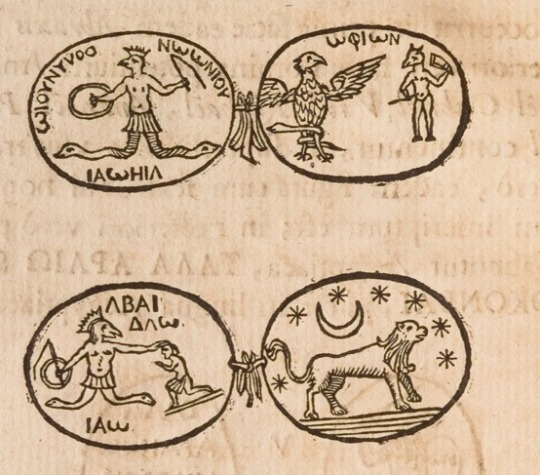

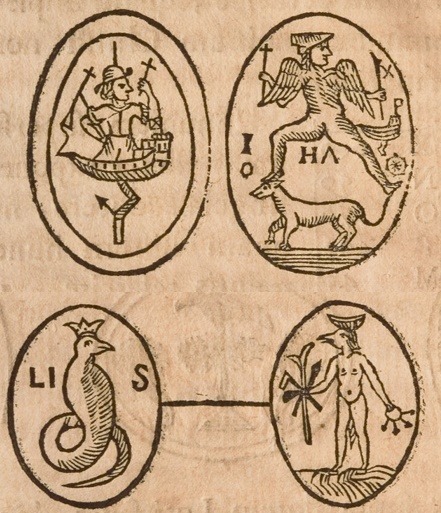
A feline of prodigious mathematical learning may have tutored the ancients in arithmetic. The Volvelles of Llull may have been employed to animate the workings of a creature whose integument is of hollowed stone, whose lungs are of goathide, whose ribcage is of copper wire, whose diaphragm is a bellows of caoutchouc. The amulets of fallen lands may have many uses and many employments. The beaked man, the anguiped, the crowned serpent that has lately fed: They may have much to impart to us, should we but put them near to our hearts. Who is to say otherwise?
#athanasius kircher#kircher's automaton#Arithmologia#sive De Abditis Numerorum Mysteriis#amulet#mathcat#funky little guys
5 notes
·
View notes
Text

This cat is comfortable³
#funny#funny cat#cats in costumes#lorraine#comfort#kitten#art#cozy#blep#this cat is chonky#this cat is comfortable#thiscatiscomfortable#tuxedo cat#tuxedocat#catsoftumblr#catstagram#catsofinstagram#catsinboxes#mathcat#lorraine baines mcfly#cowcat#cutekitty#cuteanimals#cutecat#cutest
120 notes
·
View notes