#magento admin panel theme
Explore tagged Tumblr posts
Visit Tumblr Blog
Explore Tumblr blogs with no restrictions, modern design and the best experience.
Last Seen Tumblr Blogs


Fun Fact
BuzzFeed published a report claiming that Tumblr was utilized as a distribution channel for Russian agents to influence American voting habits during the 2016 presidential election in Feb 2018.
Text
How to Change Logo in Magento 2
If you're running an online store with Magento 2, you might want to change the logo on your website to better reflect your brand. Changing the logo in Magento 2 is a simple process, and in this article, we will guide you through the steps.
Step 1: Log in to Magento Admin Panel To begin with, log in to your Magento 2 admin panel.
Step 2: Navigate to the Content Section Once you're logged in, navigate to the "Content" section in the left-hand sidebar of the admin panel.
Step 3: Select Design Under "Content," select "Design" from the dropdown menu.
Step 4: Choose Configuration In the "Design" section, choose the "Configuration" option.
Step 5: Select Theme You will see a list of themes that are installed in your Magento 2 store. Choose the theme for which you want to change the logo.
Step 6: Open Header Tab Once you've selected the theme, click on the "Edit" button in the "Action" column. This will open up the theme configuration page. Click on the "Header" tab.
Step 7: Upload New Logo In the "Header" tab, you will see the option to upload a new logo. Click on the "Choose File" button to select the new logo file from your computer.
Step 8: Save Configuration After you have uploaded the new logo, click on the "Save Configuration" button at the top of the page.
Step 9: Refresh Cache Finally, clear your Magento 2 cache by navigating to the "Cache Management" section and clicking on the "Flush Magento Cache" button.
Conclusion Changing the logo in Magento 2 is a simple process that can be done quickly through the admin panel. By following the steps outlined in this article, you can easily update your website's logo to better reflect your brand.
2 notes
·
View notes
Text
Magento to Shopify Migration – Why It’s the Right Move for Your Business
Introduction
Is Magento holding your business back?Running an online store on Magento can feel like managing a complex machine—powerful but often demanding. If you’re constantly dealing with expensive maintenance, slow performance, and limited scalability, it might be time to consider a move to Shopify.
Shopify has become the go-to platform for businesses seeking an easy-to-use, scalable, and high-performance eCommerce solution. Brands like Gymshark, Allbirds, and Kylie Cosmetics have switched to Shopify for its speed, flexibility, and hassle-free management.
If you’re wondering whether Magento to Shopify migration is the right step for your business, let’s dive into the key reasons, benefits, and how you can make the transition smoothly.
1. Why Businesses Are Leaving Magento for Shopify
Magento is known for its flexibility, but that flexibility comes at a cost—both financially and technically. Many merchants are making the switch because:
High Maintenance Costs: Magento requires dedicated developers, frequent updates, and costly hosting. Shopify eliminates these expenses with a fully managed cloud-based solution.
Slow Performance Issues: Magento stores often struggle with slow page loads, affecting SEO rankings and conversions. Shopify provides a high-speed, optimized infrastructure.
Complicated Customizations: Making changes on Magento requires technical expertise, while Shopify offers an intuitive drag-and-drop builder and customizable themes.
Security Concerns: Magento sites need manual updates and security patches, whereas Shopify handles all security updates and compliance automatically.
Example: A fashion retailer on Magento was experiencing high development costs and frequent site crashes during peak sales. After migrating to Shopify, they cut costs by 50% and improved load times by 70%, leading to higher sales and better customer experience.
2. Benefits of Migrating from Magento to Shopify
Migrating to Shopify isn’t just about switching platforms—it’s about unlocking new growth opportunities.
1. Simplicity & Ease of UseShopify is built for entrepreneurs and growing businesses. Unlike Magento, which demands technical skills, Shopify is a plug-and-play solution with an intuitive admin panel.
2. Lower Total Cost of Ownership (TCO)Magento requires custom development, expensive hosting, and maintenance fees. Shopify offers a predictable pricing model with no hidden costs.
3. Faster Time-to-MarketNeed to launch a new store or update your current one? Shopify enables businesses to go live in weeks, not months, thanks to its ready-made themes, built-in features, and app integrations.
4. High-Performance HostingWith Shopify’s cloud-based infrastructure, your store benefits from 99.9% uptime, global CDN support, and fast page speeds—something Magento merchants often struggle with.
5. Built-in Security & ComplianceShopify is PCI-DSS compliant, meaning your store and customer data are always protected. No need to manually install security patches, as Shopify automatically updates your store’s security protocols.
6. Mobile-First ExperienceWith more shoppers using mobile devices, Shopify’s mobile-optimized themes and fast checkout process help increase conversions and improve customer experience.
3. Magento to Shopify Migration: Step-by-Step Guide
If you’re ready to migrate, here’s how to make it seamless and hassle-free:
Backup Your Magento Data – Export product, customer, and order data.
Choose the Right Shopify Plan – Select the Shopify plan that fits your business needs.
Set Up Shopify Store – Customize your Shopify theme and store settings.
Migrate Data – Use migration tools or expert services to transfer products, orders, and customers.
Optimize & Test – Ensure everything works smoothly before launch.
Go Live! – Switch your domain and start selling on Shopify.
Conclusion
Is It Time to Move to Shopify? If you’re tired of Magento’s complexity and high costs, Shopify offers a scalable, cost-effective, and user-friendly alternative. Migrating might seem overwhelming, but with the right approach and expert help, you can seamlessly transition and start growing faster.
Need help with your Magento to Shopify migration? OyeCommerz Services specializes in smooth, risk-free migrations, ensuring your store moves without data loss or downtime.
Get in touch today!
0 notes
Text
How to Add a Telegram Chat to Shopify? (No App Needed)
Better communique channels like WhatsApp, Telegram, or maybe Facebook make your customer support better. Boost your online business with our Shopify Development Service – expert solutions for a sleek, high-performing store!
In this blog, I will display you how to upload a Telegram chat button to Shopify like this, where your customers can click on the button and begin speaking to you related to the product or any other question in their mind:
Telegram Chat Button Frontend
Follow this direct solution to enforce the Shopify chat button. You don’t want any outside Shopify app, as you could immediately show the Telegram chat button using the code cited here.
Steps to Add the Shopify Telegram Chat Button
You handiest want to comply with these three steps to display Shopify Telegram button:
Step 1: Open the Theme File Editor
Step 2: Add the Telegram Chat Widget
Step 3: Display Your Telegram Chat Button
Let’s look at them in detail.
Step 1: Open the Theme File Editor
Open your Shopify admin panel, head to Online Store > Themes.
Open the Theme File Editor
Click the 3 dots beside the Customize button and pick out Edit code in your modern-day topic.
Step 2: Add the Telegram Chat Widget
In the Theme File editor, open the theme.Liquid document and paste the following code earlier than the remaining </body> tag:
Step three: Display Your Telegram Chat Button
Take a preview of your save, and you'll be capable of see the Telegram chat option at the complete keep.
Display Your Telegram Chat Button
That’s all. You have successfully introduced Telegram chat to the Shopify save. 🎉
Tips to Effectively Use Telegram Chat on Shopify
While setting any verbal exchange channel in your Shopify save, be it WhatsApp chat, Telegram, or Facebook. Power up your eCommerce success with our white label shopify development – custom-built for growth and seamless performance!
Set automatic replies when you are unavailable
Make sure to get returned on your patron queries as quickly as feasible
Set your chat button function wherein customers can effortlessly spot it
Enable the chat features for mobile customers as well
Use a cellular quantity this is specific for customer support
Also Read : How to Improve Magento Core Web Vitals?
Magento 2 Hyvä Replatforming – How to Do it?
#Shopify Development Service#shopify store development services#white label shopify development services#white label shopify developers
0 notes
Text
Magento 2: New Features That Transform Online Stores
Magento 2 has changed the world of e-commerce due to its powerful features and enhancements from its initial version, Magento 1. It assures speed, improved user experience, and enhanced functionality, making it an ideal platform for modern-day businesses.
Following are some of the major features introduced in Magento 2:
1. Enhanced Performance and Scalability
Magento 2 is designed to handle high traffic and large catalogs efficiently. It features full-page caching, which reduces page load times from 5-10 seconds to 1-2 seconds. Moreover, it supports database sharding and optimized indexing, which means even large-scale stores will run seamlessly.
2. Smooth Checkout Process
Magento 2 features a two-step checkout, which is really simple and reduces cart abandonment rates. It is fast and intuitive; customers are able to place orders in fewer steps. Moreover, it has support for guest checkout, thus allowing new customers to make purchases without creating an account.
3. Mobile-Friendly Design
With the growing trend of mobile commerce, Magento 2 offers responsive themes to ensure the best experience with any device. For store owners, the admin panel is optimized for mobile from the backend side.
4. Improved Admin Interface
The new Admin panel is much more user-friendly and intuitive. It allows you to work in a customized dashboard, making the job of the administrator easier by managing orders, customers, products, and reports more efficiently. This saves time and increases productivity even for non-technical users.

5. Advanced Reporting and Analytics
Advanced reporting capabilities in Magento 2 allow for in-depth tracking of sales, orders, and customer data. The integration of Google Analytics and other tracking tools enables the store owner to make decisions based on facts.
6. Built-In Extensions and Improved Customization
Supports a wide array of Magento 2 extensions that enhance the functionality of your store. The modular code structure allows developers to customize and scale the platform with ease.
7. Better Security Features
Magento 2 is secured by: hashed passwords, protection against CSRF, improved session management, and regular updates to keep it secure from all types of vulnerabilities.
8. Multi-Store and Multi-Language Support
Magento 2 supports multiple stores, currencies, and languages, making it a great choice for international businesses.
Conclusion
The new features of Magento 2 allow store owners to provide their customers with a great shopping experience while having less hassle from the backend. The performance boost is exactly what every web store needs, as it improves the page loading speed and seamless browsing experience that customers desire so much and brings better conversions. Scalable and flexible, Magento can suit any size of store – whether it is running a small shop or a multinational company that needs to meet multiple demands.
With this state-of-the-art admin interface, the time and effort for store managers will be reduced in such a way that even non-developers can actually start thinking about store strategy and growth. Meanwhile, with advanced reporting in combination with analytics, actionable insights have provided avenues through which store owners will definitely make informed strategic decisions to achieve the best level of business output.
Overall, with Magento 2, the future is bright, and so is the powerhouse. Whether it is to improve customer experience, boost sales, or manage operations easily- all the tools and features are available to stand strong in the competitive online market. So, to succeed in business in today's era, upgrading to Magento 2 is a necessity rather than an option.
For more information about features, extensions and services visit: https://mageleven.com/
1 note
·
View note
Text
Breadcrumbs trong SEO: Cách Nâng Cao Trải Nghiệm Người Dùng và Hiệu Quả SEO

Breadcrumbs SEO hay còn gọi là “đường dẫn phân cấp,” là một công cụ điều hướng quan trọng trong thiết kế website và tối ưu hóa công cụ tìm kiếm (SEO). Không chỉ giúp cải thiện trải nghiệm người dùng, breadcrumbs còn đóng vai trò quan trọng trong việc nâng cao thứ hạng của website trên các công cụ tìm kiếm như Google. Trong bài viết này, chúng ta sẽ khám phá chi tiết về breadcrumbs, từ định nghĩa, lợi ích, cách triển khai đến những ví dụ thực tế.
1. Breadcrumbs là gì?
Breadcrumbs là một loại menu điều hướng hiển thị vị trí hiện tại của người dùng trên website. Nó thường xuất hiện ở đầu trang, ngay dưới thanh menu chính hoặc tiêu đề bài viết, và hiển thị các cấp độ phân cấp từ tổng quát đến cụ thể.
Các loại breadcrumbs phổ biến
Breadcrumbs dựa trên vị trí (Location-based): Hiển thị cấu trúc phân cấp của website.
Ví dụ: Trang chủ > Blog > SEO > Breadcrumbs.
Breadcrumbs dựa trên thuộc tính (Attribute-based): Hiển thị các thuộc tính cụ thể của sản phẩm hoặc nội dung.
Ví dụ: Trang chủ > Laptop > Thương hiệu: Dell > Gi��: Dưới 20 triệu.
Breadcrumbs dựa trên đường dẫn (Path-based): Hiển thị lịch sử các trang mà người dùng đã truy cập.
Ví dụ: Trang chủ > Tìm kiếm > Breadcrumbs.
2. Tại sao breadcrumbs quan trọng trong SEO?
2.1 Cải thiện trải nghiệm người dùng (UX)
Breadcrumbs giúp người dùng xác định vị trí của họ trên website.
Hỗ trợ điều hướng nhanh chóng giữa các trang mà không cần dùng nút “Back”.
Tăng thời gian ở lại trang (time on site) và giảm tỷ lệ thoát (bounce rate).
2.2 Tăng khả năng hiểu cấu trúc website của Google
Google sử dụng breadcrumbs để hiểu rõ hơn về cấu trúc phân cấp của website. Điều này giúp công cụ tìm kiếm lập chỉ mục nội dung chính xác hơn và nâng cao thứ hạng của trang trên SERPs (trang kết quả tìm kiếm).
2.3 Hỗ trợ hiển thị Rich Snippets
Breadcrumbs giúp tăng khả năng hiển thị của website trên kết quả tìm kiếm. Khi được tích hợp schema markup, breadcrumbs sẽ xuất hiện dưới dạng đường dẫn trực quan, giúp thu hút người dùng.
3. Cách triển khai breadcrumbs hiệu quả
3.1 Tích hợp Schema Markup
Schema Markup là yếu tố bắt buộc nếu bạn muốn breadcrumbs hoạt động hiệu quả trên Google. Sử dụng định dạng chuẩn như BreadcrumbList trong schema.org.
3.2 Tối ưu giao diện breadcrumbs
Vị trí: Đặt breadcrumbs ở đầu trang hoặc dưới tiêu đề bài viết.
Thiết kế: Sử dụng font chữ rõ ràng, kích thước dễ đọc.
3.3 Kết hợp từ khóa trong breadcrumbs
Sử dụng từ khóa chính để tăng khả năng SEO.
Ví dụ: Thay vì “Laptop,” hãy dùng “Laptop giá rẻ.”
3.4 Kiểm tra hiển thị trên thiết bị di động
Breadcrumbs cần tương thích với giao diện di động để mang lại trải nghiệm tốt nhất cho người dùng.
4. Những lỗi thường gặp khi sử dụng breadcrumbs và cách khắc phục
❌ Breadcrumbs không theo thứ tự phân cấp logic
Lỗi: Không hiển thị đúng vị trí hiện tại của người dùng.
Khắc phục: Sử dụng công cụ kiểm tra cấu trúc website để sửa lỗi phân cấp.
❌ Quá nhiều cấp độ breadcrumbs
Lỗi: Gây rối mắt và khó hiểu cho người dùng.
Khắc phục: Hiển thị tối đa 3-4 cấp độ quan trọng.
❌ Không tích hợp schema markup
Lỗi: Google không thể hiểu và hiển thị breadcrumbs trên kết quả tìm kiếm.
Khắc phục: Sử dụng công cụ hỗ trợ như Yoast SEO hoặc Rank Math.
5. Ví dụ về cách triển khai breadcrumbs trên các nền tảng phổ biến
🌐 WordPress
Plugin hỗ trợ: Yoast SEO, Rank Math.
Cách kích hoạt: Vào cài đặt plugin > Bật tính năng breadcrumbs > Tùy chỉnh giao diện.
🌐 Shopify
Breadcrumbs thường được tích hợp sẵn trong các theme. Bạn có thể kích hoạt hoặc chỉnh sửa trong phần Navigation.
🌐 Magento
Vào Admin Panel > Thiết lập > General > Bật tính năng breadcrumbs.
Sử dụng CSS hoặc JavaScript để tùy chỉnh giao diện.
6. Những ví dụ thực tế về breadcrumbs thành công
Amazon
Amazon sử dụng breadcrumbs để điều hướng người dùng qua hàng trăm danh mục sản phẩm. Điều này giúp khách hàng tìm kiếm dễ dàng và tăng doanh thu bán hàng.
Wikipedia
Wikipedia hiển thị breadcrumbs theo cấu trúc Location-based, giúp người dùng hiểu rõ vị trí của bài viết trong hệ thống phân cấp thông tin.
7. Làm thế nào để kiểm tra hiệu quả của breadcrumbs?
7.1 Google Search Console
Kiểm tra lỗi liên quan đến breadcrumbs trong mục “Enhancements.”
7.2 Công cụ kiểm tra dữ liệu cấu trúc
Sử dụng Structured Data Testing Tool của Google để kiểm tra tính chính xác của schema markup.
7.3 Phân tích dữ liệu UX
Theo dõi tỷ lệ click (CTR) và thời gian trên trang (time on site) để đánh giá mức độ hiệu quả của breadcrumbs.
8. Kết luận
Breadcrumbs là một thành phần nhỏ nhưng mang lại giá trị lớn trong cả SEO và trải nghiệm người dùng. Với những lợi ích vượt trội như cải thiện UX, tăng khả năng hiển thị trên Google và hỗ trợ điều hướng, breadcrumbs là yếu tố không thể thiếu cho bất kỳ website nào.
Nếu bạn đang vận hành một website mà chưa triển khai breadcrumbs, hãy bắt đầu ngay hôm nay. Chỉ với một thay đổi nhỏ, bạn có thể tạo ra tác động lớn đối với cả người dùng và công cụ tìm kiếm.
Bạn đã triển khai breadcrumbs trên website của mình chưa? Hãy chia sẻ kinh nghiệm hoặc câu hỏi của bạn trong phần bình luận nhé!
Công ty TNHH Lê Khang Digital Địa chỉ: 69/19/10 Đường 138, Tân Phú, TP Thủ Đức, TP Hồ Chí Minh. Điện thoại: 0906273102 Email: [email protected] Mã số thuế: 0317438032
1 note
·
View note
Text
Hire Magento Expert in India
Magento is open source shopping cart software has all the required components for building a successful online store. It has an ascendable and rich CMS based on PHP and MySQL databases.
Simple and flexible to employ, Magento imparts sufficient room to online business owners to handle content of their online stores. From controlling the outlook of the store to optimizing functionalities like SEO along with the types of Magento integration, Magento has driven online portals that can be handled with complete simplicity and ease. Endowing the online merchants to make elusive changes on their website as per the requirement of their business, Magento has evolved as one of the most coveted shopping cart software that has taken ecommerce industry to a whole new level. Hence, Magento is highly popular ecommerce solution that has created a demand for to Hire Magento expert in India with optimum experience and talent.
The most favoured benefit of the Magento platform is that it caters to a global audience, with in-built global features, namely multiple currency and multilingual support. Compatible with other browsers like Windows, Mac OC and Linux, it has built-in plug-in with unlimited designs and themes with the intention to deliver unique experience to online customers and users.
The requirement to create a highly dynamic website with an intuitive admin is one of the primary requirements of creating a sturdy ecommerce solution these days. One of the most important features that make Magento highly enticing in the ecommerce circle is its intuitive admin. Realizing the user behaviour is a vital facet for the website owners to improvise or change their marketing plan. Magento enables simple incorporation of Google Analytics that assists in getting an insight into demand supply value chain and user behaviour. This brings website owners near to the customer by enabling them to pay close attention to evolving practices and user requirement.
In an era of smart phones, there is an imminent requirement to create websites that can be accessed on the cell phones. For the same reason, Magento developers have emerged with a control panel known as “Magento Mobile Admin Panel”. This has been added to deliver real time personalization in respect to sending updates when it comes to merchandizing and promotions. The panel gets installed directly into an existing system and thereby supports multiple devices at the same time. Apart from handling orders and content across various capabilities, the panel provides smooth incorporation with content management systems, catalogues and store configurations.
To successfully carry out the above mentioned chores, it is important to Hire Magento expert in India with ample experience and proficiency. Begore hiring Magento developers, it is important to recognize the necessary skill sets. Hire a Magento developer that is a domain expert and has experience. The developers are able to deliver amazing, creative, user-friendly and flexible Magento site and solution in the stipulated time period that has been set by the clients that have initiated the work.
#Hire Magento Expert#Magento Website Design Services#website design#e-commerce developers in india#magento certified developer in india#Custom CMS Development
0 notes
Text
Comparison of ATG Commerce with other e-commerce platform
Choosing the Right E-commerce Platform Today could mean the world for your business. There are so many platforms and it's sometimes difficult to determine which will be right for you. In this article, we take ATG Commerce, an often lesser-known e-commerce platform, and pit it against some of the largest names in the e-commerce world: Shopify, Magento, and WooCommerce. Features, user-friendliness, and pricing comparisons will be made in order to guide you in your ultimate choice.
What is ATG Commerce?
ATG Commerce: This is Oracle's solution for e-commerce, built as a robust product tailored specifically for big businesses with diverse needs. It therefore offers great flexibility and accommodation in meeting any business need. This e-commerce solution allows a business to implement personalized shopping, manage inventory stocks, and process transactions efficiently.
1. Features
ATG Commerce
Personalization: The platform enables the tailoring of shopping experiences according to customer behavior and preference.
Scalability: Very good for big enterprises since they can take in massive traffic as well as their many product catalogs.
Third-Party Integration: Integrate with other third-party applications and systems with ease.
Marketing Tools: Inline management of promotions, marketing campaigns, and customer reach.
Shopify
User Friendly: Perfect for small to medium businesses
Templates: Highly offered templates that can be easily customized for setting up.
Apps: Numerous apps that enhance shop functionality.
Mobile Optimization: Responsive designs for a wonderful mobile experience in shopping.
Magento
Flexibility: Very customizable and suitable for businesses of any size.
Multi-Store Capability: Ability to manage various stores from one admin panel.
SEO Features: Intuitive built-in SEO tools to boost visibility.
Community Support: Large community for debugging and extensions.
WooCommerce
WordPress Integration: Suitable for those who already make use of WordPress for their website.
Easy Installation: Easy installation and configuration with several plugins available.
Cost-Effective: The core plugin is free, hence it is more economical for small businesses.
Customizable: Easy to customize through themes and plugins.
2. Ease of Use
ATG Commerce
ATG Commerce is demanding and may require technical people to implement and run smoothly. It is better suited for organizations with an in-house IT team or companies ready to pay the extra costs for professional support.
Shopify
Easy to use - Shopify is regarded as one of the easiest to use. The actual setup can take hours, which is perfect for first time store owners. Its home page makes it easy to handle products and orders.
Magento
Extremely flexible, but steep learning curve. Best used by people with a little technical knowledge. That might be the downfall for small businesses without extensive tech support.
WooCommerce
GCommerce
WooCommerce
This is relatively intuitive for those who understand WordPress. It gets up and running, as well as managed very quickly and easily, though the user may need to dig through a slew of plugins in order to get extra functionality.
3. Pricing
ATG Commerce
This tends to be pretty pricey compared to most other commerce sites as it is more geared towards large enterprises. It's often complete with upfront costs and ongoing fees for support and maintenance as well.
Shopify
Shopify offers several pricing levels, starting at a lower monthly fee, so this is more friendly to smaller businesses. There are also extra transaction fees unless you use Shopify Payments with the lower-priced plans.
Magento
Magento is a free download as an open source. You will pay for the hosting and development costs in the long run. Enterprise-level will be priced at a costly price, therefore suitable for businesses that have grown older.
WooCommerce
In addition, WooCommerce has no fees for usage; however, one may pay a little for hosting, domain registration, and premium plugins. Summed up, it is one of the free-of-charge alternatives for small enterprises.
Conclusion
The choice of an e-commerce site depends on the business requirement, budget, and technical skills you need. ATG Commerce is one that excellently supports personalization and scalability, so it is very much possible for large business houses. Shopify offers ease of use for small businesses, and Magento provides flexibility for those with technical skills, for WordPress users who are looking for value, then WooCommerce would be perfect.
It is important to evaluate the characteristics, usability, and cost of a selected e-commerce platform before finalizing the solution for your business. Then, with the right e-commerce platform, you can create a viable online store that can serve your customers' requirements.
Get Expert Help
Do you want expert guidance when it comes to choosing that e-commerce platform or maybe just a little help with your digital strategy? Alt Digital Technologies is here for you. Our team of professionals specializes in e-commerce solutions that can take your business forward. Learn more on how we can assist you in becoming successful online today!
0 notes
Text
Custom Magento Development Services

Magento provides a default backend theme and we can provide a custom theme which allows the admin to have a customized backend panel with custom logo, custom font, mobile and tablet based responsive design which makes it easier for the admin to handle the administer operations.Custom Magento Development Services
0 notes
Text
Enhance Your Magento Store with AfterPay Integration through IoCheckout

The AfterPay app is one of the most popular payment methods. It creates and verifies the customer account to take payments and convert them into installments. Then, it links the merchant’s account to it and verifies every small payment detail. Customers can repay purchases with multiple payments after they make them. The functionality of AfterPay will make it a game changer in your Magento store. IoCheckout makes it easy and quick to integrate AfterPay with Magento, whether you’re using a Progressive Web App (PWA) theme like ScandiPWA, Venia, Luma, GraphCommerce, or another custom theme.
Why AfterPay?
Before attempting the integration challenge, you must understand the benefits and worth of integrating AfterPay into your Magento store. The AfterPay shopping program can include all of its advantages. This means attracting even more customers to a website and encouraging them to stay there. Clients sometimes need to be more relaxed with their budgets, making them hesitant to invest in an item that costs a certain amount.
Flexibility: This option of buying now and paying later can attract lost customers and new ones, resulting in fewer deserted carts and more giant shopping carts.
Excellent experience: Customers are encouraged to be more loyal when given choices to pay through different methods, improving shopping experiences.
The Role of IoCheckout
A practical solution for handling AfterPay payment solutions without any hassles is IoCheckout, which you can implement into your Magento store. IoCheckout makes it possible to implement Magento stores with different themes. This is an easy and ideal solution if you are in charge of your store’s design. IoCheckout comes with some of the following features:
PWA and Non-PWA Compatibility: Using a modern PWA theme like ScandiPWA or a traditional non-PWA theme like Luma, IoCheckout ensures seamless integration.
Running through potential roadblocks: we will be bootstrapping our momentum with our GraphQL-powered AfterPay module with IoCheckout, which is bona fide and less cumbersome for fetching and managing payment data.
Custom Theme Support: Even if you use a custom Magento theme, IoCheckout can be incorporated with AfterPay afterward so that no feature is left behind.
Configuring AfterPay with IoCheckout
To activate AfterPay with IoCheckout, you must set up the Magento module for AfterPay. Below is a complete guide to help you out:
Become a Member of IoCheckout: First, register on the IoCheckout platform, and then the GraphQL AfterPay module will open to you, too.
Use the AfterPay Module: If you already have it, install it in your Magento store by sending the files to your server and running a few straight commands on your Magento.
Set the AfterPay Parameters: The Magento admin panel has a payment methods section where you can find the AfterPay settings. These settings need to be adjusted according to your business’s requirements, and the AfterPay-provided API keys must expressly incorporate them.
Examine the Integration: It is best to test the AfterPay integration in advance to avoid hiccups and save time when going live. Place a bid on a few test orders to make sure the installment options are displayed correctly, and the payment method works properly.
Get Customers to Make the Payment: You can now turn your store live and force your customers to use Afterpay only once you’ve verified, based on the test phase, that everything is operating without a hitch. Monitoring transactions as a safety precaution is advisable in case something goes wrong.
Benefits of Using IoCheckout for AfterPay Integration
When managing AfterPay payments in Magento, using IoCheckout offers the following benefits:
Faultless Connection: IoCheckout will simplify the process by facilitating a smooth integration with fewer technical challenges.
Enhanced Security: IO Checkout adheres to strict security protocols to ensure your customer’s financial information is secure and confidential.
Comprehensive Support: We provide extended support for various Magento themes via IoCheckout, ensuring that even the most miniature themes, such as those with non-PWA designs, can easily integrate AfterPay.
Conclusion
Sales and customer satisfaction could rise significantly if you integrate AfterPay with your Magento store using IoCheckout. Payment option flexibility is one of the most critical factors in attracting customers to your e-commerce business, driving high order values, and building customer loyalty. IoCheckout provides a direct path to the wellspring of integration, regardless of whether your Magento store uses pre-built PWA or non-PWA themes. Sign up to start your journey with IoCheckout and make AfterPay entirely available for your e-commerce business.
#Afterpay Payments For Magento#Magento Payment Methods#Afterpay integration#Afterpay Payment#Afterpay Payments Integration#Afterpay#Afterpay for Magento#Afterpay for Magento 2#Afterpay Payment for Magento Store#IoCheckout
0 notes
Text
Magento 2 Tutorial: Enhancing Your Online Store's Performance and Security

Are you looking to create a robust online store? Look no further! This Magento 2 tutorial is your step-by-step guide to setting up and optimizing your e-commerce website.
Why Choose Magento 2?
Magento 2 is a powerful platform renowned for its flexibility and scalability. Whether you're a small business or a large enterprise, Magento 2 can adapt to your needs, making it a popular choice for online retailers.
Getting Started with Magento 2
Installation:
Begin by downloading Magento 2 from the official website. Follow the installation wizard to set up the platform on your server. Ensure your hosting meets the requirements for smooth operation.
Basic Configuration:
Once installed, configure your store settings. This includes setting your store's name, currency, and language. Navigate through the admin panel to adjust these options easily.
Adding Products:
With your store settings configured, start adding products. Go to the "Catalog" section, and fill in details like product name, price, and descriptions. Upload clear images to attract customers.
Customization:
Magento 2 allows for extensive customization. Choose a theme that matches your brand and customize it using the built-in tools. You can also add extensions to enhance functionality.
Performance Optimization:
Improve your store’s speed and security by enabling caching and setting up SSL. Regularly update Magento and your extensions to keep your store running smoothly.
Ready to Dive Deeper?
For a more detailed guide, check out TAE’s comprehensive Magento 2 Tutorial. Start building your online store today and unlock your business's full potential!
With this tutorial, you're on your way to mastering Magento 2 and creating a successful online presence.
0 notes
Text

I will create and design a responsive website for your business
About this gig
Greetings!
Unleash A DECADE OF WEB Developer EXPERTISE.
Did you know a standout website can convert a staggering 65% of visitors into customers in just one visit?
Beware - a shoddy website spells business disaster. If you offer a stellar service, shout it from the digital rooftops with a captivating site.
My skills aren't confined to a single platform;
I can work my magic on Wordpress, Shopify, Bigcommerce, Squarespace, Joomla, Blogger, Wix, Prestashop, Drupal, Magento, and more.
Why Me?
4 year Experience
100% money-back guarantee
100% Satisfaction
Unlimited Revision
Will properly Guide you on how to manage
Free On-page SEO
What do we include?
Any kind of Business website
User-Friendly Admin Panel
Theme customization
Free/Premium Themes
Responsive for all devices
Blog includes
Social sharing features
Google map integration
Any kind of contact form
E-commerce
Nice looking layout
24 Hours Customer support
Free SEO
100% money-back guarantee
Clean and Professional Designs
What kind of website we can create?
A website for your
Restaurants
Jewelry Shop
Hair Salon
Beauty Products
Ready for a tailored solution? Custom orders are also available.
Plugins
Adsense
Akismet
All-in-one SEO pack
Amazon
AWeber
ClickBank
Contact form 7
Facebook
GetResponse
Gravity Forms
Instagram
LinkedIn
Mailchimp
Opencart
Paypal
Twitter
Vimeo
W3 Total Cache
WooCommerce
WordPress SEO by Yoast
YouTube
Elementor
Website type
Business
Website features
Marketing
Payment
Forum
Social media
Customer support
Shipping
Inventory
Analytics
Video
Membership
Read More!
#fiverr#freelance#usa freelance#Fiverrservices#Webisteservices#Freelancing servies#business growth#services
0 notes
Text
How to Migrate to Magento from another platform?
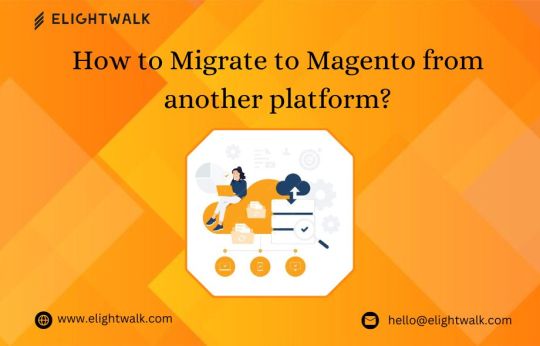
Are you considering switching to Magento for your eCommerce business? With its solid features and flexibility, Magento has become a popular choice for online retailers. However, there are important considerations to remember when migrating.
This post will discuss the steps and best practices for migrating to Magento from another platform. We've covered it whether you're on Shopify, WooCommerce, or any other platform. Let's dive into the world of Magento migration and set you up for eCommerce success.
1. Assessment and Planning:
Evaluate your current platform: Understand your existing platform's features, data structure, and functionalities.
Identify what data needs to be migrated: Products, customers, orders, categories, content, and any custom data.
Analyze your Magento requirements: Determine the version of Magento you want to migrate to and what features you need.
2. Choose the Right Migration Method:
Manual Migration: Manual migration might be feasible if you have a small store with limited data.
Automated Migration: Consider using automated migration tools or services for larger stores with significant data. Various third-party migration tools are available to migrate data from different platforms to Magento.
3. Prepare Your Magento Environment:
Install Magento: Set up a new Magento instance on your local machine or a server.
Customize your Magento installation: Configure settings, install necessary extensions, and customize the theme to match your branding and requirements.
4. Data Migration:
Products: Export product data from your platform and import it into Magento. Ensure that product attributes and categories are mapped correctly.
Customers: Migrate customer data, including accounts, passwords, addresses, and order history.
Orders: Transfer order data such as order details, status, and payment information.
Content: Move static pages, blog posts, images, and other content to Magento.
5. Design and Theme Migration:
If you're redesigning your store, create or customize a Magento theme to match your desired design. Ensure the layout, navigation, and user experience are consistent with your previous platform.
6. Integration and Customization:
Integrate any third-party services or extensions you used on your previous platform. Develop custom functionalities or extensions to meet specific requirements not covered by default Magento features.
7. Testing:
Thoroughly test your Magento store's migrated data, functionalities, and user experience. Check for any data discrepancies, broken links, or functionality issues. Conduct user acceptance testing to ensure that everything works as expected.
8. Launch and Post-Migration Activities:
Once testing is successful, schedule the launch of your Magento store. Redirect traffic from your old platform to the new Magento site. Monitor the site closely after launch and address any issues promptly. Update your SEO settings, analytics tracking, and other configurations as needed.
9. Training and Support:
Train your team on using the Magento admin panel and managing the store. Provide continuing help to resolve any queries or difficulties that occur upon migration.
10. Optimization and Maintenance:
Monitor and optimize your Magento store for performance, SEO, and user experience. Keep Magento and extensions updated with the latest security patches and updates. Regularly back up your store data to prevent data loss.
Following these 10 steps and best practices, you can simplify the migration process and successfully transition to Magento for your e-commerce store.
#magento migration#Magento 2 Data Migration#Magento 2 Upgrade#Woocommerce to Magento 2 Migration#Magento Extension Migration
1 note
·
View note
Text
Magento 2 Hyvä Replatforming – How to Do it?
Are you dealing with Magento 2 terrible center net vitals issues? Then, it’s a good time to re-platform it to the Hyvä subject matter.
The Hyvä topic for Magento is known for its lightning-rapid front give up. In this guide, we explore the complete method of Magento 2 Hyvä replatforming. Supercharge your online store with our professional Shopify Development Services – customized for your success!
Let’s get began.
What is Magento 2 Hyvä Replatforming?
Magento 2 Hyvä replatforming is the procedure of updating your Magento 2 store’s the front quit to a Hyvä subject matter, which is light-weight and optimized for overall performance.
It facilitates you notably improve the web page speed performance of your store while retaining the core functionalities and records intact.
When you re-platform to a Hyvä subject:
Your the front-stop internet site overall performance (middle internet vitals rating) is progressed
The website backend (admin panel) remains intact and not using a information loss
In short, it’s an awesome pass to enhance your internet site for search engine marketing and person revel in.
Why Choose Hyvä Frontend for Magento 2?
In our examine, we discovered that 3000+ Magento 2 web sites have already adopted Hyvä.
That’s due to the subsequent benefits it offers compared to the default Luma-based topics:
Lightweight structure
Eliminates heavy rely upon RequireJS, Knockout.Js, and jQuery
Faster debugging with decrease chances of frontend complexity
Perfectly optimized for cellular and desktop
Magento 2 Hyvä frontend is a favored choice for businesses looking for most useful overall performance and lengthy-term scalability. You can opt for Magento 2 Hyvä replatforming and pass your contemporary storefront to Hyvä frontend for better pace and performance.
How to Replatform Magento 2 to Hyvä Theme?
Changing your Magento 2 frontend to Hyvä subject matter may be a complex task regarding design, improvement, and administrative components.
Here’s an overview of the stairs for the Magento 2 Hyvä migration project:
Step 1: Theme Designing
Step 2: Hyvä Theme Implementation
Step three: Module Compatibility Testing
Step 4: Features Customization
Step five: QA Auditing
Step 6: Live Site Deployment
Let’s undergo each of the stairs briefly.
Step 1: Theme Designing
Start with designing a new keep layout seeing that Hyvä removes the traditional Magento tech stacks and makes use of Tailwind CSS and Alpine.Js, making it essential for you to plan your new UI thus. Optimize, scale, and succeed with our expert white label shopify developers – your eCommerce growth partner!
Step 2: Hyvä Theme Implementation
When your design is prepared, flow beforehand and put in force your Hyva subject.
Start with the aid of purchasing the Hyvä theme license and install it. You can install the topic through a Composer. Run the subsequent commands through SSH.
Composer require hyva-topics/magento2-default-subject
bin/magento setup: upgrade
bin/magento setup:di: assemble
bin/magento setup:static-content: set up -f
Then, head to Admin Panel > Content > Design > Configuration, and set Hyvä because the default subject matter.
Step 3: Module Compatibility Testing
Most of the Magento 2 extensions depend upon Knockout.Js, RequireJS, or UI Components, which aren't found in Hyvä.
This makes it essential for you to test if your 0.33-birthday celebration extensions are running efficiently within your save.
Look for Hyvä-like minded extensions, patches, and UI layout.
Step four: Features Customization
Since Hyvä doesn’t work well with Luma-based totally subject matters, you will need to feature new components the use of Alpine.Js.
Here are a few actionable points in order to recall:
Rewrite the HTML structure and rebuild key Magento 2 pages like Homepage, Category & Product Pages, and Cart & Checkout.
Switch to Hyvä Checkout if you are using any third-birthday celebration services.
Replace CSS with Tailwind CSS and convert jQuery-primarily based capabilities to Alpine.Js.
Step five: QA Auditing
Run a first-rate warranty check all through your store to make certain the whole lot works efficiently.
Here are the actionable for you:
Use Google Lighthouse or PageSpeed Insights to test the Core Web Vitals rating
Verify all of the security patches and HTTP configurations are operating well
Check the float of your new layout from the begin till the checkout web page
Step 6: Live Site Deployment
The final step is deploying the Hyvä subject to manufacturing and the staging surroundings.
Use the integrated Lighthouse performance equipment of Hyvä to test Core Web Vitals and web page performance.
Then, set up the subject to a staging surroundings and check it from the first step to the checkout web page. Make any wanted adjustments and send it to production. Also Read : Leading by using Example: Inspiring Change and Growth in Your Agency
Eight Best Shopify Apps for Catalogs
0 notes
Text
Essential Steps for Testing and Validating Your Magento Upgrade

Upgrading your Magento requires smart planning, precise execution, and thorough testing. To stay on top in the online selling game, it’s crucial to make the most of the newest technologies, patches, and performance enhancements. A smooth transition is key, and that means relying on expert know-how and following the best methods. Opt for our Magento upgrade services to effortlessly enhance and revamp your online store.
Executing a prosperous Magento upgrade demands proficiency in various domains. For peak performance, meticulous planning and rigorous testing are essential at every stage. Navigating this journey calls for expert assistance, guaranteeing seamless transitions while safeguarding crucial features and user experiences.
A knowledgeable guide that delves into the details of testing and validating your Magento upgrade. Planning, testing, security, optimizing performance, and ongoing monitoring are crucial elements to ensure a seamless Magento upgrade while preserving operational integrity.
Important Key features of Magento 2.
Enhancements in scalability and performance.
Magento 2 platform is crafted to deliver improved performance and scalability. Utilizing full-page caching, refined indexing, and optimized coding has notably boosted the website’s speed and overall performance. Catering to the expanding requirements of businesses, the platform’s scalability enables it to manage larger product catalogs and increased website traffic.
Streamlined Checkout Process
The Magento 2 platform is created to offer improved performance and scalability. Through the implementation of full-page caching, enhanced indexing, and optimized coding, the website’s speed and overall performance have seen a substantial increase. To meet the expanding demands of businesses, the platform’s scalability enables it to efficiently manage larger product catalogs and handle increased traffic.
Design and Optimization for Mobile-Friendly Experience
Magento 2 prioritizes mobile optimization and responsive design, recognizing the significance of mobile devices. A responsive design and interface guarantee a captivating and smooth shopping experience across all devices. The mobile responsiveness of the site plays a role in boosting user engagement and driving sales.
User-Friendly Admin Panel
Magento 2 incorporates an improved admin panel, designed for enhanced user-friendliness and efficiency. With a more intuitive user interface, improved navigation, and enhanced usability, merchants can seamlessly manage products, create content, and process orders. This user-friendly admin panel simplifies various tasks for merchants.
Handling Advanced Products
Magento 2 enables merchants to efficiently manage their products. Through features like drag-and-drop product creation, batch updates, and customizable attributes, store administrators can save time and effort.
Key Tips for Successfully Testing Your Magento Upgrade
Establish a Strong Base through Planning and Preparation
The initial phase of a Magento upgrade involves meticulous planning and thorough preparation. Develop a comprehensive roadmap outlining each step of the upgrade process. This plan should encompass risk assessments, contingency strategies, and a thorough backup strategy. Ensure that extensions, themes, and customizations are fully compatible with the new version. Implementing a robust backup strategy is crucial to prevent potential issues during the upgrade process.
Conducting Methodical Testing while Upholding Integrity and Functionality
Performing testing in a staging environment, mirroring the live production setting, is crucial. This enables thorough testing without jeopardizing the functionality of the live site. Evaluate every facet of the upgraded platform, encompassing core functionality, additional programming, extensions, and integrations. Identifying potential issues before deploying the live upgrade is imperative.
Ensuring Functionality and Regression Testing
Prioritize Functional Testing to guarantee flawless operation of essential features post-upgrade. Confirm smooth functionality of user accounts and checkout processes. Additionally, Regression Testing is vital to ensure existing features remain unaffected and perform optimally after an upgrade. The goal of this step is to identify and resolve any unexpected issues that may arise.
Verification of Extension and Theme Compatibility
Ensure compatibility of all extensions and themes with the upgraded Magento version. The extension/theme developer should furnish the latest versions or patches to facilitate seamless integration. Explore alternative extensions/themes or customize them to align perfectly with the upgraded version of Magento, resolving any compatibility issues.
Enhancing Performance for Improved User Experience
In the performance testing phase, assess the Magento platform for responsiveness, speed, and overall performance. Utilize performance testing tools to simulate various user scenarios and evaluate how well the platform manages different loads. Identify any performance bottlenecks and address them to optimize the platform’s speed.
More Info: https://www.evrig.com/blog/essential-steps-for-testing-and-validating-magento-upgrade/
0 notes
Text
The Ultimate Guide to Magento 2 Training: Everything You Need to Know

Embarking on the journey of mastering Magento 2? Whether you're a seasoned developer, an aspiring e-commerce entrepreneur, or a business owner looking to optimise your online store, our ultimate guide to Magento 2 training is your go-to resource for unlocking the full potential of this powerful e-commerce platform.
Understanding Magento 2 Basics: Begin your Magento 2 Training by gaining a solid understanding of its fundamental concepts. Explore the architecture, learn about the key components, and discover how Magento 2 differs from its predecessor. This chapter sets the stage for a comprehensive learning experience.
Installation and Configuration: Dive into the practical side of Magento 2 by mastering the installation process. From system requirements to configuration options, this chapter guides you through setting up your Magento 2 environment efficiently, ensuring a smooth start to your training journey.
Navigating the Admin Panel: Unlock the full potential of Magento 2's intuitive Admin Panel. Learn how to navigate and customise the dashboard, manage products, handle orders, and optimise your store settings. This chapter equips you with the skills needed to efficiently manage your e-commerce operations.
Theme Development: Immerse yourself in the visual aspect of Magento 2 by delving into theme development. Explore the structure of Magento 2 themes, master the customization of layouts and templates, and create a visually stunning storefront that aligns with your brand identity.
Conclusion: The ultimate guide to Magento 2 Training. Armed with a comprehensive understanding of Magento 2 fundamentals, practical skills in installation, configuration, theme and extension development, and expertise in performance optimization and security, you're well-equipped to elevate your e-commerce game.
0 notes
Text
Magento 2 Theme Development: How to Create a Custom Theme from Scratch
In the dynamic world of e-commerce, creating a unique and eye-catching online store is crucial to stand out from the competition. Magento 2, a robust and versatile e-commerce platform, provides the perfect canvas for your store. One way to make your mark is by developing a custom theme tailored to your brand. In this comprehensive guide, we'll delve into the intricacies of Magento 2 theme development, guiding you through the process of creating a bespoke theme from scratch.
Understanding the Basics
Before diving into the nitty-gritty of theme development, let's establish a solid understanding of the basics. Magento 2 is renowned for its flexibility and scalability, making it a preferred choice for businesses of all sizes. A theme, in the context of Magento, determines the look and feel of your online store, encompassing elements such as layout, design, and functionality.
Setting the Stage: Prerequisites for Theme Development
Creating a custom theme demands a structured approach. Begin by ensuring you have the necessary tools and environment. Install a local instance of Magento 2, a reliable code editor, and set up a version control system. Familiarize yourself with Magento's file structure, and you're ready to embark on your theme development journey.
Step-by-Step Guide to Magento 2 Theme Development
1. Create Your Theme Directory
Start by generating a new theme directory within the app/design/frontend path. This directory will house all your theme-specific files.
2. Define Theme Properties
In your theme directory, create a theme.xml file to define crucial properties like the theme name, parent theme (if any), and other metadata.
3. Create Registration.php File
Develop a registration.php file to register your theme with Magento. This step is essential for Magento to recognize and load your custom theme.
4. Design Your Theme's Layout
Crafting a visually appealing layout is paramount. Leverage Magento's layout files (XML files) to structure your theme's pages. Define page templates, blocks, and containers to achieve the desired arrangement.
5. Style Your Theme with CSS
Inject life into your theme with custom styles. Create a styles.css file in your theme directory to apply unique styling, ensuring a seamless blend with your brand identity.
6. Integrate JavaScript for Enhanced Functionality
Magento 2 supports the integration of JavaScript libraries for enhanced functionality. Utilize this capability to add interactive elements and improve user experience.
7. Implement Theme Images
Optimize visuals by incorporating custom images. Create a web/images directory within your theme to store logo images, icons, and any other visuals that define your brand.
8. Configure Theme in the Admin Panel
Navigate to the Magento Admin Panel to configure and activate your custom theme. Go to Content > Design > Configuration and select your store. Choose your custom theme from the 'Applied Theme' dropdown and save the configuration.
9. Test Thoroughly
Before launching your custom theme to the public, conduct rigorous testing. Ensure compatibility with various browsers and devices to guarantee a seamless user experience.
10. Optimize for Performance
Fine-tune your theme for optimal performance. Minimize CSS and JavaScript files, optimize images, and implement caching mechanisms to enhance page loading speed.
Conclusion
Embarking on Magento 2 theme development empowers you to sculpt a digital storefront that aligns perfectly with your brand vision. By following the steps outlined in this guide, you not only create a visually stunning online presence but also ensure a smooth and responsive shopping experience for your customers. Remember, the key to a successful custom theme lies in attention to detail, creativity, and a commitment to delivering an exceptional user interface. Now, go ahead and bring your brand to life with a tailor-made Magento 2 theme!
#Magento 2 theme#magento 2#magento development company#magento#magento development services#magento developers
1 note
·
View note