#key lime cooler
Explore tagged Tumblr posts
Visit Tumblr Blog
Explore Tumblr blogs with no restrictions, modern design and the best experience.
Last Seen Tumblr Blogs


Fun Fact
In Q3 of 2020, 31% of US users access the Tumblr app daily.
Text

BBW Key Lime Cooler Slushy Shower Wash
Summer 2000
found on Ebay, user *thejewel*
#bath and body works#vintage bath and body works#key lime cooler#2000#y2k body care#y2k summer#key lime#slushy#2000s nostalgia#summertime#green#limes
14 notes
·
View notes
Text
anyway. here is MY state fair food review:


1. alligator bites - 6/10 kinda just tasted like chicken nuggets but texture reminded me of halibut…good but boring
2. chai cinnamon roll lumpia - 8/10 so yummy wrapper was crunchy & inside was gooey & u could definitely taste the chai


3. fairy dust soda - 3/10 my twin got this it was basically watered down grape soda with glitter
4. asian sweet & sticky tots - 7/10 i’m a sucker for scallions & sesame seeds what can i say…everyone else thought they had too much sauce but i didn’t mind. could have been crunchier tho


5. cheese curds - 5/10 my sister got these & they were. fine. not really seasoned at all tho kinda boring
6. birria egg rolls - 7/10 yummy but the oil from the birria made the egg roll wrapper soggy instead of crispy…also slightly underseasoned


7. deep fried lemonade bites - 9/10 def my favorite thing we tried i love lemon & this was the perfect mix of slightly crispy outside & gooey middle YUM
8. deep fried reese’s cup - 8/10 dough was fluffy & i love reese’s. delish
#did not try the key lime pie iced cooler that i had my eye on bc i got too full…#but did go on some rides & also sang karaoke! overall a successful trip 2 the state fair
6 notes
·
View notes
Text
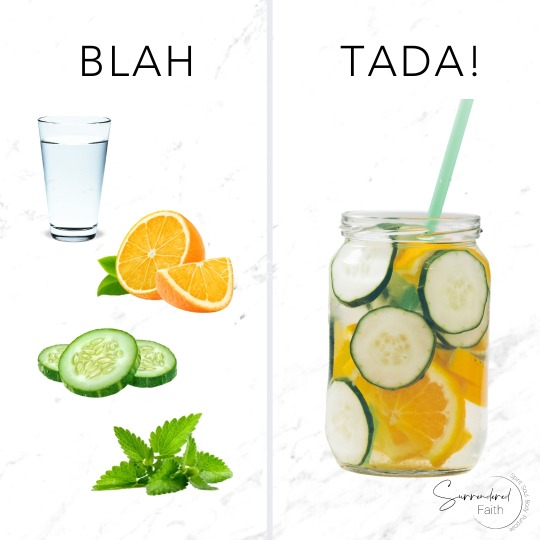

HYDRATION. 💧
We know it's key to our health, but sometimes we're looking for something a little less... boring. Can you relate? 👀
The fun thing is, there are endless ways to make fruit infused water! 👏
Use water, still, or bubbly, or try concentrated steeped tea as a base. Try these delicious combos to stay hydrated this summer.
🥒 Cilantro-Lime Melon Cooler: honey dew + cilantro + matcha green tea + lime juice + cucumber
🍓 Ultimate Aqua Fresca: strawberry + mint + hibiscus tea + lime + sparkling water
🍑 Fuzzy Peach-Basil Chia Fresca: peach + basil + peach green tea + lemon + chia seed
🌿 Blackberry-Sage Cooler: blackberries + sage leaf [just one will do] + berry green tea + sparkling water
🍊 Citrus Rosemary Refresher – nectarine + rosemary [just a few leaves with stem for garnish] + green tea + grapefruit + cucumber
10 notes
·
View notes
Text
Most Glass Rooms Use Double-Glazed Panels for Thermal Efficiency

In the ever-evolving skyline and residential aesthetics of Dubai, glass architecture is becoming more than a trend—it’s a lifestyle. Among the most sought-after contemporary structures are glass rooms, which fuse modern design with practical luxury. One of the key features that makes these installations so appealing, especially in a climate like Dubai's, is the use of double-glazed panels. These provide not just elegance and light but also crucial thermal efficiency. This article explores the growing popularity of Glass Rooms in Dubai, their energy-saving features, and how they integrate with other glass installations like shower glass enclosures.
The Allure of Glass Rooms in Dubai
The architecture of Dubai is synonymous with innovation, and glass rooms fit naturally into this high-end landscape. Whether it's a panoramic glass extension to a villa, a rooftop glass enclosure, or a modern garden conservatory, the demand for Glass Rooms Dubai has surged among homeowners and commercial developers alike.
These structures are popular because they offer a seamless view of the outside world while creating a cozy indoor environment. In Dubai's climate—characterized by intense sun and high temperatures for most of the year—traditional building materials often fall short when it comes to heat management. Glass rooms, when constructed with the right materials and expertise, offer a solution that is both luxurious and sustainable.
Why Double-Glazing is Essential in Dubai
The term “double-glazing” refers to two layers of glass separated by a vacuum or a layer of inert gas like argon. This design dramatically improves insulation properties, making double-glazed panels essential for thermal efficiency in extreme climates like Dubai's.
Here’s how double-glazing enhances a glass room:
Thermal InsulationThe main benefit is the reduction of heat transfer. Double-glazed glass can keep interiors cooler in summer and warmer in winter. This significantly reduces the reliance on air conditioning, which is both eco-friendly and cost-effective.
Energy EfficiencyBetter insulation translates into lower electricity bills. Since air conditioners and HVAC systems are among the biggest energy consumers in UAE households, glass rooms built with double-glazed panels contribute to long-term savings.
Noise ReductionBeyond temperature control, double-glazing also acts as a sound barrier. This is particularly useful in bustling urban settings like Dubai, where construction and traffic noise can be intrusive.
UV ProtectionHigh-performance double-glazed glass often comes with coatings that block harmful UV rays, which protects your furniture, flooring, and décor from fading due to sunlight.
Customization and Style
Modern glass rooms are not just functional—they’re customizable. Whether you want a minimalist aesthetic or a lavish design, professional glass solution providers in Dubai offer bespoke services. From frame colors to opening mechanisms and integrated blinds, there’s a vast array of choices.
Some companies even provide smart glass technology, where glass panels can change from clear to opaque with a touch of a button. This is ideal for those who want the option of privacy without compromising the visual appeal of their space.
Integrating Shower Glass Installations
While glass rooms may be the centerpiece of your home’s architecture, the elegance of glass doesn’t have to stop there. Another complementary trend in Dubai is the increasing use of SHOWER GLASS enclosures. Just like glass rooms, these shower spaces offer a sleek, modern, and easy-to-maintain solution for bathrooms.
In fact, homeowners who invest in glass rooms often extend this design language indoors with frameless or semi-frameless shower glass cabins. These cabins are crafted with tempered safety glass and often feature anti-lime and anti-fog coatings. In terms of style, they maintain a minimalist aesthetic that matches the transparency and openness of glass room environments.
Sustainability and Environment-Friendly Choices
One might assume that glass structures are less eco-friendly due to the energy required to produce them. However, the use of double-glazed and low-emissivity (Low-E) glass mitigates this concern. These energy-efficient materials, especially when locally sourced and installed by reputable companies, reduce a building’s carbon footprint significantly.
Moreover, some manufacturers offer recyclable glass options and participate in environmental certifications. For homeowners in Dubai aiming for green building certifications like LEED or Estidama, these materials are essential.
Choosing the Right Supplier
With the rising popularity of glass rooms and glass shower enclosures, many suppliers have entered the Dubai market. However, not all deliver on quality and durability. When considering a provider, be sure to assess:
Experience in UAE-specific climate requirements
Portfolio of past projects
Use of certified and tested materials
Customization options
Warranty and after-sales service
Companies like Zealcon Glass Room are known for their tailored approach and advanced installation techniques. Their work in Glass Rooms Dubai is widely recognized for blending innovation with function.
Conclusion
Glass rooms offer more than just aesthetic value—they are practical, efficient, and luxurious spaces perfect for Dubai’s climate and lifestyle. With the integration of double-glazed panels, these structures become thermally efficient sanctuaries that enhance both property value and quality of life. Coupled with premium SHOWER GLASS solutions, homeowners can maintain a consistent and elegant design throughout their living spaces.
As Dubai continues to push the envelope in architectural excellence, glass rooms are likely to become a staple in both residential and commercial design. By choosing experienced installers and prioritizing energy-efficient materials, residents can enjoy the beauty of glass while staying cool and eco-conscious year-round.
0 notes
Text
Ten Tips For Growing Tomatoes in the East Bay

Introduction:
Tomatoes are a favorite among home gardeners, especially in the East Bay where the Mediterranean climate offers warm, dry summers and mild, wet winters. However, growing the perfect tomato crop takes a little knowledge, the right tools, and consistent care. Whether you’re a seasoned green thumb or a first-time gardener, these ten tips will help ensure your tomato plants thrive in the unique conditions of the East Bay.
1. Choose the Right Tomato Varieties
East Bay gardeners should select tomato varieties that flourish in warm weather but can also handle some cooler evening temperatures. Opt for early maturing varieties like 'Early Girl', 'Stupice', or 'Celebrity'. These cultivars tend to perform well in microclimates and offer a higher yield before the late summer heat takes over.
2. Start with Healthy Soil
Tomatoes are heavy feeders, so starting with nutrient-rich soil is key. Amend your garden bed with well-rotted compost or organic matter to boost fertility. The ideal soil pH for tomatoes is between 6.2 and 6.8. Conduct a soil test to check pH and nutrient levels. You can adjust the soil accordingly with organic fertilizers or lime.
3. Pick a Sunny Location
Tomatoes love the sun. Ensure your tomato bed gets at least 6-8 hours of direct sunlight daily. East Bay gardeners should also be aware of coastal fog and shade from nearby buildings or trees. Select the sunniest spot in your garden to encourage fruit production.
4. Use the Right Gardening Tools
Investing in quality gardening tools will make the process smoother and more efficient. Basic tools like a hand trowel, pruners, gloves, and a watering can are essential. A sturdy tomato cage or trellis system will also support your plants as they grow and bear fruit. Having the right tools can mean the difference between a frustrating experience and a flourishing garden.
5. Water Consistently and Deeply
Inconsistent watering can lead to issues like blossom end rot and cracked fruit. Water deeply and regularly to keep soil consistently moist but not soggy. In the East Bay, where the climate can be dry in the summer, consider using a drip irrigation system or soaker hoses to conserve water and reduce evaporation.
6. Mulch to Conserve Moisture and Prevent Weeds
Mulching around your tomato plants helps retain moisture, suppress weeds, and regulate soil temperature. Organic mulches like straw, shredded leaves, or bark are great options. Apply a 2-3 inch layer around the base of each plant, leaving a small gap around the stem to prevent rot.
7. Prune for Better Air Circulation
Pruning your tomato plants helps improve airflow and reduce the risk of disease. Remove the lower leaves that touch the ground and any "suckers" that develop in the joint between the stem and a branch. This practice focuses the plant's energy on fruit production rather than excess foliage.
8. Fertilize Appropriately
Tomatoes benefit from a balanced fertilizer that includes nitrogen, phosphorus, and potassium. Start with a nitrogen-rich fertilizer to promote leafy growth in the early stages. As the plant begins to flower, switch to a phosphorus-heavy fertilizer to encourage fruiting. Be cautious not to over-fertilize, as it can lead to lush foliage but few tomatoes.
9. Watch for Pests and Diseases
Common tomato pests in the East Bay include aphids, whiteflies, and hornworms. Fungal diseases like early blight and powdery mildew can also be an issue due to morning fog and humidity. Regularly inspect your plants and use organic pest control methods when necessary. Neem oil, insecticidal soap, and introducing beneficial insects like ladybugs can help keep problems in check.
10. Harvest at the Right Time
The best time to harvest tomatoes is when they are fully colored and slightly soft to the touch. Picking tomatoes at peak ripeness ensures the best flavor and texture. In the East Bay, tomatoes typically ripen from late June through September, depending on the variety and weather conditions.
Before You Plant: Plan Your Space and Supplies
Before planting, take time to plan your garden layout and gather necessary supplies. Raised beds or large containers can be great options if you're working with limited space. Also, ensure you have all the essential gardening tools on hand so you're ready to hit the ground running. For a complete overview of tomato growing practices, you can explore the Wikipedia article on Tomato cultivation to deepen your knowledge and gain more perspective on the science behind it.
Final Thought
Tomatoes are a rewarding crop for East Bay gardeners, offering fresh, delicious fruit straight from your own backyard. With the right preparation, tools, and techniques, your tomato plants can produce bountiful harvests season after season. Whether you're growing cherry tomatoes on a balcony or heirlooms in raised beds, a little effort goes a long way. For expert advice, premium-quality gardening supplies, and healthy plants, visit The Evergreen Nursery and let your tomato-growing journey flourish!
0 notes
Text
Hot Ones Challenge Meets Craft Beer: A Hot Sauce & Beer Pairing
Eatin' and Drinkin' With Lizzie

Have you ever watched Hot Ones? Maybe? No! Or, of course you have—anyone glued to their doom scroll at night more than likely has. If not, let me explain. Hot Ones is a show where celebrities eat progressively spicier hot wings until they're sweating through their eyeballs. Think Jennifer Lawrence crying and asking, “What do you mean?” Over and over. There are memes galore of this snapshot into brutal hot sauce pain.
There is a stark reality to doing a hot sauce challenge. You’re literally standing up and saying that you can handle the heat and the kitchen. You’re sacrificing your taste buds and your guts for probably the next 24 hours to prove that you can handle the heat. I get those feelings of butterflies before we start the challenge, like going on a first date. I get super nervous, but usually, everything works out just fine.
Well, because I'm nothing if not a glutton for punishment (and because beer pairings are my literal jam), Chelsea and I decided to tackle our own version: the infamous Hot Ones challenge paired with craft beer. Ready, Fire, Aim!
Now, back to the pairing, you might be thinking, does beer help or hurt when things get spicy? Did we have a cooler of ice cream on standby? Read on to find out more.
Round 1: Señor Lechuga (1,200 Scoville heat units. From here on out to be known as SHU)
Heat Level: 1/10 Ingredients: Garlic, Avocado Oil, Vinegar, Lemon Juice, Habanero Peppers, Salt
Beer Pairing: ¡Venga! Mexican Lager by Cerveceria Colorado
SRM (Color): 2–6 SRM (very pale straw to gold in color)
IBU (Bitterness): 10–20 IBUs (low bitterness, subtle hop character)
ABV (Alcohol by Volume): 4.9% ABV (light, crisp, easy-drinking)
Why This Pairing: Starting off easy, I wanted something light and crisp to match the mild garlic kick of the sauce. A Mexican lager felt like the perfect companion. Indeed, it was.
Tasting Notes: The sauce was a garlicky delight—savory with a hint of lemon. Just a hint. The ¡Venga! Lager, with its light and refreshing profile, complemented the garlic without overpowering it. An excellent start that had me feeling quite confident. I mean, I often eat hot sauce with my eggs for breakfast. Maybe I’m too confident…
Round 2: Lift Off by Karma Sauce (5,600 SHU)
Heat Level: 2/10
Ingredients: Green Chiles, Vinegar (Infused with Galangal aka ginger, Lemongrass, Kaffir Lime Leaf), Lime Juice, Coconut Water, Coconut Sugar, Garlic, Salt, Toasted Onion, Green Chile Flake, Thai Basil, Cilantro, Spices
Beer Pairing: La Chouffe Blonde by Brasserie d'Achouffe
SRM: 4–7 SRM (pale golden to light amber color)
IBU: 20 (mild bitterness, balanced hop character)
ABV: 8% (medium strength with noticeable alcohol warmth)
Why This Pairing: The sauce's Thai-inspired flavors called for a beer with some complexity. Enter the Belgian Blond Ale, known for its citrus and spicy notes.
Tasting Notes: The sauce brought a funky, herbal heat with the galangal and lemongrass shining. La Chouffe's citrus notes and spicy finish performed what is known as a Khon dance across my palate. Belgian blonds are my new IPA, making the beer the true hero of this round. Two hot sauces in, and I'm geeking out about the flavor explosions. Best day ever!
Round 3: Pickled Garlic Sriracha by Hot Ones (18,000 SHU)
Heat Level: 3/10 Ingredients: Jalapeño Pepper Mash, Distilled Vinegar, Pure Cane Sugar, Key Lime Juice, Garlic, Arrowroot Powder, Water, Salt, Dill
Beer Pairing: Aecht Schlenkerla Rauchbier Märzen
ABV: 5.1% (Märzen style beer, which is a medium-strong lager)
IBU: 28 (smoky, and slightly sweet taste)
SRM: 17-30 (amber to dark brown)
Why This Pairing: The smoky yummy bacon profile of a Rauchbier seemed like the best chance we had in producing a smoked pickle beer. A gamble? Perhaps. A tastebud revolution. You bet!
Tasting Notes: Imagine a smoky pickle—sounds odd, tastes amazing. The sauce's dill and garlic met the beer's bacon-smoked malt head-on, creating a savory, BBQ-like experience. Unexpected? Not at all. Confidence level: Explosive!
Round 4: Elotes Loco Fire Edition by Savir Foods (26,500 SHU)
Heat Level: 4/10
Ingredients: Vinegar, Kosher Salt, Avocado Oil, Nutritional Yeast, Sweet Corn, Chile de Arbol, Ghost Pepper, Cilantro, Garlic, Onions, Spices
Beer Pairing: Irish Red by Lone Tree Brewing Company
ABV: 6% (moderate strength, smooth drinkability)
IBU: 23 (mild bitterness, balancing malt sweetness)
SRM: 9–14 SRM (reddish amber to medium copper-red color
Why This Pairing: Sweet corn and malt? Yes, please. An Irish Red's caramel notes seemed like they'd play ultra nice with the elote-inspired sauce. They did.
Tasting Notes: The sauce's sweet corn and subtle heat found a friend in the malty, slightly sweet Irish Red. The beer's rich and malty backbone elevated the corn's sweetness. Four sauces down, feeling good. Can’t wait for more delicious drinks of beer to pair with these sauces!
Round 5: Los Calientes Rojo by Hot Ones (49,000 SHU)
Heat Level: 5/10 Ingredients: Smoked Red Jalapeño, Habanero, Apricot, Apple Cider Vinegar, Agave Nectar, Lemon Juice, Tomatillo, Water, Garlic, Salt, Toasted Onion, Cumin, Cilantro, Black Pepper, Thyme, Celery Seed
Beer Pairing: Weihenstephaner Hefeweissbier
ABV: 5.4% (light to moderate alcohol content, refreshing and easy-drinking)
IBU: 14 (very low bitterness, hops are subtle)
SRM: 8 (pale straw to golden, hazy/cloudy due to yeast and wheat proteins)
Why This Pairing: The fruity and spicy elements of the sauce seemed like they'd mesh well with the banana and clove notes of a classic Hefeweizen.
Tasting Notes: The sauce's smoky heat and sweet undertones were beautifully complemented by the Hefe's fruity esters. The apple cider vinegar in the sauce popped alongside the beer's effervescence. Halfway through, and I'm thinking, "When does the hot sauce challenge begin?" Read on, because it’s coming.
Round 6: Volkano by Piko Peppers (76,000 SHU)
Heat Level: 6/10
Ingredients: Distilled Vinegar, Roasted Onions, Red Bell Peppers, Habanero Mash, Roasted Habanero Peppers, Lemon Juice, Water, Garlic, Cane Sugar, Sea Salt, Ground Habanero Peppers
Beer Pairing: Black Butte Porter by Deschutes Brewery
ABV: 5.5% (medium strength, robust and smooth)
IBU: 30 (moderate to high bitterness, noticeable hop character)
SRM: 22–40 SRM (very dark brown to black, opaque)
Why This Pairing: Roasted flavors in the sauce called for a beer with depth. A porter with chocolate and coffee notes seemed like a solid choice. And it was!
Tasting Notes: This is where things started to get real. Did you read the ingredient list? Habanero mash and habanero peppers. Did we need both? Yes, for heat purposes we did. The sauce's roasted onion and habanero heat were intense, but the porter's creamy mouthfeel and roasted malt backbone provided a much needed soothing counterbalance. The heat was now building, but the beer seemed to be keeping it in check. I’m fine. You’re fine. We’re all going to be fine.
Round 7: Hot House Hot Sauce by Butterfly Bakery (131,000 SHU)
Heat Level: 7/10 Ingredients: Serranos, Habaneros, Reapers, Ghosts, Carmens, Distilled Vinegar, Tomatoes, Water, Cilantro, Salt, Olive Oil, Lemon Juice Concentrate, Dill, Black Pepper
Beer Pairing: Colette Farmhouse Ale by Great Divide Brewing Company
ABV: 6.5% (Dry, crisp finish, noticeable alcohol warmth)
IBU: 35 (Moderate bitterness, earthy, herbal hops)
SRM: 5–14 (Gold to amber, hazy or clear)
Why This Pairing: A complex sauce with multiple chili peppers needed a beer that could match the dueling personalities of hard working peppers. A farmhouse ale's fruity and slightly tart profile seemed to fit the bill. And with four different yeast strains, the Colette was the lady to get it done.
Tasting Notes: Sadly, or maybe my palette was nearing expiration at this point, the sauce was a bit underwhelming in flavor but definitely packed a punch in heat. The beer, the woman of the hour, stepped up, enhancing the tomato notes and added a refreshing, funky twist. The farmhouse ale was the MVP here, making the experience enjoyable despite the heat. I can confidently reflect and say that I was feeling a bit on the cocky side here. The heat I was tolerating, and I knew I was crushing these pairings.
Round 8: Evolution Hot Sauce by Da Bomb (135,000 SHU)
Heat Level: 8/10
Ingredients: Red hot chili peppers (not the band), water, vinegar, salt, spices (including paprika and turmeric), minced garlic, cane sugar, garlic powder, extra virgin olive oil, onion powder, lemon juice concentrate, cilantro, mint
Beer Pairing: Deadhead IPA (West Coast-Style) by DESTIHL Brewery
ABV: 7% Moderate to higher strength)
IBU: 60 (Very high bitterness, strong hop aroma)
SRM: 5–8 (Golden to copper, clear)
Why This Pairing: Facing the notorious Da Bomb, I shopped tirelessly (Ha! Not for IPAs) for a beer bursting with hoppiness and balanced bitterness to stand up to the impending inferno. This one was going to hurt and I knew it was going to hurt. This hot sauce and I had met in a life I’d lived not a decade before this previous life. A West Coast-Style American IPA, known for its psychedelic hoppiness, fruity aromas and citrusy notes, seemed like the perfect comrade.
Tasting Notes: Da Bomb lived up to its memorable reputation—thick, fiery, delicious and relentless, it felt like a flamethrower to the tongue. Swallow lightly because it’s literally a choking hazard. The Deadhead IPA, with its tangerine and grapefruit aromas from Citra and Mosaic hops, offered a fleeting tropical respite before the heat surged back. The beer's piney finish from Chinook hops tried to douse the flames, but Da Bomb's heat was unyielding. This pairing was less about balance and more about survival. I am officially spiraling into a heat panic. Note: I remember wanting this to be a terrible idea. Why?
Round 9: Sicilian Scorpion by Queen Majesty (816,000 SHU)
Heat Level: 9/10
Ingredients: White Vinegar, Scorpion Peppers, Tomato Puree, Lemon Juice, Olive Oil, Garlic, Peppercorn, Kosher Salt, Toasted Onion, Oregano, Basil
Beer Pairing: Hazy Beer Hug by Goose Island Beer Co.
ABV: 6.8% (Smooth mouthfeel, moderate strength)
IBU: 20 (Moderate bitterness, juicy/fruity hops dominate)
SRM: 3 - 7 (Very pale gold to straw, opaque/hazy)
Why This Pairing: With the Scorpion pepper's intense heat and the sauce's Italian-inspired flavors, I opted for a hazy IPA. Its juicy, fruity notes could potentially complement the tomato and herbs while offering a soothing contrast to the heat. To be fair, my mouth doesn’t scream IPA when I eat Italian, it screams Sangiovase. Same thing right? Not even close but the intrigue had my curiosity peaking. The gamble was about to pay off.
Tasting Notes: The Sicilian Scorpion sauce was a fiery marinara on steroids—rich tomato flavor with a scorpion pepper kick that didn't quit. Hazy Beer Hug stepped up with notes of peaches, white grapes, and guava, creating a tropical oasis amidst the heat. The beer's lower bitterness allowed the fruitiness to shine, offering a brief, blissful distraction from the mouth-numbing spice. Basically the heat kicked the italian and tropical romance out of my taste bud bed right away. At this point I’m just waiting to get the tenth sauce done and out of the way.
Round 10: The Last Dab: Xperience by Hot Ones (2,693,000 SHU)
Heat Level: 11/10 Ingredients: Pepper X pepper, distilled vinegar, Pepper X pepper powder, Pepper X pepper distillate
Beer Pairing: Guinness Draught
ABV: 4.2% (Lower alcohol, smooth, creamy body)
IBU: 45 (Moderate bitterness, balanced roastiness)
SRM: 40 (Black to deep opaque brown)
Why This Pairing: Facing the final boss of heat, I sought solace in the classic, creamy embrace of Guinness. This is where it’s important to recognize being kind to yourself. The smooth, roasted malt character and lower carbonation was the perfect antidote to the fire-nado.
Tasting Notes: Yes, that’s a lot of zeroes. The Last Dab was pure, unadulterated heat—Pepper X in all its glory, delivering a knockout punch to my senses. Amidst this chaos, Guinness was a comforting presence. A pillow on a cement bench. Its velvety mouthfeel and subtle notes of coffee and chocolate provided a soothing balm, tempering the x-factor heat. The true hero of the day. Forget what I said earlier. Guinness, not only good for you, in moderation, but a true first responder to the palette when it comes to a hot sauce pairing. So good at saving lives that even granted additional courage. I went back to the sauces, dabbing again for more flavor, and drinking the fire extinguisher Guinness to fulfill my gluttonous afternoon.
What about the ice cream? Yeah, never had it. Not even the cottage cheese and it wasn’t until I stopped my shenanigans that I sampled the milk for additional relief. By that time it was warm and gross. I’m not a milk drinker to start with, so warm milk was a total turnoff.

Chelsea and the Non-alcoholic’s.
Okay, that totally sounds like the perfect name for Chelsea's next band. A band of pregnant women—but seriously, here's the chicken feet on Chelsea's side of this fiery inferno of an adventure. My interpretation of it anyway. While I was hyper-focused on how my beers stacked up against these blazing hot sauces, Chelsea was quietly navigating her own non-alcoholic beer journey. It seemed to me, based on her commentary, that NA beers don’t quite cut it when it comes to standing up against intense vinegar and heat. Almost every delicate flavor note she was hoping to pick up in her non-alcoholic beers got completely washed away by the sauces. Yet, if you watch the videos, and you totally should, you’ll also notice her palette is queuing right on point for some unique flavors.
That said, Chelsea handled the heat itself like an absolute champ. Honestly, during the challenge she seemed totally unfazed, at least until sauce number ten hit. Pepper X was her demise. Watching her casually breeze through the sauces had me thinking she was immune, but she’s always been able to ‘out heat’ me. I wasn’t surprised. Watching her edit our footage later painted a different picture. Today she laughed, shaking her head and saying, “I must have blacked out during the last four sauces.” Ha! Guess heat-induced amnesia is real when you’re staring down 2.6 million Scoville units.
It’s also worth mentioning she took noticeably smaller dabs of sauce during the challenge (clever girl). But here’s the twist: In the days that followed, Chelsea was still casually dabbing and pouring hot sauces on her snacks while I was begging to keep them far, far away. Turns out she’s not just tougher with the heat—she's more consistent too. These are my surprised words.
When we first started shopping the idea of doing the Hot Ones challenge paired with beer, I questioned whether beer would be a friend or foe. Full transparency, I thought it was a terrible idea. The carbonation and hops in certain beers did amplify the heat, particularly with the West Coast IPA alongside Da Bomb—it was like throwing a match into a tiny gas tank. Boom. Boom. Yet, in other instances, beer was a savior. A path to a fresh start at life and my taste buds. The creamy stout and juicy hazy IPA provided much-needed relief and complemented the complex flavors of the sauces. We are winning no matter how I try to tell this story.
At the end of the day, a beer and hot sauce Hot Ones challenge proved to be a thrilling romantic comedy that I’d do again. Next time, I'll put full sauce on the wings. Oh, that is a bold statement, isn’t it?
Whether you're a vegetarian or a meat-lover, a lover of alcoholic beers or non-alcoholic ones like Chels, there's a hot sauce pairing out there for you. Note to self: the style of beer matters: lagers refresh, IPAs intensify, and maltier, darker beers soothe. Choose your adventure character wisely. These tips could save your palette's life.
Would I embark on this journey again? Ask me after my taste buds recover.
Cheers!
0 notes
Text
Understanding the Unique Properties of AAC Blocks: Pros and Cons

When it comes to modern construction, Autoclaved Aerated Concrete (AAC) blocks have gained immense popularity due to their lightweight, durability, and eco-friendly nature. If you're planning a construction project in Chennai, understanding the advantages and disadvantages of AAC blocks can help you make an informed decision.
At Chennai Civil Supply, we provide high-quality AAC blocks that meet industry standards. In this blog, we’ll explore the unique properties of AAC blocks, along with their pros and cons, to help you decide if they’re the right choice for your project.
Extra Ideas : Check out other blogs Eco-Friendly Construction Materials: The Future of Sustainable Building
What Are AAC Blocks?
AAC blocks are precast, lightweight, foam-like construction materials made from a mixture of sand, cement, lime, water, and aluminum powder. They are cured under high pressure and heat (autoclaving), making them strong, durable, and resistant to fire and pests.
Key Properties of AAC Blocks

1. Lightweight Yet Strong
3-4 times lighter than traditional bricks, reducing structural load.
High compressive strength (3-5 N/mm²), suitable for multi-story buildings.
2. Excellent Thermal Insulation
Keeps interiors cooler, ideal for Chennai’s hot climate.
Reduces AC dependency, saving energy costs.
3. Fire-Resistant
Withstands fire for up to 6 hours, enhancing safety.
4. Soundproofing Qualities
Reduces noise transmission, perfect for urban buildings.
5. Eco-Friendly & Sustainable
Made from natural materials, low carbon footprint.
Less construction waste compared to traditional bricks.
6. Easy to Work With
Can be cut, drilled, and shaped easily, speeding up construction.
Uniform size ensures precise masonry with less mortar.
7. Moisture & Pest Resistant
Resists dampness and mold growth.
Termite-proof, ensuring long-term durability.
Extra Ideas : Check out other blogs Top Ready Mix Concrete Suppliers in Chennai
Pros of AAC Blocks

Lightweight – Reduces dead load on structures, allowing for taller buildings with lighter foundations.
Energy Efficient – Excellent thermal insulation lowers cooling/heating costs.
Fireproof – Enhances building safety in case of fires.
Sound Absorption – Great for homes and offices in noisy areas.
Eco-Friendly – Uses less energy in production and generates minimal waste.
Faster Construction – Larger block size and easy handling speed up work.
Durable – Resists cracks, pests, and weathering better than clay bricks.
Cons of AAC Blocks
Higher Initial Cost – Slightly more expensive than traditional bricks, but saves long-term costs.
Brittle Nature – Requires careful handling to avoid breakage during transport and installation.
Limited Availability – Not all local suppliers stock high-quality AAC blocks (but Chennai Civil Supply does!).
Specialized Fixings Needed – Regular nails/screws may not hold well; requires special anchors.
Curing Time – Needs proper curing to prevent shrinkage cracks.
Extra Ideas : Check out other blogs How to Find M Sand Supplier Near Me in Chennai – A Guide to Choose M Sand Supplier
Why Choose AAC Blocks from Chennai Civil Supply?
Chennai Civil Supply is a high quality premium Brick and Blocks supplier in Chennai, offering a diverse range of high-quality materials for all construction needs. Trust our expertise and reliability to enhance your projects with top-notch bricks. Elevate your construction materials in Chennai endeavors with the finest AAC Blocks from the industry leaders.
At Chennai Civil Supply, we offer:
Premium-quality AAC blocks with consistent strength.
Competitive pricing for bulk orders.
On-time delivery across Chennai.
Expert advice on the best construction materials.
Chennai Civil Supply is your one-stop destination for Purchasing Construction materials Online and AAC Blocks Supplier in Chennai.
Visit Us: 112, Vallalar St, Moorthy Samy Colony, Padi, Chennai, Tamil Nadu 600050
Call Us: 09206312345
Website : https://www.civilsupply.in/
Final Verdict: Are AAC Blocks Worth It?
Yes! Despite a few limitations, AAC blocks offer superior strength, insulation, and sustainability compared to traditional bricks. They are ideal for:
Residential buildings (keeps homes cooler).
Commercial complexes (better fire safety).
High-rise constructions (reduces structural load).
For the best AAC blocks Supplier in Chennai, trust Chennai Civil Supply for quality and reliability.
Contact us today for inquiries and orders
0 notes
Text
Her Voice, Not Mine
I wake to the sound of my name.
Not the name I use now, but the one she always called me. A whisper—panicked, but calm.
I don’t recognize it anymore. It belongs to someone I used to be, someone I’ve shed like old skin. But the voice? The voice is hers. I know that instantly.
My breath catches. She shouldn’t be here. We haven’t spoken in months. Not since we left pieces of each other in the wreckage of what we were.
I sit up, scanning the dark. Nothing. Just the quiet hum of the night. Maybe I dreamed it. Maybe—
Then, again: the whisper. My name.
I swear it’s just behind me.
I turn, pulse hammering, but there’s only my reflection in the dark window. A distorted shape. A face I should know but suddenly don’t.
I close my eyes. Breathe.
She’s not here. She can’t be.
But then it happens again.
At work, during the dinner rush, when the air is thick with heat and the sizzle of grills.
I’m checking orders, scanning the floor, making sure no one’s drowning. The servers weave between tables, arms full of plates. A dishwasher slams shut in the back. A couple outside on the deck laughs too loudly.
And in the middle of it all—her voice.
My name.
The noise should swallow it whole. But I hear it, clear as if she were standing right beside me.
I turn so fast I knock over a glass of wine, red spilling like blood across the table. The guests look at me, startled.
"Sorry," I mutter, grabbing a napkin, my hands unsteady.
I scan the room. Nothing. No one.
I press my fingers to my temples. I don’t have time for this.
But it doesn’t stop.
The walk-in cooler, when I step inside to check inventory. The moment the heavy door swings shut behind me, trapping me in the quiet, her voice presses against my skull.
“You’re not listening.”
I drop a case of limes. They scatter at my feet, rolling into the shadows.
I don’t pick them up. I just get out.
By the end of the week, I can barely think. My staff notices. I catch them exchanging glances when they think I’m not looking.
"Everything okay, ma’am?" my head server, asks one night.
"Fine," I say too quickly.
But it’s not fine.
Because now, I hear her voice even when I know she isn’t speaking.
I hear it when I read the orders on the screen. I hear it layered over customer chatter. I hear it whispering just beneath the clatter of plates and the scrape of silverware.
And one night, after close, when the restaurant is empty and I’m locking up alone—
I hear it right behind me.
My name.
I turn slowly. My breath is shallow. My fingers tighten around the keys in my hand.
There’s no one there.
Of course, there isn’t.
I swallow hard, my throat dry.
I stare at the empty restaurant, at the overturned chairs, the dim glow of the exit sign.
For the first time, I let myself say it.
"You’re not real."
The air is still. The silence stretches.
And then—
A soft, familiar laugh.
“You were never good at knowing what’s real.”
A cold shiver runs through me.
I squeeze my eyes shut, inhale sharply.
When I open them again, the room is silent.
But I know it won’t last.
- Thespianwriter (delusional since 1992)
"She is everywhere; it doesn't matter what voodoo magic I try—giving her back to the ocean, dancing naked under the moonlight, or burning our soul contract—nothing gets rid of her." - ThespianWriter
0 notes
Text
The girls from Ipanema
We woke up at the literal crack of dawn today (04:00) to see the sunrise over Rio at the Dona Marta Viewpoint. The sunrise was vibrant and quite beautiful, but I have to say, I was a little shocked at how many people were there. I would estimate 100 people were crowded on this tiny stone balcony. The guides from all the groups essentially banded together to create a queue system to take a million photos for the women on their tours, which were beautiful, but it, along with girls filming tiktoks, slightly killed the ambiance. Overall, still very beautiful. After that we actually visited the Selaron steps again, this time before any crowds were there. It was nice to have some time to enjoy the art without feeling rushed.
We actually saw an unexpected amount of animals on this tour. We saw a falcon, some monkeys, and even a pig walking in the streets. This pig was enormous. I could have sat side-saddle and ridden him around, no problem.
Our next stop was Christ the Redeemer. We got there before it opened and there was already a small line. I’m so glad we were there early, because apparently the crowds get so thick you can’t even walk. Christ the redeemer was built on a high peak overlooking Guanabana bay, to bless all those who came to Rio. It is one of the seven New Wonders of the world, but it is much newer than all the others (colosseum, Petra, Great Wall of China, etc). Honestly, I don’t get the hype. It’s just a really tall concrete statue of Jesus. I enjoyed seeing the monkeys in the trees and the views of Rio more than anything. You could see North vs South Rio, and there is a clear difference. North Rio is much poorer, and mainly favelas. It has almost no trees, and is just densely packed houses. South Rio is quite wealthy, and very green in comparison. Apparently the shade and climate impact from the trees can make a 5 degree temperature difference between the north and the South.
The last stop on our early morning tour was this beautiful park in called Parque Lage, in Jardim Botanico. It used to be the home of a man who had the house built for his wife, and now the grounds are gardens with walking trails, and the house is used as a beautiful cafe and visual arts school. It sits at the bottom of the Corcovado, where Christ the Redeemer is perched.
We found a lovely little brunch place to eat something after our tour. It was maybe my favourite meal we’ve had. We both got the special, which was avocado toast with this Brazilian cream cheese, fried eggs, and tomatoes. I also finally got a “Brazilian” lemonade. I thought they would be everywhere given the name, but this is the first place I found one! It’s made using whole limes, ice, and sweetened condensed milk. It’s like a key lime pie in a glass. Delicious.
We didn’t have the energy to do much afterwards, so we headed to Ipanema beach to lay in the sun for a couple hours. There is actually a famous song called “the girl from Ipanema”. It was hit worldwide in the 60s, and even won a Grammy! The woman who it was written about is about 70 today, and looks fabulous. She still lives in Ipanema!
It was a good people watching spot. There are so many types of food vendors. Some I understand (drinks, ice cream, chips), but some seem wild to me. Shrimp on a skewer? Boiled corn? Coolers of hamburgers? Styrofoam bowls of rice/noodles/meat that have been out in the sun since 08:00?! Very questionable. Joelle and I brought our own snacks in an effort to save ourselves from food poisoning. We had two classic Brazilian treats: acai, and Globo manioc crisps. The crisps are very airy, light, and mild. They come as either sweet or salty (red vs green bag) and are pretty easy to put away. They are quite dry though. You need to eat them with a liquid. Most of the men selling them also sell mate, an herbal, caffeinated drink similar to coffee/tea. The açai was frozen and mixed with guarana - super refreshing on a hot day. We actually also ate these frozen chocolate covered raspberries. Not Brazilian, but amazingly tart and delicious.
We had a sunset tour of Guarabana bay booked for the later afternoon. It was peaceful and delightful after our early start. We had Antarctica beer (local) and caipirinhas, of course, and when we got hot enough, we jumped off the boat to swim. At the end of a couple hours we were treated to a beautiful view of the sunset behind Christ the Redeemer. Gorgeous.
We had initially planned to try to go to a samba club, but we were dead tired and opted for dinner and then home. We went to quite a nice restaurant in our bathing suits, again, anything goes here, and enjoyed cocktails and a steak dinner. We actually tried to order more food, but the waiter flat out refused to let us, telling us it was “way too much”. Mildly offended, but tired and happy with steak and cocktails, we turned in early for the night. We’re getting old, I think.
0 notes
Text
Improve Your House with Stucco Wall Plaster Solutions Designed Durably
Among the most durable and aesthetically beautiful materials used in modern buildings is stucco wall plaster. For both indoor and outside walls, this adaptable solution provides aesthetic appeal as well as utility. Applied, its firm, long-lasting surface results from a mix of sand, cement, lime, and water. Customizing stucco wall plaster with varying textures, colors, and styles yields a smooth, pleasing finish. Whether applied in historic buildings or contemporary dwellings, stucco provides a sophisticated and ageless appearance that accentuates the whole design of any construction.

Stucco wall plasters have advantages.
Using stucco wall plaster is one of its key benefits in terms of amazing durability. Applied once, it creates a durable, weather-resistant barrier capable of surviving demanding environmental conditions. Stucco holds great resistance against the elements, whether it is subjected to strong heat, cold, or dampness. Furthermore, low-maintenance stucco simply needs occasional cleaning to keep its look. Its energy-efficient qualities enable it to control indoor temperatures, so it is a good choice for buildings and households. For both builders and homeowners, stucco wall plaster is a wise investment because of its mix of strength, adaptability, and energy economy.
Personalizing your stucco wall covering
Regarding outside design, the great range of stucco wall covering choices is one of the most fascinating features of the material. From smooth to rough, or even in artistic designs that give any structure character and appeal, stucco can be put in several textures. Customizing the finish allows homeowners and designers to choose a color that either accentuates the surrounding surroundings or captures their flair. Stucco can also be mixed with other materials, including stone, wood, or metal, to produce distinctive, layered designs that are both contemporary and classic. There are countless opportunities guaranteeing a perfect fit for every project.

Energy Efficient Stucco Wall Covering
One major benefit of stucco wall covering is its capacity to improve the energy economy of construction. Stucco's thermal mass characteristics—that is, its ability to collect and gradually release heat—help to control the temperature within a house or other structure. Especially in areas with severe climates, this can result in notable energy savings. Stucco can help to lessen the need for too much air cooling or heating by keeping inside spaces cooler in the summer and warmer in the winter. Consequently, environmentally aware builders and homeowners trying to design more ecological and energy-efficient living environments find it to be a popular choice.
Stucco wall plaster maintenance and care
Given its very low upkeep compared to other wall coverings, stucco wall plaster appeals to property managers and busy people. Although it's weather-resistant and sturdy, occasional cleaning is necessary to maintain its best appearance. Dirt and grime that could build up over time can be cleaned using power washing, but care should be taken to prevent surface damage. Should damage or cracks arise, repairs are rather simple, and the plaster can be restored to bring back its look. Stucco keeps providing long-lasting beauty and function with little maintenance.
Conclusion
Ultimately, in terms of durability, adaptability, and energy economy, stucco wall covering and plaster provide unparalleled advantages. Stucco offers a useful and pleasing alternative for your walls, whether you are renovating an old house or creating a new one. Its adaptability opens countless design opportunities, and its robustness guarantees long-lasting environmental protection. Companies like spitfireconcrete.com offer professional services to produce outstanding results that improve the curb appeal and value of any property for anyone interested in premium stucco installations.
0 notes
Text
The Importance of Local Rendering Services: Enhancing Construction and Design Projects
Rendering is a crucial aspect of modern architecture and design, offering a smooth, durable, and aesthetically pleasing finish to buildings, walls, and various surfaces. Local rendering services have become an essential part of the construction industry, providing homeowners, builders, and architects with professional solutions that ensure both the visual appeal and longevity of structures. Whether for residential homes, commercial buildings, or public spaces, rendering plays a vital role in protecting surfaces from weather conditions, improving insulation, and boosting the overall look of a project.
What Are Local Rendering Services?
Local rendering services involve the application of a mixture of materials, such as cement, sand, lime, or acrylic, to the external surfaces of buildings. This mixture creates a layer that enhances both the look and function of the walls. There are various types of renderings, including traditional cement render, acrylic render, and silicone-based render, each with its benefits and applications. Local rendering services are typically offered by specialized companies that cater to the unique needs of the local community, ensuring that the work meets the specific building regulations, climate conditions, and aesthetic preferences of the area.

Benefits of Local Rendering Services
Enhanced Aesthetic Appeal One of the primary reasons homeowners and builders opt for rendering services is the improved visual appeal. Rendered walls can be smooth, textured, or even designed to imitate other materials such as brick or stone. The right rendering technique can transform a plain or outdated building into a modern, attractive structure, helping it stand out in the neighborhood or the city.
Protection Against the Elements The weather can have a significant impact on the durability of a building’s exterior. Rendering acts as a protective barrier against moisture, wind, and extreme temperatures. It prevents water penetration, which can lead to issues like damp, mold, and structural damage. This layer of protection is particularly important in areas with harsh weather conditions, as it can prolong the lifespan of a building.
Improved Insulation and Energy Efficiency Many types of rendering, especially those with insulating properties, help to enhance the thermal efficiency of a building. By applying the right render, homeowners can reduce heat loss in winter and keep interiors cooler in the summer. This contributes to energy savings, making local rendering services an eco-friendly and cost-effective option for maintaining comfortable indoor temperatures.
Increased Property Value A well-rendered property often stands out as more polished and well-maintained, which can be an attractive feature for potential buyers or tenants. By investing in local rendering services, homeowners and property developers can increase the market value of their buildings. In competitive real estate markets, this added value can make all the difference when it comes to selling or renting.
Customization and Versatility One of the key advantages of Professional rendering services is the ability to customize the appearance of the finish. With various textures, colors, and finishes available, local rendering companies can help clients achieve the exact look they desire, whether they are aiming for a traditional, contemporary, or cutting-edge design.
Choosing the Right Local Rendering Service
Selecting a local rendering service provider requires careful consideration of several factors, including the quality of materials used, the expertise of the team, and the reputation of the company in the community. It’s important to hire a contractor who has experience with the type of rendering that suits your project’s needs. A reliable rendering service should provide clear communication, professional advice, and a detailed quote that outlines the scope of work and timeline for completion.
Local rendering services are a valuable investment for anyone looking to enhance the appearance, durability, and efficiency of a building. By choosing a skilled local contractor, property owners can ensure that their structures are not only visually appealing but also well-protected against the elements and energy-efficient. Whether for new construction or renovation projects, local rendering can elevate any building’s look and functionality.
0 notes
Text

How to Grow Sweet Potatoes Sweet and nutritious, growing sweet potatoes in your garden can be a rewarding experience! With just a little knowledge and care, you can cultivate these delicious tubers right at home. In this guide, you'll learn the crucials to plant, nurture, and harvest your very own sweet potatoes, making your garden not only beautiful but also bountiful. So, roll up your sleeves, and let's dig into the world of sweet potato gardening together!Choosing the Right Variety While there are many sweet potato varieties available, selecting the right one for your garden can make all the difference in your harvest. Each variety has its unique taste, texture, and growth habits, so you want to choose one that fits your preferences and growing conditions. Explore your options, and consider the space you have and the flavor you enjoy most for a successful sweet potato experience. Popular Sweet Potato Varieties You might want to try some well-loved sweet potato varieties like Beauregard, which is known for its sweet flavor, or the purple-fleshed Okinawan, celebrated for its unique color and taste. Other favorites include Covington for its reliable yield and Japanese sweet potatoes for their creamy texture. Pick one that excites your palate and suits your cooking needs! Factors to Consider for Your Climate Right before you plant, assess your local climate to ensure you pick the best sweet potato variety. Different types thrive in varying conditions, so it's important to consider: Your average growing season length Soil type and conditions Sunlight exposure in your garden Possible pest or disease pressures Thou can ensure a robust sweet potato harvest by aligning your choice with your specific environment. Potato varieties have unique adaptations and can perform better under different climate conditions. Some are suited to cooler environments while others flourish in warm, humid weather. To make an informed decision, take the time to evaluate: Your zone's temperature range Regional humidity levels Soil moisture during the growing season Wind patterns that influence growth Thou will find a sweet potato variety that not only survives but thrives in your garden, leading to a bountiful harvest!Preparing the Soil It's important to prepare your soil properly before planting sweet potatoes. Starting with loose, well-draining soil is key, as sweet potatoes thrive in warm, sandy loam. Make sure to till the soil at least 12 inches deep to allow the roots to spread and grow freely. Adding organic matter, such as compost, can enhance soil fertility and structure, providing your plants with a healthy environment to flourish. Soil Testing and Amendments The first step in preparing your soil is to conduct a soil test. This will inform you of the pH level and nutrient content, allowing you to make informed amendments. Ideally, sweet potatoes prefer a pH between 5.8 and 6.5. Depending on the test results, you might need to adjust your soil by adding lime to raise the pH or sulfur to lower it. Adding organic compost can also help balance nutrients and enhance soil health. Tips for Ideal Growing Conditions Ideal growing conditions for sweet potatoes include warm temperatures and well-drained soil. Here are some tips to help you create the perfect environment for your plants: Choose a sunny location with at least 6-8 hours of sunlight daily. Keep soil temperature around 65°F to 85°F for optimal growth. Ensure good drainage to prevent root rot. Thou should keep an eye on these conditions to help your sweet potatoes thrive! Soil quality plays a vital role in growing healthy sweet potatoes. You should also consider the following aspects to ensure your soil is well-suited for their growth: Incorporate plenty of organic matter to support soil structure. Avoid heavy clay soils that retain too much moisture. Implement crop rotation practices to maintain soil health. Thou will find that these steps will set the stage for a successful sweet potato harvest!Starting from Slips
You can kickstart your sweet potato journey by growing them from slips. Slips are sprouts that grow from a sweet potato and serve as the foundation for your new plants. These green shoots can be planted directly into the soil once they have reached a suitable size, allowing you to cultivate your own delicious sweet potatoes right from home. How to Grow Your Own Slips Some simple steps can help you grow your own slips. Start by placing a healthy sweet potato in a container of water, ensuring that half is submerged. Keep it in a warm, bright location, and in a few weeks, you'll notice shoots emerging from the potato. Once these slips reach about 6 inches in length, you can carefully twist them off and plant them in your garden! Tips for Purchasing Healthy Slips Healthy slips are fundamental to a successful harvest. When purchasing slips, look for those that are robust and green, with no signs of wilting or disease. It's also important to choose slips that have been grown in trustworthy conditions. Here are some tips to ensure you get the best: Inspect for healthy foliage and strong roots. Avoid slips with yellowing leaves or abnormalities. Buy from reputable suppliers specializing in sweet potatoes. Perceiving these details can help you make the right choice for your garden. To ensure that you select the healthiest slips for planting, consider checking the growth conditions as well. Ideally, slips should come from organically grown sweet potatoes to avoid harmful pesticide exposure. Also, don't hesitate to ask the seller about their growing practices and any guarantees on quality. These details can enhance your chances of having a bountiful crop. Look for slips that are stored in a cool, dry place. Choose slips that have been recently harvested. Seek recommendations from local gardeners for trusted sources. Perceiving the advantages of quality slips can pave the way for a successful sweet potato harvest.Planting Your Sweet Potatoes Many gardeners find that planting sweet potatoes is a rewarding experience. You can achieve the best results by choosing healthy slips or whole sweet potatoes and ensuring they are planted at the right time. With the right conditions and care, your sweet potatoes will thrive and reward you with a delicious harvest. When and How to Plant Some of the best times to plant sweet potatoes are late spring to early summer when the soil temperature reaches at least 65°F. You can plant your slips in well-drained soil, making sure to bury two-thirds of each slip to encourage growth. Water them thoroughly after planting, and watch as they grow into a bountiful crop! Spacing and Depth Considerations Little thought should be given to how far apart you place your sweet potato slips. Ideally, you want to space them about 12 to 18 inches apart, allowing enough room for the vines to spread and develop. The planting hole should be around 4 to 6 inches deep, ensuring that the slips are securely anchored while also leaving sufficient space for root development. Potatoes thrive on proper spacing and depth, so it's important to give them room to grow. When planting, consider rising mounds or rows to improve drainage and airflow, supporting healthy plants. By allowing ample space, you not only enhance their growth but also make harvesting easier when the time comes. Keep soil moist but not waterlogged, and you'll set the stage for a fantastic sweet potato yield!Caring for Your Sweet Potatoes Not only do sweet potatoes require sunlight and space to grow, but proper care is also crucial to ensure a bountiful harvest. You'll want to keep an eye on their watering needs and fertilization schedule to make sure they thrive in your garden. Watering and Fertilization Tips Even with the right soil, your sweet potatoes will need consistent moisture and nutrition. Here are some tips to help you: Water deeply and regularly, particularly during dry spells. Use a balanced fertilizer once a month to promote growth.
Avoid over-fertilizing as this can lead to lush foliage but fewer tubers. Knowing these tips, your sweet potatoes will flourish all season! Pest and Disease Management Pest issues can arise with sweet potatoes, like any garden plant, so vigilance is key. You might encounter pests such as aphids, spider mites, or whiteflies that could harm your plants. Keeping the garden clean and removing any affected leaves promptly can help greatly. Management of pests and diseases relies on regular monitoring of your plants and maintaining good garden hygiene. Implementing crop rotation and using organic pest deterrents can also be effective ways to keep your sweet potatoes healthy and thriving. Always be proactive to ensure your sweet potatoes can grow healthy and delicious!Harvesting Your Sweet Potatoes Unlike other vegetables, sweet potatoes thrive underground and can be a delight to harvest. You'll want to give them enough time to mature, usually in about 90 to 120 days after planting. Look for the right conditions—after the leaves start to yellow and before the first frost—so you can enjoy those delicious sweet potatoes at their best. Signs Your Sweet Potatoes Are Ready Your sweet potatoes are ready for harvest when the vines begin to yellow, signaling that the tubers have reached their full size. Additionally, check the soil's temperature; when it cools down to around 50°F (10°C), it's a good indication that the sweet potatoes are not only ripe but also have enhanced sweetness and flavor! Best Practices for a Successful Harvest An effective harvest begins with gentle digging to avoid damaging the sweet potatoes. Use a garden fork or spade to carefully loosen the soil around the plant without piercing the tubers. This helps you lift them out easily. After harvesting, it's important to brush off excess dirt without washing them. Instead of water, allow them to cure in a warm, humid spot for about a week to enhance their sweetness and improve their storage life. Sweet potatoes benefit from proper handling post-harvest to ensure optimal flavor. Provide a soft surface for harvested sweet potatoes to rest on, avoiding any rough treatment. After a week of curing, store them in a cool, dark place, maintaining high humidity to keep them fresh longer. Following these practices will ensure that you enjoy your homegrown sweet potatoes throughout the season!Final Words Now that you know how to grow sweet potatoes, you can enjoy the rewarding experience of watching them thrive in your garden. With just a little patience, the right soil, and some sunlight, you can cultivate delicious, nutritious sweet potatoes for your family. Whether you're planting slips, ensuring proper watering, or harvesting your crop, each step brings you closer to a bountiful harvest. Enjoy the journey, and happy planting! https://gardenreview.us/how-to-grow-sweet-potatoes/?feed_id=244&_unique_id=6731d7433331e https://gardenreview.us/how-to-grow-sweet-potatoes/?feed_id=244&_unique_id=6731d7433331e
1 note
·
View note
Text
How to Combine Bold Colors in Interior Design for Maximum Impact
Bold colors can transform a room, making it feel vibrant, energetic, and even more personalized. While many shy away from using bold hues in interior design, combining them in the right way can create a space that's both visually striking and inviting. Whether you’re decorating a living room, bedroom, or kitchen, the right color combinations can provide maximum impact without overwhelming the senses.
1. Start with a Neutral Base
When combining bold colors, it's essential to have a neutral backdrop. Neutral tones like white, gray, beige, or even muted pastels provide a calm foundation that allows the bold colors to stand out without competing for attention. This balance is key to achieving an overall harmonious look. A neutral base also ensures that the room doesn't become too chaotic, especially when combining multiple vibrant hues.
2. Choose a Color Palette
To maximize the impact of bold colors, it's essential to choose a cohesive color palette. Think about combining two or three bold colors that complement each other. For instance, deep navy blue with mustard yellow or emerald green paired with a warm terracotta can create a chic, modern aesthetic. You can also add contrasting shades—like pairing bright pink with lime green—to bring a playful energy to the room. However, be mindful of how these colors interact, keeping color psychology in mind. Some hues, like yellow and blue, evoke feelings of positivity and calm, while reds and oranges can energize and create excitement.
3. Use Color Blocking
One of the most effective techniques to combine bold colors is color blocking. This involves using blocks or sections of contrasting colors within a space. You could paint one wall in a deep, rich color and another wall in a complementary bold tone, creating a striking visual impact. For example, a teal accent wall paired with a mustard yellow sofa can make a room feel lively and dynamic. When using this technique, it's important to break up the space in a way that feels balanced—perhaps using rugs or large furniture pieces to add structure.

4. Add Bold Accents
If you're hesitant about committing to large blocks of bold color, consider incorporating them in smaller accents. Bold-colored throw pillows, rugs, art, or light fixtures can infuse personality into a room without dominating the space. These accents can act as the focal point of the room and allow for a mix of colors in more subtle ways. For example, a neutral-toned living room can come to life with vibrant throw pillows in rich shades of coral, teal, or mustard. This strategy lets you experiment with bold colors without feeling overwhelmed.
5. Balance Warm and Cool Tones
To avoid creating a space that feels too intense or disconnected, it’s essential to balance warm and cool tones. Cool colors like blues and greens can calm a space, while warm colors like reds, oranges, and yellows inject energy and warmth. Combining these two types of colors in a balanced way can create a space that feels inviting yet lively. For instance, a navy blue and bright orange combination can feel chic and modern when balanced correctly, especially with the right accents or materials.
6. Consider the Function of the Space
The way bold colors interact with the function of the room matters. For example, if you're decorating a living room or family room, you might want to use bold colors to create a sense of warmth and intimacy. In contrast, a home office or kitchen might benefit from cooler tones that inspire focus and productivity. Think about how the room is used daily and choose colors that support that function. A kitchen with bright red and white can feel energetic and inspire creativity, while a bedroom with deep blues and purples may create a serene environment perfect for relaxation.

7. Mix Patterns and Textures
Combining bold colors doesn't just apply to solid colors. Patterns and textures can also play a significant role in creating impact. You can layer bold-colored fabrics, such as velvet cushions or patterned curtains, on bold-colored walls or furniture. Patterns like stripes, florals, and geometric shapes can help break up large blocks of color and add visual interest. A chevron-patterned rug in teal paired with a coral couch, for example, can create a stunning focal point in the room.
8. Test Before You Commit
Bold colors can be intimidating, so it’s always a good idea to test them before committing. Use sample paints on your walls or try out different textiles in various colors. You might find that certain hues don’t work well with your existing decor or that you prefer a slightly different shade. Trying out color combinations on a smaller scale will help you understand how they will affect the mood and feel of the space, and whether they achieve the dramatic impact you're going for.
9. Use Lighting to Enhance Color
Lighting can significantly alter how bold colors appear in a room. Natural light brings out the true tones of your bold colors, while artificial light can add warmth or coolness depending on the type of bulbs you use. Consider how the lighting in a room interacts with your color choices and how it can enhance the boldness of the space. A well-lit room with a bold accent wall can create a stunning visual effect, while dim lighting may make a room feel cozy but a little more subdued.

0 notes
Text
Perfect Harmony: Matching Glass Bangles with Your Outfits

Perfect Harmony: Matching Glass Bangles with Your Outfits
Glass bangles are a timeless accessory that can add a splash of color and personality to any outfit. Their versatility makes them suitable for various occasions, from casual gatherings to formal events. The key to styling glass bangles effectively lies in understanding how to match them with your outfits for a harmonious look. Here are some tips and ideas to help you elevate your style by perfectly pairing glass bangles with your attire.
Understanding Color Theory
When matching glass bangles with outfits, consider the principles of color theory. This will help you choose colors that complement or contrast beautifully with your clothing.
Complementary Colors: These are colors opposite each other on the color wheel. For example, pairing blue bangles with an orange outfit creates a striking effect.
Analogous Colors: These colors sit next to each other on the color wheel. For instance, yellow and green bangles can enhance a dress with shades of green, creating a cohesive look.
Monochromatic Schemes: Using different shades of the same color can also be stylish. For a pastel dress, consider using bangles in various pastel shades for a soft, elegant appearance.
Casual Outfits
For casual outings, glass bangles can add a fun and relaxed vibe to your ensemble. Here’s how to style them:
T-Shirts and Jeans: Pair a basic white tee with denim jeans and stack colorful bangles for a pop of color. Mixing vibrant hues, like turquoise and coral, can create an eye-catching look.
Summer Dresses: For a light sundress, choose bangles in bright colors that reflect the floral patterns in the dress. Layering several thin bangles can add a bohemian touch.
Formal Attire
When dressing up for formal occasions, glass bangles can enhance your elegance without overpowering your outfit.
Evening Gowns: For a sophisticated gown, opt for delicate bangles in metallic colors like gold or silver. A single statement bangle can add a touch of glamour while keeping the focus on the dress.
Cocktail Dresses: Choose bangles that complement the dress color. For instance, if wearing a little black dress, bright red or royal blue bangles can add a vibrant contrast that elevates the look.
Ethnic Wear
Incorporating glass bangles into ethnic wear is a beautiful way to celebrate tradition while maintaining a modern flair.
Sarees: Traditional sarees can be paired with glass bangles that match the saree’s border or embellishments. If the saree is heavily embellished, opt for simpler bangles to maintain balance.
Lehengas: A colorful lehenga can be beautifully complemented by glass bangles in matching hues. Consider a mix of chunky and thin bangles to create a layered effect that adds depth.
Seasonal Styling
Adjust your bangle choices based on the season to reflect the mood and colors of the time.
Spring/Summer: Bright, vibrant colors like fuchsia, lime green, and sunny yellow can enhance your warm-weather outfits. Floral patterns or nature-inspired designs can also be fitting.
Fall/Winter: Rich jewel tones, such as deep burgundy, emerald green, and navy, are perfect for cooler months. Pair these with cozy sweaters or layered outfits to create a chic look.
Accessorizing Tips
When wearing glass bangles, consider the other accessories in your ensemble.
Minimalist Approach: If your bangles are bold and colorful, keep other jewelry simple. A pair of stud earrings or a delicate necklace can complement without overwhelming the look.
Layering Jewelry: If your outfit is understated, you can afford to be bolder with your accessories. Layer glass bangles with other bangles made from different materials like metal or wood for an eclectic vibe.
Occasion-Specific Pairing
Different occasions may call for different styles of bangles:
Casual Lunch Dates: Opt for playful, colorful bangles that reflect your personality.
Weddings or Formal Gatherings: Choose elegant, embellished bangles that can enhance your overall attire.
Workplace: For a professional look, stick to more muted colors or simple designs that convey sophistication.
Personal Style
Ultimately, let your personal style guide your choices.
Statement Pieces: If you have a standout bangle, let it take center stage by keeping the rest of your accessories understated.
Play with Textures: Combine glass bangles with materials like leather or metal for a modern twist on traditional styles.
Conclusion
Matching glass bangles with outfits is an art that can elevate your style and express your individuality. By understanding color theory, considering the occasion, and experimenting with different layering techniques, you can create harmonious looks that reflect your personality. Whether you’re dressing up for a formal event, embracing casual chic, or celebrating cultural traditions, glass bangles are a versatile accessory that can enhance your outfit beautifully.
Embrace the vibrant world of glass bangles and let them be the finishing touch to your ensemble. With a little creativity and attention to detail, you can master the art of styling these beautiful accessories, making them an essential part of your wardrobe.
#Style glass bangles#Fashion glass bangles#Glass bangles designs#Matching glass bangles with outfits#Glass bangles for weddings#Indian glass bangles#Modern glass bangles styling tips
0 notes
Photo

Cooler Days Ahead? Warm Up with a Florida Keys Vacation, Key Lime Sailing Club, Key Largo, FL
0 notes
Text
Eco-Friendly Roof Painting Options: Sustainable Choices for Your Home

As environmental concerns become increasingly prominent, homeowners are seeking ways to make more sustainable choices in every aspect of home maintenance, including Roof Painting Auckland. In Auckland, where diverse weather conditions and unique environmental factors come into play, eco-friendly roof painting options offer a way to protect your home while reducing your ecological footprint. This blog post will guide you through the best sustainable choices for roof painting, highlighting how these options can benefit both your home and the environment.
1. Understanding the Importance of Eco-Friendly Roof Painting
Eco-friendly roof painting goes beyond just choosing the right color or finish. It involves selecting materials and techniques that have a lower environmental impact. Sustainable roof painting options contribute to:
Reduced Carbon Footprint: By using environmentally friendly products, you can minimize the carbon emissions associated with manufacturing, application, and disposal.
Energy Efficiency: Some eco-friendly paints enhance the energy efficiency of your home by reflecting sunlight and reducing heat absorption.
Longevity: High-quality, eco-friendly paints often last longer, reducing the need for frequent repaints and conserving resources over time.
2. Benefits of Eco-Friendly Roof Painting
Opting for eco-friendly roof painting offers several key benefits:
1. Lower Environmental Impact
Eco-friendly paints are formulated with fewer volatile organic compounds (VOCs), which are harmful chemicals that contribute to air pollution and can negatively impact indoor air quality. By choosing paints with low or no VOCs, you contribute to cleaner air and a healthier environment.
2. Improved Energy Efficiency
Certain eco-friendly roof paints have reflective properties that can reduce heat absorption. This helps to keep your home cooler in summer, potentially lowering your energy bills by reducing the need for air conditioning. This energy-saving feature is particularly beneficial in Auckland’s variable climate.
3. Enhanced Durability
Many eco-friendly paints are designed to be more durable and resistant to weathering. This can lead to a longer-lasting finish, reducing the frequency of repainting and minimizing waste.
4. Safe for Your Home
Eco-friendly paints are often safer for homeowners and contractors. They typically contain fewer hazardous substances, reducing the risk of health issues associated with traditional paints.
3. Types of Eco-Friendly Roof Paints
When selecting an eco-friendly roof paint, consider the following sustainable options:
1. Low-VOC and No-VOC Paints
Low-VOC Paints: These paints contain reduced levels of volatile organic compounds. They offer a healthier alternative to traditional paints and are a popular choice for homeowners looking to minimize their environmental impact.
No-VOC Paints: These paints contain zero VOCs, making them the most eco-friendly option. They are ideal for those with sensitivities or allergies and provide a safe option for both indoor and outdoor applications.
Choosing the Right Option: Look for paints that are certified by environmental standards, such as Green Seal or EcoLabel, to ensure their eco-friendly credentials.
2. Reflective Roof Coatings
Cool Roof Coatings: These coatings are designed to reflect more sunlight and absorb less heat. By reducing heat absorption, cool roof coatings help to keep your home cooler and can improve energy efficiency.
Benefits in Auckland: Given Auckland’s diverse weather patterns, reflective roof coatings can help manage heat and reduce cooling costs, making them a practical choice for homeowners looking to enhance their home’s energy performance.
3. Natural and Mineral-Based Paints
Natural Paints: Made from natural ingredients like clay, lime, and plant extracts, natural paints are biodegradable and free from harmful chemicals. They provide a sustainable option for those who prefer to use products derived from natural sources.
Mineral-Based Paints: These paints use minerals such as silicates or silica as their base. They are durable, breathable, and environmentally friendly, offering a long-lasting solution that resists weathering and staining.
Considerations: Natural and mineral-based paints are often more expensive but provide unique aesthetic and environmental benefits.
4. Recycled Paints
Recycled Paints: These paints are made from leftover or surplus paint that has been reprocessed. By choosing recycled paints, you contribute to reducing waste and promoting a circular economy.
Availability in Auckland: Check with local suppliers and paint stores in Auckland to find options for recycled paints. These products can offer both environmental benefits and cost savings.
4. Preparing for Eco-Friendly Roof Painting
Proper preparation is crucial for achieving the best results with eco-friendly roof paints. Follow these steps to ensure a successful application:
1. Roof Inspection and Cleaning
Inspection: Before painting, inspect your roof for damage, such as cracked or missing shingles, rust, or mold. Address any issues to ensure a smooth surface for painting.
Cleaning: Clean the roof thoroughly to remove debris, dirt, and mold. Use environmentally friendly cleaning solutions that do not contain harsh chemicals. Ensure the roof is completely dry before painting.
2. Choosing the Right Tools and Techniques
Tools: Use high-quality brushes, rollers, or sprayers suitable for the type of paint you’re using. Eco-friendly paints may require specific application techniques to achieve optimal results.
Techniques: Follow the manufacturer’s guidelines for application and drying times. Apply the paint in thin, even coats to ensure good coverage and durability.
3. Application Considerations
Weather Conditions: Choose a day with mild weather conditions for painting. Avoid painting in extreme temperatures or high humidity, as these conditions can affect paint performance.
Ventilation: Ensure good ventilation during the application process to disperse any residual fumes and maintain a safe working environment.
5. Maintaining Your Eco-Friendly Roof Paint
To maximize the benefits of eco-friendly roof painting, proper maintenance is essential:
1. Regular Inspections
Conduct regular inspections of your roof to identify any signs of wear, damage, or peeling paint. Address any issues promptly to prevent further damage.
2. Cleaning and Upkeep
Keep the roof clean by removing debris and dirt. Use gentle cleaning methods and avoid harsh chemicals that can damage the paint. Regular upkeep helps maintain the appearance and performance of the paint.
3. Addressing Issues Promptly
If you notice any issues with the paint, such as peeling or discoloration, address them promptly to prevent more extensive damage. Minor touch-ups can help extend the life of the paint and keep your roof looking its best.
6. Eco-Friendly Roof Painting in Auckland
Auckland’s climate presents unique challenges for roof painting, including high humidity and variable temperatures. Choosing eco-friendly roof painting options can help you address these challenges while making a positive impact on the environment.
Local Suppliers and Resources
In Auckland, you can find eco-friendly paint options at various local suppliers and paint stores. Look for products certified by environmental standards and consult with local experts for recommendations tailored to Auckland’s climate.
Professional Services
If you prefer to hire a professional for your roof painting project, seek out contractors who specialize in eco-friendly painting practices. They can provide valuable insights and ensure that the job is done according to best practices for both quality and sustainability.
Conclusion
Eco-friendly Roof Painting Auckland is an excellent way to enhance the sustainability of your home while addressing the unique environmental conditions of Auckland. By choosing low-VOC or no-VOC paints, reflective coatings, natural and mineral-based options, or recycled paints, you can contribute to a healthier environment and improve your home’s energy efficiency.
Let's Connect!
Name: Roof Restore
Address: 78 Jeroboam Loop, Kumeu, Auckland 0892, New Zealand
Phone No: 0800 476 389
0 notes