#it's time to start planning the layout of your user interface. Make a wireframe that depicts the fundamental layout of your interface. You
Explore tagged Tumblr posts
Visit Tumblr Blog
Explore Tumblr blogs with no restrictions, modern design and the best experience.
Last Seen Tumblr Blogs


Fun Fact
69% of Tumblr users are millennials.
Text
Creating a Stunning and Responsive Dashboard with ReactJS: A Comprehensive Guide

Building a collective and visibly engaging dashboard with ReactJS can be both powerful and challenging. A well-designed dashboard not only increases user experience but also make sure smooth data solving and real-time updates.
Whether you're a skilful developer or a beginner exploring ReactJS, or looking to hire remote ReactJS developers, this guide will help you create a dynamic and responsive dashboard that meets latest user expectations.
Planning and Designing Your Dashboard
Before jumping into coding, it's important to correctly plan and design your dashboard. A well-thought-out design sets the bottom for a functional and graceful pleasing interface.
Define Goals & Metrics: Decide what key measures need to be present and make sure they match with user needs.
Wireframing & UI Design: Sketch blueprint to visualize the setup and start a visual hierarchy using appropriate printing and colours.
Responsiveness: Make sure your dashboard is mobile-friendly and change smoothly to various screen sizes.
User Experience (UX): Focus on availability, usability, and inborn navigation to increase user interaction.
Setting Up the ReactJS Project

Once your design is ready, the next step is setting up your ReactJS development environment.
Install Node.js – Make sure you have Node.js installed.
Create a New React Project – Use create-react-app to set up your project well.
Install Dependencies – Include libraries like Axios for data attracting and Chart.js for visualization.
Organize Files – Maintain a structured project with directories for parts, assets, styles, and data.
Run Development Server – Start the server to see real-time changes as you develop.
Component Architecture: Building the Dashboard Layout
Breaking down your dashboard into reusable components makes sure maintainability and scalability.
Main Components: Header, Sidebar, Content Area, Widgets, and Data Visualizations.
State Management: Use React hooks like useState and useContext or libraries like Redux for managing application state.
Responsiveness: Implement CSS Grid, Flexbox, or frameworks like Tailwind CSS to make layouts adaptable.
Styling & Theming: Use styled-components or Material UI for a consistent design theme.
Fetching and Managing Data Efficiently
Efficient data handling is key for an interactive dashboard.
API Integration: Use Axios or Fetch API to retrieve data from servers or third-party services.
State Handling: Store and manage fetched data using React’s useState or useReducer hooks.
Error Handling & Loading Indicators: Display loading animations and error messages to improve user experience.
Filtering & Sorting: Allow users to filter, search, and sort data dynamically.
Enhancing User Experience with Interactions & Real-Time Updates
Adding interactive options makes the dashboard more engaging.
User Controls: Implement buttons, dropdowns, and checkboxes for filtering and sorting.
Real-Time Updates: Use WebSockets or Server-Sent Events (SSE) to update data dynamically without refreshing.
Interactive Data Visualization: Use libraries like Chart.js, D3.js, or Recharts to create insightful graphs and charts.
Optimizing Performance for a Seamless Experience
Optimizing your dashboard ensures smooth performance, even with large datasets.
Code Splitting & Lazy Loading: Reduce load times by splitting JavaScript bundles.
Virtualization: Use React Virtualized for handling large lists efficiently.
Caching & Compression: Store frequently used data locally to minimize server requests.
Performance Testing: Utilize Lighthouse or React DevTools to identify bottlenecks.
Testing and Deployment
Before making your dashboard live, thorough testing makes sure there is bug-free contact.
Unit Testing: Test individual components using Jest and React Testing Library.
Integration Testing: Validate involvement between different parts of the dashboard.
End-to-End Testing: Use Cypress to simulate real-world user interactions.
Deployment: Place the dashboard using platforms like Vercel, Netlify, or AWS.
Conclusion
Creating a responsive and active dashboard with ReactJS needs careful planning, structured development, and a focus on user experience. By following these best practices, you can build a best dashboard that delivers real-time insights better.Whether for business analytics, project management, or monitoring key metrics, a well-built ReactJS dashboard improves decision-making and user engagement. Start with IMENSO software for building today and bring your data to life with ReactJS.
0 notes
Text
Building Your First App with No-Code Platforms
In today's fast-paced digital landscape, anyone can become a creator with the help of no-code platforms. You no longer need to know how to code to bring your ideas to life. With these tools, anyone from a busy entrepreneur to a curious hobbyist can create useful applications that solve real problems. This guide will walk you through the process of building your first app step by step, without writing any code.
No-code platforms let you design applications visually by using pre-built components and workflows. This approach can improve your workflow efficiency and save money. Below, we outline the steps to help you start your app development journey.
Understanding No-Code Platforms
No-code platforms enable users to create applications through graphical interfaces instead of traditional coding. This means you can drag and drop elements, design the look, and set up the logic all without writing a line of code.
Some of the most popular no-code platforms include:
Bubble: Great for web apps, it allows for a high level of customization, with more than 8,000 templates available.
Adalo: Focused on mobile apps, making it notably easy for beginners to create functional applications.
Airtable: It combines spreadsheet simplicity with powerful database capabilities, streamlining project management tasks.
AppGyver: Ideal for building mobile apps quickly, offering a user-friendly interface backed by impressive functionalities.
The convenience of no-code platforms means you can create apps tailored to your needs without learning complex coding languages.
Step 1: Define Your Idea
The cornerstone of your app development is a clear idea. To formulate your concept, consider these questions:
What specific problem is your app addressing?
Who is your intended audience?
Which features are crucial for your idea to become a reality?
Spend time fleshing out your concept. Consider using a mind map or outline to visualize and organize your thoughts. For example, if you want to create a budgeting app for students, determine essential features like expense tracking and budgeting tips.
Step 2: Choose the Right No-Code Platform
With many no-code platforms to choose from, pick one that suits your project's goals. Here are some factors to keep in mind:
Ease of Use: Select a platform that feels comfortable to navigate, especially if you're new to app development.
Features and Flexibility: Ensure the platform offers the functionalities you envision for your app, such as user logins or payment processing.
Integration Capabilities: Check if the platform can connect with other tools you plan to use, like email marketing software.
For instance, if you're creating a task management app, you might find Airtable or Bubble to be particularly helpful due to their organization features.
Step 3: Sketch Your Wireframe
Before diving into the actual build, create a wireframe to outline your app’s layout. A wireframe provides a visual guide for the user experience and interface and doesn't need to be perfect—just an initial layout showing how everything fits together.
You can use tools like Figma or even sketch it on paper. Visualize the main screens of your app. If, for example, your app is a recipe sharing platform, you might sketch a homepage with featured recipes, a search bar, and links to user profiles.
Step 4: Design Your App
With your wireframe in place, it's time to flesh out your app’s visual design. Most no-code platforms feature customizable templates, which streamline the design process.
Here are principles to guide your design:
Consistency: Keep the color scheme and font style uniform throughout your app to create a cohesive look.
Simplicity: Avoid clutter. A clean design makes navigation intuitive.
Accessibility: Ensure that users with disabilities can adequately use your app. Implement features like alt text for images and proper contrast between text and background.
If you're designing an ecommerce app, for instance, make sure that product pages are clear and concise for a better shopping experience.
Step 5: Build Your App
Once your design is ready, it’s time to build your app using your chosen no-code platform. Begin by dragging and dropping your components.
Pay attention to these aspects:
User Authentication: If your app has user accounts, set up secure login systems to manage access.
UI Elements: Incorporate buttons, sliders, and forms to enhance user interaction.
Database Connection: Link your app to a database if it needs to store or retrieve user-generated content. Platforms like Airtable offer built-in database tools.
Utilize tutorials and community forums to troubleshoot any issues that arise.
Step 6: Iterate and Test
After building a prototype, it is vital to test your app and iterate based on user feedback. Get insights from friends, family, or potential users who can provide unbiased opinions.
Consider the following areas during your testing phase:
Functionality: Confirm that all features perform as intended.
User Experience: Gather feedback on the ease of navigation and clarity of information.
Performance: Measure how quickly your app responds. Statistically, a one-second delay can yield a 7% reduction in conversions.
Improving your app is an ongoing process, so be ready to adapt based on feedback.

Step 7: Launch Your App
When you're confident about your app's performance, it’s time to launch. Depending on your app's nature, this could involve publishing it on websites, app stores, or distributing it personally for beta testing.
To optimize your launch:
Create Buzz: Leverage social media, email promotions, and your website to build anticipation.
Gather Feedback: Encourage early users to leave reviews or suggestions after trying out your app.
Plan for Updates: Stay prepared for updates based on initial user feedback.
The hard work leads to this moment, and your launch is just the beginning of your app's journey.
Step 8: Maintain and Update Your App
After launching, prioritize maintaining and updating your app. Analyze user feedback and analytics to pinpoint areas needing attention. Regular updates will keep your app functional and relevant in the ever-changing tech landscape.
Consider maintaining:
New Features: As your user base grows, you may want to implement features that enhance usability.
Bug Fixes: Regular checks guarantee your app operates smoothly.
User Engagement: Keep users informed about updates to foster loyalty and interest.
Your dedication to ongoing improvement will drive your app’s long-term success.
The Journey Ahead
Creating your first app without writing code is a rewarding venture. With no-code platforms, your creativity can shine without technical limitations.
By following this guide—defining your idea, selecting the right platform, and iterating based on feedback—you can transform your concepts into functional applications. As the no-code movement grows, more individuals have the opportunity to step into the world of app development.
Start your journey today, and imagine the possibilities ahead as you watch your app positively impact its users.
#NoCode#AppDevelopment#Entrepreneurship#Startups#AI#Technology#Innovation#Business#Automation#DigitalTransformation#Productivity#SoftwareDevelopment#Bubble#Adalo#Airtable#LowCode#TechTrends#WebApps#MobileApps#FutureOfWork
0 notes
Text
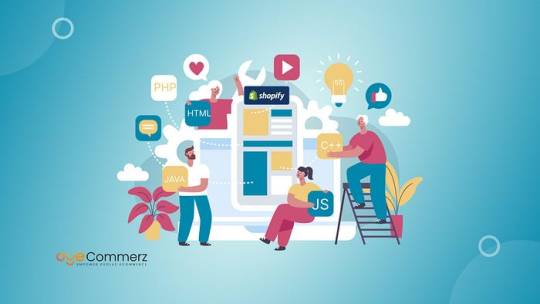
From Idea to Launch: The Shopify App Development Timeline Explained
1. Ideation and Planning: Laying the Groundwork
Every successful app starts with a clear idea. The first step in the Shopify app development timeline is identifying the problem you want to solve or the experience you want to enhance for your customers. Whether you want to simplify inventory management or create a personalized shopping experience, your app should align with your business goals.
During this stage, focus on:
Defining the app’s purpose: What pain points will your app address for your business or customers?
Researching the market: Check out existing Shopify apps to see if there’s something similar, and find ways to differentiate your app.
Establishing a budget: How much are you willing to invest in the development process?
Once you have a clear vision and goals for your app, it’s time to move on to the next phase.
2. Design and User Experience: Crafting the Blueprint
Before diving into development, it’s important to design the user interface (UI) and user experience (UX) of your app. This phase focuses on the look and feel of your app to ensure it’s easy to use and visually appealing.
In this phase, your developers and designers will:
Create wireframes and mockups: This is where the app layout and flow are planned.
Design the user interface (UI): Attention to detail is key here — your app should be intuitive and seamless.
Define the user experience (UX): Make sure that the user journey is smooth, and tasks are easy to complete.
A well-designed app is essential for keeping your customers engaged and satisfied, so take your time with this stage.
3. Development: Building the App
Now comes the exciting part — turning your idea into a fully functional app. During the development stage, your development team will begin coding and building the app according to the wireframes and design specifications.
Key tasks during development include:
Back-end development: Setting up the app’s database and server-side logic.
Front-end development: Creating the app’s interface and connecting it with the back-end systems.
Integrating Shopify APIs: Your app will need to integrate with Shopify’s core features to function properly, such as products, orders, and customer data.
Depending on the complexity of your app, this stage can take anywhere from a few weeks to a few months.
4. Testing and Quality Assurance: Ensuring Flawless Performance
Once the app is developed, it’s time for thorough testing. Quality assurance (QA) is a crucial step to ensure that your app works as expected and meets the necessary performance standards.
In this phase, your development team will:
Test functionality: Check if all features work correctly.
Conduct user testing: Have users try out the app to spot any usability issues.
Ensure compatibility: Verify that the app works across different devices and browsers.
Fixing bugs and optimizing performance is key to delivering a polished app that your customers will love.
1 note
·
View note
Text
How to Use Figma for Stunning UI/UX Designs

Figma has emerged as a powerful tool for UI/UX designers, offering a cloud-based platform that simplifies the design process while fostering collaboration. Whether you’re a beginner or an experienced designer, Figma provides the features you need to create stunning and functional user interfaces. This blog will guide you through the best practices and techniques for using Figma effectively in your UI/UX design projects.
1. Getting Started with Figma
To begin, you need to set up your Figma account and familiarize yourself with its interface:
Create an Account: Sign up on figma.com and choose a plan that suits your needs.
Explore the Dashboard: Understand the layout, including the files section, drafts, and recent projects.
Figma Interface: Familiarize yourself with the design panel, layers, toolbar, and properties panel.
2. Understanding Figma’s Core Features
Figma is packed with features designed to streamline your workflow:
Design Tools: Use shapes, text, images, and vectors to create designs.
Components: Create reusable elements to maintain consistency across designs.
Frames and Layout Grids: Organize your designs and ensure alignment.
Prototyping: Link screens to create interactive prototypes without code.
Collaboration: Work with team members in real-time, providing comments and feedback directly on designs.
3. Setting Up Your Design System
A well-structured design system ensures consistency and efficiency:
Color Styles: Define a color palette and apply it consistently.
Typography Styles: Set up text styles for headings, subheadings, and body text.
Components Library: Create a library of buttons, icons, and UI elements that can be reused across projects.
Auto Layout: Design responsive components that adjust automatically to different screen sizes.
4. Designing UI Elements
Start building your UI with precision:
Wireframes: Sketch basic layouts to outline the structure and flow of your app or website.
Mockups: Add visual details like colors, images, and fonts to create high-fidelity designs.
Interactive Prototypes: Connect frames to simulate user interactions, transitions, and animations.
Responsive Design: Use constraints and grids to ensure your design looks great on all devices.
5. Collaboration and Feedback
Figma’s real-time collaboration features make teamwork seamless:
Sharing Designs: Invite team members to view, comment, or edit designs.
Comments: Leave feedback directly on specific elements within the design.
Version History: Track changes and revert to previous versions if needed.
Design Handoff: Share design specs with developers, including measurements, CSS code, and assets.
6. Plugins and Integrations
Enhance Figma’s capabilities with plugins and integrations:
Popular Plugins: Use plugins for icons, stock images, charts, and more (e.g., Unsplash, Iconify, Figmotion).
Custom Plugins: Develop custom plugins to automate repetitive tasks.
Third-Party Integrations: Connect Figma with tools like Slack, JIRA, and Zeplin for streamlined workflows.
7. Best Practices for Stunning UI/UX Designs
To create exceptional designs, follow these best practices:
Keep It Simple: Focus on clarity and usability. Avoid unnecessary complexity.
Consistent Design: Maintain uniformity in colors, typography, and UI elements.
User-Centered Approach: Design with the user’s needs and behaviors in mind.
Accessibility: Ensure your designs are inclusive, considering color contrast, font size, and keyboard navigation.
Iterative Design: Test prototypes, gather feedback, and refine designs continuously.
8. Advanced Techniques in Figma
Take your designs to the next level with advanced Figma features:
Smart Animate: Create smooth transitions and animations between frames.
Interactive Components: Design components with built-in interactions for prototyping.
FigJam: Use Figma’s whiteboarding tool for brainstorming, mind mapping, and team collaboration.
Design Tokens: Manage design variables like colors and typography consistently across projects.
9. Learning Resources and Community Support
Stay updated and continuously improve your Figma skills:
Figma Community: Explore templates, plugins, and files shared by other designers.
Tutorials and Courses: Learn from Figma’s official resources, YouTube channels, and online courses.
Design Communities: Join forums, Slack groups, and social media communities to exchange ideas and get feedback.
Conclusion
Figma is more than just a design tool; it’s a comprehensive platform for creating, prototyping, and collaborating on UI/UX projects. By leveraging its powerful features and following best practices, you can create stunning, user-friendly designs that stand out. Whether you’re designing a simple app or a complex web interface, Figma provides everything you need to bring your creative vision to life.
0 notes
Text
The Ultimate Guide to Building a Website: From Planning to Launch

Building a website is an exciting yet complex process that requires careful planning, execution, and maintenance. Whether you're creating a personal blog, an e-commerce store, or a corporate website, this guide will walk you through every step—from planning to launch—to ensure your website is functional, user-friendly, and optimized for success.
1. Planning Your Website
Before diving into design or development, it’s crucial to lay a solid foundation for your website. Here’s how to get started:
Define Your Goals and Target Audience
Identify the purpose of your website (e.g., selling products, sharing information, building a community).
Understand your target audience’s needs, preferences, and behaviors.
Choose a Domain Name and Hosting Provider
Select a domain name that is short, memorable, and relevant to your brand.
Choose a reliable hosting provider that offers good speed, uptime, and customer support.
Create a Sitemap and Wireframe
A sitemap outlines the structure of your website, including all pages and their hierarchy.
A wireframe is a visual blueprint of your website’s layout, helping you plan the placement of elements like headers, images, and buttons.
2. Choosing the Right Platform
The platform you choose will determine how your website is built and managed. Here are some popular options:
Content Management Systems (CMS)
WordPress: Highly customizable and beginner-friendly, ideal for blogs, portfolios, and business websites.
Wix: Drag-and-drop builder, perfect for small businesses and personal websites.
Squarespace: Known for its stunning templates, great for creatives and small businesses.
Shopify: Designed for e-commerce, offering robust features for online stores.
Custom Development
If you need a highly unique or complex website, consider hiring a web development company in Kochi to build a custom solution tailored to your needs.
3. Designing Your Website
Design plays a critical role in user experience (UX) and engagement. Follow these tips to create a visually appealing and functional design:
Responsive Design
Ensure your website looks great on all devices (desktop, tablet, mobile).
Use a mobile-first approach to prioritize mobile users.
User Interface (UI) and User Experience (UX)
Keep the design clean and intuitive, with easy navigation.
Use consistent fonts, colors, and styles to maintain brand identity.
Visual Elements
Use high-quality images and videos to enhance your content.
Optimize visuals for fast loading times.
4. Development Process
Once the design is finalized, it’s time to bring your website to life. Here’s what the development process involves:
Front-End Development
Focuses on the visual and interactive aspects of your website.
Uses languages like HTML, CSS, and JavaScript.
Back-End Development
Handles the server-side functionality, such as databases and user authentication.
Uses languages like PHP, Python, or Ruby.
Frameworks and Libraries
Use frameworks like Bootstrap (for front-end) or Laravel (for back-end) to streamline development.
Leverage libraries like React or Angular for dynamic, interactive features.
5. Adding Functionality
Your website needs more than just a pretty design—it needs functionality to meet user needs. Here’s how to enhance your site:
Plugins and Widgets
Add features like contact forms, social media integration, and SEO tools using plugins.
Use widgets to display dynamic content, such as recent posts or testimonials.
E-Commerce Features
If you’re building an online store, integrate payment gateways, product catalogs, and shopping carts.
Platforms like WooCommerce (for WordPress) or Shopify make this process easier.
SEO Best Practices
Optimize your website for search engines by using proper meta tags, alt text, and structured data.
Ensure your site is fast, mobile-friendly, and secure (HTTPS).
6. Testing and Debugging
Before launching, thoroughly test your website to ensure it works flawlessly:
Cross-Browser and Cross-Device Testing
Check how your website performs on different browsers (Chrome, Safari, Firefox) and devices (desktop, tablet, mobile).
Performance Optimization
Use tools like Google PageSpeed Insights or GTmetrix to identify and fix performance issues.
Compress images, minify CSS/JavaScript, and enable caching.
Debugging
Fix any bugs or errors that could affect user experience.
Test forms, links, and interactive elements to ensure they work as intended.
7. Launching Your Website
Once your website is ready, it’s time to go live. Follow these steps for a smooth launch:
Final Checks
Review all content for accuracy and consistency.
Test all functionalities, including forms, buttons, and navigation.
Set Up Analytics
Install tools like Google Analytics and Google Search Console to track traffic, user behavior, and performance.
Submit to Search Engines
Submit your sitemap to Google and Bing to ensure your site is indexed quickly.
8. Post-Launch Maintenance
Your work doesn’t end after the launch. Regular maintenance is essential to keep your website running smoothly:
Content Updates
Regularly publish new content or update existing pages to keep your site fresh and relevant.
Security
Use security plugins or services to protect your site from threats.
Regularly update your CMS, plugins, and themes to patch vulnerabilities.
Backups
Schedule regular backups to prevent data loss in case of technical issues.
Why Choose Professional Web Development Services?
While DIY website builders are great for beginners, professional services offer unparalleled expertise and customization. If you’re looking for web development in Kochi, consider partnering with a trusted agency like SvaHub Media. Their team of experts can help you design, develop, and launch a website that meets your unique needs.
For businesses in Kochi, web development services in Kochi provide end-to-end solutions, from planning and design to post-launch support. Whether you need a simple blog or a complex e-commerce platform, professional developers can deliver a high-quality website that drives results.
Final Thoughts
Building a website is a multi-step process that requires careful planning, execution, and ongoing maintenance. By following this guide, you can create a website that not only looks great but also performs well and meets your goals. Whether you choose to build your site yourself or hire a professional team, the key to success lies in understanding your audience, optimizing for usability, and staying committed to continuous improvement.
If you’re ready to take your online presence to the next level, consider partnering with a web development company in Kochi to bring your vision to life. With the right strategy and expertise, your website can become a powerful tool for growth and success.
0 notes
Text
We Turn Your Vision Into Engaging Mobile Applications

Turning Your Vision into Engaging Mobile Applications: A Journey from Concept to Reality
Mobile applications in today's world are necessary to interact with your customers, upgrade internal processes, and come up with unique experiences for the user. Be a startup with some innovative idea, or be a well-established company looking to come up with some cutting-edge application; converting an idea into a great mobile application requires experience, creativity, and strategic planning. Our company boasts of converting your ideas into a fully realized mobile application that meets your goals while also appealing to your target audience. In this blog, we will explain how we take your vision and develop mobile apps that are functional, engaging, and stand the test of time.
Understanding Your Vision: The Foundation of the Project
Every successful app begins with a clear vision. Before we start designing and developing, we make sure to understand your core idea, business objectives, and the problems you're solving. Our team takes the time to get to know you, your brand, and your users. We believe aligning your vision with the right technology is the first step in making sure that the product works seamlessly for your business and your audience.
During this discovery phase, we conduct in-depth discussions with you to gather insights on:
Target Audience: Who are you building the app for? Are they tech-savvy or do they prefer simplicity? Understanding the demographics, preferences, and behaviors of your audience is crucial for designing an intuitive interface and delivering personalized experiences.
Business Goals: What are your goals for the app? Are you looking to boost sales, enhance customer engagement, provide a new service, or streamline internal operations? Identifying the end goal helps us determine the most suitable features and functionalities for your app.
Competitive Analysis: We also conduct a thorough analysis of your competition. This enables us to identify gaps in the market and discover innovative solutions that will set your app apart from others.
Once we have a solid understanding of your vision, we can begin the planning and strategizing phase to make it a reality.
User-Centered Design: Crafting a Seamless Experience
Designing an app for a mobile is way beyond making it look pretty. A good application should be intuitive, user-friendly, and efficient. We believe in user-centric design, thus making sure the application delivers the best experience as soon as it's touched.

The key elements of our design process include:
Wireframing and Prototyping: Before we start coding, we create wireframes and prototypes of the app. These blueprints give you a clear visualization of the app’s layout, navigation, and user flow. This step helps in identifying potential issues early on and gives you a chance to make adjustments before moving forward.
UI/UX Design: The look and feel of the app are just as important as its functionality. Our design team focuses on creating an intuitive, clean, and aesthetically pleasing interface. We pay attention to every detail—colors, fonts, buttons, and icons—to ensure a visually appealing and easy-to-use design. The user experience (UX) is paramount, and we focus on creating smooth navigation and seamless transitions.
Responsive Design: In today’s world, users access apps on various devices, from smartphones to tablets. We ensure that the design adapts well to different screen sizes, ensuring an optimal experience regardless of the device being used.
Brand Consistency: The design of the app should align with your brand identity. We make sure that the app's colors, fonts, logo, and overall aesthetic reflect your brand’s personality and values. This consistency enhances brand recognition and builds trust with your users.
Development Process: Turning Ideas into Reality
Once the design is approved, the development phase begins. This is where the magic happens—taking your vision and transforming it into a functional, high-performing mobile application. Our development process follows agile methodologies, which allows us to be flexible, adapt to changes, and deliver a product that meets your evolving needs.
Key components of our development process include:
Choosing the Right Technology Stack: We understand that every app is unique, and so are the technologies that power them. Based on your requirements, we select the most appropriate tech stack to ensure the app is scalable, secure, and high-performing. Whether you're building an iOS, Android, or cross-platform app, we use the latest tools and frameworks to ensure top-notch performance.
Backend Development: A great mobile app requires a solid backend. Our backend developers create a robust, secure infrastructure that powers the app’s functionalities. We ensure seamless integration with databases, APIs, third-party services, and payment gateways, depending on the requirements of your app.
Frontend Development: The frontend is what users see and interact with, so it’s crucial that it’s responsive and user-friendly. Our frontend developers work closely with the design team to bring the visual design to life, ensuring that all the elements are interactive, dynamic, and smooth.
Quality Assurance (QA): A bug-free, high-performing app is essential for user satisfaction. Our QA team rigorously tests the app across different devices and platforms to ensure it performs as expected. From functional testing to performance and security testing, we leave no stone unturned to deliver a flawless app.
Security: In an age of increasing cyber threats, app security is more important than ever. We implement industry-standard security practices, including data encryption, secure authentication methods, and secure communication protocols, to ensure that your app and its users' data are protected.
Launch and Post-Launch Support: Ensuring Continued Success
Launching the app is a big milestone, but the journey doesn't end here. After releasing the app in the app stores, we support and maintain the app to make it successful in the long run.
App Store Optimization (ASO): We help you optimize your app listing on app stores to improve its visibility and attract more downloads. This includes writing compelling descriptions, selecting the right keywords, and adding attractive visuals like screenshots and videos.
Monitoring and Analytics: After launch, we monitor the app’s performance, track user behavior, and gather feedback. This data helps us identify areas for improvement and determine whether the app is meeting your business objectives.
Continuous Updates and Enhancements: Technology and user expectations are constantly evolving, and so should your app. We provide regular updates to add new features, fix bugs, improve performance, and ensure compatibility with the latest operating system versions.
Customer Support: We offer ongoing customer support to resolve any issues or questions that users may encounter. A responsive support system is crucial for maintaining a positive user experience and retaining loyal customers.

Why Choose Us?
At our company, we understand that developing a mobile app is a big investment. That's why we are committed to turning your ideas into an app that not only meets your requirements but also exceeds your expectations. Our team of experienced designers, developers, and project managers work collaboratively to ensure the success of your project from start to finish.
Here’s why you should choose us:
Expertise: Our team has years of experience in building mobile apps across a variety of industries, including healthcare, e-commerce, entertainment, education, and more. We have the skills and knowledge to tackle even the most complex projects.
Custom Solutions: We don’t offer one-size-fits-all solutions. Every app we build is tailored to your specific needs, goals, and target audience. We work with you to create a custom app that stands out in a crowded marketplace.
Transparency and Communication: We believe in maintaining open lines of communication throughout the development process. From the initial consultation to post-launch support, we keep you informed every step of the way.
Quality Assurance: We don’t compromise on quality. We ensure that every app we develop is high-quality, secure, and performs flawlessly.
Client-Centric Approach: Our goal is to build long-term relationships with our clients. We listen to your feedback, adapt to your changing needs, and provide continuous support to ensure your app’s ongoing success.
Conclusion
Developing a mobile app is an exciting journey that requires careful planning, creative design, and technical expertise. By turning your vision into reality, we create mobile applications that not only meet your business goals but also provide your users with exceptional experiences. Whether you’re launching your first app or looking to enhance an existing one, our team is here to help you every step of the way. Together, we can turn your ideas into engaging mobile applications that make a real impact. For more info Eloiacs
0 notes
Text
How do I develop a restaurant reservation app?
Imagine a restaurant on a Friday evening. The customers are streaming in, but the host is struggling to manage reservations. This is where the restaurant reservation app comes in – a digital solution designed to streamline bookings and enhance customer satisfaction. In the ever-evolving hospitality industry, such apps have become indispensable. They not only simplify the reservation process but also boost operational efficiency for restaurateurs.
Understanding the Basics
What is a Restaurant Reservation App?
A restaurant reservation app is a mobile platform through which diners can book tables without much hassle. From selecting their preferred seating time to personalizing special requests, these apps cater to the needs of various customers. Some examples like OpenTable and Resy have set the benchmark, showing how these apps can change the face of dining experiences.
Why Restaurant Reservation Apps Are Important?
To customers, these apps present efficiency in making reservations without long wait times or cumbersome phone calls. Restaurants fare better in terms of table turn-over rates, fewer no-shows through reminders, and invaluable data on customer preferences. It's all about a win-win that's hard to ignore.
Market Research
Analyzing User Needs
Knowing your audience is essential in creating a successful app. Are they tech-savvy millennials expecting a seamless experience or perhaps a family that wants extensive previewings of menus? Identifying areas of pain, such as the inconvenience of last-minute reservations without any payment options, will be used in the development process.
Competitor Analysis
Studying industry leaders like OpenTable reveals what works and what does not. Analyze their strengths, such as robust backend systems, and note gaps you can fill, like enhanced personalization or superior loyalty programs.
Core Features to Include
User-Friendly Interface
Your app must be intuitive, with user-friendly design and visually appealing graphics. Easy navigation accompanied by attractive graphics results in a great user experience. Seek inspirations from other successful applications while not afraid to reinvent the wheel.
Reservation System
This system will include real-time updates regarding availability and table management, which helps reduce frustration among your customers.
Personalized User Profiles
Enable users to create profiles that store their dining history, preferences, and loyalty points. This customization improves the user experience and encourages user retention.
Notifications and Alerts
Timely reminders, promotional alerts, and reservation confirmations keep users informed and engaged. Push notifications can also drive repeat business by promoting special offers.
Integration with Payment Systems
Integrate secure payment gateways to help users settle their bills or make deposits easily. This feature increases user trust in addition to providing convenience.
Review and Rating System
Developing a feedback mechanism encourages users to share their experiences. Restaurants can utilize such feedback to enhance service provision and earn credibility.
Planning the Development Process
Defining the Project Scope
Well-defined goals and timelines are essential. Specify the app's purpose, main features, and target audience. Proper planning avoids resource wastage and ensures timely delivery.
Choosing the Right Tech Stack
Use scalable frameworks that can handle increased user loads. React Native and Flutter are the most popular ones, providing flexibility and performance.
Partnering with Experts
Work with a trustworthy development team. Whether it is the Top Mobile app development company in Dubai, the Mobile app development company in Kuwait, or the Best mobile app development company in Abu Dhabi, choose a partner with a proven track record.
The Development Stages
Wireframing and Prototyping
Start with sketching out the app's layout and user flow. You will refine the features in the prototype so that it works smoothly without getting into the code.
Front-End Development
Develop a beautiful and responsive design. Test compatibility across devices and platforms.
Back-End Development
Develop a strong backend that will handle the user data, reservations, and API integrations in an efficient manner.
Quality Assurance
Thorough testing can never be negotiated. Address possible bugs so the app works correctly under varied conditions.
Launching the App
Preparation for Launch
Follow the app store guidelines to the letter to avoid rejection. Invest in pre-launch marketing to create buzz and attract early adopters.
Initial Feedback
Encourage users to give their opinions after the launch. Utilize these suggestions to improve user satisfaction and your app.
Post-Launch Strategies
Updates
Introduce new features periodically to keep users engaged. Address bugs promptly and incorporate user suggestions.
Marketing and Growth
Utilize social media campaigns, collaborate with food bloggers, and consider loyalty programs to attract and retain users.
Conclusion
Developing a restaurant reservation app is an exciting journey filled with opportunities to innovate. By following these steps and partnering with experts, you’ll create an app that not only meets but exceeds user expectations. Now is the moment to make your dream a reality!

0 notes
Text
What Are the Steps Involved in Travel Portal Development?

A travel portal is a website that makes it easy for people to plan and book their trips. You can look for and book flights, hotels, and rental cars all in one place. This guide will help you understand the main steps needed to create your travel portal. Let’s break it down so you can see what it takes to turn your idea into a reality!
Define Your Business Objectives
Before you start building your travel portal, it’s important to know what you want to achieve. Think about these questions:
Are you creating the portal for individual travelers or travel agents?
Who will use it—business travelers, solo adventurers, or families?
What goals do you have in mind? For instance, do you want to boost bookings, make the customer experience better, or increase profits?
Having clear goals will help you create a travel portal that meets your needs effectively.
Conduct Market Research and Competitor Analysis
To create a successful travel website, it's important to understand what your audience wants. Look into what travelers are searching for in a travel platform. Check out your competitors—see what features they have and what makes them popular. Also, find areas where you can offer something new. This research will help you make a travel portal that is different and appealing in the busy travel market.
Plan the Features and Functionalities
The success of your travel portal depends on its features. Make a list of essential and advanced features to include:
Essential Features:
A search engine for flights, hotels, and car rentals.
A real-time booking system.
Secure payment gateways.
User account management.
Advanced Features:
Integration with third-party APIs like flight or hotel suppliers.
Multi-currency and multi-language support to serve global users.
Customer support through chatbots or live chat.
Analytics to track performance and user behavior.
These features will make your portal user-friendly and efficient.
Choose the Right Technology Stack
Technology plays a key role in building travel websites. Choosing the right tools and platforms is very important:
Use programming languages such as PHP, Python, or JavaScript for the website's coding.
Pick reliable databases to store user information and bookings.
Make sure your website works well on mobile devices so people can access it anywhere.
Having a solid tech setup makes your travel website fast, safe, and able to grow as needed.
Design the User Interface (UI) and User Experience (UX)
Design is important because it grabs a user’s attention. Your travel website should be easy to use with a clear layout.
Begin by sketching a wireframe to map out where everything will go. Keep the design clean and simple.
Make sure your website works well on computers, tablets, and phones.
A good design will make users want to return to your site.
Develop the Portal
Now it's time for the building phase. Here's what the development process includes:
Backend Development: This involves creating the booking engine, setting up user accounts, and connecting to other services.
Frontend Development: This is about designing the visual look of the website and making sure it’s easy to use.
Your development team will make sure everything works well together to give users a great experience.
Integrate APIs and Third-Party Services
APIs, or Application Programming Interfaces, let your travel website connect with outside services, like booking flights, hotels, or rental cars. For example, you can:
Use Global Distribution System (GDS) APIs like Amadeus or Sabre to find and book travel options.
Add payment gateway APIs to make sure transactions are secure.
These connections give users access to up-to-date information and many choices for their travel needs.
Test the Travel Portal
Before launching, testing is critical to ensure your portal is error-free and performs well. Types of testing include:
Functional Testing: Ensure the booking process, payment gateway, and other features work correctly.
Performance Testing: Check if the portal can handle high traffic without slowing down.
Security Testing: Protect user data from breaches.
User Testing: Get feedback from a group of users to improve usability.
Thorough testing ensures your portal is reliable and user-friendly.
Launch the Travel Portal
Once everything is ready, it’s time to launch your portal. Deploy it on a reliable hosting platform and optimize it for search engines to attract users. Promote the launch through social media, email campaigns, and other channels. A well-executed launch will help you gain visibility and drive traffic to your portal.
Maintain and Scale the Portal
Launching the portal isn’t the end—it’s just the beginning. Regular maintenance is necessary to keep it running smoothly.
Update features and fix bugs as needed.
Monitor user feedback and improve the portal accordingly.
Scale your infrastructure to handle more traffic as your business grows.
Consistent updates and improvements will help your portal stay relevant in the competitive travel market.
Conclusion
Travel portal development is a step-by-step process that requires careful planning, design, and execution. By following these steps, you can create a portal that meets the needs of your users and helps your business grow. Whether you’re catering to individual travelers or businesses, a well-built travel portal is an invaluable tool to boost your success in the travel industry.
If you’re ready to start your travel portal development journey, consider working with an experienced development team to ensure a smooth and successful process.
0 notes
Text
Mastering App Development: A Comprehensive Guide for Success
The app development industry has revolutionized the way we interact with technology, offering endless possibilities for businesses, entrepreneurs, and tech enthusiasts. App developers india, however, is more than just writing code; it’s about creating a seamless experience that solves a problem or fulfills a need. Whether you’re a beginner or an experienced developer, this blog will walk you through the key stages, challenges, and best practices of app development.
Why App Development Is Essential Today
Apps have become a cornerstone of digital transformation. They drive innovation, connect people, and fuel economic growth. Here's why app development remains indispensable:
Market Penetration: Mobile devices account for over 50% of global internet traffic, making apps an essential tool for engagement.
Competitive Advantage: Businesses with apps gain a competitive edge by offering convenience and accessibility to their users.
Creative Outlet: For developers, app development is a way to bring creative ideas to life while impacting society positively.
Understanding App Categories
Before starting your journey, it’s important to identify the type of app you want to create. The choice depends on your goals, target audience, and budget.
Native Apps:
Built for specific platforms like iOS (using Swift) or Android (using Kotlin).
Offer optimal performance but require separate development for each platform.
Hybrid Apps:
Developed using frameworks like Flutter or React Native.
Provide cross-platform functionality with a single codebase, balancing cost and performance.
Web Apps:
Accessed through web browsers and built with HTML, CSS, and JavaScript.
Easy to develop but lack native app features.
Progressive Web Apps (PWAs):
Combine the best of web and mobile apps, offering offline access and fast load times.
Steps to Building an App
1. Define Your Purpose
Start with a clear vision of your app. Ask yourself:
What problem does it solve?
Who is your target audience?
What features are essential for success?
2. Research and Analyze
Conduct market research to:
Identify competitors and their offerings.
Understand user preferences and pain points.
Assess the demand for your app.
3. Plan Your App
Create a roadmap detailing:
Core functionalities and features.
Monetization strategies (e.g., in-app purchases, ads, or subscriptions).
Timelines and budgets for development.
4. Design the User Experience (UX)
Great apps prioritize user experience. Focus on:
Wireframing: Outline the app’s layout and navigation.
Prototyping: Use tools like Figma or Adobe XD to create interactive designs.
Aesthetic Appeal: Ensure your app is visually pleasing and aligned with your brand identity.
5. Choose the Right Development Approach
Decide between:
Building from scratch: Ideal for unique apps requiring custom solutions.
Using templates or frameworks: Quicker and cost-effective for simpler apps.
6. Development
The development process involves:
Frontend Development: Focuses on the user interface and design elements.
Backend Development: Manages databases, server logic, and integrations.
API Integration: Enables communication between the frontend and backend.
Frameworks like React Native and Flutter can speed up development for cross-platform apps, while Firebase or AWS can handle backend services efficiently.
7. Test Thoroughly
Testing ensures your app is functional, secure, and user-friendly. Conduct:
Functional Testing: Ensures features work as intended.
Performance Testing: Evaluates app speed and responsiveness.
Security Testing: Identifies vulnerabilities and safeguards user data.
User Testing: Gathers feedback from real users to refine the app.
8. Launch and Market Your App
Deploy your app to platforms like the Apple App Store or Google Play Store. Optimize your app listing with:
An engaging app description.
High-quality screenshots and videos.
Keywords for App Store Optimization (ASO).
Promote your app through social media, email campaigns, and partnerships to maximize visibility.
9. Post-Launch Maintenance
Apps require regular updates to:
Fix bugs and improve performance.
Introduce new features based on user feedback.
Adapt to platform updates or market changes.
Challenges in App Development
Developing an app is rewarding but not without challenges. Here are common obstacles and how to address them:
Budget Constraints:
Plan effectively and prioritize features.
Consider using open-source frameworks to reduce costs.
Technical Complexity:
Stay updated on the latest technologies.
Collaborate with skilled developers or mentors.
User Retention:
Focus on providing value and a seamless experience.
Use push notifications and personalization to keep users engaged.
Security Concerns:
Use encryption and secure APIs to protect data.
Regularly update your app to address vulnerabilities.
Best Practices for App Development
Prioritize Simplicity: Make your app intuitive and easy to navigate.
Focus on Scalability: Plan for future growth by building a flexible architecture.
Leverage Analytics: Use tools like Google Analytics to track user behavior and improve the app.
Stay Agile: Adopt an agile development approach for flexibility and faster iterations.
Engage Users: Actively seek user feedback and incorporate suggestions to improve your app.
Emerging Trends in App Development
The website development company in india landscape is constantly evolving. Stay ahead of the curve by embracing these trends:
AI-Powered Apps: AI is transforming apps with features like personalized recommendations and chatbots.
IoT Integration: Apps connecting to IoT devices are on the rise, particularly in smart homes and healthcare.
5G Technology: Faster networks enable richer, more interactive app experiences.
Wearable Technology: Apps optimized for smartwatches and fitness trackers are becoming popular.
Augmented Reality (AR): AR is creating immersive experiences in gaming, retail, and education.
Tools and Resources for Developers
To streamline app development, utilize these popular tools:
Frameworks: React Native, Flutter, Xamarin.
Design Tools: Figma, Sketch, Adobe XD.
Backend Services: Firebase, AWS, Heroku.
Testing Tools: Appium, Selenium, TestFlight.
Version Control: Git and GitHub.
Getting Started with App Development
If you’re new to app development, here are some tips to get started:
Learn Programming Basics: Familiarize yourself with programming languages like Swift, Kotlin, or JavaScript.
Start Small: Build simple apps to practice and gain confidence.
Join Communities: Engage with other developers on forums like Stack Overflow, GitHub, or Reddit.
Take Online Courses: Platforms like Udemy, Coursera, and Codecademy offer valuable resources.
Conclusion
Website design company is a rewarding journey that combines creativity, technical expertise, and problem-solving. By following the right process and staying updated with industry trends, you can create impactful apps that stand out in the competitive market. Whether you’re building an app to solve a problem, start a business, or pursue your passion, the possibilities are endless. Start your journey today and turn your vision into a reality!
1 note
·
View note
Text
Beginner’s Guide to Professional Web Development
In today’s digital world, having a strong online presence is key for any business. Whether you’re just starting or want to revamp your site, working with a web design company can bring your vision to life. For many business owners, web development in Melbourne can feel tough and unclear. In this guide, we will walk you through each step so you can approach a web company with clear expectations.

Why Professional Web Development Matters?
Start by seeing why expert web development and SEO services in Melbourne are key. A smart, sleek site can:
Earn trust and loyalty from users
Lift your brand’s reach online
Refine user paths to keep them on
Raise search rank, letting more users find you
Boost sales by turning clicks into buys
With so much riding on this, pick a web help team skilled in both tech and style to craft a site that suits your work.
1. Initial Consultation and Discovery Phase
Web development in Melbourne starts with a consultation. You will meet with your team to discuss your goals, objectives, and website vision. In this phase, you’ll share your preferences, like design style, features, and functions. This is also when developers collect key details to guide the project.
What happens during the discovery phase:
Business Goals: What do you want your site to do? More traffic? Sales online? Lead generation?
Target Audience: Who do you want to reach? Knowing your audience helps create a user-friendly design.
Competitor Analysis: The team may review competitor sites. This helps you understand what works in your field.
Budget and Timeline: Set a clear budget and timeline. This ensures everyone is aligned on the project.
At this stage, talk is key. Be ready to share your needs clearly. This sets the tone for the whole project.
2. Planning and Strategy
Once the discovery phase ends, the team will map out your website. This is when the web development in Melbourne begins to take shape. The planning stage includes:
Site Architecture: The team will define the site’s layout, menu, pages, and content flow.
Wireframes: Wireframes are blueprints for your site. They show the layout of each page without design details. They help plan how your content fits.
Content Strategy: Content is key to any website. This stage decides the types of content needed (text, images, videos, etc.) and how to organise it.
The planning phase is key to building a site that works well and looks great. The clearer the plan, the easier the next steps will be.
3. Design and Development
With a plan set, the design and build phase starts. This is where your site takes shape to look great. You’ll work with a designer to make sure your web development in Melbourne fits your brand and appeals to your users.
Design Process:
Visual Design: The designer will craft drafts or image models of your site. These will show shades, fonts, and art.
User Interface (UI) Design: This step works on an easy-to-use page plan. It boosts how users feel when they use your site.
Feedback Loop: You will view and test the drafts. You can give input to match your idea.
Development Process:
Front-End Development: The front-end is the part users see and use. This step turns the draft into a live site with HTML, CSS, and scripts.
Back-End Development: The back-end is the tech side of your site. It runs files, tools, and all active parts shown to users.
A skilled web team must know both front-end and back-end. This keeps your site sleek, fast, and simple to use.
4. Testing and Quality Assurance
Before your site goes live, it faces strict checks. This step during web development in Melbourne ensures that all works well and that the user flow stays smooth. Tests often check:
Forms and Links: Ensuring all links, forms, and clicks work.
Browsers: Make sure the site runs fine on Chrome, Edge, and others.
Mobile Use: Testing how well the site fits phones and tabs.
Speed: Checking load times and site pace for smooth use.
Fixing Issues: Clearing bugs or errors to get it live.
This stage is key to a solid launch.
5. Launch and Post-Launch Support
After web development in Melbourne, the team ensures to test the site. After which it’s set to launch. The team will send the site to your live domain and check that all works well. This is a big step, yet it’s not the close of the task.
Post-launch work has these steps:
SEO Optimisation: Make sure the site stays search engine smart by fixing tags, titles, and pics.
Training: The team will show you how to use the CMS if you need to edit the site.
Ongoing Care: Fixes, updates, and checks keep your site in top shape.
Most web design firms give post-launch help to fix any issues that show up once the site goes live.
6. Marketing and Enhancements
Once your site is live, you need to promote it. A good site works if people find it. SEO, social media, and content marketing can help bring traffic and turn visitors into customers.
Some firms also offer site upgrades, like adding features, using third-party tools, or growing the site’s functions as your business grows.
Key Considerations for Choosing the Right Web Development Company
Picking the best team for web development in Melbourne is key to the success of your plan. Here are key points to note:
Experience and Portfolio: Find a firm with a great record of building sites for firms like yours.
Client Reviews: Read posts and speak to past users to check the firm’s trust and service.
Clear Process: Be sure the firm has a neat, clear plan for tasks and chats.
Skill in Tech: Ensure the firm knows the tools and sites that fit your needs (e.g., WordPress, Shopify, custom builds).
Post-Launch Help: Make sure they give post-launch aid and can add tools in time to come.
Concluding Words
Web development in Melbourne and globally is a complex task. With the right team, it can boost your online presence. This will help your business grow. From the first chat to support after launch, every step is key. Each phase ensures your site is useful, eye-catching, and easy to use. When you know the process and set clear goals, you can work well with a web development company. This will bring your business online.
Want a website designed for your business? Contact Make My Website to learn how we can help. We build sites that look great and drive results. Our team is ready to help you bring your vision to life.
0 notes
Text
The Ultimate Guide to iPhone App Creation

The world of mobile apps has expanded exponentially in recent years, with iPhone apps taking a central role in this revolution. iPhone app development has become a booming industry as businesses look to tap into the vast potential of the iOS ecosystem. Whether you're a startup, a small business, or a large enterprise, having a dedicated app for your brand on the iPhone is essential to reach customers, increase engagement, and improve overall business efficiency. However, creating a successful iPhone app involves more than just coding. It requires careful planning, design, development, and marketing.
Step 1: Define Your App Idea
The first step in creating an iPhone app is defining your idea. What problem does your app solve? Who is your target audience? What unique features will your app offer? These are some of the key questions you need to answer before moving forward.
Start by brainstorming the core concept of your app. Whether you are building a social networking app, an e-commerce platform, or a productivity tool, a solid idea is the foundation for everything that comes next. Make sure your app idea aligns with your business goals and addresses a real pain point for your users.
Once you’ve clarified your concept, it’s time to move on to designing your app. The design phase is crucial because the user experience (UX) and user interface (UI) will determine how successful your app will be in the competitive market.
Step 2: Design the User Experience (UX) and User Interface (UI)
Design plays a pivotal role in iPhone app creation. The design should be intuitive, engaging, and easy to navigate. If users find the app difficult to use, they are likely to abandon it, no matter how great the features are.
The first step in the design process is creating wireframes, which are low-fidelity representations of the app’s layout. This gives you a blueprint of how the app will flow and how users will interact with it. From wireframes, you can move on to designing the actual UI, including buttons, icons, color schemes, and fonts.
In addition to aesthetics, the UX design must ensure that the app is easy to navigate, fast, and responsive. Remember, iPhone users expect a high level of performance and design quality. A clean, attractive design combined with a seamless experience will set your app apart from the competition.
Book an Appointment with our experts to help you design a user-friendly and visually appealing iPhone app that enhances user engagement.
Step 3: Choose the Right Development Approach
Now that you have your app idea and design in place, it’s time to choose the right development approach. There are several options to consider, depending on your resources, timeline, and target audience.
Native iPhone App Development: Native apps are developed specifically for iOS using programming languages like Swift or Objective-C. These apps provide the best performance and user experience but require more time and resources to develop.
Hybrid App Development: Hybrid apps use a combination of web technologies like HTML, CSS, and JavaScript to create cross-platform apps that work on both iOS and Android. While hybrid apps are faster and more cost-effective to develop, they may not offer the same level of performance as native apps.
Web Apps: A web app runs in a browser and doesn’t need to be downloaded from the App Store. These are typically easier and cheaper to create, but they can’t fully utilize iPhone hardware or offline capabilities.
Selecting the right development approach depends on your app's functionality, budget, and long-term goals. A mobile app cost calculator can help you get an estimate of the overall cost of development, whether you're going for a native or hybrid approach. By inputting the app’s features, design complexity, and other factors, you can get a better understanding of the costs involved.
Step 4: Develop the App
Once you've settled on the development approach, it’s time to start building the app. This phase involves coding the app's functionality, integrating APIs, and ensuring it performs smoothly on all supported iPhone models.
If you’re using native iOS development, your development team will use languages like Swift and tools like Xcode to code the app. For hybrid apps, developers might use frameworks like React Native or Flutter. During this phase, developers will work closely with designers to ensure the app works as intended and maintains the look and feel of the wireframes and UI designs.
In parallel with development, you will need to test the app to identify bugs and performance issues. Quality assurance testing should be done at every stage of the development process to ensure that the app runs smoothly on various devices and operating systems.
Step 5: Launch and Market the App
After the app has been developed and thoroughly tested, it’s time to launch it on the App Store. Before doing so, make sure to prepare all necessary marketing materials, such as a compelling app description, eye-catching screenshots, and a video demonstrating the app’s features.
Marketing your app is crucial to its success. Create a pre-launch campaign to build anticipation among potential users. Consider investing in digital marketing strategies, such as social media ads, influencer partnerships, and app store optimization (ASO), to increase visibility and downloads.
Once the app is live, monitor user feedback closely and address any issues or bugs quickly. Regular updates with new features or bug fixes will help keep users engaged and improve your app’s rating on the App Store.
Step 6: Continuous Improvement and Updates
The launch of your app is just the beginning. Continuously gathering feedback from users and tracking app performance through analytics tools will help you identify areas for improvement. Regular updates, new features, and performance enhancements are essential to keeping your app relevant and competitive.
An effective way to ensure your app remains in top shape is by keeping a close eye on user reviews and implementing changes based on feedback. Furthermore, you should stay updated with iOS platform changes and trends to ensure your app stays compatible with the latest devices and iOS versions.
Final Thoughts
Creating an iPhone app is an exciting and rewarding venture that can significantly impact your business. However, successful iPhone app creation requires thorough planning, design, development, and marketing efforts. By choosing the right development approach, crafting an engaging design, and ensuring quality through continuous testing, your app will be well-positioned for success.
As you move forward with your iPhone app creation journey, remember to focus on providing real value to your users. Whether you're launching a simple app or an advanced platform, user experience should always be your priority.
For businesses looking to scale their mobile offerings, iOS app development is a critical area of focus. Building an iPhone app not only enhances customer engagement but also drives business growth in the long term.
0 notes
Text
A Step-by-Step Guide to Developing Your First Mobile App
Mobile app development can seem like a daunting task, especially if you're new to the world of coding and app design. But with the right approach, anyone can build their first mobile app, whether you're looking to create a personal project, a business solution, or something entirely unique. This guide will walk you through the essential steps to get started on your first mobile app, from idea to launch.
1. Define Your App’s Purpose and Goals
Before you dive into development, it's crucial to have a clear vision of what your app will achieve. Start by asking yourself the following questions:
What problem does your app solve? Consider your target audience and how your app can make their lives easier or more enjoyable.
What features will your app offer? Identify the core functionalities your app needs, such as user authentication, in-app purchases, notifications, or location tracking.
What platforms will your app support? Will it be for Android, iOS, or both? Defining this early on will help determine the tools and technologies you need to use.
Tip: Write down your goals, including a list of features and how you envision the user experience (UX). This will serve as the blueprint for your app development process.
2. Choose Your Development Approach
There are different approaches to mobile app development, each suited to different needs and skill levels. Choose the one that fits your project.
a. Native App Development
Native apps are developed specifically for a particular platform (iOS or Android). They offer the best performance and full access to platform-specific features.
iOS: Developed using Swift or Objective-C within Xcode.
Android: Developed using Java or Kotlin within Android Studio.
b. Cross-Platform App Development
Cross-platform frameworks allow you to build one app for both iOS and Android. Popular frameworks include:
Flutter (using Dart)
React Native (using JavaScript)
Xamarin (using C#)
Cross-platform development can save time and resources, but it might come with some performance trade-offs compared to native apps.
c. No-Code or Low-Code Development
If you don’t have coding experience, there are platforms like Appgyver, Bubble, and Adalo that allow you to create apps with little to no code. These tools provide a drag-and-drop interface and simplify the development process.
3. Design the User Interface (UI)
The user interface (UI) is one of the most important aspects of your app. A clean, intuitive design ensures a positive user experience and can significantly impact the success of your app.
a. Wireframe Your App
Start by sketching out your app’s layout, including all the screens and how users will navigate between them. Tools like Sketch, Adobe XD, or Figma allow you to create digital wireframes and mockups.
b. Design the UI
Once the wireframe is in place, focus on the look and feel of the app. Choose colors, fonts, icons, and design patterns that align with your brand and create a smooth user journey. Pay attention to:
Button placement
Color contrast for readability
Touch targets for mobile screens
c. Build an Interactive Prototype
Use the wireframe to create an interactive prototype. This helps you test user flow and get feedback before moving into the actual development phase.
4. Set Up Your Development Environment
Now that you’ve planned your app and its design, it’s time to set up the tools you'll use for development. Here are some essential steps for setting up your development environment:
a. Install IDE (Integrated Development Environment)
For iOS: Download and install Xcode, Apple's IDE for iOS app development.
For Android: Download and install Android Studio, the official IDE for Android development.
For Cross-Platform: If you choose Flutter or React Native, install their respective development environments and required dependencies.
b. Set Up Version Control
Use version control systems like Git to manage your code. Platforms like GitHub or GitLab provide remote repositories where you can store and collaborate on your code.
5. Start Coding Your App
This is where the magic happens. Start building your app according to the design and features you defined earlier.
a. Set Up the App’s Structure
Begin by creating the main project structure for your app. This involves defining the main screens, navigation, and initial setup.
b. Add Features
Integrate the features you’ve outlined in the planning stage. Depending on the platform you're using, you’ll interact with different libraries and APIs to enable functionality such as:
Authentication: Add user login and registration functionality using Firebase, OAuth, or custom servers.
Location Tracking: Use GPS services for apps that require location-based features.
Push Notifications: Implement push notifications using Firebase Cloud Messaging or Apple's Push Notification Service (APNs).
c. Test Regularly
It’s important to test your app regularly during development. Use unit testing and debugging tools to ensure the app works correctly and doesn’t contain major bugs.
6. Test Your App Thoroughly
Testing is an essential step to ensure your app runs smoothly on all devices. There are several types of tests you should perform:
a. Functional Testing
Make sure all features of the app work as intended, such as buttons, navigation, and forms.
b. Usability Testing
Evaluate the user experience by getting feedback from real users. Does the app have an intuitive design? Is the navigation easy to understand?
c. Performance Testing
Test the app's performance, including load time, speed, and responsiveness. Ensure the app functions well on both high-end and lower-end devices.
d. Compatibility Testing
Test the app on different devices and operating systems (iOS and Android) to ensure it works across a variety of screen sizes and OS versions.
e. Beta Testing
Before the official launch, release your app as a beta version to a small group of testers to catch any last-minute issues.
7. Publish Your App
Once your app is ready and thoroughly tested, it’s time to launch. Here’s how to publish your app on the major app stores:
a. Publishing on the Apple App Store
Create an Apple Developer Account.
Prepare the app’s listing, including the title, description, screenshots, and keywords.
Submit the app for review. Once approved, it will be available on the App Store.
b. Publishing on Google Play
Create a Google Play Developer Account.
Prepare your app’s listing with the necessary information.
Upload the APK or AAB file and submit the app for review. Once approved, your app will be available on Google Play.
8. Promote and Maintain Your App
After launching your app, your work isn’t done. Focus on marketing and maintaining your app:
Marketing: Promote your app on social media, blogs, and websites. Use app store optimization (ASO) techniques to increase visibility.
User Feedback: Encourage users to leave reviews and use feedback to improve the app.
Updates: Regularly update the app to fix bugs, add new features, and improve performance.
Conclusion
Developing your first mobile app can be an exciting and rewarding experience. By following these steps—from defining your app’s goals to launching it on app stores—you can turn your idea into reality. With persistence, attention to detail, and constant learning, you’ll be able to create an app that users love. Whether you're building a simple utility or a complex solution, the key is to start small, iterate based on feedback, and continue improving.
0 notes
Text
Typography Tips for Figma Landing Pages

A well-crafted landing page can make or break the first impression users have of your product or service. With Figma, designing a landing page becomes a seamless process, thanks to its intuitive interface, powerful tools, and collaborative capabilities. Whether you’re a seasoned designer or a beginner, creating a Figma landing page that grabs attention and converts visitors requires a mix of creativity, strategy, and technical know-how.This guide explores how to design an effective Figma landing page, covering essential elements, design principles, and actionable steps to ensure success.
What is a Landing Page?
A landing page is a standalone web page, distinct from a website’s main pages, designed with a single focused goal — typically to drive conversions. Whether it’s capturing leads, promoting a product, or encouraging downloads, every element of a landing page should work toward that specific goal.
Key characteristics of a landing page include:
A clear and compelling headline.
Minimal navigation to keep the focus on the call-to-action (CTA).
Engaging visuals and concise copy.
A prominently displayed CTA button.
Benefits of Using Figma for Landing Page Design
1. Collaborative Capabilities
Figma’s real-time collaboration allows designers, developers, and stakeholders to work together seamlessly. Feedback can be provided directly on the design, reducing iteration time.
2. Design Consistency
Figma’s components, styles, and libraries ensure design consistency across the landing page. You can reuse buttons, typography styles, and other elements to create a cohesive look.
3. Prototyping and Testing
With Figma’s prototyping tools, you can create interactive mockups to test user flows and gather feedback before development.
Essential Elements of a Figma Landing Page
1. Hero Section
The hero section is the first thing visitors see and sets the tone for the entire page. It should include:
A strong, benefit-driven headline.
Supporting subheadlines that add context.
A visually engaging image or illustration.
A clear CTA button.
2. Value Proposition
This section communicates what makes your product or service unique. Use concise copy, supported by icons or visuals, to highlight key features and benefits.
3. Social Proof
Testimonials, reviews, or case studies can establish credibility and trust. Incorporate logos of clients or publications, along with user testimonials.
4. Call-to-Action (CTA)
The CTA should be prominently displayed, easy to spot, and action-oriented. Examples include “Sign Up Now,” “Get Started,” or ��Learn More.”
5. Visual Hierarchy
Use Figma’s grids, frames, and spacing tools to create a clear visual hierarchy. This ensures that visitors’ attention is guided to the most important elements.
6. Responsive Design
With Figma’s responsive design features, such as auto-layout and constraints, you can design for various screen sizes, ensuring your landing page looks great on desktop, tablet, and mobile.
Step-by-Step Guide to Designing a Figma Landing Page
Research and Planning
Understand Your Audience: Define your target audience and their needs. What problem does your product or service solve?
Set a Goal: Determine the primary objective of the landing page — whether it’s generating leads, driving sales, or building awareness.
Gather Inspiration: Look at competitor landing pages or design inspiration platforms like Dribbble and Behance.
Wireframing
Before diving into Figma, create a low-fidelity wireframe to outline the layout and structure. Use placeholder text and shapes to plan sections such as the hero area, value proposition, and testimonials.
Set Up Your Figma File
Create a new project in Figma and set up artboards for different screen sizes.
Define a color palette, typography styles, and component library to maintain consistency.
Design the Hero Section
Add a striking headline that conveys the page’s purpose.
Use a high-quality image or custom illustration to capture attention.
Place the CTA button in a highly visible location.
Build the Content Sections
Use Figma’s grids and alignment tools to maintain a clean layout.
Incorporate visuals such as icons, charts, or animations to break up text-heavy sections.
Highlight key features or benefits with cards or bullet points.
Add Social Proof
Include testimonials, client logos, or success stories. Use Figma’s text and layout tools to create visually appealing quote blocks or carousel-style testimonials.
Design for Responsiveness
Use Figma’s auto-layout feature to make elements adapt to different screen sizes.
Preview designs on various devices to ensure a consistent experience.
Best Practices for a Successful Landing Page
1. Focus on a Single Goal
Avoid cluttering the page with multiple CTAs or distracting elements. Keep the design focused on a single objective.
2. Use High-Quality Visuals
Images and illustrations should be clear, relevant, and high-resolution. Avoid stock images that feel generic or overused.
3. Prioritize Speed
Optimize visuals and design elements to ensure fast loading times. A slow landing page can lead to high bounce rates.
4. Keep Copy Concise
Use short, impactful sentences that highlight benefits and value. Avoid jargon or overly technical language.
Examples of Successful Figma Landing Pages
1. Dropbox
Dropbox’s landing page features a clean design with a simple headline, concise copy, and a prominent CTA. The use of white space and intuitive navigation enhances the user experience.
2. Slack
Slack’s landing page highlights its value proposition with engaging visuals and clear CTAs. The page incorporates testimonials and customer logos to build trust.
Conclusion
Designing a landing page in Figma requires a balance of creativity, technical skill, and user-centric thinking. By focusing on clarity, consistency, and responsiveness, you can create a landing page that not only looks great but also drives results. Remember to continuously test and refine your design based on user feedback to ensure it meets its intended goals. With Figma’s powerful features, the possibilities for crafting impactful landing pages are endless.
My Fiver link for : Figma Landing Page Design Service
0 notes
Text
Custom vs. Template Websites: What Web Development Companies in Arizona Recommend
When we say "what's trending," we’re talking about what people across industries are diving into. Sure, we can’t claim to know everything that’s trending, but when it comes to the business world, we’ve got a solid hunch. These days, every business wants a digital presence. It’s no surprise that having a website is a must—whether it’s a single page or a multi-page platform, it’s the first step to standing out.

Now comes the big question: custom or template?
This choice isn’t just about aesthetics; it shapes your brand’s online identity, how users interact with your site, and even how much you’ll spend. Feeling torn and confused? You’re not alone. Businesses across Arizona and beyond grapple with this decision all the time.
Custom websites sound fancy—and they are! They’re like a tailored suit: made to fit your brand perfectly. Templates, on the other hand, are like ready-to-wear outfits: budget-friendly and easy to use.
That being said, how do you know which one suits best for business needs? This will be answered by the end of this blog.
Whether you want a unique design or just need to get your website live fast, a web development company Arizona can guide you through the process. Let’s break down the details, and weigh the pros and cons. Let's start!
What Goes Into a Custom Website?
A custom website isn’t just built overnight. It’s crafted step by step to meet your business needs perfectly. Here’s a quick look at the stages:
Discovery & Planning Think of this as the blueprint phase. It’s where developers understand your brand, your audience, and your goals. They’ll research competitors, map out the structure, and draft wireframes.
Develops & Design Development stages are mainly related to coding. You need a language geek for this stage. The design stage is where creativity shines. Developers create mockups that align with your brand’s vibe. Every detail, from color schemes to fonts, is fine-tuned for your audience. User experience (UX) and user interface (UI) design ensure the site is both functional and visually appealing. Many companies nowadays use wireframing and prototyping to see how their plan is coming along. This helps them to take feedback from you and other clients alike.
Content CreationGood content makes or breaks a site. After the design and functionality of the website, its content can take your business from rags to riches. After all, what is the purpose of content if you can influence & persuade people with it? This phase involves writing catchy, SEO-friendly text and sourcing high-quality visuals to keep visitors hooked.
DevelopmentThis is the techy part. Front-end developers build the site’s appearance, while back-end developers create the engine that makes it work. Features like content management systems (CMS) make it easy for you to update content later.
TestingBefore launch, the website goes through rigorous testing. Many called it a soft launch. Developers ensure it works seamlessly on all devices, browsers, and screen sizes.
Launch & Post-Launch Maintenance After a final review, the site goes live for the world to see. Even after the launch, the work isn’t over. Regular updates, security patches, and performance monitoring keep your site running smoothly.
Why Choose a Custom Website?
Custom websites bring a lot to the table, especially for businesses with specific goals. Here’s why:
Unique Brand Identity & Position A custom site is all about you. No cookie-cutter layouts here. You get a design that reflects your brand perfectly. You can have anything in this option like -personality, identity, and positioning.
Scalability A custom site can adapt as your business expands, adding features when needed. You can add a landing page or separate blog section any time when your business needs it.
Tailored Functionality Whether it’s booking systems or e-commerce tools, custom sites can handle your specific needs effortlessly.
Enhanced Performance Do we have to elaborate on this? I think not! Built with clean code, custom websites load fast and perform smoothly.
SEO Benefits A custom build gives you full control over SEO settings, helping your site rank higher on search engines.
That being said, there is plain truth i.e. custom websites aren’t for everyone. They take more time, cost more, and require skilled developers. If you’re considering one, look for website development services that align with your budget and vision.
What About Templates?
Templates are great for businesses that need a quick, affordable solution. They come with pre-designed layouts that you can tweak to fit your needs.
Here are some upsides:
Cost-Effective Templates are easy on the wallet. Many are free or inexpensive, making them ideal for startups.
Fast to Launch With everything pre-built, you can have your site live in days, not months.
User-Friendly Platforms like WordPress and Wix make it simple to edit templates without coding skills.
Responsive Design Most templates are mobile-friendly, so your site looks great on any device.
But here’s the catch:
Limited Customization While templates can be tweaked, they might not allow the level of personalization you want.
Overhead Code Templates often come with extra features you don’t need, which can slow down your site.
Lack of Uniqueness There’s always the risk of looking like someone else. After all, others can buy the same template.
Custom or Template: How to Choose
Still not sure which route to take. Here’s a quick breakdown:
Go Custom If:
You need a unique design
Your website requires advanced features.
You’re planning for growth.
Go Template If:
You’re on a tight budget.
You need a website up quickly.
Your site’s needs are simple.
What Web Development Companies Arizona Say
Many website development services in Arizona suggest that custom websites are best for businesses aiming for long-term growth and uniqueness. On the other hand, they believe that templates are great for startups or businesses looking for a quick, affordable solution. Or someone just starting and they do not have a digital presence and footprint.
Also, experts in Design and software development believe that a custom website may be worth the investment if you want full control and scalability. If you’re unsure, consulting a web development company in Arizona can help. They’ll guide you through the decision-making process, ensuring your choice aligns with your business needs.
Final Thoughts
That’s it from our side on this topic. We understand that the coin has two sides the same way everything has the same pros and cons. What is more interesting is that what is cons for you may be pros for another person. That’s why we have tried to give both sides so that you decide what will work for you. Choosing between custom and template designs comes down to your budget, timeline, and goals.
After all, Having a well-built website or software can do wonders for your online business.
Or if you are thinking of going for Design and software development services you can have an idea of what these professionals are talking about. You can understand technicality a little bit better if you do not have technical know-how. Through this write up we want to help confuse founders like you to make sound decisions.
Looking for the best Web development company Arizona, for your business, get in touch with Yelling Wolf.
#YellingWolf#DigitalSolutions#WebDevelopment#WebDesignServices#CustomWebDevelopment#EcommerceDevelopment#ResponsiveDesign#AppDevelopment#MobileApps#iOSAppDevelopment#AndroidAppDevelopment#CustomAppSolutions#MobileAppAgency#SoftwareDevelopment#CustomSoftware#SoftwareSolutions#TechConsulting#EnterpriseSolutions#GraphicDesign#CreativeDesign#UXUIDesign#VisualDesign#Branding#SEOExperts#DigitalMarketing#SEOServices#LocalSEO#MarketingSolutions
0 notes
Text
A Complete Guide to Collaborating with Mobile App Development Professionals: What to Anticipate📱👩💻
Embarking on the journey of developing a mobile app can be both exciting and daunting. Whether you're a startup founder, a business owner, or an individual with a brilliant idea, partnering with mobile app development experts is a key step towards bringing your vision to life. To ensure a smooth collaboration and successful outcome, it's essential to know what to expect when working with these professionals. Here’s a comprehensive guide to help you navigate the process. 🌟🚀
1. Initial Consultation and Discovery Phase 🎯
The first step in working with mobile app development experts is the initial consultation and discovery phase. This is where the groundwork for your project is laid.
Understanding Your Vision: Experts will start by discussing your app idea, objectives, and target audience. They’ll seek to understand your business goals, the problems your app aims to solve, and your vision for its features and design.
Scope and Requirements: Together, you'll define the scope of the project, including key functionalities, technical requirements, and budget constraints. This phase helps set clear expectations and a roadmap for development.
2. Research and Planning 📊
Once the initial discussions are complete, the experts will conduct thorough research and planning to ensure a well-informed development process.
Market Research: Experts will analyze your competitors, market trends, and user preferences to identify opportunities and potential challenges. This research helps in designing a competitive and user-friendly app.
Technical Feasibility: They’ll evaluate the technical aspects of your project, such as platform compatibility, technology stack, and integration needs, to ensure that your app can be built within the desired parameters.
3. Design and Prototyping 🎨
The design and prototyping phase is where your app begins to take shape visually and functionally.
Wireframes and Mockups: Mobile app development experts will create wireframes and mockups to illustrate the app’s layout, structure, and user interface. This helps you visualize how the app will look and function before development begins.
Feedback and Iteration: You'll review the designs and provide feedback. Experts will make necessary revisions to ensure that the design aligns with your vision and meets usability standards.
4. Development and Coding 💻
With the design approved, the development phase kicks off. This is where the actual coding and technical work happen.
Front-End Development: Experts will start building the user interface and user experience elements of your app, ensuring that it’s visually appealing and easy to navigate.
Back-End Development: This involves setting up the server-side logic, database management, and integration with APIs. It’s crucial for ensuring that the app functions smoothly and handles data efficiently.
Regular Updates: Throughout the development process, experts will provide regular updates on progress, including milestones and any issues encountered. This keeps you informed and allows for timely adjustments.
5. Testing and Quality Assurance 🧪
Testing is a critical phase to ensure that your app performs reliably and meets quality standards.
Functional Testing: Experts will test all app functionalities to ensure they work as intended. This includes checking for bugs, glitches, and any issues that could affect user experience.
Performance Testing: They’ll evaluate the app’s performance, including load times, responsiveness, and stability, to ensure it handles various scenarios effectively.
User Testing: User testing involves real users interacting with the app to provide feedback on usability and overall experience. This helps identify any areas for improvement before launch.
6. Launch and Deployment 🚀
Once testing is complete and any issues have been resolved, it’s time for the app’s launch and deployment.
App Store Submission: Mobile app development experts will handle the submission process to app stores, such as Google Play and the Apple App Store. They’ll ensure that all requirements are met and that the app is optimized for approval.
Launch Strategy: Experts will help you plan and execute a launch strategy, including marketing and promotional activities, to generate buzz and attract users to your app.
7. Post-Launch Support and Maintenance 🛠️
The work doesn’t end with the launch. Ongoing support and maintenance are essential for ensuring your app’s continued success.
Bug Fixes and Updates: Experts will monitor the app for any post-launch issues and provide timely bug fixes and updates to address any problems that arise.
Feature Enhancements: Based on user feedback and market trends, experts can help you plan and implement new features and improvements to keep the app relevant and engaging.
Performance Monitoring: Regular performance monitoring ensures that the app continues to run smoothly and efficiently. Experts will provide insights and recommendations for optimizing performance as needed. To find more information about mobile app development services, you can also visit various online sources.
8. Communication and Collaboration 🗣️
Effective communication and collaboration are key to a successful partnership with mobile app development experts.
Clear Communication: Establishing clear lines of communication helps ensure that your ideas, feedback, and concerns are addressed promptly. Regular meetings and updates keep everyone on the same page.
Collaboration Tools: Experts may use collaboration tools like project management software to share progress, track tasks, and facilitate teamwork. This helps streamline the development process and keeps the project organized.
9. Budget and Timeline Management 💵
Managing budget and timeline expectations is crucial for a successful project.
Cost Estimates: Experts will provide cost estimates and budget planning based on the project’s scope and requirements. This helps you understand the financial aspects and avoid unexpected expenses.
Timeline Adherence: They’ll create a development timeline with key milestones and deadlines. Regular updates help ensure that the project stays on track and meets its deadlines.
10. Strategic Advice and Insights 📈
Mobile app development experts offer valuable strategic advice and insights to help you make informed decisions.
Market Trends: They can provide insights into current market trends, user preferences, and emerging technologies, helping you stay ahead of the competition and make strategic decisions for your app.
Business Impact: Experts will help you understand how your app fits into your overall business strategy and how it can drive growth, engagement, and revenue.
Conclusion 🎉
Working with mobile app development experts is a collaborative and dynamic process that involves several key phases, from initial consultation to post-launch support. By understanding what to expect at each stage, you can effectively manage the development process and ensure that your app meets your vision and business goals. With the right experts by your side, you can navigate the complexities of app development and achieve a successful launch, setting the stage for ongoing growth and success. 🌟📱🚀
0 notes
Text
How to Build a Blablacar Clone App: A Step-by-Step Guide

Building a Blablacar clone app is an exciting venture for entrepreneurs interested in the ride-sharing industry. Blablacar has revolutionized carpooling, allowing drivers to share their rides with passengers traveling along the same route, making travel more affordable and environmentally friendly. This guide provides a step-by-step approach to developing your own Blablacar clone app, covering everything from initial planning to deployment.
Market Research and Planning
Understanding the Market
Before diving into development, it's crucial to conduct thorough market research. Analyze the existing ride-sharing market, including competitors like Blablacar, UberPool, and Lyft Line. Understand their strengths and weaknesses, and identify gaps in the market that your app could fill.
Defining Your Target Audience
Identify your target audience based on demographics, geographic location, and travel behavior. Understanding your potential users will help you tailor the app’s features and marketing strategies to meet their needs.
Setting Clear Objectives
Determine the primary objectives of your Blablacar clone app. Are you focusing on reducing travel costs, promoting eco-friendly transportation, or providing a more convenient travel option? Clear objectives will guide your app's development and marketing efforts.
Designing the User Experience (UX)
Wireframing and Prototyping
Start by creating wireframes that outline the basic structure and flow of your app. Tools like Figma, Sketch, or Adobe XD can help you design and prototype the user interface (UI). Your goal should be to create an intuitive and user-friendly design that simplifies the carpooling process for both drivers and passengers.
User Interface Design
The design of your Blablacar clone app should be visually appealing and easy to navigate. Focus on creating a clean layout with consistent branding, easy-to-read typography, and intuitive navigation elements. The app should have distinct sections for drivers and passengers, each with its own set of features.
User Journey Mapping
Map out the entire user journey, from the moment they open the app to the completion of a ride. This includes account creation, searching for rides, booking a ride, payment processing, and rating the experience. Ensuring a smooth user journey is key to retaining users.
Key Features and Functionalities
User Registration and Profiles
Allow users to register using their email, phone number, or social media accounts. Both drivers and passengers should be able to create detailed profiles that include personal information, profile pictures, and preferences for travel (e.g., smoking, and music preferences).
Ride Search and Booking
Develop a robust ride search feature that allows passengers to find rides based on their desired route, date, and time. Once they find a suitable ride, they should be able to book a seat with just a few clicks.
Payment Integration
Integrate secure payment gateways to facilitate smooth transactions. Consider offering multiple payment options, such as credit/debit cards, digital wallets, and bank transfers. Ensure that payment processing is secure and complies with industry standards.
Real-Time Communication
Implement an in-app chat or messaging system that allows drivers and passengers to communicate before and during the ride. This feature enhances the user experience by making it easier to coordinate pickup locations and other details.
GPS and Navigation
Integrate GPS functionality to allow real-time tracking of rides. Passengers should be able to track the driver’s location, and drivers should have access to navigation tools to ensure efficient routes.
Rating and Review System
Allow both drivers and passengers to rate and review each other after a ride. This feature helps build trust within the community and ensures that users are accountable for their behavior.
Notifications and Alerts
Implement push notifications to keep users informed about ride confirmations, cancellations, payment receipts, and other important updates. Notifications should be customizable, allowing users to choose what they want to be notified about.
Safety Features
Incorporate safety features such as driver verification, emergency contact options, and ride-sharing with friends and family. These features help build trust and ensure a safe ride-sharing experience for all users.
Backend Development
Choosing the Right Technology Stack
Select a technology stack that best suits your app’s needs. For the front end, consider using frameworks like React Native or Flutter for cross-platform development. For the backend, Node.js, Ruby on Rails, or Django are popular choices for building scalable applications.
Database Management
Set up a database to store user information, ride details, payment records, and other critical data. PostgreSQL, MongoDB, or MySQL are commonly used databases that offer reliability and scalability.
API Development and Integration
Develop APIs to connect the frontend with the backend. These APIs should handle user authentication, ride search and booking, payment processing, and other core functionalities. Additionally, integrate third-party APIs for features like GPS tracking, payment gateways, and social media logins.
Security Protocols
Implement security measures to protect user data and prevent unauthorized access. Use encryption protocols, secure authentication methods (e.g., two-factor authentication), and regular security audits to safeguard the app.
Testing and Quality Assurance
Functional Testing
Conduct extensive functional testing to ensure that all features of the app work as intended. Test the app’s performance under different conditions, including high traffic, various device types, and different network speeds.
Usability Testing
Perform usability testing to gather feedback on the user experience. This testing helps identify any areas where users may encounter difficulties, allowing you to make necessary adjustments to improve usability.
Security Testing
Carry out security testing to identify and fix vulnerabilities. This includes testing for data breaches, payment security, and user authentication processes. Regular security updates are essential to maintaining the app’s integrity.
Beta Testing
Release a beta version of your Blablacar clone app to a select group of users. Gather feedback on the app’s performance, usability, and overall experience. Use this feedback to make final adjustments before the official launch.
Launch and Marketing
App Store Submission
Submit your Blablacar clone app to both the Apple App Store and Google Play Store. Ensure that the app meets all submission guidelines and is optimized for searchability with appropriate keywords, descriptions, and screenshots.
Marketing and Promotion
Develop a marketing strategy to promote your app. Utilize social media, content marketing, influencer partnerships, and paid advertising to reach your target audience. Offering promotional discounts or referral programs can also help attract early adopters.
Monitoring and Analytics
After launching the app, use analytics tools to monitor user behavior, app performance, and other key metrics. This data is invaluable for making informed decisions on future updates and improvements.
Continuous Improvement
Gathering User Feedback
Regularly gather user feedback to understand their needs and identify areas for improvement. Use surveys, in-app feedback forms, and social media interactions to collect this information.
Rolling Out Updates
Based on user feedback and performance data, roll out regular updates to enhance the app’s features, fix bugs, and improve security. Continuous improvement is essential for maintaining a competitive edge in the market.
Expanding Features and Services
Consider expanding the app’s features and services as your user base grows. This could include adding new ride categories, expanding to new regions, or integrating additional payment options.
Conclusion
Creating a Blablacar clone app with an on-demand app development company requires strategic planning, a focus on user experience, and continuous improvement. This approach ensures a scalable and profitable ride-sharing platform that meets the needs of both drivers and passengers. Success hinges on thorough research, thoughtful design, and responsiveness to user feedback and market trends.
#blablacar clone app#app like blablacar#blablacar clone script#readymade blablacar clone app#blablacar clone app development#blablacar clone#ride-sharing app development#carpooling script
0 notes