#im608
Explore tagged Tumblr posts
Visit Tumblr Blog
Explore Tumblr blogs with no restrictions, modern design and the best experience.
Last Seen Tumblr Blogs


Fun Fact
In February 2021, Tumblr had 518.6 million blog accounts.
Text
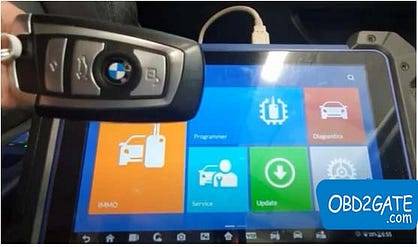
Autel IM608 Program Key for BMW CAS4 CAS4+ via OBD
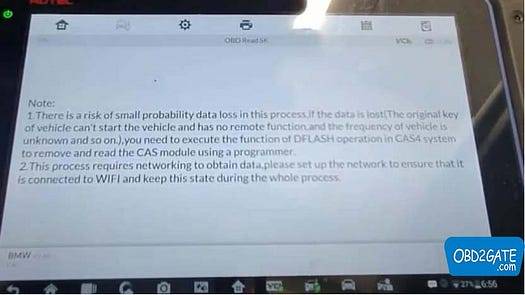
Autel MaxiIM IM608 II can program BMW CAS4 and CAS4+ keys using OBD, without needing to open the ECU box. Remember, a network connection is essential during the whole process.
For instance, let’s consider BMW F30 key programming:
Important Notes:
For CAS4, the procedure for adding a key in case of all keys lost remains the same; ISN retrieval is unnecessary.
For CAS4+ all key lost scenarios, attempt to read the Engine ISN code under ISN code management. If this is not supported, explore alternative methods to acquire the ISN code.
The subsequent steps are identical to adding a key. To determine the CAS system type, access “ECU information.”
Programming Procedure:
Connect IM608 II to the OBD2 port of your BMW.
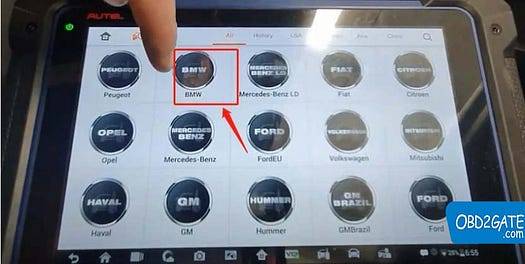
Navigate to “BMW” in the device.
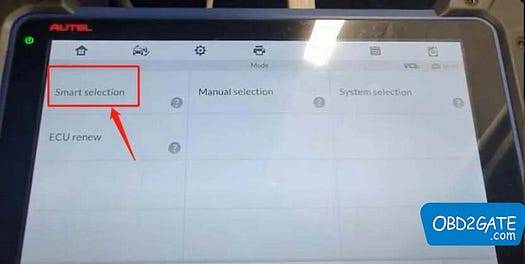
Opt for “Smart Selection.”
Choose “Mini (Europe) > Smart Mode.”
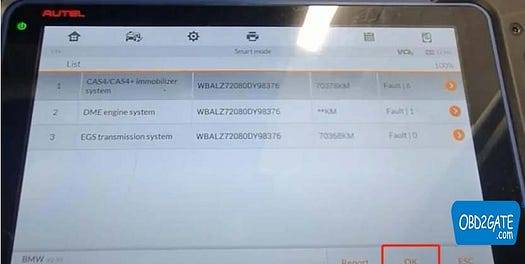
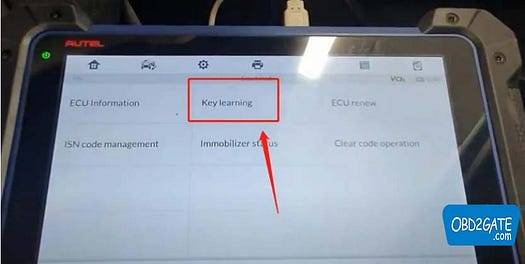
Select “Key Learning” followed by confirming vehicle information with “OK.”
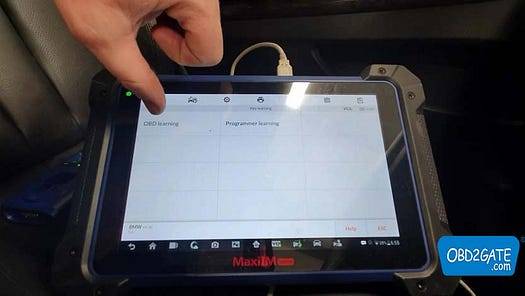
Proceed to “OBD Learning” >read the provided instructions, click ‘OK’
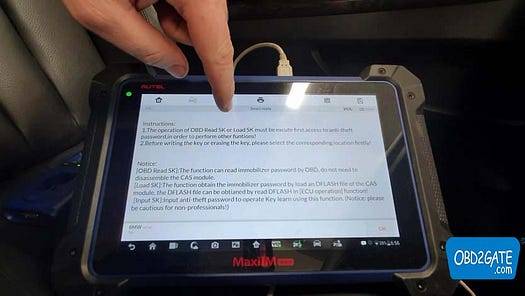
Click “OBD Read SK” on MaxiIM IM608> read notes.
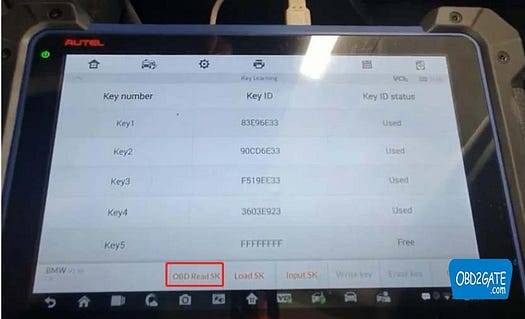
Respond to the question about having a working key with “Yes” or “No.”

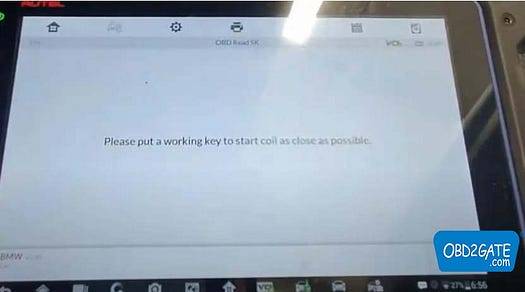
Position a working key as close to the start coil as possible.
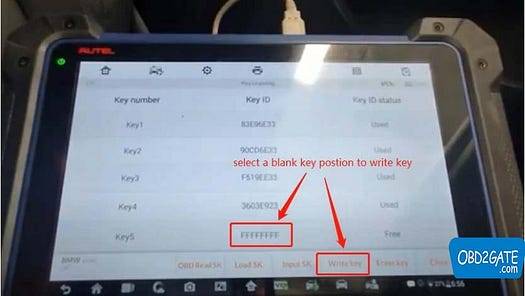
Successful reading of the password.
Pick an empty key position for key writing.
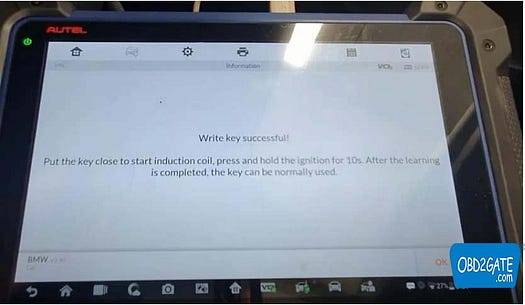
Place the new key near the starting coil. Key frequency: 868MHZ.
The key learning process consists of two steps.

Key writing is completed successfully.
By adhering to the instructions on Autel MaxiIM IM608 II, the entire process will be effortlessly accomplished!
Check Autel im608 pro II price on OBD2GATE.com:
2 notes
·
View notes
Text
How to Virginize Mercedes CR3.23 ECU with Autel IM608/IM508?
Customer problem:
I can’t virginize cr3.23 mercedes ecu. Can you help me do this with Autel IM608?
Eobdtool.co.uk engineer gives the suggestion below.w.
Please refer to the Mercedes W212 Delphi ECU CRD3.10 ECU to read and get the special key number from ECU with IM508.
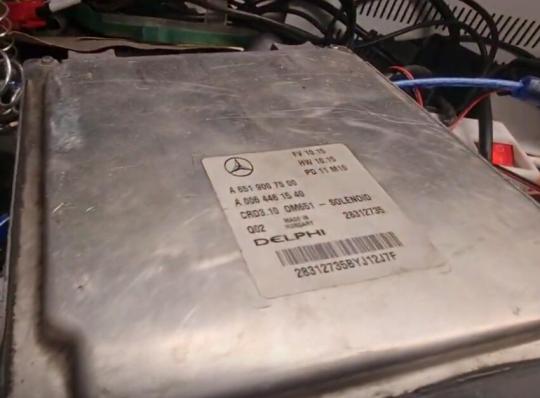
Though the Bosch ECU type is different, the operation steps are the same by I508 and IM608 series (IM508S/IM608II).
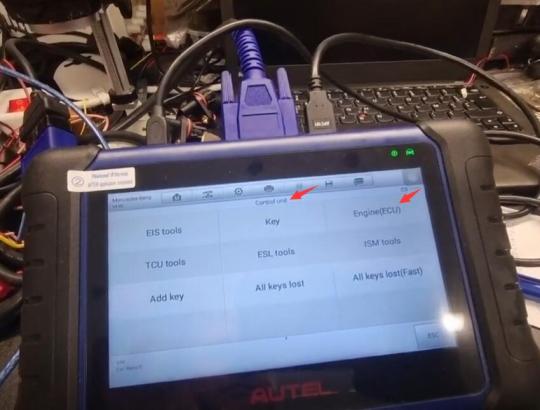
Go to Control Unit>> Engine (ECU)
The wiring diagram of CRD2.xx and CRD.11 is a little different.
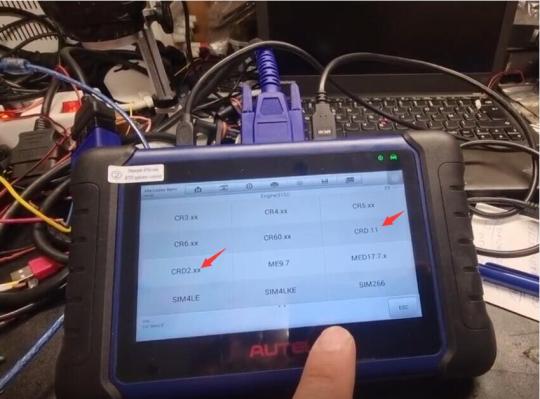
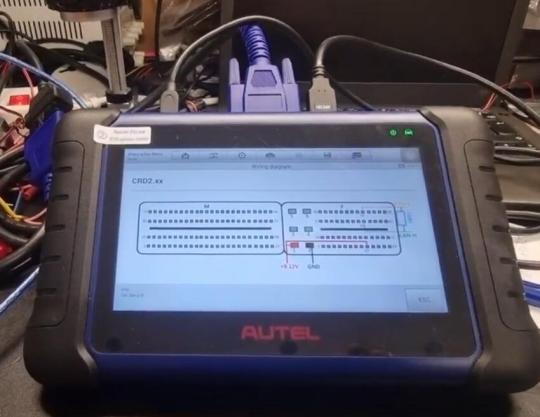
We follow the crd2.xx wiring diagram to connect Autel key programmer and Mercedes ECU
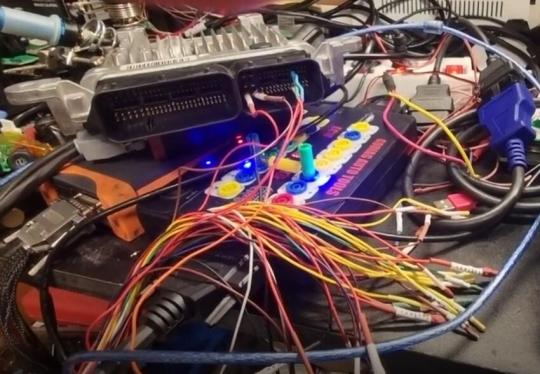
When we read engine ECU info, it prompts that “The testing device cannot communicate with ECU!”

So we choose CRD.11 wiring diagram to try
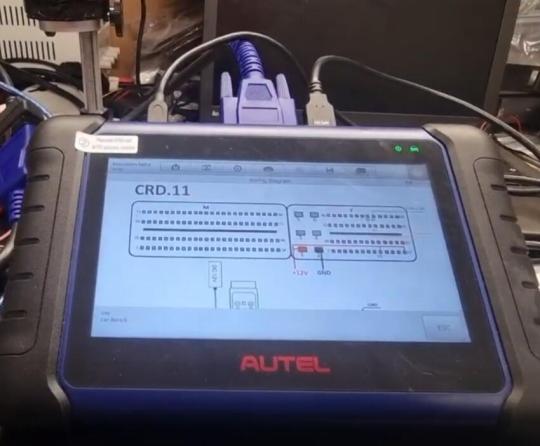
Be sure there's 12v to 13v, and don't forget 120ohm resistance between CANBUS
The cable marked is not required.
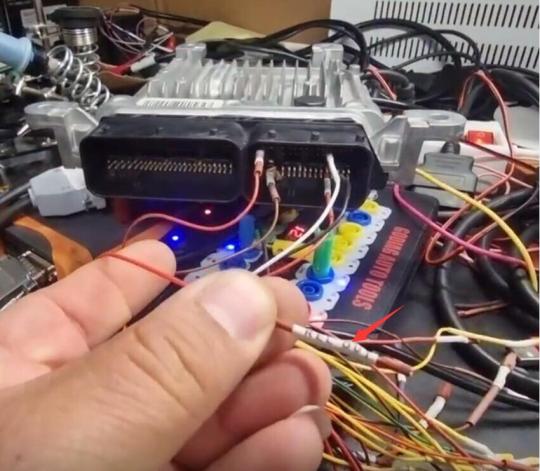

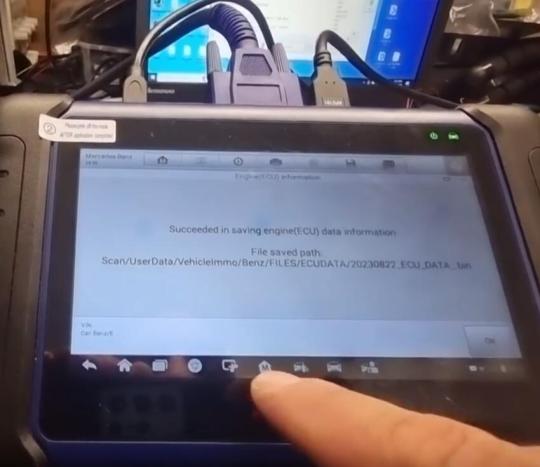
It can read the engine ECU data successfully.
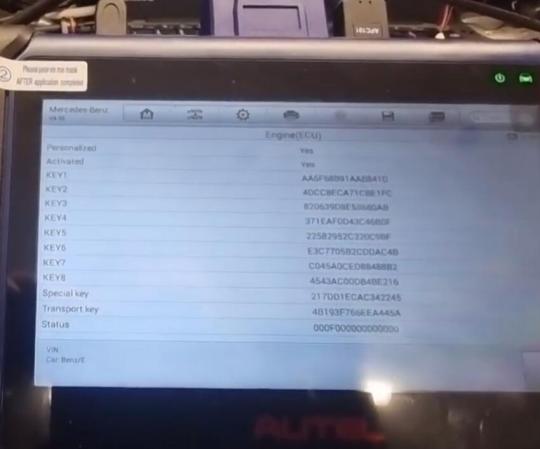
Remember to save the engine data info as well.
Customer’s feedback:
Thanks! Now I can virginize the ECU.
0 notes
Text
0 notes
Text
Autel diagnostic tool scanner, Autel maxisys ultra, Autel km100, im608 pro, im508 pro – Autelobd
Autelobd is one of the official distributor of the Autel.To provide the best service to our customers, Autelobd strive to understand each end-users' needs, and translate those needs into superior products.Our goal is to provide customers with the highest quality products, the most competitive prices and the best after-sales service. autel im608 pro
1 note
·
View note
Text
Toyota Corolla Add New Smart Key by Autel IM608 II and APB112
Autel MaxiIM IM608 II key programmer and APB112 Smart Key Simulator can work together to add a smart key for Toyota Corolla in less than 2 minutes. Here is the instruction.

A Step-by-Step Procedure:
Step 1: Establish Vehicle Connection
Plug in the VCl into the vehicle’s OBDII port.
Activate the vehicle’s ignition.
Step 2: Navigate to IMMO and choose vehicle model
Press “IMMO” on the main menu of MaxiIM IM608 II
Agree to the disclaimer
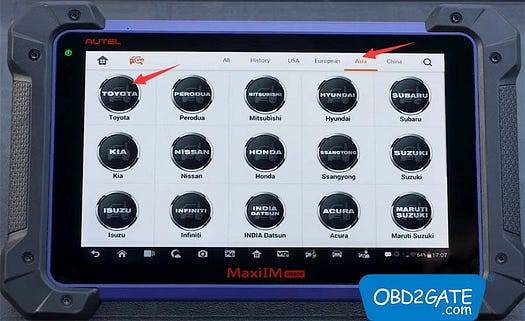
Select the region “Asia,” followed by “Toyota.”
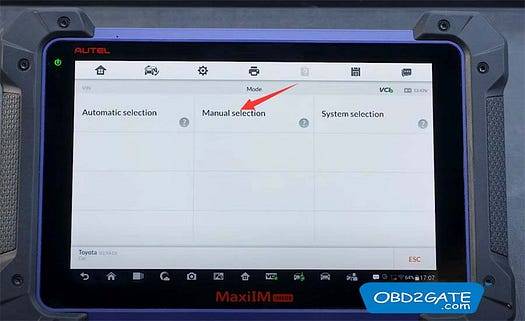
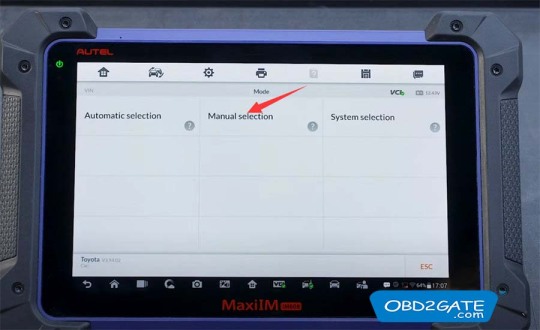
Choose “Manual selection,” then “USA,” and further select “COROLLA.”
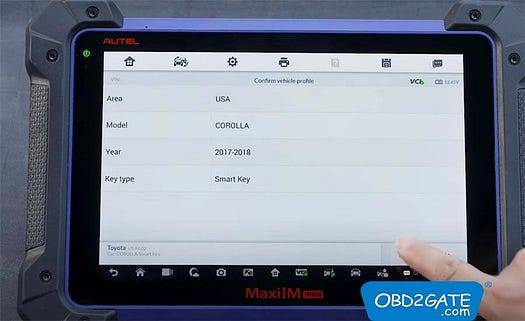
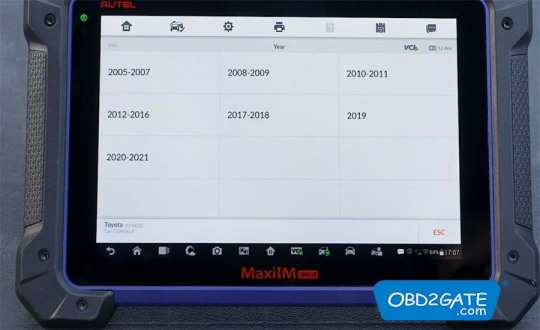
Choose the appropriate car year range (e.g., 2017–2018).
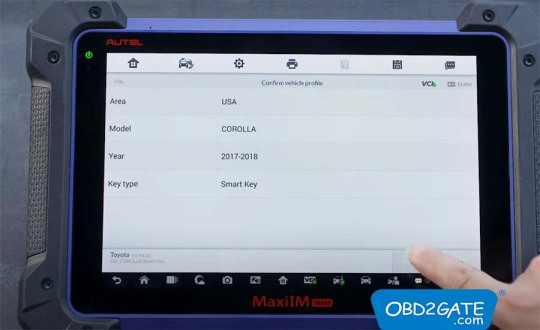
Opt for “Smart key.”
Confirm vehicle profile
Step 3: Add a Smart Key
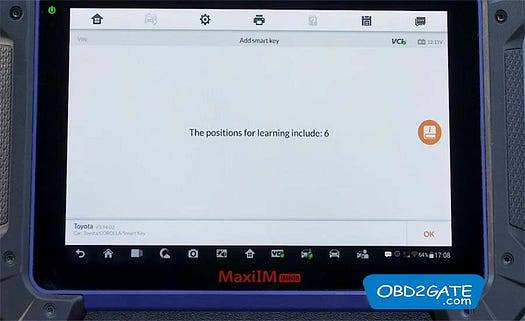
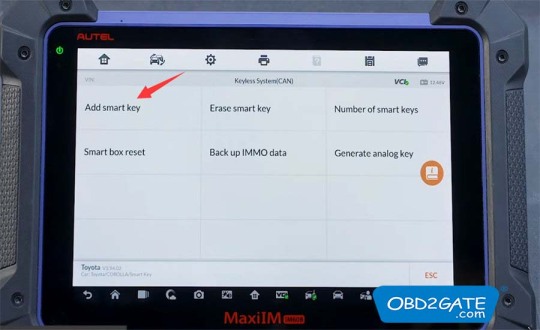
Select “Control Unit,” followed by “Keyless System (CAN),” and choose “Add Smart Key.”
Verify the usage of Autel APB112 smart key simulatorActivate the hazard warning lamps.

Every step must be performed within the designated time frame.
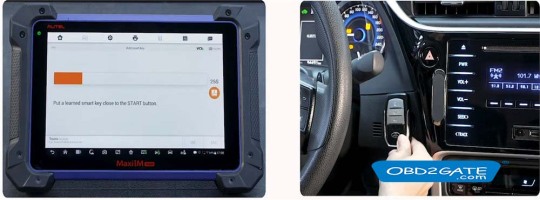
A total of 6 learning positions are involved.
Position a previously learned smart key near the START button.
Successful learning confirmation.

Process Completed!
By following these straightforward steps, Autel MaxiIM IM608 II successfully adds a new smart key for Toyota Corolla model.
0 notes
Text
youtube
0 notes
Text
Toyota Corolla Add New Smart Key by Autel IM608 and APB112
Autel MaxiIM IM608 key programmer and APB112 Smart Key Simulator can work together to add a smart key for Toyota Corolla in less than 2 minutes. Here is the instruction.
A Step-by-Step Procedure:
Step 1: Establish Vehicle Connection
Plug in the VCl into the vehicle's OBDII port.
Activate the vehicle's ignition.
Step 2: Navigate to IMMO and choose vehicle model
Press “IMMO” on the main menu of MaxiIM IM608
Agree to the disclaimer
Select the region "Asia," followed by "Toyota."
Choose "Manual selection," then "USA," and further select "COROLLA."

Choose the appropriate car year range (e.g., 2017-2018).
Opt for "Smart key."
Confirm vehicle profile
Step 3: Add a Smart Key
Select "Control Unit," followed by "Keyless System (CAN)," and choose "Add Smart Key."
Verify the usage of Autel APB112 smart key simulator
Activate the hazard warning lamps.
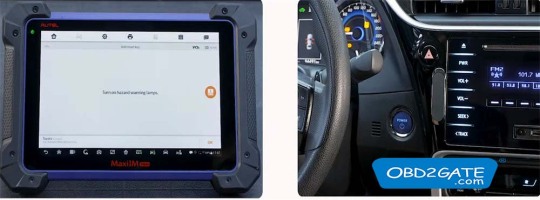
Every step must be performed within the designated time frame.
A total of 6 learning positions are involved.

Position a previously learned smart key near the START button.
Successful learning confirmation.
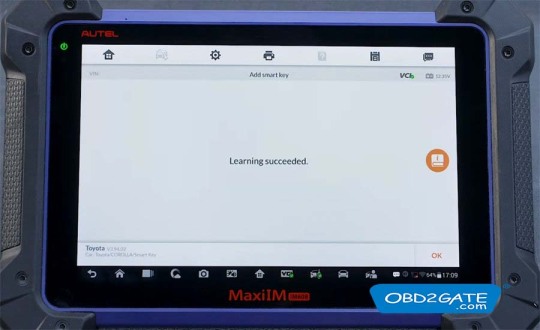
Process Completed!
By following these straightforward steps, Autel MaxiIM IM608 successfully adds a new smart key for the Toyota Corolla model.
2 notes
·
View notes
Text
2024 - 2025 Kia Carnival Smart Prox Key 7B Hatch / Remote Start / Power Doors- TQ8-FOB-4F81M44 95440-R0810
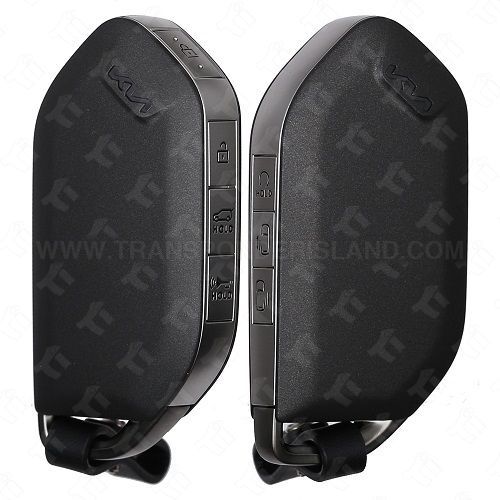
Deliver quality results with this OEM Smart - Intelligent Key for Kia , featuring a 7 Button-L/U/P, Hatch, Remote Start, Side Doors design and a frequency of 434 MHz. Powered by a CR2450 battery, its performance is backed by OE Part # 95440-R0810 , FCC ID TQ8-FOB-4F81M44 , and the HITAG-AES (4A chip) chip type. Note: emergency key (TIK-KIA-200) Not Included and This Smart - Intelligent Key does not support on-board programming. Programming requires the use of diagnostic tools..
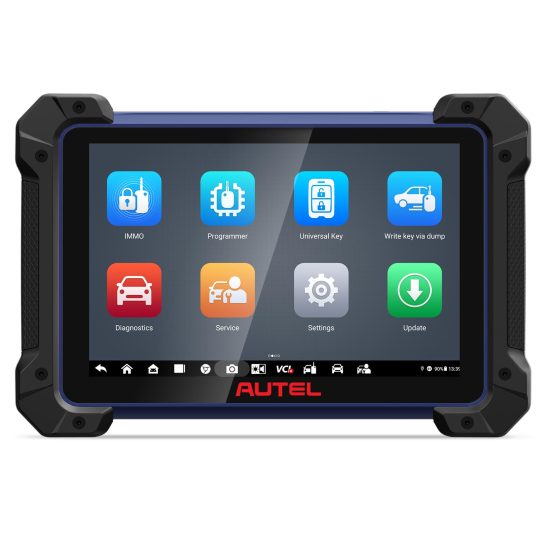
For programming, it is recommended to use advanced key programming devices like the Smart Pro by Ilco or the IM608 by Autel. These tools offer comprehensive support for a wide range of vehicles, including Kia models, ensuring efficient and reliable key programming. The IM608, for instance, combines powerful IMMO and programming functions with OE-level diagnostics and advanced service functions in one Android-based 10.1-inch touchscreen tablet.
Login to see price
visit - https://transponderisland.com/shop/tik-kia-226-2024-2025-kia-carnival-smart-prox-key-7b-hatch-remote-start-power-doors-tq8-fob-4f81m44-95440-r0810-39632?page=2&category=294
0 notes
Text
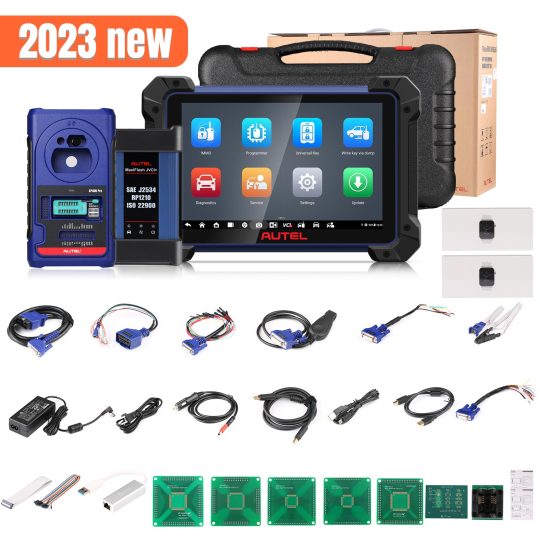
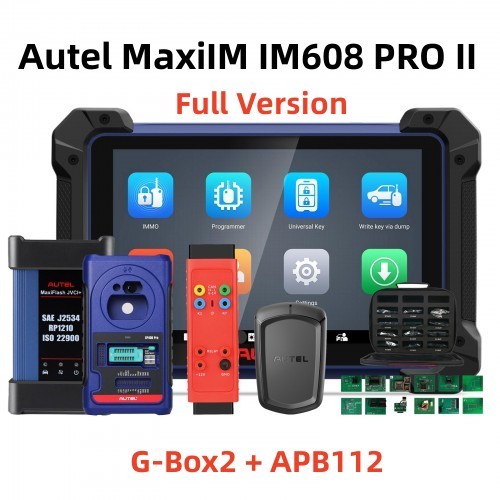
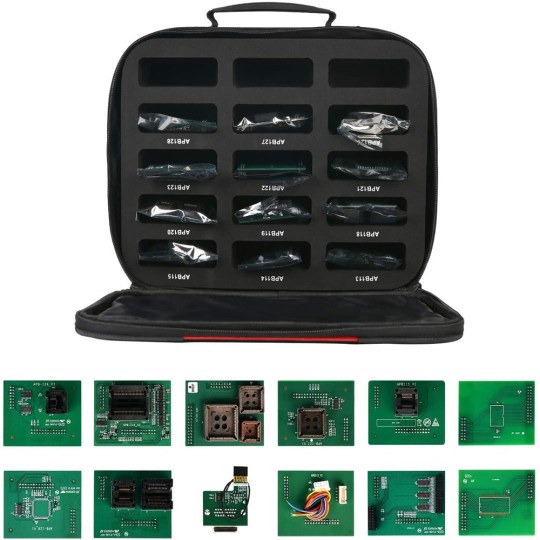
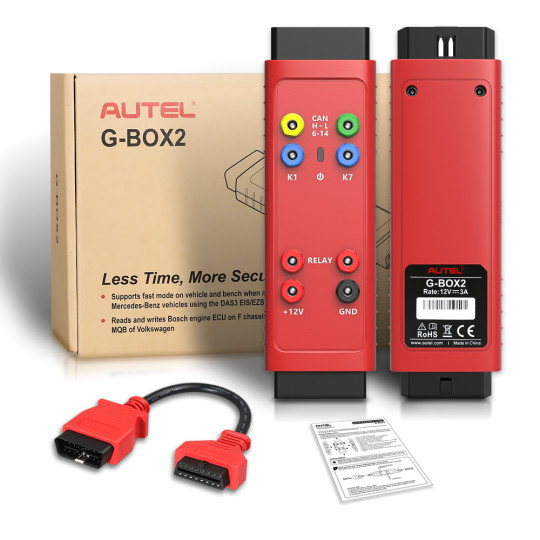
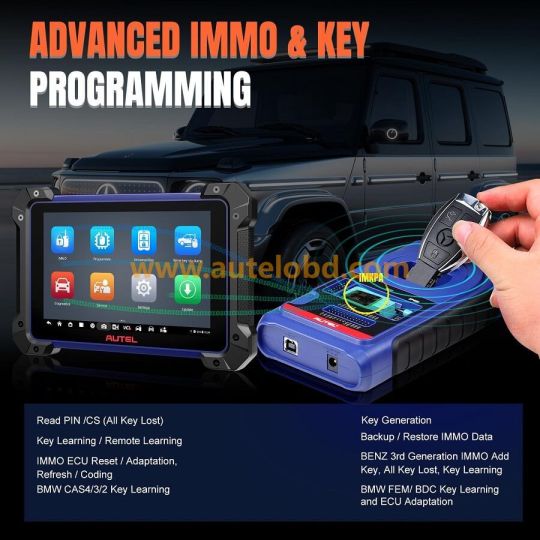
Autel MaxiIM IM608 PRO II Plus IMKPA Accessories with G-Box2 and APB112 Replace Autel IM608 PRO
#autel #autelim608pro2 #im608pro2 #gbox2 #apb112 #im608 #im608proii


wasap.my/+8615886576826
0 notes
Photo

Access all our search tools by brand, model, and year of car. We show Information about Types of keys, tumble chart, Cut Code, Part Number, FCC, Transponder, Frequency. A library of technical data. Types of immobilizer, types of microprocessors, number of supported keys, image galleries. We offer complete video programming procedures with the most versatile tools on the market: AUTEL, ADVANCED DIAGNOSTICS, XTOOL, XHORSE, SUPERVAG, SKORPIO, and more. Soon, AVDI and KEYLINE will be part of our family. All information is updated weekly with new videos and step-by-step procedures. We always innovate for the future. #evoautopro #locksmith #automotive #training #videos #professionals #autolockmsith #automechanics #automotiveshop #autel #smartpro #vvdi #autopropad #vvdiprog #xtool #advanceddiagnostics #abrites #im508 #im608 #stak #keyline #skorpio #tango #orange #carprog #aloa #carkeys #autokeys #madeinusa (at United States) https://www.instagram.com/p/B1twXRTgugh/?igshid=10li3vybfpl6d
#evoautopro#locksmith#automotive#training#videos#professionals#autolockmsith#automechanics#automotiveshop#autel#smartpro#vvdi#autopropad#vvdiprog#xtool#advanceddiagnostics#abrites#im508#im608#stak#keyline#skorpio#tango#orange#carprog#aloa#carkeys#autokeys#madeinusa
1 note
·
View note
Text
Autel MaxiIM IM608 PRO II IM508 Registration & Activation Guide
This blog by AutelUSA.com offers a step-by-step guide to register and activate Autel MaxiIM IM608 Pro II or Autel MaxiIM IM508. If you have an earlier IM608 or IM608 Pro, you can also refer to this guide.
Step 1: Email Registration
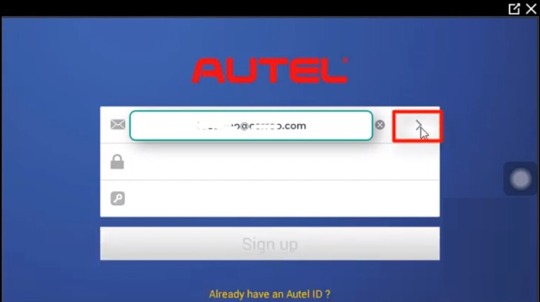
Create an account by entering your email address.
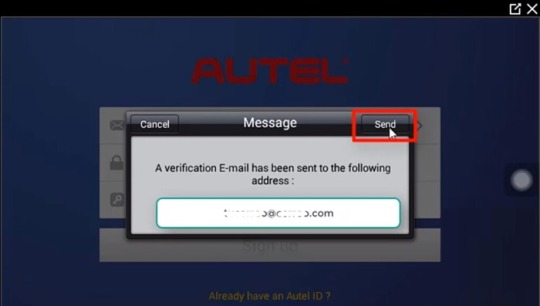
A verification email will be sent to your provided address.
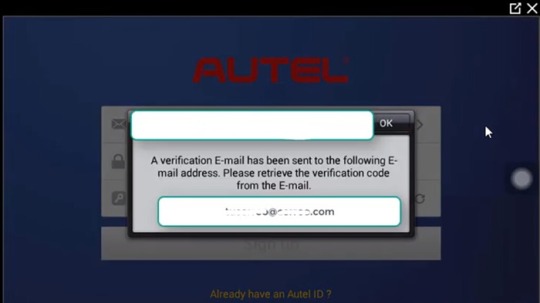
Obtain the verification code from your email inbox.
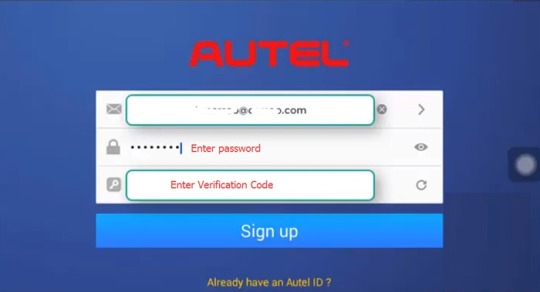
Input your email, password, and verification code to complete the sign-up process.
Step 2: MaxiIM Registration
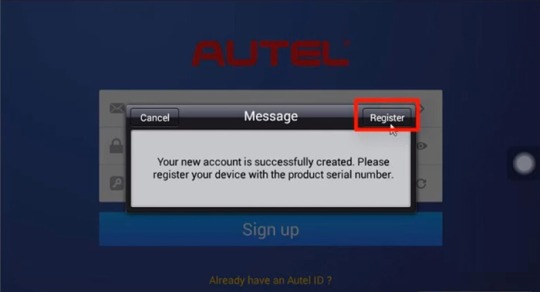
Register your device by following these steps:
Press the Register button.
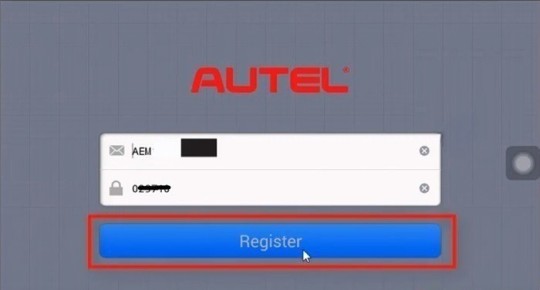
Enter the serial number and finish registration.
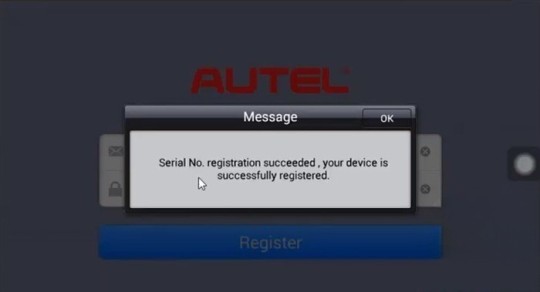
Your MaxiIM device is now successfully registered.
Step 3: Software Update
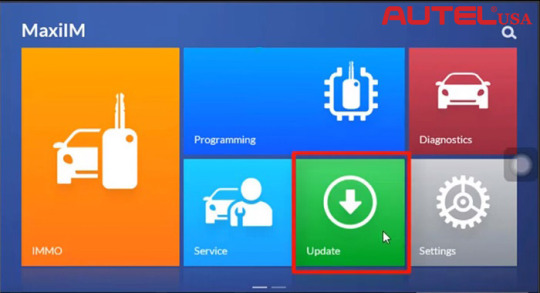
Access the MaxiIM menu and select the Update function.
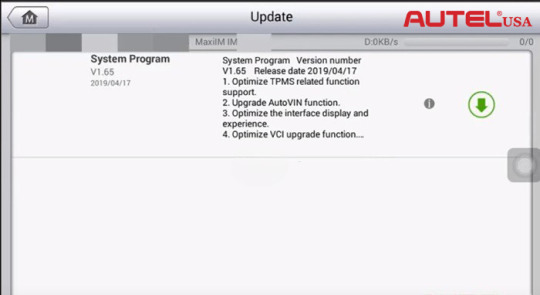
Check for available software updates and proceed with the download.
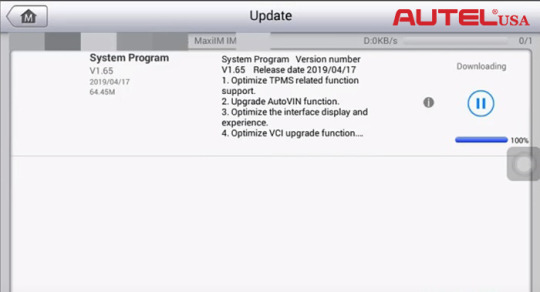
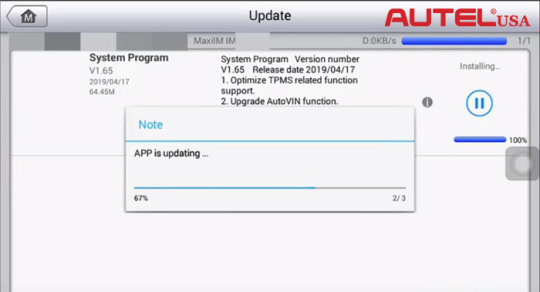
The MaxiIM APP will automatically install and update.
Launch the MaxiIM home menu.
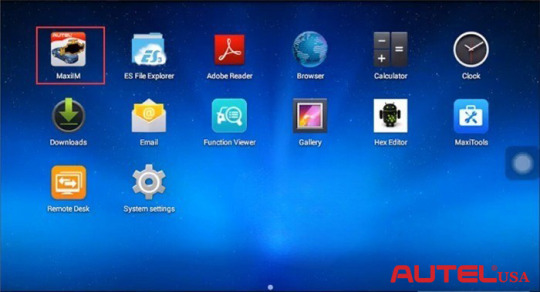
Open the MaxiIM App.
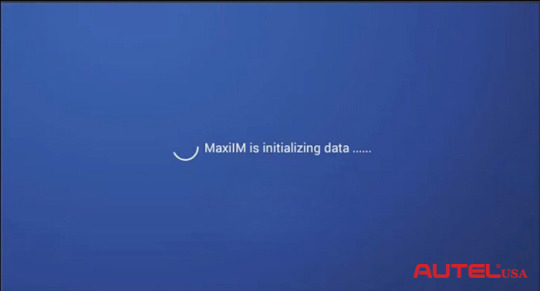
The MaxiIM device will initialize data.

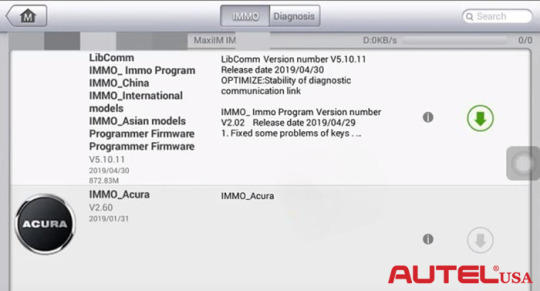
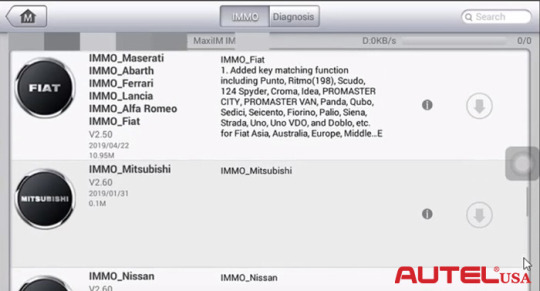
Go back to the Update function.
Check for available IMMO or Diagnosis updates and run the update.
Congratulations! You have successfully completed the registration and activation process for your Autel IM608 Pro II or Autel IM508 key programmer.
1 note
·
View note
Text
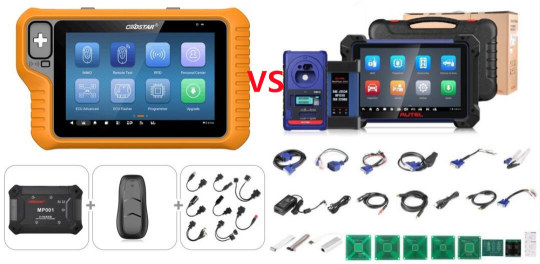
OBDSTAR X300 Classic G3 vs Autel IM608
What’s the difference between OBDSTAR X300 Classic G3 and Autel IM608? Which one is better?
This post will compare them in Immobilizer, Diagnostics, Remote Keys, Chips & MCUs, Gateway, Motorcycles, Add-on function and update aspects.
Similarity:
Both support immobilizer function.
Differences:
1.Immobilizer
X300 Classic G3 is for IMMO and programming.
Autel has been on the market for many years before the G3. G3 is a new product. So the database of Autel is a bit more robust on the outside.
For example:
Program 2016/2017 Toyota Camry, the key was just fine but when into the remote programming it did not work under the Camry menu. In fact, it is capable of doing it but it most likely has to do with the market difference from the Asian market to the US market, you can program the remote function under the GT86 Toyota and that’s cable to program the remote just fine.
But under directly under Toyota Camry it did not work.
But OBDSTAR will out the R & D behind it and adds all the vehicles as well.
You can see the list of all the vehicles supported on the immobilizer side and it is pretty good. Another thing is that OBDSTAR has no Mercedes support yet, OBDSTAR said they are working on it.
IM608 has good coverage. IM608 not only programs the keys but is an excellent scanner and can program other units like ELV, dashboard, EZS, Skin, and ECU.
2.Diagnostics
Autel IM608 is also a full-fledged scanner, not just an immo programming tool.
It has a full-fledged diagnostic tool built in so it does take advantage of that. It has very good diagnostic capabilities and covers the Euro/Asian/US & Australian markets very well.
G3 is not a full-fledged scanner.
3.Remote Keys
MaxiIM IM608 will also generate Autel universal ikey remotes, but OBDSTAR doesn’t support remote generation.
4.Chips & MCUs
Autel has a bigger database to that than the G3.
It has a much larger database of chips and MCUs.
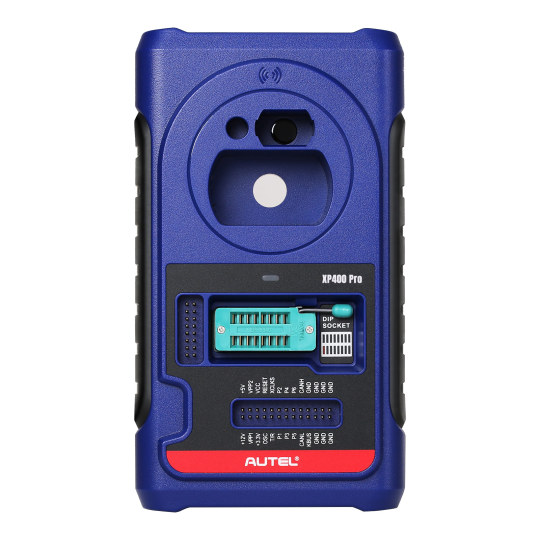
It can read and write a lot of chips and MCUs with the XP400 pro programmer.
The database on the amount of actual chips that OBDSTAR supported is not very extensive at the moment. This is a new tool. This is being added to the monthly things.
5.Gateway
OBDSTAR X300 G3 has built-in FCA Chrysler Fiat, Renault and CAN FD gateway connectors, you don’t need to buy separate gateway adapters.
You can use it to connect the compatible vehicle directly into the gateway like that bypass the gateway. Very convenient!
6.Motorcycles
The G3 also does motorcycles and aquatic Vehicles.
The G3 comes with motorcycle cables so you get all these cables for Ducati, Yamaha, Harley, BMW, Honda motors, etc. You’ll be able to program all these vehicles with the OBDstar.
Autel does not have it. It does not do motorcycles and aquatic vehicles.
7.Add-on function
OBDSTAR G3 is a flagship device you can add on all the other features. You can add odometer correction, airbag reset, test platform and ECU cloning license to the G3. It wins Autel MaxiIM IM608!
All these features are not available on the Autel.
OBDSTAR G3 License
G3 can add the same feature to clone as dc706. If you go to Advanced ECU where this tool starts to blow away everything else.
There is no competition, to be honest.
ECU license allows you to write the PIN to it, you can also write the VIN, change the VIN number, and correct mileage for some ECUs, G3 can do immo off on certain ECMs.
You can reset the VIN on the radio you see so if you get a used radio and then it gives you VIN locked you can reset it.
When going to the ECU flasher if you add on the cloning function, it handles different modules as well as body control modules. You can clone them and once you enter into these modules you can read them and modify the units.
They are good on GM ACDelco ECUs, it also does Fiat IAW 9DF, Chrysler GPEC2/3/2A, Hyundai SIM2-50, etc.
They have very good wiring diagram pictures.
The test platform function allows you to do is to actually send the message over the CAN BUS network and actually turn that cluster on or activate different modules that are activated via messages and not just simple powers and ground.
8.Update
OBDSTAR updates the software every month, and more vehicles are added.
If your subscription expires, you can use OBDSTAR G3 normally, but you will not get updates.
If your subscription expires, functions that require online access will not work on IM608, for example, Mercedes online password calculation, you cannot get new updates either.
Of course, you will need to renew your subscription to get current updates on both tools.
X300 Classic G3 software subscription is cheaper than Autel.
In a word, both X300 Classic G3 and Autel IM608 are good key programmers, and both support IMMO. The main difference is in the Database. It is a lot more extensive on the Autel IM608. IM608 wins G3 on IMMO!
OBDSTAR is a very good compliment to the Autel. You can grab the OBDSTAR every time is a late-model Dodge Ram. 23-24. Autel takes a long time to pull the pin and fails to program keys. The OBDSTAR pulls the pin in seconds and programs the keys very fast as well. No Mercedes support yet, OBDSTAR said they are working on it.
0 notes
Text

1 note
·
View note
Text
How to repair BMWMini electric windows by Autel IM608
My BMW/MiniFRM module is not responding and now the power windows are not working. It’s not like earlier cars could use hand-operated switches. So I decided to read the EEPROM and rewrite the corrupted data. This article will show you How to repair BMWMini electric windows by Autel IM608.
Tools used: Autel MaxiIM IM608 FRM Info Chip: MC9S12XEQ384 Mask: 3M25J
Path On Autel IM608, go to Programmer>>Chip (EEPROM,MCU,ECU)>>Chip read & write>>Other>>BMW>>E – SERIES>FRM>XEQ384>RW

Step 1. Read D-FLASH, EEPROM, P-FLASH Check “Schematic diagram”.

Connect APA109, IM608, XP400Pro and FRM circuit board by diagrams.


Go to “Set” to check if we’ve got 5 voltage, and turn on read/write/earse validation.
Then try to “Read” D-FLASH.
Empty, that’s why it is done.
Read Partition. Also empty.
EEPROM is also empty.

So we just read and save P-FLASH as a backup.
Usually this part is intact.

Step 2. Write partition
Go to D-FLASH and select “Write partition”. (So we can get a new EEPROM to write data in.)
Set EEPROM as 16, which will give you four kilobytes of memory on EEPROM.
Set D-FLASH as 0.

Step 3. Write EEPROM back
Then I find an EEPROM file with the same part number (3456395) on Google.


Of course this EEPROM belongs to a a different car, VIN…but it allows FRM to boot.
Transfer the data file to IM608 Key Programmer.
Go to “EEE” (EEPROM), and select “Write”.
Load the EEPROM file we just found.
Write successfully.

Go back to read D-FLASH and EEPROM.
FLASH is also empty, but we have the data in EEPROM.
Step 4 . Check FRM on car
Restore FRM back, and see if it boots well.
Use an Autel Diagnostic Tool to check windows quickly.
The wrong chassis means our FRM has communications.

Before we have a DTC about FRM error.

Diagnosis>>Control unit>>Body>>FRM2 (Footwell Module 2)>>Read codes
Now our FRM comes back.

And then the rest work is to program the module the car because it comes from a different car.
Notice: IM608 doesn’t support BMW X1 FRM program.
Credits to LM Auto Repairs.
Hope this could help.
https://blog.obdii.shop/how-to-repair-bmwmini-electric-windows-by-autel-im608/
0 notes
Text
How to Use Autel IM608 II to Diagnose Toyota FJ?
In this guide, I will show you how to diagnose a Toyota FJ vehicle using Autel MaxiIM IM608 II key programmer. The following are the procedures to achieve this.
Equipment involved:
IM608 II
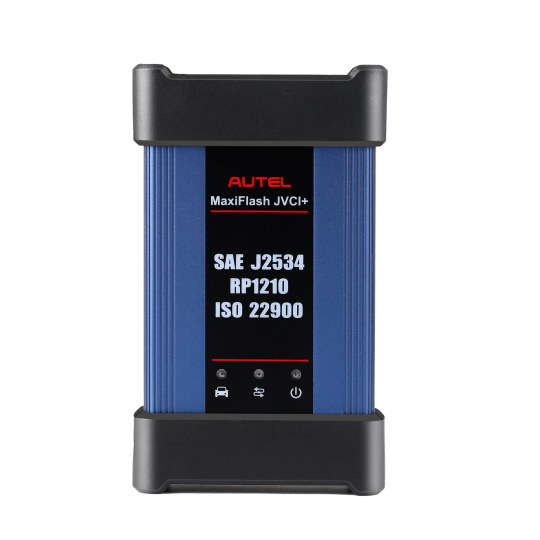
Autel J2534
Toyota FJ
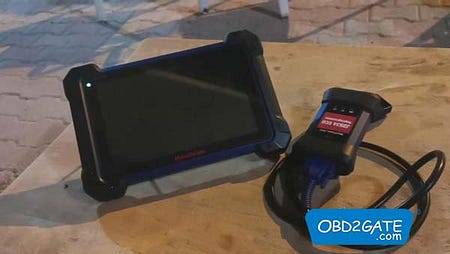

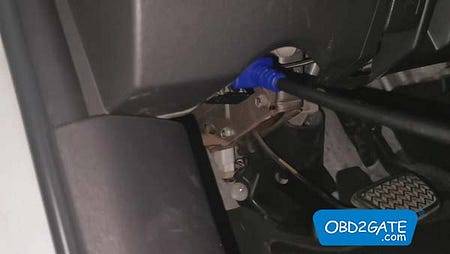
Procedure:
1. Begin by connecting the OBD port to the car’s connector.
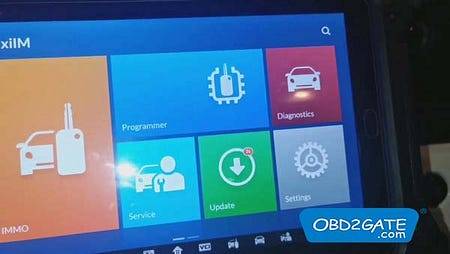
2. Power on MaxiIM IM608>> input the password >> start the car’s ignition.
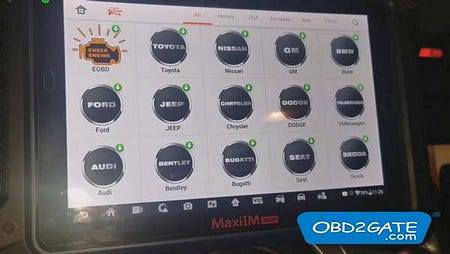
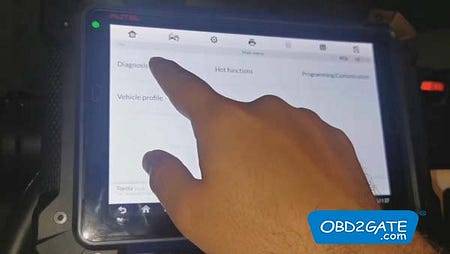
3. Access the “Diagnostics” section >> click on”Toyota” button>>Agree to the disclaimer.
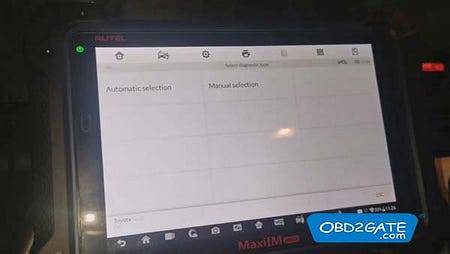
4. Opt for “Automatic selection” and click”Read” to have the system automatically identify the vehicle’s VIN number.
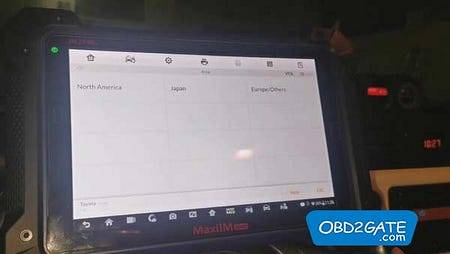
5. Select”Japan” , then click “08/2012 later” , and click “Yes.”
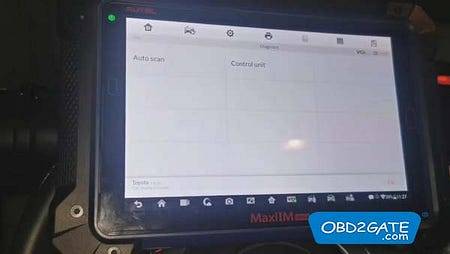
6. Press”Diagnosis” >>”Auto scan”
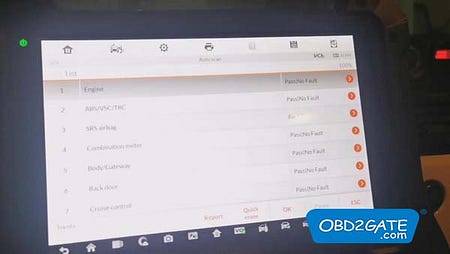
Autel Maxi IM608 II will perform a comprehensive scan automatically.
7. The task has been completed, and now we should proceed to clear faults. Click on “Quick Erase” and then everything will be set.
With these simple steps, you can effectively diagnose a Toyota FJ using Autel MaxiIM IM608 II.
0 notes