#how to print aadhar card
Explore tagged Tumblr posts
Visit Tumblr Blog
Explore Tumblr blogs with no restrictions, modern design and the best experience.
Last Seen Tumblr Blogs


Fun Fact
Tumblr has 4 main sources of revenue.
Text
CISF Fireman Admit Card 2024 Download Exam Date Centre Details Pattern Syllabus

CISF Fireman Admit Card 2024: Central Industrial Security Force Constable Fireman 1130 Posts Physical Admit Card has been released on 16th December 2024. All the candidates must know that the physical has been conducted from 24th December 2024 to 20th January 2025. In different cities. Many candidates were waiting after applying.
CISF Fireman Admit Card Overview
The application process for the CISF Fireman Recruitment 2024 started on August 31, 2024, and ended on September 30, 2024. During this period, eligible candidates were able to fill out their forms online through the CISF recruitment portal. Recruitment OrganizationCentral Industrial Security ForcePost NameFireman (Constable)Total Posts1130 VacancyPET/ PST Date24 December 2024 to 20 January 2025CISF Fireman Constable Admit Card16 December 2024Official Websitecisf.gov.in
CISF Fireman Selection Process
The selection process for the CISF Fireman Constable Recruitment involves the following steps: - Physical Efficiency Test (PET): Candidates will be required to complete a 5 km run in 24 minutes. This is a qualifying test, and no marks will be awarded. - Physical Standard Test (PST): Candidates who pass the PET will undergo the PST, where their height, chest, and weight will be measured. The minimum requirements are- Height: 170 cm & Chest: 80-85 cm (minimum expansion of 5 cm). - Document Verification (DV): After the physical tests, candidates’ documents will be verified. - Written Examination (CBT/OMR): Candidates who pass the physical tests and document verification will be invited for a 100-mark written examination. - Detailed Medical Examination (DME): Candidates who qualify in the written examination will undergo a medical examination to ensure they meet the required standards.
CISF Fireman Exam Pattern
The exam pattern of CISF Constable Fireman is given below. The time for the exam will be 120 minutes i.e. 2 hours. All your questions will be objective type and there will be 100 questions and you will get one mark for one question. Check the syllabus for its related and full information. CISF Constable Fireman Recruitment 2024 Subject Qus. Marks Hindi/ English Language 2525General Intelligence & Reasoning 2525Elementary Mathematics2525General Knowledge and Awareness2525Total 100 100
CISF Fireman Admit Card Details
The admit card is a mandatory document to appear for the CISF Fireman Recruitment tests. It will include the candidate’s details, such as: - Name - Roll number - Photograph - Exam centre and address - Date and time of the exam Candidates will not be allowed to participate in the test without the admit card. Along with the admit card, candidates must carry a valid photo ID such as an Aadhar card, voter ID, or driving license.
How To Download CISF Fireman Admit Card
To download the CISF Fireman Admit Card, follow these simple steps: - Step 1: First of all candidates visit the official website of Central Industrial Security Force cisf.rectt.in. - Step 2: Now candidates go to the link of Constable (Fire) present on the homepage. - Step 3: Now on the new page that is open, candidates have to enter their registered email id and password. - Step 4: After that the candidates download the admit card for the physical test. - Step 5: At last, candidates should take a print out of the admit card.
Important Links of CISF Fireman Admit Card
Admit Card DownloadClick HereDownload NotificationClick HereJoin NEToday ChannelWhatsApp | TelegramGet More InformationClick HereWebsiteClick Here Read the full article
0 notes
Text
Mukhayamantri Saur Swarojgar Yojana (MSSY)
Mukhayamantri Saur Swarojgar Yojana (MSSY)
A hearty greeting to the people of Uttarakhand from the Sustainable Himalayas family. People of the state, as you know, you can earn from Rs. 10,000 to Rs. 1,30,000 per month by installing a solar print un der the Mukhayamantri Saur Swarojgar Yojana (MSSY). Under this scheme, you will get a subsidy of 50% to 20% as per your area from the Ministry of Small and Medium Enterprises (MSME) as well as the facility of loan at low interest. Under this scheme, you are informed that the Sustainable Himalayas organization has been continuously working for the last 5 years to build smart villages in Uttarakhand, Himachal Pradesh, Jammu and the North Eastern states.
In this series, under the Sustainable Himalaya Uttarakhand State Solar Policy, any young entrepreneur, industrialist, who wants to set up his own solar plant or captive solar plant or rooftop solar plant, can join our organization today and earn a monthly income of Rs. 10,000 to Rs. 1,30,000 by setting up a solar plant of 20 KW to 200 KW on his land or leased land and selling the electricity produced to the state government enterprise UPCL. Under this scheme, the government will make a Power Purchase Agreement with you for 25 years and will pay you at the rate of Rs. 4.64 per unit.
Main points of Mukhayamantri Saur Swarojgar Yojana (MSSY):-
Under this Mukhayamantri Saur Swarojgar Yojana (MSSY), you can set up solar plants of 20 KW, 25 KW, 50 KW, 100 KW, 150 KW, 200 KW.
Maximum 200 kW per family You can install solar power plant of capacity upto 100 KW only
Only permanent residents of Uttarakhand will be eligible to apply under this Mukhayamantri Saur Swarojgar Yojana (MSSY). Technical standards for the scheme 1. Land required 250-300 Wm for 25 KW, 750-1000 Wm for 50 KW, 1500-2000 Wm for 100 KW, 3000-4000 Wm for 200 KW shadowless land will be required 2. Estimated power generation From a 25 KW power plant, you will generate electricity worth Rs. 1,76,320 per year, from a 50 KW power plant, you will generate electricity worth Rs. 3,52,640 per year, from a 100 KW power plant, you will generate electricity worth Rs. 7,05,280 per year
At present, the power line has been installed by Uttarakhand Electricity Department at the rate of 4.64 per unit, 11 KVA power line has been installed by UPCL under the 100 kW to 200 kW capacity scheme, the maximum aerial distance from the transformer in the mountainous range of the Pacific provinces will be 300 meters and in the plain areas the maximum aerial distance will be 100 m, the Sukhshamu and Medium Enterprises(MSME) Ministry is giving grants ranging from 50% to 20% under the minimum written table, interest subsidy, small cost, other things to note, the landlord cannot legalize the ownership of his Apollo Power Plant to anyone else without the permission of UREDA,
the application for proprietorship will be accepted only as a proprietorship, the date of project share, within thirty days, the landlord will get group kill twenty thousand rupees on WhatsApp, Sukhshamu kid watt eight thousand rupees and two thousand kilowatt development One rupee in UREDA Project Karle in the form of FD or CDR which will be in the form of NFT or Demand Draft as given below 20 to 25 kW, Rs. 500 amount 50 to 100 kW, Rs. 2,000 amount 100 to 200 kW, Rs. 5,000 amount Scheme Order Documents.
For registration of this scheme, the applicant has to apply for the following documents Applicant’s Aadhar Card, PAN Card, copy of front page of passbook account details, mobile number, mail details, land details, copy of lease agreement also has to be submitted. Why only from our organization? Our organization has experience of setting up innovative plants from 3 kW to 250 kW in the previous years. In which we have included Mukhayamantri Saur Swarojgar Yojana (MSSY) in East Uttarakhand in many district and Surya Rooftop Yojana in Suryodaya Planned Places in entire Uttarakhand.
How to apply?
Alternatively, you can apply directly from the Uttarakhand government website www.mssy.uk.in. Or you can contact the team member of Sustainable Himalayas and submit your application. To apply, you can contact on the given number. For more information you can contact:- 7455853737, 9810075920
Name:- Abhilash Rana
Designation:- IT
Social Media:-
Website:- https://dysun.in/
0 notes
Text
CLAT 2025 Hall Ticket is Now Available
Great news for CLAT 2025 aspirants! The much-awaited CLAT 2025 Hall Ticket is now available for download. If you’re one of the candidates preparing for the Common Law Admission Test (CLAT) 2025, it’s time to check your application status and access your admit card.
CLAT 2025 is not at all optional for candidates seeking to get admission in the best National Law Universities in India as undergraduate and postgraduate law courses. The hall ticket test of the Consortium of National Law Universities, CNLU, is essential to gain entry inside the exam center.
In this blog, we shall take you through how one may download the CLAT 2025 hall ticket and give you some of the important information to prepare you fully for the exam day.
How to Download CLAT 2025 Hall Ticket The CLAT 2025 hall ticket will be downloadable on the official website of the Consortium of National Law Universities. To access your hall ticket, you may follow these steps:
How to Download the CLAT 2025 Hall Ticket First of all open the Official Webpage https://consortiumofnlus.ac.in/, Click on Download Hall Ticket Scroll down and check the download link of CLAT 2025 Hall Ticket on the home page. Usually, it is displayed prominently on the homepage soon after the release of the admit card. Login using credentials Enter your application number and date of birth (or other credentials as mentioned) in the login section to view your hall ticket.
Download Hall Ticket After log-in, your hall ticket will appear on the screen. Now cross verify all the details like names, exam center, and timing mentioned on the hall ticket.
Print Hall Ticket Print the downloaded admit card. These are required at the time of entry into the exam hall. It is very much recommended to carry a couple of extra photocopies as well.
Important Details in CLAT 2025 Admit Card All these details should be referred to only after the download of the admit card.
Personal Details: The name, photograph, signature, and all other personal details should be perfect in your copy. Exam Date and Time : Please note the date of the examination and also your allotted time for the examination. This helps you to plan and so reach the center before time. Exam Center: You will also see details about the exam center where you would be writing the exams. In the hall ticket, you would find the address of the exam center. Know its location so that you can plan ahead. Instructions: Read the exam day instructions printed on the hall ticket. These may include things like required documents, prohibited items, and guidelines for a smooth exam experience. Important Exam Day Guidelines for CLAT 2025 Here are some crucial tips to help you prepare for the big day:
Report Early: Arrive at the exam center at least 30 minutes before the scheduled time to avoid any last-minute issues. Bring your hall ticket and Valid ID: Please note down that you must carry the print-out of your hall ticket while coming along with a valid photo proof ID like Aadhar, Passport, or Voter ID for verification purposes. Follow the applicable guidelines of COVID-19: As per the current health guidelines, one needs to follow all the COVID-19 protocols. In addition, a mask and hand sanitizer are to be carried, along with maintaining social distancing. No Restricted Articles: Make sure you check the list of restricted articles. Items like mobile phones, calculators, handbags, or books are strictly not allowed to take into the exam hall. What to Do If You Lost Your Hall Ticket In case, you are getting any sort of trouble in downloading the CLAT 2025 admit card then follow these:
Check Your Internet Connection: Ensure that there is a stable internet connection while you are trying to download your hall ticket. Correct Login Credentials: Re-check the login credentials (application number, date of birth, etc.) and make sure that they are correct. Connect to CLAT Helpdesk: If it does not, then get in touch with CLAT 2025 Helpdesk immediately. They will assist you about it. This is how you can connect the helpdesk:
Email: Usually, contact email is given on the official website for the queries posted by the applicants. Phone Number: Generally, the phone number for the CLAT helpdesk is available on the website. Dial them up to avail immediate assistance . What Next After Downloading the Hall Ticket? Once you get the hall ticket ready, your focus should be spent upon exam preparation. CLAT is an extremely competitive exam and more you are prepared to face; more would be the possibility of getting a seat in one of India's elite National Law Universities (NLUs).
Focus on the Syllabus: Get proper knowledge about what to expect in the CLAT 2025 syllabus. Focus on the important subjects that are English, Logical Reasoning, Legal Aptitude, General Knowledge, and Mathematics. Mock Tests and Previous Papers: Prepare mock tests and previous years' question papers to increase the speed and accuracy level. Stay Calm: Stay calm and positive during the exam. Proper rest and mental preparation help a candidate perform better. Conclusion The release of the CLAT 2025 hall ticket marks an important milestone in your journey toward law school. With your hall ticket now available, it’s time to focus on final preparations. Make sure to download your hall ticket on time, verify all the details, and follow the exam day instructions carefully.
Good luck with all your CLAT 2025 preparations, and remember — success in the exam is just one step toward fulfilling your dream of studying law at one of India's top National Law Universities.
Struggling with your CLAT 2025 preparations? Let us know in the comments section below or reach out for further tips and resources!
#clat#law#lawschool#lawstudent#lawyer#legal#lawstudents#legalnews#lawyerlife#supremecourt#indianlaw#lawyers#advocate#judiciary#ailet#highcourt#lawfirm#lawmemes#lawyersofinstagram#court#legalupdates#indianlawyer#clatpreparation#nlu#attorney#supremecourtofindia#lawupdates#cat#india#clatexam
1 note
·
View note
Text
Which Documents Need to Rent a Car at Goa Airport: Best Self Drive Car Rental in Goa Airport

When planning a trip to Goa, many travelers seek the freedom and flexibility that comes with renting a car. The best self-drive car rental in Goa Airport offers an excellent opportunity to explore this beautiful coastal paradise at your own pace. However, to ensure a smooth rental experience, it’s crucial to have the right documents ready. In this post, we’ll guide you through the necessary documentation for renting a car at Goa Airport and provide insights into the best car rental services in Goa, particularly focusing on self-drive car rentals in Goa.
The Appeal of Self-Drive Car Rentals in Goa
Before diving into the specifics of documentation, let’s discuss why self-drive car rentals in Goa are a preferred choice among tourists. Goa is not just about its stunning beaches; it’s a destination rich in culture, history, and natural beauty. With a rented car, you can explore hidden gems, charming villages, and lush landscapes that are often overlooked by those relying on public transportation.
Advantages of Renting a Car at Goa Airport
Convenience: Arriving at Goa Airport and having a car ready to go means you can head straight to your accommodation or start your adventure without delays.
Flexibility: Self-drive car rentals in Goa allow you to create your own itinerary. Whether you want to visit popular tourist spots or explore off-the-beaten-path locations, having a car provides the freedom to do so.
Cost-Effectiveness: For families or groups, renting a car can be more economical than multiple taxi rides.
Comfort: Traveling in your own space, with your own music and snacks, makes for a more enjoyable journey.
Exploration: Goa’s charm lies in its hidden treasures, from secluded beaches to vibrant local markets. With a self-drive car, you can uncover these attractions at your leisure.
Essential Documents for Renting a Car at Goa Airport
To rent a car at Goa Airport, certain documents are mandatory. Here’s a comprehensive list to ensure you are well-prepared:
1. Driving License
A valid driving license is the most crucial document required. If you are a domestic traveler, your Indian driving license will suffice. For international tourists, an International Driving Permit (IDP) is essential. Make sure your license is valid and not expired.
2. Identity Proof
You will need to provide a government-issued identity proof. This can be any of the following:
Passport (for international travelers)
Aadhar card
Voter ID
Driving license
Make sure that the identity proof matches the name on your driving license to avoid any confusion.
3. Passport-Sized Photographs
Some car rental services may require passport-sized photographs. It's advisable to carry a few extra copies, as they may come in handy for other purposes during your trip.
4. Credit/Debit Card
Most car rental companies require a credit or debit card for security deposits. Ensure that the card you present has sufficient credit or balance to cover the deposit amount. Some companies might also accept cash, but this varies, so check in advance.
5. Booking Confirmation
Having a printed or digital copy of your car rental booking confirmation is also essential. This document will typically include your reservation details, rental agreement, and any special instructions provided by the rental company.
6. Additional Documents for Corporate Rentals
If you're renting a car for business purposes, you may need additional documents, such as:
Company ID
Letter of authorization from your employer
Any specific documentation as required by the rental company
7. Insurance Documents (Optional)
While not always required, having proof of car insurance can be beneficial, especially if you have a personal auto insurance policy that covers rentals.
Choosing the Best Car Rental Services in Goa
Now that you know the essential documents needed to rent a car at Goa Airport, let’s explore how to choose the best car rental services in Goa.
1. Reputation and Reviews
Before finalizing your choice, research the rental company’s reputation. Look for online reviews and ratings on platforms like Google, TripAdvisor, and social media. A company with positive feedback is likely to provide better service. Always read recent reviews to gauge current performance.
2. Fleet Variety
Different travelers have different needs. Ensure the car rental service has a diverse fleet, including compact cars, SUVs, and luxury vehicles. This variety allows you to select a car that fits your budget and travel plans. Having options enhances your travel experience.
3. Transparent Pricing
Be wary of hidden charges. The best car rental services in Goa offer transparent pricing, including all taxes and fees. Ask about any additional costs, such as fuel policy, mileage limits, and insurance options. Understanding the total cost upfront will help you avoid surprises later.
4. Customer Support
Good customer service is essential. Choose a rental service that offers 24/7 support in case you encounter any issues during your rental period. Quick assistance can make a significant difference in your experience. Consider companies that provide multiple communication channels, such as phone, email, and chat.
5. Flexible Policies
Look for companies that offer flexible rental policies. This includes options for extending your rental period or making changes to your reservation without hefty fees. Flexibility can be invaluable, especially if your travel plans change unexpectedly.
6. Pickup and Drop-off Options
Convenience is key. Check if the rental company provides airport pickup and drop-off services, as this will save you time and hassle upon arrival and departure. Many companies also offer drop-off at different locations, making it easier to plan your itinerary.
Top Self-Drive Car Rentals in Goa Airport

When it comes to car rental in Margao and surrounding areas, two of the top self-drive car rental companies you might consider at Goa Airport are Top Goa Car Rentals and Saqib Rent a Cab.
1. Top Goa Car Rentals
Known for their extensive fleet and competitive pricing, Top Goa Car Rentals is a popular choice among travelers. They offer a range of vehicles, from economy cars to luxury sedans, and provide easy online booking. Their user-friendly website makes the booking process hassle-free. Customers often praise their reliability and well-maintained vehicles, making them a trusted option for self-drive rentals.
2. Saqib Rent a Cab
Saqib Rent a Cab is another reputable option, offering transparent pricing and excellent customer service. Their fleet includes various vehicles suitable for different travel needs, and they pride themselves on customer satisfaction. Many customers appreciate the straightforward booking process and the helpfulness of the staff, ensuring a pleasant rental experience.
3. Zoomcar
Zoomcar has made a name for itself in the self-drive market across India. With a strong presence in Goa, they offer an app-based rental experience, making it easy to book and manage your rental. Their fleet includes well-maintained vehicles that are perfect for exploring Goa.
4. Rent A Car Goa
This service specializes in local tourism and offers tailored packages to suit different traveler needs. They provide excellent customer support and are known for their well-maintained vehicles. Their staff can also offer insights on the best places to visit in Goa.
5. RoadMech
RoadMech offers both self-drive and chauffeur-driven options. Their self-drive cars are well-serviced, and they also provide comprehensive insurance packages for peace of mind. Customers appreciate their commitment to safety and quality.
Final Tips for a Smooth Rental Experience
Inspect the Vehicle: Before driving off, thoroughly inspect the car for any pre-existing damage. Take photos and ensure that any issues are noted in the rental agreement. This can help avoid disputes when returning the vehicle.
Understand the Fuel Policy: Familiarize yourself with the fuel policy of the rental company. Some may require you to return the car with a full tank, while others may offer different arrangements. Clarifying this upfront can save you money.
Follow Local Traffic Rules: Goa has specific traffic regulations, so ensure you familiarize yourself with local driving laws to avoid fines or penalties. Be aware of speed limits, parking rules, and other regulations.
Plan Your Routes: Use GPS or mapping apps to plan your routes in advance. This will help you navigate the beautiful yet sometimes winding roads of Goa with ease. Consider downloading offline maps in case of poor connectivity.
Stay Safe: Always wear seatbelts and drive cautiously. Goa can be busy with tourists, especially during peak season, so staying alert is essential. Also, avoid driving at night in unfamiliar areas.
Emergency Kit: Keep an emergency kit in the car, including a first aid kit, flashlight, and basic tools. This will help you handle minor issues without hassle.
Conclusion
Renting a car at Goa Airport opens up a world of possibilities for exploring this vibrant destination. By ensuring you have the necessary documents, choosing the best self-drive car rental in Goa Airport, and preparing for your journey, you can enjoy a seamless and memorable travel experience. Whether you're visiting popular attractions or discovering hidden treasures, the freedom of having your own vehicle will make your time in Goa truly special.
1 note
·
View note
Text
How to Easily Book a Ferry in Andaman: Your Ultimate Travel Guide
When planning a trip to the beautiful Andaman Islands, traveling by ferry between the islands is essential to fully explore the archipelago. With breathtaking beaches, crystal-clear waters, and rich marine life, island-hopping via ferry is one of the best ways to experience Andaman’s natural wonders. If you're unsure how to book a ferry in the Andaman Islands, don’t worry! This guide walks you through everything you need to know to make your booking hassle-free.
Why Ferries Are Essential for Andaman Travel
The Andaman and Nicobar Islands consist of around 572 islands, but only a few are open for tourism. The major islands like Port Blair, Havelock Island (Swaraj Dweep), and Neil Island (Shaheed Dweep) are connected by regular ferry services. Ferries are the most convenient and budget-friendly way to travel between these islands. With multiple options to choose from, including government-run ferries and private services, ferries cater to different travel preferences.
Types of Ferries in Andaman
There are two main types of ferries available for travelers in the Andaman Islands:
Government FerriesOperated by the Directorate of Shipping Services, these ferries are economical but can be difficult to book during peak seasons. They provide connectivity between Port Blair, Havelock, Neil, and other islands. However, tickets need to be booked in advance, and the services can sometimes be delayed.
Private FerriesPrivate ferry services like Makruzz, Green Ocean, and Sea Link offer a faster and more comfortable journey with options like luxury seating. These ferries are more reliable in terms of schedule and are easier to book online.
Step-by-Step Guide to andaman ferry booking
1. Choose Your Route
The most common ferry routes in Andaman are:
Port Blair to Havelock Island
Havelock Island to Neil Island
Port Blair to Neil Island
Decide on your route and plan your ferry ride according to your travel itinerary. Note that ferry schedules can vary depending on the season, so check the timing for your chosen route in advance.
2. Check Ferry Availability and Timings
The next step is to check the availability of ferries on your selected travel dates. This can be done on the official websites for government ferries or private operators.
provide easy access to their schedules and timings. Government ferry schedules can be checked on the official Andaman tourism website or at the Port Blair ticket counter.
3. Book Online or Offline
Online Booking (Recommended):
For private ferries, booking online is the most convenient option. Visit the websites of ferry operators and select your travel dates, route, and preferred seating class. Most websites accept international and domestic credit/debit cards.
Offline Booking (Government Ferries):
To book a government ferry, you need to visit the counters in Port Blair or the islands. You can purchase tickets at:
Phoenix Bay Jetty (Port Blair)
Havelock Island Jetty
Neil Island Jetty
Government ferry tickets usually go on sale 2-3 days before the departure date, so book early, especially during peak seasons like December and January.
4. Choose Your Class of Travel
Ferries typically offer different classes of seating:
Economy Class: Basic seating with affordable prices.
Deluxe or Premium Class: More spacious seats with better amenities.
Luxury Class: Top-tier service with a luxurious experience.
Choose a class based on your budget and comfort level. Private ferries offer more premium experiences with air-conditioned cabins and modern amenities.
5. Prepare Your Travel Documents
Ensure you have the required documents handy when booking and boarding the ferry. For both government and private ferries, you will need:
A valid ID (Passport, Aadhar, or Voter ID)
A printed or digital copy of your ferry ticket
Foreign nationals may require an additional permit for certain islands, so check with the authorities beforehand.
6. Arrive Early at the Jetty
It’s advisable to arrive at the ferry terminal at least 30-45 minutes before departure. Boarding usually begins around 30 minutes before the scheduled time, and latecomers may not be allowed on board.
Tips for a Smooth Ferry Experience
Book Early: Ferries can get fully booked during peak tourist seasons, so plan ahead and book your tickets as soon as possible.
Carry Essentials: The ferry ride can last between 1-3 hours depending on the route, so carry water, snacks, and entertainment to keep yourself occupied.
Motion Sickness Medication: If you're prone to seasickness, it's a good idea to take motion sickness medication before the ride.
Stay Updated on Weather: Ferry schedules can be affected by weather conditions, so keep an eye on the forecast and stay in touch with your ferry operator for any updates.
1 note
·
View note
Text
Chardham Yatra Online Registration Guide

Here is how to register for Chardham Yatra easily. It is important whether you are going alone or with a tour package. Just follow these steps:
Visit the Official Website: Visit the official tourism website or the Chardham Yatra registration portal. This is the primary source for all official information and registration.
Create an Account: Create an account by entering your name, email, and phone number. After that, log in to fill out the registration form. It is simple and quick to get started.
Fill in the Registration Form: Fill out the online form with your info and when you want to travel. Choose how you will get around. If you are using a Chardham Yatra Tour Package, have your package details ready.
Upload Necessary Documents: Upload clear pictures of your ID (like your Aadhar card or passport) and a recent photo of yourself. Make sure these images are easy to see and read. This helps confirm who you are.
Submit and Pay: Review your details, then pay the registration fee online. You can use a credit card, debit card, or online banking. Double-check everything before submitting your payment to complete the process.
Download the Registration Receipt: After paying, get your registration receipt. Download and print it. This is your travel permit. Keep it with you during your entire journey. It is important for the Chardham Yatra.
#chardhamyatraregistrationguide#chardhamyatra#chardhamyatrabyhelicopter#chardhamyatrawithtempotraveller#tempotraveller#touristcarhireindelhi#chardhamyatratourpackage
0 notes
Text
How to Get a Passport for Your Newborn Baby in India
Planning to travel with your little one? You’ll need to get a passport for your newborn. Here’s a simple guide to help you navigate the process of obtaining a passport for your baby in India.
Step-by-Step Guide to Getting a Passport for Your Newborn in India
1. Gather Necessary Documents
First, collect the required documents:
Birth Certificate: An original or a certified copy of your baby’s birth certificate.
Proof of Address: This can be any valid document that shows your current address, such as a utility bill, Aadhar card, voter ID, or bank statement.
Parents’ Proof of Identity: Both parents must provide valid ID, such as a passport, Aadhar card, or driver’s license.
Annexure D: This is a declaration form that both parents need to sign.
2. Complete the Passport Application Form
Visit the official Passport Seva website to complete the online application form. Create a login ID if you don’t have one, and fill out the application form for a new passport.
3. Make an Appointment
After filling out the form, you need to schedule an appointment at the nearest Passport Seva Kendra (PSK) or Regional Passport Office (RPO). Pay the application fee online and choose a convenient date and time for your appointment.
4. Get a Passport Photo
Your newborn will need a passport photo that meets specific requirements:
The baby’s eyes should be open (or partially open).
The background should be plain white.
The baby should be facing the camera directly with a neutral expression.
Many photography studios are familiar with the passport photo requirements for infants.
5. Visit the Passport Seva Kendra (PSK)
On the day of your appointment, both parents should accompany the newborn to the PSK. Carry all the required documents, including:
Printed application form
Original and photocopies of the birth certificate
Parents’ proof of identity and address
Annexure D form
At the PSK, you will submit your documents, and the staff will verify them. The baby’s photo and fingerprints will also be taken if needed.
6. Pay the Fees
The current application fee for a minor’s passport (under 18 years) is ₹1,000. This fee can be paid online during the application process. Fees are subject to change, so check the latest rates on the official website.
7. Track the Application Status
Once you’ve submitted everything, you can track the status of your application online through the Passport Seva website. Standard processing time is typically a few weeks, but it can vary depending on the case.
Tips for a Smooth Process
Double-Check Everything: Ensure all forms are filled out correctly and all documents are included to avoid delays.
Make Copies: Keep copies of all documents submitted, just in case.
Stay Informed: Regularly check the status of your passport application online.
Conclusion
Obtaining a passport for your newborn may seem like a daunting task, but with careful preparation and attention to detail, it can be a smooth process. Start early to ensure you have ample time to gather documents, fill out forms, and account for processing times.
Need assistance? Contact a passport agent for expert help and a hassle-free experience. Our agents are experienced in handling all aspects of the passport application process and can ensure everything is done correctly the first time around.
Ready to get started? Contact a Passport Agent Today!
Travel safely and enjoy your adventures with your little one!
Source: https://passportagentsinmumbai.com/get-passport-for-newborn-india/
0 notes
Text
Mahakaleshwar Temple Bhasm Aarti Online Booking: A Guide
Mahakaleshwar Temple, located in Ujjain, Madhya Pradesh, is one of the twelve Jyotirlingas and holds a significant place in Hinduism. The temple is renowned for its unique Bhasm Aarti, a ritual performed with sacred ash (bhasma) in the early morning hours. Given the spiritual importance and the limited capacity for this ritual, many devotees seek to book their attendance in advance. This guide provides detailed information on how to book Mahakaleshwar Temple Bhasm Aarti Online Booking , along with insights into the ritual's significance.
Importance of Bhasm Aarti

Unique Ritual: The Bhasm Aarti is unique to the Mahakaleshwar Temple and involves the offering of bhasma (ash) to Lord Shiva. It symbolizes the eternal nature of the soul and the cycle of life and death.
Spiritual Experience: Participating in the Bhasm Aarti is considered highly auspicious and spiritually uplifting. It offers devotees a profound connection with the divine.
Cultural Heritage: The ritual is an integral part of the temple's cultural heritage and attracts pilgrims from all over India and beyond.
Online Booking Process for Bhasm Aarti
To facilitate the participation of devotees and manage the large influx of pilgrims, the Mahakaleshwar Temple Committee offers an online booking system for the Bhasm Aarti. Here’s a step-by-step guide to booking your slot:
Visit the Official Website:
Go to the official website of Mahakaleshwar Temple (www.mahakaleshwar.nic.in).
Registration:
If you are a first-time user, you need to register on the website. Provide necessary details such as your name, email address, and mobile number to create an account.
After registration, log in with your credentials.
Booking a Slot:
Navigate to the ‘Bhasm Aarti Booking’ section on the website.
Select the desired date for your visit. Keep in mind that bookings are often made weeks in advance due to high demand.
Enter the number of participants (usually, there is a limit on the number of bookings per user).
Upload Required Documents:
Upload a scanned copy of your Aadhar Card or other valid ID proof as required.
Upload a recent photograph. Ensure the photo is clear and meets the specified guidelines.
Payment:
Complete the payment process. The booking fee can be paid online using a credit card, debit card, or net banking.
After successful payment, you will receive a confirmation email and SMS with your booking details.
Print the Booking Confirmation:
Print the confirmation receipt. You will need to present this along with your ID proof at the temple.
Tips for Attending the Bhasm Aarti
Arrive Early: The Bhasm Aarti starts early in the morning, around 4 AM. It is advisable to arrive at least an hour before the scheduled time to complete security checks and find a good spot.
Dress Code: Follow the temple’s dress code strictly. Men are usually required to wear dhotis, and women should wear sarees.
Respect the Rituals: Maintain decorum and respect the sanctity of the rituals. Photography is generally not allowed during the Bhasm Aarti.
Conclusion
Booking the Bhasm Aarti at Mahakaleshwar Temple online is a convenient and efficient way to ensure your participation in this unique and spiritually enriching ritual. By following the outlined steps, you can secure your spot and prepare for an unforgettable experience. The Bhasm Aarti is not just a ritual; it is a profound journey into the depths of spirituality, connecting devotees with the eternal essence of Lord Shiva. Make sure to book your slot well in advance and immerse yourself in the divine energy of Mahakaleshwar Temple.
For more info. Visit us:
Mahakaleshwar Aarti Booking
Ujjain Jyotirlinga Darshan
Taxi for Ujjain Mahakal Darshan
0 notes
Text
Invalid Signature Problem fix with e card cutter go24 info
How to validate digital signature in PDF in mobile
If you want to validate digital signature in a PDF from your mobile phone, then you can take help from ecardcutter.go24.info website.
online pdf signature validation and download
If you want to validate the digital signature by uploading the PDF of a certificate online and also want to download the validated PDF, then you can use this E-Card Cutter Go24. You can go to the website
https://ecardcutter.go24.info/digital-signature-validation-online
DSC All in One PDF
All in One PDF Digital Signature Validation Online, Validate Digital Signature in All in One pdf website?
DSC All PDF
DSC Aadhaar Card
Aadhar Card PDF Digital Signature Validation Online, Validate Digital Signature in eAadhaar pdf website?
DSC Aadhaar
DSC PAN Card
PAN Card PDF Digital Signature Validation Online, Validate Digital Signature in PAN pdf using website?, Signature Not Verified in PAN PDF
DSC PAN Card
DSC Birth Certificate
Birth Certificate Rajasthan PDF Digital Signature Validation Online, Validate Digital Signature in Birth Certificate Rajasthan using website?, Signature Not Verified in Birth Certificate PDF Rajasthan
DSC Birth Raj.
DSC Death Certificate
Death Certificate Rajasthan PDF Digital Signature Validation Online, Validate Digital Signature in Death Certificate Rajasthan using website?, Signature Not Verified in Death Certificate PDF Rajasthan
DSC Death Raj.
DSC Marriage Certificate
Marriage Certificate Rajasthan PDF Digital Signature Validation Online, Validate Digital Signature in Marriage Certificate Rajasthan using website?, Signature Not Verified in Marriage Certificate PDF Rajasthan
DSC Marriage Raj.
DSC Bonafide Certificate
Bonafide Certificate Rajasthan PDF Digital Signature Validation Online, Validate Digital Signature in Domicile Certificate Rajasthan using website?, Signature Not Verified in Mool Niwas PDF Rajasthan
DSC Bonafide Raj.
DSC Caste Certificate
Caste Certificate Rajasthan PDF Digital Signature Validation Online, Validate Digital Signature in Caste Certificate Rajasthan using website?, Signature Not Verified in Jati PDF Rajasthan
DSC Caste Raj.
DSC Ration Card
Ration Card Rajasthan PDF Digital Signature Validation Online, Validate Digital Signature in Ration Card Rajasthan using website?, Signature Not Verified in Ration Card PDF Rajasthan
DSC Ration Raj.
DSC Ration NOC
Ration NOC Rajasthan PDF Digital Signature Validation Online, Validate Digital Signature in Ration NOC Rajasthan using website?, Signature Not Verified in Ration NOC PDF Rajasthan
DSC Ration NOC Raj.
DSC Character PDF
Character or Police Verification Certificate Rajasthan PDF Digital Signature Validation Online, Validate Digital Signature in Police Verification Certificate Rajasthan using website?, Signature Not Verified in Character Certificate PDF Rajasthan
DSC Character Raj.
How to use ?
Cropping Cards from PDFs has never been easier. E-Card Cutter makes cropping cards super easy. With Just a few clicks the Card is ready to be Printed !
0 notes
Text
Aadhaar Card Correction Online - JDMR
Guide to know the way of Aadhaar Card Correction Online
The 12-digit unique identification number on an Aadhaar card must be presented in order to confirm a person's identity and place of residence. This is the reason it is regarded as an important document. Moreover, a number of government perks and subsidies are exclusive to those who can show their Aadhar card. Having said that, it is imperative that you regularly update the details on your Aadhar card in order to prevent errors. Continue reading for comprehensive information on how to visit an Aadhar enrollment or update center to acquire an offline update for your Aadhar card. The opportunity to change personal data at the center, including name, DOB, gender, phone number, and email address, is one of these services.
In response to recent events, the Unique Identification Authority of India (UIDAI) released a notification detailing the updated requirements for Aadhaar enrollment and updates. New forms are available for both residents and non-residents (NRIs) to Apply for New Aadhaar Card Online who wish to change their identifying information or join in the Aadhaar program.

Updates to information or documents can now be made by anyone with an Aadhaar card, for a period of ten years beginning on the day the card was generated. There are several simple ways to complete the form: going to an enrollment facility, filling it out online, or using the UIDAI mobile app.
When these changes on Online Apply Aadhaar Card take effect on January 16, 2023, they will make Aadhaar enrollment and updates more thorough and accessible by encouraging online updates. This is a far cry from the standards of 2016.
Techniques for Online Aadhar Card Updates
A person can change their address, name (with some restrictions), date of birth, and gender online on their Aadhaar card.
Please follow the guidelines below to update or correct the information on your Aadhaar card online:
Step 1: Click on the Portal of Aadhaar Self Service Update. Your registered cell phone number and the one-time password that was sent to it are required, as well as your Aadhaar number.
Step 2: Choose the "Name/Gender/Date of Birth & Address Update" option.
Step 3: Choose the modifications you wish to make in the online Aadhaar update process. Depending on the Head of Family (HOF), you can update your address or change your name, gender, date of birth, or other personal information.
Step 4: Once you've chosen whatever demographic field to modify, enter the necessary information in it.
Step 5: Please submit scanned copies of the original documents so that your name, address, and birthdate can be updated.
Step 6: To pay fifty rupees for the online update, use net banking, a debit or credit card, or both.
Step 7: Obtain the Service Request Number. You can follow up on the update request or use this number for any future interaction with the UIDAI helpdesk.
Step 8: You will receive an SMS message containing the Enrollment ID once your request has been verified by the UIDAI's internal quality control operators. This will occur as soon as the demographic information you submitted is compared to the supporting documentation.
Step 9: Complete your request processing, following a few further validations by the backend program. You will then receive an SMS notice with the final tally.
Requests for Aadhaar Card Correction Online are typically responded to within 30 days. When the update is finished, you will be able to print your Aadhar card and download the updated version.
Should your Aadhaar Card not be available online, how can you update certain details?
You can ask help from JDMR It Solution PVT. LTD. to update or modify your email address, mobile number, or biometric data is an Aadhaar Seva Kendra or Enrolment Center. This is in addition to any and all demographic information that may be required.
0 notes
Text
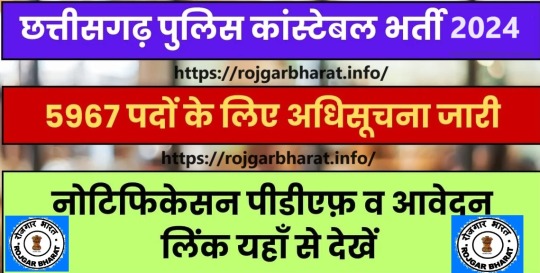
Name of Post:
Chhattisgarh Police Constable Online Form 2024
Post Date:06 January 2024 | 09:37 PMShort Information :Chhattisgarh Police Department has Recently Invited to the Online Application Form for the Post CG Police Constable (GD / Trade / Driver) Posts Recruitment 2024.
Chhattisgarh Police Department
CG Chhattisgarh Police Constable Recruitment 2024
Important Dates
Start Date of Application Form: 01/01/2024
Last Date of Application Form : 15/02/2024
Exam Date : Notify later
Application Fee
General/OBC :Rs. 200/-
SC/ST/EWS :Rs. 125/-
ExSM : Rs. 0/-
Pay the Exam Fee Through Debit Card / Credit Card / Net Banking / UPI Fee Mode Only.
Age Limit as on (01/01/2023)
Minimum Age : 18 Years
Maximum Age : 28 Years
Age Relaxation read the notification.
Education Qualification
10th Passed From CG /MP Board ( 8th Pass for ST and 5th Pass for Naxalite Areas Only)
Vacancy Details
Total Post : 5967 Posts
Physical Standard
Height: 168 cm (Male), 158Cm (Female)
Chest : 81cm -86 Cm
Race- 1500 Meter (Driver & Trade) , (800 meter, 100 meter )-GD
Selection Process
PET/PST/ DV
Written Test
Medical Examination
Required Documents
Candidates Photograph
Candidates signature
08th / 10th Mark sheet And Certificatest
Aadhar Card / Pan Card
Pay Scale
Rs. 19500- 62000/- (Level-4 Pay Matrix).
How To Apply CG Police Constable
These are following step.
Click on the Apply Online Link given below.
Fill out the application form.
Upload the required documents
Pay Fees
Print the Application Form.
USE IMPORTANT LINKS
Apply Online
0 notes
Text
RRB JE Admit Card 2024 Download Exam Date Centre Details Syllabus Pattern

RRB JE Admit Card 2024: The Railway Recruitment Board is released the RRB Junior Engineer Admit Card on 12th December 2024 on the official website. According to the official announcement, the Junior Engineer CBT 1 exam will be conducted from 13th to 17th December 2024, at various centers nationwide.
RRB JE Admit Card Overview
The RRB JE Recruitment 2024 application process started on 30 July 2024 and ended on 29 August 2024. Candidates who successfully applied within the given period can download their admit cards from the official RRB website. OrganizationRailway Recruitment Board – RRBName of the Post Junior Engineer - JETotal Vacancies7951 VacancyCBT-1 Exam Date13th - 17th December 2024Admit Card Released12th December 2024Official Websiterrbapply.gov.in
RRB JE Selection Process
The selection process for RRB JE Recruitment 2024 is extensive, comprising four key stages. Candidates must clear each stage to qualify for the Junior Engineer positions. The selection process is as follows: - Computer-Based Test (CBT) 1 - Computer-Based Test (CBT) 2 - Document Verification - Medical Examination
RRB JE Exam Scheme & Paper Pattern
The RRB JE Exam consists of two Computer-Based Tests (CBT 1 and CBT 2), followed by document verification and a medical examination. Here we have added the complete examination scheme for both tests. Computer-Based Test (CBT) 1 Pattern This is the first stage of the exam, consisting of 100 multiple-choice questions covering subjects such as Mathematics, General Intelligence & Reasoning, General Awareness, and General Science. The exam duration is 90 minutes. Each question will carry one mark and there will be a negative marking of 1/3 marks for each wrong answer. SectionNumber of QuestionsMaximum MarksMathematics3030General Intelligence & Reasoning2525General Awareness1515General Science3030Total100100 Computer-Based Test (CBT) 2 Pattern Candidates who pass CBT 1 will proceed to CBT 2. Each question will carry one mark and 1/3 marks will be deducted for each wrong answer. The duration of the test is 120 minutes. SectionTotal QuestionsMaximum MarksGeneral Awareness1515Physics & Chemistry1515Basics of Computers and Applications1010Basics of Environment and Pollution Control1010Technical Abilities100100Total150150
RRB JE Admit Card Details
The RRB JE Admit Card is a crucial document for all candidates appearing for the RRB JE exam. Candidates must bring the admit card to the exam centre, along with valid identification such as Aadhaar Card, Voter ID, or Passport. Without the admit card, entry to the exam hall will be prohibited. It will contain important information such as: - Candidate’s name and photograph - Roll number - Exam date, time, and venue - Exam day guidelines and instructions
How To Download RRB JE Admit Card 2024
Remember, without Admit card you won’t be allowed into the exam center, and you’ll automatically fail the exam. Make sure to also bring a photo or Pan Card or Aadhar Card for identity verification. Always read the instructions carefully before the exam. Follow these easy steps to download your RRB Junior Engineer Admit Card: - Go to the official website: indianrailways.gov.in and rrbapply.gov.in - Look for recent announcements on the homepage. - Find the link for the RRB Junior Engineer Admit Card 2024. - Click on the link. - Fill in the necessary information where asked. - Hit the submit button. - Your admit card will then appear on the screen. - Download it as a PDF. - Print it out to have it ready for your exam day.
Important Links of RRB JE Admit Card
Download Admit CardClick HereDownload NotificationClick HereJoin NEToday ChannelWhatsApp | TelegramGet More InformationClick HereWebsiteClick Here Read the full article
0 notes
Text
The Role of Holograms in Aadhar Cards

The Aadhar card, India's unique identification system, has become an integral part of the lives of over a billion citizens. With its widespread use in accessing government services, financial transactions, and more, safeguarding the integrity and security of Aadhar cards is of paramount importance. One crucial measure in this regard is the use of holograms.
Holograms have emerged as one of the most effective security features for documents like Aadhar cards. These 3D images are created through a complex process of laser beams, offering depth, movement, and a level of complexity that is extremely difficult to replicate. Here's how holograms enhance the security of Aadhar cards:
Holograms on Aadhar cards are visually striking and can be quickly authenticated by officials and service providers. They are challenging to reproduce accurately, deterring counterfeiters.
Attempts to tamper with or alter the hologram are readily noticeable, making it harder for individuals to manipulate the card.
Holograms can also be used to protect sensitive information on the card. Information can be hidden within the holographic image, and any tampering or duplication will immediately reveal alterations.
Holographic printing process is a sophisticated and specialized technique that involves high precision and technology. This makes mass production of counterfeit cards significantly more difficult.
The use of holograms in Aadhar cards is a crucial step in securing the identity of every Indian citizen. It not only deters fraud but also protects sensitive data. As technology continues to advance, holograms will remain a vital component of ensuring the trustworthiness and authenticity of the Aadhar system. By employing holograms, India demonstrates its commitment to maintaining the integrity of the Aadhar card, a fundamental tool in its journey towards a more efficient and secure digital future.
#holograms#2d/3d hologram#hologram#holographic#dot-matrix#kiranholographics#stickerprinting#3dhologram#raw materials#kiran holographics
0 notes
Text
A Step-by-Step Guide on How to Apply for a Permanent Driving License Online

Obtaining a permanent driving license online is a significant milestone in one's life, granting the freedom and responsibility to operate a motor vehicle legally. The process of applying for a permanent driving license can be a bit daunting, involving paperwork and visits to government offices. However, in today's digital age, many countries have streamlined this process by allowing individuals to apply for a permanent driving license online. In this article, we will provide a comprehensive guide on how to apply for a permanent driving license online, outlining the steps you need to follow for a smooth and hassle-free experience.
Why Apply for a Permanent Driving License Online?
Applying for a permanent driving license online offers numerous advantages over the traditional, in-person application process. Here are some reasons to consider applying online:
Convenience: Applying online eliminates the need to visit government offices in person, saving you time and effort.
Accessibility: Online applications are available 24/7, allowing you to apply at your convenience.
Reduced paperwork: Online applications often require less physical documentation, as you can upload digital copies.
Faster processing: Online applications tend to be processed more quickly than their offline counterparts.
Secure and efficient: Government websites often employ robust security measures to protect your personal information.
Step-by-Step Guide on How to Apply for a Permanent Driving License Online
Eligibility Check: Before you begin the online application process, ensure that you meet the eligibility criteria for obtaining a permanent driving license in your country. Requirements may vary, but typically include age restrictions, learner's license possession, and passing a driving test.
Create an account: The first step in applying for a permanent driving license online is to go to our website and apply for a permanent driving licence online. Our portal will serve you all driving-related transactions.
Select the License Type: Once you have created an account, log in and select the option to apply for a permanent driving license. The website will guide you through the process based on your current driving status and any existing learner's license.
Upload Required Documents: The online application will prompt you to upload necessary documents, which may include:
Proof of address (utility bills, passport, or other government-issued documents)
Proof of age and identity (passport, birth certificate, or Aadhar card, depending on your country)
Passport-sized photographs
Learner's license
Medical certificate (if required)
Ensure that all uploaded documents are in the required format (often PDF or image files) and meet the specified size limits.
Complete the Application Form: You will need to fill out an online application form with your personal details, such as name, date of birth, and contact information. Be accurate and honest, as any discrepancies may result in delays or rejection.
Pay the Application Fee: Pay the prescribed application fee through the online portal. Payment options typically include debit/credit cards, net banking, or other online payment methods. Keep a copy of the payment receipt for your records.
Schedule a Driving Test (if required): Depending on your country's regulations, you may need to schedule a driving test as part of the application process. If so, the online portal will guide you through selecting a test date and location.
Appear for the Driving Test: Attend your scheduled driving test on the designated date and location. Be prepared by practicing your driving skills in advance. Pass the test to move forward in the application process.
Track Application Status: After completing the driving test, you can track the status of your application online. You may receive updates on your application's progress, from initial submission to license printing.
Collect Your Permanent Driving License:
Once your application is approved and processed, you will receive instructions on when and where to collect your permanent driving license. Be sure to carry the necessary identification and supporting documents when collecting your license.
Enjoy Your New Privileges:
With your permanent driving license in hand, you are now legally authorized to drive a motor vehicle on public roads. Drive responsibly, follow traffic rules, and enjoy the freedom and convenience that a driver's license provides.
Conclusion
Applying for a permanent driving license online has become more accessible and convenient in recent years. This digital approach streamlines the application process, reduces paperwork, and provides quicker results. By following the step-by-step guide outlined in this article, you can navigate the online application process with ease and look forward to enjoying the privileges of driving legally. Always ensure that you meet the eligibility criteria, provide accurate information, and follow the regulations of your specific country's transport department or licensing authority for a smooth application experience. Remember to drive safely and responsibly once you obtain your permanent driving license.
0 notes
Text
Simple Guide to UP Ration Card Download, Status Check, and More
In Uttar Pradesh, the Ration Card is necessary for subsidised access to vital goods. This document helps households below the poverty level buy food grains and other basics and identifies them. This page will explain Ration Card download, status checks, and UP's Ration Card status relevance.
Understanding UP Ration Card Significance
Many Uttar Pradesh households depend on their Ration Card. It verifies identities and assures worthy households get government subsidies for food grains, fuel, and other necessities. The Ration Card also provides scholarships, LPG subsidies, and more. These rights need a current Ration Card UP.
Steps to Download Ration Cards
Online services make Uttar Pradesh Ration Card applications easier. Steps to download your Ration Card:
Visit the Official Website: Visit the Uttar Pradesh Food and Civil Supplies Department website.
Ration Card Section: Visit the website's Ration Card area. Search for new apps or Ration Card services.
Provide Details: Provide your Aadhar number, family information, and other essential information.
Identity, residence, and income certificates must be uploaded.
After submission, the application is verified. Complete your information accurately to prevent delays.
Download Ration Card: After approval, download the Ration Card from the website. It is generally a PDF that you can download and print.
Checking Ration Card Status
You must check your Ration Card application status to keep informed. How to do it:
Visit the Official Website for Ration Card Download: Visit the Uttar Pradesh Food and Civil Supplies Department website.
Track Application: Click ‘Track Application’ or ‘Check Status’ on the webpage.
Enter App Number: Enter your Ration Card application number and other info.
Check Status: View your Ration Card application status after entering the required information. It shows if your application is pending, granted, or denied.
Importance of UP Ration Card
Many Uttar Pradesh households depend on their Ration Cards. Here are some reasons for its importance:
The Ration Card lets households buy critical food grains at significantly discounted prices from government-run Fair Price Shops, providing food security for everyone.
Ration Cards provide access to government health care, education, and financial aid.
Proof of Identity and Residence: The Ration Card is required for government services, bank accounts, and more.
Linking your Ration Card to your LPG connection gives you cooking gas subsidies, decreasing household costs.
Education and Scholarships: Ration Cards are needed to receive government scholarships and educational advantages, assuring a better future for youth.
Conclusion
Ration Cards are more than a document in Uttar Pradesh—they provide assistance and security for many households. The application procedure is easier thanks to government online services. Every qualified person may protect their family by knowing the Ration Card and completing the easy download and status check instructions. Take advantage of these online services to apply for your Ration Card and guarantee a brighter future for your family.
0 notes
Text
How to Get Paperless Loans ATD Money
Paperless loans are a convenient way to get quick cash. They can help you cover unexpected expenses and meet financial obligations. However, it is important to understand how these loans work.
One example of a paperless loan is the ATD Money app. This microfinance solution provider offers hassle-free mini-cash loans for salaried employees. The loan application process is simple and straightforward, and the approval time is fast.
1. Applying for a loan
Getting a paperless personal loan can be an excellent way to meet financial needs without the hassle of filling out paperwork. However, it is important to understand the terms and conditions of the loan before applying. Most lenders will consider your credit history and credit score when determining whether you qualify for the loan. Some lenders may even allow you to prequalify for a loan before applying, which can be helpful if you’re unsure of your eligibility.
The application process for a paperless personal loan is simple and can be done from the comfort of your home or office. You can fill out the application using your smartphone or computer, and submit any required documents online. The lender will then review your application and contact you if it is approved. Once the loan is approved, the funds will be deposited directly into your bank account.
A paperless personal loan is an excellent option for those who need a quick cash infusion, but do not want to wait weeks for the approval process. In addition, this type of loan is convenient for those who have poor or bad credit. Unlike traditional loans, a paperless personal loan does not require collateral or security and can be approved within minutes or hours.
Before applying for a paperless personal loan, it is important to have the required documents ready. These include proof of identity, proof of address, and income. Typical documents used for proof of identity include a passport, Aadhar card, and PAN card. Proof of address can be provided by a utility bill, driving license, or voter ID. To apply for a paperless personal loan, you will also need to have a valid e-mail address and a bank account.
When you are ready to apply for a paperless personal loan, be sure to choose a reputable lender. Reputable lenders will use encryption technology and security measures to protect your personal information. They will also adhere to all applicable regulations and laws. Moreover, they will not sell your personal information to third parties without your consent.
2. Filling up the application form
The digitisation of processes in the banking industry has led to more convenient solutions for customers, especially when it comes to loans. You can now apply for a personal loan online with minimal documentation and get the money you need within a few hours. This kind of service is a great solution for people who need quick loans for financial emergencies.
A paperless personal loan is a type of unsecured loan that doesn’t require any collateral or security to be approved. Depending on the lender, this type of loan can be used for a variety of purposes. Typically, the loan amount is transferred to the borrower’s bank account in a few minutes after the application process is complete.
To apply for a paperless personal loan, you’ll need to have an internet connection and a valid email address. You’ll also need to have a government-issued identification document, such as an Aadhar card or a PAN card. You’ll also need to have scanned copies of any other documents that may be required, such as proof of income or residence.
Another benefit of a paperless loan is that it’s safer than traditional applications, as the process is conducted entirely online. This eliminates the risk of losing important documents or misplacing them. In addition, lenders can slash the costs of printing and paper. As a result, this method is becoming increasingly popular among both consumers and financial institutions.
If you want to get a paperless personal loan, it’s best to apply through an established online lender. You can find many options on the web, and some are even mobile-friendly. Just make sure you’re using a trusted website and that you’re providing accurate information.
When you’re ready to apply, simply visit the lender’s website or download their app. Then, fill out your loan application form with the necessary information. Upload any necessary documents and finish the KYC process by linking your bank account. After verification, the loan will be automatically disbursed into your account. You can use the money to pay for your bills or to finance a new purchase.
3. Uploading documents
A paperless loan is a loan that can be applied for, verified, and approved without any physical documents. This type of loan is becoming more popular as technology advances, and it offers many benefits for borrowers. For example, it can save borrowers time and money by eliminating the need for a physical document check. In addition, it can help to protect personal information by keeping it out of the hands of third parties. This can be particularly important for loans that involve sensitive financial information, such as mortgages or car loans.
Typically, paperless loans are processed through an online application. This application can be completed on the lender’s website or mobile app. The borrower will need to provide basic information such as their name, address, and employment information. They may also be required to provide a valid source of income and submit a photo ID. In some cases, lenders will also ask for a credit report to help determine their eligibility.
Once the information is submitted, it will be reviewed by a representative. If the borrower is approved, they will be asked to sign an electronic agreement. This will eliminate the need for physical signatures, and it will also allow the lender to process the loan more quickly.
While some lenders have strict underwriting requirements, others are more flexible. For example, a payday loan company may only require a minimum credit score and income to qualify. This makes it a good option for borrowers with poor or bad credit. In addition, a payday loan company may offer a lower interest rate than other lenders.
In some cases, a paperless loan can be funded in as little as 24 hours. However, it is always best to research a variety of lenders to find the one that is right for you. Additionally, it is important to understand the terms and conditions of each lender. A loan with high interest rates or hidden fees can make the repayment process more difficult.
In conclusion, a paperless instant personal loan can be an excellent way to meet emergency expenses. These loans are easy to apply for and can be funded in as little as 24 hours. In addition, they can be used to cover unexpected expenses or pay off existing debt.
4. Paying the EMIs
A paperless personal loan is a quick, easy and secure process. It eliminates the hassle of submitting hard copies of documents and reduces the risk of losing them. It also saves time and money by eliminating the need for paperwork. In addition, it is easier to keep track of your EMI payments with a paperless personal loan.
One of the main benefits of a paperless personal loan is that you can apply for it online from anywhere. The process is fast and convenient, and you can even check your eligibility using a personal loan EMI calculator. Moreover, it allows you to pay your EMIs through NACH, which is an automated mode of payment that transfers funds between two accounts without manual intervention.
However, before applying for a paperless personal loan, make sure that you read the terms and conditions carefully. Make sure that you understand them fully, and that there are no hidden charges or costs. Also, make sure that you have a steady source of income and a high CIBIL score. This will ensure that you can repay the loan quickly.
Several banks and NBFCs offer paperless instant loans to their existing customers. These lenders will have all your KYC details including PAN, Aadhaar, address proof, income details, and loan repayment history. This will help them to approve your loan quickly and without any fresh documentation.
The benefits of a paperless personal loan are numerous and can be beneficial to anyone looking for financing. They can be used to purchase a home, start or expand a business, or even buy an automobile. These loans are easy to obtain and provide flexible repayment terms. They can also be used to consolidate debt or pay off other outstanding liabilities.
With the advent of technology, many processes have been digitized. For example, you can now get a paperless loan from Buddy Loan by applying on their website or downloading their app. Once you’ve filled in the required information, you can submit or upload your documents and complete the KYC process. Once the documents have been verified, you can deposit the amount directly into your bank account. You can also set up auto-debit to make your EMI payments on time.
#payday loans#quick cash loans#personal loans#instant loan#cash loans#loan app in india#payday loans in india#fast cash loans online#advance salary loan#loan apps
0 notes