#formcreator
Text
Free Poll Maker Google 2022 - Create New Google Polls Now!
Get a simple guide to know how to create Google Poll easily. Try FormBot, the best Free Poll Maker Google offers more than 500+ templates. Get yours now!

#googlepoll#Free Poll Maker Google#googleform#pollmaker#formbuilder#formcreator#onlinepollmaker#googlepollmaker
0 notes
Text
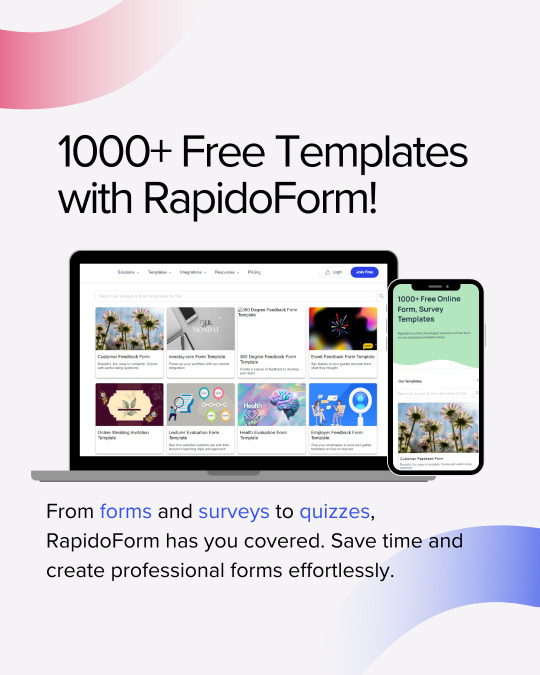
Wow! 1000+ free templates are now at your fingertips with RapidoForm! From forms and surveys to quizzes, we’ve got everything you need to create professional forms effortlessly.
#formbuilder#freetemplates#surveymagic#productivityhacks#worksmart#createwithease#formcreation#surveytools#efficiencyboost
0 notes
Text
Structs, Arrays, Matrices … [part 2]
Consider a class definition:
TAdvancedDropDownList = class
public
currPos :Integer;
items :Array of String;
constructor Create(entryItems :Array of String);
end;
implementation
{ TAdvancedDropDownList }
constructor TAdvancedDropDownList.Create(entryItems:Array of String);
begin
items := entryItems;
end;
Call this with:
procedure TForm1.FormCreate(Sender: TObject);
var
items :Array of String;
begin
items :=['Lorem','ipsum','dolor','sit','amet',
'consetetur','sadipscing','elitr','sed',
'diam nonumy eirmod tempor invidunt',
'ut labore et',
'dolore','magna aliquyam erat',
'sed','diam','voluptua'];
TAdvancedDropDown.TAdvancedDropDownList.Create(items);
end;
This is not a very god minimum working example. I cut off the unnecessary bits (in context of this post). This will fail. Error Message is :
Error: Incompatible types: got "{Open} Array Of AnsiString" expected "TAdvancedDropDownList.{Dynamic} Array Of AnsiString"
HHHMPH. Turns out, I have to use this trick.
type
TStringArray = Array of String;
{ TAdvancedDropDownList }
TAdvancedDropDownList = class
public
currPos :Integer;
items :TStringArray;
constructor Create(entryItems :Array of String);
end;
implementation
{ TAdvancedDropDownList }
constructor TAdvancedDropDownList.Create(entryItems:Array of String);
begin
items := entryItems;
end;
The changes are shown in orange. If I use the type of the argument (violet line in all examples) to the constructor as an Array of String, (it is expecting as such), then the supplied and try to set an Array of String inside the constructor using the said argument, it will fail.
It appears, that the type of the argument to the function (here the constructor), even tho is an Array of String, it is different than the type of a class variable, which is also defined as Array of String. The reason, as I understand is :
The former is an array of unspecified length, but immutable (Open Array)
The later is a mutable array of unspecified length that can add or remove elements (Dynamic Array).
Even tho, both are Array of String, we need a method to differentiate these. So, the current syntax of Lazarus / FPC requires the mutable class variable to have a different type signature.
This is done by creating a new type which is also an Array of String, and then setting the class variable to this type.
TStringArray = Array of String;
I do not understand the complete story here. But I am told in the forum, that this is the syntax now, and people use autopilot to work through this.
Okey .......
0 notes
Text
Borland c++ builder onchange


Int Alpha = ScrollBar1->Position // Alpha will store how much Alpha you want. Either place this code in the FormCreate method, or in a Buttwhenclickedon, a ScrollBar OnChange. Once you have done that, on to the code that matters. This method should work in all Builder versions however.įirst of all, you need to include the following defines If you are using 5, it is a bit easier than mentioned below, as your version includes newer API calls. Ok, im gonna presume that everyone is using borland C++ Builder 4. By using this code you agree to indemnify UtilMind Solutions from any liability that might arise from its use.

All this stuff is written in Borland Delphi. Its a really cool effect, below is how to do it. This page contains the set of freeware and shareware Delphi and C++ Builder components, which can help developers to write their own applications more effective and save their time. This is just one of the solutions for you to be successful. Bug - Fixed output monitor not saving regex match to variable. Bug - Persistent variables were only being saved after successful builds. Change - Added code completion to FBStandardGrid. Feature - Improvements to code completion in action studio. This also enables you to save space on the form.See the image below for examples of using the page control.XYZ軟體補給站 強力推薦!!!一定讓你值回票價,保證錯不了。-=-=-=-=-=-=-=-=-=-=-=-=-=-=-=-=-=-=-=-=-=-=-=-=-=-=-=-=-=-=-=-=-=-=-=-= DevExpress ExpressNavBar Suite v1.I just discovered how to make forms see through, like the start menu when u drag it. borland-c-builder-the-complete-reference 1/1 Downloaded from qa. on Novemby guest MOBI Borland C Builder The Complete Reference Yeah, reviewing a ebook borland c builder the complete reference could amass your near associates listings. Feature - Added OnChange event to CheckListBox control. Using this control allowsyou to break controls needed in your application intocategories. You will have to use a special descendant written by Dmitri Dimitrienko for Kylix support. It is however not designed to work directly with Kylix or Delphi for. Thus, you cancustomize the content of each page separately by droppingcontrols onto it.When switching between tabs, the controlautomatically displays the corresponding page.Use the page control if you need different set of controlsto reside on each separate page. Virtual Treeview is designed for Delphi 4 and higher and can also be used with Borland C++ Builder 4 and up. Borland Software Corporation may have patents and/or. Brian Long used to work at Borland UK, performing a number of duties including Technical Support on all the programming tools. It also contains a set of tabs and a client area.The only difference is that the page control provides aseparate page panel for each tab within it. that you can distribute in accordance with the C++Builder License Statement and Limited Warranty. See the image below for an example of using thetab control within other tab controls.The page control provides the same features as the tabcontrol. The image belowdisplays the tab control after completing the steps listedin that topic.You can also create more complex structures using the tabcontrol. Thecontent of controls can be dynamically changed by handlingthe OnChange event.Thus, one of the common applications ofthe tab control is to display dataset records.Tabs displayvalues of the dataset field that can identify a record.Controls within the page display values of other fieldsfrom the selected record.Please refer to the Using the TabControl to Display Dataset Records topic for an example ofusing the tab control in this manner. Thus, youcannot specify different page contents for different tabs(unless you change the page content dynamically in code).The tab control is most likely to be used if you want thesame set of controls to be displayed within its page. Note that unlike the page control, thetab control client area is a single panel.
0 notes
Link
Hunting for the best online form builder? We have done our bit of prudent research and found out the 10 best form builder apps that 2020 has to offer.
0 notes
Photo

Easy Form Builder is friendly and Powerful form creator.
With this plugin you can easily Create professional form. Create Unlimited Forms Create Multi step Forms Create Sample File uploading Email…More
https://wordpress.org/plugins/easy-form-builder/
1 note
·
View note
Text
"Pssst, Hey you, yeah I'm talking to you; have you signed up yet?"
Having someone else to do the writing for you so your time & energy can be freed up for other things is soooooo CLITCH!
For all those the sign up by Friday August 5, 2022 you will receive 10% off your next writing service.
Go to my website & hit the followed by the Contact Us link to sign up today.
#CHStyleLLC #clearcommunicator #documentexpert #articulatewriter
#formcreator #helpinghand #timesaver #careeradvancement #businessdevelopment #careersucess #successminded #takethenextstep
0 notes
Text
What you'll learn
Understand the purpose of Tables and how they are used in a databaseEdit the Form Properties to help Users navigate the Form Fields and enter dataLearn how to design Queries and use Queries to lookup records in the TablesUse Query Criteria and Parameter Queries to select specific records in the TablesLearn how to design and modify Reports in Layout and Design ViewsLearn how to design Forms and Subform that represent a one-to-many relationshipCreate a Switchboard Form with Command buttons that open Forms and ReportsUse a Query to calculate the Total in a ReportUnderstand how to create and Normalize a databaseLearn how to create relationships between Tables in a Database: using Key dataLearn strategies for Archiving data using Action QueriesOptimize a database for Multi-Users and improve network performanceShow moreShow lessAnother Computer Mama Guide: www.thecomputermama.com
If you wish to prepare for Certification Exam 77-424: Microsoft Office Access 2013 this course will help you build the skills and knowledge you need.
Step-by-step video demonstrationsCompanion eBooks with pages of detailed instructionsSample presentations and imagesPractice, Quizzes and Skill Test
All materials for this program are available online.
The following resources are available to download throughout the lessons:
Beginning Guide to Microsoft® Access 2013Intermediate Guide to Microsoft® Access 2013Advanced Guide to Microsoft® Access 2013Microsoft Access 2013 Sample files
In Beginning Access, you’ll cover basic through advanced topics, including:
Learn how to navigate the online course and submit your assignmentsUnderstand the purpose of Tables and how they are used in a databaseEdit the Form Properties to help Users navigate the Form Fields and enter dataLearn how to design Queries and use Queries to lookup records in the TablesUse Query Criteria and Parameter Queries to select specific records in the TablesLearn how to design and modify Reports in Layout and Design ViewsLearn how to manage Database files: Save and Save As
In Intermediate Access, you’ll cover basic through advanced topics, including:
Review the definition of one-to-many relationships in a databaseCreate a One-From-Many Relationship by using a Combo Box on a FormLearn how to design Forms and Subform that represent a one-to-many relatinshipUse Forms and Subforms to create a Search FormCreate a Switchboard Form with Command buttons that open Forms and ReportsUse a Query to calculate the Total in a Report
In Advanced Access, you’ll cover basic through advanced topics, including:
Understand how to create and Normalize a databaseLearn how to create relationships between Tables in a Database: using Key dataUnderstand Primary Keys and RelationshipsCreate a Receipt Form that uses a Report and Subreport to calculate the totalBecome skilled at working with Dates in a QueryVisualize the results and export the ReportsLearn strategies for Archiving data using Action QueriesOptimize a database for Multi-Users and improve network performance
The Microsoft Access 2013 Certification Training Program is part of the Microsoft Business Certification program: Microsoft Office Specialist (MOS). MOS certification is the globally recognized standard for validating expertise with the Microsoft Office 2013 suite. Students who wish to prepare for Microsoft Certification Exam 77-424: Microsoft Office Access 2013 will find beginning through advanced lessons that demonstrate these required MOS topics.
This course teaches the objectives for the following certification tests:
Expert Certification:
Access® 2013: Exam 77-424Who this course is for:This program is for you if you are an office worker, manager, entrepreneur, or other professional who wants to start using advanced Microsoft Office skills immediately. This program is also suitable for you if you are looking to learn about this software and expand your job possibilities.
0 notes
Text
I will convert/design word documents to a fillable pdf form. Contact
#wordtopdf #pdf #fillableform #designform #editpdf #fiverrgig #fiverrseller #fiverrgigs #imageediting #fileconversion #formcreation #fillablepdf
#word to pdf#pdf#pdfform#fillable form#fillable pdf form#designers#fiverrgigpromotion#fiverr buyer#fiverr#fiverrfreelancer#fiverrseller#businesswomen#businesss#real estate#formdesign
0 notes
Text
Consider
Check out my latest post: Consider
A galaxy wrapped in violenceBut all that happens in silenceNo one hears the planets dieAs they sink into the horizons eyeWhat we see is pastNone of it will lastCollisions change the formCreating some new bornBut the rocks continue to tumbleIt’s like they simply fumbleSlip from where they stoodNow spiralling for goodUntil the next impactWhen it’s death or a new tractThe cycle will continueLong…
View On WordPress
1 note
·
View note
Photo

Bookcases, floating and mounted shelves – FormCreations: Made to measure …, # books … https://ift.tt/36qg198
0 notes
Photo
Just Pinned to Virtual Assistants: #Virtualassistant services available at an affordable rate with a great turnaround time. | #Typing #transcription #dataentry #emailmanagement #formcreation #UKLateHour https://t.co/J1ivmVBSoc https://t.co/rScFzuE2FD VirtuadminUK https://t.co/J1ivmVBSoc https://ift.tt/2npL3gq
0 notes
Photo

Bücherregale, schwebende und eingebaute Regale – FormCreations: Maßanfertigung… http://bit.ly/2WqSTG0
0 notes
Text
Using Delphi Parse API
Given Parse was retired earlier this year, does it make sense to keep the Parse components in Delphi and how can you still use them?
The Parse web site (owned by Facebook) was retired earlier this year. This was a fairly popular BaaS (backend as a service) provider for mobile applications, but something you could use also from desktop apps. Delphi (and also C++Builder, btw) has included ready-to-use components for interfacing Parse APIs for quite some time. It was very easy to set up an account on the system and create an app. But the hosting was discontinued, and now what?
Additional Parse Hosting and the Delphi ParseProvider Component
While stopping the Parse web site, Facebook did you positive thing: they made the entire Parse server open source. So what happened is that many cloud hosting providers took that code and created compatible hosting services. By hosting the a fully API-compatible version of the Parse server, these providers made it possible to migrate client applications that were using parse with almost no effort.
There was one additional issue to use these additional providers from Delphi. Given Parse applications were hosted on parse.com, the main domain name was hard-coded in our component. Now in Delphi Tokyo Release 1 (or 10.2.1) we have added a class helper that lets you easily change the URL provider. As you can read at https://quality.embarcadero.com/browse/RSP-13608 all you need to do is add the line:
ParseProvider1.BaseURL := '...';
In a future release, this will become a property of the component, but to preserve compatibility it was added as a runtime only feature for Tokyo updates.
An Actual Example
To check this does really work I did the following. First I went to one of the Parse server providers that offers a limited free account, https://www.back4app.com/. By entering my credentials, in a minute I could create a test app and manually enter a user on their web console. The console configuration listed all of the parameters needed to connect.
Second I create a VCL forms application, with a ParseProvider component, a BackendUsers component, a button and a memo. In the ParseProvider I copied the various required IDs:
object ParseProvider1: TParseProvider ApplicationID = 'esSv_______Whi' RestApiKey = 'mxBY______Wl6' MasterKey = 'kxW_____DHl' end
The BackendUsers component only configuration is the connection to the provider (which should be automatic). Third step I wrote the following code to refer to the proper URL and get the list of users:
procedure TForm12.FormCreate(Sender: TObject); begin ParseProvider1.BaseURL := 'https://parseapi.back4app.com/'; end; procedure TForm12.Button1Click(Sender: TObject); var aJSONArray: TJSOnArray; begin aJSONArray := TJSOnArray.Create; try BackendUsers1.Users.QueryUsers([''], aJSOnArray); Memo1.Lines.Add (aJSOnArray.ToString); finally aJSONArray.Free; end; end;
0 notes
Text
Delphi - How to plot a math function (step by step)
I have seen many times people asking for a working solution about the function plot and now I am showing you a very easy step-by-step guide! :) First of all I need to say that this method is able to plot any kind of function f(x) for example f(x) = x^2 - 2x - 1. Let's see what we need:
Create a new project and drop a container. It can be what you prefer, for example a TPanel or a TRectangle. I am going to use the latter but it's your choice, the important thing is that you can use the OnPaint event.
It is optional that you have a function parser (Parser10 or tbcParser) to parse a function. It is not needed but without this you'll have to hard code the function every time. Later we'll discuss about this.
I'll create an example with a new Firemonkey HD From (File > New > Multi-Device Application). Drop a TRectangle and align it to client; in the object inspector on the left expand the Fill property and change the Color to white. Add the following code above the declaration of your form.
type TDoubleVector = record x, y: double; end;
This will be te container of our functions. Now add these procedures to the private part of your form and press CTRL + Shift + C to enable the code completion. br>
private xmin, xmax, ymin, ymax: integer; h, w: single; procedure DrawAxes(aCanvas: TCanvas); function LogToScreen(LogPoint: TRealVector): TPoint; function ScreenToLog(ScreenPoint: TPoint): TRealVector;
Let's code! The first procedure will be used to draw the x/y axes and the other 2 functions will convert the function to a line in the TRectangle so that we can see the plot. Click on the Form in the Structure view and add a OnCreate event. Let's start with the first piece of code:
procedure TForm1.FormCreate(Sender: TObject); begin xmin := -5; xmax := 5; ymin := -5; ymax := 5; end; procedure TForm1.DrawAxes(aCanvas: TCanvas); var i: integer; pw, ph, w, h: single; begin //draw intermediate lines aCanvas.Stroke.Color := TAlphaColorRec.Silver; w := (Rectangle1.Width / (xmax*2)); h := (Rectangle1.Height / (ymax*2)); pw := w; ph := h; for i := 0 to (xmax*2)-1 do begin aCanvas.DrawLine(TPointF.Create(pw, 0), TPointF.Create(pw, Rectangle1.Height), 1); aCanvas.DrawLine(TPointF.Create(0, ph), TPointF.Create(Rectangle1.Width, ph), 1); pw := w + pw; ph := h + ph; end; //draw x and y axes aCanvas.Stroke.Color := TAlphaColorRec.Black; aCanvas.Stroke.Thickness := 2; w := Rectangle1.Width; h := Rectangle1.Height; aCanvas.DrawLine(TPointF.Create((w/2), 0), TPointF.Create((w/2), h), 1); aCanvas.DrawLine(TPointF.Create(0, (h/2)), TPointF.Create(w, (h/2)), 1); end; procedure TForm1.Rectangle1Paint(Sender: TObject; Canvas: TCanvas; const ARect: TRectF); begin DrawAxes(Canvas); end;
The procedure DrawAxes is very important; just click on the Rectangle1 and put the procedure inside its OnPaint event. In the first part we calculate the space between the lines of the grid [ Rectangle1.Width / (xmax*2) ] and the in a for loop I draw the lines. The second part is the same but note that I am using a dark thick stroke. The result should be this:
Now we have to create the 2 most important function of the program: they will convert the points of a given function into a line in our chart! Let's use this code. Note that this has a scaling feature that allows a nice view of our function in the chart.
function TForm1.ScreenToLog(ScreenPoint: TPoint): TDoubleVector; begin result.X := xmin + (ScreenPoint.X / Rectangle1.Width) * (xmax - xmin); result.Y := ymin + (ymax - ymin) * (Rectangle1.Height - ScreenPoint.Y) / Rectangle1.Height; end; function TForm1.LogToScreen(LogPoint: TDoubleVector): TPoint; begin result.X := round(Rectangle1.Width * (LogPoint.X - xmin) / (xmax - xmin)); result.Y := Rectangle1.Height - round(Rectangle1.Height * (LogPoint.Y - ymin) / (ymax - ymin)); end;
We have almost finished! Now we have to draw the equation f(x) = x^2 - 2x - 1 we mentioned above and this is the code. Please note that it is inside the OnPaint event of the Rectangle. If you need to change the equation of the function at some point (for example when you click a button) don't forget to call the Rectangle1.Repaint procedure! Let's see the code:
procedure TForm1.Rectangle1Paint(Sender: TObject; Canvas: TCanvas; const ARect: TRectF); var PrevPoint, CurrPoint: TPointF; x: integer; logx: double; logy: double; y: integer; punti: TDoubleVector; begin DrawAxes(Canvas); Canvas.Stroke.Color := TAlphaColorRec.Cadetblue; PrevPoint := Point(0,0); for x := 0 to (round(Rectangle1.Width) - 1) do begin punti.X := logx; punti.Y := logy; logx := ScreenToLog(Point(x, 0)).X; logy := logx*logx - 2*logx - 1; // f(x) = x^2 - 2*x - 1 punti.X := logx; punti.Y := logy; y := LogToScreen(punti).Y; CurrPoint := Point(x, y); Canvas.DrawLine(CurrPoint, PrevPoint, 1); PrevPoint := CurrPoint; end; end;
Ta daa! Now we have written a code that can plot any kind of function :) Please note that the important line is when I give logy a value which is the value of the function. Let's see the result of our work: below we will discuss it.
Use the logy to define your function and use logx as variable. For example: we wanted to plot x^2 - 2*x - 1 and so we have written logx*logx - 2*logx - 1. What if we want to plot x^2 - 2? Very easy! Just use the code above and replace this line: logy := logx*logx - 2 (x*x - 2 x^2 - 2).
The code has logx and logy that allow us to do a scaling and plot the function. The "problem" is that we have to hard-code the function and assing a value to logy at compile time. What if we want this to be more flexible? For example: get the function x^2 - 2x + 3 from a TEdit and click a button to show the function. Well, we need a parser to parse the function. A very good one is Parser10 which is free (even if a bit old it's very good in our case) or tbcParser.
We can improve our work even more! :) Let's add the possibility to resize the plot. Add 2 buttons on the bottom on the form and give them the Text + (Name = ButtonZoomIn) and - (Name = ButtonZoomOut). Double click both and add the following code:
procedure TForm1.ButtonZoomInClick(Sender: TObject); begin //don't get negative numbers from the zoom + !! if ((xmax - 5) > 0) then begin xmax := xmax - 5; ymax := ymax - 5; xmin := xmin + 5; ymin := ymin + 5; Rectangle1.Repaint; end; end; procedure TForm1.ButtonZoomOutClick(Sender: TObject); begin xmax := xmax + 5; ymax := ymax + 5; xmin := xmin - 5; ymin := ymin - 5; Rectangle1.Repaint; end;
Now we have really finished! With this code we are able to zoom in and zoom out our function :D The important part is Rectangle.Repaint which is refreshing the content of our container (the Rectangle) with the new code. The 5 is the "scaling factor". You could declare at the beginning of the unit something like const scFactor = 5; (or whatever, it can be 10, 15... but I suggest you to keep the 5) and put scFactor instead of all those 5. Here's the final result:
This is an example of the great things you can do with Delphi! Imagine having this in your Andorid/iOS app, that would be great! You can addd Gestires to zoom in/zoom out with your fingers or support multiple functions in a single Rectangle (just draw and call Repaint). Stay tuned for more!
Article by Alberto Miola.
0 notes
Text
Convert any existing document to a fillable pdf. Contact
#PDF #fillableform #designform #editpdf #fiverrgig #fiverrseller #fiverrgigs #imageediting #fileconversion #formcreation #fillablepdf
#pdf#pdfform#fillable form#pdf editor#fiverrfreelancer#fiverrseller#fiverrgigpromotion#fiverr buyer#fiverr#freelanceratwork#designers#onlinebusiness#businesswomen#businessowners
0 notes
Last Seen Blogs

777qiuqiu
Untitled

sofia-td
Sofia TD

phim-thuyet-minh
phim thuyết minh

smutoperator
Smut Operator

lifestyleaficionado
Lifestyle Aficionado