#first gifset of 2021!!!
Explore tagged Tumblr posts
Text
I was thinking about foundation s1 while doing housework (as you do) and just realised that salvor starts the season rescuing an unconscious poly and ends it being rescued by gaal... gaal starts the season saying goodbye to her parents for the last time and ends it meeting her daughter for the first time... I'm emotional don't touch me
#I'm thinking about making a 'first scene/last scene' comparison gifset for all of the main characters#there could be a lot of interesting parallels to dig into there#foundation#gaal dornick#salvor hardin#foundation apple tv#foundation 2021#txt
19 notes
·
View notes
Text
my poor laptop isn’t gonna know what hit it. it’s gonna be photoshop 24/7, I’m going to have NO scratch disk space, my fan is going to be whirring like a jet engine, gifsets left and right
#me @ my past self: why didn't you spend this week converting the MKVs. why isn't that done yet.#NOW THE QUESTION IS: WHAT DO I GIF FIRST#it will probably be some Gifset Ideas that I had in 2021 where I was like 'but that'll take years bc I need footage from ruin & rising'#and unexpectedly! did not take as many years
11 notes
·
View notes
Text
god 2022 had some killer tv huh
#andor aloto iwtv were the ones i personally was obsessed with when they came out#watching all of those that year i was like....... wow these are the best new shows ive seen in a WHILE#i didnt watch the bear til last year but that came out in 2022 as well#and abbott started at the very end of 2021#havent watched severance yet but. also 2022.#this is good bc i remember thinking wow i am loving all this tv this year but its a shame all these shows i like are adaptations#/'existing ip' in the cast of andor#anyway one of these days i will watch severance#i really want to ive wanted to since i saw old man yaoi (first gifset i saw of the show)#but i havent been in the mood for a highly stressful show lately#just finished jojo though so honestly maybe i am in a headspace to handle it lmao#had a jojo inspired nightmare the other night. BEFORE i had started finishing the series#r.txt
0 notes
Note
hi sole! your sharpening is always so soft and pretty, i was wondering if you would be open to share it? hope you are having a wonderful november so far <3
Hi, Anon! Thank you so much <3 Yeah, sure, tutorial under the cut:
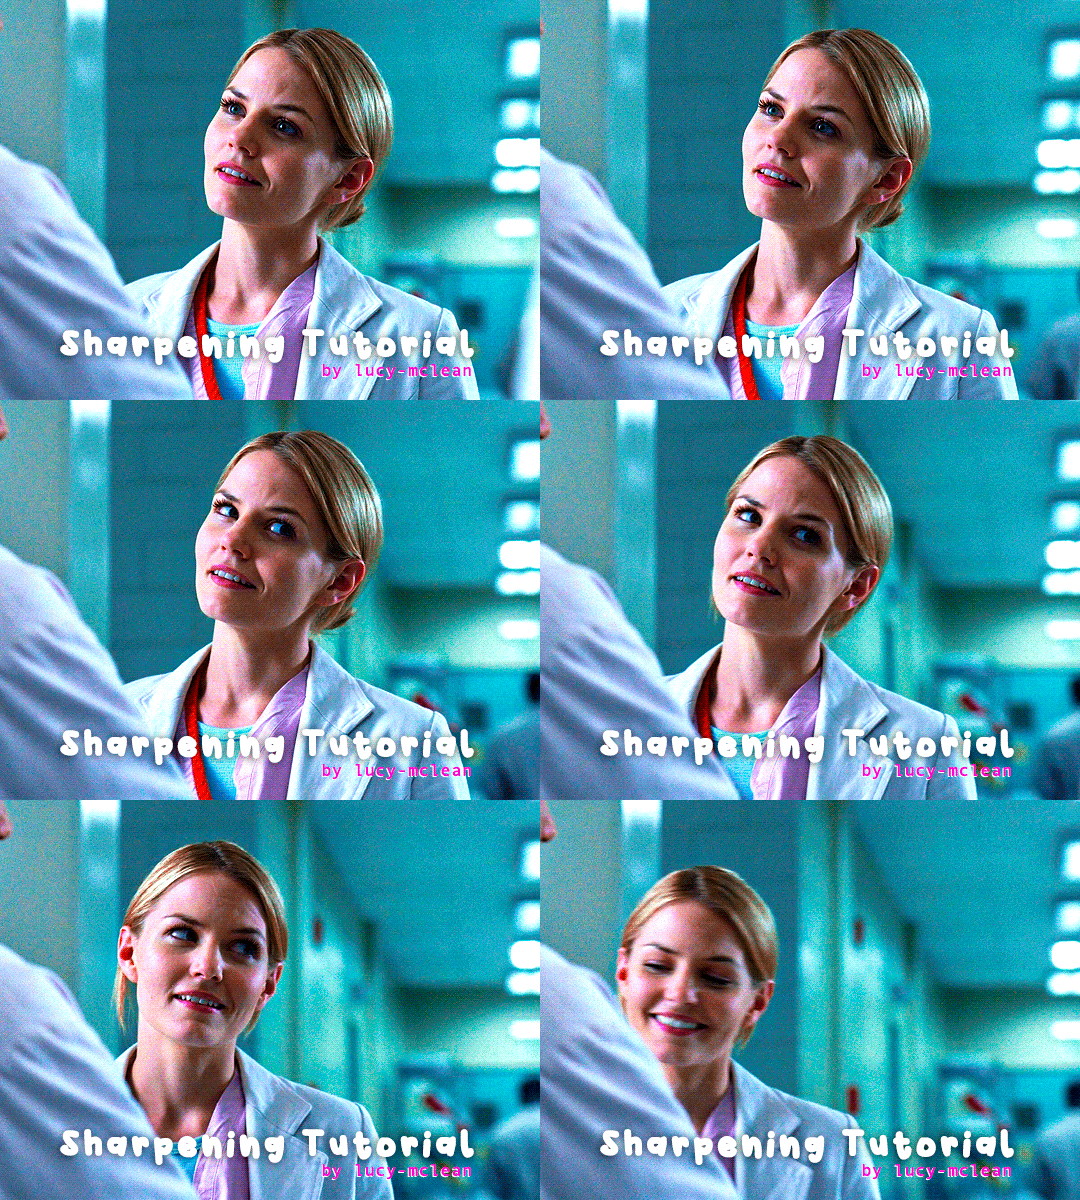
What you'll need:
Photoshop (I use Photoshop 2023)
Basic knowledge on how to make gifs
Camera Raw filter installed
Okay so, first of all, I use two different methods depending on the size of the gif. Let's start with the one I use for most of my gifsets which are big gifs (examples: x x x x.)
METHOD #1: Smart Sharpen + Camera Raw
I started using the Camera Raw filter last year and let me tell you, I'm obsessed! It completely changes the game of sharpening. I use this method for all gifs with a 540px width.
We're going to work on timeline so get your gif ready and convert it for smart filters. I'm using this scene from my last set as a base:

Here's the gif after I color it (I usually sharpen my gifs before I color them but for the sake of the tutorial I'm showing you this so you guys can see the difference):

(1) Smart Sharpen Layer: Let's start by adding a Smart Sharpen layer (Filter > Sharpen > Smart Sharpen) with these settings:
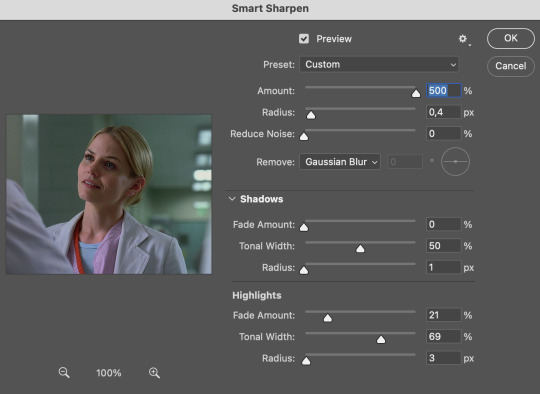
Disclaimer: I didn't come up with these settings myself I got them from these sharpening actions forever ago so I don't know which one it is :/. I also wasn't able to find that person's new blog (if they even have one since they've been inactive since 2021) so if anyone knows please let me know and I'll give them proper credit!
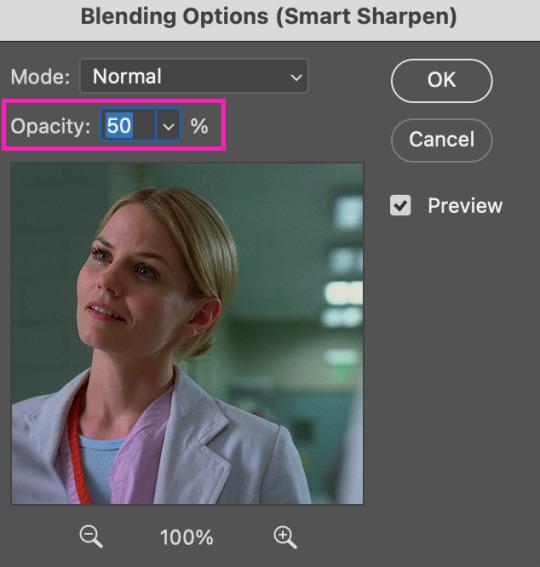
Now we're going to go to the 'Layers' panel and click on this little thingy:

This window will pop up and we are going to change the Opacity to 50%.
(2) Camera Raw Filter: Here's where the fun begins. Go to Filter and click on Camera Raw Filter (you'll need to have the plugin installed for it to show up.) I don't know how the Camera Raw window will look like the first time you open it but good thing you only need to change a couple of things!
If it isn't opened yet click on 'Effects' and we're going to change the Texture and Clarity:
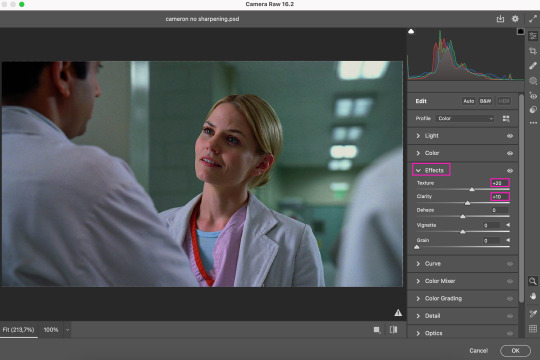
Depending on the scene/show/film I'm giffing, or if I want a stronger or softer sharpening, I'll use two different settings, but 99% of the time they are these:
First setting: Texture (+20) Clarity (+10)
Second setting: Texture (+40) Clarity (+20)


As you can see the difference isn't huge but the first setting gives a "softer" look. As I said I'll use one or the other depending on how I see the scene (it's almost always about the vibes yk.)
Feel free to experiment with these two and see what works best for you (although I wouldn't go higher than 40 on texture because the sharpening will look too fake imo.)
Also this filter is soooo good at making low quality videos look 1080p! Every time I've had to use 720p videos the Camera Raw filter has saved me 🫡
METHOD #2: Smart Sharpen
I use this method for smaller gifs. For example, 8 gifs of 268px x 180px sets (like these) or small-ish gifs in complex sets (like the second gifs in this set.)
This process is much simpler since it's the one I explained before but without adding the Camera Raw filter. That's it that's the method. Just a Smart Sharpen layer with the Opacity turned down to 50%.
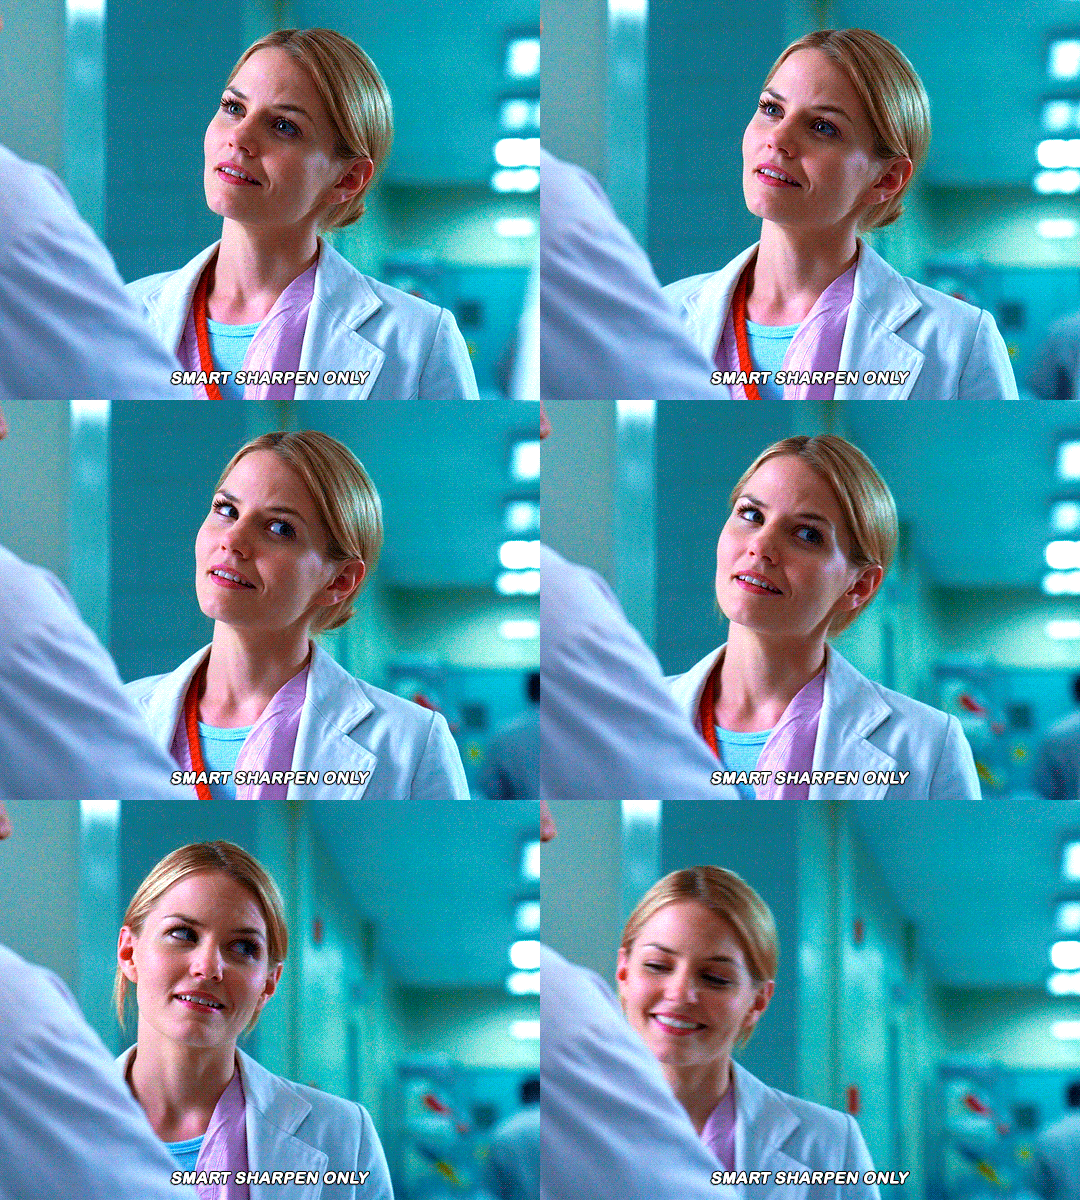
As I said this method looks best on smaller gifs but to be honest it looks good on big gifs too? Depends on what you like most!
Anyway I hope this was easy to follow and if anyone has any questions please feel free to dm me or send an ask! ♡
#ask#Anon#ps tag#useraljoscha#usermelone#userchibi#usermagic#uservivaldi#userlorna#tuserhol#usercats#userlix#usersavana
199 notes
·
View notes
Text
heaven can wait, vernon chwe
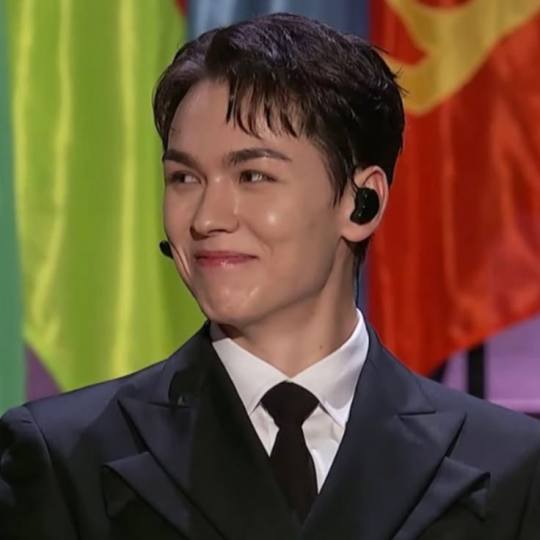
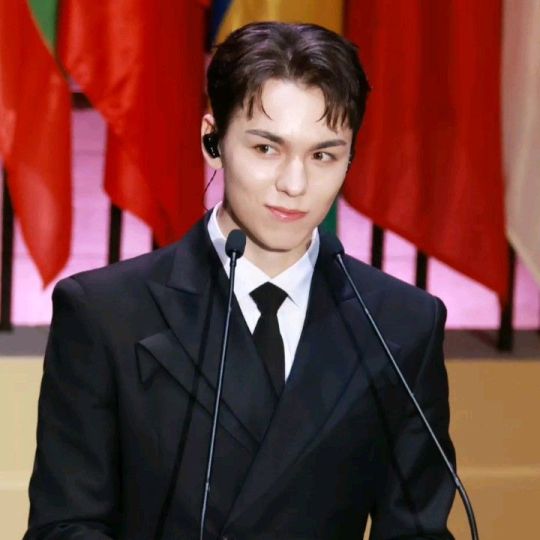
♫ pairing, vernon chwe x reader ♫ warnings, non-idol au, fluff, cursing, lawyer au if you squint (not important to the plot), vernon's an heir to a corporation, reader is wearing a dress but not described otherwise, vernon calls reader baby, kissing (making out), one mention of social anxiety ♫ synopsis, everything could wait when your boyfriend awakened something in you with the flash of a smile and a nice, straight suit.
♫ author's note, this is literally just me 1) making up the vernon birthday fic i had promised 3 days ago and 2) missing vernon's hair 😭 i saw a gifset on tumblr yesterday w vernon and his long brown hair he had in 2021 and sigh I just miss it bro...this fic is just really self indulgent ngl 🧍enjoy!!
♫ now playing, heaven can wait (michael jackson)
♫ word count, 553 | for @kstrucknet
"are you ready, vernon? we've got to leave now if we want to get there as early as your dad is asking us to!" calling to the bathroom, you smooth out the last wrinkles clumping in your dress as you pivot in the mirror.
vernon was speaking at his father's dinner party for the first time as the up-and-coming ceo of 'chwe law & co.' offices and had invited you as his plus one for the evening. as his girlfriend (and to vernon, his future wife), you had been the one to keep vernon on track today, reminding him of what was to come later this evening.
"vernon, we've got to go─" you sigh, turning away from the mirror just as the bathroom door finally opens. out comes vernon, dress shoes clicking against the wooden floor as he looks at you with that cute, familiar blank look on his face.
his suit is straight without wrinkles, the double collar perfectly sharp as the tie peaks from behind. he's glowing, and whether it's because he did his skincare like he had promised you he would start doing, or the shine of the lights on his soft skin, you couldn't tell.
"holy hell, vernon." you breathe out, too shocked to try to watch your language. vernon stares at you, the ghost of a frown on his face as he sighs.
"fuck, did i get the collar wrong?" vernon walks up to you, wide brown eyes sparkling like a puppy as you lift your hands up, running them over his shoulders as you shake your head slowly.
"no, vern. not at all," you whisper, studying him up close for the first time since you had seen him. his eyelashes are as long and pointed as ever, complimenting his brown eyes perfectly. vernon's hair is styled nicely too, with bangs complimenting the sharpness of his jaw.
"you look really good. if only i knew you could clean up this nicely." you tease quietly, too in awe of vernon's features to say anything.
vernon laughs, shrugging as he gets a good look at your outfit. "damn, you look really nice too. very pretty."
the compliment, however simple and overused it may be, made your heart do somersaults in your chest. vernon was a man of little words, so when he said things like this and looked at you like you had hung the stars in the sky, you melted on the spot.
"come here and kiss me, vernon. i need you," you sigh softly, and vernon does what you ask, walking up to you as he lets his hands fall to your hips without a second thought.
before you know it, your lips are on his and he's pressing into your body like you're the only thing he has left. your phones are buzzing in time with each other, but you're too absorbed in vernon's hands on your hips, his supple lips on yours, and the low groans he's letting out under you to even care to look. it was probably his mom and dad calling each of you to ask where you were, but they could wait.
anything could wait at this moment in time, when vernon was softly running his hands up and down your bare shoulders, long fingertips leaving goosebumps in their wake.
anything could wait.
#svt#seventeen#vernon chwe#svt fic#kstrucknet#chwe hansol#hansol vernon chwe#vernon fluff#hansol chwe#svt vernon#vernon x reader#vernon imagines#vernon seventeen#seventeen fluff#okay#....#i'm okay i swear#(okay i'm not ngl)#WHY IS HE SO#RAH#i had to okay#i needed to get this out#i would combust if i didn't#this vernon though...#the unesco vernon w the suit#.....#makes me feel too many things#i may#i think i may start tweaking out#he's so jfslekj
90 notes
·
View notes
Text
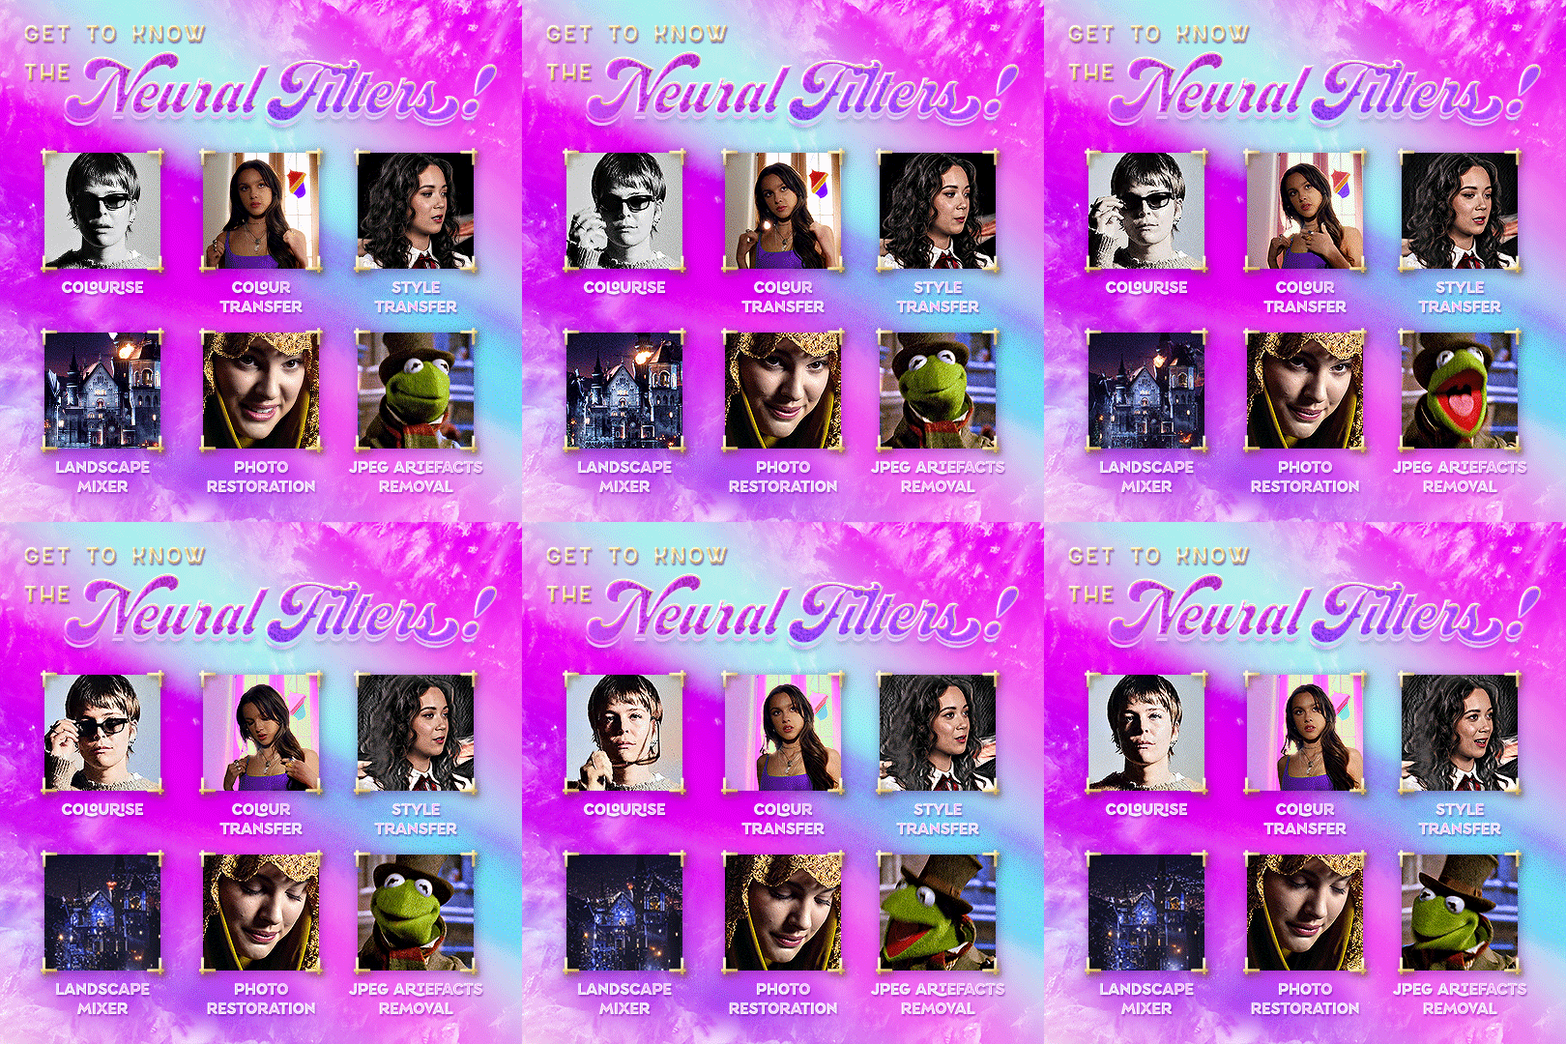


Neural Filters Tutorial for Gifmakers by @antoniosvivaldi
Hi everyone! In light of my blog’s 10th birthday, I’m delighted to reveal my highly anticipated gifmaking tutorial using Neural Filters - a very powerful collection of filters that really broadened my scope in gifmaking over the past 12 months.
Before I get into this tutorial, I want to thank @laurabenanti, @maines , @cobbbvanth, and @cal-kestis for their unconditional support over the course of my journey of investigating the Neural Filters & their valuable inputs on the rendering performance!
In this tutorial, I will outline what the Photoshop Neural Filters do and how I use them in my workflow - multiple examples will be provided for better clarity. Finally, I will talk about some known performance issues with the filters & some feasible workarounds.
Tutorial Structure:
Meet the Neural Filters: What they are and what they do
Why I use Neural Filters? How I use Neural Filters in my giffing workflow
Getting started: The giffing workflow in a nutshell and installing the Neural Filters
Applying Neural Filters onto your gif: Making use of the Neural Filters settings; with multiple examples
Testing your system: recommended if you’re using Neural Filters for the first time
Rendering performance: Common Neural Filters performance issues & workarounds
For quick reference, here are the examples that I will show in this tutorial:
Example 1: Image Enhancement | improving the image quality of gifs prepared from highly compressed video files
Example 2: Facial Enhancement | enhancing an individual's facial features
Example 3: Colour Manipulation | colourising B&W gifs for a colourful gifset
Example 4: Artistic effects | transforming landscapes & adding artistic effects onto your gifs
Example 5: Putting it all together | my usual giffing workflow using Neural Filters
What you need & need to know:
Software: Photoshop 2021 or later (recommended: 2023 or later)*
Hardware: 8GB of RAM; having a supported GPU is highly recommended*
Difficulty: Advanced (requires a lot of patience); knowledge in gifmaking and using video timeline assumed
Key concepts: Smart Layer / Smart Filters
Benchmarking your system: Neural Filters test files**
Supplementary materials: Tutorial Resources / Detailed findings on rendering gifs with Neural Filters + known issues***
*I primarily gif on an M2 Max MacBook Pro that's running Photoshop 2024, but I also have experiences gifmaking on few other Mac models from 2012 ~ 2023.
**Using Neural Filters can be resource intensive, so it’s helpful to run the test files yourself. I’ll outline some known performance issues with Neural Filters and workarounds later in the tutorial.
***This supplementary page contains additional Neural Filters benchmark tests and instructions, as well as more information on the rendering performance (for Apple Silicon-based devices) when subject to heavy Neural Filters gifmaking workflows
Tutorial under the cut. Like / Reblog this post if you find this tutorial helpful. Linking this post as an inspo link will also be greatly appreciated!
1. Meet the Neural Filters!
Neural Filters are powered by Adobe's machine learning engine known as Adobe Sensei. It is a non-destructive method to help streamline workflows that would've been difficult and/or tedious to do manually.
Here are the Neural Filters available in Photoshop 2024:
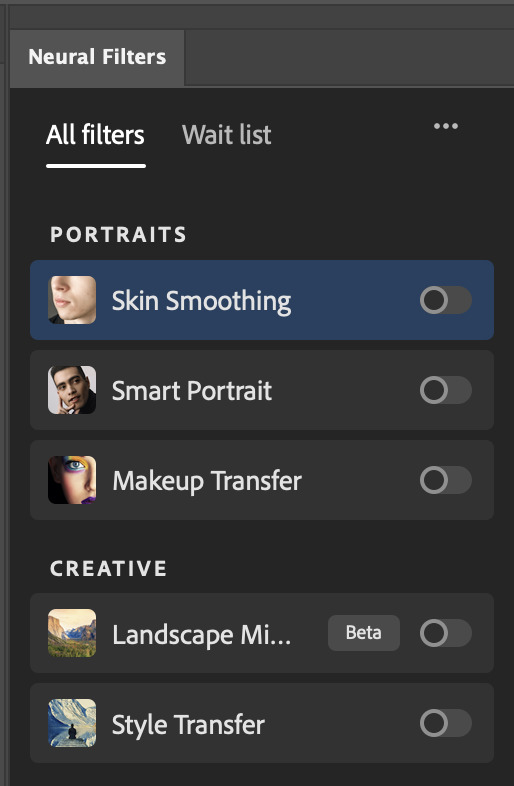

Skin Smoothing: Removes blemishes on the skin
Smart Portrait: This a cloud-based filter that allows you to change the mood, facial age, hair, etc using the sliders+
Makeup Transfer: Applies the makeup (from a reference image) to the eyes & mouth area of your image
Landscape Mixer: Transforms the landscape of your image (e.g. seasons & time of the day, etc), based on the landscape features of a reference image
Style Transfer: Applies artistic styles e.g. texturings (from a reference image) onto your image
Harmonisation: Applies the colour balance of your image based on the lighting of the background image+
Colour Transfer: Applies the colour scheme (of a reference image) onto your image
Colourise: Adds colours onto a B&W image
Super Zoom: Zoom / crop an image without losing resolution+
Depth Blur: Blurs the background of the image
JPEG Artefacts Removal: Removes artefacts caused by JPEG compression
Photo Restoration: Enhances image quality & facial details
+These three filters aren't used in my giffing workflow. The cloud-based nature of Smart Portrait leads to disjointed looking frames. For Harmonisation, applying this on a gif causes Neural Filter timeout error. Finally, Super Zoom does not currently support output as a Smart Filter
If you're running Photoshop 2021 or earlier version of Photoshop 2022, you will see a smaller selection of Neural Filters:

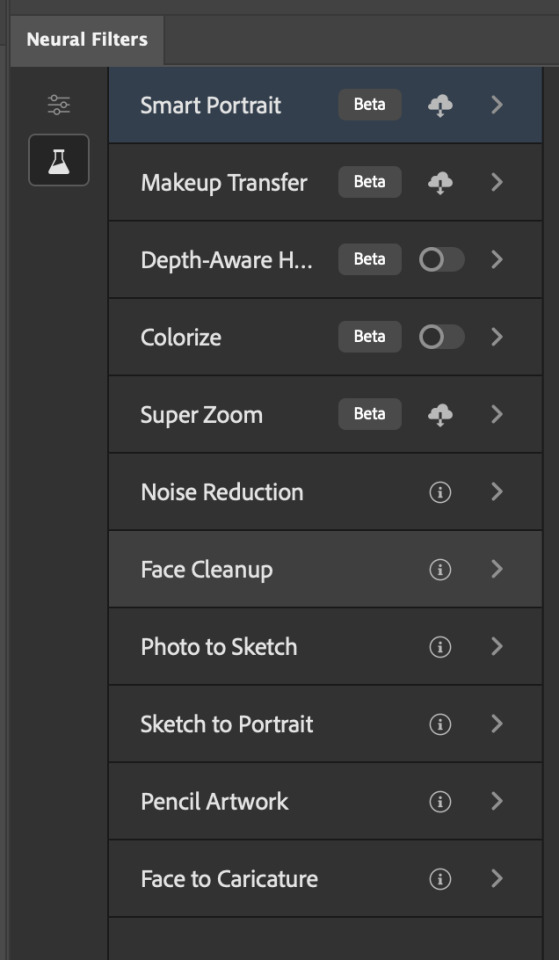
Things to be aware of:
You can apply up to six Neural Filters at the same time
Filters where you can use your own reference images: Makeup Transfer (portraits only), Landscape Mixer, Style Transfer (not available in Photoshop 2021), and Colour Transfer
Later iterations of Photoshop 2023 & newer: The first three default presets for Landscape Mixer and Colour Transfer are currently broken.
2. Why I use Neural Filters?
Here are my four main Neural Filters use cases in my gifmaking process. In each use case I'll list out the filters that I use:
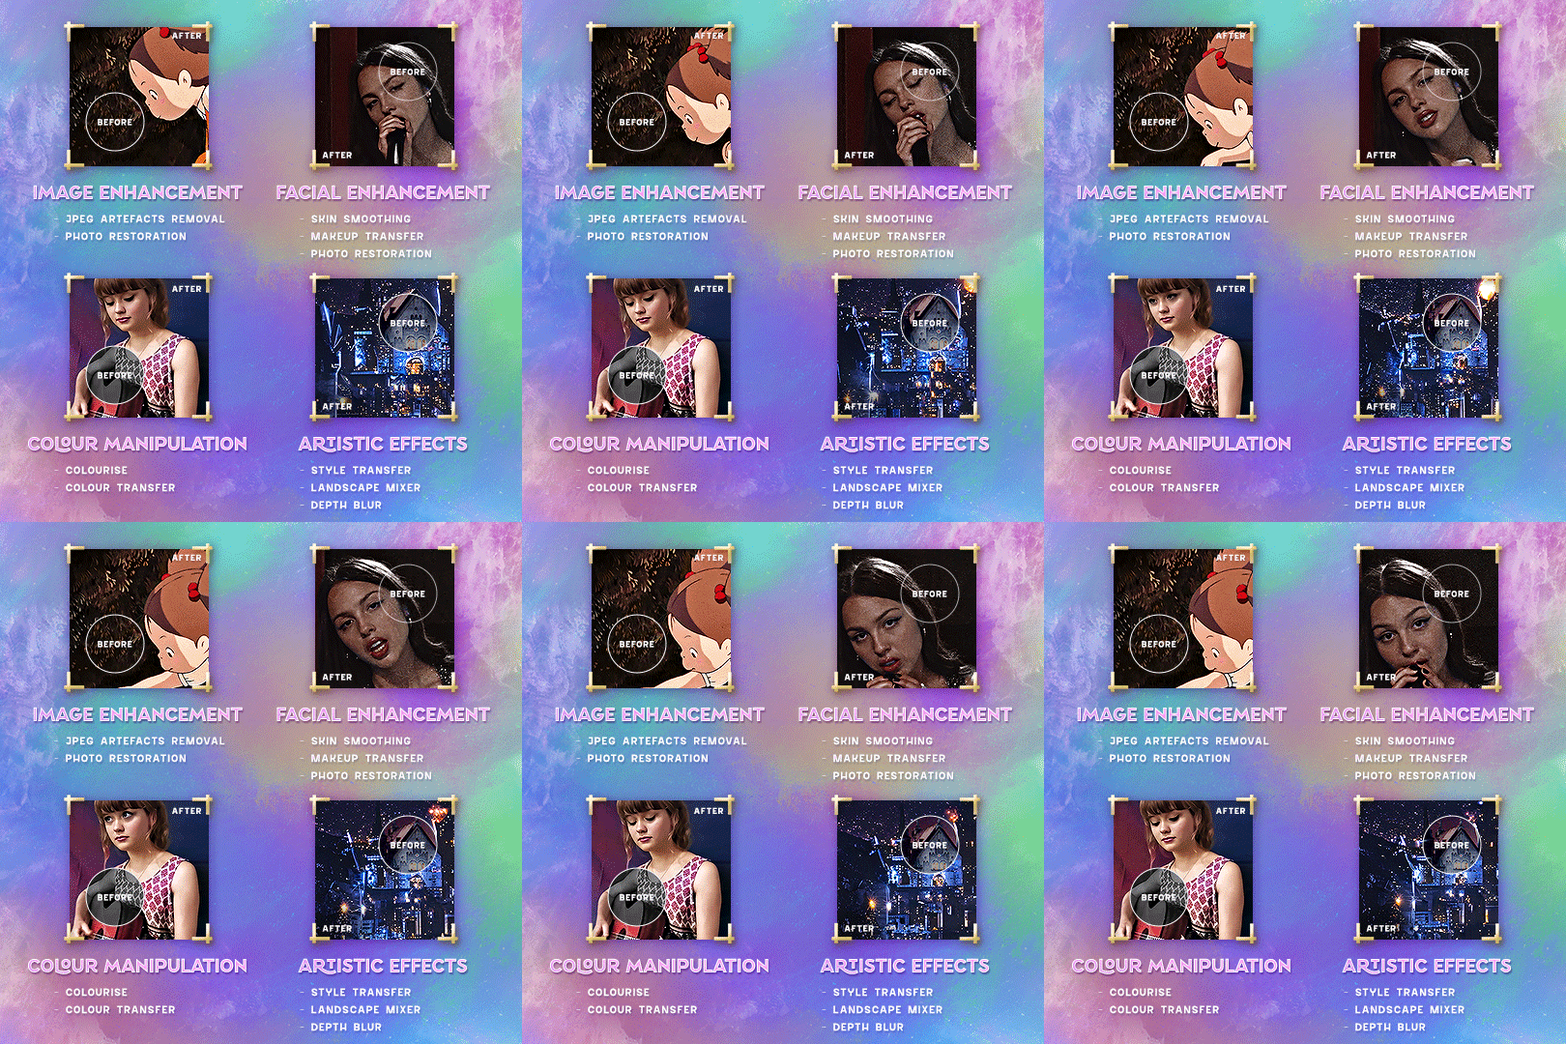
Enhancing Image Quality:
Common wisdom is to find the highest quality video to gif from for a media release & avoid YouTube whenever possible. However for smaller / niche media (e.g. new & upcoming musical artists), prepping gifs from highly compressed YouTube videos is inevitable.
So how do I get around with this? I have found Neural Filters pretty handy when it comes to both correcting issues from video compression & enhancing details in gifs prepared from these highly compressed video files.
Filters used: JPEG Artefacts Removal / Photo Restoration
Facial Enhancement:
When I prepare gifs from highly compressed videos, something I like to do is to enhance the facial features. This is again useful when I make gifsets from compressed videos & want to fill up my final panel with a close-up shot.
Filters used: Skin Smoothing / Makeup Transfer / Photo Restoration (Facial Enhancement slider)
Colour Manipulation:
Neural Filters is a powerful way to do advanced colour manipulation - whether I want to quickly transform the colour scheme of a gif or transform a B&W clip into something colourful.
Filters used: Colourise / Colour Transfer
Artistic Effects:
This is one of my favourite things to do with Neural Filters! I enjoy using the filters to create artistic effects by feeding textures that I've downloaded as reference images. I also enjoy using these filters to transform the overall the atmosphere of my composite gifs. The gifsets where I've leveraged Neural Filters for artistic effects could be found under this tag on usergif.
Filters used: Landscape Mixer / Style Transfer / Depth Blur
How I use Neural Filters over different stages of my gifmaking workflow:
I want to outline how I use different Neural Filters throughout my gifmaking process. This can be roughly divided into two stages:
Stage I: Enhancement and/or Colourising | Takes place early in my gifmaking process. I process a large amount of component gifs by applying Neural Filters for enhancement purposes and adding some base colourings.++
Stage II: Artistic Effects & more Colour Manipulation | Takes place when I'm assembling my component gifs in the big PSD / PSB composition file that will be my final gif panel.
I will walk through this in more detail later in the tutorial.
++I personally like to keep the size of the component gifs in their original resolution (a mixture of 1080p & 4K), to get best possible results from the Neural Filters and have more flexibility later on in my workflow. I resize & sharpen these gifs after they're placed into my final PSD composition files in Tumblr dimensions.
3. Getting started
The essence is to output Neural Filters as a Smart Filter on the smart object when working with the Video Timeline interface. Your workflow will contain the following steps:
Prepare your gif
In the frame animation interface, set the frame delay to 0.03s and convert your gif to the Video Timeline
In the Video Timeline interface, go to Filter > Neural Filters and output to a Smart Filter
Flatten or render your gif (either approach is fine). To flatten your gif, play the "flatten" action from the gif prep action pack. To render your gif as a .mov file, go to File > Export > Render Video & use the following settings.

Setting up:
o.) To get started, prepare your gifs the usual way - whether you screencap or clip videos. You should see your prepared gif in the frame animation interface as follows:

Note: As mentioned earlier, I keep the gifs in their original resolution right now because working with a larger dimension document allows more flexibility later on in my workflow. I have also found that I get higher quality results working with more pixels. I eventually do my final sharpening & resizing when I fit all of my component gifs to a main PSD composition file (that's of Tumblr dimension).
i.) To use Smart Filters, convert your gif to a Smart Video Layer.
As an aside, I like to work with everything in 0.03s until I finish everything (then correct the frame delay to 0.05s when I upload my panels onto Tumblr).
For convenience, I use my own action pack to first set the frame delay to 0.03s (highlighted in yellow) and then convert to timeline (highlighted in red) to access the Video Timeline interface. To play an action, press the play button highlighted in green.

Once you've converted this gif to a Smart Video Layer, you'll see the Video Timeline interface as follows:

ii.) Select your gif (now as a Smart Layer) and go to Filter > Neural Filters
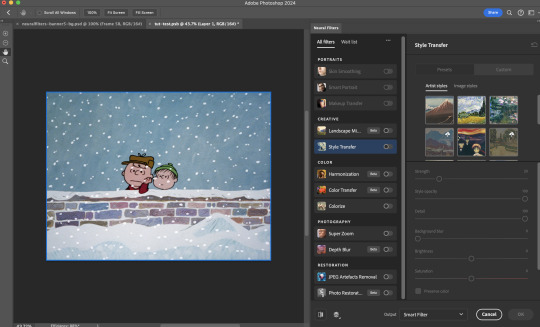
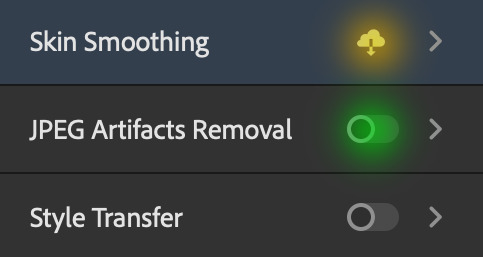
Installing Neural Filters:
Install the individual Neural Filters that you want to use. If the filter isn't installed, it will show a cloud symbol (highlighted in yellow). If the filter is already installed, it will show a toggle button (highlighted in green)
When you toggle this button, the Neural Filters preview window will look like this (where the toggle button next to the filter that you use turns blue)

4. Using Neural Filters
Once you have installed the Neural Filters that you want to use in your gif, you can toggle on a filter and play around with the sliders until you're satisfied. Here I'll walkthrough multiple concrete examples of how I use Neural Filters in my giffing process.
Example 1: Image enhancement | sample gifset
This is my typical Stage I Neural Filters gifmaking workflow. When giffing older or more niche media releases, my main concern is the video compression that leads to a lot of artefacts in the screencapped / video clipped gifs.
To fix the artefacts from compression, I go to Filter > Neural Filters, and toggle JPEG Artefacts Removal filter. Then I choose the strength of the filter (boxed in green), output this as a Smart Filter (boxed in yellow), and press OK (boxed in red).
Note: The filter has to be fully processed before you could press the OK button!
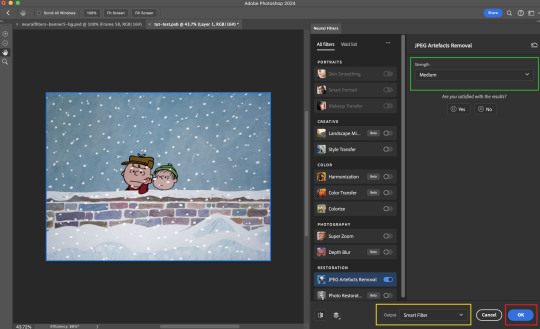
After applying the Neural Filters, you'll see "Neural Filters" under the Smart Filters property of the smart layer

Flatten / render your gif
Example 2: Facial enhancement | sample gifset
This is my routine use case during my Stage I Neural Filters gifmaking workflow. For musical artists (e.g. Maisie Peters), YouTube is often the only place where I'm able to find some videos to prepare gifs from. However even the highest resolution video available on YouTube is highly compressed.
Go to Filter > Neural Filters and toggle on Photo Restoration. If Photoshop recognises faces in the image, there will be a "Facial Enhancement" slider under the filter settings.

Play around with the Photo Enhancement & Facial Enhancement sliders. You can also expand the "Adjustment" menu make additional adjustments e.g. remove noises and reducing different types of artefacts.

Once you're happy with the results, press OK and then flatten / render your gif.
Example 3: Colour Manipulation | sample gifset
Want to make a colourful gifset but the source video is in B&W? This is where Colourise from Neural Filters comes in handy! This same colourising approach is also very helpful for colouring poor-lit scenes as detailed in this tutorial.
Here's a B&W gif that we want to colourise:

Highly recommended: add some adjustment layers onto the B&W gif to improve the contrast & depth. This will give you higher quality results when you colourise your gif.
Go to Filter > Neural Filters and toggle on Colourise.
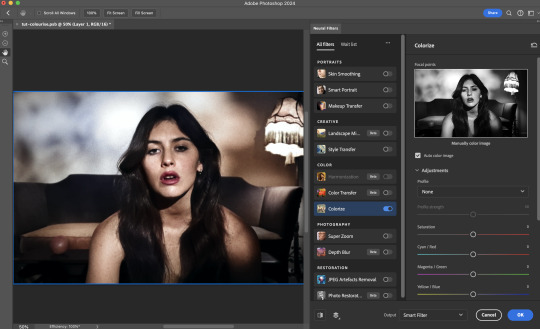
Make sure "Auto colour image" is enabled.
Play around with further adjustments e.g. colour balance, until you're satisfied then press OK.
Important: When you colourise a gif, you need to double check that the resulting skin tone is accurate to real life. I personally go to Google Images and search up photoshoots of the individual / character that I'm giffing for quick reference.
Add additional adjustment layers until you're happy with the colouring of the skin tone.
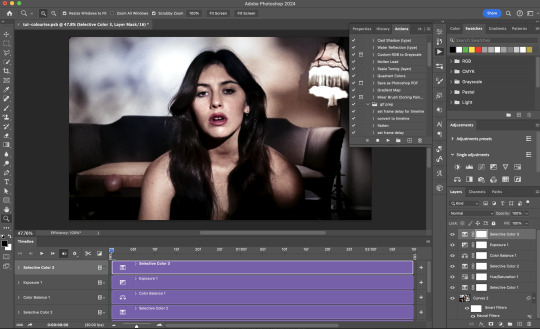
Once you're happy with the additional adjustments, flatten / render your gif. And voila!

Note: For Colour Manipulation, I use Colourise in my Stage I workflow and Colour Transfer in my Stage II workflow to do other types of colour manipulations (e.g. transforming the colour scheme of the component gifs)
Example 4: Artistic Effects | sample gifset
This is where I use Neural Filters for the bulk of my Stage II workflow: the most enjoyable stage in my editing process!
Normally I would be working with my big composition files with multiple component gifs inside it. To begin the fun, drag a component gif (in PSD file) to the main PSD composition file.
Resize this gif in the composition file until you're happy with the placement

Duplicate this gif. Sharpen the bottom layer (highlighted in yellow), and then select the top layer (highlighted in green) & go to Filter > Neural Filters

I like to use Style Transfer and Landscape Mixer to create artistic effects from Neural Filters. In this particular example, I've chosen Landscape Mixer
Select a preset or feed a custom image to the filter (here I chose a texture that I've on my computer)
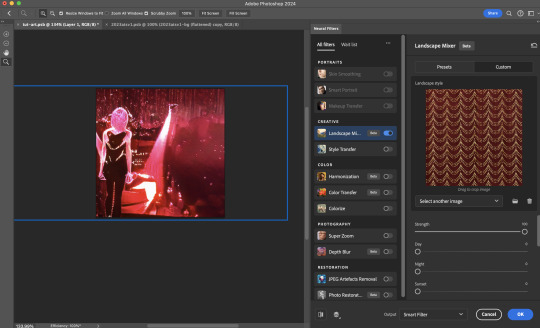
Play around with the different sliders e.g. time of the day / seasons
Important: uncheck "Harmonise Subject" & "Preserve Subject" - these two settings are known to cause performance issues when you render a multiframe smart object (e.g. for a gif)
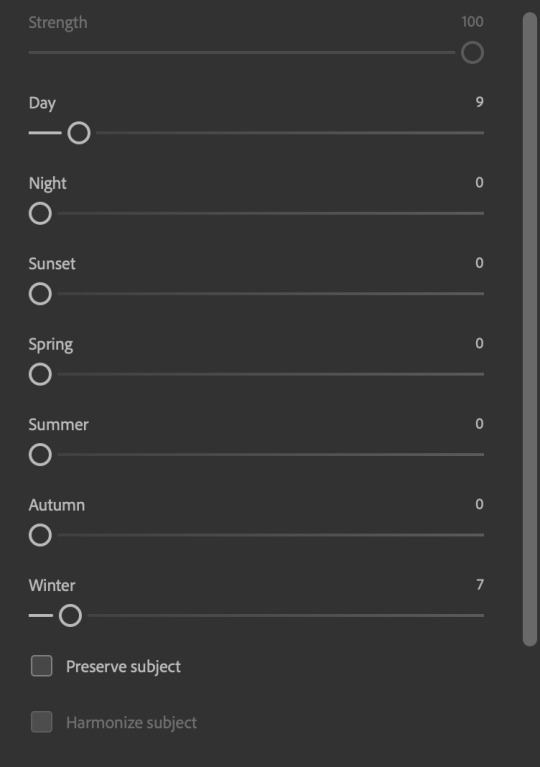
Once you're happy with the artistic effect, press OK
To ensure you preserve the actual subject you want to gif (bc Preserve Subject is unchecked), add a layer mask onto the top layer (with Neural Filters) and mask out the facial region. You might need to play around with the Layer Mask Position keyframes or Rotoscope your subject in the process.
After you're happy with the masking, flatten / render this composition file and voila!

Example 5: Putting it all together | sample gifset
Let's recap on the Neural Filters gifmaking workflow and where Stage I and Stage II fit in my gifmaking process:
i. Preparing & enhancing the component gifs
Prepare all component gifs and convert them to smart layers
Stage I: Add base colourings & apply Photo Restoration / JPEG Artefacts Removal to enhance the gif's image quality
Flatten all of these component gifs and convert them back to Smart Video Layers (this process can take a lot of time)
Some of these enhanced gifs will be Rotoscoped so this is done before adding the gifs to the big PSD composition file
ii. Setting up the big PSD composition file
Make a separate PSD composition file (Ctrl / Cmmd + N) that's of Tumblr dimension (e.g. 540px in width)
Drag all of the component gifs used into this PSD composition file
Enable Video Timeline and trim the work area
In the composition file, resize / move the component gifs until you're happy with the placement & sharpen these gifs if you haven't already done so
Duplicate the layers that you want to use Neural Filters on
iii. Working with Neural Filters in the PSD composition file
Stage II: Neural Filters to create artistic effects / more colour manipulations!
Mask the smart layers with Neural Filters to both preserve the subject and avoid colouring issues from the filters
Flatten / render the PSD composition file: the more component gifs in your composition file, the longer the exporting will take. (I prefer to render the composition file into a .mov clip to prevent overriding a file that I've spent effort putting together.)
Note: In some of my layout gifsets (where I've heavily used Neural Filters in Stage II), the rendering time for the panel took more than 20 minutes. This is one of the rare instances where I was maxing out my computer's memory.
Useful things to take note of:
Important: If you're using Neural Filters for Colour Manipulation or Artistic Effects, you need to take a lot of care ensuring that the skin tone of nonwhite characters / individuals is accurately coloured
Use the Facial Enhancement slider from Photo Restoration in moderation, if you max out the slider value you risk oversharpening your gif later on in your gifmaking workflow
You will get higher quality results from Neural Filters by working with larger image dimensions: This gives Neural Filters more pixels to work with. You also get better quality results by feeding higher resolution reference images to the Neural Filters.
Makeup Transfer is more stable when the person / character has minimal motion in your gif
You might get unexpected results from Landscape Mixer if you feed a reference image that don't feature a distinctive landscape. This is not always a bad thing: for instance, I have used this texture as a reference image for Landscape Mixer, to create the shimmery effects as seen in this gifset
5. Testing your system
If this is the first time you're applying Neural Filters directly onto a gif, it will be helpful to test out your system yourself. This will help:
Gauge the expected rendering time that you'll need to wait for your gif to export, given specific Neural Filters that you've used
Identify potential performance issues when you render the gif: this is important and will determine whether you will need to fully playback your gif before flattening / rendering the file.
Understand how your system's resources are being utilised: Inputs from Windows PC users & Mac users alike are welcome!
About the Neural Filters test files:
Contains six distinct files, each using different Neural Filters
Two sizes of test files: one copy in full HD (1080p) and another copy downsized to 540px
One folder containing the flattened / rendered test files
How to use the Neural Filters test files:
What you need:
Photoshop 2022 or newer (recommended: 2023 or later)
Install the following Neural Filters: Landscape Mixer / Style Transfer / Colour Transfer / Colourise / Photo Restoration / Depth Blur
Recommended for some Apple Silicon-based MacBook Pro models: Enable High Power Mode
How to use the test files:
For optimal performance, close all background apps
Open a test file
Flatten the test file into frames (load this action pack & play the “flatten” action)
Take note of the time it takes until you’re directed to the frame animation interface
Compare the rendered frames to the expected results in this folder: check that all of the frames look the same. If they don't, you will need to fully playback the test file in full before flattening the file.†
Re-run the test file without the Neural Filters and take note of how long it takes before you're directed to the frame animation interface
Recommended: Take note of how your system is utilised during the rendering process (more info here for MacOS users)
†This is a performance issue known as flickering that I will discuss in the next section. If you come across this, you'll have to playback a gif where you've used Neural Filters (on the video timeline) in full, prior to flattening / rendering it.
Factors that could affect the rendering performance / time (more info):
The number of frames, dimension, and colour bit depth of your gif
If you use Neural Filters with facial recognition features, the rendering time will be affected by the number of characters / individuals in your gif
Most resource intensive filters (powered by largest machine learning models): Landscape Mixer / Photo Restoration (with Facial Enhancement) / and JPEG Artefacts Removal
Least resource intensive filters (smallest machine learning models): Colour Transfer / Colourise
The number of Neural Filters that you apply at once / The number of component gifs with Neural Filters in your PSD file
Your system: system memory, the GPU, and the architecture of the system's CPU+++
+++ Rendering a gif with Neural Filters demands a lot of system memory & GPU horsepower. Rendering will be faster & more reliable on newer computers, as these systems have CPU & GPU with more modern instruction sets that are geared towards machine learning-based tasks.
Additionally, the unified memory architecture of Apple Silicon M-series chips are found to be quite efficient at processing Neural Filters.
6. Performance issues & workarounds
Common Performance issues:
I will discuss several common issues related to rendering or exporting a multi-frame smart object (e.g. your composite gif) that uses Neural Filters below. This is commonly caused by insufficient system memory and/or the GPU.
Flickering frames: in the flattened / rendered file, Neural Filters aren't applied to some of the frames+-+
Scrambled frames: the frames in the flattened / rendered file isn't in order
Neural Filters exceeded the timeout limit error: this is normally a software related issue
Long export / rendering time: long rendering time is expected in heavy workflows
Laggy Photoshop / system interface: having to wait quite a long time to preview the next frame on the timeline
Issues with Landscape Mixer: Using the filter gives ill-defined defined results (Common in older systems)--
Workarounds:
Workarounds that could reduce unreliable rendering performance & long rendering time:
Close other apps running in the background
Work with smaller colour bit depth (i.e. 8-bit rather than 16-bit)
Downsize your gif before converting to the video timeline-+-
Try to keep the number of frames as low as possible
Avoid stacking multiple Neural Filters at once. Try applying & rendering the filters that you want one by one
Specific workarounds for specific issues:
How to resolve flickering frames: If you come across flickering, you will need to playback your gif on the video timeline in full to find the frames where the filter isn't applied. You will need to select all of the frames to allow Photoshop to reprocess these, before you render your gif.+-+
What to do if you come across Neural Filters timeout error? This is caused by several incompatible Neural Filters e.g. Harmonisation (both the filter itself and as a setting in Landscape Mixer), Scratch Reduction in Photo Restoration, and trying to stack multiple Neural Filters with facial recognition features.
If the timeout error is caused by stacking multiple filters, a feasible workaround is to apply the Neural Filters that you want to use one by one over multiple rendering sessions, rather all of them in one go.
+-+This is a very common issue for Apple Silicon-based Macs. Flickering happens when a gif with Neural Filters is rendered without being previously played back in the timeline.
This issue is likely related to the memory bandwidth & the GPU cores of the chips, because not all Apple Silicon-based Macs exhibit this behaviour (i.e. devices equipped with Max / Ultra M-series chips are mostly unaffected).
-- As mentioned in the supplementary page, Landscape Mixer requires a lot of GPU horsepower to be fully rendered. For older systems (pre-2017 builds), there are no workarounds other than to avoid using this filter.
-+- For smaller dimensions, the size of the machine learning models powering the filters play an outsized role in the rendering time (i.e. marginal reduction in rendering time when downsizing 1080p file to Tumblr dimensions). If you use filters powered by larger models e.g. Landscape Mixer and Photo Restoration, you will need to be very patient when exporting your gif.
7. More useful resources on using Neural Filters
Creating animations with Neural Filters effects | Max Novak
Using Neural Filters to colour correct by @edteachs
I hope this is helpful! If you have any questions or need any help related to the tutorial, feel free to send me an ask 💖
#photoshop tutorial#gif tutorial#dearindies#usernik#useryoshi#usershreyu#userisaiah#userroza#userrobin#userraffa#usercats#userriel#useralien#userjoeys#usertj#alielook#swearphil#*#my resources#my tutorials
513 notes
·
View notes
Text
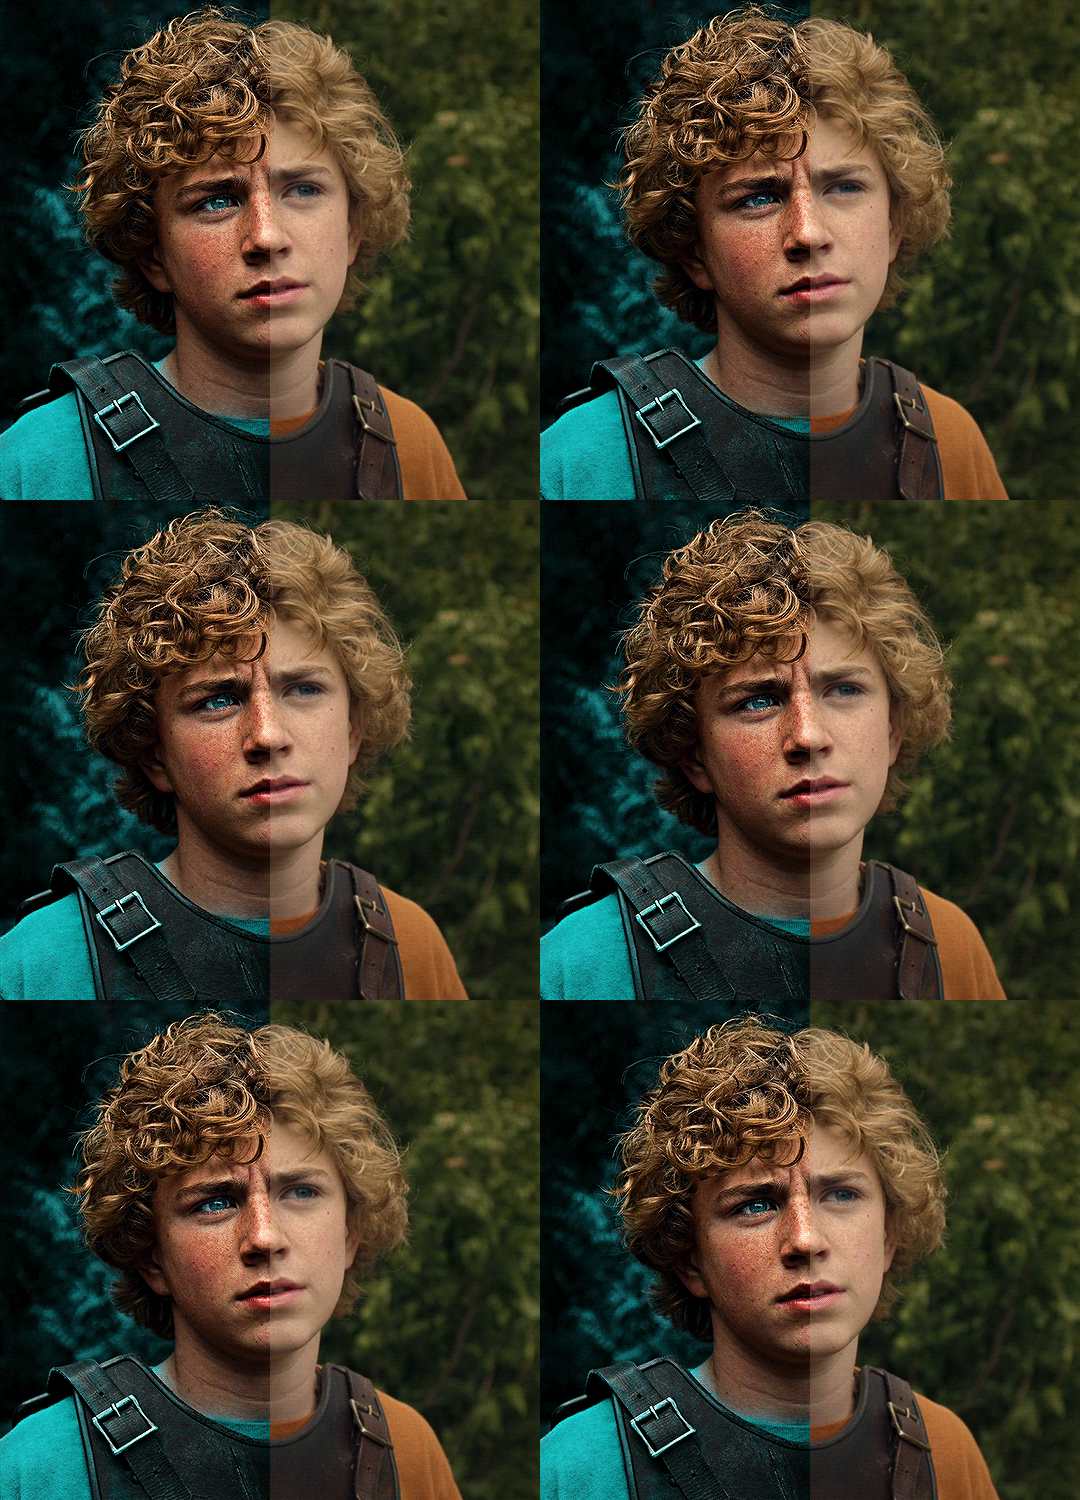
The silent art of gif making
The gif above has 32 layers plus 6 that aren't shown because this is part of a larger edit. I wanted to share it to give everyone a glimpse of the art of gif making and how long it usually takes for me to make something like this. This one took me about an hour and a half but only because I couldn't get the shade of blue right.
I use Adobe Photoshop 2021 and my computer doesn't have a large memory space (I don't know what to call it) so usually most of psds get deleted because I'm too lazy to get a hard drive. It doesn't really bother me that much because I like the art so when it's done, it's done. Off to somewhere else it goes.
Here are the layers:

Everything is neat and organized in folders because I like it that way. I prefer to edit it in timeline but others edit each frame. There's a layer not shown (Layer 4 is not visible) and it's the vector art. Here it is:
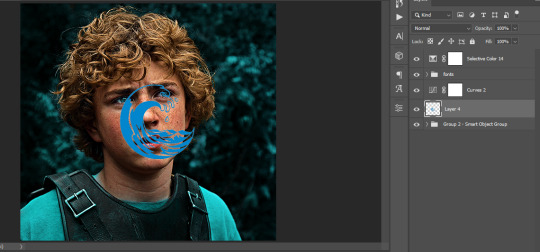
Now it is visible. I don't plan to make this a tutorial, but if you're interested I'd love to share a few tricks about it. I'm pretty new to the colors in gifmaking but the rest is simple to understand. Here, I just want to show how much work it takes to make it.
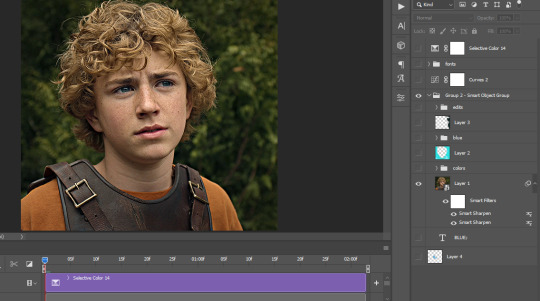
I opened Group 2 and here's the base gif. I already sharpened and sized it correctly but that's about it. Let's open the base coloring next.
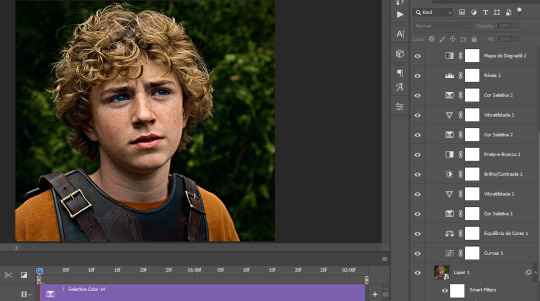
Yay! Now it looks pretty! The edits are in Portuguese but it doesn't matter. There's a silent art of adding layers depending on how you want the gif to look but you get used to it. The order matters and you can add multiple layers of the same thing (for eg. multiple layers of levels or curves or exposure).
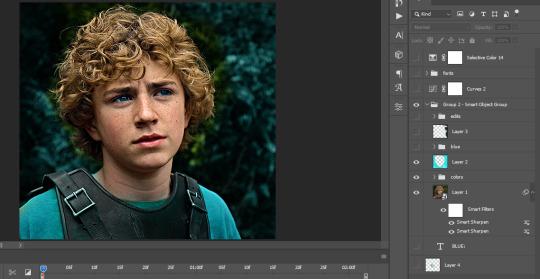
This was pretty much my first experiment with coloring so I don't know what I'm doing (this happens a lot with any art form but gifmaking exceeds in DIYing your way to the finished product) but I didn't want to mess up his hair, that's why the blue color is like that. Blue is easy to work with because there's little on the skin (different from red and yellow but that's color theory). I painted the layers like that and put it on screen, now let's correct how the rest looks.
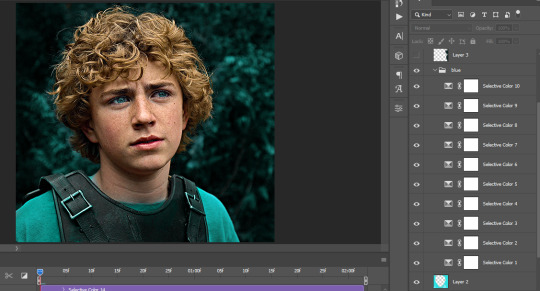
I was stuck trying to get the right teal shade of blue so yes, those are 10 layers of selective color mostly on cyan blue. We fixed his hair (yay!) we could've probably fixed the blue on his neck too but I was lazy. This is close to what I wanted so let's roll with that.
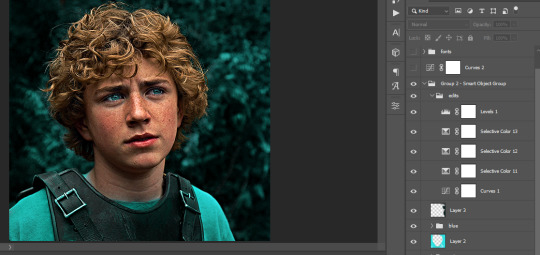
BUT I wanted his freckles to show, so let's edit a little bit more. Now his hair is more vibrant and his skin has red tones, which accentuates the blues and his eyes (exactly what I wanted!). That lost Layer 2 was me trying to fix some shadows in the background but in the end, it didn't make such a difference.
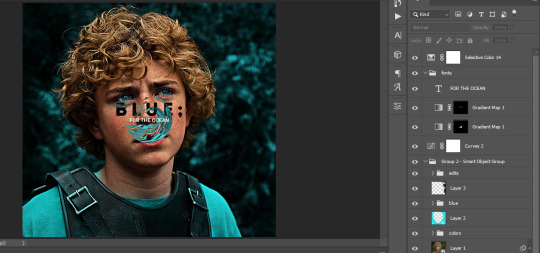
This was part of an edit, so let's add the graphics and also edit them so they're the right shade of blue and the correct size. A few gradient maps and a dozen font tests later, it appears to be done! Here it is:
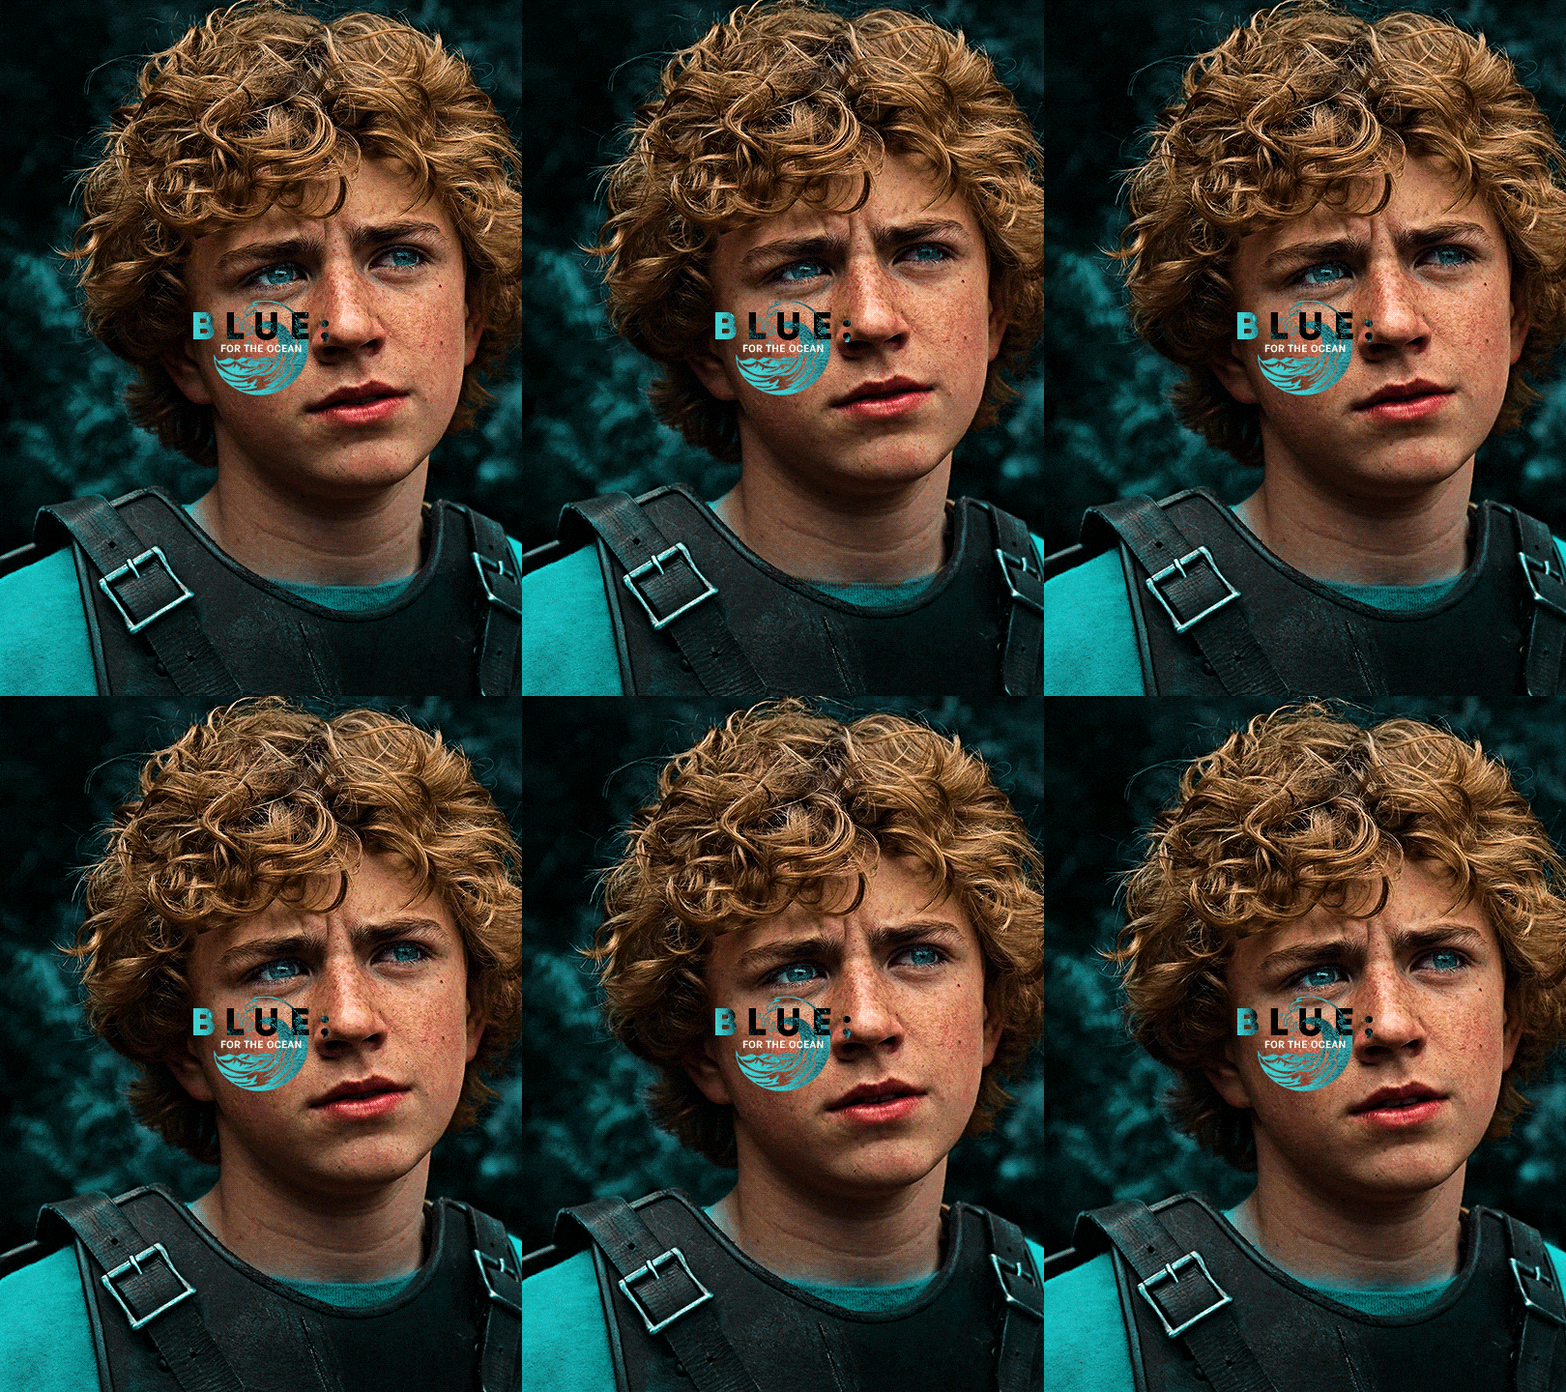
Please reblog gifsets on tumblr. We gifmakers really enjoy doing what we do (otherwise we wouldn't be here) but it takes so long, you wouldn't imagine. Tumblr is the main website used for gif making and honestly, we have nowhere to go but share our art here. This was only to show how long it takes but if you're new and want to get into the art of gif making, there are a lot of really cool resource blogs in here. And my ask box is always open! Sending gifmakers all my love.
#gif making#gif tutorial#resources#completeresources#y'know what that post yesterday got me into this#i love creativity so i send all my love to gifmakers#this is HARD#my tutorials#tutorials
668 notes
·
View notes
Text

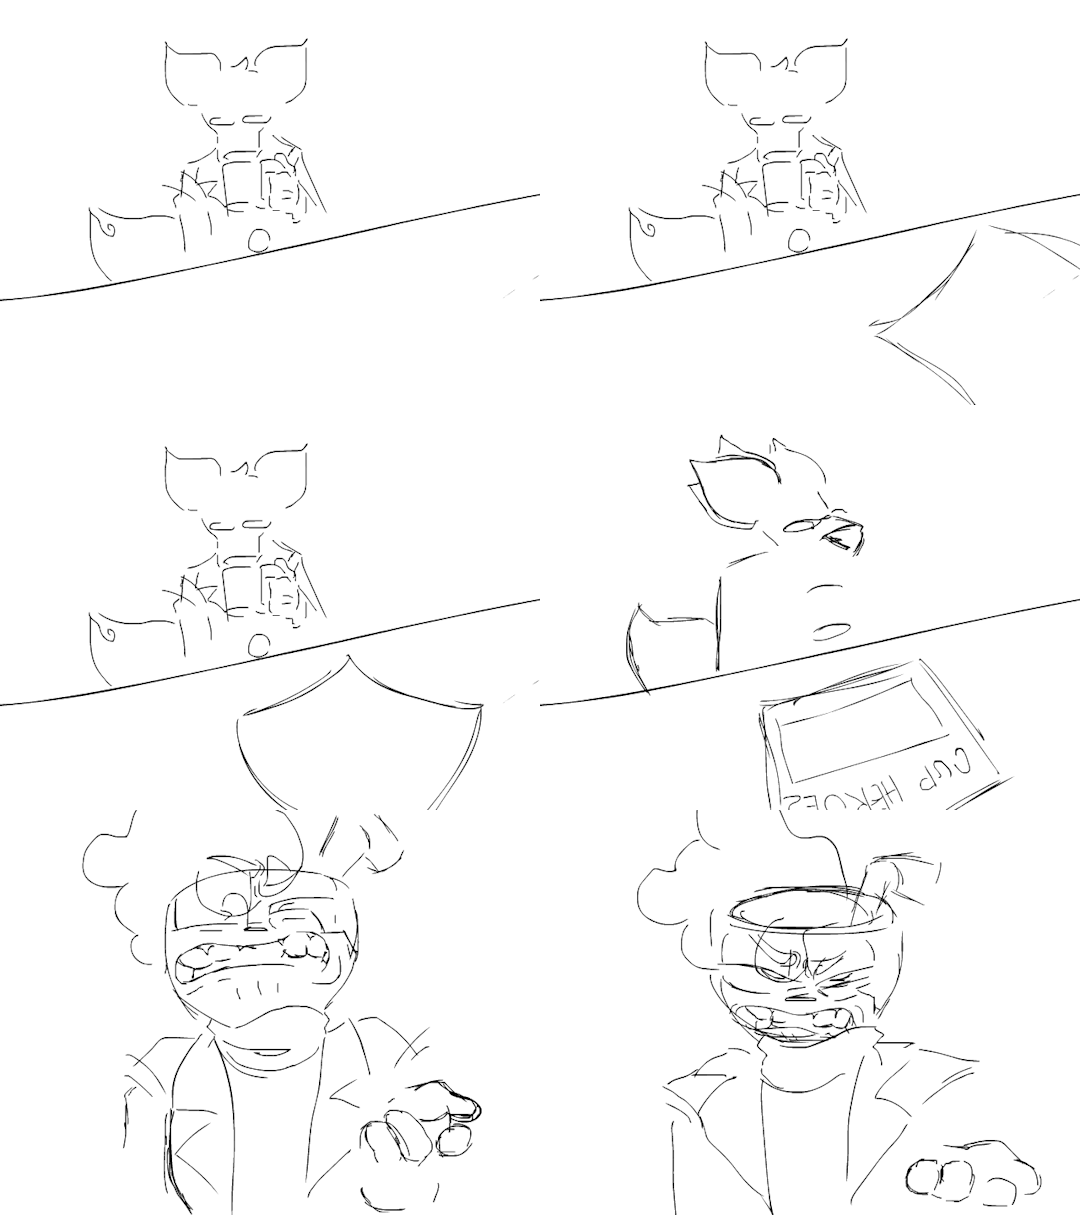
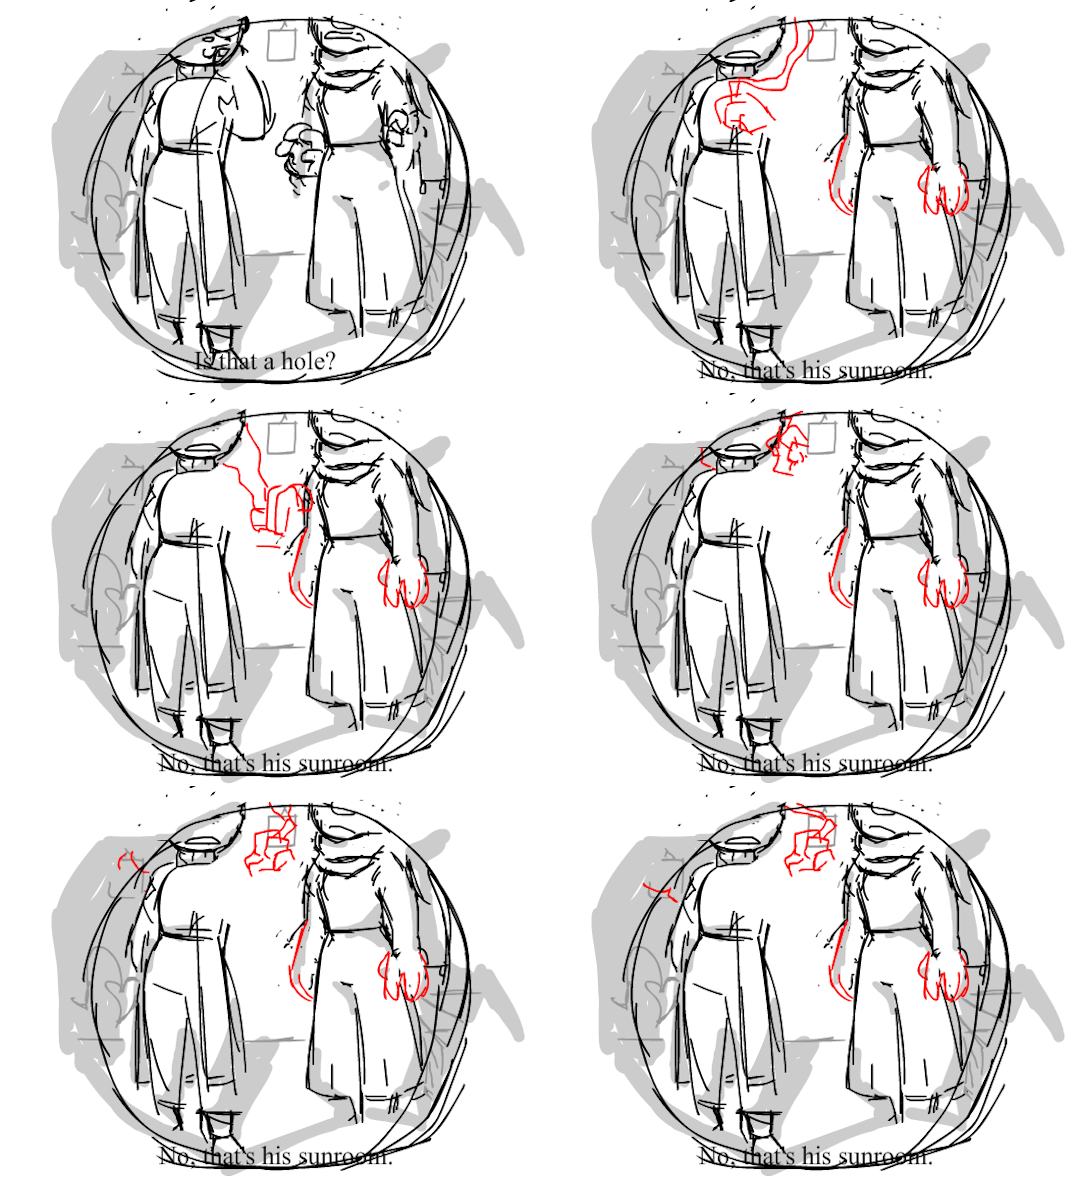


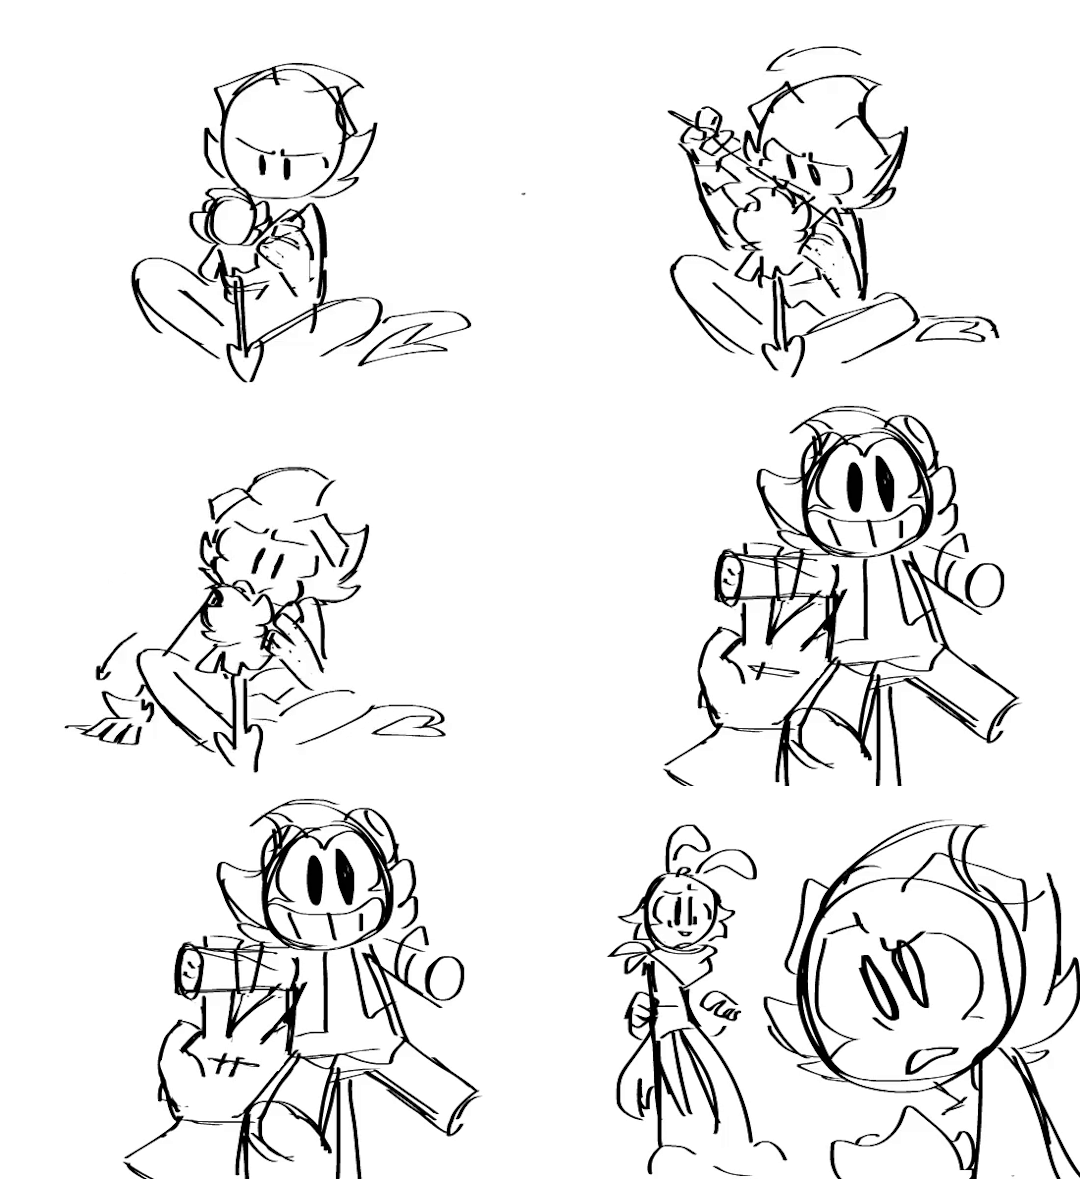

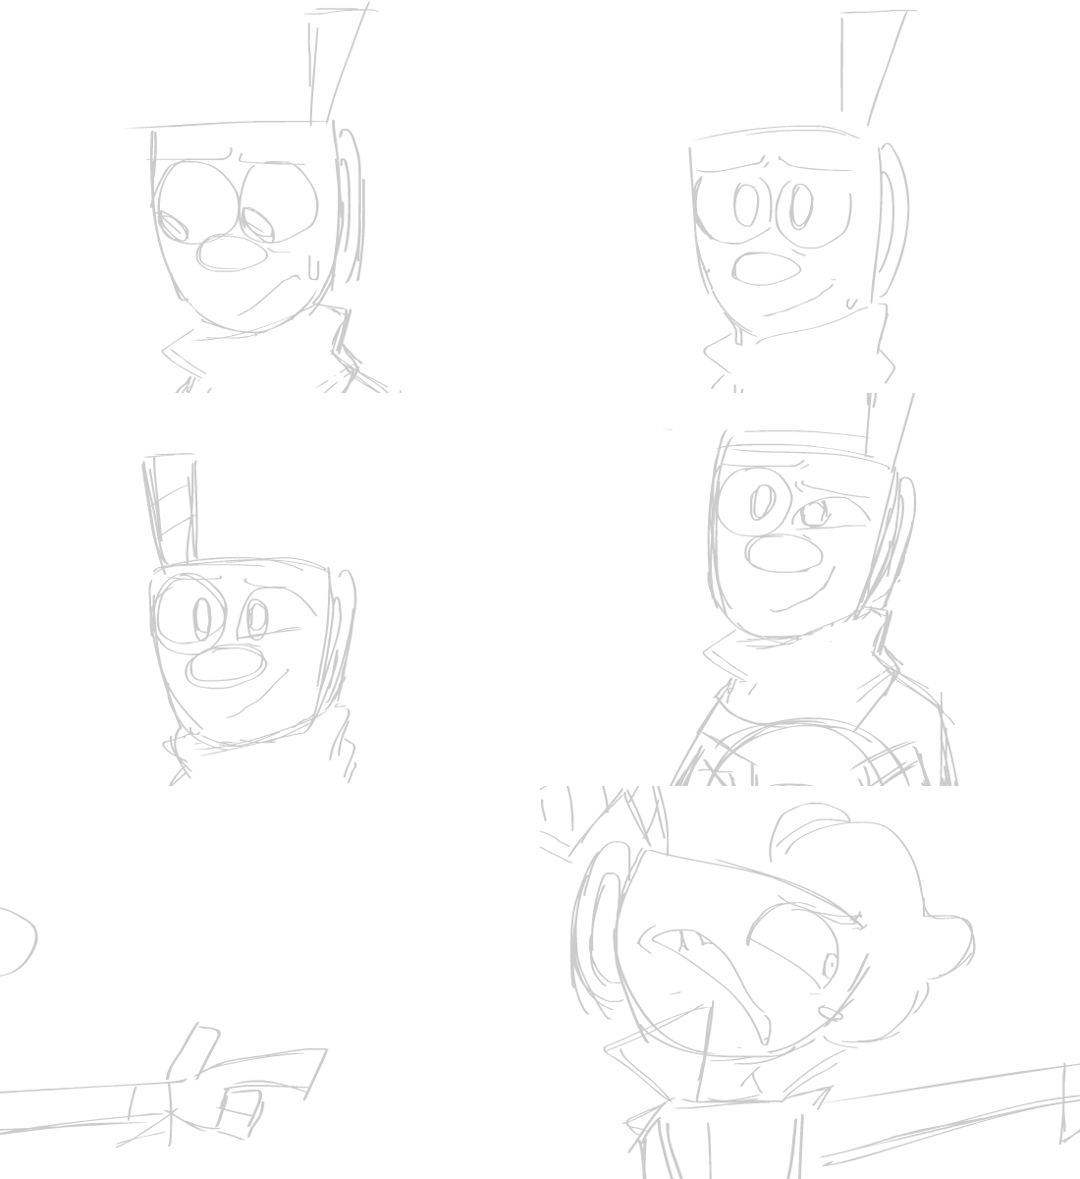


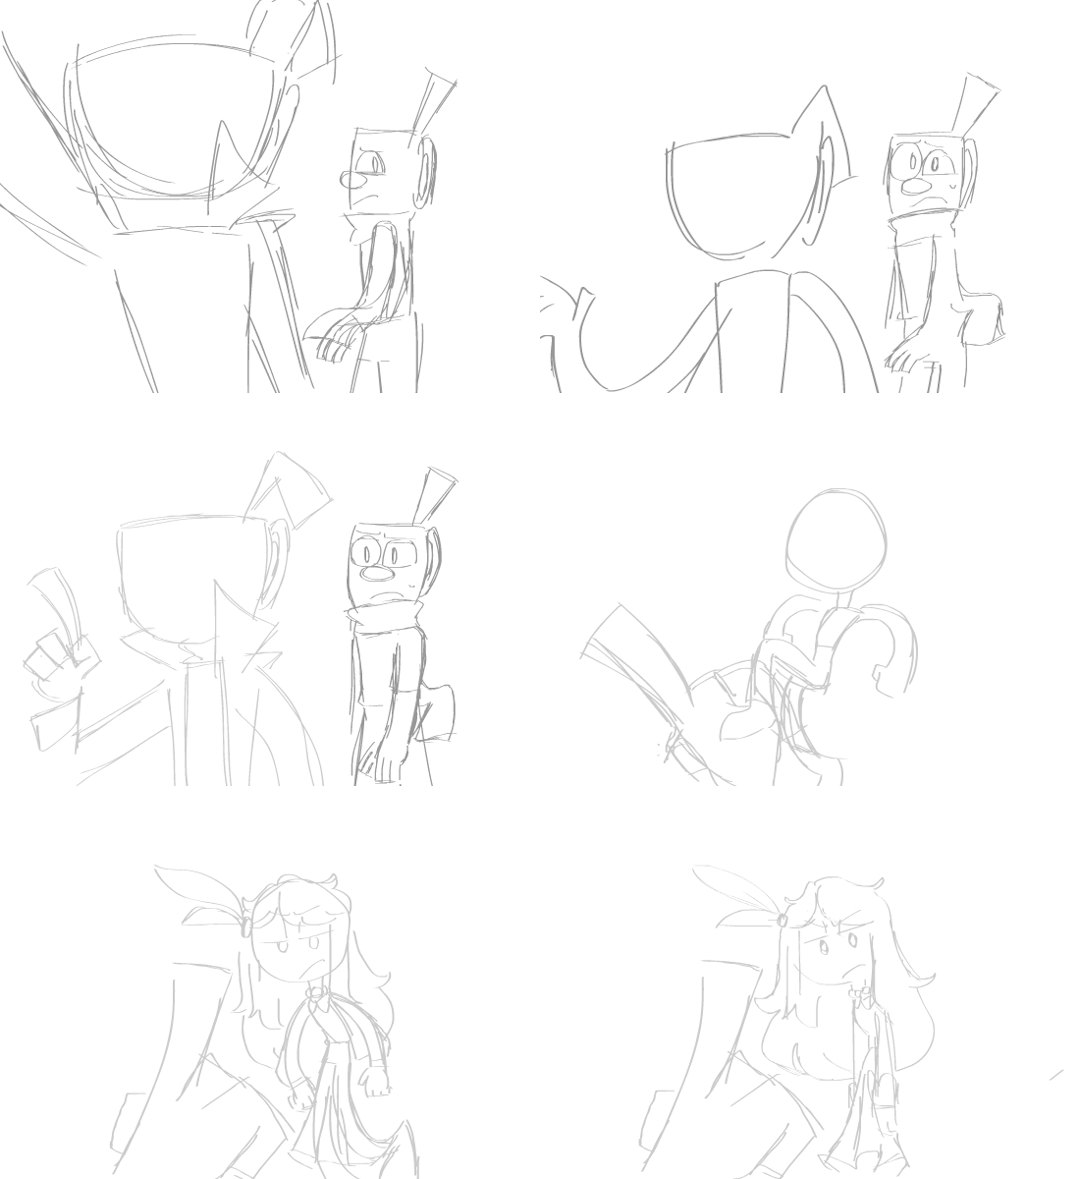
Finally revealing what our plan for the credits was! this project was initially much smaller, in 2021 i was going to do a fake gifset with fake refsheets and fake screenshots of what an Inky mystery cartoon could have looked like. You will notice some of the gifs above look older in artstyle for that reason(I believe only the first three were made this year, in 2024, so please forgive the old art). I had even more gifs planned, as well, of other scenes in the fanfic. After my dear friend Star arrived to the server and talked about it as an actual cartoon, we began brainstorming and working together for the pilot, with Star eventually hopping off and WhatsaFelony hoping in. I decided, then, that i could pay an homage to that, and play through the credits these gifs, but now fully animated.
One of them is animated by me, but the others are all by other incredible animators, such as Perri, Draco, Carbonatedfrog/onyxmistkes, Insane masquerade, Toby, Emolly, Bunnianimates, Brainyrot, and a guest animator Gazela de pijama.
Now that we are reaching the end of the project, with our audios being 6/12 done, and have officially recieved all of the storyboards, we wanted to first post the original sketchy versions, so everyone could reconize the charm these fantastic animators have brought on(Perri for example, added even more energy and desperation to his gif, while Gazela's even more cartoony and fluid, Draco added a cute tail movement that was so expressive, i made the trembling of the hand more obvious and fixed the expressions, Carbonated added gorgeous details that only help to make the characters feel even more alive, and so on!) once the pilot comes out, in the half of august!
When we reach august, we will do a poll on discord to set up a date of the week for our stream to happen, and for us all to watch and comment together. I hope to see you all in there!
#inky mystery#inky mystery animated#inky mystery pilot#the inky mystery#bendy and boris in the inky mystery#behind the scenes#by patchwork
310 notes
·
View notes
Text

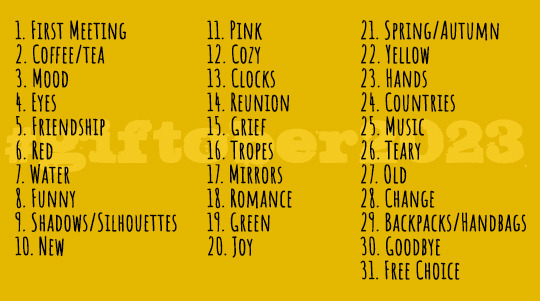
Hello everyone!! welcome to our 3rd round of Giftober!! 👋🪄
It´s so good to be back!! Last year event was fabulous so I really wanted to meet you all again finally!
If it´s your first time in this blog, I officially started this 2 years ago, with the idea that these October 31 prompts can specially inspire, encourage and support gifmakers across all fandoms!
HOW TO PARTICIPATE:
Reblog this post. (Optional but encouraged.) Create a gifset inspired by the daily prompts. Tag your posts with #giftober2023. Caption your gifsets with: @giftober 2023 | Day #: "prompt description". (Recommended.)
IMPORTANT:
Make your own gifs. (I won´t reblog reposted gifs or gifs taken from the Tumblr search.) No explicit content. All fandoms are welcome! As long as you all respect each other! ☝
(The prompt list written and more info under the cut.)
Any doubts you may have, you´re welcome to leave it in my 📧 inbox.
THIS EVENT STARTS ON OCTOBER 1ST and I can't wait to see all your creations! 💗
Ele :))
REMEMBER:
You don´t need to make all 31. You can make as much and as few as you want. And not exactly in order nor you have to post on time.
If you can´t exactly fit one of the prompt with your fandom, no worries! You can skip it or... modified it as your convinience, think of another prompt, do one from the 2021/2022 events instead! 😁
I know it might be a few others challenges in October, and make a daily set for a whole month sounds quite overwhelming, so please, don´t feel any pressure to complete this one! (in fact, you can combine prompts from other challenges!)
Since you don´t need to post in time, you can finish this after the month is over. Although I´ll check the tag less frequently then.
These prompts are completely up to your interpretation, but for any doubt, please, you´re welcome to ask me.
PROMPT LIST:
First meeting
Coffee/Tea
Mood
Eyes
Friendship
Red
Water
Funny
Shadows/Silhouettes
New
Pink
Cozy
Clocks
Reunion
Grief
Tropes
Mirrors
Romance
Green
Joy
Spring/Autumn
Yellow
Hands
Countries
Music
Teary
Old
Change
Backpacks/Handbags
Goodbye
Free choice
(Again, thanks @4marvels-universe for your help and patience! 💗)
Now, everyone in the following mentions and tags below are cordially invited to participate and/or to share this post so this can reach more fandoms. (thank you so much! 💗)
@sersi @luke-skywalker @anthonybrxdgerton @kamalaskhans @harrison-ford @edwards-teach @obiwan @daisyssousa @cutterpillow92 @safedistancefrombeingsmart @bcth-uk @lokihiddleston @oppienheimer @yellenabelova @cillianmurphy @scottxlogan @everythingsouthasian @mel-loves-all @sabinnewren @seth-lael @thelostsmiles @lastencoregraphics @suledins @mckiwixsylpha @ijustthinkevilunoisneat @madeline-kahn @arthurpendragonns @msmischief101 @simonghostrileys @avasillva @tomshiddles @henry-alex @eddiediaaz @carricfisher @piperhaliwell @cobiesmlders @linusbenjamin @bladesrunner @simoneashley @dani-clayton @annacoleman @ghouls-ghoul @tessas-thompson @trashcora @barbie-movie @tennant @cal-kestis @usercreate ❤
#giftober#giftober2023#2023 prompts#multifandom#gif challenge#gifmakers on tumblr#tvedit#moviegifs#chewieblog#userbbelcher#usersource#useroptional#userstream#userlgbtq#perioddramasource#paletmblr#usergif#cinemapix#dailyflicks#cinematv#every reblog will be much appreciated!#se you all in october!! <3
441 notes
·
View notes
Text
Fandom New Year's resolutions...
I found myself thinking quite a lot about this fandom and my place in it over the holidays. It was already on my mind due to Faves Fest, and the hate anon I got on Christmas Eve and the general discussion on the confessions blog on whether shipping Wille/Felice was "allowed" made sure it remained there.
I've summarised some of my thoughts as resolutions concerning my presence in the fandom in 2025.
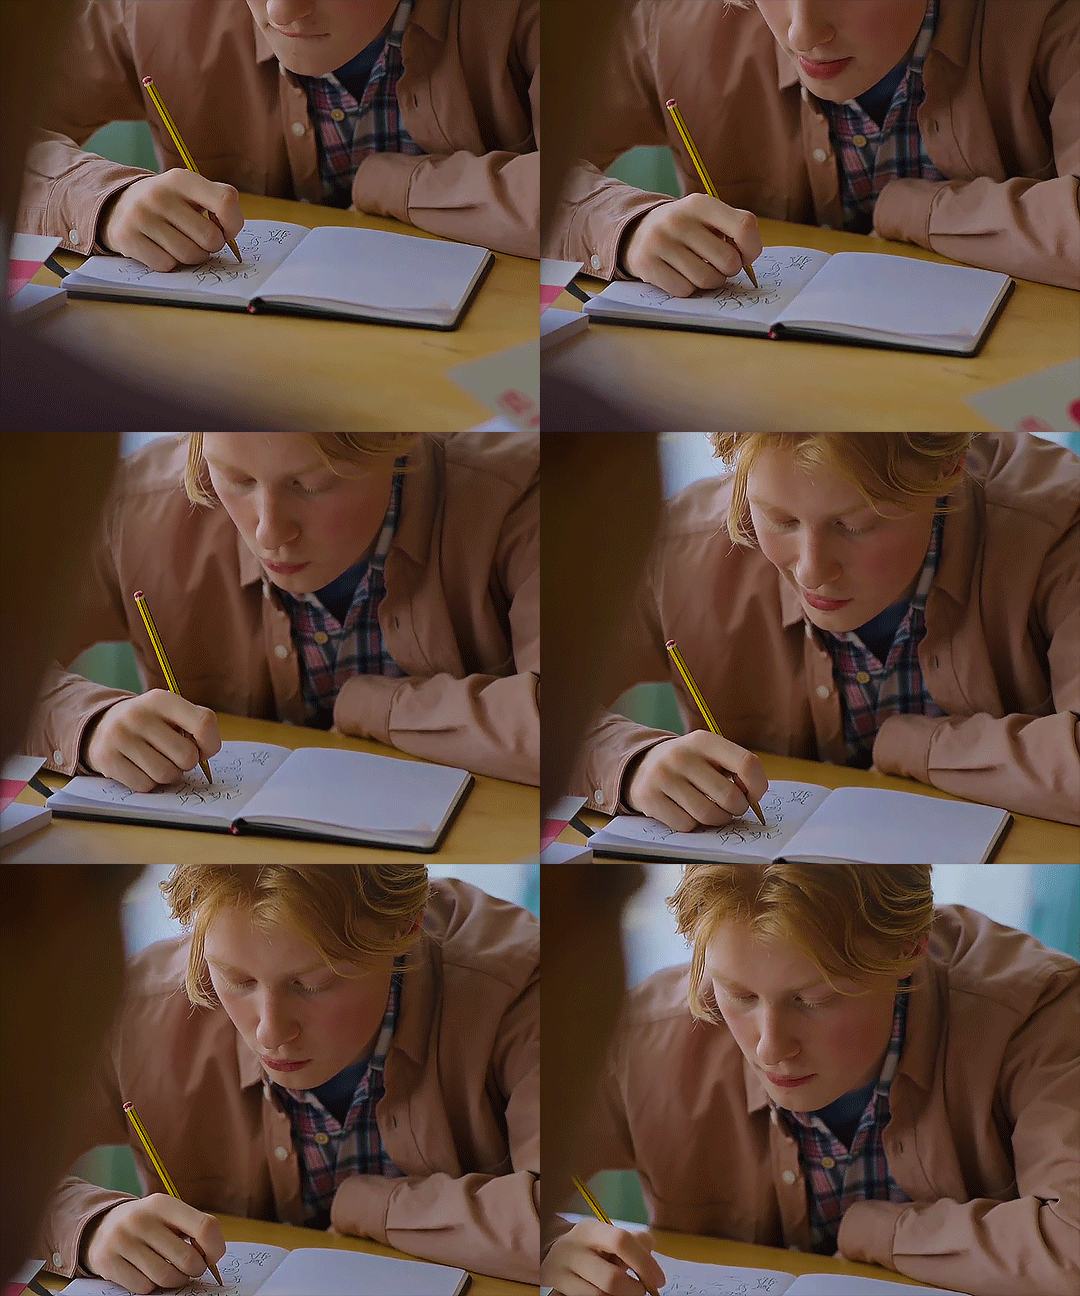
Keep writing and posting my "diabolical" and "deranged" thoughts here when I feel like it, and especially "dying on the hill of Henry and Walter's entirely made up relationship" on ao3. Sorry not sorry, anon. That's the corner of the YR sandbox that I have enjoyed playing in since August 2021, and I will keep playing until l run out of things to say or stories to write. .
Keep reblogging my friends' posts and posts by others interested in the non-Wilmon aspects of the show (when I come across them). Including gifsets etc! I'm not naturally great at paying attention to those because I'm more of a text post person, but they still deserve to be seen by as many people as possible. .
Spend less time scrolling tumblr as a whole. It takes far too much energy and headache-free time away from fic writing and keeping up with my friends. .
Make a safe and comfortable space for my more personal posts. Frankly, the haters scrolling my blog feels similar to that one time when someone broke into our basement storage and tried on some of my old jackets, leaving them in a bundle on the floor with the sleeves turned inside out. I washed them, but they all went to goodwill because I didn't feel comfortable wearing them anymore. In the same spirit, I've taken all personal posts except my intro off this blog and reblogged them to a new one that is currently set to private. When it's ready, I will make a separate post asking if anyone wants to follow me there. .
No longer allow anons. I have wanted to keep them on in the past to provide a forum for thoughts that people might be too shy to express on their own blog, such as the Stedrika debate a while back and some past anons about August's ED and accountability, but I'm done risking hate for it. If you want to discuss something with me, you are always welcome to do so in your own name. Whether in agreement or mutually respectful disagreement! .
Radically accept the state of the fandom at large: interest in our corner of the sandbox is what it is. My friend and I had made some plans to liven things up, but after recent events, I'm backing out. I don't want to spend my remaining time in the fandom feeling demoralised; I want to focus on what I enjoy. At the risk of sounding like an obnoxious brag, I can look back on my past contributions to the non-Wilmon corner with pride. Countless people have told me it was my longfic that got them interested and invested in Henry as a character, and it also started the Walty ship that has since become a fandom staple! (Receipts: my fic was the first one from Henry's POV, I added the Henry/Walter tag on ao3, and my readers coined the ship name. The fic was quite popular in its heyday, with 700 to 1,200 reads per chapter. It's still the fourth-most commented fic in the fandom, the most kudo'ed fic with a non-Wilmon focus [although Wilmon do feature prominently as side characters], and the 116th most kudo'ed out of the total 5,880 YR fics on ao3.) But the time for that has been over for a while now. Interest in non-Wilmon aspects and characters, which was always remarkably low, has waned as the people in the fandom have changed and new seasons have been added to the canon. Which is perfectly fine; everyone enjoys the show in their own way! Live and let live. Except... Even that seems to be a controversial opinion nowadays. The sad fact is that weirdly puritanical, fundamentalist sentiment has gained more and more ground in this fandom as time has gone by. There are people who feel the need to police others' shipping, opinions, and interpretations of canon. People who see all characters who either stand in Wilmon's way or represent the establishment that Wille is meant to break free from as rotten and unworthy of further exploration, and by extension, the fans who still want to explore them as morally dubious. People who see themselves as righteous warriors and anonymous hate mail to their "fandom adversaries" as a force for good. I never thought back when I was posting my longfic that I would one day be sent hate on Christmas Eve for making an analysis post about Henry and Simon's dynamic for an event that was meant to be about celebrating your fandom faves. Or that I would dread to publish said hate anon, because I was afraid people would either agree with it or more likely ignore it. But here we are. To reiterate, I'm not going anywhere. I'm just going to focus on enjoying my corner rather than trying to wave people over. .
Thanks for reading!
29 notes
·
View notes
Text
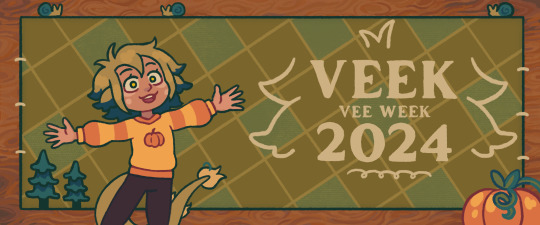
Veek 2024 FAQ
What is this?
Vee Week, or Veek, is a celebration of our favorite basilisk. We're hoping to encourage new fanworks of all kinds!
When is it?/Why those dates?
Veek will take place from Wednesday, August 14th to Tuesday, August 20th, 2024. Those dates were chosen because Yesterday's Lie first aired on August 14th, 2021. (That's also the planned release date for the @vee-fanzine and we thought it would help boost both fandom events.)
That said, it's never "too late" to be inspired or post fanworks. We'll try to reblog tagged posts during actual Veek, so keep that in mind if you decide to post early or late.
Are there prompts?
Yes! There are three to choose from each day and five alternate prompts as well. This post has the final prompts and explains the tagging system. Many thanks to everyone who submitted potential prompts and voted in our poll.
Are there event graphics?
Yes! @kkupttown has done amazing work. This post has the prompt list, a banner you can use for posts, and participant/completionist badges.
What can I make?
You can make or write basically anything: haikus, limericks, 100 word drabbles, ficlets, long fics, traditional art, digital art, gifsets, rec lists, cosplay, embroidery, latte art, etc. One fanwork can be used to fill multiple prompts. If you have an ongoing WIP and want to incorporate a prompt into a new chapter, that's fine too!
What if I'm not interpreting a prompt correctly?
We are not policing people's interpretations of the prompts. If a prompt inspires you to create, that's fantastic!
Is there an AO3 Collection?
Yes! This will open on August 13, 2024. You can post fanworks there, or add bookmarks to external links (like Tumblr posts with fan art).
Are there any other Vee fandom events?
YES! The @vee-fanzine will be released on August 14, 2024. At least one future event may also be in the works. Mod @zyrafowe-sny cannot singlehandedly run something more complicated than a fanweek until the @nimonabigbang wraps up, but would be happy to consider assisting/collaborating on other TOH fandom events if you have any ideas.
What about...?
Feel free to send an ask if you have additional questions. We will also be updating the FAQ as needed.
#veek#veek 2024#vee week 2024#vee noceda#vee the basilisk#vee the owl house#toh vee#the owl house vee#vee toh#the owl house#toh#fandom event
101 notes
·
View notes
Note
wait what did jared and jensen say at dencon 2021? i wasn’t on tumblr then and even now i can’t always keep up with everything 🫠
There was a Destiel question which i believe was directed at JUST Jensen abt how meaningful the confession was to the fan and seeing that representation. I forget the specifics of the actual question, but then Jared just started responding before Jensen could say anything. And it was just pure word vomiting abt how spn was abt more than sexuality and I believe he compared Cas saying i love you to Jared telling his children he loves them ??? and you could tell the whole time Jensen was like. going into a panic of "oh shit i need to stop this man from speaking" like you could literally see it on his face. And then Jensen finally got to cut in and he was stumbling over his words and saying how cas's love for dean went BEYOND the romantic (which imo encompasses the romantic AND MORE) and saying that since Cas is a cosmic being his love basically isn't confined by what humans can comprehend and can't be easily defined in human terms, that it "superseded" human concepts of sexual and romantic love (which again to me reads at it is even MORE than just those things).
And then some fans took this to mean that he was trying to "ungay" it or minimize Cas's love for Dean by saying it's cosmic and beyond human comprehension. Like to me what he was saying is that Cas's love is SO great that there just aren't words in human language to properly define that love!!! Yet somehow because it came after Jared's word vomit, Jensen's response got lumped in with that.
Also Jensen used the term "open to interpretation" during that response when he's framing what HIS interpretation is, and this fandom honestly has a horrible knee-jerk reaction to that phrase and automatically thinks it's negative or invalidating when literally it's a GOOD THING for media to be open to interpretation. As someone who literally got their degree in literature one of the first things you learn is that....all media is open to interpretation. And it just comes down to how well you can argue / support your interpretation with canon. And the thing about media being open to interpretation is....it means YOUR interpretation is valid too. Jensen saying this was not him saying "Castiel's for dean love is debatable" it was more "Castiel's love can mean whatever you want it to." That absolutely validates destiel. And it's a very positive statement imo, especially followed by him saying he thinks Cas's love supersedes all known language we have to describe love. Like hello???
Also the sheer hypocrisy of people acting like this was a "hashtag offensive destiel invalidating moment" to say this when I cannot count the amount of times I've seen fellow destiel shippers describe Cas's love for Dean and vice versa as akin to WORSHIP and describe their profound bond and their cosmic narrative defying love as this great powerful force. Of course that kind of love is going to go beyond human language!!! That's so fucking romantic wtf. And the fact that he said all this in front of a predominantly JayTwo / w*ncest audience ??? HUGE. And I'll always be a little salty abt people throwing Jensen under the bus after that con and making a whole big stink about his response. EYE think it was fine, given the circumstances. Great, even. Which is unfortch an unpop opinion in some destiel circles lol.
Anyways this got so long but here's a link to a gifset of his response. I can't find Jared's word vom bc i think we all just chose to delete it from our minds lol.
39 notes
·
View notes
Text
fandom memories
thanks for the tags @reyesstrand, @tellmegoodbye, @marjansmarwani and @lire-casander for the tags! love you all 💚 listen. i have been through some series finales in my time. bbc merlin. bbc atlantis. bbc robin hood. supernatural. the good place. the umbrella academy. for individual reasons, none of them felt quite like this. lone star is probably the first time i've ever been quite so involved in a fandom. it's been a huge part of my life for six years, six years in which i have been through two degrees and got a job, so i'm going to share six memories, one from each year.
2020: picture this: you are me, aged 18. the world has just started going crazy and you have no idea what's going to happen regarding university, which you have barely started. you're scrolling on tumblr when this new show starts popping up, and you ignore it for a while but then you see a gifset of one of the characters overdosing so you sigh and decide to check it out. cue bingeing every available video on youtube and a swift descent into obsession which leads to writing two fics before you've seen a full episode. good times.
2021: the first season i watched as it came out (though not live that time). also notable that my mental health crashed and burned in early 2021 and lone star was one of the few things that got me through that period. i remember having a really bad day once, and the only happy moment i had was watching bad call for the ?????? time. this was also the year of not one, but two angst weeks, and my 20th birthday fic celebration, which i loved doing.
2022: ah yes. season 3. my first time watching live, and honestly the experience of watching push and freaking out in real time was. well. this was when i really became a part of the fandom and joined some discord servers, where i made some amazing friends. there was discourse, which was fun and highly irritating, and i went to the dinah convention which...was probably a low point tbh but there were good moments.
2023: this was a weird year, as i very much started to step back from the fandom. some things had happened and i didn't feel comfortable anymore being quite so social. but who can forget watching the double episode season finale live? fun fact: this was the night before an important exam yet i still decided to stay up until 3am to watch my silly little firefighter show!
2024: we're going to ignore the year and a half of waiting. i honestly thought i would be okay with the show ending because of the aforementioned step back, but then i met a new group of lovely people and suddenly i was back, not quite in the thick of it, but comfortably present. season 5 has honestly been a bit of a car crash but it has been a joy to share these moments with friends.
2025: i can't believe that it will all be over in a couple of days. i am so grateful to this show for everything it has given me, my pocket friends, some of whom have become real life friends, all the triumphs and defeats, the epic highs and lows of being a lone star fan. i'm going to be honest - i don't have the highest expectations for the finale, but i do know that, whatever happens, it's going to be special. and also that i'm never getting this invested in a usa tv show ever again because jesus christ it is torture staying up until the early hours to have the actual show interrupted by ads every five minutes.
okay, i hope that was sappy and coherent enough. godspeed everyone, i'll see you at the finish line 🫡
open tag!
14 notes
·
View notes
Text
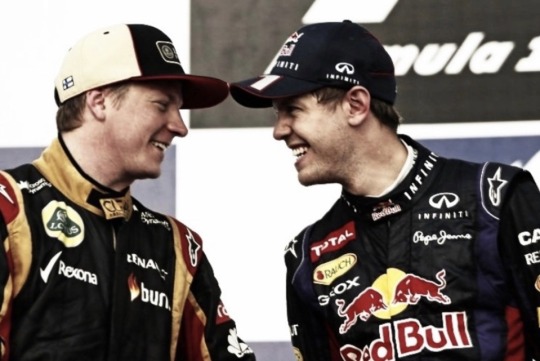
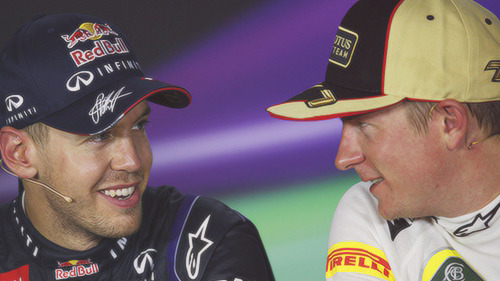
Simi Day 2024
Back in 2021 we had our first and so far only simi day ever. That has been a while… so now in 2024 we’d like to do another one on May 7th 2024.
What do you need to do in order to participate?
That’s entirely up to you. Fics, fic recs, gifsets, art, playlists, whatever you feel like doing is accepted and encouraged as long as the main pairing is of course Kimi and Sebastian.
We will set up a Simi day collection on ao3 as we’re approaching the date of 7/5. In the meantime, you can join our discord here if you’d like to talk about anything simi: https://discord.gg/jQJC8PFy
The tags used for this event will be:
#simiday2024 and/or #0507simiday2024.
We are looking forward to seeing everyone’s contributions and creations!
@sewismi-agenda @wolfsbanesbite @rednyx-sf @ill-procastinato @didierpironi @itsillyakuryakin @eatlrj @kimisicecream
81 notes
·
View notes
Text
Welcome to the SPN Graphics Archive!
🔥🐸 graphic design is our passion 🐸🔥
[click for rebloggable post to help spread the word about us!]
What will you find here?
The purpose of this blog is to collect SPN graphics, edits, and manips, with a focus on static images, though some gif edits may be reblogged, specifically creative / colorful gifsets, gifsets using typography, and manip gifs.
We also plan to host graphics challenges and other events to foster the creation of more fan graphics and manips!
Mod boundaries: Content related to incest ships or NSFW content between underage characters or minor / adult relationships will not be reblogged.
🚫 absolutely NO AI created content🚫
** I will do my best to ensure nothing AI created is posted here but if you notice something please let me know. This blog is to celebrate fandom creatives and the hard work that goes into making graphics.
Categorization
graphics will be used as an umbrella category for all static image creations.
gifs will be used for all gif content.
edits will refer to creative content that primarily involves edits to images, using color, textures, and typography.
manips will refer to creative content that creates a new scenario / image.
**there is sometimes a fine line between what is an "edit" vs "manip" and overlap does occur but we will try our best to stay consistent with tagging. Some graphics may simply be tagged as both.
Navigation Tags
characters will be tagged as ch: [first name last name] (where applicable) such as ch: dean winchester or ch: castiel
ships will be tagged by popular ship name (ex: destiel, drowley, samwena) or names together (ex: jocassie, jodydonna, deanvictor).
platonic relationships will be tagged as first names separated by "and" (ex: dean and mary, castiel and claire, etc)
this is done for navigation purposes and so people only interested in certain characters / ships can also easily filter out content they don't want to see.
disclaimer: we may also reblog edits / manips attached to fics. These posts will be tagged as "fics" and are not personal recommendations by this blog, we are just reblogging for the graphics.
graphics - gifs - edits - manips - icons - collage - mockups - posters - picspam - webweaves - nsfw - AUs - historical - fantasy - scifi - preseries - post canon - spnwin - tfw - the impala - purgatory - the empty - wayward sisters - cowboys - reverse!verse - trueform!cas - angel!dean - demon!dean - demon!cas - endverse - angels - archangels - demons - monsters - witches - wings - flowers
by year: 2011, 2012, 2013, 2014, 2015, 2016, 2017, 2018, 2019, 2020, 2021, 2022, 2023, 2024, 2025
by color: pink, red, orange, yellow, green, teal, blue, purple, b&w, gold
birthdays: hbd dean, hbd sam, hbd castiel, hbd jack
holidays: new years, vday, halloween, christmas
(🛠 blog still under construction - more tags to be added 🛠)
While I will try my best to find and reblog as many graphics as I can, you are always welcome to send in your finds / link to your own graphics. You can also use the tracked tag #spngraphics-archive or @ this blog in any graphics you post.
8 notes
·
View notes
Text


Content Creator Evolution Challenge tagged by @elena-gilbert and @noajennifers
1st gif was from the first set I ever made in 2020
2nd gif is from a gifset made in 2021
3rd gif is also from 2021
Tagging (no pressure ofc): @oscar-isaac @useragarfield @milesgmorales @laylakeating @abramsgracies
@clubglee @annacoleman @iero @pennywises @hellboys + anyone who sees this and would like to do so :)
#tag games#*mine#i have no idea who to tag so if you see this and want to post your own evolution feel free to make your own and say i tagged you#also i took sooooo long to do this so chances are most of you have already done it
18 notes
·
View notes