#editopen
Explore tagged Tumblr posts
Visit Tumblr Blog
Explore Tumblr blogs with no restrictions, modern design and the best experience.
Last Seen Tumblr Blogs


Fun Fact
Tumblr has 16.74 million mobile monthly users in the US.
Text
Edit
Open Heart
Loving You, Loving Me | Sienna Trinh x M!OC (Max Valentine) - @liaromancewriter
The Moment I Knew | Sienna Trinh x M!OC (Dan Ramirez) - @gryffindordaughterofathena
Fanfiction
Desire and Decorum
Best Part Of The Night | Ernest Sinclaire x F!OC (Alisha Hastings) - @lorirwritesfanfic
Desire and Decorum AU Drabble | Hamid x MC (Daphne Wang) - @lilyoffandoms
Open Heart
Little Things | Ethan Ramsey x F!MC (Cassie Valentine) - @liaromancewriter
Moodboard
Open Heart
Cupcake moodboard | Sienna Trinh - @peonierose
12 notes
·
View notes
Text
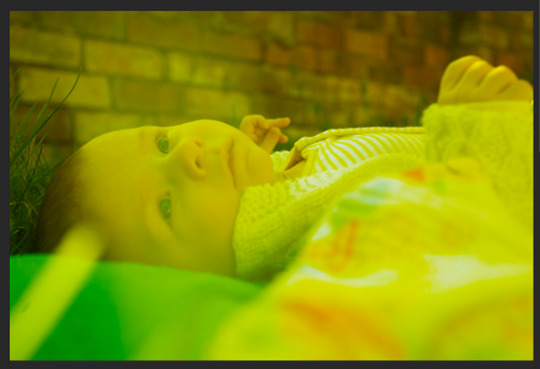
Curves and Gradience
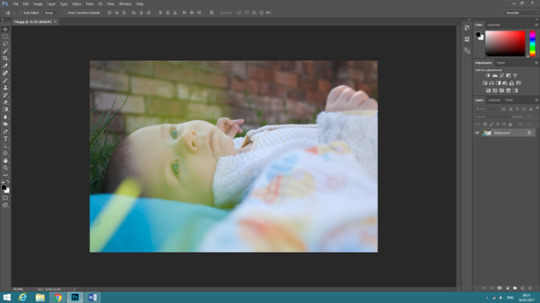
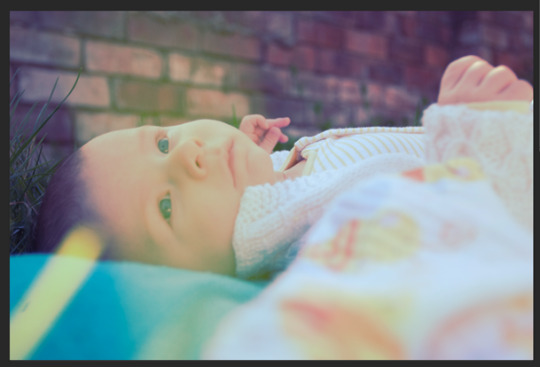
Open image in Photoshop.
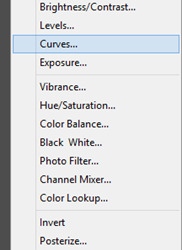
Make a curves adjustment layer.
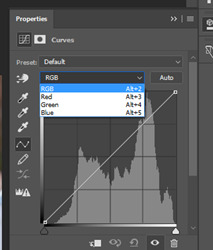
When on “RGB”, it changes all of the tonal range (all the image).
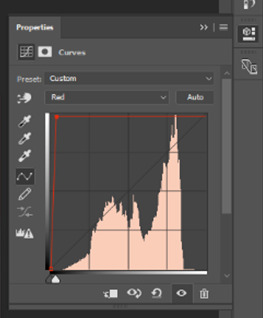
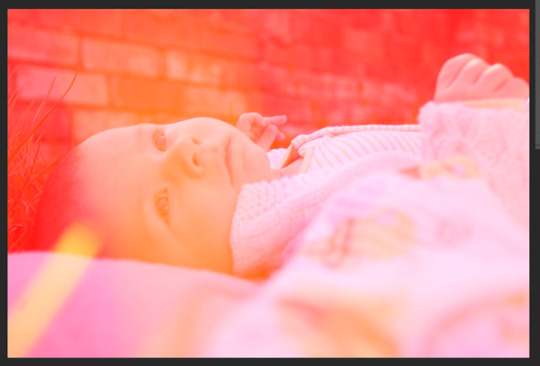
When selecting the red curves layer. When pulling up the red line it turns the whole image red.
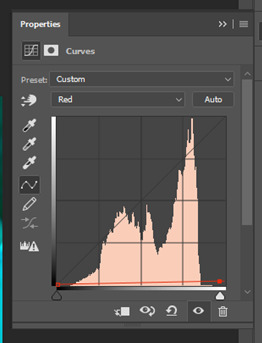
When the red curves are pulled down it makes the image cyan (the opposite to red on the colour wheel).
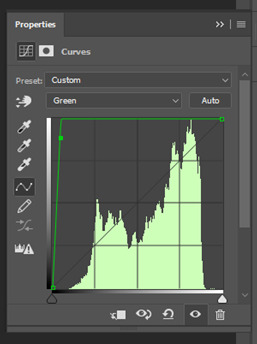
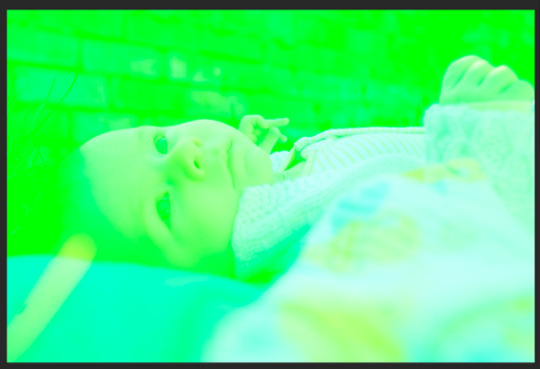
Go to the green curves and when you pull the curve up the image goes green.
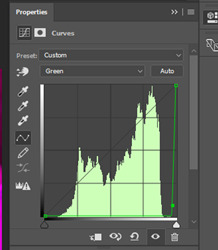
When you pull the green curve down it goes magenta (the opposite of green on the colour wheel).
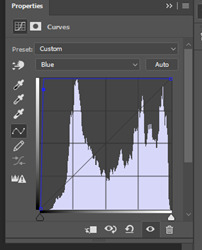
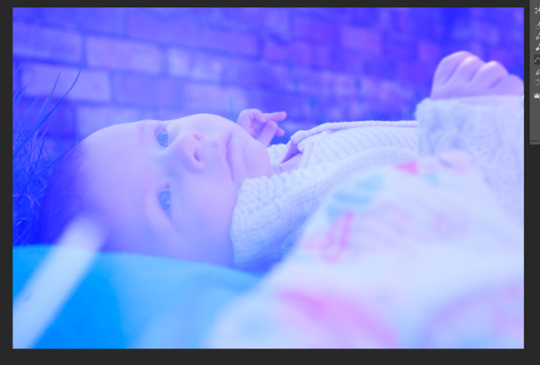
On the blue curves when turned up the image goes blue.
When the blue curves are pulled down the image turns yellow (the opposite to blue on the colour wheel).
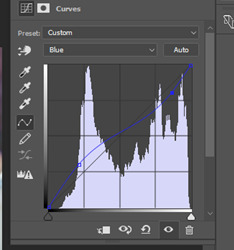

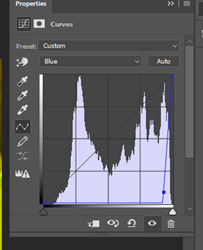
Delete everything just done and go onto the blue curves. Make two anchor points. One a quarter to the top and another a quarter to the bottom. Pull the bottom one up a little and pull the top one down a little, making the line more like a wave. This changes the blue in the image and evens the colour out.
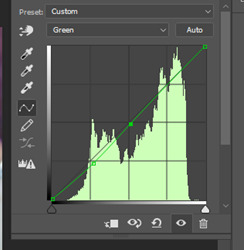
Move to the green curves and add two anchor points. One in the middle and the other a quarter to the bottom. Pull the bottom one down a little to make the magenta come out. However by doing this it make the highlights of the image go a more vibrant green, so with the middle anchor point, turn it down a little so the green isn’t so vibrant.
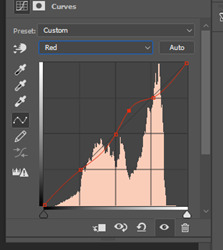
After all this, move onto the red curves. Put 4 anchor points on this one. One a quarter to the bottom, one in the middle, one a quarter to the top and the other in between the middle and the quarter to the top anchors. Move the anchor between the middle and quarter to the top anchors a little up to create a small curve in the line to add a little warms to the image.
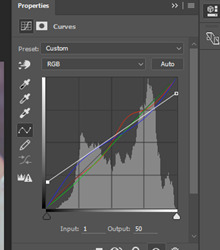
Go back to the RGB curves. There are already two anchors, one right at the top and the other right at the bottom. Change the bottom anchor so that the output is 50 and change the top anchor so the output is 225.
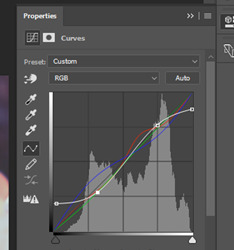
Add two anchor points, one a quarter to the top and the other a quarter to the bottom. Move both so that the line turns into a curve/ wave. By moving these anchor points it make the image look less flat.
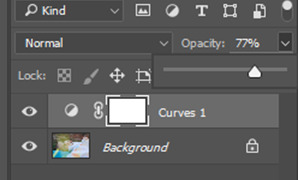
If it looks too much on the image you can always change the curves around or change the opacity on curve. I changed mine to 77%.
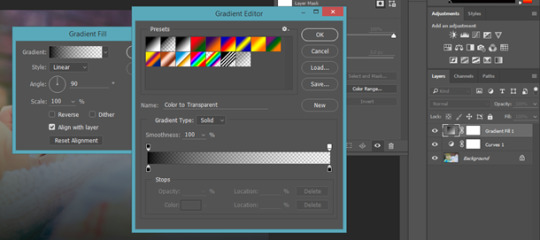
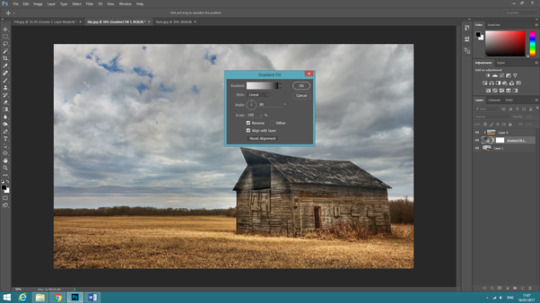
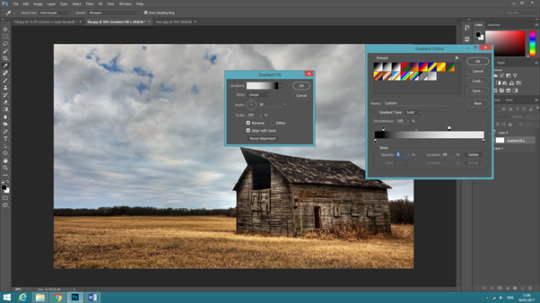
Go to adjustment layers and click on gradient.
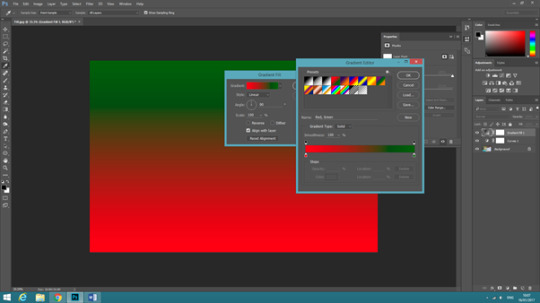
Select the green and red gradient.
Select the black arrow above the green gradient arrow and make the opacity to 0%. Then click ok.
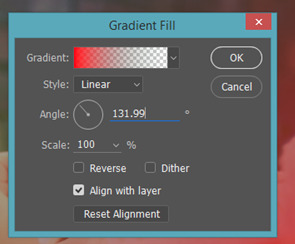
On gradient fill, change the angle to 131.99 which will change which side/ angle the colour is coming from.
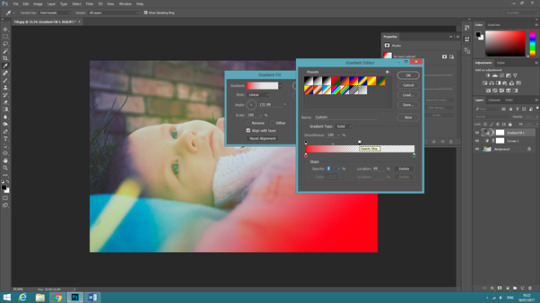
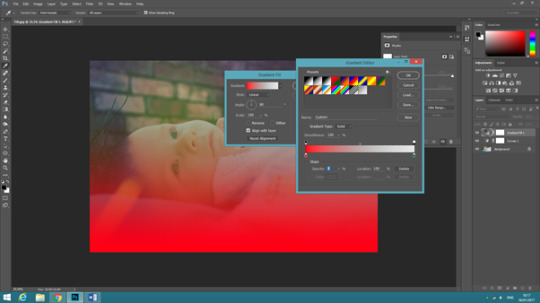
The more I move the opacity arrow, the smaller the amount of colour is shown.
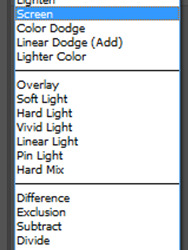
After all this, press ok on the gradient boxes and change the box at the top from normal to screen to merge both gradient layer to the rest of the image, making the gradient fit in better.
EXAMPLE
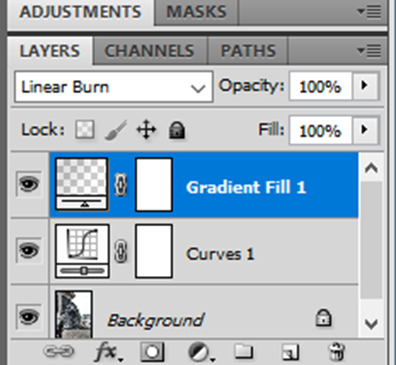
I changed the gradient to black and white, put it in the top corner and turner the “normal” to “Linear Burn”.
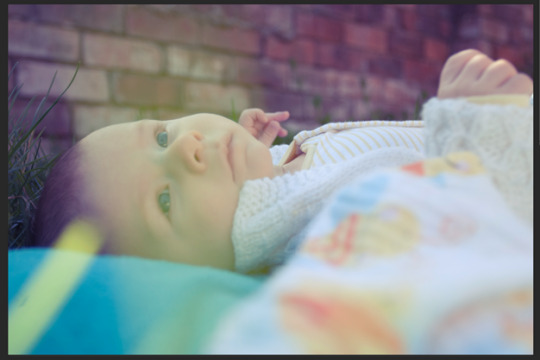
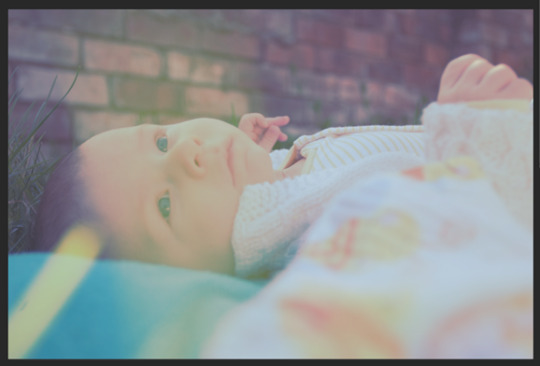
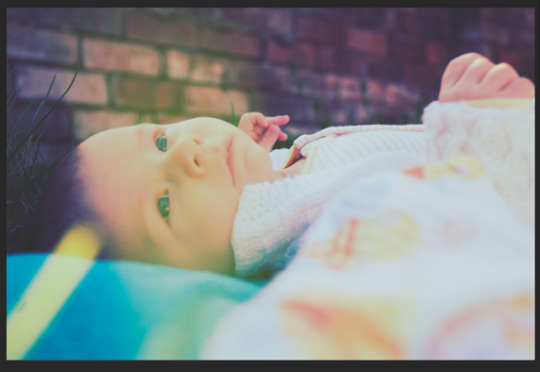
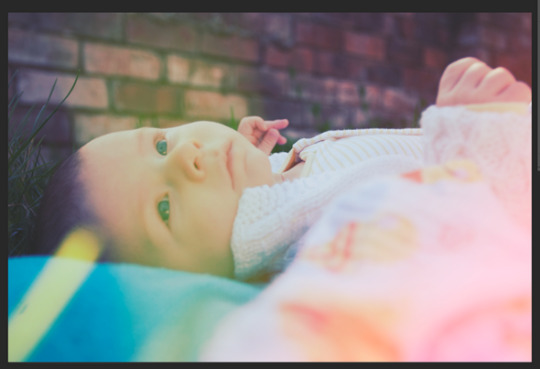
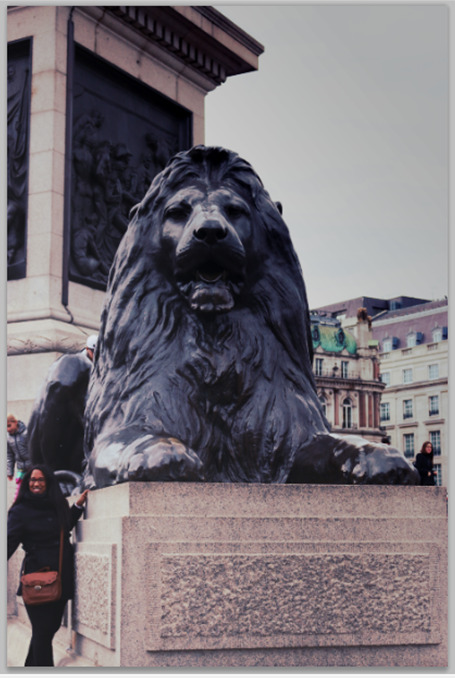
Original

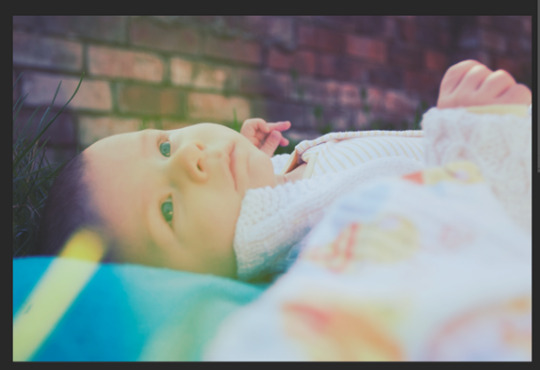
Final
Layering Gradient


Open “Sky” and “Barn” images onto Photoshop and layer over each other.

Open a “Gradient” layer and press “OK”.
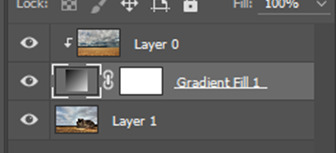
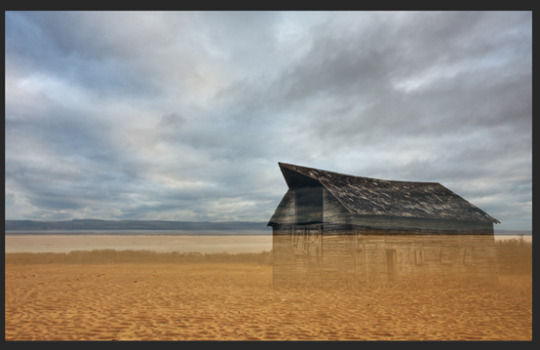
Clip the “sky” image to the “Gradient” layer by holding “Alt” and clicking on the “Gradient” layer.
Click back on the “Gradient” layer and click the box where it says “Reverse”.
Change the slides so the black is 8 and the white is 68% (or whatever looks best).
EXAMPLE!!!
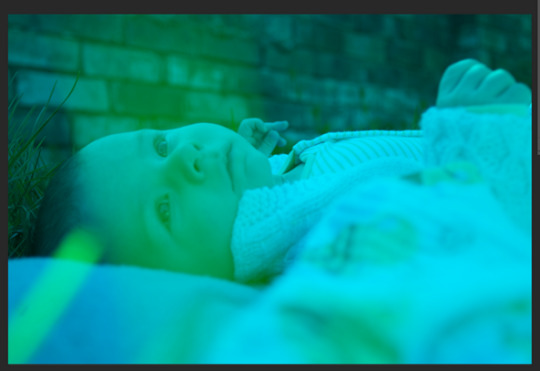
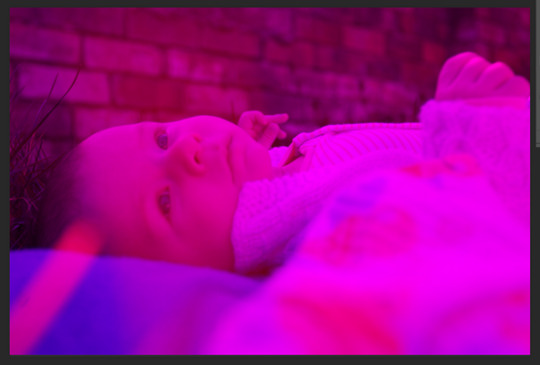
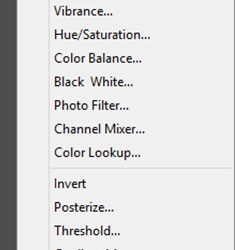
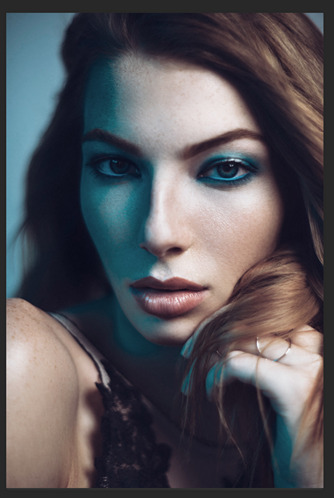
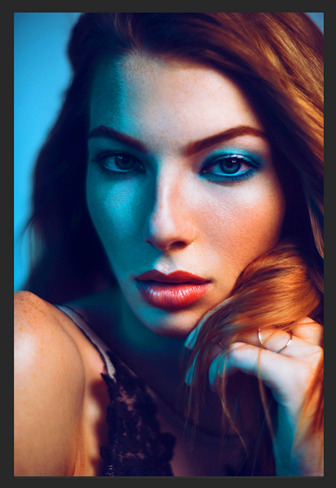
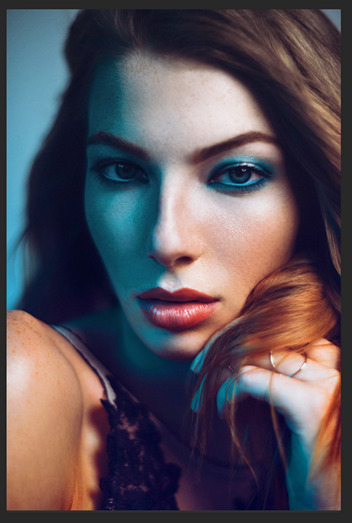
Colour Gel Edit
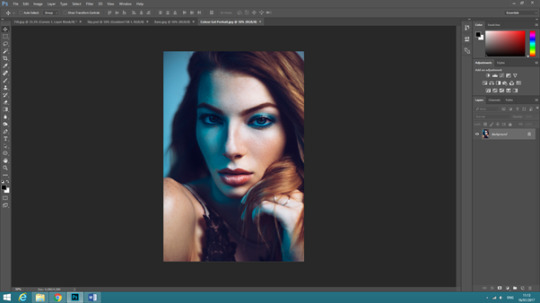
Open the image in Photoshop.

Open “Hue/ Saturation” layer.
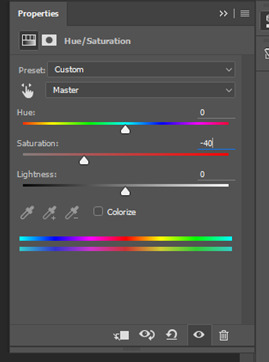
Set “Saturation” to -40.
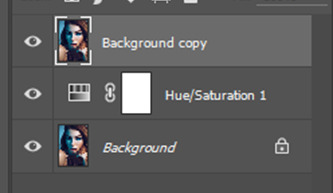
Duplicate “colour gel” layer.
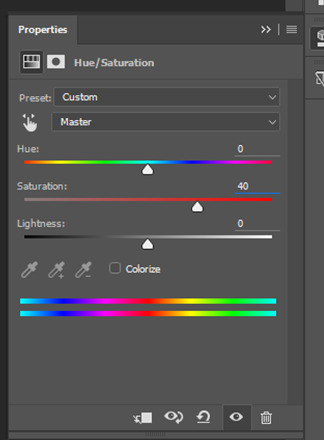
Get a new “Hue/Saturation” layer. Set “Saturation” to 40.
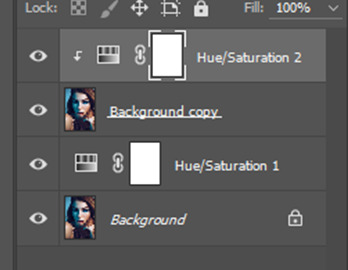
Clip “Hue/Saturation 2” to “Background copy” by holding alt and clicking on the layer you want to clip together.

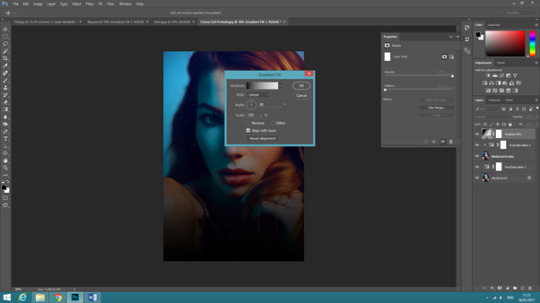
Go on “Gradient” then click “OK”.
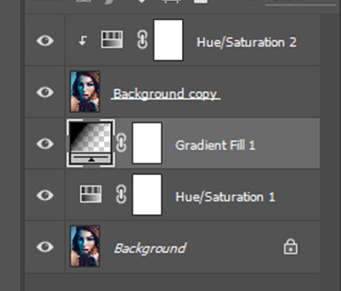
Move the “Gradient” layer down to 3rd in the layers column.
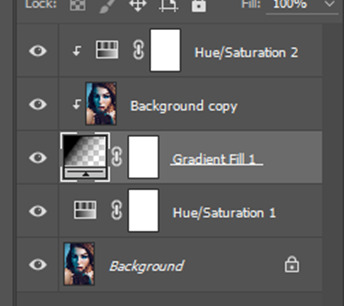
Clip “Background copy” to “Gradient” layer.
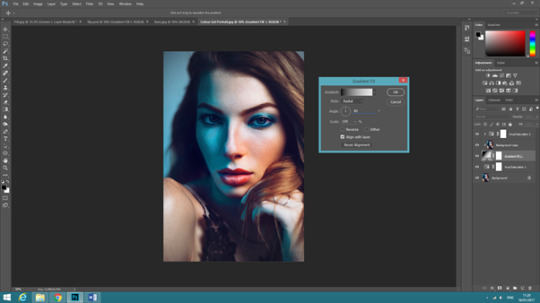
After linking it, double click on the “Gradient” layer to get the changing settings back up and change them around to how you like, I chose to change my style to “Radius” instead of “Linear”.
EXAMPLE!!!
QUESTIONS
- What is the potential of the curve adjustment layer?
The potential of the curves adjustment layer is that you can change the colours together or separately nd the colours can make the outcome of the image took completely different but natural. You can change them together with the RGB curve, where it changes the image over all. ???
- What can it do when you use it fully?
It can make the image look like its got a filter on it, making the image look vintage, bringing out vibrant colours and shadows and can define an image.
- How do colour adjustments work? (Think CMY as well as RGB!)
(look at the first edit i did of the child)
- What can you limit with the curves layer?
You limit how bright or dark the image is?
- What is the potential of the gradient adjustment layer?
You can use the gradient layer to change the colours of an image, you can set an image into many colours or just have one, you can change an image so it fades from one colour to another.
0 notes
Text
Edit
Open Heart
Baby Wishes | Ethan Ramsey x F!MC (Cassie Valentine), Sienna Trinh x M!OC (Max Valentine) - @liaromancewriter
Moodboard
Desire and Decorum
Daphne Wang (Desire and Decorum modern MC) moodboard - @lorirwritesfanfic
Mother of the Year
Hiking | Thomas Mendez, Luz Mendez, MC, MC’s daugther - @choicesfanaf
9 notes
·
View notes
Text
Edit
Open Heart
Show Me A Garden That’s Bursting Into Life | Sienna Trinh x M!OC, Ethan Ramsey x F!MC - @gryffindordaughterofathena
Fanfiction
Blades of Light and Shadow
Blades Drabble | Tyril Starfury x M!elf!MC (Maiele Nightbloom) - @lilyoffandoms
The Royal Romance
Not Just A Horse | Party Liam Rys x MC (Jade Bourbon-Rys) - @lorirwritesfanfic
#choicesnovember2021#choices fanfic#choices edits#blades of light and shadow#open heart#the royal romance
8 notes
·
View notes
Text

Edit
Open Heart
Shining Like Fireworks | Sienna Trinh x M!OC - @gryffindordaughterofathena
Moodboard
Teja Desai moodboard - @lorirwritesfanfic
4 notes
·
View notes