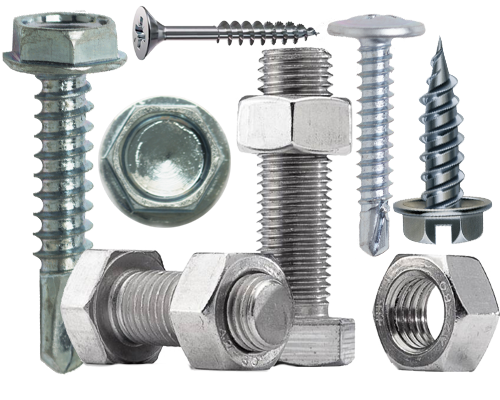
#dual nut manufacturer
Explore tagged Tumblr posts
Visit Tumblr Blog
Explore Tumblr blogs with no restrictions, modern design and the best experience.
Last Seen Tumblr Blogs


Fun Fact
Forty percent of Tumblr users are between the ages of 18 to 25.
Text

Another year, another birthday! Normally I don’t draw much attention to it, but it’s been a rough year, and I want to celebrate my surviving of it by recommending 10 works from mutuals that live in my head RENT FREE forever! Please enjoy them with me, and feel free to shout at me about them in the DM’s, it will make my day!
1. Devil’s Snare All The Way Down by @malpal132
Pairing: Pansy Parkinson/Neville Longbottom Rating: E This is a gorgeous Pansy Parkinson character study, spanning her younger years to post-hogwarts. She becomes reacquainted with Neville Longbottom and discovers who she’s meant to be in this slow-burn ETL.
2. Down a Hill at High Speed by @tepre
Pairing: Harry Potter/Draco Malfoy Rating: E This 8th year fic is the BEST sex-pollen trope story I’ve ever read. Period. Tepre is a genius with sexual tension.
3. May Contain Nuts by scoradh
Pairing: Harry Potter/George Weasley Rating: M This is the fic that I REFUSE TO SHUT UP ABOUT (sorry if you’ve been caught in the crosshairs.) George is trying out a new line for XXX products at the joke shop. Harry is George’s go-to for product testing. Contains found family, dubious sweets, broken George, and NUTS of course! *Note the Archive warning for MCD is in reference to Fred, I think. No Harrys or Georges are harmed in the making of this fic.
4. Savour by @mignon-chignon
Pairing: Hermione Granger/Draco Malfoy Rating: E This is just pure PWP. And all my favorite kinks. Definitely not safe for ANYTHING but a quiet room, a glass of your favorite beverage, and a favorite toy. Mind the tags.
5. Like a Brother Would by @wolfpants
Pairing: Harry Potter/Ron Weasley Rating: E This Deathly Hallows AU explores the posibility of Ron returning back to the tent that night in the Forest of Dean. I can’t tell you how many times I’ve read and reread this. I’m obessed with this friends to lovers pairing, this vulnerable and delicious fic. One of the best Ronarry I’ve ever read.
6. The Luxury of a Regret by @swoontodeath
Pairing: Horace Slughorn/Regulus Black, Horace Slughorn/Sirius Black Rating: E IT’S A DEAD DOVE, FOLKS! But it is so creepy and beautiful. I CANNOT stop thinking about it. Imagine if this were canon, Slughorns obession with Harry would be THAT MUCH CREEPIER.
7. Hate, Lead the Way! by oh_black_sparrow
Pairing: Walburga Black/Orion Black Rating: E One of the Rare Pair fest 2022 stories I fell head-over-heels in love with. We know her as the shrewish shrieking portrait permanently stuck to the wall in 12 Grimmauld Place, but in this rage-filled story, she’s a force to be reckoned with.
8. Manufacturing Consent by onefiftyeight
Pairing: Lucius Malfoy/Hermione Granger Rating: E HEAR ME OUT. I don’t normally go for this pairing, but THIS FIC is deliciously sinister. A masterclass in gaslighting and manipulation. A breeding kink extravaganza. Crack at its finest. Give it a chance, I promise you won’t regret it. Mostly.
9. Hot and Bothered by @roseharpermaxwell
Pairing: Ron Weasley/Draco Malfoy, background Dramione Rating: T Who’s the better kisser? Only one way to find out… (Guys. This is reason #1 why Dron is amazing. Mic Drop.)
10. I Like Your Skirt by @the-francakes
Pairing: Ron Weasley/Harry Potter Rating: E Aside from the fact that Fran is lovely and wrote this gift for me, RON AND HARRY are SO YUMMY IN THIS!!! Dual POV, Friends to Lovers, flirting, pining and no small amount of filthy content. The epilogue chapter (bonus smut) is to die for. It will forever reside in my wank bank.
*****
Stay tuned for part 2... (self-recs!)
#Birthday#Harry Potter fics#Ronarry#Dron#Lucius x Hermione#Draco x Ron#Ron x Harry#Rarry#Walburga x Orion#Horace x Regulus#Horace x Sirius#Dramione#DHr#Draco x Hermione#Harry x George#Firebolt#Panville#Pansy x Neville#Paneville#Draco x Harry#Drarry#mutuals#fic recs
92 notes
·
View notes
Text
Duplex Fasteners: Manufacturer, Stockist, Supplier, and Exporter
Introduction to Duplex Fasteners
Duplex Fasteners are a specialized class of fasteners manufactured using duplex stainless steel, known for its dual-phase microstructure comprising austenite and ferrite. This unique composition provides exceptional mechanical strength, corrosion resistance, and durability, making duplex fasteners highly desirable across industries such as oil & gas, chemical processing, marine, and construction.
Duplex stainless steel grades, like 2205, offer superior performance compared to traditional austenitic or ferritic stainless steels. These fasteners are versatile and ideal for applications where high strength and resistance to harsh environments are crucial.
Types of Duplex Fasteners
Duplex Fasteners are available in various forms to meet diverse industrial needs, including:
Duplex Bolts: Hex bolts, U-bolts, eye bolts, and more.
Duplex Nuts: Hex nuts, lock nuts, coupling nuts, etc.
Duplex Washers: Plain washers, spring washers, and more.
Duplex Screws: Machine screws, self-tapping screws, and more.
Duplex Studs: Threaded rods, double-end studs, etc.
Each type is designed to withstand high pressure, temperature, and corrosive environments.
2205 Duplex Stainless Steel Fasteners
The 2205 grade of duplex stainless steel is among the most widely used. It offers the following benefits:
High Strength: Its yield strength is approximately double that of standard austenitic grades like 304 and 316.
Excellent Corrosion Resistance: Particularly effective in chloride-rich and acidic environments, such as marine or chemical industries.
Thermal Stability: Maintains consistent performance across a broad spectrum of temperatures.
Cost Efficiency: Provides a balance of cost and performance due to reduced material requirements in designs.
Applications of Duplex Fasteners
Duplex fasteners are employed in various sectors, including:
Marine Engineering: Shipbuilding, offshore platforms.
Oil & Gas: Refinery pipelines, storage tanks.
Chemical Processing: Reactors, heat exchangers.
Construction: Bridges, structural reinforcements.
Power Generation: Nuclear and thermal power plants.
Ananka Group: Your Trusted Duplex Fasteners Manufacturer
As a leading manufacturer, supplier, stockist, and exporter of duplex fasteners, Ananka Group specializes in delivering top-quality products worldwide. Our fasteners are manufactured to international standards and undergo rigorous quality testing to ensure unmatched reliability and performance.
Key Features of Our Duplex Fasteners:
Precision-engineered and ISO-certified.
Wide range of sizes, grades, and coatings.
Customized solutions for specific industrial needs.
Conclusion
Duplex fasteners are a reliable solution for industries requiring superior strength, corrosion resistance, and long-term performance. Their versatility and durability make them indispensable in challenging environments. Ananka Group is committed to providing premium duplex fasteners, including 2205 grade, tailored to meet the diverse needs of clients globally.
Frequently Asked Questions (FAQ)
1. What are duplex fasteners?Duplex fasteners are made from duplex stainless steel, combining high strength and excellent corrosion resistance, ideal for harsh environments.
2. What are the benefits of 2205 duplex stainless steel fasteners?2205 duplex fasteners offer high mechanical strength, superior corrosion resistance, thermal stability, and cost efficiency.
3. In which industries are duplex fasteners used?Duplex fasteners are used in marine, oil & gas, chemical processing, construction, and power generation industries.
4. Does Ananka Group provide customized duplex fasteners?Yes, Ananka Group offers customized duplex fasteners tailored to meet specific industrial requirements.
5. What standards do Ananka Group's duplex fasteners comply with?Our duplex fasteners are crafted in compliance with renowned international standards such as ASTM, ASME, and DIN.
#Ananka hashtag#AnankaFasteners hashtag#Linkedin hashtag#Article hashtag#Blog hashtag#Duplex hashtag#Duplexfasteners hashtag#Fasteners hashtag#FastenersManufacturer#anankafasteners#ananka#manufacturer#fasteners#supplier#mumbai#hex#bolt#usa
0 notes
Text
Price: [price_with_discount] (as of [price_update_date] - Details) [ad_1] PrimAlite Brand presents 350 WATT MINI BELGIAN WAFFLE MAKER MACHINE: 4 Inch- Getting Perfect Waffles on First Go!!Fresh Belgian waffles and a clean counter-top have always been the unachievable dream for the home cook and breakfast enthusiast. With the mess-free, Anti-Overflow Waffle Maker, PrimAlite has made those dreams a reality. The Unique Waffle Iron prevents any batter from overflowing or leaking. The non-stick plates make cleanup a breeze – no spray needed.WAFFLE has never been cleaner, simpler, or more delicious! From now on, fresh waffles will be just as easy. A great gift for anyone on your list!FEATURES:Superior Non-Stick Surfaces: Extra-strong non-stick coating for easy cleaning and waffle removal. Gently wipe down the exterior and interior plates.The Anti-overflow channel catches any excess batter and helps keep your countertops neat and clean! Gone are the days of batter overflowing out of your waffle iron, making a huge mess.Indicator Lights: Just plug it in. When the green light turns offs, you’re ready to go.With 350 WATTS, it heats up quickly & evenly, giving you perfect results everytime.Easy Storage- PrimAlite MINI Waffle Maker comes with a Storage Box so you can easily place the unit in any cabinet or cupboard without taking up too much space.It's time to re-think they way you make waffles!Try classic Belgian waffles topped with just a little maple syrup and fresh fruit, or decadent waffles topped with chocolate hazelnut spread and chopped nuts, or maybe waffles smothered in vanilla ice cream and fudge sauce.With this PrimAlite’s MINI Waffle Maker you and your kids can enjoy mouth-watering waffles any time you like. A great gift for mothers, father, families, at-home cooks, and more! The timeless style meets modern convenience with this handy electric appliance. COMPACT & LIGHTWEIGHT: Weighing around 550 grams, this is a MUST-HAVE for that first apartment, smaller kitchen, kids party college room life or traveling. QUICK & EASY: Simply plug it in and go; it heats up in mere minutes. The dual non-stick surfaces provide an even cook for consistent results, each and every time. PERFECT GIFT: The perfect wedding or new home gift. Its small size takes up little counter space, and its sleek design and trendy color options will match any kitchen dÃcor. MORE THAN WAFFLES: Make paninis, pan cakes, and even biscuit pizzas! Any wet batter will “waffle†your treats and snacks into single serving portions. Great for kids or on the go! WHAT YOU WILL GET- Backed by a 1-year manufacturer warranty, the PrimAlite Mini Belgian Waffle maker includes User Manual and a Storage Box (all non-electric parts are easily wiped clean) Suitable for gifting on Diwali and other special occasions. [ad_2]
0 notes
Text
A Health Revolution: How Nutraceuticals Are Transforming Women’s Lives
The landscape of women’s health is undergoing a significant transformation, largely fueled by the rise of nutraceuticals. These bioactive compounds, derived from food sources, are proving to be powerful allies in promoting wellness and preventing disease. This blog explores how nutraceuticals are revolutionizing women's health, addressing unique challenges they face, and empowering them to take control of their well-being.

Understanding Nutraceuticals
Nutraceuticals are products derived from food that provide health benefits beyond basic nutrition. They encompass a wide range of substances, including vitamins, minerals, herbal products, and functional foods. The term combines "nutrition" and "pharmaceutical," highlighting their dual role in promoting health and treating ailments.
The Unique Health Challenges Faced by Women
Women often encounter specific health issues throughout their lives, including hormonal fluctuations, reproductive health concerns, and increased susceptibility to certain diseases. Nutraceuticals can play a crucial role in addressing these challenges:
- Hormonal Balance: Phytoestrogens found in soy and flaxseeds can help alleviate symptoms of menopause by mimicking estrogen in the body.
- Bone Health: Calcium and vitamin D are essential for maintaining bone density, especially post-menopause when women are at higher risk for osteoporosis.

- Mental Health: Omega-3 fatty acids have been linked to improved mood and cognitive function, providing support during times of hormonal changes.
Key Nutraceuticals Transforming Women's Lives
1. Omega-3 Fatty Acids: Found in fish oil and flaxseed oil, omega-3s are known for their anti-inflammatory properties and benefits for heart health. They also support brain function and may help reduce symptoms of depression.

2. Probiotics: These beneficial bacteria promote gut health and can enhance immune function. For women, probiotics may also help prevent urinary tract infections and support vaginal health.
3. Antioxidants: Vitamins C and E, along with selenium, combat oxidative stress, which is linked to aging and various chronic diseases. Antioxidants play a vital role in skin health and may reduce the risk of breast cancer.
4. Herbal Supplement: Herbs like black cohosh and evening primrose oil are popular for managing menopausal symptoms. Additionally, adaptogens such as ashwagandha help the body cope with stress.
The Impact on Lifestyle Choices
The integration of nutraceuticals into daily routines encourages women to adopt healthier lifestyles. By focusing on whole foods rich in these compounds—such as fruits, vegetables, whole grains, nuts, and seeds—women can enhance their overall health while enjoying delicious meals. This shift not only improves physical well-being but also fosters a sense of empowerment as women take charge of their health.
The rise of nutraceuticals marks a pivotal moment in women's health. By addressing unique challenges through targeted nutrition, these compounds are transforming lives and fostering a proactive approach to wellness. As more women become aware of the benefits of nutraceuticals, we can expect a continued shift towards holistic health practices that prioritize prevention and empowerment.
In this health revolution, knowledge is power. Women who embrace nutraceuticals can unlock new pathways to vitality and resilience, ensuring they lead fulfilling lives at every stage.
Zeon Lifesciences is a leading player in the nutraceutical industry, specializing in high-quality manufacturing of dietary supplements and herbal products tailored to women's health needs. Our commitment to innovation and quality ensures that they provide effective solutions for hormonal balance, immune support, and overall wellness, empowering women to lead healthier lives.
0 notes
Text
Fully Automatic Kaju Processing Machine Solutions for Cashew Industry
The 2-Blade Automatic Cashew Cutting Machine from Delta Cashew Machines is a highly efficient and precision-driven tool designed to enhance productivity in cashew processing. This machine ensures clean and uniform cuts, reducing waste and preserving kernel quality. Delta Cashew Machines is recognized as one of the best automatic cashew processing machine suppliers in India, offering a full range of equipment including automatic cashew cutting machines, fully automatic cashew processing machines, and automatic kaju processing machines. They stand as a top choice for businesses looking for reliable cashew cutting, peeling, and processing solutions.
The Evolution of Cashew Processing: 2-Blade Automatic Cashew Cutting Machine
The cashew industry has seen significant advancements with the introduction of automated technology designed to streamline the cashew processing cycle. The 2-Blade Automatic Cashew Cutting Machine stands as one of the most advanced innovations that has not only boosted efficiency but also enhanced the quality of output. This machine, manufactured by Delta Cashew Machines, incorporates cutting-edge technology, ensuring precision, speed, and uniformity in cashew cutting processes.
Cashews, being one of the most consumed nuts worldwide, require delicate and efficient processing to ensure quality and maximize yield. Delta Cashew Machines is renowned for being one of the best automatic cashew processing machine suppliers in India, providing a wide array of automated machines designed for different stages of cashew processing, including automatic cashew cutting machines, automatic peeling machines, and fully automatic cashew processing machines. The 2-Blade Automatic Cashew Cutting Machine represents the company’s commitment to excellence and innovation.
Best Automatic Cashew Processing Machine Supplier in India
India leads the world in cashew production, and with the increasing demand for high-quality cashews, the need for automatic cashew processing machines has grown significantly. Delta Cashew Machines, known as one of the best automatic cashew processing machine suppliers in India, delivers a variety of machines to cater to the growing demands of the cashew industry.
The company focuses on delivering machinery that not only increases production efficiency but also maintains the highest standards of product quality. The 2-Blade Automatic Cashew Cutting Machine is a prime example of how Delta Cashew Machines continues to innovate and set the benchmark for cashew processing in India and around the world.
Automatic Cashew Cutting Machine: Maximizing Efficiency
Traditional cashew cutting methods were labor-intensive, time-consuming, and often resulted in high levels of waste. However, with the advent of the automatic cashew cutting machine, manufacturers can now enjoy faster, more efficient production with less wastage and a higher yield of whole kernels. The 2-Blade Automatic Cashew Cutting Machine is specifically designed to ensure that cashews are cut cleanly and uniformly, which is crucial for maintaining the quality of the nuts.
The machine’s dual blades enable faster cutting with precision, making it possible for manufacturers to process a larger volume of cashews in a shorter time. This makes it an invaluable asset for cashew processing companies aiming to scale up their operations without compromising on quality.
Automatic Cashew Peeling Machine Supplier in India
After cutting, the next critical step in cashew processing is peeling. The outer skin of the cashew nut must be carefully removed to ensure the kernel is ready for packaging and consumption. Delta Cashew Machines is a leading automatic cashew peeling machine supplier in India, offering efficient and reliable solutions for peeling large volumes of cashew kernels without damaging them.
The company's automatic cashew peeling machines are designed to handle the peeling process swiftly and efficiently, minimizing kernel breakage and ensuring a smooth, damage-free peel. These machines are ideal for manufacturers looking to optimize their processing lines and improve their product yield.
Automatic Kaju Processing Machine: Innovation in the Cashew Industry
In India, cashews are commonly referred to as “kaju.” The automatic kaju processing machine is specifically designed to cater to the processing needs of cashew manufacturers. Delta Cashew Machines has built a solid reputation for providing high-quality automatic kaju processing machines that cover every stage of cashew production, from cutting and peeling to grading and packaging.
The 2-Blade Automatic Cashew Cutting Machine is one such innovation that has significantly improved the efficiency of the cashew processing line. It reduces the need for manual labor and ensures that the nuts are processed uniformly, preserving their natural shape and flavor.
Cashew Cutting Machine: Ensuring Precision and Speed
One of the key pieces of equipment in cashew processing is the cashew cutting machine. Without precise cutting, manufacturers may experience high levels of wastage, which can significantly reduce profitability. The 2-Blade Automatic Cashew Cutting Machine is engineered to deliver precision cutting, ensuring that the cashew kernels retain their shape while minimizing wastage.
This machine uses a two-blade system to cut cashews more efficiently, allowing for a higher volume of nuts to be processed in a shorter period. The accuracy of the cuts ensures that cashew manufacturers can meet high production demands while maintaining product quality.
Fully Automatic Cashew Processing Machine
The cashew industry is moving towards full automation, and the demand for fully automatic cashew processing machines is on the rise. These machines are designed to handle every stage of cashew processing, from cutting and peeling to sorting and packaging. The fully automatic cashew processing machines offered by Delta Cashew Machines are highly efficient and can significantly reduce labor costs while increasing production output.
With the 2-Blade Automatic Cashew Cutting Machine at the core of their processing line, manufacturers can achieve faster, more precise results. The machine's automated features ensure consistency and accuracy, making it easier for businesses to scale up operations and meet growing demand.
Kaju Cutting Machine: Designed for Precision
Cashew processors require specialized equipment to handle large volumes of cashew nuts, and the kaju cutting machine from Delta Cashew Machines is built to do just that. This machine is designed to cut cashews with precision, ensuring that each nut is processed evenly without breaking the kernels.
The 2-Blade Automatic Cashew Cutting Machine incorporates advanced technology that allows it to handle large quantities of cashews while maintaining precision in the cutting process. Its efficiency makes it a must-have for any cashew processing operation looking to enhance productivity.
Kaju Peeling Machine: Protecting Kernel Integrity
The kaju peeling machine is another essential piece of equipment in the cashew processing line. Once the cashews have been cut, they must be peeled to remove the thin outer skin. Delta Cashew Machines offers advanced kaju peeling machines that efficiently remove the skin without damaging the cashew kernels.
These machines are designed to handle the delicate process of peeling with care, ensuring that the final product is smooth, whole, and ready for market. The efficiency and reliability of Delta’s peeling machines have made them a top choice for cashew processors across India.
Top Cashew Processing Equipments Supplier in India
Delta Cashew Machines has solidified its reputation as one of the top cashew processing equipment suppliers in India. Their product lineup includes everything from cutting machines and peeling machines to sorting and packaging equipment, making them a one-stop solution for cashew processing needs.
The 2-Blade Automatic Cashew Cutting Machine is a testament to the company's commitment to innovation and quality. With a focus on delivering machines that enhance productivity and reduce manual labor, Delta Cashew Machines has become a trusted name in the cashew processing industry.
Conclusion
The 2-Blade Automatic Cashew Cutting Machine from Delta Cashew Machines is a revolutionary piece of equipment that is transforming the cashew processing industry. By automating the cutting process, this machine significantly reduces labor costs, increases productivity, and ensures that the quality of the cashew kernels is maintained.
As a leading automatic cashew processing machine supplier in India, Delta Cashew Machines offers a comprehensive range of equipment that caters to every stage of cashew processing. Whether you're in need of a cashew cutting machine, kaju peeling machine, or fully automatic cashew processing machine, Delta Cashew Machines has the right solution to meet your needs.
By investing in the 2-Blade Automatic Cashew Cutting Machine, cashew processors can take their production to the next level, ensuring efficiency, precision, and profitability.
#best automatic cashew processing machine supplier in india#automatic cashew cutting machine#automatic cashew peeling machine supplier in india#automatic cashew processing machines#automatic kaju processing machine#cashew cutting machine#fully automatic cashew processing machine#kaju cutting machine#kaju peeling machine#top cashew processing equipments supplier in india
0 notes
Text
The Importance of Double Ferrule Fittings in India's Industrial Landscape
In India's thriving industrial sector, tube and pipe fittings play a critical role in ensuring the safety, efficiency, and reliability of fluid and gas systems. Among the most vital components in this category are double ferrule fittings. These fittings are designed to provide secure, leak-proof connections in high-pressure environments, ensuring the smooth operation of industries ranging from chemical processing to oil and gas.

As demand for high-quality fittings grows, leading manufacturers such as Expand Engineering have stepped up to meet the need. As a prominent double ferrule fittings manufacturer in India, Expand Engineering is known for producing durable and precision-engineered products that are trusted across various sectors. In this blog, we will explore the significance of double ferrule fittings, the key manufacturers in India, and their impact on industries both locally and globally.
What Are Double Ferrule Fittings?
Double ferrule fittings are specialized tube fittings designed to create a secure, leak-proof seal. The fittings consist of four main components: a nut, a front ferrule, a back ferrule, and the body. When the nut is tightened, the front ferrule bites into the tube, while the back ferrule grips the tube and positions the front ferrule. This creates a tight, mechanical seal that is highly resistant to leaks and can withstand extreme pressure and temperature conditions.
The dual-ferrule design offers several advantages, including resistance to vibration, ease of installation, and reusability. These fittings are essential in industries where high precision and leak prevention are critical, such as in instrumentation, oil and gas, petrochemical, and pharmaceutical applications.
Leading Double Ferrule Fittings Manufacturer in India
India is home to several reputable manufacturers of double ferrule fittings, but Expand Engineering stands out as one of the top names in the industry. As a leading double ferrule fittings manufacturer in India, they have built a reputation for producing high-quality, durable, and precision-engineered products.
Expand Engineering offers a wide range of double ferrule fittings designed to meet the rigorous demands of various industries. Their fittings are manufactured with high-grade materials such as stainless steel, brass, and carbon steel to ensure longevity and performance. Additionally, their products comply with international standards, making them suitable for use in both domestic and international markets.
Tube Fittings Manufacturer in Mumbai
Mumbai, being a major industrial hub in India, is home to several tube fittings manufacturers that cater to the local and global markets. One of the most prominent manufacturers in the city is Expand Engineering. As a leading tube fittings manufacturer in Mumbai, the company is known for producing fittings that ensure high performance, reliability, and safety across various applications.
Tube fittings are essential in a wide range of industries, from chemical processing and power generation to aerospace and pharmaceuticals. These fittings are designed to connect, control, and redirect the flow of fluids or gases, ensuring that industrial systems operate efficiently and safely.
Expand Engineering's tube fittings are manufactured using advanced technology and adhere to strict quality control measures. This ensures that their products can withstand high pressures, extreme temperatures, and corrosive environments. Whether it's a small-scale project or a large industrial application, their tube fittings are designed to meet the needs of the most demanding environments.
Double Ferrule Fittings Manufacturer in India: Key Features
Leak-Proof Sealing: The double ferrule design provides a secure seal, preventing leaks even in high-pressure and high-temperature environments.
Vibration Resistance: Double ferrule fittings are designed to resist vibration, making them ideal for use in systems that are subject to constant movement.
Ease of Installation: These fittings are easy to install and do not require any special tools, which reduces installation time and costs.
Reusability: Double ferrule fittings can be disassembled and reassembled multiple times without losing their effectiveness, making them cost-effective over time.
Durability: Manufactured using high-quality materials like stainless steel and brass, these fittings are built to last, even in harsh industrial environments.
Pipe Fittings Manufacturer in Mumbai
In addition to tube fittings, pipe fittings are an essential component in industrial piping systems. As a leading pipe fittings manufacturer in Mumbai, Expand Engineering produces a wide range of pipe fittings designed to connect, control, and direct the flow of fluids and gases. These pipe fittings come in various types, including elbows, tees, couplings, and reducers, each serving a specific function within a piping system.
Pipe fittings are used across various industries such as oil and gas, chemical processing, water treatment, and power generation. Their role is critical in ensuring that fluid and gas systems function efficiently and without leaks or other issues that could disrupt operations.
Pipe Fittings Manufacturer in India
Beyond Mumbai, Expand Engineering is recognized as a top pipe fittings manufacturer in India. Their products are used across the country in a wide range of applications, from small-scale commercial projects to large industrial plants. The company's pipe fittings are known for their durability, precision, and adherence to strict quality standards.
By producing pipe fittings that meet international specifications, Expand Engineering has gained a strong reputation not just within India, but also in global markets. Their commitment to innovation and quality ensures that they remain at the forefront of the pipe fittings industry in India.
As the demand for high-quality fittings continues to grow, double ferrule fittings, tube fittings, and pipe fittings play an increasingly critical role in various industries. Companies like Expand Engineering are leading the way as key manufacturers in India, providing durable, precision-engineered solutions that meet the highest standards of performance and safety.
Whether you're looking for a reliable double ferrule fittings manufacturer in India, a top tube fittings manufacturer in Mumbai, or a trusted pipe fittings manufacturer in India, Expand Engineering is a name that stands for quality, innovation, and reliability. Their expertise in producing these essential components ensures the smooth and efficient operation of industrial systems across a range of sectors.
0 notes
Text
I got everything worked out. There was a lot that needed to get fitted and fixed.
1. Seth lover pickup was grounding out.
2. The neck was thicker than neck pocket on body
3. Once set up, saddles were at their highest point and string action was too low
4. Neck was straight with no relief, I didn't know what type of truss rod had been used.
5. Plastic nut
The ground issues were fixed with shrink wrap insulation on the shielding wire under the switch
The neck pocket was sanded sides were opened up 1/64 for better fitment.
Seing that the neck was sitting way higher on the body, I had to deepen the neck pocket. It needs to be 1/8 deeper.
The relief was set once the neck manufacturer was contacted. The neck has a dual action truss rod.
Even then, the saddles sat a bit higher than what I preferred. Seeing the neck pocket was at proper depth, I kicked the neck forward with a single 0.25 degree shim.
New bone nut made from scratch installed.


1 note
·
View note
Text
Explore the Different Types of Packaging Pouches for Your Product Packaging
While stand-up pouches may be the most common kind of flexible pouch, there are really quite a few other varieties. Gusseted pouches (with a side gusset and a bottom gusset), three-side seal pouches, pillow pouches, and many more are examples that you might not be as acquainted with. Flexible packaging materials have been sold by EntrePouch for a long time. If you're looking for a flexible pouch, this article will walk you through the several options available to you. So, select the option you think is good for your product packaging and get them from the online store, EntrePouch, as they offer high-quality pouches.

Different Types of Packaging Pouches
Zipper Pouches: Some products, such as edibles, trail mix, coffee beans, and cleaning solutions, are designed to be used for a prolonged period of time. These pouches are designed to be used for some time. When the packaging is opened, a zipper that can be closed again is included in order to extend the amount of time that the contents can be stored.
Stand-up Pouches: Stand-up pouches, or doypack are the most extensively used and accessible kind of pouch. A stand-up pouch is a type of flexible packaging that can sit upright on its bottom for usage, storage, and exhibition. It's a plastic bag sort of thing, but it also looks like a plastic bottle.
Side Gusseted Pouches: There is a gusset on each side of these stretchy pouches. Additional room for storing products is made possible by these gussets. To produce a flat end and increase the bag’s capacity, the top is left open while the bottom is shut horizontally. These are commonly known as coffee pouches because of their common use for storing tea and coffee.
Pillow Pouches: The pillow pouch is one of the most established types of flexible pouches available today. This style of packaging has long been used for smaller quantities of food, such as crackers, potato chips, coffee in a single serving, snack packs for one, and so on. Many food companies use them since they are one of the most affordable and simple pouches available, which is great for snack food manufacturers.
Liquid Pouches: Several distinct variations of liquid pouches are available for use in the liquid packaging industry. Pouch styles range from stand-up to dual-component, burst, white pouch, or three-side seal. Hot sauce, ketchup, barbecue sauce, mustard, relish, energy drinks, nut butter, industrial liquids, dietary supplements, and a plethora of other liquid products find widespread usage in the packaging of liquid pouches.
Spouted Pouches: A plastic cap allows you to re-close the spout on these bendy pouches. You may construct spouted pouches to work with a variety of goods, from cleaning solutions to beverages, and they are commonly used for holding liquids. Unlike PET and glass bottles, they don't make a mess when transported.
Takeaway
Select the type of pouch you think is perfect for your product packaging. Flexible packaging products have been sold by EntrePouch for a long time. They help you get the ideal flexible pouch for your needs by analyzing the different types available in this post. You can get white pouch, kraft pouches, zip-lock pouches, gusset pouches, and more from them, and if you want customized pouches for your brand, that is also possible. So, contact them and get your ideal packaging pouches.
0 notes
Text
CNC busbar machine manufacturer (what are the manufacturers of Yunnan CNC parent row scissors)
The hydraulic punching machine is mainly used for L, H tablet copper, copper plate aluminum exhaust punching, and the door is used for metal plates such as corner iron, flat iron, copper plates and other metal plates. It is particularly suitable for the power and construction industries to operate in the wild construction site. For oil return, the mold uses high -carbon and tungsten alloy steels to be damaged. The bottom is designed with a flat seat, and it is smooth and stable. , Extend the maintenance cycle; hydraulic stirring machine is used for switch boxes and automatic control disks in power distribution disk.
The manufacturer of the CNC busbar machine, the mechanical transmission part of the bus machine is located on the upper part of the bedside box, and the electrical part is installed on the rear side of the bedside box. The transmission handle dials the dual -connected gear to achieve high speed and low change of the spindle.
Editor's reminder: Because the copper row processed by the CNC bus is very important for our lives, it is very important to understand the production process requirements of the CNC parent machine. In addition, if you need a CNC bus, welcome to order to order , High -quality products and professional services guarantee your satisfaction
Sanhe -one -bus machining machine must have optimized structural design in order to ensure that each structure can play the best role. In this way, when the equipment is used, the operating effect will be better. The level of level will be relatively high. In this way, when buying equipment, pay attention to whether the structure design is optimized, and try to choose a very optimized equipment to buy.
In order to control the pressure more accurately, the torque motor or cylinder used by the tightly tightening mechanism has been replaced by a servo motor. In order to control the size tolerance of the winding coil, increase the grating ruler and detect the size of the coil online. The tension of various lines on the multi -axis lines is controlled independently. According to the length of the winding coil, the launch vehicle is followed by tracking to avoid the twisted deformation of the wires to generate new stress and reduce the vortex loss of the winding. CNC bus rushing machine manufacturer
Three companies are true. Can you determine that the bending machine is definitely the most beautiful and cheap? In this regard, you have to compare. In order to get the best CNC bending machine, you can run a few more times and strive to encounter the best, most affordable, and quality is the best bending machine. The same as above. Good quality is the most important.
The manufacturer manufacturer of the CNC bus is a galvanized bolt, nut, and ring. When the bus is located, the bolt should be penetrated from bottom to top. The length of the probe should be based on the screw wire buckle of 2-3 buckles. In other states, the nut should be placed on the maintenance side. Both sides of the bolt should have a cushion ring. There is a net distance of more than 3mm between adjacent cushions, and spring should also be installed on the side of the nut or a lock -up nut should be installed.
The movement site of the portable bus processing machine needs to add lubricating oil to the components of each unit at least twice a day, and check the amount of oil in the fuel tank regularly to observe whether the oil injection is required; When the previous remaining oil should be poured out to avoid mixing with the newly added oil, it will affect work efficiency. The functional operating element of the portable bus machining machine may be worn. Pay attention to regular inspections and replace it. Pay attention to the needs of lubrication. It is very necessary for the guarantee of the device in stability and extend the service life.
0 notes
Text
Enhancing Reliability: A Deep Dive into Stainless Steel Double Ferrule Tube Fittings
Introduction
Stainless steel double ferrule tube fittings have become indispensable components in various industries, providing a robust and reliable solution for fluid and gas systems. In this blog post, we will explore the features, benefits, and applications of these fittings, shedding light on why they are the preferred choice for many engineering applications.
Understanding Double Ferrule Tube Fittings:
Double Ferrule Tube fittings consist of two distinct ferrules — the front ferrule and the back ferrule. This innovative design ensures a strong and leak-free connection in tubing systems. The front ferrule seals the space between the fitting body and the tubing, while the back ferrule seals the space between the nut and the body. This dual ferrule design imparts enhanced gripping power and resistance to vibration, making them highly reliable in challenging operational conditions.

Key Features and Benefits:
Reliable Leak-Free Connections: The dual ferrule design provides a robust sealing mechanism, ensuring leak-free connections even in high-pressure applications. The back ferrule’s-controlled positioning eliminates the risk of over-tightening, preventing damage to the tubing and ensuring a reliable seal.
High Temperature and Corrosion Resistance: Stainless steel, a common material for these fittings, offers excellent resistance to high temperatures and corrosive environments. This resistance makes them suitable for applications in chemical processing, oil and gas, and other industries where exposure to harsh conditions is common.
Ease of Installation: Double ferrule tube fittings are designed for easy installation without special tools. Their user-friendly design reduces assembly time and increases overall efficiency.
Versatility in Applications: These fittings find applications in a wide range of industries, including petrochemical, pharmaceutical, food and beverage, and semiconductor manufacturing. They are suitable for both instrumentation and process control systems.
Durability and Longevity: Stainless steel construction ensures durability and longevity, reducing maintenance costs and downtime. The fittings are resistant to wear and tear, providing a reliable solution for long-term use.
Applications: Stainless steel double ferrule tube fittings find applications in various industries, including:
Oil and Gas
Petrochemical
Railway
Aerospace
Défense
Marine
Conclusion: Stainless steel double ferrule tube fittings have revolutionized fluid and gas systems by providing a reliable, leak-free, and durable solution. Their unique design, coupled with the benefits of stainless steel, makes them a preferred choice for critical applications in numerous industries. As technology advances, these fittings continue to play a vital role in ensuring the efficiency and safety of fluid and gas handling systems.
#Tube Fitting manufacturer#Stainless steel fittings#Double ferrule fittings#Tube fittings suppliers#Tube fittings
0 notes
Text
Duplex vs Super duplex Fasteners
Super Duplex fasteners are made of super duplex steel, a superior version of duplex steel. This material has higher nickel and molybdenum content than duplex stainless steel and offers better properties. The material is known to provide pitting and crevice corrosion resistance. Super Duplex 2507 grade is a top alloy for applications involving critical environments. Super duplex steel fasteners require chromium and nickel alloys for their manufacturing. These fasteners have high strength and temperature resistance. The material also consists of properties of ferritic and austenitic stainless steel. The fasteners are perfect in the industrial sector as they are strong, corrosion-resistant, and cost-effective. Moreover, these fasteners provide stress-cracking resistance and require a simple manufacturing process.
Features of Super Duplex 32750 fastener
These fasteners are known to resist erosion under saltwater and freshwater conditions as the composition of this material helps resist corrosion.
Super duplex steel has high strength, formability, and pliability.
It has high strength and corrosion resistance.
Super duplex fasteners do not pit at high temperatures of around 425 degrees Celsius.
Super duplex steel fasteners have stress corrosion cracking and crevice corrosion resistance.
These fasteners have higher durability and deformability than chrome steel.
These fasteners can resist impacts under extensive temperature ranges, abrasion, and erosion.
Super duplex fasteners have excellent hardenability and low heat transfer rates. Super Duplex vs Duplex Steel S32205 fasteners
Stainless steel is classified as duplex and super duplex stainless steel per their microstructure phases. Duplex stainless steel has microstructures like austenitic and ferritic stainless steel. Duplex steel has a combination of ferrite and austenite stainless steel. The crystalline structure has a balanced ratio (50:50) of austenite and ferrite. Another category of duplex steel is super duplex stainless steel. The super duplex stainless steel has a dual microstructure and fasteners made of super duplex steel have high pitting resistance, ranging between 22 and 45. This steel category has better corrosion resistance than its counterparts. Super Duplex 32750 fasteners and Super Duplex 32760 fasteners have better properties than Stainless Steel 304 or 316 fasteners. Super duplex stainless steel fasteners have high strength but they have low impact resistance due to their intermetallic phase. Hence, one must consult reputed stainless steel fastener suppliers who will help you understand your requirements and deliver quality products. Super Duplex Fastener Applications Super duplex fasteners have better properties than other stainless steel grades. The material is used for manufacturing fasteners like screws, bolts, nuts, threaded rods, stud bolts, washers, and custom fasteners. Super duplex fasteners are available in grades like S32550, S32760, and S32750. These fasteners find offshore and onshore gas and oil applications, especially in pipelines, as they are prone to corrosion due to the fluids flowing inside them. Super duplex steel does not break easily and is perfect for high-pressure applications, making it perfect in the commercial and residential sectors. Following are some of the top applications of super duplex fasteners: Sea Water Desalination Plants Power Plants Marine Sector Chemical Processing Shipbuilding Paper & Pulp Processing Sector Petrochemical Industry Oil and Gas Industry Power Plants Energy Generation Pharmaceutical Sector Food Processing Aerospace Sector Refineries Final thoughts Super duplex fasteners have exceptional properties, which makes them perfect for marine applications or applications involving corrosive environments. These fasteners are available in extensive designs, sizes, materials, and more. Fasteners & Fixtures LLP is a Fastener manufacturer offering quality products that undergo advanced manufacturing. The company utilizes high-grade raw material that undergoes extensive testing. Manufacturing of the stainless steel fasteners utilizes advanced technologies. The products also undergo rigorous testing to ensure their quality. Experts at Fasteners and Fixtures LLP guide customers to choose the perfect product for their project requirements. For more information, visit their website today!
0 notes
Text
Holmbury Couplings, Holmbury Quick Release Coupling, Mumbai, India
Manufacturer and Supplier of Holmbury Couplings, Holmbury Quick Release Coupling, Camlock Quick Coupling, Mumbai, India.
Quick Release Coupling, Quick Release Couplings, Ball Valve, Ball Valves, Gemel Ball Valves, Industrial Ball Valves, Quick Coupling, Quick Couplings, Camlock Coupling, Camlock Couplings, Camlock Quick Coupling, Camlock Quick Couplings, Micro Hose, Micro Hose For High Pressure, Micro Hose For Pressure Fittings, Test Coupling, Test Couplings, Minipress Test Coupling, Minipress Test Couplings, Test Point Coupling, Test Point Couplings , Threaded Test Coupling, Threaded Test Couplings, Bulkhead Test Coupling, Bulkhead Test Couplings, Female Swivel Test Coupling, Female Swivel Test Couplings, Plug in Test Coupling, Plug in Test Couplings, Pressure Gauge Adaptors, Cartridge Valve, Cartridge Valves, Hydraulic Hoses, Hydraulics Hose, Hoses Crimped Hydraulic, Hydraulic Systems, Pneumatic Systems, Hydraulic Accessories, Hydraulic Couplings, Hydraulic Fitting, Hydraulic Fittings, SS304 Hydraulic Fittings, SS316 Hydraulic Fittings, CS Hydraulic Fittings, DIN 2353 Fittings, Pressure Gauge, Pressure Gauges, Industrial Valves, Coupling Valves, Hydraulic Components, Inline Valve, Inline Valves, Inline Flow Indicator, Inline Flow Indicators, Portable Hydraulic Crimping Machine, Portable Hydraulic Crimping Machines, Portable Hydraulic Instrument, Portable Hydraulic Instruments, Pressure Gauge Anti Shock Valve, Pressure Gauge Anti Shock Valves, Stainless Steel Hydraulic Components, High Pressure Check Valve, High Pressure Ball Valve, High Pressure Flow Control Valve, High Pressure Needle Valve, Non Return Valve, Gemels Italy Ball Valves, Holmbury Uk Couplings, Minipress Italy Couplings, Oleoweb Italy Valves, SS304 Csermeto Fittings, SS316 Csermeto Fittings, Flat Face Coupling, Quick Connect Disconnect Coupling, Screw Coupling 1000 Bar, Dust Cap, Test Point, Test Hose, Test Point Coupling, Test Point Hose, SAE Flange Ball Valve, Rotating Union, Hose Burst Check Valve, Compensated Load Control Valve, Compensated Flow Control Valve, Load Shuttle Ball Valve, End Stroke Valve, Single Acting Pilot Check Valve, Double Acting Pilot Check Valve, Double Cross Line Direct Acting Relief Valve, Single Cross Line Direct Acting Relief Valve, Sequence Valve, Single Counter Balance Valve, Dual Counter Balance Valve, Hand Pumps, Tube Clamp, Instrumentation Fittings, Lubrication Fittings, PP Pipe Clamp, Dowty Seal Copper Washer, Bonded Seal, Nut, Ferrule, asia, asian, india, indian, mumbai, maharashtra, industrial, industries, thane, navi mumbai, pune, nashik, aurangabad, ratnagiri, nagpur, ahmednagar, akola, amravati, chandrapur, dhule, jalgaon, raigad, sangli, satara, belgaum, kolhapur, belgaon.
0 notes
Text
Stop a Running Toilet: DIY Repair Guide by Plumbnerd

Stop a Running Toilet: DIY Repair Guide by PipeMaster
Hey there, plumbing enthusiasts! I'm Jack Thompson, your friendly plumber and proud member of the Plumb Nerd community. Known to some as "Pipe Master," I'm here to share my plumbing wisdom with you. Today, we're tackling a common annoyance: a running toilet. By the end of this step-by-step DIY guide, you'll be equipped to silence that constant flow and save water like a pro. The Aggravation of a Running Toilet A running toilet isn't just a source of irritation; it's a water waster. In this guide, we'll troubleshoot the issue and walk through the steps to put an end to the incessant running.
Tools and Materials You'll Need
Before we embark on this plumbing adventure, let's gather the tools and materials you'll need: Tools: - Adjustable Wrench: A versatile tool for tightening or loosening nuts. - Screwdriver Set: Various screwdrivers for different parts of the toilet. - Bucket: To catch any excess water during the process. Materials: - Toilet Flapper: If your flapper is worn or damaged, you might need a replacement. - Flapper Chain: In case the chain is too long or damaged. - Tank Float: If the float is misaligned or damaged,
Step-by-Step Guide
Step 1: Identify the Cause - Remove the Tank Lid: Lift the tank lid and observe the inside. Identify the source of the running water. Common culprits include a faulty flapper, a misaligned float, or a damaged fill valve. Step 2: Adjust the Flapper Chain - Inspect the Flapper Chain: Ensure the flapper chain is not tangled or too long. - Adjust the Chain Length: If needed, adjust the chain length to provide enough slack without getting caught under the flapper. Step 3 - Check the Flapper for Leaks - Dye Test: Drop a few drops of food coloring into the toilet tank. Wait for a few minutes without flushing. - Check the Bowl: If the colored water seeps into the bowl, your flapper is likely leaking and needs to be replaced. Step 4 - Replace the Flapper - Turn Off the Water Supply: Locate the shut-off valve behind the toilet and turn it clockwise to stop the water supply. - Remove the Old Flapper: Disconnect the flapper from its mounting ears and remove it. - Install the New Flapper: Attach the new flapper to the mounting ears and ensure a secure fit. Step 5 - Inspect and Adjust the Float - Check the Float Position: Ensure the float is not sticking or obstructed. It should move freely with the water level. - Adjust the Float: If the float is adjustable, set it to the proper height. Follow the manufacturer's instructions for your specific float type. Step 6 - Examine the Fill Valve - Inspect for leaks: Check the fill valve for any leaks or signs of wear. - Clean or Replace the Fill Valve: If necessary, clean the fill valve or replace it if there are visible signs of damage. Step 7 - Turn On the Water Supply Turn the shut-off valve counterclockwise to restore the water supply. Allow the tank to fill and check for any leaks or running water. Step 8 - Perform a Flush Test Flush the toilet and observe the flapper's performance. Ensure it lifts and seals properly after each flush.
Additional Tips
- Regular Maintenance: Periodically check the toilet components for wear and clean or replace them as needed. - Know Your Toilet Parts: Familiarize yourself with the different parts of your toilet to troubleshoot issues more effectively. - Consider Water-Saving Devices: Explore water-saving options like dual-flush converters or low-flow toilet models to reduce water consumption.
Conclusion
Congratulations! You've successfully put an end to the persistent sound of a running toilet. With these simple DIY steps, you've not only saved water but also tackled a common plumbing issue like a pro. Remember, a well-maintained toilet is the unsung hero of any household. Happy plumbing! Read the full article
0 notes
Text
What industries use fasteners?
Fasteners play a critical role in construction, manufacturing, and engineering. As a leading force in the industry, Bullion Pipes & Tubes LLP stands out as the premier fasteners manufacturer, supplier, stockist, and exporter worldwide. With an extensive range that includes Bolts, Nuts, Screws, Washers, Studs, Rivets, Self-Clinching Fasteners, and more, our commitment is to provide top-notch solutions that cater to diverse project requirements.
This blog post aims to shed light on the diverse industries that heavily rely on fasteners, emphasizing the broad spectrum of applications our products cater to.
Types of Fasteners We Offer
With us, we offer fasteners with a variety of Types and Features, including the following;
Bolts: These threaded fasteners require corresponding nuts for secure connections. Choose from an array of head styles, including hex head, socket head, and round head.
Nuts: Complementing bolts, nuts secure connections. Opt for hex nuts, lock nuts, or wing nuts based on specific application requirements.
Screws: Known for versatility, screws find use in diverse applications. Choose from different head styles like Phillips, flat, or hex, and opt for self-tapping or machine screws.
Washers: Flat and disk-shaped, washers play a pivotal role in distributing fastener loads and protecting surfaces. Types include flat, lock, and spring washers.
Studs: Characterized by threaded rods without heads on one end, studs are ideal for dual-threaded connections and situations where nuts are impractical.
Rivets: Permanent fasteners with a cylindrical shaft and deformed head create a secure connection.
Pins: Cylindrical fasteners for alignment, securing, or support, including types like dowel, cotter, and clevis pins.
Anchors: These fasteners affix objects to hard surfaces, such as concrete. Common types involve wedge, sleeve, and drop-in anchors.
Clips and Clamps: Secure items like hoses and cables using clips and clamps, such as hose clamps, spring clips, and wire rope clamps.
Threaded Rods: Lengthy straight rods with continuous threading, frequently used for hanging and providing support.
U-Bolts: Featuring a U-shaped design with threads on both ends, they secure round objects to surfaces.
Eye Bolts: Equipped with a loop or "eye," these bolts are designed for lifting and securing heavy loads.
Stud Bolts: Threaded at both ends with an unthreaded portion in the middle, commonly used in flange connections.
Self-Clinching Fasteners: Specifically designed for sheet metal and thin materials, including self-clinching nuts, studs, and standoffs.
Hinges and Latches: Serving as fasteners for attaching doors, gates, and panels, they include hinges, hasps, and latches.
Materials Wise Grade We Offer – Fasteners
At, Bullion Pipes & Tubes LLP, provides a wide variety of fasteners, including;
Copper – CDA 102, CDA 101, CDA 110
Titanium – Titanium Alloy Gr 2 & Titanium Alloy Gr 5
Monel – Monel K500 & Monel 400
Carbon Steel – ASTM A193/194 & ASME SA193/194 Carbon Steel
Brass – Alloy 260, Alloy C48200 – C48500, Alloy 385, Alloy 360, Alloy 353, Alloy 330, Alloy 272, Alloy 464
Tantalum – RO5200, RO5400, RO5252(Ta2.5W), RO5255(Ta10W)
Inconel – Inconel 718, Inconel 600, Inconel 601, Inconel 625
Aluminum – he 20 65032 6061, he 30 64430, ASTM 6061, 6063, 6351
Nickel – Nickel Alloy 200/201
SMO 254 – ASTM A 479 ASME SA 479
Duplex Steel – Duplex Steel UNS S32205, Duplex Steel UNS S31803
Hastelloy – Hastelloy C22 & Hastelloy B2, Hastelloy C276
Super Duplex Steel – Super Duplex Steel UNS S32750, Super Duplex Steel UNS S32760
Incoloy – Incoloy 800/800H/800HT, Incoloy 825
Alloy 20 – DIN 2.4460 Alloy Hexagonal Nut, Alloy 20 Bolts, UNS N08020 Alloy 20 Screws, Alloy 20 Washers
Industries Uses Fasteners
Here are some industries where fasteners are used extensively:
Construction: Fasteners such as bolts, nuts, screws, and anchors are widely used in the construction industry for connecting structural elements like beams, columns, and panels.
Automotive: The automotive industry relies heavily on fasteners for assembling vehicles. A variety of screws, bolts, nuts, and clips are used in the manufacturing of cars, trucks, motorcycles, and other vehicles.
Aerospace: Aerospace applications require precision and reliability. Fasteners play a critical role in assembling aircraft and spacecraft components, ensuring safety and structural integrity.
Manufacturing: In general manufacturing processes, fasteners are used to assemble a wide range of products across different industries, including appliances, electronics, and consumer goods.
Energy: Fasteners are used in the energy sector for assembling components in power plants, wind turbines, solar panels, and other energy infrastructure.
Shipbuilding: The shipbuilding industry relies on fasteners for assembling the various components of ships, including the hull, decks, and internal structures.
Railway: They are crucial in the railway industry for connecting rail tracks, assembling train components, and maintaining the structural integrity of railway infrastructure.
Oil and Gas: In the oil and gas industry, fasteners are used in the construction and maintenance of pipelines, platforms, and other infrastructure.
Electronics: Fasteners play a role in the assembly of electronic devices and equipment. They are used to secure components on circuit boards and in the housing of electronic products.
Medical Devices: Fasteners are used to ensure that components are held together in a precise manner in medical devices and equipment.
Furniture: In the furniture industry, fasteners such as screws, bolts, and nuts are used to assemble various types of furniture, from simple household items to complex office furniture.
Final Words! As a global Fasteners Supplier, Manufacturer Stockist, and Exporter, Bullion Pipes & Tubes LLP takes pride in contributing to the success of diverse industries. Our fasteners, available in an array of sizes, specifications, standards, grades, materials, and types, offer versatility and reliability. Whether it's bolts, nuts, screws, washers, studs, rivets, or self-clinching fasteners, our commitment to quality ensures that our customers can confidently choose the perfect solution for their project requirements. Contact us today at [email protected] or [email protected] to explore how our fasteners can enhance the strength and durability of your applications.
0 notes
Text
Ananka
Q1) Are there hex bolts specifically designed for woodworking?
Ans) Yes, specific hex bolts are designed for woodworking purposes, often known as "wood bolts" or "hanger bolts." These specialized bolts cater to the unique demands of woodworking projects and are crafted with features tailored to working with wood materials. Here is an overview of wood bolts and their distinct characteristics:
1. Thread Configuration: Wood bolts are characterized by a dual thread design. One end is equipped with wood threads, which are coarse and designed to firmly grip wood. The opposite end features machine threads that allow for the attachment of nuts or other fasteners.
2. Pointed Tip: The wood-threaded end of a wood bolt usually boasts a pointed tip. This design facilitates easy initiation of the bolt into the wood material without the necessity of pre-drilling.
3. Nuts Not Always Required: In woodworking, wood bolts are frequently used without nuts. They can be directly threaded into wood or employed alongside wood inserts for secure connections.
4. Tailored Sizes: Wood bolts are manufactured in sizes and lengths tailored to woodworking projects. They are often utilized for fastening legs to tables, chairs, and other types of furniture.
5. Materials: Wood bolts are typically crafted from steel or stainless steel. Stainless steel variants are favored when resistance to corrosion is paramount, such as in outdoor furniture or projects exposed to moisture.
6. Use of Washers: While wood bolts offer effective wood-gripping capabilities, washers can be employed to evenly distribute loads and prevent damage to surfaces. Flat washers or fender washers are commonly used in conjunction with wood bolts to enhance connections.
7. Installation: Wood bolts can often be installed without the necessity of pre-drilling, particularly in softwood materials. However, pre-drilling might be advisable when working with hardwoods to prevent splitting.
8. Applications: Wood bolts find widespread use in the construction of furniture, cabinetry, woodworking projects, and applications necessitating robust and dependable wood-to-wood or wood-to-metal connections.
When utilizing wood bolts, it is crucial to select the correct size, length, and material for your woodworking endeavor. Adhering to proper installation techniques, which might involve pre-drilling in certain cases, will contribute to secure and successful connections. Always adhere to the recommendations of the manufacturer and follow woodworking best practices pertaining to the specific type of wood bolt being utilized.
Hex Nut Suppliers
Q2) How do you ensure proper alignment when threading a hex nut onto a bolt?
Ans) To ensure proper alignment while threading a hex nut onto a bolt, it is crucial to establish a secure and effective connection. Adhere to these steps to maintain alignment throughout the nut threading process:
1. Examine Threads: Before commencing, inspect the threads on both the bolt and nut. Verify that they are clean, undamaged, and devoid of debris or obstructions. Damaged threads can lead to misalignment during the threading process.
2. Hold Nut Correctly: Grasp the hex nut between your thumb and fingers, orienting it with the threaded opening facing the bolt. Ensure that the flat sides of the nut are parallel to the corresponding flat sides of the bolt.
3. Initial Alignment: Gently position the nut onto the exposed threads of the bolt, aligning the nut's threads with those of the bolt. Exercise caution to prevent tilting or placing the nut at an angle.
4. Start by Hand: Initiate the threading process by manually turning the nut clockwise (righty-tighty) using your fingers. This manual start guarantees that the nut enters the threads smoothly and without encountering any resistance.
5. Monitor Progress: As you rotate the nut clockwise, monitor its progression. Confirm that the nut is threading onto the bolt in a straight manner. If you experience any resistance, misalignment, or a sense of "cross-threading," halt immediately.
6. Reverse If Necessary: In the event of encountering resistance or an irregular threading sensation, reverse the nut's motion by turning it counterclockwise (lefty-loosey). Realign the nut with the bolt's threads before restarting.
7. Utilize Wrench or Tool: Once the nut has been threaded onto the bolt manually for a few rotations, employ a wrench or an appropriate tool to proceed. Steadily secure the bolt with a wrench while turning the nut clockwise using another wrench or socket.
8. Apply Uniform Pressure: While continuing the threading process with the wrench, ensure uniform pressure is applied to the nut to prevent tilting or binding on the threads. This practice promotes the maintenance of proper alignment.
9. Regular Alignment Checks: Periodically verify that the nut remains aligned with the bolt's threads throughout the threading process. Should any deviation or misalignment be observed, adjust the nut's orientation before proceeding further.
10. Final Inspection: Upon achieving full threading of the nut onto the bolt, visually inspect the connection. Confirm that the nut is flush against the material and that no gaps or misalignments are present.
11. Torque as Required: Should your application necessitate specific torque settings, employ a torque wrench to attain the recommended torque value. Adhere to the directives of the manufacturer or established industry standards.
By adhering to these guidelines and meticulously monitoring the alignment of the nut with the bolt's threads, you can ensure a seamless and successful nut threading process. This results in the creation of a secure and dependable fastening connection.
High Tensile Fasteners
Q3) How do you ensure proper torque when using power tools for washer installation?
Ans) Ensuring proper torque when using power tools for washer installation is crucial to achieve a secure and reliable fastening connection. Here's how to ensure proper torque when using power tools for washer installation:
1. Choose the Right Tool: Select a power tool with adjustable torque settings. Many power tools, such as electric drills or impact drivers, have torque adjustment features that allow you to set a specific torque value.
2. Select the Correct Torque Setting: Refer to the manufacturer's specifications or engineering guidelines to determine the recommended torque value for the specific washer and fastener combination you're using. Set the power tool to the appropriate torque setting.
3. Practice on Scrap Material: Before starting the actual installation, practice using the power tool on scrap materials of the same type and thickness as the ones you'll be using in your project. This helps you get a feel for the tool's torque and speed settings.
4. Use a Torque Wrench for Calibration: To ensure accuracy, use a torque wrench to calibrate the power tool's torque setting. Tighten a fastener with the power tool and then measure the torque applied using a torque wrench. Adjust the power tool's setting if necessary.
5. Use a Torque-Limiting Attachment (If Available): Some power tools offer torque-limiting attachments that help prevent over-tightening by disengaging the tool when the preset torque is reached. If your power tool has this feature, consider using it for added accuracy.
6. Apply Gradual Pressure: When using the power tool, apply gradual and steady pressure to the trigger. Avoid applying sudden or excessive force, as this can lead to over-tightening.
7. Pay Attention to Feedback: Many power tools provide tactile and audible feedback as you reach the preset torque. Listen for any changes in sound or feel as the tool nears the desired torque value.
8. Stop at the Right Torque: As the power tool reaches the preset torque value, the tool may stop turning or exhibit a change in sound and vibration. Once you notice this feedback, release the trigger to stop the tool.
9. Inspect the Connection: After using the power tool, visually inspect the connection to ensure that the washer is properly seated and flush against the material. Check for any gaps, misalignments, or signs of over-tightening.
10. Double-Check Torque: For critical applications, consider using a calibrated torque wrench to double-check that the installed fasteners meet the specified torque requirements. This provides an additional layer of assurance.
11. Avoid Repeated Tightening: Avoid repeatedly tightening a fastener using a power tool, as this can lead to over-tightening and potential damage to the washer or material.
By following these steps, you can ensure that power tool-assisted washer installation is performed with the correct torque, resulting in reliable and secure fastening connections in your project.
Carbon Steel Fasteners
Q4) How do you ensure proper alignment when threading a nut onto a stud bolt?
Ans) Ensuring proper alignment when threading a nut onto a stud bolt is essential to achieve a secure and reliable fastening connection. Here's how to ensure proper alignment during this process:
1. Inspect Components: Before beginning, make sure the stud bolt and nut are clean, free from debris, and in good condition. Inspect the threads on both the stud bolt and the nut to ensure they're undamaged.
2. Hold the Nut Correctly: Hold the nut between your thumb and fingers with the threaded opening facing the stud bolt. Make sure the nut is held perpendicular to the stud bolt to ensure a straight start.
3. Align the Nut: Position the nut at the end of the stud bolt, ensuring that the threads of the nut align with the threads of the stud bolt. Hold the nut steadily in this aligned position.
4. Start by Hand: Begin threading the nut onto the stud bolt by turning it clockwise (righty-tighty) using your fingers. Apply gentle downward pressure to keep the nut aligned with the threads as it starts to thread.
5. Avoid Cross-Thread: As you start threading the nut, make sure it starts straight and threads smoothly onto the stud bolt. Be cautious not to cross-thread, as this can damage the threads and compromise the connection.
6. Turn Gently: Continue turning the nut clockwise by hand until it's threaded a few turns onto the stud bolt. Make sure the nut remains properly aligned with the bolt's threads during this process.
7. Use a Wrench or Tool: Once the nut is threaded a few turns by hand, you can use a wrench or an appropriate tool to continue tightening. While using the tool, maintain downward pressure on the nut to prevent it from tilting.
8. Apply Even Pressure: Whether using a wrench or your fingers, apply even pressure to the nut while turning. This helps prevent tilting or misalignment during the threading process.
9. Check Alignment: Periodically check that the nut remains aligned with the stud bolt's threads as you continue threading. If you notice any deviation, adjust the nut's angle to ensure proper alignment.
10. Tighten to Desired Torque: If your application requires specific torque settings, use a torque wrench to tighten the nut to the recommended torque specification. Follow manufacturer guidelines for torque values.
11. Inspect the Connection: Once the nut is properly threaded and tightened, visually inspect the connection to ensure that the nut is flush against the material and there are no gaps or misalignments.
By following these steps and being mindful of proper alignment, you can ensure that the nut is securely threaded onto the stud bolt, establishing a reliable and stable fastening connection for your application.
Inconel Bolts Price
0 notes
Text
Reasons To Install An Alumiframe Canopy
A canopy system has long been accepted as a reliable shading solution for residences and neighborhood stores. Manufacturers have come forward to tweak the age-old designs that helped them come up with innovative solutions. The end-user may order a canopy in steel, aluminum, or glass today instead of relying on canvas. Moreover, choosing an Alumiframe canopy with several pluses never seen before is possible.
The inherent meaning of the term is obvious enough. It indicates that the canopy is manufactured from an aluminum frame but incorporates other components to ensure high quality and ease of use. The advantages that are sure to be found in such canopies include the following:
· Passive Shading- The best manufacturers use solar control effectively. The aluminum frame of the shading system will lower the heat transfer rate when exposed to the elements. There will be reduced UV absorption into the material as well. The limited sunrays may be utilized flawlessly to enhance the aesthetics of the building structure. This principle does not work identically for every user. Instead, the installers calculate the requirement of solar energy based on specific details such as geographical location and climate. The sunlight is thus optimized to ensure the right amount of exposure. This provides the perfect shading solution. The user may make an additional effort and add LEED credits if needed.
· Integrated Design- The time consumption is lowered considerably by ordering pre-engineered products from a manufacturer that excels in providing architectural canopies. A majority of users are concerned about the effectiveness of the canopy as well as its cost. It is essential to check the design and learn how this system works to fulfill an objective. It is heartening to know that the top manufacturer will reduce the costs by replacing the heavy steel with a lightweight aluminum frame. The beams take on a dual role by serving as gutters, too. The result is most pleasing, with the canopy being set up within a few hours. This enables the user to continue with business operations and experience undiminished productivity without a break
· Aesthetic Appeal- Commercial buildings and turnkey projects can benefit by installing architectural canopies constructed from aluminum frames. While functionality is paramount, the customer does not want to compromise on the aesthetics either. No worries! The best commercial canopies can incorporate all elements with perfection without hindering the appearance of the building. It is indeed astounding to find the canopy being sleek and clean-cut. There are no jarring components to restrict the visual appeal. None of the critical areas are left out during the construction either. It is innovation that drives the design, with the nuts and bolts remaining concealed perfectly. The beams also serve as gutters as well as conduits of electricity.
Small retail shops find it beneficial to install attractive store canopies with multiple advantages. The surface may also serve as a notice board or a place for promoting the wares.
0 notes