#customtexture
Explore tagged Tumblr posts
Text
This is for installing Sun Haven mods from Nexus on a Windows PC. I don't know about Mac or Steam Deck. (Updated for Patch 1.7)
Each section of these instructions assumes you have read the previous sections and already finished those steps.
If you need more help, check out the Sun Haven Discord #game-mods channel!
----------
To install BepInEx (you can install from github or Nexus, I found the Nexus one to be easier):
1) Download this file: https://www.nexusmods.com/sunhaven/mods/30
2) Find where it was downloaded, right click, and unzip/extract it. If there is no unzip/extract option, you'll need to download a program that can do that, such as 7zip.
3) In a separate window, find where your game files are located. You can do this by opening Steam, opening the game screen in your library, clicking the gear icon, going to "Manage," and clicking "Browse local files." This should put you in a folder called "Sun Haven." Otherwise, you can likely find it by opening file explorer, then navigating to This PC -> C: -> Program Files (x86) -> Steam -> steamapps -> common -> Sun Haven
4) Find the mod you unzipped. Either drag or cut+paste the folder called "BepInEx" into the "Sun Haven" folder.
5) Also drag or cut+paste "doorstop_config.ini" and "winhttp.dll" into the "Sun Haven" folder. Your computer might not show the ini or dll file extensions, that's fine, they're still the same files.
BepInEx should now be set up. It's probably a good idea to start up the game, make sure things are still working. I think running the game will also generate a LogOutput file.

The above picture is what the inside of your “Sun Haven” folder should look like. It should have these three things the arrows are pointing to, if you downloaded from Nexus.

The above picture is what the inside of your “BepInEx” folder should look like, though you might not have a LogOutput until you run the game.
----------
To install other mods that use BepInEx (which I believe is all the Sun Haven mods on Nexus, but you should always read mod descriptions for instructions):
1) Download the mod you want.
2) Unzip the download.
3) Open the "BepInEx" folder we were just talking about.
4) Open the "plugins" folder.
5) Drag the dll file into the "plugins" folder. Your computer might not show the dll file extension, but it will be the only file in many mods (though there are some that also include folders that need to be moved too).
Note: ReadMe and info files, if they're included, have no effect and do not need to be put into the "plugins" folder. They are just instructions, credit, or extra info for you about the mod.
Now you can open the game and test if the mod is working. If you installed BepInEx from the Nexus download, you should be able to open the configuration manager by pressing F1, and you can use that to turn mods on/off or make adjustments to them. Some mods might not show up there, I'm not sure, but many will.

The above picture is an example of what the inside of your “plugins” folder might look like, though it will have different folders and files, depending on what you’ve downloaded. You may not have any folders. You also may not have the dll file extension showing.
----------
To install custom textures:
1) Download the Custom Textures Updated mod: https://www.nexusmods.com/sunhaven/mods/278/
*Note: There is an old Custom Textures mod that no longer works. Make sure you're using the one I've linked to if you are playing the latest version of the game.
2) Unzip it.
3) Put the "CustomTextures.dll" file into the "plugins" folder.
4) Start up the game. This should create a folder called "CustomTextures" inside the "plugins" folder. If it doesn't, you can right click and create a new folder and name it that yourself.
5) Download other mods with the custom textures you want.
6) Unzip them.
7) Place the image (png) files into the "CustomTextures" folder. (You can put the png files directly into the "CustomTextures" folder, or you can create more folders for organization. However, if you have two files with the same name, either one or both won't work. So the safest thing is to put all the png files directly into "CustomTextures." That way you can be sure you don't have any duplicates.)
8) Open your game, and the new textures should be working. If they’re not, open the configuration manager (F1) and make sure Custom Textures is toggled on.
----------
General Mod Notes:
When using mods, always make backups of your save files (copy+paste them to somewhere else on your computer), just in case. That's a good thing to do every so often regardless of mods. You can probably find saves in your computer files in C: -> Users -> YourName -> AppData -> LocalLow -> Pixel Sprout Studios -> Sun Haven -> Saves
You may need to change your computer settings to show hidden files, if you can't find the "AppData" folder.
If you need to use a backup, just delete the file from the "Saves" folder and then copy+paste your backup into the folder.
Whenever the game updates, mods may break. In which case, you'll just have to play without some mods or wait for modders to update them (if they update them). Then you replace the old files with the new files.
There might be some mods on Nexus that no longer work. Others haven't been updated for years but still work perfectly. Sometimes you just have to test things. If something goes wrong, that's what backup saves are for :-)
10 notes
·
View notes
Photo

Bold first post? deal with it
#custom#customtexture#customanimalcrossing#ac#newhorizons#animalcrossingnewhorizons#customnewhorizons#animalcrossing#animalcrossingqr#qr#qrcode#berniesanders#berniesanders2020
1 note
·
View note
Link
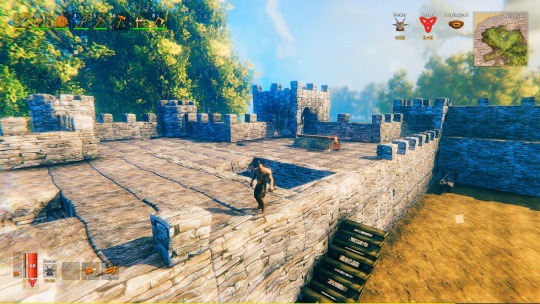
Çıktığı günden beri popülerliğini hiç kaybetmeyen Valheim oyunu, yükselişine devam ediyor. Güncellemelerle sürekli olarak kendini yenileyen oyun, iki yeni mod ile görüntü kalitesini maksimum boyuta taşıdı.
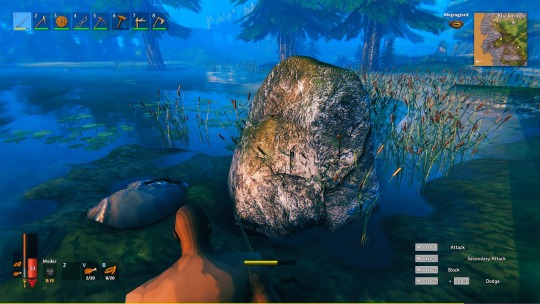
Valheim modları, Iron Gate Studio tarafından geliştirilen ve oyunun görsellerine büyük oranda iyileştirmeler sağlayan destek paketleri. İlk mod, gerçekçi kaya, duvar ve kale dokuları sunuyor. Yüksek kaliteli, 4K çözünürlüklü bir doku paketi. İkinci mod ise Alan Derinliği sağlayan ve görüntüdeki netliği arttıran bir paket.
Valheim gerçekçi 4K doku paketi
4k doku paketine sahip mod, kale içerisinde ve etrafında bulunan tüm çevresel unsunları barındırıyor. Bu modu yüklemek için BepInEx ve Özel Doku modları gerekiyor. Paket içerisinde Vikingler zamanından kalma kayalar bulunuyor. Oyundaki kalelerin ve taşların görünümü eski çağdan esintiler barındırıyor. Kayalar, rengi biraz soluk ve toprak rengine yakın bir renk paletine sahip olarak karşımıza çıkıyor.

Yüksek görüntü kalitesine sahip bu mod, standart olarak 3840 x 2160 piksel çözünürlüğe sahip. Ancak mod yapımcısı bu modun aslında teknik olarak, 4k çözünürlüğün de üzerine çıktığını ve 4000 x 4000 piksel çözünürlüğe sahip olduğunu dile getiriyor.
Öte yandan modu kurmak için içerisinde bulunan dosyaların tümünü seçin ve kopyalayın. Daha sonra ”CustomTextures’‘ klasörüne .PNG dosyalarını aktarın.

Valheim 4K doku paketini indirmek için buraya tıklayabilirsiniz.
Valheim Alan derinliği (Depth of field) modu
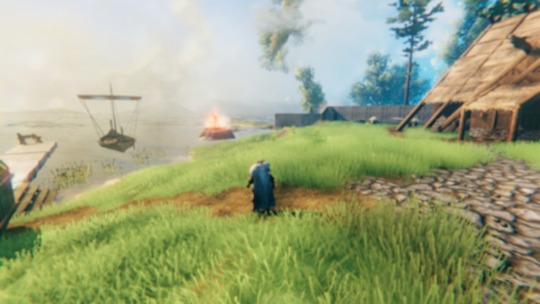
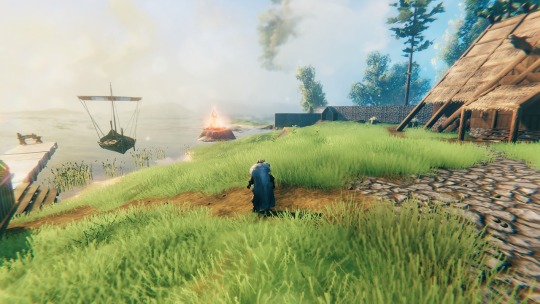
Alan derinliğini iyileştiren mod sayesinde ise görüş mesafesini minimum ve maksimum değerde ayarlayabiliyorsunuz. Detaylı bilgilendirme için mod geliştiricisi paket özelliklerini anlatan şu açıklamaları yaptı:
”Oyunun Depth of Field için varsayılan minimum mesafesi 50’dir. Minimum değerde yaptığım testler, bana göre oyunu çok biraz fazla bulanık hale getirdi. Biraz deneme yoluyla 75 değeri benim için tatlı bir nokta haline geldi. Modun varsayılan değeri 75 olarak ayarlı ve siz bunu kendi zevkinize göre değiştirebilirsiniz.”

”Oyunun maksimum derinlik mesafesi için varsayılan değer 3.000’dir. Bu değer bana gayet iyi görünüyor. Bu noktada hiçbir nesne bulanıklaşmıyor. Uzak mesafelerin bulanıklaşmasını istiyorsanız bu değeri biraz düşürebilirsiniz. Bu mod için varsayılan maksimum değeri 3.000’de bıraktım.”

Depth of field modunu indirmek için buraya tıklayabilirsiniz.
Valheim artık Steam‘de Erken Erişim sürümü olarak mevcut.
Kaynak: Shiftdelete.net
0 notes
Photo

Real time custom texture with a reaction-diffusion system. CustomTexture is a new feature of Unity 2017.01.
https://github.com/keijiro/RDSystem
12 notes
·
View notes