#but the thing is the entire scarf is a 1x1 rib
Explore tagged Tumblr posts
Text
just had to undo about ten rows of knitting because I kept making stupid mistakes and I'm so upset 😭 knitting is so easy but it's so hard
#im literally just making a scarf#this is my very first project ever#but the thing is the entire scarf is a 1x1 rib#and i didnt have any lifelines (I DO NOW)#and i couldnt tell what exactly i had done and didnt know how to tink it#so i decided to just frog a few rows back#but again with the rib thats really hard#and i figured out how to do it but i kept making mistakes#its fine whatever its back to normal now :/
0 notes
Text
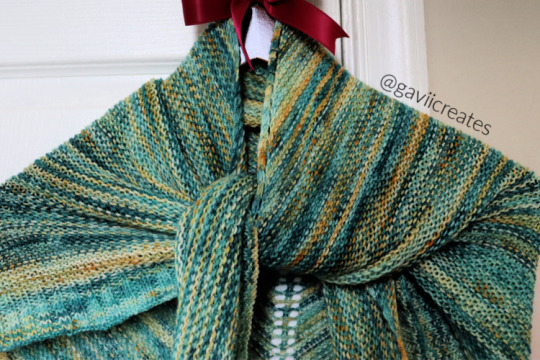
FO: time flies by in the yellow and green...
...Stick around and you'll see what I mean
(there will also be more pictures under the cut)
Remember literally yesterday when I mentioned I was doing a stretchy bind-off purlwise, and I loved the fluidity of it? Well, obviously a bind off pretty much heralds the end of a project in sight so here we are. I was so eager for this one to be completed that I lightly washed the shawl and pinned it overnight so that, by today, I'd have my first finished, knitted shawl.

Pattern: Mara Shawl by Madelinetosh, available here through Ravelry
Yarn: Arcane Fibre Works, "Calm Waters" -80/20 Extra Fine Merino Nylon Super Wash Fingering Weight. (2 Skeins)
Tools: Clover Takumi Bamboo Circulars - US 5 3.75mm, Eucalan Lavender Wash for blocking
This shawl is a garter stitch shawl with yarn overs down the center and sides to both increase and add a bit of lacy interest. I had actually started on this before I finished the throw blanket, so these two pieces together were so critical for my knitting journey thus far, and I've learned so much already.
While the throw maintained the upward structure of its rows, this shawl gave me the experience of increasing along the center and sides, working outward as well as up. Once I figured out the yarn-over and the cadence from row to row, the location of the yarn-overs was easy to remember. Simple, but elegant on the piece. It did take me a few rows in to figure out that a stitch marker for the RS vs WS would probably be helpful, and from there it was smooth sailing.
Almost too smooth, because I just kept going. I don't remember the cord size I used, but eventually working the stitches scrunched up on the needles, and the work curled into itself. Once that started, I had a hard time imagining what it would look like finished. I had no idea what the shaping would look like once it was off the needles, so my plan was to hope I just figured out when would be a good time to stop. Low stakes winging it, if you will.

She's big. This is no shawlette you behold. The length surpasses my wingspan on both sides, and the drape down the back is lovely and full while the fabric itself is light and breathable between the stitches. I think because the needles were a bit bigger than recommended size for fingering weight, this resulted in some space between the stitches.
I'm dreaming of that first cool day of fall, and wrapping myself up with her covering my shoulders pinned with a nice brooch, or rolled into a scarf around my neck over denim. She's going to be a wonderful addition to my wardrobe, and I am ecstatic with the final length and look.
I mentioned above I used two skeins. Another learning curve for me - one I intentionally played with here - was the way the colors fell. I don't think it's a crochet thing specifically because I know opinions still vary, but coming from a craft that tends to create potentially less ordered fabrics with variegated yarns, I'm kind of open to color pooling at times. It's not for everyone, but I think there's a fun little magic in letting the colors land the way they want to in both crafts it seems.
I started with one skein, then switched to alternating after a while to learn that technique, then ended with one skein again as I finished out the project. I was nervous about this choice, especially as I started seeing entire blocks of yellow forming. But in the final garment, I don't feel like these larger streaks take away from the color combination. I'm loving that it's not uniform and there's a bit of fun and randomness to how the colors fall.

Towards the final rows, the pattern switched from garter to 1x1, then 2x2 ribbing, which I could see being a great opportunity to switch out to another color to complement. But I really wanted to have my yellow and green shawl, so I decided to keep working up with the same yarn. Plus I am kind of in love with seeing how different stitches create a new texture that gives the colors in a variegated yarn a bit of a different life to them.
Now - I do have one more skein of this colorway, as I had bought a just-in-case extra. I am thinking my big shawl needs a little something else to go with it - maybe a hat or some fingerless gloves, oooh! or some socks.
Now, I have... how many more months till I can wear this?
60 notes
·
View notes
Text
My WIP Molly Hooper Scarf - Warning, there is knitting talk ahead
@midnightjade221 @theleftpill @rooneykmara @simplyshelbs16xoxo
Since someone asked, here’s some information on the practice run on a Molly Hooper scarf I’m working on.
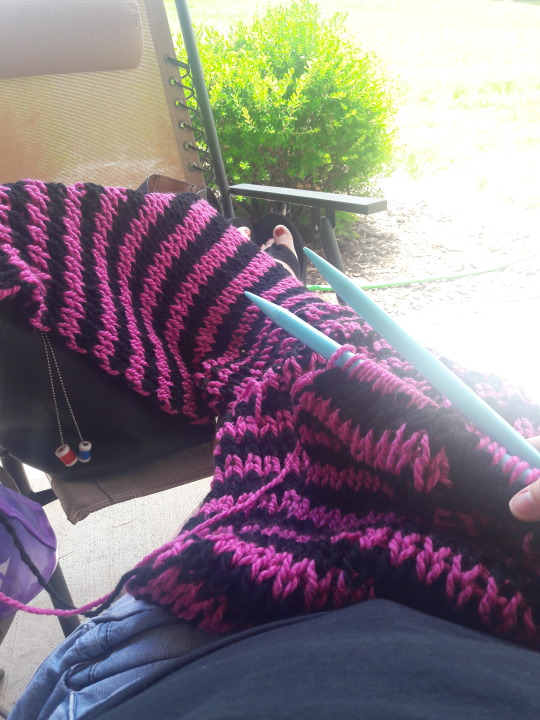
I looked at screen grabs of Molly’s scarf in TEH and the scarf that Cassandra created and posted on Ravelry, and did my best to reverse engineer those bad boys. Keep in mind that I am a novice knitter for the most part and I was guessing my way through most of this.
I decided to go with a 1x1 rib so that A) both sides would be identical and B) because I didn’t want to have to knit it as a tube or double the length or width and sew a seam. Ribbing tends to give a scarf (or whatever) a lot of horizontal stretch. Sometimes too much (as may be the case in my example below).
Here is my initial swatch and the screen grabs I used to give me an idea of the gauge to shoot for.

The lower right corner is my swatch using super bulky yarn and US 15 needles (which is what Cassandra recommended in the post on Ravelry). Because the close ups on the screen grabs and the Ravelry post seemed to indicate the rows were two stitches high, I ended up increasing my needle to US 19 for gauge after consulting my cousin-in-law who works in a yarn shop and is a way, way, way, way better knitter than I am. (She also suggested sticking with the US 15 needles and knitting in the round with possibly a different yarn weight, but this was on sale and I’m cheap so . . . )
A word about the yarn - Molly’s scarf has a much fuzzier yarn than what I purchased. I would not say it has been felted because you can still see individual stitches (And also because I have no clue how to actually felt something, so what do I really know?). The above mentioned cousin-in-law suggested taking some steel wool to the scarf after it’s knitted (or someone else suggested the pokey bits of velcro) to break up the fibers a bit and build up a similar fuzzy appearance.
More pictures and a lot more words behind the “Keep Reading” because I’m overly verbose and there are only so many pictures of a partially-finished pink and black scarf that a person with zero knitting interest can look at before they unfollow someone, you know?
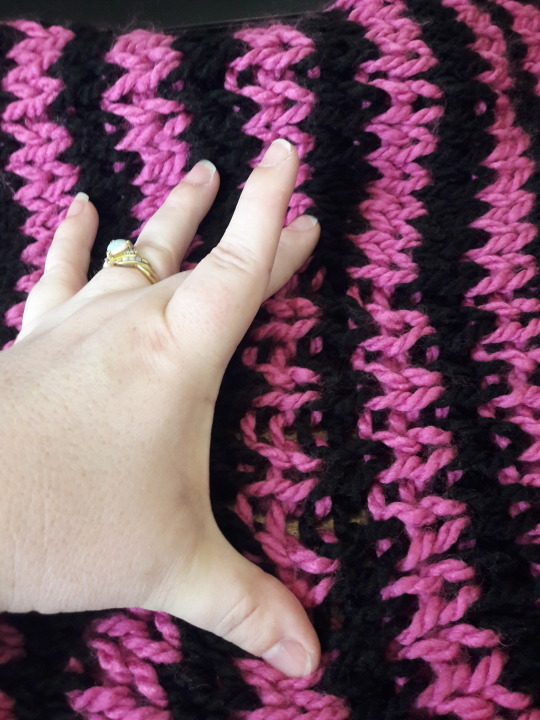
I’m using a 1x1 rib which is basically a repeating K1, P1 to the end on the wrong side (or whatever you prefer to call the first row after your cast on), and a repeating P1, K1 on the right side. It is extremely important to have an odd number of stitches for a 1x1 rib for a reason that I can’t remember, so you’ll just have to trust me on this. (I cast on with 41 st, in case you were curious.)

Horrible lighting here (that pink is really fuchsia), but you can see both sides of the scarf and what the stitches look like.

That is an 8 1/2 by 11 piece of paper for scale.

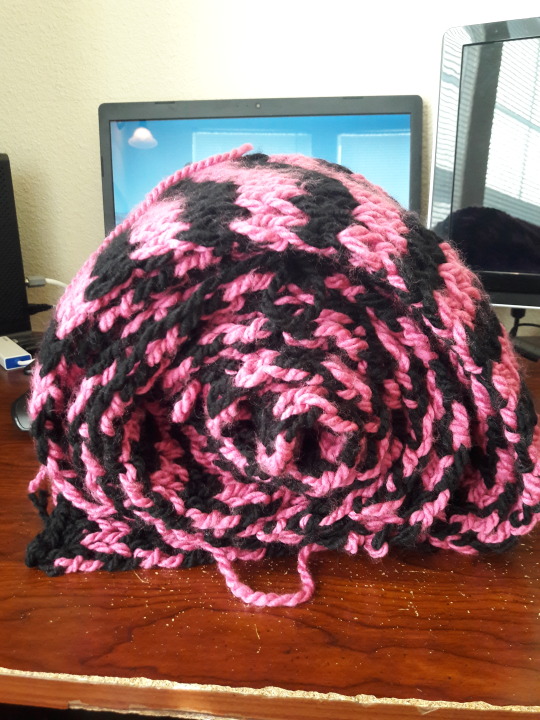
Better look at the color and a hint at the length.
I know you’re thinking “That thing is huge!”, and you are absolutely right. BUT, the scarf that Molly is wearing appears to be folded in half, which is how I designed this thing to be worn. As my very put upon husband has graciously agreed to model.

That poor, poor man.
ANYWHO - moving on.
If you prefer the look of a slipped stitch at the front of your rows, then you would do something like this:
Row 1 (WS): Sl 1 pwise, *p1,k1; rep from *to end of row
Row 2 (RS): Sl 1 pwise, *k1, p1; rep from *to end of row
Or, if you don’t like to slip a stitch at the beginning of the row (Personally, it didn’t work for me on this project.) then:
Row 1 (WS): K1, *p1, k1; rep from *to end of row
Row 2 (RS): P1, *k1, p1; rep from *to end of row
And then you end up with a scarf that can do this:

And this:

And even this if you really want to get stretchy:

Yes, that is the entire width of my desk. As mentioned above, perhaps it’s a bit too stretchy. That’s the risk you take with super bulky yarn and giant needles. But it does give you a nice drape-y material.
The scarf begins and ends with black stripes. I guesstimated 43 black stripes (42 pink) to get the length I wanted (just below the knees on someone who is 5′6″ - me) with the stitch size I was getting.
As for the color changes, I am an inherently lazy person and I chose to carry the wrong color yarn up the side instead of breaking and rejoining at each color change. I can’t say for certain that Molly’s scarf does or does not have a yarn carry, but I can tell you that I have zero interest in weaving in 80 plus stripes worth of yarn ends.
So that is why the side looks like this:

I still have to weave in the ends from when I had to switch to new skeins of yarn (I used two and a third/half of black, and two pink.) and figure out the best length and placement of the fringe; but the knitting itself is done on this first attempt.
53 notes
·
View notes