#and they changed the outside color scheme to this ugly muted green??
Explore tagged Tumblr posts
Text
while looking for stuff apparently in 2019 chuck e cheese started like. a whole new rebranding and god i hate it
no wonder they had to close a bunch of locations
#'veggie platters instead of pizza buffet!'#like. i know ur appealing to parents but thats not gonna make kids like it#theyre also getting rid of ALL the animatronics#for. seemingly no real reason other than rebranding#and they changed the outside color scheme to this ugly muted green??#and the new logo just. looks so lifeless#this isnt just me being nostalgic and dislikeing change#it honestly looks so bad#apparently the color scheme inside inside is more muted too#and the pictures i saw were. alright#bt the poorly made cgi versions of the characters look like theyre made from a chuck e cheese rip off place#theyre so crusty looking#they also changed the tokens for play cards#and you can pay fr unlimited games for a certain amount of time#and while the tokens are cool#i think this ones an actually good change#other than that though#fucking hell of COURSE you went bankrupt appealing to parents over kids
2 notes
·
View notes
Text
The Making of a Warrior
The act of building and painting models is arguably my favorite aspect of the hobby of tabletop wargaming, and is also the most artistically involved part of it. My skills are still developing, but it's become such a passion that the drive to create outweighs the dissatisfaction with the result. There are a number of ways to improve, from brush techniques to better equipment to a better eye for color. However, even a burgeoning hobbyist like me has a discrete process to follow when unleashing the fiendish artist within.
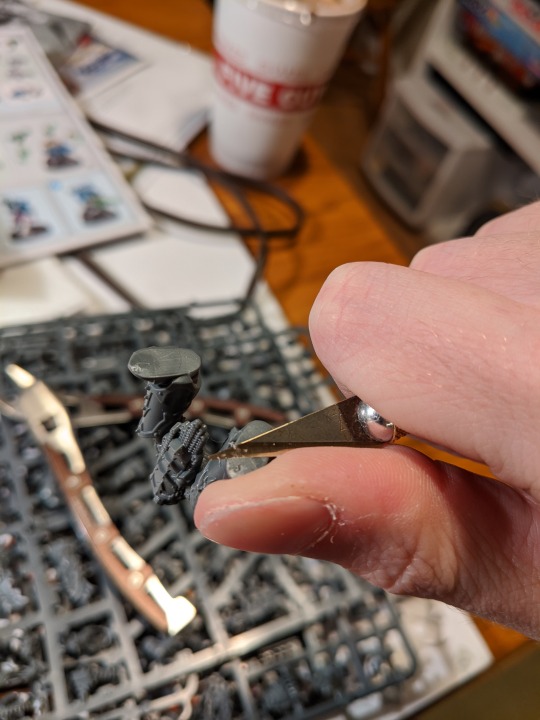
The first thing I do when I want to tackle a hobby project is gather my tools at my usual desk. At bare minimum when assembling models, you'll want a small exacto knife that can fit between your fingers like a pen, a pair of clippers, and a small bottle of superglue. I personally use Loctite, as the brand is sold everywhere and the bottles are very ergonomic and easy to handle. On top of those three tools, I use a pair of sanding instruments with two different levels of granulation, to sand down unwanted details or to smooth out imperfections. Furthermore, I have a special tool called a moldline remover that does exactly what it says on the tin- easily shaves off the unsightly lines left on the model from when it was cast from a mold. When painting, I have four brush sizes to use for inks, basecoating, details, and fine details. This is probably the minimum number of brushes one would want to employ for this sort of artistry, but brushes are very expensive. Also necessary for painting is a cup of water, and a square of cardboard to act as a pallet. I find it's also important to have a nice cup of tea with you, regardless of whether you're painting or building. Hobbying's first and foremost a relaxing, stress-relief activity, and nothing maxes relaxation more complete than a piping hot cup of tea.

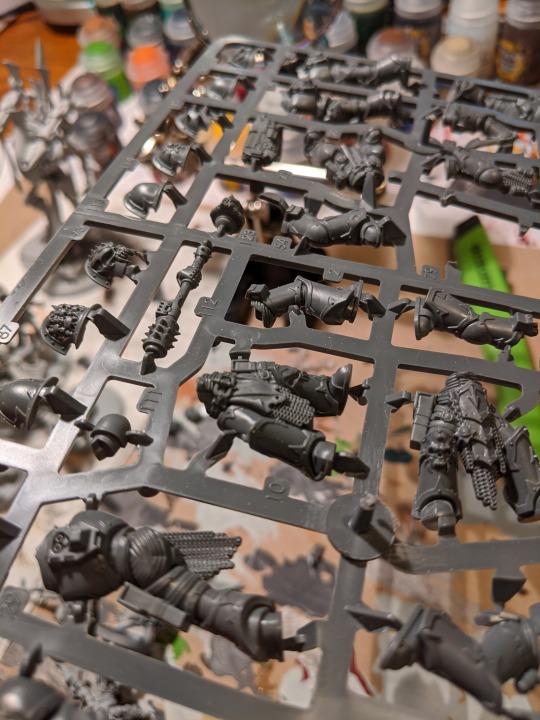
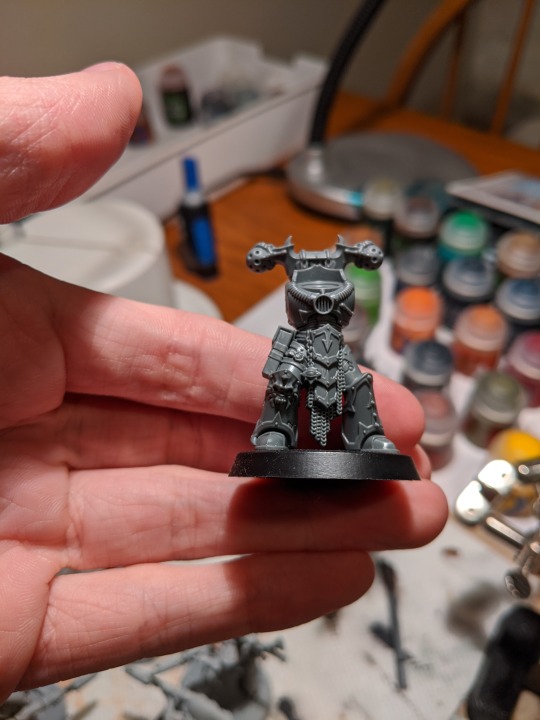
When you first open a miniature kit, you'll notice the parts are all connected to a plastic scaffolding called a sprue. I start modeling by removing a number of parts from the sprue using the clippers, and cleaning them up with the knife. For this showcase, I've removed all the parts necessary to assemble one member of this infantry squad. I'll spend quite a while fussing over each part, making sure I've hidden the places where the parts were connected to the sprue, and shaved down all the moldlines. After a model is glued together, it can be hard to reach some areas with a file, and thus it's much more prudent to handle all the imperfections now. Once all the parts are liberated, I test-fit the interchangeable parts, like different heads or guns, to see what would look the coolest. Once I'm satisfied with equipment and pose, I use the glue to set it all in place. The glue dries completely after about fifteen minutes, but I always wait a day in between building and painting.

Unlike building, which I usually do in peace, I go out of my way to pick out music to listen to while painting that suits the theme I'm going for with the army that model is a part of. The sword-swinging soldier I assembled the other day featured in the photos hails from an evil, brutal band of undead warriors, and so while painting them I listen to a lot of old school rock and metal. For this new model, a more organic looking alien rifleman that is a servant of a vagrant, mysterious alien race, I like to listen to piano solos when painting them. Anything to help me stay in the right mindset.


I changed models halfway through the showcase due to the improper temperature for spray painting. Before you can use the brushes, each model must be sprayed with a base coat that helps the traditional paint stick easier, and adds a slight tint to the colors you'll apply. If the temperature is too low, the spray will not dry properly and the model will look ugly.

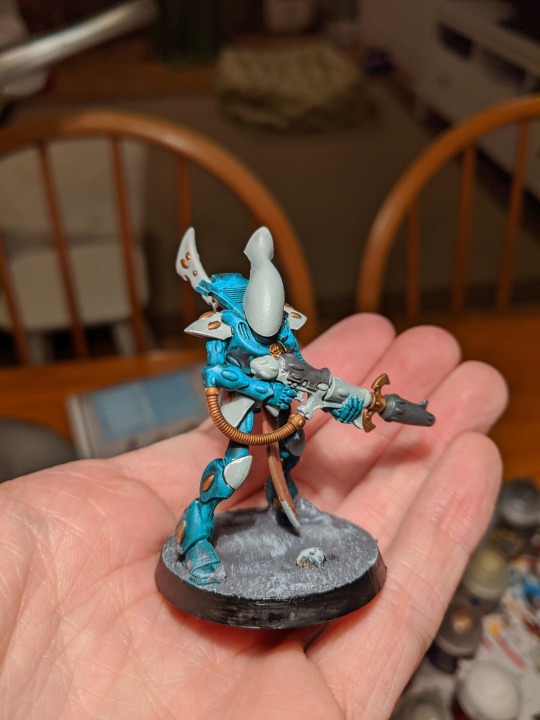
To begin, I sprayed this model in a light gray, as it will complement the turquoise and gray scheme I'll paint over it. After waiting a few hours, the base coats are applied.- turquoise for the main body, with light gray secondary colors to accent it. The details on the miniature like tubing and gemstones I paint brass, to give the model a bit of metal to catch the eye. I paint the gun casing a darker shade of gray to keep in line with the color scheme, but also to differentiate it as not part of the wielder. Lastly, the cloth is painted a muted green color, to bring a more grounded, military aspect to the alien rifleman, which is called a wraithguard.

The next step in painting is washing. To wash a miniature is to apply a shade, kind of like an ink, into the recesses of a miniature to simulate dramatic lighting. Washes come in many colors,so for this miniature I've selected a black wash for the gray areas, and a reddish brown wash for the brass areas. Black sits on the monochrome scale, and thus is perfect for the secondary armor color. I selected red and brown for the brass to give it a warmer hue, and make it really pop. The turquoise is a special kind of base coat that automatically functions as a wash, allowing me to tackle the main armor color in one swoop. Because the model is very vibrant and bright, I will only apply the shade to the recesses, instead of on the whole model- I don't want to darken all the color down. When applying paint of any kind to a model, it's very important to apply a brushful of the paint you want to use to your pallet, and thin it down with water until the paint becomes slightly runny. Thinning your paints and applying multiple thin coats will always get you better results than fewer thick coats. Thick coats of paint run the risk of congealing into recesses and clogging up the nice details of a model.
It's almost inevitable that one makes mistakes while painting something of this size, and shaky hands can exacerbate this issue. To mitigate mistakes, I set my elbows on the table and bring my hands close together, in a pose the internet likes to refer to as the 'triangle of power.' When I do make mistakes, it's not too difficult to simply go back over them with a few thin coats to correct them. Once the mistakes are fixed, I move on to the last stage of painting the wraithguard itself.
The next step is highlighting- using thin paints in small quantities to brighten the raised areas of a model, picking out important details in such a way as to make it look like the light is catching them. This is mostly applied to raised surfaces and edges. For an example, I apply a lighter gray tone to the outside edges of the alien soldier's eerie faceless mask, to make the armor color stand out. Here I also apply a much lighter brass back onto the metal details to bring some of their sheen back, and a more vibrant green onto the cloth to make that color really attract the eye.

The last step in painting a model after the highlights have been applied and the mistakes fixed is called 'basing.' This process aims to make the model's circular black base much more pleasing to look at, and to simulate the terrain the model may be fighting on. I wanted to continue the theme of eerie, alien majesty for this army, and to that end I wanted to make it look like they were standing on the moon. To accomplish this, I start with a special texture paint, which is a paint that's had granules of sand added in to make it chunky, like mud. I apply the grey mud to the base with a piece of sprue, because doing so with a paintbrush will ruin the brush in short order. Before it fully dries, I add some pools of PVA glue, and set some small pebbles into the mud on top of the glue piles. This will give some definition to the terrain, and make it a bit more hostile. Once the glue and mud dry after about two hours, I wash the pebbles with black wash. The next step is to use a technique called drybrushing to apply more color to the base. Drybrushing involves taking a larger, flat brush, and getting a bit of paint into the bristles. Then, rather than applying it to the pallet and thinning it, I rub the brush forcefully into a paper towel, until most of the paint is off the brush. Then, I lightly feather the brush over the terrain and partially over the model's feet, leaving faint traces of color. I used a darker gray for this, trying to emulate the dark side of the moon. Next, I drybrush a lighter grey over the rocks and the raised areas of the mud. Lastly, I drybrush an almost white color to catch just the edges of the rocks and the absolute most raised areas of the mud. Once the base colors are applies, I apply black to the outside edge of the base to make sure it looks clean and crisp, and the model is complete.
This lengthy process goes into each and every individual in a tabletop army, from soldiers to tanks to fighter jets. There is infinite depth to the craft, and it is a painstaking but very rewarding hobby. Sometimes it can be difficult to get up the motivation to try once again to improve your craft, but inspiration can come from absolutely anywhere. I try to keep my mind as open as possible when working on a hobby project, and I never know where it will take me.

0 notes