#and then i unplugged my mouse and plugged my controller into its usb port and There. fun times forever and ever
Explore tagged Tumblr posts
Visit Tumblr Blog
Explore Tumblr blogs with no restrictions, modern design and the best experience.
Last Seen Tumblr Blogs


Fun Fact
Tumblr posted its first advertisements in May 2012 and subsequently earned $13M in revenue.
Text
elden ring fucks so hard i'm so glad i confronted my fear of fromsoft games
#just beat godrick babyyyyyyyyyyy everybody take me seriously now.#i was bummed for a while bc i couldnt play it because my controller just decided to not work at all#and i was losing my mind trying to figure out what was going on bc i'd go and test it and all was well and then i'd open elden ring and Nope#no inputs for you#and then i unplugged my mouse and plugged my controller into its usb port and There. fun times forever and ever
11 notes
·
View notes
Text
i was going to take a picture of my setup but i cant get both screens in one picture without getting a picture of half of my room along with it, and i'd rather not do that lol. instead ive done my best to illustrate it:

im a genius i set up my drawing tablet so i can use it like a second monitor. sure its in a shitty spot, but does that really matter when i can have two monitors? i think not
#this setup is completely unfeasible to use for anything except wiki browsings and background youtube videos. its horrible <3#i cannot play games with controllers this way. my tablet takes up 2/3 of my usb ports and the last one is for my mouse#well... i might be able to unplug one cord that lets me use the tablet as a tablet and not just a monitor#and i could try to move the power cord to an actual outlet instead of just plugging it into my laptop. tho id need a strip for that
2 notes
·
View notes
Quote
A little while back, I shared an announcement of a new standing desk (or as I like to call them, sit-stand desks) by Flexispot called the Comhar EG8. In my article, I mentioned I would be receiving one to review. Well, due to the high demand for this sit-stand desk, it took a while for one to arrive. But it finally did, and it couldn’t come at a better time as I have been building out my home office to accommodate my work-from-home environment and process better. I was curious as to if and how it would live up to expectations. From the pictures, it definitely looked fantastic. But how easy was the assembly? Was it solid and stable? This review touches on those items now that I have spent some time with the Flexispot standing desk. (*Disclosure below.) For the month or so that I waited for the Flexispot Comhar to arrive, I used a simple fold-out table that was almost the exact size of the Comhar EG8. But there was one core difference. The height was set. It was essentially a sitting desk. The beauty of having a motorized standing desk, which the Flexispot is, is that you can go from a low, sitting position to a high, standing position with a push of a button. From a health perspective, it is important to get up and walk around during your workday. The ability to convert your desk to a standing one, even if just for half of an hour a couple of times a day, is a huge advantage. And this is part of the reason I needed to have one for my office build-out. The Flexispot Comhar EG8 not only electronically adjusts the height of the tabletop, it also has a unique glass top surface (available in white or black). This gives it a modern, polished look and makes it quite easy to clean, for example. There are also a few other nifty features that I will mention later in this review. First, though, let me talk about the setup. Setting up the Flexispot Standing Desk In the press information, Flexispot says that you can set it up in about five minutes. I was curious to see how they could claim that. But honestly, that claim isn’t too far from the truth. Here’s how my setup process worked. First, I received a pretty battered box with the desk packaged inside. I was a bit concerned that the glass top would be broken or cracked just from how the box was beaten up. Note: the box is VERY heavy – you need to have two people to carry it. Or you can do what I did which was open it up and carry the individual pieces to where you want to assemble it. I crossed my fingers as I opened it up. Due to the solid packing of the desk, legs, and other components, my desk had arrived with no cracks or issues whatsoever! Unpacking it outside and taking the individual pieces into my office probably took more than five minutes. But the Flexispot claim was about having a five-minute assembly. Once I got all of the pieces out and into my office, I got ready to assemble. Note: I would recommend doing the assembly on a rug or carpet or very soft surface, especially if you have a Flexispot with a glass surface like the Comhar. Above, you can see the core components of the Flexispot standing desk: the desk surface (the underside is showing), the support beam (it’s one piece), and two leg floor supports. There are also the accessories like instructions, parts, and electrical cord. The setup instructions themselves are quite clear. And the parts are clearly labeled so it is practically impossible to make a mistake. The assembly itself is extremely straightforward: attach the main support beam to the tabletop surface, attach the leg floor support, and connect the cable. That is pretty much all there is to it. The only tool you need is an Allen key (hex wrench) which is included. As mentioned, you just screw the lifting columns, which are one piece, to the table surface. I recommend keeping the screws a bit loose until you have it all aligned, then tighten them all down. Next, you attach the feet to the lifting columns again using the hex wrench. After that, the desk is pretty much assembled! You simply need to plug in the power and then place the desk in position. There is only one motor lifting the desk, but it is more than powerful enough. Once you have the Flexispot standing desk in place, you can plug it in to test the motor. I go into a bit more detail below about the function of the desk. Here is the Flexispot standing desk in place in the sitting position. And here is the Flexispot sit-stand desk all the way up as high as it will go (which was much higher than I would ever need, but I’m only 5′ 7″). So did the assembly take only five minutes as promised? Honestly, I think so. There are only three steps where you are screwing things together. I spent more time unpacking and moving all of the parts to my office and taking pictures than I did actually putting the Flexispot together. The whole assembly process is easy and fast! Favorite Features of the Flexispot Standing Desk Once I had it all assembled, it was time to test everything out and understand the Flexispot Comhar’s additional features. While it is important to remember that this is “just a desk,” it’s actually quite a bit more than just a desk, especially since the height is adjustable. And, I actually found the hardest thing to be hiding all of the cables. It’s practically impossible. With the white top, black cables stand out. But the white glass top looks clean and modern and brightens up the room. So it is a bit of a catch-22. Here are the key highlights in my opinion: Glass top4 memory settingsUSB chargerBuilt-in drawerQuiet operationWide height range I honestly love both the clean, white look of the entire desk but also the glass surface. My wife helped me design out the color scheme of the office (which is pretty much a black and white theme, favoriting the white dominant color). I even took my 50+-year-old wooden desk, which has a glass top, and put a white surface under the glass to match the Flexispot standing desk. It’s a very nice old versus new dichotomy. The pushbutton controls of the Flexispot are extremely easy to use (there is even a child lock button to prevent your children from playing with the settings). The control section has a small display that shows the height setting, if the desk is at the top or bottom of its reach, and any error codes. Next to that are the up and down arrow buttons to raise or lower the desk’s height. Then there are four preset buttons. I set one for my standing setting and one for my sitting setting. The motor is quiet and quick. And then next to the preset buttons are two USB Type-A and one USB Type-C ports for charging various devices. Note that charging is paused when the motor is active. Lastly is the child lock button. Another feature that I love is the smooth-sliding middle drawer. This is a great addition to any desk, and I have only seen a few sit-stand desks that have this drawer built-in. It is wide and deep and locks into place when closed. By the way, the thickness with the drawer of the tabletop is just 1.7″. I already mentioned the quiet operation of the single motor. It is quick and efficient. I did have an error code show up once, but I was able to reset it by unplugging the Flexispot desk. It probably occurred because I kept testing out the motor. There are built-in safety guards to prevent overheating. But the motor is rated to lift about 110 pounds! Lastly, let me talk about the dimensions of the Flexispot Comhar Standing Desk. The desktop itself is not massive. It measures 48″ by 24″. On my desk, I have a large monitor, a laptop, and some additional monitors and a mouse pad. There is ample room for all of this. The glass itself is 0.2″ thick. At full height, the Flexispot reaches 47.6″. And all of the way down, it is a low 28.3″. As I mentioned, I’m 5′ 7″ and while I continue to test what heights are good for me, I have the low setting at 28.9″ and the high setting at 39.5″. Obviously, there is almost eight more inches I could go so I’m guessing that someone as tall at 6′ 4″ could be fine with this desk height. A Complete Sit Stand Desk Solution at a Reasonable Price Flexispot will be celebrating its fifth year anniversary at the end of May. I highly recommend taking a look at their site in the coming weeks as there may be additional discounts beyond many of the specials that they currently have running. The Flexispot Comhar All-in-One Standing Desk with the glass top (otherwise known as the EG8) comes in either black or white, as I mentioned. It normally retails for $499.99, but as of the writing of this review, it is $70 off at $429.99. (Note: if you click through my affiliate link, you will get $15 off your order of $150 or more!) If Amazon is more of your thing, the Flexispot is available currently for $429.99 and there are other versions with wooden tops available as well. Shop on HighTechDad The product shown below (and related products that have been reviewed on HighTechDad) is available within the HighTechDad Shop. This review has all of the details about this particular product and you can order it directly by clicking on the Buy button or clicking on the image/title to view more. Be sure to review other products available in the HighTechDad Shop. Flexispot Standing Desk Comhar EG8 $429.99 Buy on Amazon Disclosure: I have a material connection because I received a sample of a product for consideration in preparing to review the product and write this content. I was/am not expected to return this item after my review period. All opinions within this article are my own and are typically not subject to the editorial review from any 3rd party. Also, some of the links in the post above may be “affiliate” or “advertising” links. These may be automatically created or placed by me manually. This means if you click on the link and purchase the item (sometimes but not necessarily the product or service being reviewed), I will receive a small affiliate or advertising commission. More information can be found on my About page. HTD says: I believe that having a standing desk solution is an important ergonomic decision you must make for any office space where you work multiple hours a day. The Flexispot Comhar Standing Desk with the glass surface is elegant and perfect to build out your office!
https://www.hightechdad.com/2021/05/02/reach-new-heights-flexispot-standing-desk-comhar-eg8-review/
0 notes
Text
Lanq PCDock Monitor Stand Tries to Do So Much, but Fails at Nearly Everything
Lanq PCDock
5.00 / 10
Read Reviews
Read More Reviews
Read More Reviews
Read More Reviews
Read More Reviews
Read More Reviews
Read More Reviews
Read More Reviews
Read More Reviews
Read More Reviews
Read More Reviews


Shop Now
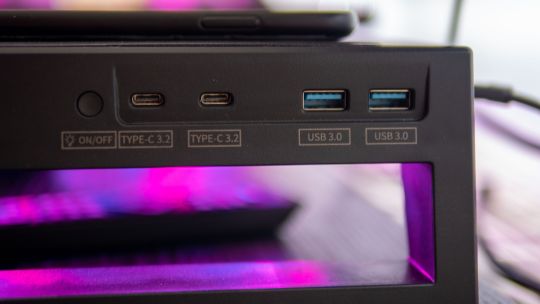
The Lanq PCDock is a competent monitor stand with RGB lights, a fingerprint reader, Bluetooth, Wi-Fi, and some USB ports. But I can't quite figure out ... why?
Key Features
All-in-one desktop hub
Specifications
Brand: Lanq
Connection: USB-A
Ports: 2 x USB3.1, 2 x USB-C, Fingerprint reader, Wi-Fi, and Bluetooth 5.0
Pros
As a monitor stand, it's solidly built
Qi charging pad is convenient
Cons
Drivers requires for the Wi-Fi, Bluetooth, and fingerprint reader
RGB lighting doesn't integrate with anything
Buy This Product
Lanq PCDock other
Shop
// Bottom var galleryThumbs1 = new Swiper('.gallery-thumbs-1', { spaceBetween: 10, slidesPerView: 10, freeMode: true, watchSlidesVisibility: true, watchSlidesProgress: true, centerInsufficientSlides: true, allowTouchMove: false, preventClicks: false, breakpoints: { 1024: { slidesPerView: 6, } }, }); // Top var galleryTop1 = new Swiper('.gallery-top-1', { spaceBetween: 10, allowTouchMove: false, loop: true, preventClicks: false, breakpoints: { 1024: { allowTouchMove: true, } }, navigation: { nextEl: '.swiper-button-next', prevEl: '.swiper-button-prev', }, thumbs: { swiper: galleryThumbs1 } });
The Lanq PCDock claims to be the new standard of monitor stand. With a built-in USB hub, fingerprint sensor, Wi-Fi and Bluetooth chip, Qi charger, and RGB lights—everything except a kitchen sink, in fact—is it everything you could want from a monitor stand? Probably not.
Crowdfunding Disclaimer
The Lanq PCDock is currently seeking backers on IndieGogo, with about a week left on the campaign. Back it now to save around 40-50% off the eventual RRP. Or don't.
The usual disclaimer applies here: crowdfunding is not a pre-order system, and there's no legal responsibility for the company to deliver anything to backers. Lanq—or Langqun Yunchang (Shenzhen) Electronics Co—appears to be a new company, with no previous products or crowdfunding history.
PCDock As a Monitor Stand
Two sizes of Lanq PCDock monitor stand are available—the Pro and Max—and they only differ by width. The largest Max size (as tested) measures 43.5W x 8.62D x 3.27H inches (1105W x 219H x 83D mm), while the smaller Pro measures 24.8 inches (631mm) wide.
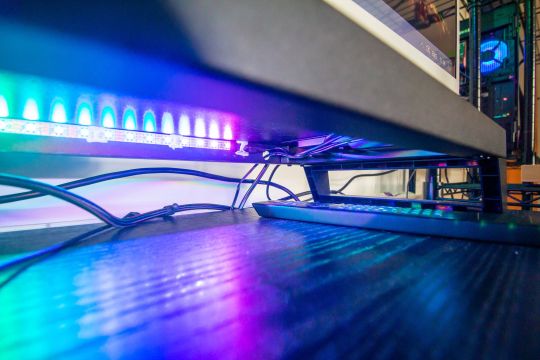
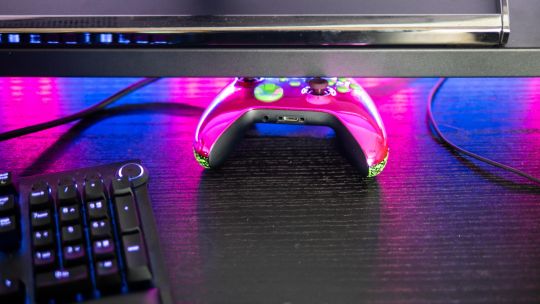
One benefit of a monitor stand is that it frees up desktop space, allowing you to store a keyboard, mouse, and other bits underneath it when they're not in use. Both sizes of the Lanq PCDock offer 2.24 inches (57mm) of clearance underneath. That's just about enough for a mouse, but just shy of what's needed for an Xbox controller. It's deceptively small, in fact.
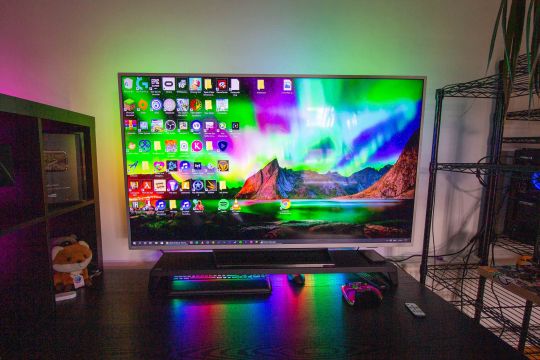
The PCDock Max size is designed to accommodate dual monitors, side-by-side, though I "only" have a 55-inch TV to test with on my gaming desk. It handled that fine, thankfully not collapsing at any point during testing. With ABS plastic legs on the side, the main frame is made of an unspecified metal (probably steel), and certainly feels sturdy.
If I did have two, or three monitors, I suspect I'd rather attach them to adjustable VESA mounting arms, so as to give me more control over the angle and tilt.
Lanq claims the PCDock stand will raise the monitor to the correct viewing height, thereby easing neck strain. I can't help but think monitor manufacturers have already considered this rather fundamental design aspect into their products, so this statement may be a little presumptuous. My work monitor actually includes a height-adjustable stand, as do many designed for use in an office.
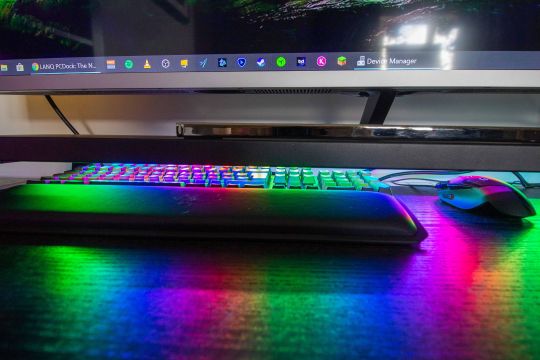
RGB Lights
RGB lighting is not to everyone's taste, but it's a key feature of the Lanq PCDock. Offering either 60 or 120 LEDs depending on the size of the dock, these are pixel LEDs rather than a single color strip. A remote control is included, and a variety of attractive, if somewhat distracting, animations are pre-programmed.
You can also choose static colors, or you can change the speed of the animations to be less annoying. It really does look quite impressive, if you're into that sort of thing, which I am. I want all the RGBs.
Unfortunately, there's no integration here between the lights and desktop controller software. Your only method to choose how the lights behave is through that small remote control, so don't lose it.
Keen gamers who already have a lot of RGB kit will likely have already bought into a specific system, such as Razer Chroma, Corsair iCue, or even Philips Hue. This is therefore not going to appeal to them.
As a Hub
The Lanq PCDock is also a generic hub, offering two USB-A 3.0 ports, and two USB-C 3.2 ports, which have fast charging capability. However, these aren't Thunderbolt, so don't expect to be running a monitor off of them.
The exterior right-hand side of the dock feels like a sub-optimal placement. I'd much rather hide my keyboard and mouse cable underneath the monitor stand, and keep the cables off the desk. Useful as quick access for plugging in a USB stick perhaps; but my Razer keyboard also does that.
Ultimately, you wouldn't be purchasing the Lanq PCDock for the USB hub alone, so I'm not going to dwell on it; it's an ancillary feature that's useful to have.
10W Qi Charger
Also on the right-hand side you'll find a smartphone-sized rubber pad embedded into the top surface; this indicates the location of the 10W Qi charger.
This functioned much as expected, reliable triggering a wireless charge when my phone was placed onto it. But I can't say I found it all that useful. Modern smartphones tend to last me the entire day if I'm sat at my desk. It's only when heading out and about, using GPS, or taking videos that the battery doesn't last a whole day. In which case, I'm not at my desk.
Fingerprint Reader, Bluetooth, and Wi-Fi
I've grouped these features together because they all require a separate driver download. The drivers come as a RAR file, and extract to reveal a bunch of DLLs, as well as a INF file, which you should locate and right-click on, then select "Install" in order to add them to your system. In 2021, I expect much better. A single driver package with an install executable should be an absolute minimum. But moreover, the fact you even need to install drivers for such generic features is almost unheard of nowadays.
It seems even more curious when you consider that in order to activate the Wi-Fi functionality, you either need to already have Wi-Fi, or an Ethernet cable plugged in. Are you going to unplug your faster, Gigabit Ethernet, to replace it with a less reliable and potentially laggy Wi-Fi connection? I doubt it. The only reason to use this Wi-Fi adaptor is if your existing one is a decade old, and only capable of 2.4Ghz. The Lanq dual-band Wi-Fi apparently goes up to 5.8Ghz.
The Bluetooth chip (BlueSoleil), worked briefly after a lot of fiddling and allowed me to connect to an Xbox controller. Until Windows decided something was wrong and disabled the driver. Fixing it required a restart and USB dance each time, which seemed like far more effort than it was worth.
I was unable to test the fingerprint reader, but in fairness, I don't think this is Lanq's fault. I disabled Windows login years ago, and now it won't let me re-enable it again. As a gaming-only Windows user, I don't need to secure my desktop in any way. Supposedly it can be used for Windows Hello, but there doesn't seem to be any deeper integration such as web payments, as I'm accustomed to on my Macbook Pro. That said, this might be the one killer feature for you, and if it is, you can probably justify the rest of the package too.
Should You Buy the Lanq PCDock?
The sales page seems to be aiming the Lanq PCDock at professionals and office workers, but the inclusion of RGB lighting would suggest gamers. Yet, the RGB lighting isn't integrated into any existing RGB system, which means gamers won't be interested in it unless this is their first foray into this kind of lighting system.
If the lighting was exposed to the connected PC system through the third-party "works with Razer Chroma" plugin or similar, it'd be a whole lot more useful. As it is, the reliance on a single point of failure (a tiny remote control) makes this aspect of the dock difficult to recommend.
Then there's the fact that the Wi-Fi, Bluetooth, and fingerprint reader require separate driver downloads. I can't remember the last time I had to install drivers for such basic features. My experience with Bluetooth dongles thus far on Windows 10 has been "plug and play". And even if the Lanq Bluetooth had worked reliably for me, which it didn't, a plug-and-play dongle from Pluggable is less than $10, and only a fraction bigger than the USB port it plugs into.
The whole thing feels like it was thrown together as part of a "design your ultimate monitor stand" competition. It's a mish-mash of nice-to-have features (if they worked), but none of them are individually compelling, and the whole is, well, less than the sum of its parts.
The Lanq PCDock is a sturdy monitor stand with some cool lighting and a USB hub, but at $200, the value for money simply isn't there.
Lanq PCDock Monitor Stand Tries to Do So Much, but Fails at Nearly Everything published first on http://droneseco.tumblr.com/
0 notes
Text
Windows 7 in 7 hours
Aight y’all chilluns siddown, i got a story to tell.
Okay so I’m like
real good friends with this lovely artist
@raspberryusagi
in fact she’s my girlfriend right now but that’s not important to the story because it wasn’t true at the time and wouldn’t be for a rather long time
Anyways and so she needed something with a bit more oomph for arting than her Macbook.
And she had some budget for a new tablet and computer so
i volunteered to build a pootr with her paying for parts
(though i did contribute some amount to the build becuz i’m nice like that)
(and i did end up contributing more than i expected but that was my fault, and i’ll get to that)
So. A bit of internet shopping later and she’s got all the parts and everything we’ll need.
So a day is planned for a few of us friends to get together for a “build a computer and chill”.
I do most of the building process, though a dear friend did help put in like 5 of the screws.
Eventually comes that magic moment when I push the power button to start things up. And the computer flashes on for a brief moment but nothing more happens.
Trying it again yields the same results. Not completely dead, but nothing interesting.
A bit of research says that the CPU may be bad. I find this discomforting because I had messed up the CPU installation somewhat.
So, on every Intel stock cooler I had seen before that, and every cooler since, the 4 retaining pins shipped loose. The ones on this cooler shipped tight, so I pushed unusually hard in an effort to try to get them to go through the board.
This actually bent the PCB and gave it a hairline fracture in one spot, which was of course, utterly fatal.
It also probably damaged the motherboard, causing that to fail a few months later and I’d need to replace it, but I digress.
So I overnight a replacement i5 6400 which is not exactly cheap but it was my fault that the cpu was broken so whatever. I did also have to get an extra day off work to do this, but that was fine, it was my fault.
In the morning, I realize that I forgot to put enough on my card, so I have to order the cpu again. By afternoon, the package is on its way to UPS.
By morning again, the package is still on its way to UPS.
By afternoon, the package is still on its way to UPS from Amazon.
I go home that evening from their place out of town, about an hour away from my home. Amazon is still sending it to UPS who will then send it to my vbf’s house where I can pick it up from.
I wake up in the morning before I have to go to work.
It’s still on the way to UPS.
No idea where the heck it went.
I go to work.
I check at around noon at work.
Package is still
on the way
to fricking
ups
4 pm I get a text message from my vbf’s dad
I check the shipping information
It’s still en route to ups
They received a package
It has the i5 6400
It also has a USPS label which has been stuck on OVER the correct UPS label, and the USPS label is for 2 day shipping instead of 1 day.
So. That was weird. One brief call to customer support later and I get a refund on shipping overcost, though not the package because that actually did arrive.
Another trip out of town is arranged, and I go down to pick up the CPU and put it into the computer. Success, everything works fine now. BIOS seems fine, it loads up the Windows 7 installer with the “choose language/region” screen.
And the mouse and keyboard are utterly unresponsive, not even capslock works. Not a good sign.
So I restart, and get the same thing.
The mouse and keyboard work fine in the BIOS menu, and unplugging/replugging the keyboard does bring the capslock light back on, so it looks like it’s working enough that it can receive capslock state from the computer but not do anything at all.
I take it to my vbf’s house for overnight testing, because my vbf’s dad has an old PS/2 mouse/keyboard combo, which may circumvent my suspicion that something weird was going on with the usb ports.
I was actually right the entire time about the USB ports behaving strangely, I just hadn’t realized that things could work out exactly how they did.
So, with a mouse and keyboard using the legacy PS/2 plug instead of USB, I was able to proceed further through the install process, showing that the hardware and all was fine.
The problem now was, when I attempted to choose a drive/partition to install to (in this case, the Crucial MX300 275GB ssd) it prompted an error window saying to select a CD/DVD driver.
I’m installing off a flashdrive.
Those apt with computers may be noting that flash drives are run over USB, which I was already having issues with. And you’d be correct. The installer drive was no longer accessible to Windows, so it had no data to load for installing Windows.
The search for answers took hours. Switching to USB 2.0 ports did nothing. Every fix I found did nothing or was irrelevant to the situation.
At about 3:04 AM, I came across a forum post I’d already seen before. This post had a link to the ASRock website, and I figured I may as well take a look, because the motherboard in question was ASRock.
I took one look at the headline for the page and my reaction was best summarized as the following.
youtube
http://www.asrock.com/microsite/win7install/
The page is slightly different than it used to be, but that headline still works.
“Installing Windows 7 on an Intel 100 series motherboard”
When a formal page like this says exactly what you’re trying to do and having issues doing it, without starting out by specifying an error message, you immediately know that you have been screwed by something or someone.
In this case, the world has moved on. Starting with the Intel 100 motherboards, and AMD AM4 platforms, the chipset no longer supports EHCI.
For a quick review, the physical USB port hasn’t changed too much, except with the USB type C. USB 1.0, 1.1, 2.0, and 3.0 ports all are physically compatible. The electronics managing them are rather different.
The internal controller for USB 2.0 ports is EHCI, and for USB 3.0 ports is XHCI.
Windows 7 was created before USB 3.0, so it does not natively support XHCI.
The intel 100 series motherboard only has the XHCI controller. USB 2.0 ports may exist but are controlled by the XHCI at USB 2.0 speeds.
So basically I did need a CD/DVD driver. Only not quite. In this case, I needed an XHCI controller driver to be loaded as part of the Windows 7 installer.
Thankfully, ASRock provided an easy button which is basically their own version of the .iso->usb burner which after creating the bootable USB, patches in their drivers.
The install process after that took like, 10 minutes because even budget ssd’s are pretty blazing fast.
I spent another hour adding graphics and ethernet and chipset drivers but that was it.
Showed up at her place the next day with the now-happy computer in tow. It couldn’t install her tablet drivers yet because those drivers needed a CRT which was part of windows updates, and the computer needed so many updates from being a fresh install of windows 7 that windows update itself was kinda locked up trying to process everything.
But, the computer worked now. All that was needed was time.
Later the motherboard crapped out because I pushed too hard but I replaced it and mailed it back to her and that was easy enough. Just took a while because depression and executive dysfunction and lack of motivation and crap.
TL;DR took 7 hours to install Windows 7.
4 notes
·
View notes
Text
Minix Neo U22-XJ is Minix’s latest (and blazing fast!) Amlogic based Android TV Box! Based on Amlogic’s most powerful S922-XJ SoC, you can now expect great HDR support as well as Dolby Vision straight out of the box.
What’s in the Box?
U22-XJ comes in the standard classy box embossed with the logos of supported standards such as 4k, HDR, Dolby and so on. Inside we find the TV Box itself encased in soft nylon and laid in a caveat inside a cardboard cover. After we lift that cover we find all the peripherals – HDMI 2.1 cable, USB-OTG cable and, of course, the DC power adapter (with multiple power plug adapters), removable antenna, IR remote control and the Setup guide. U22-XJ itself uses the standard black minix matte plastic box with its plethora of ports (see details bellow)
U22-XJ Looks
Minix box design remains the same over the years. If I had to venture a guess, it is to reduce cost and use the same basic box design for all of Minix’s Android/Windows product lines. At most, extra ports need to be embedded into the box, but the classic black plastic shell is the same.
U22 Top
U22 Front
U22 Back
U22 Right
U22 Bottom
U22 Left
U22-XJ PCB Top without heatsink. Curtesy of Minix & Trebor from Freaktab Forum
U22-XJ PCB Bottom. Curtesy of Minix & Trebor from Freaktab Forum
U22-XJ Open Box showing PCB with heatsink. Curtesy of Minix & Trebor from Freaktab Forum
Here are the items that come in the box: WiFi antenna, HDMI 2.1 cable, User Guide, IR Remote, Power adapter, Power plug adapters, and a USB-OTG cable.
Minix Neo U22-XJ Items
Minix Neo U22-XJ Home Screen
U22-XJ Specifications
Chipset Amlogic S922XJ Quad Core Cortex-A73 + Dual Core Cortex A53 Processor (64-bit) GPU Mali-G52 MP4 Memory / Storage 4 GB (LPDDR4 3200 MHz) / 32GB eMMC 5.1 flash, microSD card slot LAN Yes, RJ-45, 1Gbit / s Wireless 802.11ac 2.4GHz / 5GHz WiFi (2 × 2 MIMO) Bluetooth Bluetooth 4.1 + EDR OS Android 9.0 Pie Video Output HDMI 2.1 output up to 4Kp60 with HDR10, HDR10+, Dolby Vision support Audio Output / Input HDMI 2.1, Optical S/PDIF, 3.5mm audio jack Power 5VDC/3A via power jack Peripheral Interface RJ-45 Gigabit Ethernet Micro SD card reader, Kensington Lock ready USB 3.0 port x 3, USB-C port x 1 (data only) 3.5mm audio jack, IR receiver (remote included) Packing Included power adapter, OTG-USB Cable, HDMI Cable, MINIX IR remote control, and a user manual Dimensions 128mm x 128mm x 28 mm
U22-XJ Benchmarks and Testing
All benchmarks have been repeated 3 times and results have been averaged to give a more accurate reading:
Antutu Benchmark
The Antutu benchmark tests single core performance over multi-core as it is a better indication of the performance of one device over others in most situations. Minix U22-XJ performs amazingly, and is placed number 1 in the list of TV boxes (and one tablet) reviewed. It is also worth noting that Minix U22-XJ is placed above any other Amlogic based box on the list.
Bellow is a screenshot of the latest Antutu benchmark (I have not tested other boxes with this new version, so there is no comparison graph as yet):
GPU Mark Benchmark
[easy-image-collage id=28444]
GPU Mark tests 3d gaming performance and also provides a normalized score according to the used screen resolution (for a more accurate result). The test is quite short and should be taken as a supporting result to that of the more serious 3D Mark benchmark. Minix U22-XJ performs very well here, placing it second only to the top contender (a powerful tablet) – it’s S922-XJ chipset placing it higher than all TV Boxes reviewed so far.
A1 SD Benchmark
[easy-image-collage id=28447]
A1 SD Benchmark tests RAM and flash memory speeds. As can be seen in the provided graphs, RAM is much faster (by a factor of about 40) than flash memory – that is why it’s in smaller amount and is also volatile (does not keep its contents after a reboot). Minix U22-XJ achieved 2th place in the RAM Copy Speed test, placing it only under the powerful tablet. In the storage Read/Write testing, Minix U22-XJ takes 2nd place again, this time only behind a Realtek based box.
PC Mark Benchmark
The PC Mark benchmark tests run several productivity tests, but sadly, results page comes up empty, and freezes the application.
3D Mark Benchmark
Slingshot
Slingshot Extreme
3D Mark benchmark is considered as one of the best ways to test 3d performance on Android (and other platforms). Minix U22-XJ is officially compatible with only these two tests: Slingshot, and Slingshot Extreme (which results are also showing above). But using an older APK of 3dmark, I was able to run the older “Ice Storm Unlimited” test and get quantifiable results (with the new version on the android play store, you can run the test, but the result comes out as “Max”). As can be seen, this new generation of Amlogic chipsets opens a wide gap ahead of everything I tested before it..
U22-XJ Extra Benchmarks
For some more information, see the following screenshots from other benchmarks such as Basemark, Vellamo, Passmark, and GFXBench:
CPUMark
DiskMark
PassMark
U22-XJ Bugs and Issues
Restarting the box causes loss of picture on screen. Must unplug and re-plug HDMI cable to restore.
PCMark Work 2.0 benchmark will not show results at end of testing
After shutting down box from remote, sometimes unable to turn it back on from remote, and must use the physical power button. Then must unplug and re-plug HDMI cable to restore picture as in issue above
Built-in Root function only works per session (while the device is running, and reverts to non-root after a restart). Also does not play well with SuperSU root permission management app, as when you try to update the SU binary, it will brick the U22-XJ box. Also, the root switch stay “ON” after a restart, even though root functionality is not active.
John from Minix assures me that at least some of these aforementioned issues (especially the loss of picture) will be corrected in upcoming firmware updates.
U22-XJ Root function
Minix seems to have done away with the unofficial (which requires some know-how and may cause box bricking) methods for rooting their new boxes. Instead, you get a nice menu option for turning Root “ON” or “OFF”.
But.. it is far from perfect. Instead of turning it on and expecting it to stay on after reboot, this root is only per session. Meaning, after reboot the U22-XJ is no longer rooted. On top of that, the switch option itself still remains as “ON”, even though the root is not active. To allow root status again, you’ll need to turn it “OFF”, and then back “ON”. That’s tedious, and really unnecessary.
On top of that, this is a permission-less root. So there is no “SuperSU” or other permission management app which gets installed along with the root. It will automatically grant your application root rights as needed. Personally, I prefer to have better control of which applications gets root access and which do not. You can always install SuperSU yourself, but be warned: if you agree to update the SU binary – which the application will automatically offer you to do, the U22 will be soft bricked upon reboot, and will require a firmware flash using a cable and a PC. Learned that the hard way.
U22-XJ Video Playback testing (Using KODI)
Resolution Video Format Local Playback Network (Wi-Fi) Playback 720p (1280*720) AVC ([email protected]) Plays OK Plays OK 1080P (1920*1080) AVC (High@L4) Plays OK Plays OK 2160P (3840*2160) HEVC (H.265) Plays OK Plays OK 4K (4096*2304) AVC ([email protected]) Plays OK Plays OK 4K HDR HEVC Main 10@L5@High HDR10 Plays OK Some buffering 4K TS HEVC HEVC (H.265) 10Bit Plays OK Plays OK
Kodi 18.6 arrives pre-installed on the U22-XJ. Video performance is very good, although local network streaming was less than perfect (especially with 4k HDR content) even though the WiFi performance measured very well outside of Kodi.
* 8k video is not really usable in kodi, but I have found that these samples DID play locally (with some stutter and a bit of buffering) on MX Player Pro
Kodi add-ons tested quite well. IPTV streamed without issues. Also, this box contains a SDR to HDR and HDR to SDR capabilities. It makes the picture pop. Some would like it and some would not, but you can always turn that feature off.
Antutu Video Testing got mixed results: U22-XJ played all the videos in the test, aside for FLV and RMVB formats which failed. Video playback was pretty flawless in general.
U22-XJ Network performance
I tested the network performance using the popular Speedtest.net application from the play store. I tested both WiFi (the fastest WiFi supported – in this case 5GHz 802.11ac), and wired connection (in my case AV1200 Ethernet over power line). My home connection is a symmetric 500 Mb Fiber connection so it would not limit the testing (but the Ethernet over power line connection does) – Minix U22-XJ shows the strength of its MIMO antennas in the excellent WiFi performance, but less so with the LAN over Power-line connection:
WiFi 5Ghz
Wired, over power lines
According to the Speed test, the network connection performed amazingly on WiFi 5 GHz (probably due to the MiMo and hardware), but not so great on the wired connection. Since the wired connection is over powerline adapters, inferior speeds are to be expected.
U22-XJ Gaming performance
U22-XJ is definitely suited for smooth gaming – as long as you have a proper controller with which to play:
Asphalt 8 Airborne – a 3d graphic intensive racing game. Loads and runs smoothly, Using the included standard IR remote I could steer, but could not use Nitro..
Angry Birds 2 – a popular 2d action game. U22-XJ loaded the game fast and run smooth as butter – using an air mouse (not included). There is an issue where you cannot move from one stop to the next due to inability to click on an icon (clicking does nothing – also tried with a mouse), but that seems to be due to a game bug with this and some of the other TV boxes I tested.
Walking War Robots – an online robot warfare game that requires a game-pad (I don’t have a game-pad). U22-XJ loaded the game fast, and it run smoothly without issues. But full control was only possible via an air mouse with built in keyboard. otherwise, could only look around, but could not shoot or move with the standard IR remote.
U22-XJ Conclusions
Did I like it? Yes, it is another quality power performer from Minix.
Would I recommend it? Yes, even though there area few issues, they do not affect the stability or the performance of the box in general. (8k is not currently common, a requirement or officially available on this chipset, so it cannot be counted)
You like it! Where can you buy it? It’s not a cheap box, but starting at about 170 USD for the basic package, you can find it here: AliExpress.com Product – MINIX NEO U22-XJ TV BOX S922X-J Android 9.0 4GB DDR4 32GB eMMC Smart TV BOX Dolby Video Audio 4K UHD Media Hub 2.4G/5.0G WiFi
or here: MINIX Android 9.0 Pie Media Hub 4K Ultra HD Dolby Vision Dolby Audio HDR10+4GB DDR4/32GB eMMC HDMI 4K @ 60Hz 3 x USB 3.0 USB-C [data only] GLAN AC Wi-Fi TF Card (NEO U22-XJ)
Amazon Minix Store
Aliexpress Minix Store
Review | Minix Neo U22-XJ AMLogic S922-XJ TV Box Minix Neo U22-XJ is Minix's latest (and blazing fast!) Amlogic based Android TV Box! Based on Amlogic's most powerful S922-XJ SoC, you can now expect great HDR support as well as Dolby Vision straight out of the box.
#3dmark#9.0#a1sd#amlogic#android#antutu#benchmark#Dolby#fullhd#gpumark#HDR#internet#kodi#minix#neo#pcmark#pie#review#s922-xj#streamer#tv box#U22-XJ#UltraHD#Vision
0 notes
Text
Dump the Junk Software!
New Post has been published on https://myupdatesystems.com/dump-the-junk-software/
Dump the Junk Software!
Undoubtedly, some of my friends out there will wake up Christmas day and find a brand new shiny Windows-based computer under the tree. Or, maybe you have a computer that’s not that old, and you just want to get rid of the junk software. What do you do with it now that you have it, and where is the best place to start? The PC manufacturers want you to unpack it, fire it up and get busy, leaving all their crappy little software applications alone. My advice is that once you have it powered up and running, back away from the keyboard slowly to think for a moment. This article includes some facts and info for you to consider. Now, I am not asking you to take the case off and start disassembling it. I am just suggesting a few tweaks to the software before you dive in and start using it.
Let’s start where, hopefully your computer has already started for you automatically. Understand that the PC manufacturers keep the versions of their software, somewhat current, but the first thing that should happen when you start a new computer, is a Windows Update. The Windows Update goes out to the big Microsoft Server in the sky, and updates the operating system. During this update, it goes out and grabs entire new versions, version updates, and what are called patches, to the operating system. When a new virus or security hole in the operating system appears that needs fixing, sometimes the only way to fix i,t is with an upgrade or a patch to the software. That is where Windows Update comes in. Your new system should be set up, so that straight out of the box, it runs a Windows Update when it detects a network connection. That Windows Update will run on a schedule, and will go out and keep your machine current. If it doesn’t do it automatically, then click the Windows Control Panel’s “Windows Update” link and let it do its work.
The next thing you will possibly see, is a prompt from an internet Security program bundled into the software that came with your computer. The anti-virus developers play on your emotions, to make you think you are going to have all sorts of problems, if you don’t use their software. They give the software to you free for 30, 60 or 90 days, and then you are hooked. You have to sign up and give them a credit card for 12 months worth of their valuable service. My suggestion, is to uninstall their software asap, and download and install Microsoft Security Essentials. It is free, it comes from Microsoft, it integrates well with their Operating System, and in my humble opinion, it does a better job than the ones you have to pay for. You can search for Microsoft Security Essentials, or do a search and download. So my first suggestion is to dump the included anti-virus that comes with your PC, it will save you money and a lot of headaches down the road. To uninstall and then delete a program like the anti-virus that came with your new PC loaded with Windows 7, here is how you go about doing that. Go to your Control Panel and click the “Programs and Features” link. Scroll down in the list until you find the program you want to delete, and click the uninstall button at the top of the box. It is not a good idea to keep 2 anti-virus programs running at once. They may conflict with each other, so I would delete the one that came with the PC first, then download and install Microsoft Security Essentials. Next step is to update what are called plug-ins on your system. The most important plug-in is the Adobe’s Flash plug-in. Flash is used to play most web videos, and is also used in other content included in websites that requires user interaction. The latest version should be downloaded here. The next plug-in that needs installation is Adobe’s Reader X, it can be installed by downloading here. The Adobe Reader is used to read any PDF Files that might be emailed or sent to you. The next PDF related plug-in, is needed if you have Microsoft Office 2007 or Microsoft Word 2007 installed. That MS plug-in is the “Microsoft Save as PDF” plug-in for Word. It can be found here. It doesn’t hurt to install Oracle’s Java update, but it isn’t used much by most home users, and is required more in a business setting than for home use. Here is the location to download and install, if you ever need it.
Next step is to install some sort of backup system. In order for any backup system to work, you need to create the backup copies on an external disk. For most users, that means either an external USB hard disk drive or an external USB RDX drive. The RDX drive is a rugged hard drive, in a protective case, and is the more expensive option of the two, but they both give you the option of unplugging the disk, and plugging in a new disk, one allowing you to create more than one backup copy. The RDX is possibly overkill for a typical home user, but I mention them here just in case you want to go that route. You can find links on the web to look at RDX drive technology, my suggestion is to look for a Tandberg RDX drive, so you can see what one looks like and what I am talking about here. Most users will make backups to an external hard drive attached to their computer by plugging it into an available USB port. Once it is plugged in and the drivers are loaded for it, you treat it just like any other hard drive in the system. When you are done, you can either leave it plugged in or unplug it for safe keeping. If you data is highly critical, I would suggest unplugging it, storing it and plugging it back in, when you need to make a backup. There is a software developer located in Longmont, CO, that creates a very well featured software product and for the money ($99.00) you can’t buy a better backup product, for a laptop or a desktop computer. The product you want to look into is, the dataStor Pro Desktop version. Go online and search for their website for a demo of the product. Another, no cost option is always to use the backup software included inside Windows. The big differences are in usability, and the Pro Desktop software from dataStor includes data de-duplication, which is a great disk saving feature, and is a nice product for a home user to use. Download an evaluation and use it. If you like it, after evaluating it, you can buy it online with a credit card. To setup the free backup application that comes with Windows, start by going to Backup in the control panel or click start and type Backup in the search field and you will see the Backup application pop-up in the window or in Windows 7 you can click the little red flag that pops up in the bottom right corner of your screen. That little flag is Windows 7’s reminder that there are items that need attention. With Windows backup, you can backup to a CD, DVD or an external flash or hard drive. My recommendation is always backup your data to an external hard drive because it is quicker, easiest to use, and it provides the most capacity to store your data on. If you don’t own one, make sure you get one next time you make a tech purchase.
Now that we have addressed system security with Microsoft Security Essentials, and we discussed the need for a good backup of your system data using dataStors’ Pro Desktop product, let’s take a look at all the many icons on the desktop and clean that up a bit shall we? Any unused icons on the desktop, can be deleted or drug off to the recycle bin. When you delete the desktop icon, you are not deleting the application, only the icon that starts it. Uninstall any trial software using the uninstaller, we discussed earlier in this article. To get rid of unwanted tool bars, drag your mouse down to the task bar at the bottom of the screen. Find an empty spot and right-click. Up comes a menu and you want to click tool bars. Next, a small window will open up with all the installed tool bars listed. The ones with checkmarks are active, and you see them on the screen. If you un-check one of them, the tool bars will go away until you repeat the procedure and re-check the box next to it. When you have the tool bars the way you like them, on the way out click the link that says “lock the tool bars”. Next time you want to make adjustments, unlock them, make changes and lock the tool bars on the way back to your desktop.
There is a program, I will mention here, that might help you with your PC cleanup process. It is dangerous, so use it carefully! The program is the PC Decrapifier and can be downloaded here. The PC Decrapifier is absolutely free for personal use. However, if you have found it very helpful, and would like to show your appreciation, you can make a donation under the purchase tab. I dislike the included Windows browser, Internet Explorer very much. I prefer to use Mozilla’s Firefox browser. I find the Firefox Browser to be more intuitive and faster. Firefox can be downloaded here. Another option is Google’s Chrome browser, I am told it is faster, and that it updates it’s Adobe Flash and PDF plug-ins automatically. Chrome can be downloaded and installed here. As I have stated before, your PC is probably the biggest tool in your toolbox, at your disposal to use while you are reinventing yourself.
This article hopefully will help you whip a new computer into shape, as soon as possible. Besides there is nothing better than a finely tuned computer, ready to go and nothing worse than a poorly equipped, and under powered computer. As always, if you need help, ask for it. Only delete programs with the uninstaller included with Windows and before you delete anything, think twice. Software is a lot easier to delete than it is to reinstall. Since you have a new computer, call tech support and tell them what you are doing they most likely will be helpful. They have an interest in keeping the anti-virus and the other software installed, so remember that, and stand your ground if you want to uninstall it. I hope this all helps and I hope all my friends have a very Prosperous New Year!
I am Mark McIntyre, and I write about reinventing yourself. Not the kind of reinvention you get on a couch paying someone by the hour. The kind of reinvention you get, when you want to, or need to change your circumstances. I provide practical tools, tips, techniques and tactics, that a healthy balanced individual like you and I, can use to reinvent ourselves with. The best place to start is by looking in the mirror. I hope you enjoy my twist on things, and that the tips I pass along are useful to you. If the articles I write are useful to you, I hope you will come back often, and tell your friends about them.
0 notes
Text
How Small Business And Nonprofits Can Afford Multimedia For The Web
New Post has been published on https://netmaddy.com/how-small-business-and-nonprofits-can-afford-multimedia-for-the-web/
How Small Business And Nonprofits Can Afford Multimedia For The Web
Undoubtedly, some of my friends out there will wake up Christmas day and find a brand new shiny Windows-based computer under the tree. Or, maybe you have a computer that’s not that old, and you just want to get rid of the junk software. What do you do with it now that you have it, and where is the best place to start? The PC manufacturers want you to unpack it, fire it up and get busy, leaving all their crappy little software applications alone. My advice is that once you have it powered up and running, back away from the keyboard slowly to think for a moment. This article includes some facts and info for you to consider. Now, I am not asking you to take the case off and start disassembling it. I am just suggesting a few tweaks to the software before you dive in and start using it.
Let’s start where hopefully, your computer has already started for you automatically. Understand that the PC manufacturers keep the versions of their software, somewhat current, but the first thing that should happen when you start a new computer is a Windows Update. The Windows Update goes out to the big Microsoft Server in the sky and updates the operating system. During this update, it goes out and grabs entire new versions, version updates, and what are called patches, to the operating system. When a new virus or security hole in the operating system appears that needs fixing, sometimes the only way to fix I,t is an upgrade or a patch to the software. That is where Windows Update comes in. Your new system should be set up, so that straight out of the box, it runs a Windows Update when it detects a network connection. That Windows Update will run on a schedule and will go out and keep your machine current. If it doesn’t do it automatically, then click the Windows Control Panel’s “Windows Update” link and let it do its work.
The next thing you will possibly see is a prompt from an internet Security program bundled with the software that came with your computer. The anti-virus developers play on your emotions, to make you think you are going to have all sorts of problems if you don’t use their software. They give the software to you free for 30, 60 or 90 days, and then you are hooked. You have to sign up and give them a credit card for 12 months worth of their valuable service. My suggestion is to uninstall their software asap and download and install Microsoft Security Essentials. It is free, it comes from Microsoft, it integrates well with their Operating System, and in my humble opinion, it does a better job than the ones you have to pay for. You can search for Microsoft Security Essentials, or do a search and download. So my first suggestion is to dump the included anti-virus that comes with your PC, it will save you money and a lot of headaches down the road. To uninstall and then delete a program like an anti-virus that came with your new PC loaded with Windows 7, here is how you go about doing that. Go to your Control Panel and click the “Programs and Features” link. Scroll down in the list until you find the program you want to delete and click the uninstall button at the top of the box. It is not a good idea to keep 2 anti-virus programs running at once. They may conflict with each other, so I would delete the one that came with the PC first, then download and install Microsoft Security Essentials. Next step is to update what are called plug-ins on your system. The most important plug-in is the Adobe’s Flash plug-in. Flash is used to play most web videos and is also used in other content included in websites that requires user interaction. The latest version should be downloaded here. The next plug-in that needs installation is Adobe’s Reader X, it can be installed by downloading here. The Adobe Reader is used to read any PDF Files that might be emailed or sent to you. The next PDF related plug-in is needed if you have Microsoft Office 2007 or Microsoft Word 2007 installed. That MS plug-in is the “Microsoft Save as PDF” plug-in for Word. It can be found here. It doesn’t hurt to install Oracle’s Java update, but it isn’t used much by most home users and is required more in a business setting than for home use. Here is the location to download and install, if you ever need it.
Next step is to install some sort of backup system. In order for any backup system to work, you need to create the backup copies on an external disk. For most users, that means either an external USB hard disk drive or an external USB RDX drive. The RDX drive is a rugged hard drive, in a protective case, and is the more expensive option of the two, but they both give you the option of unplugging the disk and plugging in a new disk, one allowing you to create more than one backup copy. The RDX is possibly overkilled for a typical home user, but I mention them here just in case you want to go that route. You can find links on the web to look at RDX drive technology, my suggestion is to look for a Tandberg RDX drive, so you can see what one looks like and what I am talking about here. Most users will make backups to an external hard drive attached to their computer by plugging it into an available USB port. Once it is plugged in and the drivers are loaded for it, you treat it just like any other hard drive in the system. When you are done, you can either leave it plugged in or unplug it for safe keeping. If your data is highly critical, I would suggest unplugging it, storing it and plugging it back in, when you need to make a backup. There is a software developer located in Longmont, CO, that creates a very well featured software product and for the money ($99.00) you can’t buy a better backup product, for a laptop or a desktop computer. The product you want to look into is the dataStor Pro Desktop version. Go online and search for their website for a demo of the product. Another, no cost option is always to use the backup software included inside Windows. The big differences are in usability, and the Pro Desktop software from dataStor includes data de-duplication, which is a great disk saving feature and is a nice product for a home user to use. Download an evaluation and use it. If you like it, after evaluating it, you can buy it online with a credit card. To setup the free backup application that comes with Windows, start by going to Backup in the control panel or click start and type Backup in the search field and you will see the Backup application pop-up in the window or in Windows 7 you can click the little red flag that pops up in the bottom right corner of your screen. That little flag is Windows 7’s reminder that there are items that need attention. With Windows backup, you can backup to a CD, DVD or an external flash or hard drive. My recommendation is always backup your data to an external hard drive because it is quicker, easiest to use, and it provides the most capacity to store your data on. If you don’t own one, make sure you get one next time you make a tech purchase.
Now that we have addressed system security with Microsoft Security Essentials, and we discussed the need for a good backup of your system data using dataStors’ Pro Desktop product, let’s take a look at all the many icons on the desktop and clean that up a bit, shall we? Any unused icons on the desktop can be deleted or drug off to the recycle bin. When you delete the desktop icon, you are not deleting the application, only the icon that starts it. Uninstall any trial software using the uninstaller, we discussed earlier in this article. To get rid of unwanted toolbars, drag your mouse down to the taskbar at the bottom of the screen. Find an empty spot and right-click. Up come a menu and you want to click toolbars. Next, a small window will open up with all the installed toolbars listed. The ones with checkmarks are active, and you see them on the screen. If you un-check one of them, the toolbars will go away until you repeat the procedure and re-check the box next to it. When you have the toolbars the way you like them, on the way out click the link that says “lock the toolbars”. Next time you want to make adjustments, unlock them, make changes and lock the toolbars on the way back to your desktop.
There is a program, I will mention here, that might help you with your PC cleanup process. It is dangerous, so use it carefully! The program is the PC Decrapifier and can be downloaded here. The PC Decrapifier is absolutely free for personal use. However, if you have found it very helpful, and would like to show your appreciation, you can make a donation under the purchase tab. I dislike the included Windows browser, Internet Explorer very much. I prefer to use Mozilla’s Firefox browser. I find the Firefox Browser to be more intuitive and faster. Firefox can be downloaded here. Another option is Google’s Chrome browser, I am told it is faster, and that it updates it’s Adobe Flash and PDF plug-ins automatically. Chrome can be downloaded and installed here. As I have stated before, your PC is probably the biggest tool in your toolbox, at your disposal to use while you are reinventing yourself.
This article hopefully will help you whip a new computer into shape, as soon as possible. Besides, there is nothing better than a finely tuned computer, ready to go and nothing worse than a poorly equipped, and under the powered computer. As always, if you need help, ask for it. Only delete programs with the uninstaller included with Windows and before you delete anything, think twice. The software is a lot easier to delete than it is to reinstall. Since you have a new computer, call tech support and tell them what you are doing they most likely will be helpful. They have an interest in keeping the anti-virus and the other software installed, so remember that, and stand your ground if you want to uninstall it. I hope this all helps and I hope all my friends have a very Prosperous New Year!
I am Mark McIntyre, and I write about reinventing yourself. Not the kind of reinvention you get on a couch paying someone by the hour. The kind of reinvention you get, when you want to, or need to change your circumstances. I provide practical tools, tips, techniques, and tactics, that a healthy balanced individual like you and I, can use to reinvent ourselves with. The best place to start is by looking in the mirror. I hope you enjoy my twist on things, and that the tips I pass along are useful to you. If the articles I write are useful to you, I hope you will come back often, and tell your friends about them.
0 notes
Text
Microsoft Surface Studio scores big for creatives, but the Dial is just lame
Mashable illustrator Bob-Al Greene draws in Sketchable with the Surface Pen and Surface Dial on the Microsoft Surface Studio.
Image: Lili Sams/Mashable
For the two weeks that the Microsoft Surface Studio sat at my desk, it attracted a lot of attention. I’m an illustrator and I work with a lot of other creatives, and artists love to look at something beautiful. There were plenty of Oohs and Aahs, and the beautiful simplicity of the device was demonstrated when, for about 15 minutes, five co-workers gathered around my desk as we went on a tour of the world via Google Maps.
SEE ALSO: Dell Canvas gives you Surface Studio abilities without the luxury price tag
Navigating a 3D satellite view of New York City became a magical experience. Swiping a single finger on the screen allowed for rotating vistas that looked incredible. Was this a high point of artistic achievement? No. Was it insanely fun and beautiful, just because it was on the Studio? Yep.
3D Google Maps on the Surface Studio is an insanely fun and beautiful experience.
Image: Lili Sams/Mashable
Let me back up for minute: I’m Mashable‘s senior illustrator my job is to create the art and graphics that accompany our stories on our website and across our various social channels. In other words, I’m exactly the kind of person Microsoft is trying to appeal to with the Surface Studio, the company’s sleek and powerful all-in-one PC.
In a splashy press event last fall, Microsoft unveiled the Surface Studio and showed off its arsenal of tools and toys for drawing, drafting and painting on its large digital canvas. The news immediately piqued my interest since I spend almost all of my time at work on a Wacom Cintiq 22-inch touchscreen tablet, making things like this:
Image: bob al-greene/mashable
The Cintiq is a top-of-the-line device and allows artists to draw directly on the screen almost as if they were working on paper. Ive worked on various models from Wacom over the years, and the experience on the Cintiq is closest to the feeling of “traditional” tools of pen and ink. However, it functions as a second screen that I use solely for art creation; my everyday tasks, like web browsing and email, I do on an iMac.
The author’s Wacom Cintiq tablet workstation.
Image: Bob Al-Greene/Mashable
That would change with the Surface Studio, which puts all of your tools in one machine. I’d been thinking about the device’s promise an enormous, beautiful screen housing an all-in-one creative suite so I jumped at the opportunity to switch out my 27-inch iMac and Cintiq for a week or two and work exclusively on the Studio.
At the same time, I was apprehensive: I havent owned or regularly used a Windows device in more than five years. But the transition from macOS to Windows 10 was smooth, and with the exception of some hot-key confusion (curse that Ctrl button!) I was able to focus entirely on the hardware which is a good thing, because there is a lot to take in on the Surface Studio.
Elite Studio
The Surface Studio is a remarkably simple and elegant device. The massively immersive 28-inch screen is attached to the rectangular base by a pair of dual-hinged struts what Microsoft calls the “zero gravity hinge.” The base has to be heavy so you dont inadvertently shift your entire workstation every time you adjust the reclining screen. Ports are in the back of the base four USB 3.0, an SD card slot, a Mini DisplayPort, a headphone jack and Gigabit Ethernet along with the lone power cord.
The Surface Studio makes for an impressively austere workstation.
Image: Lili Sams/Mashable
I tested the fully tricked-out Surface Studio with an Intel Core i7 processor, 2TB of storage, 32GB of RAM and an Nvidia GeForce GTX980M graphics card with 4GB of GPU-dedicated RAM. All that power means a price tag of $4,199, up from the base model at $2,999. The high price might be a turn-off for some, but consider that a 22-inch Wacom Cintiq retails for $1,799 and it needs a separate computer to function.
All the ports in back: 4 x USB 3.0, Gigabit Ethernet, Mini DisplayPort, microSD, headphone jack.
Image: Lili Sams/Mashable
As I disassembled my usual workstation, I was frustrated by the tangle of cords and adapters connecting my Cintiq to power and to my iMac. Despite my best efforts to keep them organized, theyd become tangled, making unplugging a chore. Replacing it all with the Surface Studio doubled my extra desk space instantly and made my whole area feel cleaner and more organized. All I had to plug in was one cord, for power. I booted it up, and within minutes I was creating art.
Getting Immersed
The Surface Studio boasts an expansive 28-inch display, and, at 192 pixels per inch (ppi), everything on it looks and feels crystal clear. The experience of using it is incredibly immersive: The screen is so large that it hides the heavy base and hinge from view, so the display seems to float on its own, magically just “there” in front of your face. In the words of one of my animator colleagues, five minutes after sitting down with the Studio: I feel like Im in my art.
Id never worked on a touchscreen computer before now. I have an iPad at home and Ive experimented with the iPad Pro and Surface Pro, but the ability to touch a screen and manipulate programs with my fingertips on a desktop computer seemed extraneous and unnecessary.
The Surface Studio’s 28-inch screen bestows the feeling of getting immersed in your art.
Image: Lili Sams/Mashable
The Surface Studio taught me the exact opposite was true. I quickly eschewed the mouse in favor of the more direct interaction offered by the Surface Pen and the five styluses on my own right hand.
With 10-point multitouch, you can really do anything you need to on the Studio with your fingers. Pinching to zoom or rotate an image, scrolling with two fingers, tapping a link quickly with the pad of my index finger, all of this quickly became second nature, as the Studio recreates the feeling of manipulating flat paper on a desk. The ease and simplicity also makes switching between programs a necessity when working on one screen rather than two less of a chore.
After you work on the Surface Studio, you’ll want to touch all your screens.
Image: Lili Sams/Mashable
In fact, when I did some work on my home workstation later that evening, I caught myself intermittently trying to tap my iMac screen and wishing I had touch capability on my 13-inch Cintiq (a smaller version of my work tablet). I turned this function off within a week of setting up my Wacom tablet, but now I want to give it another try. I suspect the palm rejection on the Surface Studio is more advanced than on the Cintiq, and Ill probably find myself missing the intuitive interface of this gorgeous device. Apple, give us a touchscreen iMac already!
Using the Surface Studio mouse a cheap-feeling, dull gray, plastic blob with a scroll wheel felt unnatural and often unnecessary compared with the touchscreen. That’s partly because the mouse is overly sensitive and twitchy compared to the Apple Magic Mouse Im used to. But also, when a device features five input mechanisms a keyboard, a mouse, a stylus, a dial (more on that in a minute) and your own hand youre bound to start ignoring one.
One sleek all-in-one
Two things about the Surface Studio cant be overstated: the crystal-clear display and the thinness of the screen. At only 0.34 of an inch (8.6mm) along the edge (and 0.49 inch at the center), the Studio puts the bulging back of the iMac to shame. And the ridiculously high resolution (4,500 x 3,000) means 4K videos look next-level gorgeous (heck, I was thrilled enough with a 4K desktop wallpaper).
The Microsoft Surface Studio is an unbelievably slim all-in-one.
Image: Lili Sams/Mashable
As loyal as I am to my Cintiq, its worth noting that the color display has never been perfect. No matter how many times Ive adjusted the RGB settings on both devices, they never quite match their accompanying iMacs in terms of color saturation and tone. This means double-checking and adjusting every piece of art I make on two screens. But by using just one screen with an sRGB display, this problem disappears on the Surface Studio.
I would be remiss without mentioning two other functions the Studio boasts over my usual work setup: Cortana and Windows Hello. The former, an easily accessible voice-controlled desktop assistant, I found competent but superfluous. Id expect to use it about as much as I use Siri on desktop, which is to say: not much. But Windows Hello which uses face-scanning technology to recognize me and automatically log me in every time I sat down at the Studio was easy to set up and felt pretty cool every time. Again, the word I keep coming back to with the Studio is magical.
Call it a draw
Im ambivalent about making the switch from a Wacom stylus to the Surface Pen. On one hand, its a fine-looking instrument: Sleek and silver, it’s slimmer and shorter, yet heavier, than the Wacom stylus.
The Surface Pen feels natural in my hand, and I was surprised to learn that many of my colleagues dislike the fatter Wacom stylus, which does feel like a fat kindergarten crayon by comparison. To me, both are more than fine.
The Surface Pen was very capable, but lacked the same precision and tools as a Wacom stylus.
Image: Lili Sams/Mashable
Where the Surface Pen loses out is functionality. To start off, the Pen touts 1,024 levels of pressure sensitivity precisely half of the Wacom Cintiqs 2,048. So expect less pressure control right off the bat. I do a lot of drawing and often need to vary line width based on how much pressure Im applying, so I want the highest level of pressure control possible. The Surface Pen is just not that.
The Surface Pen touts 1,024 levels of pressure sensitivity precisely half of the Wacom Cintiqs 2,048.
Beyond that, theres the issue of customization. Every Wacom stylus Ive used has two buttons on the side that can be programmed to suit the user. I personally use one button as a Pan/Scroll shortcut, and the second to right-click. The Surface Pen has only one button on its side, with only one programmable action: a right-click function I found sluggish.
The Pens shortcut button, located where you would find an eraser on a pencil, offered more promise to me as a first-time user. Its Eraser function not so much its quicker and easier to just use a keyboard shortcut than to constantly be flipping the Pen back and forth in my hand but the Windows Ink Workspace allows for some cool tricks.
A double-click, for instance, brings up Screen Sketch mode and instantly creates an editable screenshot that I can draw on, crop, and save. I take a lot of screenshots on my Mac, so having this function programmed right into my Stylus was refreshing.
Another big feature of the Surface Pen is that it can be magnetically attached to either side of the Studios massive screen at any time. Im a bit absent-minded and I often misplace my Wacom stylus or let it roll underneath my tablet, then have to scrounge around my entire desk looking for it. Not so with the magnetic Stylus Pen. Kudos, Microsoft!
The power of gravity
A lot of the Surface Studios reputation as a revolutionary device hinges on one element: namely, the “zero gravity” hinge. Because its been designed as a multi-purpose creative tool for artists, photographers, designers, videographer and musicians, the Studios screen can be tilted and readjusted almost instantaneously based on what you want out of it.
The Surface Studio’s “zero gravity” hinge.
Image: Lili Sams/Mashable
So if youd prefer to work on a nearly flat 20-degree incline in Studio Mode, or the more traditional 90-degree Desktop Mode, or somewhere in between, the choice is up to you.
Angling the screen is effortless and cool every time the ease of adjustment makes it a cinch to find your preferred angle instantly. I typically grabbed the screen by its left and right edges to adjust, but you can lift it from the bottom with one hand or press it down with a single finger. Its that easy. The process is smooth and virtually silent, reinforcing the illusion that this is not a grounded device but a levitating screen.
Detail shot of the Surface Studio’s elegant rear #hinge http://pic.twitter.com/dxv7wfYG1v
Bob Al-Greene (@BobAlGreene) February 15, 2017
This light-touch adjustment is both a great strength and one of the Surface Studios few apparent flaws. I prefer to have my screen closer to a 45-degree angle when Im drawing. The Studio accommodated me and it was easy to find my perfect position and begin drawing but I found that applying too much pressure with the stylus would push the screen down slightly, changing the angle.
This happens because the hinge was designed without the locking mechanism seen on devices like the Wacom Cintiq. Of course, the absence of a lock also makes the experience intuitive and smooth, but it’s a trade-off. I hope Microsoft can incorporate some kind of locking mechanism into a future model of the Surface Studio while keeping the adjustment process smooth, simple and elegant.
Dial me out
The other big star of show, if less central to the Surface Studios function, is the Surface Dial. Microsoft has hyped it as a completely new way to interact with technology, though third-party dials have been available for years. This Dial is sold separately from the Studio, retailing for $99.99.
I found it to be a confounding little device.
The Microsoft Surface Dial
Image: Lili Sams/Mashable
Smooth, sleek and silver, the Dial feels heavy in your hand, like a paperweight, and at first it seems far more impressive than the Surface Studios mouse. The Dials high-friction rubber underside allows it to stick to your screen (sort of), but most of the time I left it sitting on my desk behind the keyboard. In this default mode the Dial has five basic functions (with two extra programmable slots): Volume, Play Next Track, Scroll, Zoom and Undo. Users can switch between these functions by pressing and holding on the dial, which brings up a circular pop-up menu.
The main functions stay the same, but some programs grant the Dial extra powers. Placing it on the screen makes it even more powerful; in the drawing program Sketchable, for instance, the Dial becomes a super-charged homebase for brush controls. Line weight, opacity, brush shape, color and more are all editable, on the fly, while youre drawing. It makes for some eye-catching demonstrations, but Im not convinced its useful in my day-to-day workflow.
The Surface Dial lets you change the color of your brushstroke on the fly.
Image: Lili Sams/Mashable
The Dial started to frustrate me when I realized it didnt truly stick to my screen. I had assumed, based on the demo videos Id seen, that its sticky base would allow it to cling to the screen wherever I placed it, like a phone on a car dashboard. Even on a tilted screen, I expected the Dial to hold on (at reasonable angles anyway).
Instead, I found that the Dial immediately starts to slide down the screen when you place it, no matter how gentle that angle is. Even at the Studios flattest setting 20 degrees the Dials slow creep downward is visible, made more obvious by the way the devices circular menu lags behind before following the Dial downward every few seconds.
At the 20-degree setting, with a freshly cleaned screen, the Dial takes about 6 minutes to slide from the top of the screen to the bottom. It moves twice that speed when the screen has been in use; it seems the oils from my fingerprints and smudges make the screen slicker. Such is touchscreen life.
“Dial creep” on the Surface Studio after cleaning the screen with a screen wipe. Noticeably slower descent. Time lapse by @KeithHopkin http://pic.twitter.com/RB6k7waPYO
Bob Al-Greene (@BobAlGreene) February 15, 2017
“Dial creep” on the Surface Studio screen at its lowest setting. Time lapse by @KeithHopkin http://pic.twitter.com/ExCDritEWR
Bob Al-Greene (@BobAlGreene) February 15, 2017
All of this simply means that the Dial cannot be placed onscreen and left until you need it again if you want to use the Dial onscreen, Microsoft wants you to hold it there. Its not an oversight or flaw on their part; this is how the designers want you to use it.
This essentially confirms one of the biggest fears I had about the Surface Studio: that using the Dial would be a constant routine of picking it up, placing it on screen, then placing it back on my desk. For what the Dial offers, this extra work isnt quite worth the payoff.
But the sliding was only the beginning.
Mo’ Dial, mo’ problems
I found the Surface Dial to have problems in almost every way I used it. Lets take a look at its five core functions:
Volume: This is probably the most intuitive of the dial’s “main” functions. Using a dial to control volume is not a strange concept to anyone, and the fine-tuning of the dial allows you to quickly and naturally find the perfect volume. If youre listening to music while you work, it makes the most sense to leave the dial in volume mode.
God help you, though, if you then decide to use the Dial for something else: If it’s in a different mode and you want to change the volume with it, you’ll have to hold down the Dial for a moment, navigate to the volume control function, click it, and then rotate to change the volume. Thats four steps to do something I can do now by hitting one key at the top of the keyboard (or by using the volume buttons on the righthand side of the screen).
The Surface Dial is often more trouble than it’s worth.
Image: Lili Sams/Mashable
Play next track: Brings up a widget with Play, Pause, Next and Last Track and Volume controls. I found tapping the screen more intuitive than using the Dial to skip tracks.
Scroll: Scrolling with the dial is a pleasant and smooth experience, but just marginally more pleasant than the mouses scroll wheel. I’d still rather use my iMac’s Magic Mouse or Trackpad both of which allow for side-to-side panning, not just vertical scrolling.
Zoom: Working in art programs like Photoshop and Sketchable, I found myself far more likely to use the pinch-and-zoom capability of the touchscreen, which is more intuitive and precise, and allows for rotation at the same time.
The Surface Dial and the Surface Studio mouse.
Image: Lili Sams/Mashable
Undo: This is a big one. The Dial becomes a full-on time machine in Undo mode. When activated, the onscreen Dial display shows your work progress as a percentage 100% is your current stage (the present), and 0% is the first stroke you made (the past). By turning the wheel counterclockwise, you travel backward through your work at the pace you decide.
The Dial so sensitive that getting back to any specific point, even one or two steps backward, is a challenge bordering on impossible.
It might sound cool, but this function is the most frustrating to me. With the super-sensitive Dial, moving just one step at a time takes a light touch. In my workflow and that of the artists I talked to, the Undo command is usually used to go back only a step or two to fix an error. For anything more than that, I typically use the History panel in Photoshop. This panel displays dozens of previous steps and labels them, allowing me to quickly navigate to a point in time.
The problem with the Dial is it’s so sensitive that getting back to any specific point, even one or two steps backward, is a challenge bordering on impossible, and I found myself repeatedly getting stuck in loops erasing too much, then jumping too far forward, then too far back, then too far forward.
Moreover, I frequently experienced lag when rewinding quickly or going backward more than, say, 10% at a time. This led to several frustrating moments spent helplessly watching my art unmaking itself far beyond what I intended, knowing I would have to immediately turn the dial back forward again. The effect of rewinding the creation of art makes for a flashy visual, but not when you cant control it effectively. More feedback from the dial or a ratcheting effect within the mechanism could increase the precision, but for now, Undo is an monster you should never unleash on your work.
One last note about the Dial. Just like adding pressure with the Pen, pressing the Dial can occasionally cause the screen to tilt down. In this way, the two premier aspects of the Surface Studio the Dial and the Hinge work together to make the overall experience imperfect. Oh, well.
A Studio worth visiting
At the end of my time with the Microsoft Surface Studio, I did not want to give it up. Considering what a joy it is to work on my regular Cintiq, thats saying quite a bit. Despite its few obvious faults the lack of a locking mechanism on the hinge, and a Dial that I have all but given up on it remains a compelling and undeniably gorgeous instrument.
One of the pieces of art the author created on the Surface Studio.
Image: Bob Al-Greene/Mashable
As a graphic artist and designer, I was able to adapt the Studio to my daily workflow fairly quickly. An animator colleague of mine used it for an afternoon to create motion graphics and found it up to the task of her workload as well. I have no doubt that artists of all stripes illustrators, musicians, filmmakers, architects, and more will find uses for the Studio and create beautiful things with it.
As hard as I am on the Dial, Im likewise sure some artists will find it an interesting and eventually an intrinsic part of their creative process, but its not the right device for me right now. Luckily, Microsoft isnt pushing anyone to buy it you certainly dont need it to fully enjoy the charms of the Surface Studio.
The Microsoft Surface Studio.
Image: Lili Sams/Mashable
So, is this the next big thing for digital artists? After years of Apple being the default brand for young creatives, is Microsoft going to carve out some of that space with the Surface Studio? Well, your mileage may vary. If youre a creative just starting out in your career, or if you dont have a significant chunk of change to drop on it, then there are certainly more affordable ways to piece together your own creative studio.
But if, like me, youre in a place where you can request devices from your employer for your professional work (wink wink), or if youre ready to take a plunge and switch up your creative process at home, then you’ll find lots to love within the Surface Studio’s canvas.
Microsoft Surface Studio
The Good
Huge, gorgeous, immersive 4,500 x 3,000 display Easily adjustable hinge True color sRGB gives it an edge over Wacom Cintiqs wonky color settings
The Bad
Sensitive rear hinge needs a locking mechanism Surface Dial is a clumsy peripheral High price tag and Windows 10 are a hard sell for Mac loyalists
The Bottom Line
Artists will love the immersive, creative workstation that is the Microsoft Surface Studio, but the Surface Dial is a poorly thought out accessory.
Read more: http://ift.tt/2krkiFG
from Microsoft Surface Studio scores big for creatives, but the Dial is just lame
0 notes