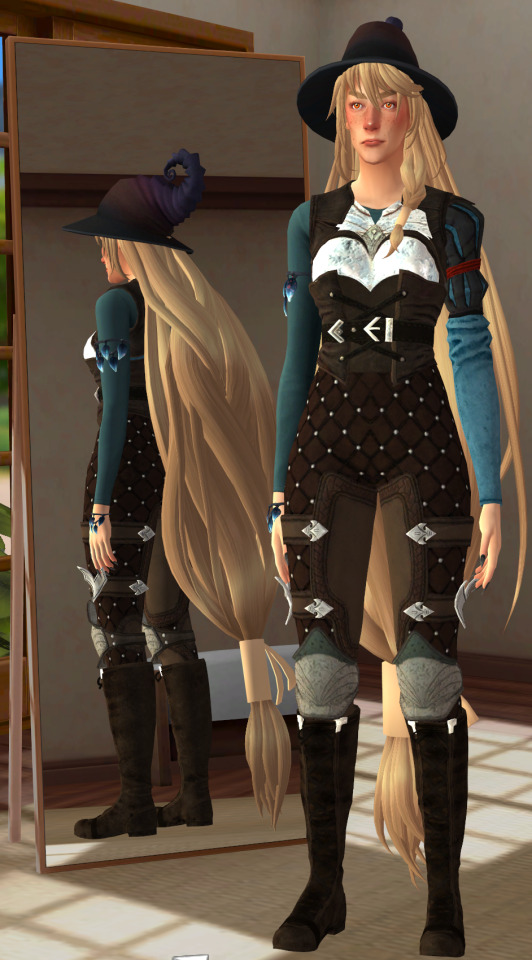
#and my god the darker skin options in CC for origins makes them look like they're covered in dirt instead of it being natural skin >:T
Explore tagged Tumblr posts
Visit Tumblr Blog
Explore Tumblr blogs with no restrictions, modern design and the best experience.
Last Seen Tumblr Blogs


Fun Fact
Tumblr Inc. has $15.1M in annual revenue.
Text
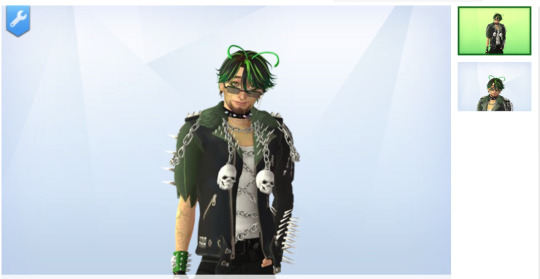
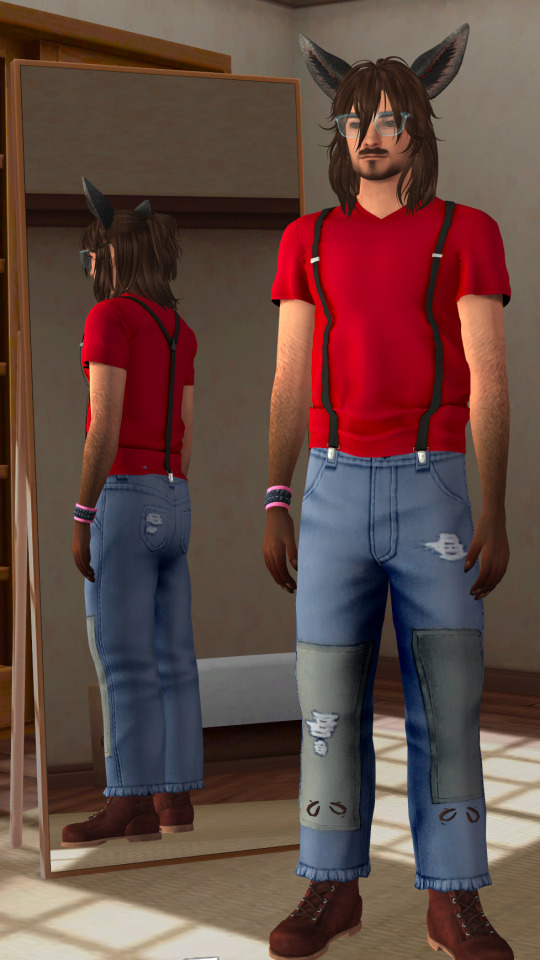
small [read: lengthy] mcrp (traffic/hermits) sims update
No more new DSMP sims, but a bunch of [the same] Hermits/Traffic sims! Mostly - mostly just Joels. The way I’m doing this is making each character, and then colour palette swapping them for each life stage in each series.
I kind of did SB out of order cause i watched LimLife first, so i knew that skin best (aside from his standard human shrek skin that i kind of mostly just want to....... ignore.... because its. it’s. it’s human shrek guys. i don’t - i can’t. I refuse.) ANYWAY yeah so we’ve got;
LimLife; green and red.

double life; green
I’m probably gonna change his hair idk. DL!Joel isn’t set in stone yet. (Once I get to life stage swapping of colours i will fucking refuse to change anything about the design because OH GOD how long that would take.....)
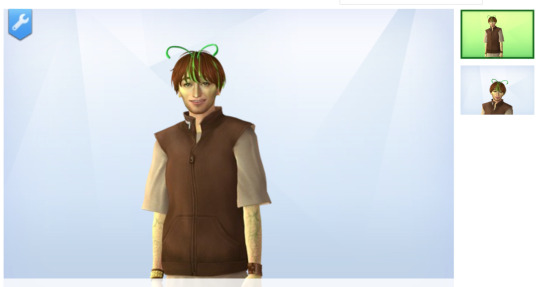
last life; green is currently in progress.
Taking liberties too for variety’s sake. Not that he spent long on Green or Yellow in LastLife, lol. Still. Ignore the crown is floating; the height slider mod and the hat slider mod (for adjusting the positon of hat-category CC, not always hats though) conflict with each other as they use the same slider location (neck). REALLY annoying. Used to exist a height slider that used the front foot location instead of the neck and I wish it still worked so I could have them both in game at the same time... alas. Also if you remove the hat slider the hats reset to original position, which is horrendous. If you remove the height slider this is not the case, so basically; do heights first, then hats. Learnt this the hard way. Annoying, though, because if they’re too short you can’t access the neck in order to adjust hat position........... ugh. Problem for future Cesca to deal with. I do have the hairs I’ll be using for Yellow and Red LastLife Joel already set aside, though. There’s so much shit I have to keep track of for this project lmao. Might swap the pinkish/reddish crown over to his greenlife and use the gold one for yellow because..... it’s... yellow. Obviously. Don’t know why I thought I needed to explain that one...Canonically he’s wearing the black crown during his redlife, so. You know. Can’t really mess with that one.
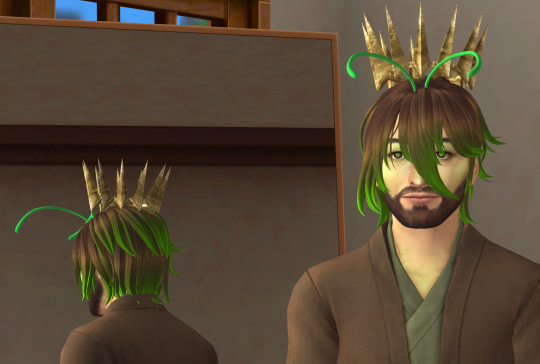
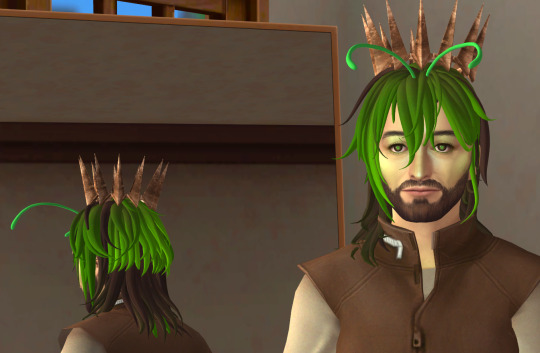
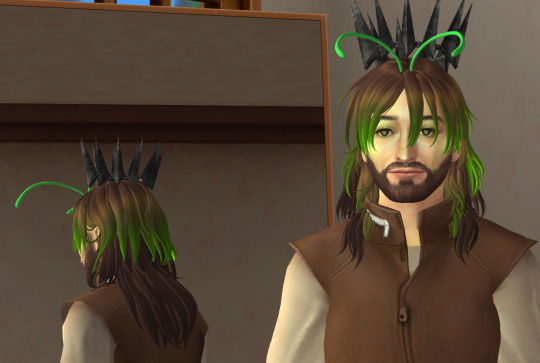
3rd life; green, yellow and red.
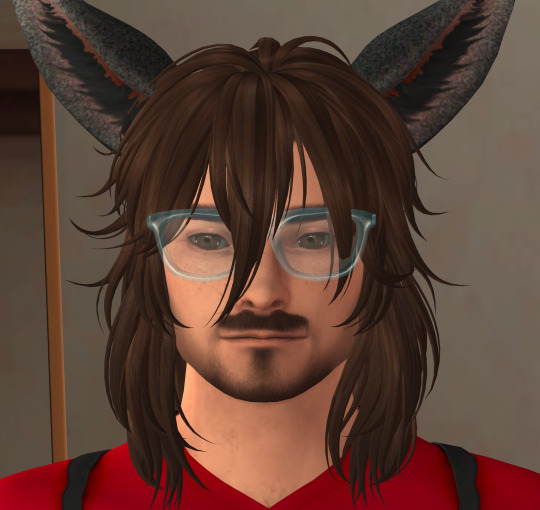
Yeah i went with the wolf thing as best I could for variety’s sake. Also like a kind of transformative corruption or whatever idk what the fuck i’m talking about. Loads of fanart gives him antennae (I guess as a way of interpreting the shrek ears?) so I just. Went with that. Why not. Alien man. Sure. Skin tinted green, yellow and red on each life. There are SO many swatches i have to swap around guys. so many. just so many. The reason i haven’t colour palette swapped LimLife!Yellow!Joel yet is bc. oh god the number of swatches i’m going to have to swap around....
Couple higher res images;
Green!3rdLife / Mazalean King!Joel, hence the purple streaks. I use an eye shine for the Traffic versions as an extra way to distinguish between non-death game versions of the characters and their usual selves. This is also what i consider Joel’s ‘default’ hairstyle to be, I guess. For now.
Couldn’t really tell in the preview, but red!3rdLife Joel is. just. that’s a lot of blood. (Not his.)
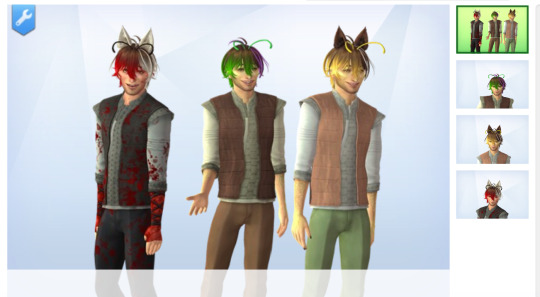
For obvious reasons, my favourite Joel to make was LimLife joel.
OTT? Absolutely. As he should be. Ik the darker green/teal dye is a bit glitched but i just used whatever I could find that worked. Can’t be arsed to replace with a better option now I have one, which I did use for the red!life and will use for the yellow. I still think it looks pretty great so I don’t really care. These glasses took FOREVER to find btw. But they’re perfect <3 so. Worth it. I also saw people draw LimLife!Joel with some kind of goatee-esque facial hair, unlike his usual design (and the times he has a full beard, like LastLife and Empires s2), and you know. Go big or go home! Especially with a Joel design. (Or a Scar design, for that matter.) So I went with that, too. Not dyed though because. Maximalism. Also I’m pretty sure everyone’s like in their 30s and I’m not checking that assumption. Jsyk. LimLife Joel is having a midlife crisis a decade too early <3. Anyway I finally got a chance to use all my alt cc i’ve been saving up for soooooo long because it’s so fun. So that’s nice. Pathetic worst loser gang Bad Boys trio my beloveds <3. Can’t wait to make tryhard failing at punk LimLife!Jimmy. That’s gonna be so fun.
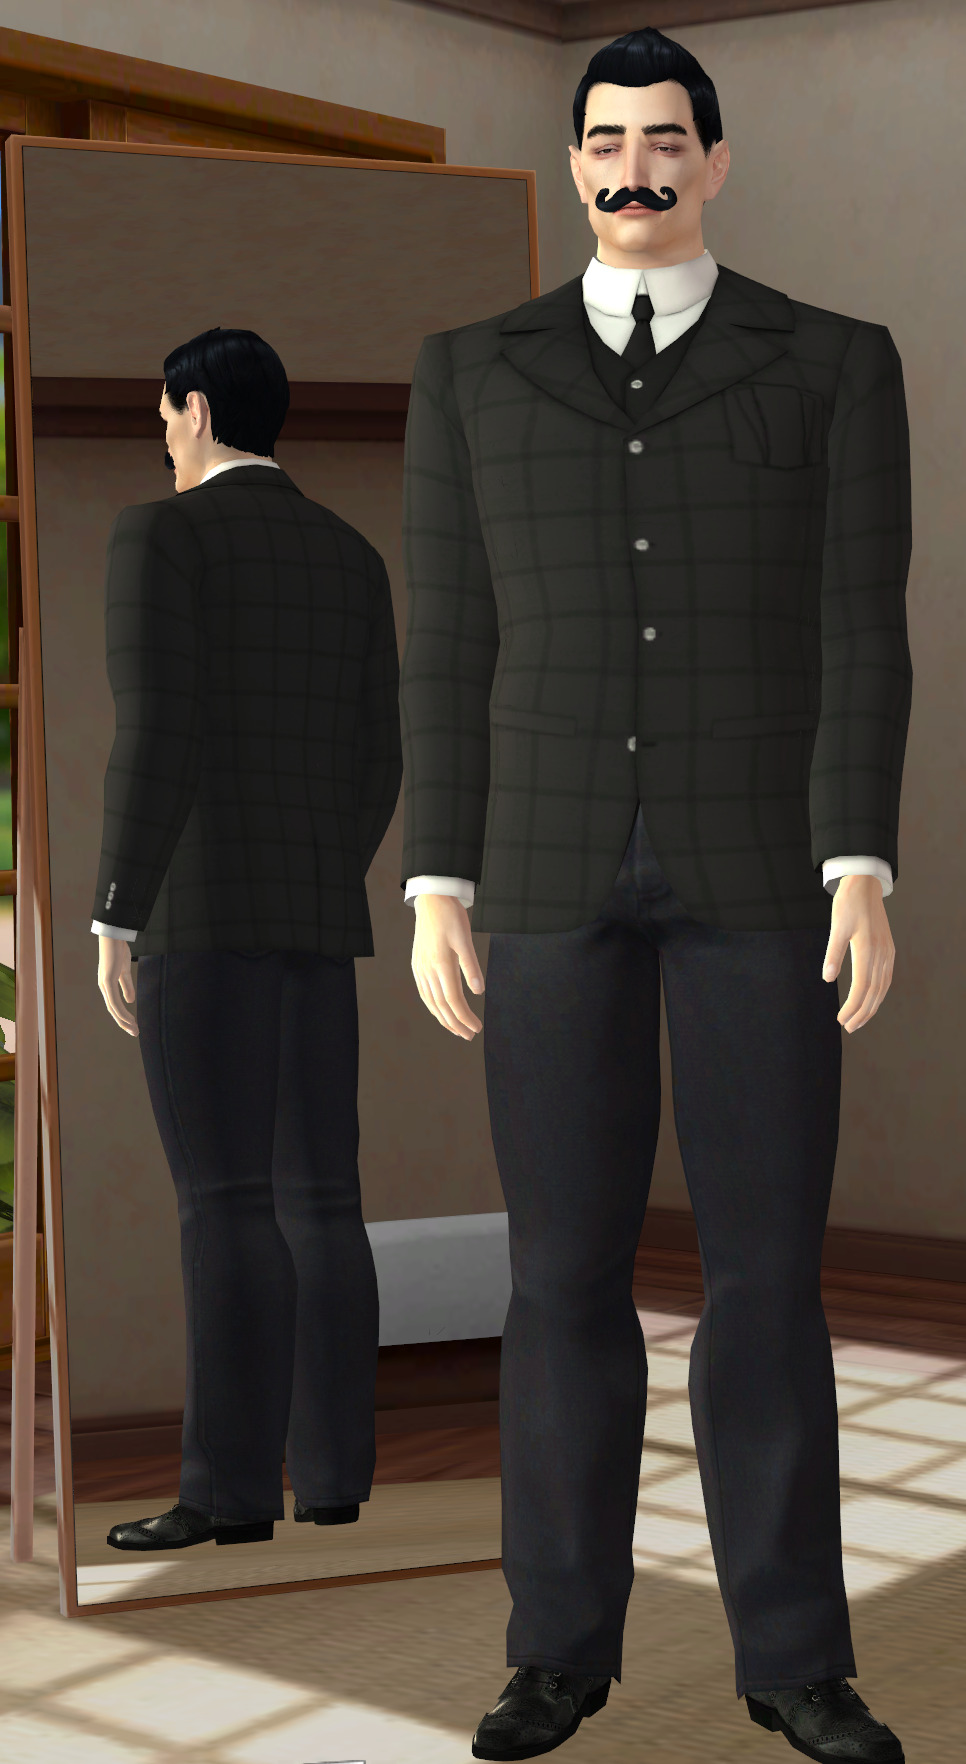
Got a base Rendog;
Which is hermit!Ren (s9, specifically). I need to make King!Ren and then i can start going over the Traffic!Rens. He has the wrong ears really because I wanted it to be more of a dog thing than a wolf thing, and I actually think these are fox ears now I’m looking at them... Oh well. They work fine for their purpose.
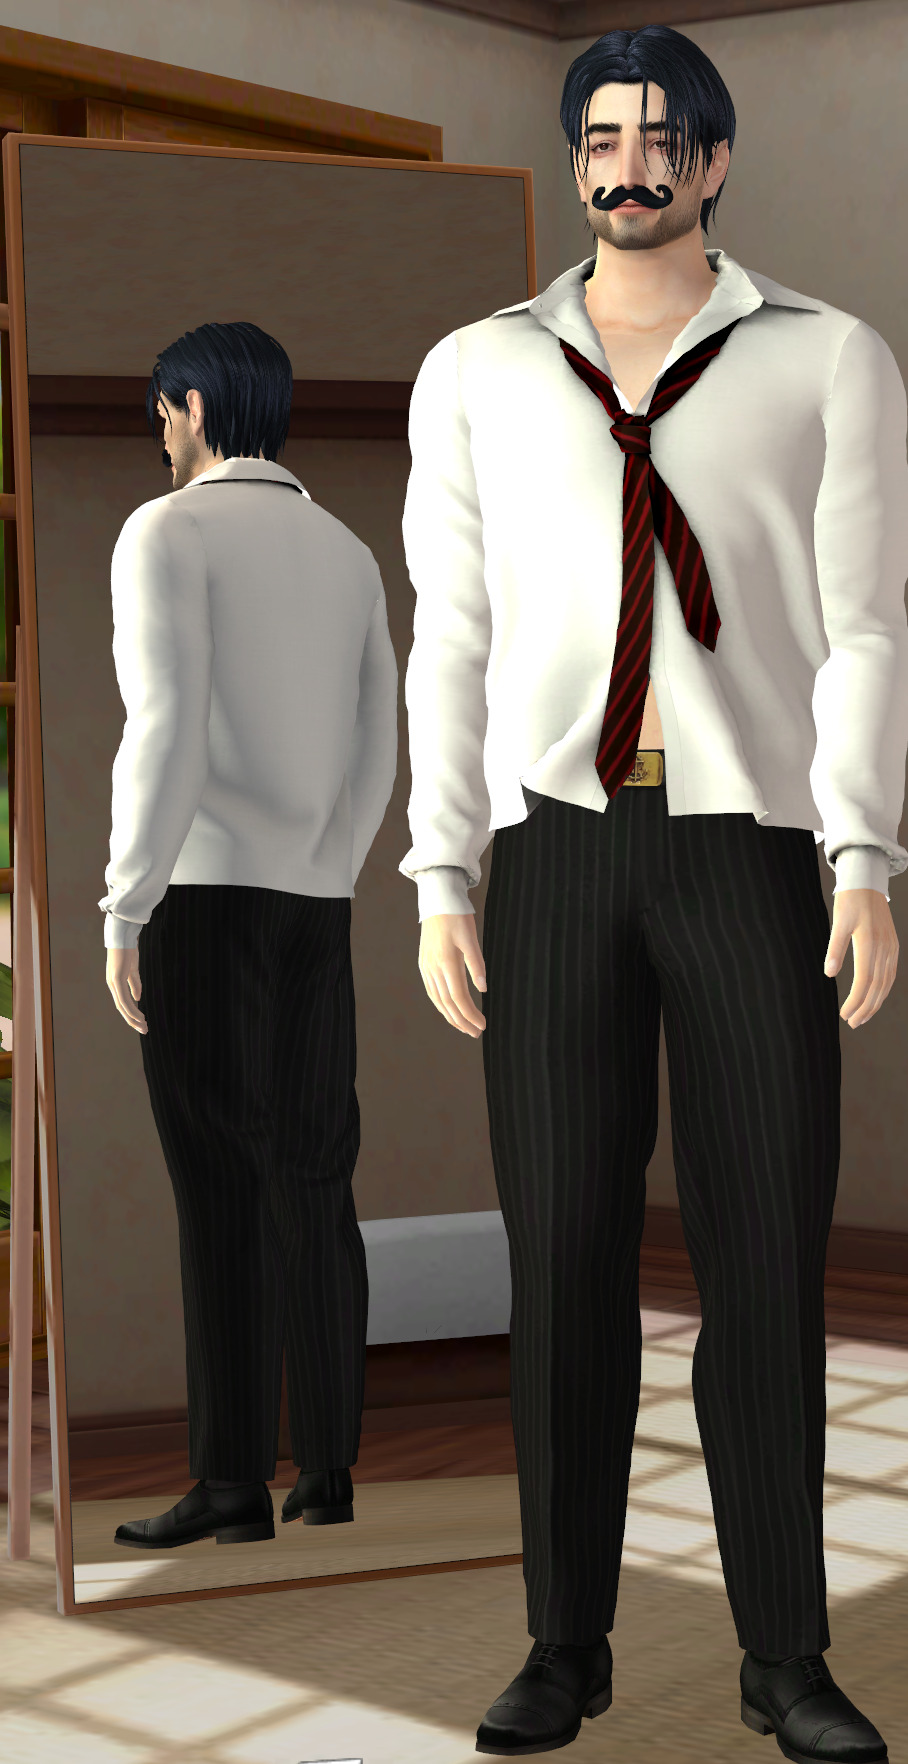
We’ve got s7, s8s, and a s9 Mumbo;
s7;
s8s;
Mooner:
Pacific:
Contractually harvested a soul (grian’s);
s9;
But we’ve got no potato or pig mumbo bc of the sims 4′s limitations when it comes to non-human[oid] characters. Need to make Traffic!Mumbo. I tihink he was only in LastLife??? So if that’s the case at least there’s only one of him to be dealing with. He’s got a bunch of outfits other than these because I don’t actually get to use the more formal cc I have in my game all that often. Pacific!Mumbo has a bunch of really fun outfits too. Mumbo was one of the more funky sims to make, actually.
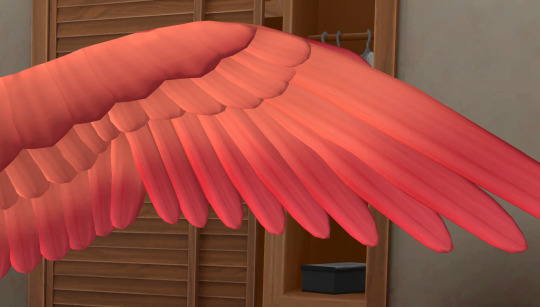
As for Grians we’ve only got a s9 Grain man so far;
And yeah, the wingspan is kind of absurd. But you know. To lift a whole-ass human person, it kind of has to be!
But he does have some CuteGuy alterego outfits;
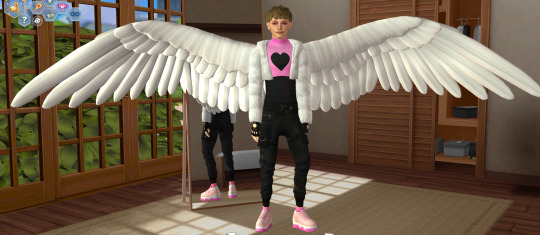
I did a whole bunch of different ones, and given the watcher!grian of it all some even have different wings. Though most of those are admitedly just a swatch swap.
Being this one.
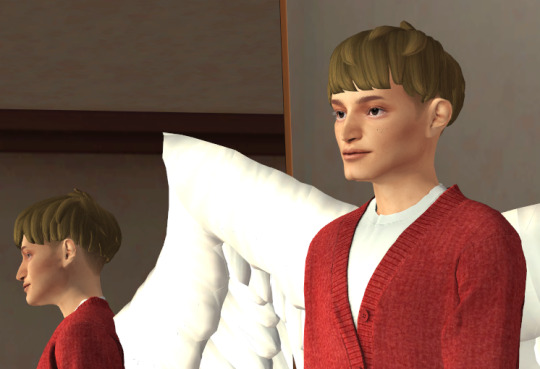
Please ignore how bad he looks from this angle but you can also see here the reason for Grian’s-Soul-Having-Mumbo’s hairstyle.
Anyway, can’t make a Poultry Man for the same kind of reason as the lack of pig/potato mumbo; there’s just no content in game or cc i can find that would make that work. (Need a chicken mascot head, basically, but there’s nothing like that anywhere I can find.) Can’t make a watcher!Grian for the same reason - no way to get enough eyes. [i go with a more eldritch angel inspired idea for how watchers look, syk. I’ve also never read ATUS and don’t plan to; my ideas are based on a combination of a) imagination and b) EVO. Also why would watchers cover their eyes......... they. they. they’re Watchers. They need those.]
I think Gem would be one of the easier ones to make (s9 Gem). So she’ll probably be next. Cleo i need to find some medusa snake hair for and some torso damage (because of the giant missing chunk in their side) as well, so that’ll be a while off. But LimLife!Cleo is easier, so she’ll probably be the first Cleo I make. I’ve already got a bunch of 80s athletic gear. Scar.... not sure how to go abt him. Also daunting bc he plays just so much dress up so much all the time so there’s going to be So Many Of Him it’s going to take forever. Cubfan shouldn’t be too hard he’s just like some guy scientist edition and never changes his clothes (as far as I know). Much like DSMP!Sam being a creeper man i’m not really sure how to render Doc given he’s also just a creeper man (with additional cyborg goat elements). Also need a labcoat cc that works for him; open, one arm ripped off, cyborg arm on that side. Really specific shit I just don’t have available unless i make it myself, and I can’t do that. Awkward to deal with; putting off as long as possible. Though i suppose a lot of fanart DocM77 uses in his thumbnails (so, as I see it, accepted as canonical appearance fanart) is a much more humanoid green guy so... I might just go with that for ease. Have everything I need for both Hermit!S9!False & Empires!S2!False, just need to make her (and decide how similar to Lomadia I want her to look. I love making things cross over with each other so it would be really funny if they’re related. To me specifically. Interconnected MC Multiverse my beloved. Every time I see a False fanart I do a double take because my brain is like. Lomadia??? no it’s False. Chronic YogsMC brain at work right there. Also False is just so weird homicidal multiple versions of self that don’t get along she’d fit right in with the YogsMC gang <3. YogLabs experimentation on the nature of Players and Respawn my beloved.)
This is my Lomadia, ftr. If you’ve seen False fanart then you’ll get why I keep confusing the two blondes. Also this outfit is a sort of placeholder. I can’t find anything even remotely like her actual skin’s attire. And I think I’m missing something that can be used to recolour the hair ties... Anyway -
Skizz really shouldn’t be difficult esp LimLife!Red!Skizz. Though i might have to go to some awkward places to get the right cc for him. (mans is really just dressed like an office worker stripper huh.) Either way Skizz wasn’t in Double Life. I’ll have to check for the other two but I think he was there? One less series for me to make though which. Makes it much easier. I’ll be going with the angel headcanon because that gives a reason why he wasn’t in DL (Angels have no soul. Literally. It’s really funny. Soulless [compliment] alskjf;alskdf.)
Etho is literally just straight-up Kakashi Hatake from Naruto. I can probably download a sim of him. It’s highly likely one already exists. Tweak the outfits and I’ll be done. Easiest shit ever. (Like Xisuma is Just Doom Guy and Philza is Just That One Bleach Character I Keep Forgetting The Name Of.) Either that or I take as much artistic licence as physically possible because I find it really really really really really boring when they’re Just Some Pre-Existing Character Design. I hate it actually. Like a lot. Hence ignoring (... mostly) that Joel is Just Human Shrek. I’ll probably - I’ll probably do that. Canonically Etho wore a T-shirt of his own face which is fucking hilarious so i’m going to try and find some naruto merch cc. Also the one and only time I know of Etho changing his character’s skin was DL so I’ll need to do some research to check but keep that in mind even if it isn’t true. And maybe have it be canon to my AU that’s the single time this man ever changed his outfit just because i think that’s so beyond funny. One and only time. Wow. Soulmateism hit him real hard huh. [Joel loves to play dress up... one and only time Etho changed his clothes......]. (I have. Just so many thoughts about how DL soulbonds & mumbo harvesting some of Grian’s soul functioned. Maybe I’ll natter on abt that at some point.)
Mhmmmmm errrr Bdubs isn’t going to be so bad. I’ve got the cc needed right down to the missing tooth so like... it’s just a matter of actually making him. Setting aside the time yk. I actually didn’t know welsknight existed until like two weeks ago so I need to do a) checking if he’s a storyline character or just kinda on the server and if the former then b) some Skin Studying bc I am. Just so blind. And i need to stare at things for far too long in order to actually know and be able to even slightly recall what they look like. But i do have a bunch of armour cc so he wouldn’t be difficult to make. Impulse is only difficult in that his top (t-shirt?) is so specific and I’m so not good at CC creating so i’ll probably be putting him off for ages. Or at least I might make his s9 dwarf sim and then craft the standard ver’s outfits later. Idk. Tango I don’t have... everything. He won’t be very firey if I do make him now so I should probably go see if there is anything even close to fire hair out there. I’ll make usual orange/red Tango first and then the blue Tango of the Tek variety later. I got the perfect torso cc for Ties!Tango. It’s great.
Outside of all that it’s just a matter of like... time and dedication, I guess. And I don’t have much of the former available so we’ll... this project will probably take me years if we’re being real a sec here. Sigh.
Anyway! I think that’s everything.
#errrrrrrrrrrr how to ramble in tags so this doesn't show up maintagging lol no thank you#this project is going to take soooooo long like sooooo long#it's not even. like there's no purpose to it. i usually do this for#reference in my fanfics but i'm very unlikely to ever actually publish any traffic/hermit/other mcrp than yogsmc fic to the actual internet#rather than just my onenote for personal perusal. sigh.#trafficverse#hc#there we go i guess#traffic sims#hc sims#for finding this damn post on my own damn blog... if tumblr decides to function for once anyway...
1 note
·
View note
Text
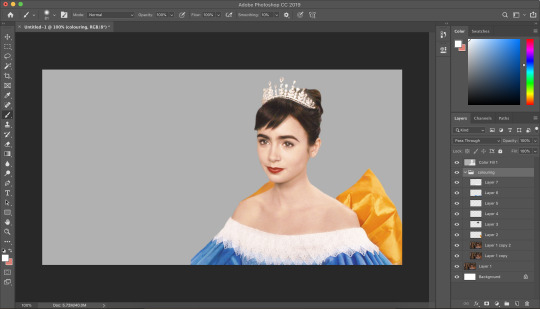
cristalcarrington’s icon tutorial!
a little treat for day 28 of my filmuary challenge!

i’ve honestly lost count of which one this is, but welcome to another icon tutorial! here i’m going to breaking down my icon creation process step by step. i currently am a mac user and all my previous tutorials have been windows orientated (which unfortunately were all lost in the great url loss of 2017). my process hasn’t changed much since then, but i have picked up quite a few new go-to tricks and i’ll be sharing these tips in this post!
anyway! here’s what you’ll need-
photoshop (i currently use photoshop cc so be aware that options and tools may not translate onto other programs/versions of ps) and yes, i do pay for my photoshop but if you’re in need of a decent, safe download i might be able to point you in the right direction so hmu
patience (believe me some of these icons have taken me a painfully long time to create) just don’t feel discouraged if things don’t work out perfectly right away!
a creative mind. please be aware that this tutorial is only for educational purposes. under no circumstance directly replicate my icons! the one involved in this tutorial is clearly fair game, but please try to take creative liberty with your work. what i’ve found a lot of fun is incorporating bits and pieces of what other people do into my own work.
further resources
if you need more reference/help, here’s an icon psd for you to have a look around while reading the tutorial or instead of the tutorial. again, please do not re-upload or redistribute.
please consider reblogging this if you’ve found it useful. or checking out my resources!
starting off
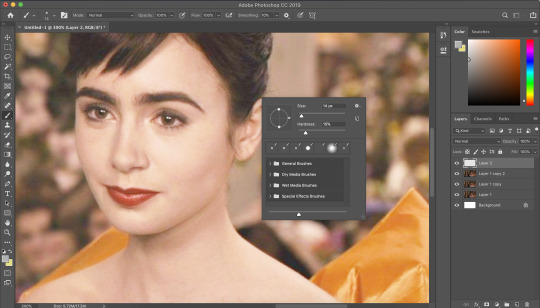
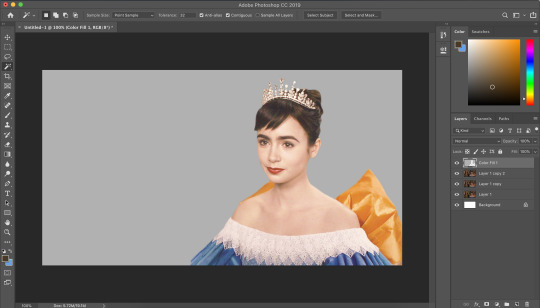
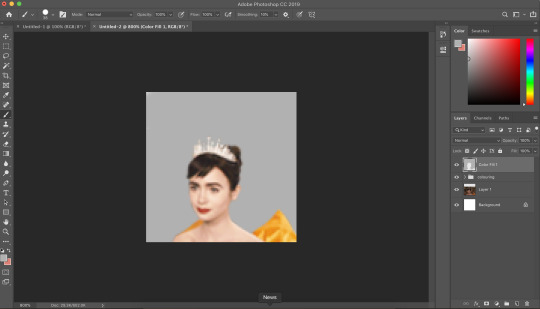
so today, i’m going to tackle a screencap for my ongoing filmuary challenge!
i tend to get my screencaps from google, so for this i literally just googled “mirror mirror screencaps” and selected a image from google images. when i’m not feeling lazy, i tend to go through the whole movie (great screencaps can be found at screencapped or kissthemgoodbye)
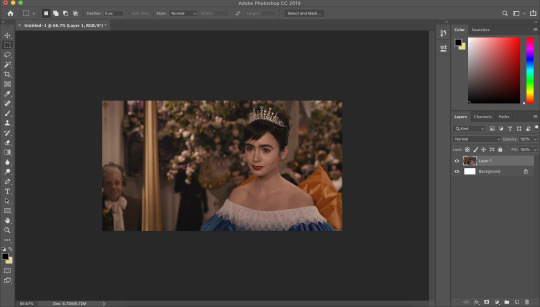
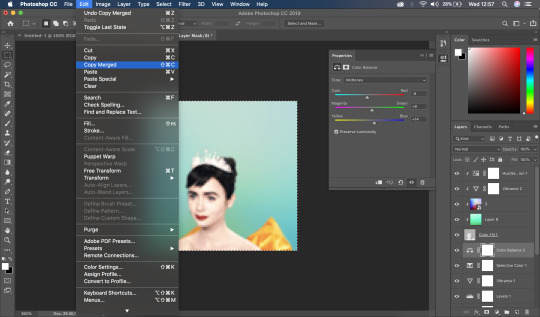
my first move is to open the screencap in the photoshop on it’s default canvas. the one i’ve chosen is normally the sort of screencap i’d go for-- one that has a central focus on the character and allows me to get a solid outline.
i tend to avoid screencaps that cut off the top of the characters head. i also tend to gravitate towards scenes that look easy to colour; if you choose overly saturated screencaps or screencaps that are too dark/light, then you will find it difficult to colour while conscious of the screencap quality.
base colouring
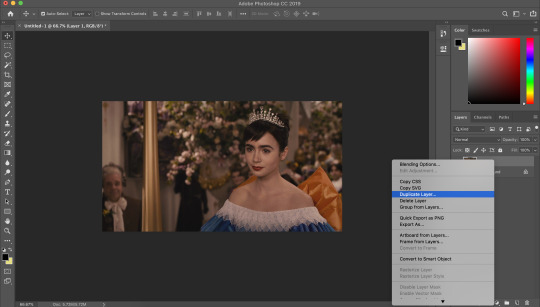
i then duplicate the screencap.
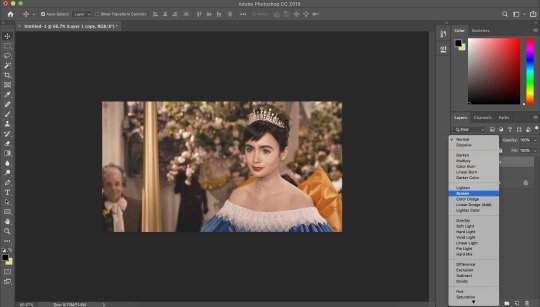
and then i set that duplicated layer to screen.
i like to make my icons super bright so i repeat this. it will vary depending on how dark the scene is. i prefer to do this to the screencaps as i find that it preserves the quality of the cap.
alternatively, you can use a psd-- my favourite as mentioned in previous tutorial is @blairsfelicity‘s icon psd which you can find in her tutorial here. my new method is just a whole lot lazier and i’ve been really enjoying the way my icons have turned out.
outlines
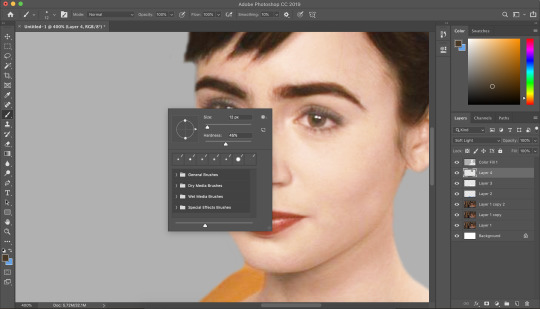
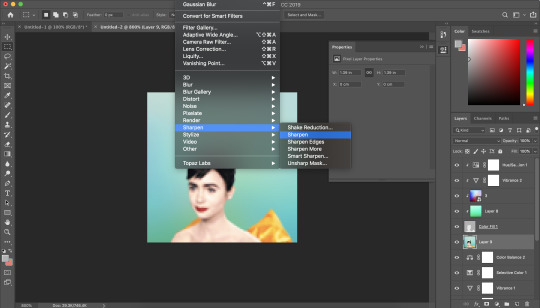
now here comes the menial part-- time for the outline.
remember to add a layer (unless you want to break your own heart by doing it directly onto the cap and being forced to start over (which i would NOT recommend by the way, crying over a screencap is as demoralising as it sounds)).
i vary between using the pen tool and a brush/eraser for my backgrounds. i like to shake it up depending on what i feel like doing or what the screencap would best fit. it also completely depends on whether i’m feeling particularly lazy or not-- if i have time to burn, i’ll use a brush. if i’m in a rush, i’ll use the polygonal lasso tool and refine my selection area with masks.
in this tutorial (due to my boredom of doing things over and over, this beautiful filmuary) i’m opting for the brush method. but if you want me to talk through polygonal lasso process which is a lot quicker and really streamlines the process-- then feel free to drop me a message and i’ll be happy to make another talk through.
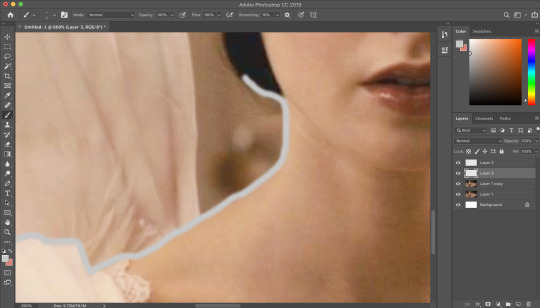
i like to use a brush for my erasing, on 30-50% hardness. i like to use a diffused/low hardness so my icon doesn’t look too sharp and the background and model seem to go with each other more. i’ll go for a small brush size when it comes to detailing (for example, when it comes to profiles, hair etc).
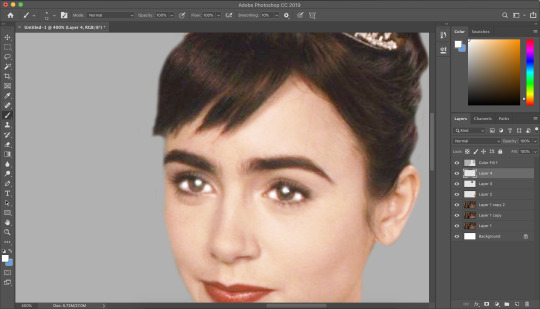
once i’ve outlined the model, i select the area around her with the magic wand tool and fill in the selected area with either a brush or a fill layer. then i merge the outline layer with the new colour layer.
(these two examples are from another icon process bc im dumb and forgot to take screenshots)
there will be a full little line around the model once you’ve merged the layers. i just tend to fill it in manually with a brush.
now here comes the fun part-- the colouring.
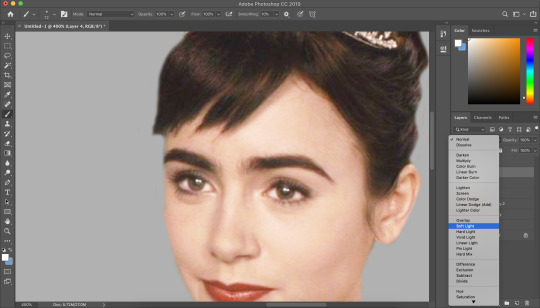
make those colours pop!
as you can see, the screencap has a lot of colours, but we need to make them pop. i take one of the colours, make a new layer and just paint until it’s vibrant and bold. once you’re happy with your colour selection, set the layer to soft light and adjust accordingly.
i tend to go for softer brushes when it comes to facial features. the lips, to make them a darker colour, i opt to set the layer style to multiply instead of soft light, and paint over the lip shape with a light pink/red.
i always like to highlight the eyes to aid contrast in the screencap. i also like to fill all eyebrows in with a black (set on soft light) as well as the lashline, just to add further dimension and contrast to the model.
prepping the icon
this is what my screencap looks like with the colouring complete. as you can see, each colour is on a separate layer. this is so i can adjust/duplicate each colour accordingly. once i’m happy, i place everything into a group together.

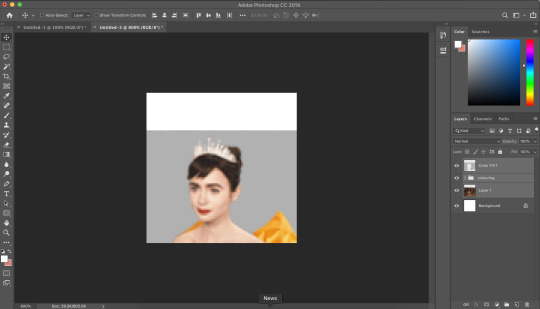
i make all of my icons on a 100x100px canvas.
i like to edit the screencaps on their original canvas as it helps with the quality of the screencap as well as allowing me to outline accurately.
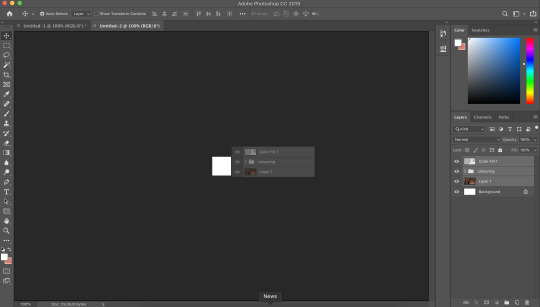
i just drag the files from one tab into another.
and then you can size it appropriately.
my next step is to select the same colour as the background and to paint over the white strip at the top of the icon. i do this directly onto my outline and then merge the two together. you now have the foundations of your icon to build onto!
final touches in the colouring department
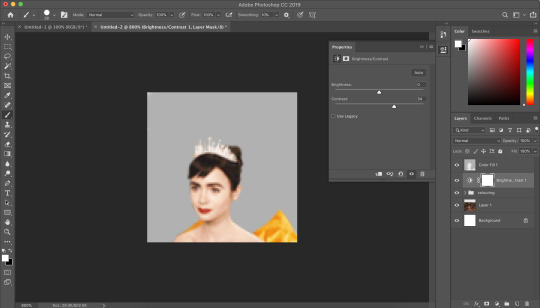
there is honestly no direction that i could give you when it comes to these final colouring steps.
i like my icons to be very bright, so i target the contrast with levels and brightness/contrast layers. I like to also turn up the vibrancy to make the colours pop even more.
my preference is for the skin to be very neutral, so i try to combat the saturation of the skin with colour balance and selective colour layers (as well as another step i will explain later in the tutorial)
as you can see above, i place the final colouring all underneath the background layer as this makes it easier for me to place textures later on.
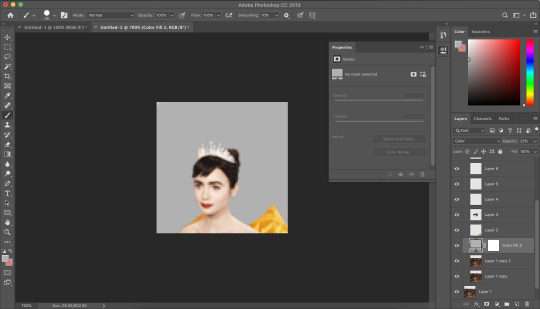
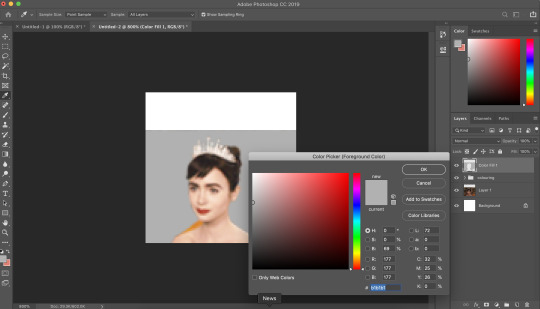
if you have problems with the model’s skin appearing too saturated, i’d recommend taking a solid fill layer of a black/white/grey and setting it to colour. place that layer just above the screencap and adjust it so it combats any saturation you might be experiencing.
textures and finishing touches!
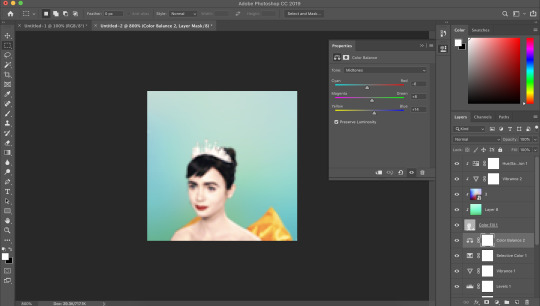
clipping masks are honestly a god send for me. you can find them by right-clicking on the layers and selecting clipping masks. as you can see above, i use clipping masks to place a green texture on top of the icon’s background. i then layer above that by using further clipping masks, adding other textures and even layers to adjust the colouring of the background.
my favourite place to find textures are livejournal and deviantart-- soaked on livejournal is my go-to at the moment and i really enjoy evey-v’s icon textures. i also have my own resouces/textures that you can find here!

once i’m happy with how the icon looks, i copy all of the layers together and paste them under the background.
this is a super lazy way of sharpening the icon-- an alternative method is explained really well by @jennifergarner (aka the god of icons) on her icon faq page. i have used this in the past but after filmuary i’ve found a few little tricks.
i then just sharpen the icon and adjust the opacity of the sharpened layer depending on my preferences.
and then there we go---
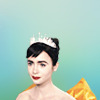
my chosen export settings are just to go for PNG every time. this helps preserve the quality of the icon and help it look super clean and tidy for whoever wants to use it.
and with that, that’s a wrap up of my tutorial.
for other tips and tricks, here are some of my asks that i’ve responded to;
do you have any tips for cutting short/curly/messy hair?
hey, would you mind sharing a psd icon?
what are some of your favorite icons textures?
can you break down how to use different types of textures?
67 notes
·
View notes
Text
These are the must-have mods you need to make your Black Sims slap
New Post has been published on https://fabulizemag.com/black-simmer-mods/
These are the must-have mods you need to make your Black Sims slap
I’ve been playing The Sims forever and if you have been playing as long as I have, you know that The Sims lacks serious diversity when it comes to creating characters. I remember when The Sims was still Sim City; a city-building where you acted as the mayor to build the undeveloped land into a city. If you were really good your city would grow into a metropolis that included crime, pollution and unemployment.
As the game grew in popularity so did the expansion of the game itself. The last Sim City game I played on the original Playstation allowed users to not just build their cities but to view their creation from the viewpoint of public transportation. It may sound boring but at the time it was exciting. Soon after, the creators of the famous game announced they were going to release a life simulating game where you would essentially play god in creating and making your characters do everything they need to do to survive. I couldn’t wait to get my hands on it.
When gaming magazines were still popular, you were able to access gaming codes for The Sims like rosebud ( to add 1000 simoleons) and motherlode ( to add 50,000 simoleons) to increase and add more interesting playability options while you were playing. In the early days of the internet, there were only a handful of Sims boards where fans would find each other and exchange info and upload what used to be known as skins. Skins better known as what we now know as Custom Content of CC are gamer/fan-made additions not created by EA or the official Sims creators. Fans started to upload new objects to bring the personalized gaming experience to that game. It started off with clothes and hair and as the expansion packs grew in popularity, so did the fans’ eagerness to create content.
With all the content that was being made, there still lacked a real voice for diversity. Let’s face it, the skin tones were ( and still are) ashy, the body types have gotten a bit better and the hairs? Ugh, The Sims had awful hair if you weren’t trying to create a Bob Pancake or Bella Goth type of family. A lot of Black gamers like myself wanted to see more custom content that resembled who we are and what we see and this is how The Black Simmer got so popular.
Ever heard of The Black Simmers? I found out about this movement on Twitter after a photo set of some Black Sims went viral. The creator of The Black Simmer forum and The Black Simmer Facebook, Amira Virgil went viral for creating Black custom content and highlighting other creators who create custom content specifically for Black Simmers. Amira curates a community that embraces custom content that illustrates all aspects of a Black lifestyle. Now, you can live out your Instagram baddie life with lacefronts, baby hairs, visible Black phenotype features, stiletto nails, darker and richer skin tones, body types and more.
So you want your Sims to slap? Tired of looking and playing regular? Here are some custom content creators, pages and mods you should download as soon as possible.
SKIN Hands down, you need to download this first. You need to start off with better skin tones and richer browns than what’s available.
Melanin Pack 2 Amira hooks you up with 52 skin tones.
If you use the Wicked Whims, download this pack instead.
Willow pack
Body Types Chubby body
Extra Large Body
Afro/Natural/Ethnic Hairs:
Ebonix
KieGross
Content Creators to follow: HBCU Black Girl KiKo Vanity Afrosimtric Simmer Niecy Pooh
Shoutout to Skillful Simmer who created the blerd trait as requested by Fabulize! Follow them and download some awesome traits!
0 notes