#also getting better at using davinci for editing
Explore tagged Tumblr posts
Visit Tumblr Blog
Explore Tumblr blogs with no restrictions, modern design and the best experience.
Last Seen Tumblr Blogs


Fun Fact
Hackers stole 65M passwords from Tumblr in 2013.
Text
Hehe, I did a tiny improvement to this clip
#code lyoko#shitpost#please listen with audio on#the audio is what makes the clip imo#also getting better at using davinci for editing#if only audio editing and clip splicing#eh idk why I did this#the rigid metal sfx when Jim falls to the ground might've inspired me and it might not've
10 notes
·
View notes
Note
Hi lovely, you've probably gotten so many notifications from me the past few days and I'm sorry but just loving all your content 😍 Your art is gorgeous and I've recently started S7 of Supernatural for the first time, so seeing your posts has been making my brain whirr in the happiest of ways!
I'm also so curious, how are you able to make GIFs? I've been on this hellsite forever at this point and never got around to learning that. Unless it's a state secret of course.
Oh, and I see you dropped this! 👑 That's better!

I will wear it proudly :')

Thank you so much for liking what I do! I wish you the best on your watch through, you have some really great stuff ahead (and some terrible, terrible things. Love this mess of a show!)
My gif making process is no secret. I've only started doing it recently and I'm still fighting with whether i compromise resolution or color grading for file size. But I'm tryin! There are no doubt better resources than me for this, but I'll walk through what I do.
**Side note, there are sites online that will let you upload clips and turn them into gifs for you. I've never really liked these for security purposes, but I'm sure things have gotten better since I've last messed with them.
Personally I go a little overboard, but I like having control of everything:
For all the stills / videos / gifs I pull, I use DaVinci Resolve. There is a free version of the application and its sick - I've never needed the paid version for the silly little edits I do in my spare time.
DaVinci Resolve looks very scary if you've never used video editing software before, but its actually pretty intuitive once you get the hang of it (not that I always know what I'm doing!) There are a bunch of great videos online that will walk you through how to use it as well.
Basic process:
Upload video into a project.
Mark in (start) and Mark out (end) the part of the video you want to make into a gif. I use the markers as I watch something and "cut" the video where needed.
Fuss with the export settings, select the part of the video you cut, and render!
If you are me, check the file size and immediately swear because you've forgotten to change the resolution again (I should just save it as a preset but I'm stubborn.)
Rinse, repeat!
As for getting videos, you can grab stuff from youtube if you want to clip a scene from anything on there. That's how I isolated the stupid tim and eric bit on my post about 'when i see Cas' lol. I use the CNVMP3 webpage to grab youtube videos and I've never had an issue with it.
Otherwise, all of my Supernatural specific stuff comes from my own blu-ray discs. I've gone through an arduous process of digitizing my physical media so I can watch it easier.
I can send you down the rabbit hole by suggesting MakeMKV and Handbrake applications, both free, if you have physical media you want to edit. I found reddit threads that taught me how to use them after a few google searches on the topic.
I'm very long winded, but hopefully that answers any questions! Thank you for the ask (and for the crown!)
#my stupid little frog brain#if i spelt something wrong shh i'm trying my best#hello internet friends
26 notes
·
View notes
Text

First successful attempt at animation!!!
I feel like a GOD right now
It moves!?!?
I had to fight a bit with my software/mac to get it to work but it WORKS
oh it is over for all of you bitches
I am so so so happy right now. I've tried animation before but this is the first time I've tried using actual animating software and rendering.
I was very pleased to learn that Krita (the drawing software I already use) had animation capabilities! I also downloaded davinci resolve, but video editing stuff seems will work much better with animatics rather than frame by frame animation.
The character you see here is one of my friend's vessel oc's <3
#animation#gif#krita#made with krita#hollowknight#if you're reading this friend crave is a baby and i love them#thank you for letting me animate your feral child#vessel oc#thepencilscratches
17 notes
·
View notes
Note
Converting MP4s... as far as I can tell the problem is the audio codec for the files I've downloaded isn't supported by davinci so it can't read the audio, so it needs to be re-coded using a codec that davinci understands Caveat: I have no idea what I'm talking about
Anyway, this seems to have worked for Turn! I hope it will work for the next thing I try it on.
First, copy all your files into a new folder. Don't try this on the originals because if it goes wrong it'll corrupt them and you'll have to download them all again (ask me how I know). I decided to rename them all with really short names because I just wanted to remove as many variables as possible but I don't know if that matters.
In VLC go to File > Convert / Save and select your files (once you're confident it's working you can do lots at once) and click Convert / Save

This next box is the important one! Select "Video - H.264 + MP3 (MP4)"

Then click on the little spanner and go to the Audio Codec tab and select "MPEG4 Audio ( AAC )" Then click save

If you've got multiple files you should select "Append -converted to file name" Idk why but even if I've got all the settings right if it tries to overwrite the existing file name it goes wrong, so this is important!

This is how my folder looks when I'm done.

There are probably other settings that will work. There are probably better ways of doing it. But this seems to work for. It takes a few minutes per file but it runs happily in the background.
When you've done a file check it plays in VLC/media player and has sound there, because when I've got it wrong a few times I've managed to lose the sound completely. And it's quicker to check it there than to import it into davinci and then realise it's more broken than when you started. Also, I have found that davinci sometimes stops playing sound when it's overwhelmed (??) You can tell there is sound because you can see the wibbly line in the audio track and if you're in the cut tab you can see the volume bars go up and down on the right-hand side, but no sound comes out. That's happened a couple of times but fixes itself if I close the program and open it again.
Have I mentioned I have no idea what I'm doing?
Yooooooo, that's perfect I'm gonna try it later!! <3
My DaVinci gets overwhelmed so easily and I can hear audio wobble/echo? in the background (cannot tell why, possibly not because I'm editing like ten edits at the same time pffff). I got so scared when I first worked in it- 'so that's how it's gonna be every time I want to edit now then, eh?' but soon I realised that it's perfectly fine (I mean it's not, but yeah)
4 notes
·
View notes
Note
For the Ask a Vidder meme, 5, 1, 16!
5. Hardest vid to edit?
Hm depends on how you define hardest...
I think the biggest technical challenge I've had, which was entirely self-inflicted, was trying to get rid of all the zillions of stupid hallmark channel logos on my hallmark hanukkah vid with absternr, which was very fussy and also unsuccessful and something I volunteered to do while absternr was away from a computer because I like fiddly technical things for the first hour of them... BeatriceEagle's cleancredits program was really great for getting rid of the simple hallmark logo! It was surprisingly easy to get rid of just a white circle with an H in the middle. But they also stuck this big countdown to Christmas thing on the bottom of some of the movies that had a mistletoe border and was kinda faded in and I tried a bunch of different mask options and all of them looked awful... Anyways this has been an unnecessary rant about something I did 100% for fun.
From more of an artistic perspective I think a little wicked was the hardest vid to edit, partially because looking back on it I have pretty mixed feelings about it. I had some pretty specific things I wanted to say about the character but also the way she was being treated in the shows at a meta level and I was trying to make one unified statement about who the character is like and how she's treated in these shows across 3 shows and a movie where she has different amounts of screentime and is treated differently by the narrative.Like I opened with a shot of a badass moment and a moment of her unnecessarily falling on her face from each show but in the one movie, she actually only loses when it's appropriate (e.g. fights with superpowered oponents) and I was sorta faking it with a shot of her falling down in a fight that she eventually won, and in one of the shows I had to work really hard to find those shots of her being badass. (Which is why I wanted to make the vid in the first place - if you have a female character who dresses cool and is verbally said to be badass and in charge but you only ever have her falling over and getting undermined on screen that says something!)
What program do you use?
Davinci resolve! I guess if we're being comprehensive I've also used avidemux a bit for clipping as well as as using ffmpeg/someone's python script to run ffmpeg for multiple clips from a spreadsheet. (Resolve freaked out on my old computer with more than a handful of whole episodes of a show and tomb shows are too many episodes not to clip regardless.)
16. Favorite thumbnail for one of your vids?
I've gotta admit I've always gone with one of the default youtube provided options (though I try to choose whatever one of those is not actively misleading?) Pulling them up, my vimeo thumbnails are way better because vimeo just lets you choose a shot from the video (which is to say they're still just whatever still looked good). I have not uploaded all that many of my vids on vimeo. But maybe I should! For example this is the youtube thumbnail for Emerald City

It looks okay! It's a shot of a car on the infinity train, which is the VAST majority of what's in this vid so you'd think that it'd be very easy to get, but going in to edit the video the other automated options for thumbnails are more focused on characters and it's hard to see what's going on with the train car, which was the focus of the vid. I get why youtube's algorithm thinks that people should be in a thumbnail, it's just wrong with this one.

In contrast this is the vimeo one which I'm pretty sure is just the beginning of the vid. It's still not great! I could have actually made a title screen! But it is a focus on scenery and I think it's fun to have the thumbnail for something titled "emerald city" as a shot of a green room.
Anyways this didn't really answer the question... This one from love is an open door is pretty good - the thumbnail is kind of the ship manifesto for this one (which is real character Wu Xie, who has in other shows in this universe been played by Zhu Yilong, serious actor/the random side characters made up for him to have someone to do exposition with in this 10 episode show) - look at them! they have weirdly a lot of chemistry for how little there is in the character of the guy on the right! (sometimes a "good thumbnail" can be me going I still think this ship and my vid is funny)

3 notes
·
View notes
Note
hi!! I wanted to say thanks for your post about gif making, it was really helpful!! I'd been struggling with sharpening for a while and with your explanation I finally figured it out.
I also wanted to ask: I'm having trouble importing video frames to layers on photoshop that didn't use to happen, and no amount of googling has helped. do you have any idea why this could be? what settings do you use on the videos you cut to import? and could you share what software you use for that?
thank you so much!!!! I love your edits ✨️✨️
thank you and you're so welcome!! 💗🤸
I just switched to using DaVinci Resolve (free video editing software but it was too heavy for my old laptop, therefore I used Clipchamp before which I don't really recommend now that I know better lmao) and converting the frame rate to 23.976. that way, I don't get duplicate frames when importing to PS (which I used to have to delete manually before 💀). right now, I do all sharpening and coloring in PS.
it's difficult for me to tell what the issue is but if it happens to videos that you used to be able to import, then I'd try re-installing PS or installing another version 😅 if it's a video issue, the above works for me (I use standard HD export settings) ✌️
hope you find a solution!!
8 notes
·
View notes
Note
Hey, can I ask you how do you make your gifs?
It took a lot of trial and error, but here is what I have learned(so far cause I'm very much still going through it):
1. Photoshop vs Photopea
To make your gifs you can either use Photoshop or Photopea. I started off with Photpea because it’s cloud-based and doesn’t take up any space on your computer, but I've since moved onto Photoshop. Most of the tutorials you’ll find will use photoshop. So if you need help or want to learn a new skill it will be much easier to find that help if you are using Photoshop.
Photoshop
👆🏽They have ones out there for mac if you search for them on here, but I happen to have a Windows PC so this is the one I use🤷🏽♀️
Photopea
2. Downloading videos
I get most of my videos from either YouTube or torrent sites which have a wide selection of shows and movies for you to download.
Watch So Much
👆🏽Is my favorite torrent site. You can also stream shows and movies on their site well.
YTS
👆🏽Is another torrent site I use, but they only have movies on there.
Qbittorrent
👆🏽Lets you download torrents. I should note that If you torrent you'll need a VPN. Literally do not try and download any content from HBO or Disney without a VPN, because at least here in America, they will email you threatening to disconnect your internet😅
For VPN’s do not use the free ones. They don’t work. I’ve personally used NordVPN, but there are other ones out there like Surfshark, or ProtonVPN.
4k downloader
👆🏽Lets you download most things off of YouTube(as well as a couple other sites like TikTok). I say most things because they will not let you download those free movies(ex. Twilight) YouTube itself uploads onto its platform.
Occasionally someone will upload an old movie onto a private channel which you can download with no problems, but anything new or recent you won’t find on there.
You do not have to use a VPN to download videos from YouTube.
3. Resources:
Whatever you're trying to gif will probably be on the long side. So you're either going to need to trim it down to make a 2-3 second clip that you can then use to make your gif, or you can screencap your video.
Screencaping allows you to take a shot of each individual frame* which you can then use to make your gifs out of.
*I like to use anywhere between 40-90 frames per gif.
VLC
👆🏽This is a video player that lets you play your videos and create screencaps from them.
👆🏽This is a great post on how to screencap using VLC.
KMPlayer
👆🏽Is another video player/screencapping software, but I found their interface to be overly complicated
Clipchamp
👆🏽This lets you trim down your videos to create those 2-3-second clips. There are better video editing tools out there(like DaVinci Resolve), but if you have Windows for what it's worth, it’s simple and gets the job done 🤷🏽♀️
rPiracy
👆🏽Has links for torrents and things of that nature.
👆🏽This is a great post on how to make a basic gif using Photoshop.
👆🏽This is a great post on how to make a basic gif using Photopea.
👆🏽This user has a lot of tutorials so when you're ready to move onto more complicated gif making, use them as a resource.
4. Lastly, have patience with yourself.
GIF making is time-consuming and as I stated it takes practice. So don't sweat it too much and have fun🎉
6 notes
·
View notes
Text
Green Screen Magic: A Beginner’s Guide to Your First VFX Scene

In the world of film and animation, few techniques have sparked as much creative revolution as green screen technology. From Marvel’s superhero universes to low-budget indie films, green screens have made it possible to transport characters from a tiny studio to the heart of a burning city, outer space, or even an underwater kingdom. And the best part? You don’t need a Hollywood budget to get started.
Whether you're an animation student, an aspiring VFX artist, or just someone fascinated by movie magic, learning how to master green screen techniques can open up a whole new world of visual storytelling.
What is Green Screen and How Does It Work?
Green screen, also known as chroma key compositing, is a visual effects technique where a solid-colored background (usually green or blue) is replaced with another image or video. The color is digitally removed in post-production, allowing filmmakers and animators to insert virtually any backdrop they can imagine.
Why green? Because it doesn’t match any natural skin tones or most clothing, making it easier to separate the subject from the background cleanly. Blue is the second option, often used when green elements are part of the subject (like plants or costumes).
Tools You’ll Need to Start
Creating a green screen scene isn’t just for high-end studios anymore. With the rise of content creators and affordable tools, even a beginner can set up a decent chroma key environment. Here’s what you need:
Green screen backdrop – Can be fabric, paper, or even a painted wall.
Camera – Any decent DSLR, mirrorless camera, or even modern smartphone works.
Lighting – Even lighting is key. You want to avoid shadows or color variation on the green screen.
Tripod – For stability.
Editing software – Adobe After Effects, DaVinci Resolve, HitFilm Express, or even CapCut for beginners.
Step-by-Step: Create Your First VFX Scene Using Green Screen
1. Set Up Your Space Choose a well-lit room or area. Hang your green screen so it’s smooth—wrinkles will create shadows and cause problems during editing. Keep your subject at least a few feet away from the screen to avoid color spill.
2. Light It Right Use softboxes or LED lights to ensure the green backdrop is evenly lit from all sides. You’ll also need separate lighting for your subject to maintain a natural look.
3. Record Your Footage Keep the camera steady and make sure your subject doesn’t cast shadows on the green screen. Filming in high resolution helps with better keying during post.
4. Edit and Composite Import your footage into your video editing software. Use the chroma key or ultra key effect to remove the green background. Then, place your subject over your chosen background—this could be a digital matte painting, a 3D environment, or stock footage.
5. Add Final Touches Color grading, motion blur, and lighting adjustments help blend your subject with the new environment seamlessly. Sound design and atmospheric effects (like dust or smoke overlays) can take it to the next level.
Mistakes to Avoid as a Beginner
Uneven lighting: Causes patchy keying.
Green on your subject’s clothes: Parts may disappear during chroma key.
No reference for shadows or reflections: Makes the subject look fake.
Forgetting to shoot plates: Empty shots help during complex composites.
Real-World Applications of Green Screen Beyond Films
While Hollywood blockbusters use green screens extensively, the technique has become popular in YouTube videos, live-streaming, online education, and virtual meetings. Content creators use green screens to place themselves in exotic locations or customize backdrops to match their brand aesthetics.
Even major news outlets now rely on virtual sets powered by green screen technology. With advancements in real-time rendering tools like Unreal Engine, even live VFX has become more accessible.
Latest Developments Making VFX More Accessible
One of the most exciting developments in the world of green screen and VFX is AI-powered keying. Tools like Runway ML and Adobe Firefly are now offering automatic background removal without needing a green screen at all. While traditional chroma key remains more precise, these new tools are especially helpful for creators working with tight deadlines or limited resources.
Another trend to watch: Virtual production using LED walls instead of green screens. This method—popularized by shows like The Mandalorian—allows filmmakers to capture realistic lighting and reflections during filming itself, reducing post-production time. However, this is still expensive and limited to high-end productions for now.
How Green Screen is Empowering Students and Indie Creators
The democratization of VFX tools has led to a surge in creative content from students and indie creators. Social media platforms are flooded with short VFX skits, tutorials, and fan edits, many of which are filmed in tiny bedrooms with DIY green screens.
In cities like Bengaluru, where the digital media ecosystem is rapidly evolving, students are leveraging these tools to create portfolios that rival professional studios. The rise in affordable tech and local demand has also led to more educational institutions offering hands-on programs that teach industry-standard VFX workflows. If you're looking to dive deep into this creative field, enrolling in an Animation course in Bengaluru could provide the practical training needed to master both foundational and advanced techniques.
Conclusion: Your VFX Journey Starts Now
Creating your first green screen scene is like opening a door to unlimited storytelling possibilities. It may seem intimidating at first, but with the right setup, tools, and a bit of patience, you’ll be surprised at what you can create—even from your bedroom.
As more creators enter the space, the demand for skilled VFX artists is only growing. Particularly in tech-forward cities like Bengaluru, we’re witnessing a rise in demand for professionals who can blend creativity with technical know-how. For beginners looking to start from scratch, enrolling in a 2D animation course bengaluru can be a powerful step toward building a strong foundation in both animation and VFX techniques.
The green screen is no longer just a tool—it's a portal to another world. Now it’s your turn to walk through it.
0 notes
Text
How Do You Choose the Right Film Production Company in Bangalore?
Bangalore is home to a fast-growing creative ecosystem with a wide range of film production companies offering everything from commercials and documentaries to music videos and corporate films. But with so many options available, how do you choose the right production company for your specific project?

Whether you're a brand looking to create an ad film, a startup planning a product video, or a filmmaker working on a short, choosing the right team is crucial to bringing your vision to life.
In this guide, we’ll walk you through the key steps to help you make an informed decision.
1. Define Your Project Goals Clearly
Before reaching out to any production company, you need to be clear about:
What type of video or film you need (ad, corporate, short film, etc.)
Your target audience
The key message or story you want to communicate
Your deadline and budget
Having a clear vision will help you choose a company that aligns with your goals and working style.
2. Review Their Portfolio and Past Work
A production company’s portfolio speaks volumes about their style, capabilities, and professionalism. Look for:
Projects similar to yours in tone or genre
Consistency in quality (cinematography, editing, storytelling)
Creativity and originality
Client testimonials or case studies
Tip: Many Bangalore-based studios showcase their work on YouTube, Vimeo, or their website—check these out before shortlisting.
3. Evaluate Their Experience and Specialization
Some production houses specialize in certain types of content:
Nirvana Films – known for high-end TV commercials
Radart Collective – focuses on indie and artistic storytelling
Catnip Films – excels at branded and lifestyle content
Choose a company that has proven experience in your niche. They’ll already understand what works and what doesn’t for that format.
4. Understand Their Process and Communication Style
A good production company will have a clear process that includes:
Script development and pre-production planning
Filming with a skilled crew and equipment
Editing, color grading, and sound design
Final delivery and revisions
Also, make sure they’re easy to communicate with. You don’t want a team that goes silent or ignores creative input.
5. Check Their Equipment and Technical Capabilities
Ask about the tools they use:
Camera quality (4K, RED, ARRI, etc.)
Lighting setups and sound equipment
Post-production software (Adobe Premiere, DaVinci Resolve, etc.)
While you don’t need to be an expert, knowing that they use professional-grade equipment is a good sign of reliability.
6. Compare Quotes, But Don’t Just Go for the Cheapest
Budget is important—but don’t compromise on quality. Get quotes from 2–3 production houses and compare:
What’s included in the price (shoot days, crew, equipment, post-production)
Revisions allowed
Turnaround time
Sometimes spending a bit more gives you much better results—and avoids having to redo work later.
7. Look for Local Knowledge and Networks
In Bangalore, having a team that knows the local scene, talent, locations, and regulations can be a huge plus. It streamlines logistics and often saves time and money during production.
Conclusion
Choosing the right film production company in Bangalore isn’t just about picking the biggest name—it’s about finding a team that understands your vision, works within your budget, and delivers high-quality content on time.
#short film production company#corporate film production#film production company#film production#film production website#corporate video production company in bangalore#advertising production company#corporate film makers in bangalore#corporate video presentation#video production company in bangalore
0 notes
Text

In the age of digital consumption, video marketing is no longer a luxury—it’s a necessity. Videos have become the most engaging and influential form of content, dominating social media platforms, driving traffic, and significantly boosting conversions. Whether you're launching a startup, scaling your business, or promoting an eCommerce store, investing in video marketing can transform your brand's visibility and engagement.
At Hire in Any Domain, we connect global businesses with top-tier creative professionals. If you're looking to hire a video marketing expert in India, you're making a strategic move toward expanding your brand's reach and influence. With affordable rates, exceptional talent, and industry experience, Indian video marketers can help you craft compelling stories that drive results.
In this blog, we’ll explore why hiring video marketing experts from India is a smart decision, how it complements eCommerce/Amazon marketing services, and how pairing this with other back-office support like accounts receivable experts can ensure your business runs efficiently at every level.
Why Video Marketing Matters More Than Ever
Video content is not just engaging—it’s effective. According to HubSpot, 91% of businesses use video as a marketing tool, and 96% of marketers believe it’s an important part of their strategy. Here’s why video marketing is such a game-changer:
Higher Engagement: Videos hold attention longer than text or images. They’re more likely to be shared and remembered.
Improved SEO: Search engines favor video content. A well-optimized video can boost your site’s search rankings.
Better Conversion Rates: Landing pages with videos can increase conversion rates by up to 80%.
Stronger Emotional Connection: Videos can convey tone, emotion, and story—helping build trust and loyalty.
Clearly, investing in video content isn’t optional—it’s essential. And there’s no better way to get started than by hiring a video marketing expert.
Why Hire Video Marketing Expert in India?
India has emerged as a global leader in creative outsourcing. When you hire a video marketing expert in India, you gain access to a wealth of talent, technical know-how, and creative vision—at a fraction of the cost compared to Western markets.
Here’s what makes Indian video marketers an excellent choice:
Creative Excellence Indian video marketers are highly skilled in conceptual storytelling, scriptwriting, animation, video editing, and post-production. Whether you need explainer videos, product promos, testimonials, or ads, they can deliver it all.
Cost Efficiency One of the biggest advantages of outsourcing to India is cost-effectiveness. You can hire top-notch professionals at competitive rates without compromising on quality.
Technical Expertise Indian professionals are proficient with the latest tools like Adobe Premiere Pro, After Effects, Final Cut Pro, and DaVinci Resolve. Many also have experience with motion graphics and 3D animation.
Cultural Adaptability Indian video marketers have experience working with global clients. They can create content tailored to Western, Asian, or international audiences while respecting cultural nuances.
Quick Turnaround With the help of efficient project management tools and time-zone advantages, Indian experts often offer fast delivery and real-time communication.
Boost Your eCommerce Brand with Video
If you’re running an eCommerce business or selling on Amazon, video marketing is one of the most powerful tools at your disposal. Shoppers today are more likely to buy a product after watching a video about it. Product demo videos, how-to guides, and testimonials help customers make informed decisions.
Hire in Any Domain can connect you with experts who not only specialize in video creation but also understand eCommerce/Amazon marketing services from India. Here’s how combining both services can skyrocket your online store’s performance:
Product Demo Videos: Highlight product features, benefits, and usage to boost buyer confidence.
Amazon A+ Content Videos: Use videos on your Amazon listings to enhance engagement and conversions.
Video Ads for Social Media: Use platforms like Facebook, Instagram, and YouTube to target your ideal customers with high-converting ad creatives.
Customer Testimonials: Build trust through genuine feedback in video form.
Explainer Videos: Educate potential buyers about your brand story or product line.
With Indian video marketing experts handling your visual content and experienced eCommerce marketers managing your store, your digital growth is inevitable.
Complete Your Team with Back-Office Support
A powerful brand needs more than just marketing—it needs smooth operations. That’s where accounts receivable experts come in. Managing cash flow is critical, especially for businesses scaling quickly through eCommerce or service-based models.
At Hire in Any Domain, we can help you Hire Accounts Receivable Experts In India to streamline your financial processes. Here’s why it’s essential:
Benefits of Hiring Accounts Receivable Experts from India:
Efficient Invoicing: Ensure timely invoicing and follow-up with clients to avoid delays.
Cash Flow Management: Keep track of pending payments, due dates, and customer account balances.
Accounts Reconciliation: Regularly update and reconcile accounts to prevent errors or discrepancies.
Reduced Overheads: Outsourcing to India offers excellent service at a lower cost than hiring in-house staff.
Combining creative marketing (like video) with solid financial support gives your business the foundation and visibility it needs to succeed long term.
Why Choose Hire in Any Domain?
At Hire in Any Domain, we bridge the gap between talent and businesses. Whether you need to hire a video marketing expert, a digital marketer for Amazon, or a finance professional—we make the hiring process seamless.
Here’s what sets us apart:
✅ Pre-vetted Experts: We handpick professionals with proven experience and skills.
✅ Customized Solutions: Whether you need a one-off project or a long-term team, we tailor our solutions to your business needs.
✅ Flexible Hiring Models: Choose from hourly, part-time, or full-time engagement models.
✅ End-to-End Support: We help you onboard, manage, and communicate with your remote talent effortlessly.
Final Thoughts
In today’s fast-paced digital world, your brand needs to be visible, relatable, and memorable. Video marketing does exactly that—and when paired with strong back-end support and eCommerce expertise, your business becomes unstoppable.
If you're ready to elevate your brand, now is the time to hire a video marketing expert in India through Hire in Any Domain. From crafting compelling visual stories to managing your Amazon marketing and accounts receivables—we have the experts you need under one roof.
Start Building Your Team Today
📧 Email us: [email protected] 🌐 Visit us: www.hireinanydomain.com
Let us help you grow smarter, faster, and stronger—with the right talent from India.
Source: https://medium.com/@hireanydomain/hire-video-marketing-expert-in-india-to-elevate-your-brand-with-hire-in-any-domain-62737d288ccc
#Hire Video Marketing Expert#Video Marketing India#Outsource Video Marketing#Video Marketing Expert India#Hire From India#Brand Promotion India#Video Content Creator#Remote Video Marketer
0 notes
Text
COLOUR GRADE
I am not much of a colorist but I have a bit of background in photo editing so there is a fair bit of transferable skill there. We had a tight turnaround to grade Worms so I kept it to a basic workflow that I picked up from a youtube video. The idea was to Colour space transform from Camera>Davinci then from Davinci>REC709 then from REC709>Cineon and combine that CST with a film LUT to get a quickly achievable cinematic look.
That node system doesn't inherently make it look good, it actually made it look rubbish but it makes the further contrast and colour adjustments a lot easier and quicker. I'll run by some key stills RAW/graded and give my thoughts.


The LUT used for this shot makes the mids and shadows very green so I tried to make them bluer and the skin tones to be warmer for contrast. It looks a bit more saturated on the monitors so I will probably go back and tweak these opening exteriors.


A lot of the blue tones were lost in the log version so I did a lot of adjustments to bring them back. It was quite difficult to balance the saturation of pinks and blues so I masked the the table and adjusted the red tone curve to resemble the original contrast on set. I also added subtle vignetting to allow more focus on the action of the scene.


I think in hindsight with this shot I could have saturated the red/pinks a bit better, they feel much more muted by comparison to the blues in this frame. Nice contrast though. Nick and I had a disagreement on this scene's colour space in general. In their initial grade, they tried to make the blues more green and the reds more orange to shot mach better for the POV transition. I see where they were coming from but I think the harsh change in environment was part of the beauty of the story. Moving between the clinical cold industrial dining room to muggy dingy bedroom promoted the eclectic world building of the film.


The Barracks scene is probably my favourite setup in terms of lighting, however I do want to go back to the grade. I think I can push the orange tones to be more saturated and heighten the yellowness of the greens to make it feel a bit more hostile and gross. I do think boosting the overall contrast and saturation made a massive difference either way.


I wanted to make this environment feel colder so I just adjusted the overall white balance in the chromatic adaptation effects window. Maybe could have desaturated the blues a bit but the overall tone is very similar to what I wanted to achieve.
0 notes
Note
When you get this, please respond with five things that make you happy! Then, send to your last ten people in your notifs (anonymously). You never know who might benefit from spreading positivity <3
Giggling. This is either one hell of a coincidence, or i know out of 3 people who this has gotta be (I hadn't even gotten to the fifth one yet <3). Hehe!! hello totally random mysterious nonnie who sent me this out of the blue!!! Also I've done this before and am about to do another one that is. Stored away in my askbox.... so I'll try for no repeats, but I can't promise that. My memory type is of the sieve classification.

Fanvideos!!! I never shout this out publicly for fear of The Evil DMCA but I adore fanvideos. [LA/G/P/Etc]MVs, Edits, whatever you wanna call em. Fanvids are the bestestest. <3 Soooo cool. so cool. Have a link!
Also sometimes I make terrible anvs myself!! This is the only one truly worth watching It Is My Magnum Opus, I love that vid. It Loops!! These are my most recent WIPs before I lost access to SVP and therefore all my hard work and understanding of editing software in one fell swoop. Yeah.... Learning Davinci is. Slow. Going. Like a snail. Stuck in molasses. I have so many ideassssssss ugh. Ugh! moving on. I love fanvids. They bring me great joy. Next!
2. I loveeeeeeee graphic design. it's a passion of mine /referential joke, but yeah - I do it a lot, or at least I used to; haven't had a need or a chance in the past couple years. Shameful, really. I need to find some time and an excuse to make more of them. Have more links!
CescaLR - Hobbyist, General Artist | DeviantArt
Graphics Galore!
3. kind of obvious, but writing! 1,389,937 is no random number; it's my wordcount on AO3! Wowzer. Hadn't checked that in a hot minute. I got a degree in this shit [Creative and Professional Writing, and absolutely to brag, 1st class with honours! I earned that shit. My 3rd year sucked so bad I had to repeat it, and my first two years were 2020 and 21. Yeah. I'm proud I stuck it through! Bunch of stuff went down I'm not gonna ramble about on main, but damn that was not a super fun 4 years of my life. Met some cool people though! Always a plus.], I better enjoy it lol.
4. Again, obvious, but video games! As a measure of how many I've played since I was a wee babe, 41,851 is my xbox gamerscore alone [I remember the original 360 UI, which I liked much better compared to it's later iterations], not even glancing at steam stats, or the amount of time I put into the various nintendo consoles I've owned (every DS up to 2DS, which I thought was stupid. I want to close that thing! It has a lid for a reason!!), plus the brief possession of a ps2 then a ps4 several years later (I used a ps3, but never had one in my house). I own a VR headset. I Love Gaming So Much. Oh and I have 2k+ hours in the Sims 4. Somehow. And roughly an equal amount in all the versions of skyrim Xbox+PC->Present. Yeah. I don't even play them that much! Which sounds insane to say, but I really don't. I spend more time writing, watching youtube vids, randomly browsing the internet's various fun time wasters, and I used to spend a hell of a lot more time reading - literally lugging around A4 copies of books to school to read in like the 5 minutes between classes. Lol. Lmao. People will really have the wildest conversations in earshot when you're Just Trying To Read, Here, Bud, Do You Really Want Me Knowing That Secret Information About Your Family?. So. Yeah I really don't know how I manage to be as prolific in this as I am, but it's true!! I love video games!!!!!! When I was 10 and my dad told me people make their livings writing stories for video games I started crying tears of absolute wonder. It's one of his favourite memories lmao I just seemed so awed at the prospect lmao! Don't remember that. Glad he does! Video game link thing; currently having my absolute entire soul drained trying to figure out rinworld despite being unable to see a single bit of that HUD. (861) Lore Harbor - YouTube is doing some pretty fun storytelling in the engine [which is what it's for; RW is sold as a story generator moreso than a game, though it's absolutely a colony management sim at its core its also very reliant on your own ability to improv a narrative, which i adore. i love improv so much.]!
5. My favourite evil little creature is the black footed cat, who is a dangerous little adorable killing machine <3 every time i see one of these i immediately start beaming. I'm forever cursed with overactive tear ducts so it's likely they'll start burning too. they're so cute. oh my god. They're teeny teeny tiny. Baby. Murder baby, but still a baby.
Bonus;
Some extra graphics under the cut, namely book covers and tumblr stuff from the archive (my decade-old files stored religiously on SSDs. *slaps PC* this shit can hold fanfics over 14 years old, babey!).
Covers!! Some for use on FFN, some for use on Rolescape (which does not exist yet), made for testing purposes! I'm on the creative team. It's Neat.
FFN; 2 covers and the profile pic:


Rolescape; three potential front covers and the chapter covers:


As always, iterate iterate iterate. I definitely like the mirror one most, though. Also no they're not cropped, it's just that the Hourglass one is a different size (I used that one on FFN, I think, which has different ratio req for the images than RS).
Blog graphics!

^unfortunately this last one is broken atm on the actual page, which is why the screenshot is so.............. wide. I have a normal widescreen 16:9 monitor aspect ratio, not an ultra-wide. Ah well.
Grace remains my one actual singular ever blog graphics request!!!!!!!!!!! So she holds a special place in my heart. I learnt to manip for her. If you can't tell what the manip is That Is The Point (It's her vampire mouth/teeth. actress doesn't have those). I wouldn't do it the same way now but these were the requested colours. I made icons and everything and it never got used LMAO oh well. Good practise nonetheless!
The braeden one was just for fun, saw a cool PSD and really wanted to use it [In A Crowd Of Thousands by someresources and cotton candy by anamakes, who has moved to anasbobashop]. Wanted to see what I could do with this tumblr code floating around that has a funky angled posts scroll... or at least the idea of that as the code itself appears to have disappeared into the aether or presumably the JavaScript ban, alas. Technically the image is the promo but like, that's what I was trying to sell - the blog would have looked basically identical. Don't know why I just said 'sell' i will do anyone whatever graphics they want for free all the time. I love Design TM. [well. Not whatever they want. I have limits! And boundaries! but for free, for sure.]
Youtube:

Can you sense a uniting colour scheme or-
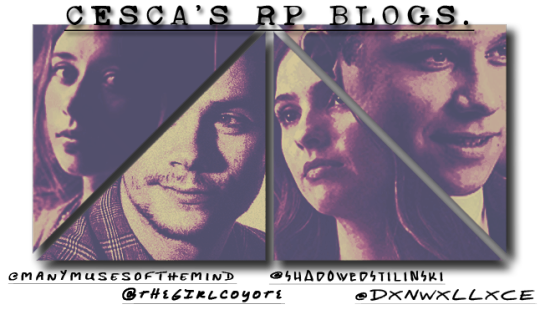
^ first proper 'promo' graphics I made for Malia, I think! On her own blog, anyway. Plus it's sibling multi-promo for my several blogs. Damn. I forgot the order of creation... manymuses was made before don, I think. Hold on Oh my god!!! Baby cesca's graphics!!! I found them!!!

wow that looks so bad <3 I love it

world's worst multi promo. I nailed malia's icon though ngl.
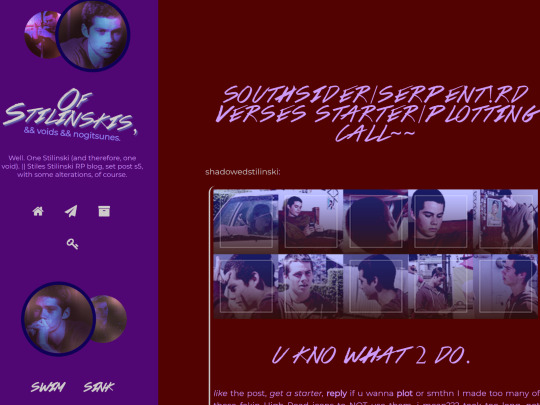
ANCIENT stiles blog!!!! Compare with the current look. I've come so far <3 Do ignore some of the side pages. Tumblr fucked me over when they removed JavaScript and yes, I've asked. they simply refuse to give a girl a break I'm afraid </3
good lord why did i even save that
???
Goddamn. very proboards rp forums of me (that's where I come from!!! the homeland!!! I was FFN -> Proboards -> Tumblr in my trajectory. Probably explains a lot about me.) Also yes I was doing all my work in paint.net, it's an excellent programme.
I found the REAL og malia promo!!!! god. wow. You know i was like ... 16 when I did this. Max. 2016, 2017? Around then. And I was 15 in 2016. So.
Crossed Coyote my beloved <3 I made this PSD colouring in literally 2018 and I never looked back. Perfect Malia colouring.

Last two;
The absolute OG Stiles graphics. Oh my god look at those. Cackling. Could you tell I was a teenager that wrote predominantly angst fanfic or what?
Anyway. That's all the images I can give. Yeah! Graphics!! Since I ran out of images and I still kind of want to gush about this, have my links:
it's crowded here.
Casual and simple style blog, because I needed a less specific look than I usually go for given it's a multimuse and not more.... specific. I don't love the main page but I think it gets interesting in the side pages. Or it *used* to, before Tumblr revoked everyone's JS rights.... sigh. Please forgive that I was in the middle of reworking some pages that had broken due to updates or just needed changing (the other blogs page, mainly, for the latter) when I was suddenly unable to save any changes anymore. Lol. Lmao. Fs in the chat. This is a common theme for the rest of the blogs. I'm going to start with the more underwhelming ones.
Magus Museum
This one didn't even get it's feet off the ground. Sadge. VERY happy with that background image/header image, though!!!!!!!!!!! Seen best on the rules redirect page... which takes you to manymuses' broken ass rules page. tragic.
Poseidon; 'Lord of the Earth.'
I am SO HAPPY WITH THIS ONE. I think it's SO GORGEOUS. AAGH. Tumblr i am pleading at this point give me back my beautiful girl javascript I promise I won't kill your servers
D ᴏ ɴ
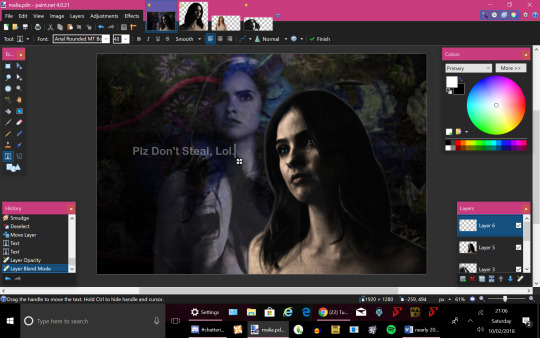
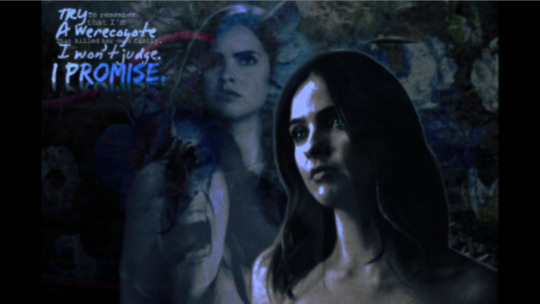
a semi-recent partial revamp of this one has occured! Sort of. Several side pages are still as they were before, and thus a little borked. I'm slow, but i am working on it. My fella <3 Making the colouring was pretty fun! Aly at * /themes & resources. has made some truly excellent codes! To note: on every page on every blog all codes should be credited, but a lot of authors use fonticons for that and sometimes those packs break, and as they tend to put the links as very tiny little things, I can lose track of them if they break :(. So at least once a year I go through and check. But rn I think they're all functional! Fingers crossed. Anyway: Don's great. I make a lot of manips for him.

Not sure why I could upload that! Hope it works. These scenes are kitbashed together. It's like playing with action figures but via video. <3 There's... a little visual glitch in this one that bothers me only a tiny amount because im pretty sure i only know it's there because i stared at this for weeks on end. Don't ask. It's mostly because very few editing software UIs are made with blind people in mind. Funny, that! Wonder why a visual editing tool might not think about blind people using it. Lol. Ah well! Such is my lot in life. In the last shot of Don the colour on the side of his head in shadow noticably changes. Sighhhhhh. Still very happy with it though <3
maiden-hours
silly little extra sideblog to the next up on the list (one the earthshaker is also a sideblog to!) that's not even a little done </3 but it's closer than magusmuseum <3. Which is not saying much </3.
вιя∂ѕ σƒ α ƒєαтнєя ƒℓσ¢к тσgєтнєя
you might be able to tell that coffee has made one of my favourite themes (another one is Knuckle Sandwich; the one I'm using on ShadowedStilinski, by 𝔣𝔩𝔬𝔴𝔢𝔯𝔰 𝔟𝔩𝔬𝔬𝔪, [Shiloh]). It's soooooooooo versatile. I adore it. And yes, I did fc Stewart and Pattinson as siblings. I found a picture where they looked eerily similar and rolled with it. Lots of manip making needed for this one! And cool little banners. I love the... like, shattered mirror effect on the main page. My greek blogs are the prettiest bunch IMO. I love mythology <3.
Last! RP blog. You're not getting away that easy.
Not So Holy.
Had to do a quick fix to the main blog page with a new code when the old one broke, so it's not looking it's most polished atm as I didn't have time that day (and then neglected) to do it properly. Still; I like the colouring I made! It suits the Vibe of SPN well. I also dabbled a bit with the carrd trend going on in the RPC when making this, so that's something unique abt this one... redirecting you to a completely different website for no discernible reason. Lol. Lmao. Will probably not change this, but I do think it's kind of silly in retrospect. It looks fine, its easy for me to read, I'm lazy. It's funny half the pages just take you right back to where you came from (the hellsite itself) though! Why did i do any of that. Most of the links back to the tumblr are to unfinished pages...... sigh. JS ban really put a wrench in all my plans and motivational cogwheels.
Cesca's RP Resources.
my first rph blog. No, I don't know why I have two? The whims and throughlines of past cesca's mind are a mystery to all and sundry, especially present cesca. They're also not my problem! That's for future cesca to figure out, if she ever decides to. RN i just assume shadowedgraphics is for my work, while scresources is for things i find that i use and-or like. Which makes sense to me! Anyway; really quick and lazy blog revamp which I literally forgot! I did! i was expecting a worse looking blog than I got. Silver linings? Anyway. At least it's cohesive with my style for personal blogs, now.
Mythos!
For my original fiction <3 worldbuilding and scraps not intended for publishing otherwise. Alas i actually need to be able to finish the blog to use the damn thing, and tumblr hates me personally /joke. oh well! I still think she's pretty even if she doesn't display properly <3
Cesca's Simblr.
nukl sammitch again!! <3 My simblr, atm. Thinking of revamping it........ again. Do like it though! <3 just want to use a newer, better sim of mine as the mascot. Thinkin of my c!joel one.............. he's one of my best. Anyway; it's not like i'd have much to revamp, most of the pages aren't finished thanks, once again, to our reoccurring nemesis the javascript ban. Grr arrgh shake my puny fist up to the sky as if something exists out there to witness my impotent rage /frustrated joke to feel better about this grave annoyance! Also you can tell it's been ages since I worked on most of these because i am 20 no longer. 4 years......
Noli pati a scelestis opprimi
ANCIENT BLOG. ancient! I forget she even exists! By the way that's the latin for don't let the bastards keep you down but grammatically correct when compared to the usual latin version people throw around. The more you know! Anyway. I made this a long time ago and honestly she's a dead blog. a corpse. I just believe in archival so I've left her be. Like in a museum or something. Or more like taxidermy. My eyes hurt looking at this these days </3 the curse of degenerative eyeballs.
This Tumblr Thing.
Ye ol' faithful!!!!!!! The blog you're currently visiting. My enjoyment of neon is at constant war with my light sensitivity, thank you for asking! I make it work. The tag page is really pleasing to look at for me. Colours <3. Thank tumblr itself (for once in it's lifetime) for the colours i use the most for everything - the goth rave tumblr theme changed me fundamentally as a person /joke but yeah for real i yoinked my palette straight from the dashboard. I love goth rave so much you don't understand
0 notes
Text
How Do I Know If My Video Needs Professional Editing or If I Can Do It Myself?
Deciding whether to edit your video yourself or hire a professional video editing service can be a tricky decision, especially if you're unsure about the level of complexity your video requires. There are various factors to consider that will help you determine if professional editing is necessary or if you can handle it on your own. Here are some key aspects to think about:
1. Quality of the Raw Footage
If your video footage is high quality, and you’re confident in your filming skills, you may be able to handle basic edits yourself. However, if your footage has issues such as shaky camera work, poor lighting, bad sound quality, or distracting background elements, professional editing can help fix these problems. A skilled editor can stabilize shaky footage, color correct, enhance audio, and cut out unwanted parts, making the video more polished.
2. Complexity of the Edit
Basic edits such as trimming footage, cutting out mistakes, and adding text overlays are relatively easy to do yourself, even with beginner-level editing software. But if your video requires advanced techniques, such as color grading, special effects, motion graphics, or detailed transitions, it might be time to consider hiring a professional. Professional editors have the tools and experience to incorporate these complex elements seamlessly.
3. Time and Effort
Editing a video, even a simple one, takes time and effort. If you’re working on a deadline or don’t have the patience or skill to spend hours learning how to use editing software, hiring a video editing service can save you time. Professionals can take care of the entire process for you, allowing you to focus on other important tasks.
4. Purpose of the Video
Consider the purpose of your video. If it's for personal use or a casual social media post, you may be able to get away with basic editing yourself. However, if the video is for a business presentation, a marketing campaign, or a professional event, it’s worth investing in professional editing. A well-edited video can greatly improve your brand’s image and convey your message more effectively.
5. Consistency and Branding
If you’re producing a series of videos or need your video to match a specific style or branding (such as logo placements, color schemes, or fonts), professional video editors can ensure that your video stays consistent with your brand identity. They can also add elements such as intros, outros, and music that align with your brand’s tone.
6. Editing Software and Tools
Editing software can range from simple to advanced. If you’re using basic tools like iMovie or simple apps for your phone, you may be limited in what you can do, especially for more complex edits. Professional editors use advanced software like Adobe Premiere Pro, Final Cut Pro, or DaVinci Resolve, which allows them to create much higher-quality edits with advanced features. If you want your video to have a polished, professional look, it’s better to leave it to an expert.
7. Audience Expectations
Think about your target audience and how they will perceive the video. If your audience expects high-quality production, whether it’s for a corporate video, a commercial, or a branded content piece, professional editing is essential. Poorly edited videos can negatively impact the viewer’s experience and diminish the professionalism of your brand.
Conclusion
If your video requires advanced editing, you lack the time or skills, or you need to make sure the final product meets a high professional standard, it’s best to seek professional video editing services. However, for basic edits or personal projects, you may be able to handle it yourself with the right tools. Ultimately, the decision comes down to the quality of the footage, your skill level, the complexity of the edit, and the purpose of the video. A professional editor can help transform your video into a polished, high-quality production, while DIY editing works for simpler, less critical projects.
0 notes
Text
How to Produce a Video for the First Time
In the modern world, generating videos can be a fun and easily accomplished act of creativity and dissemination of information to a broad community. For people who are just entering the world of video producing, knowing the basics can help you have a much easier time. Also, it is always useful to search for some platforms where you can watch videos and earn something or use a video sharing platform is a good way to expand your opportunities and look at it. Here’s the lowdown on the video production basics to help get your started on your video production.
1. Start with a Clear Vision
The rule of thumb is to be clear on the goal of your video before starting the recording process. If you are doing a tutorial, a vlog or even an artistic short video, having a clear concept makes the workflow much easier. Investigate what is popular on the platforms where you can watch videos and earn something and find out what people like.
2. Invest in Basic Equipment
It’s not necessary to spend a lot of money in order to get started. With a good smartphone, a tripod and a simple lighting setup, you can get very far. Later on, one can always invest in improved cameras and an even better microphone. Most of the video content sharing sites showcase individuals with little capital but have gained significant achievements in creating their content.
3. The Art of Storytelling: Dissected
In fact, many great videos are renowned for their great stories. Consistent storytelling is important, whether you’re making a serious informative video or just a fun vlog. Watch videos on platforms where you can watch videos and earn something to know how people make good use of narratives.
4. Optimize Lighting and Sound
Substandard lighting and ambiguous sound can distract the viewers; in any case, no matter how interesting the material is. Make sure that lighting is done with natural light during the day and make sure the filming environment is quiet. Those videos that have perfect pictures and excellent audio have a higher likelihood of success as they make the view more comfortable.
5. Edit Like a Pro
The most fun part is the editing process. For further editing, use simple editors such as iMovie, DaVinci Resolve or CapCut to remove unwanted scenes, transitions or improve the quality of your video. Understanding how to edit quickly will help your content pop on platforms where you can watch videos and earn something.
6. Understand Your Audience
It is very important to understand who your audience is. Analyse the demographic characteristics and peculiarities of using online video sharing platforms. This insight will help you to develop content that is of interest to the viewers and therefore they will keep coming back.
7. Experiment and Learn
Do not be shy of the new ideas and techniques which can be used in the process. Experimenting allows you to find out what you like and what type of content you like to create. Most of the creators who are making videos on online video sites where you can watch videos and earn something we're starting with the experiments, and using mistakes as the main guideline.
8. Stay Consistent
Regular posting will ensure that the audience increases because people will expect your posts at a certain time. It keeps you relevant on video sharing sites and also builds a loyal following. Hire a content calendar to help in the planning and sticking to a certain upload schedule.
9. Leverage Analytics
To do that, use metrics available on the online video platforms where you can watch videos and earn something. Engagement rates, watch time and audience retention all give you useful information to help boost your next video.
10. Focus on Authenticity
The audiences are all in for something real. Stay true to your brand and make videos that embody you and your brand’s beliefs. Trust is a factor which is necessary for success on platforms where you can watch videos and earn something.
Final Thoughts
Video production is one of the most creative and informative processes that I have ever been through. For beginners, knowing the essentials can make the process smoother. Platforms where you can watch videos and earn rewards, like LYKSTAGE, are great ways to get started and expand your opportunities. If your goal is to have fun, or to learn something new, or even to get inspired, there are so many possibilities on the video sharing services where one can watch the videos and earn something. Welcome to the world of video sharing platforms: it is time to show your creativity!
0 notes
Text
How to Add Special Effects to Your Videos: Tips for Beginners

Are you excited to dive into the world of video editing? Whether you’re dreaming of becoming a professional video editor or just want to create amazing videos for fun, learning the basics is the first step. In this blog, we’ll cover essential video editing techniques every beginner should know. If you’re looking for a video editing course in Yamuna Vihar, this guide will also help you understand what to expect from your classes.
Why Special Effects Matter
Special effects can transform a regular video into something extraordinary. They can help you tell a story, set the mood, or simply make your content more visually appealing. As a student or an aspiring video editor, learning how to add special effects can give you an edge in this competitive field.
Step-by-Step Guide to Adding Special Effects
1. Choose the Right Software
The first step in adding special effects is choosing the right video editing software. Some popular options include Adobe Premiere Pro, Final Cut Pro, and DaVinci Resolve. These programs offer a wide range of tools and effects that you can use to enhance your videos.
Keywords: If you're looking for a video editing training in Uttam Nagar, make sure they cover these software programs. Learning to use professional tools is essential for your career growth.
2. Plan Your Effects
Before diving into the editing process, plan out what effects you want to use and where you want to apply them. This can include transitions, overlays, color grading, and more. Having a clear plan will make the editing process smoother and more efficient.
3. Learn Basic Effects
Start with the basics. Here are a few simple effects that you can try:
Transitions: Smoothly switch from one clip to another.
Overlays: Add images or text on top of your video.
Color Grading: Adjust the colors to create a specific mood or style.
4. Use Tutorials and Online Resources
There are countless tutorials available online that can teach you how to add special effects to your videos. Websites like YouTube, Udemy, and Skillshare offer free and paid tutorials that can help you learn at your own pace.
Keywords: Look for video editing classes in Yamuna Vihar that provide access to these resources. Practical experience combined with online learning can significantly enhance your skills.
5. Practice, Practice, Practice
The key to mastering special effects is practice. Spend time experimenting with different effects and techniques. The more you practice, the better you'll become.
6. Get Feedback
Share your edited videos with friends, family, or online communities and ask for feedback. Constructive criticism can help you improve and refine your skills.
Tips for Success
Stay Updated: The world of video editing is constantly evolving. Stay updated with the latest trends and tools to keep your skills relevant.
Build a Portfolio: Create a portfolio of your best work to showcase your skills to potential employers or clients.
Network: Connect with other video editors, join online forums, and attend workshops or seminars to expand your network and learn from others.
Conclusion
Adding special effects to your videos can be a fun and rewarding experience. With the right tools, planning, and practice, you can create stunning videos that captivate your audience. If you're serious about a career in video editing, consider enrolling in a video editing coaching centre in Uttam Nagar. These programs can provide you with the knowledge and hands-on experience needed to succeed in this exciting field.
Remember, the journey to becoming a skilled video editor takes time and dedication. Keep learning, keep experimenting, and most importantly, enjoy the creative process!
0 notes