#also also i used the reference picture to cover up where my marker bled over the linework and screwed up his thumb but shhh that's a secret
Explore tagged Tumblr posts
Note
Pico F3!
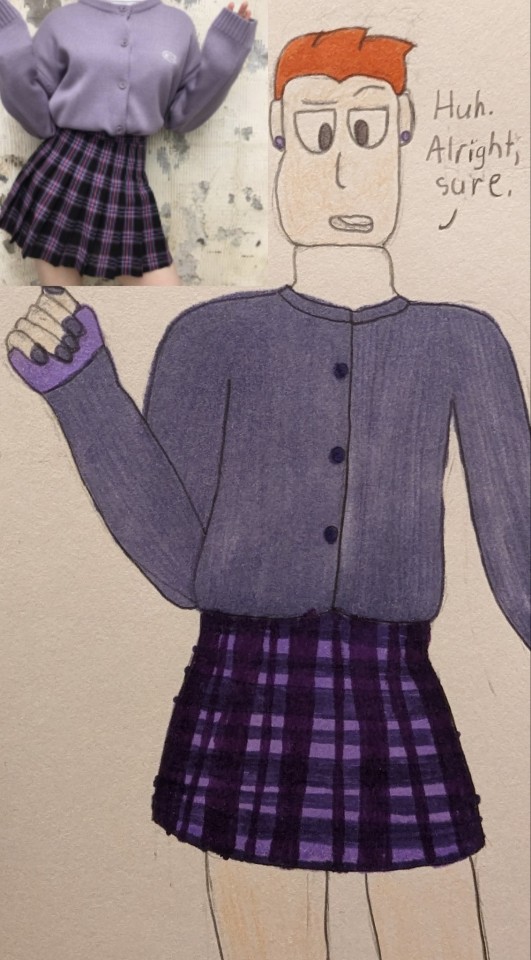
I CAN'T BELIEVE YOU WOULD MAKE ME DRAW PLAID HOW COULD YOU DO THIS TO ME 😭 /LH
#ace rambles#my art#friday night funkin#dw i'm not actually upset i had fun!!#also if you think this is weirdly cropped: it's because i didn't want to draw his other arm#also also i used the reference picture to cover up where my marker bled over the linework and screwed up his thumb but shhh that's a secret#(bc despite working almost exclusively with markers i still don't know how to compensate for marker bleed)#outfit meme#outfit meme fill#this was not in fact the outfit i was hoping someone would request but it is still very cute!#also also also i made the cuff of the sleeve a different color bc i colored his nails the same color as the sweater without thinking#and didn't realize what i'd done until i'd already done it#and i needed to choose a different color so it wouldn't all blend together#but hey doesn't he look cute#fnf pico
3 notes
·
View notes
Text
Steven Universe Shield

A prop I made for Halloween. Finished today. Two days of work. Since I was winging this for the second half of the build I’ll be admitting my errors, so you know what not to do.
Do note that I was going for passable, rather than a perfect replica of the shield. Mostly due to my limited skill and equally limited funds.
Sorry, I didn’t document every step, I only figured I should when I was in the later stages.
Start with these instructions for making a Captain America Shield, following only up to step 12.
https://www.instructables.com/id/Flying-Captain-America-Shield/
Except you don’t have to use coloured duct-tape due to the painting that will come later, all regular silver will do.
Next, add masking tape to the top, at least three layers, Layer one should criss-coss, to make a union jack, or asterisk, shape. An X on top of a +.
The second Layer should be vertical strips.
The third layer should be horizontal strips.
Do make sure all the strips are long enough so that they can be wrapped around the edge and stick onto the back side of the shield, it helps them be more secure. All of this is because duct-tape is supposed to be water repellant and spray paint may not adhere to the surface.
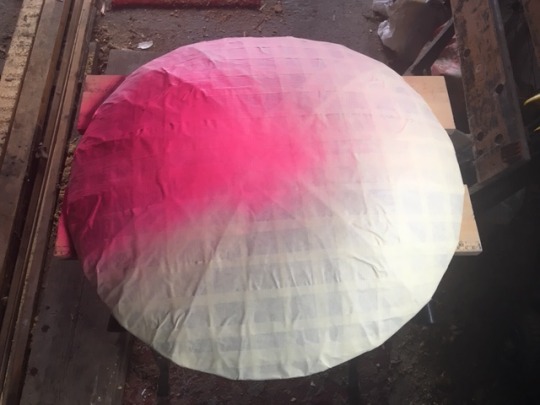
After this should come the painting. Spray Paint, I found a Fluorescent Pink on Amazon. It may seem too bright to some, but it seems to be the colour most other people choose on their replica shields.

A nice, thick, coating. While this dries, you can begin working on the stencil for the shield. When it’s dry, add a second coat to better cover the masking tape.

Not an easy task. I couldn’t find stencils online, so had to hand draw this using an image of Steven’s shield for reference.
Basic cardstock, A4 size, four pieces attached with masking tape on the front and back.
The size of the shield should come to 56 inches, give or take. Always make sure you have the size of your shield noted down. Pencil, tied to a string, attached to a pin in the middle will give you a nice circle.
Reduce the size of the string by about an inch (I went a little larger, so I know this to be wrong) and draw a second circle inside the first.
Next, I made the centre circle, which was just drawing around an everyday mug. Once that circle was in place, it helped me make the rose design. Draw three straight lines at 11 o’clock, 7 o’clock, and 3 o’clock spots and you can carefully draw lines to attach the three of them.
Keep an eraser on hand and it should go without saying that you should draw in pencil. Gentle curves, take your time and redraw until it looks close to the reference picture.
The spiral can be done easier if you can access a bendy ruler. Also known as a Flexible Curve Ruler. It’s a 12-inch strip of round or rectangular rubber or PVC, usually with a metal wire core, so it can be bent and stay in that shape. Found in most office supply stores. Or, if you don’t have one you can do what I did and make it with a combination of a string as a guideline, and a lot of slow, careful, freehand.
This will be one of the most time-consuming steps.

Using a craft knife and a cutting board, cut out the shield along the inner edge. Cut out the ring along the outer edge and save this for later.

The following is something you shouldn’t do. Taping the central stencil to the shield will not work as the flat surface does not match with the domed shield at all.

Attempting to spray around the stencil in order to create the outer edge of the shield will only result in a messy, uneven border.
For the outer edge of the shield, I chose a spraypaint with the title of Lake for its colour shade. It looked more blue in its amazon picture but, as you can see here, it came out more green. It’s the downside of shopping online for supplies.

A much better thing to do it to create a ring of masking tape. It’s best done by placing the outer ring from the stencil above onto the shield and running along its inner border. Very time consuming but necessary for a cleaner border.
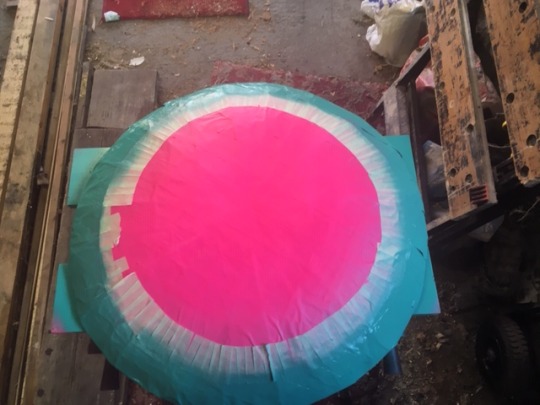
Carefully spraying the edges of the shield will result in this. Some of the paint may mist onto the pink.
While you can do this next step, it is something of a waste of time, as I discovered. I’ll be telling you a better solution later, around the time I figured it out.

What I did was place the ring over the green, to act as something of a shield, and spray the pink again, to cover up the green which had misted onto the pink. It worked well enough, but some pink did land on the very edges of the shield, spoiling the flawless green. At the time I chose to come back to this later.
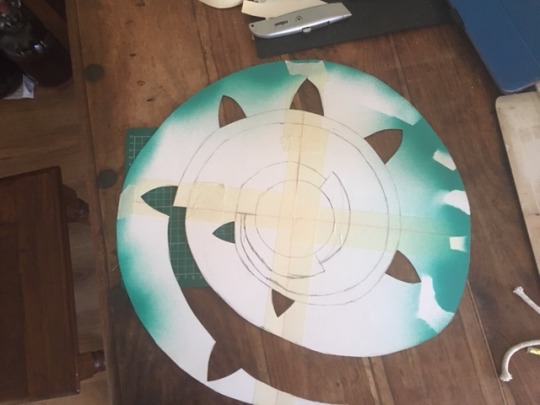
While All the paint is drying you can start cutting out the stencil. At first, I thought to take this in stages, cutting out a bit at a time, but I quickly found that cutting out the whole thing allows it to sit on the shield much better. Placing loops of masking tape on the undersides of the stencil will better fix it to the surface of the shield for a tighter fit and better protection against the paint escaping the edges.
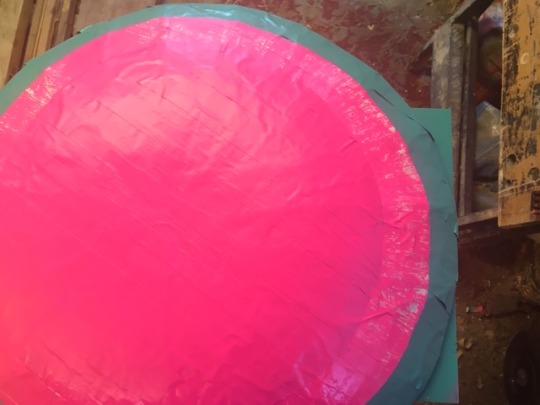
Before placing the stencil on the shield make sure that the paint is dry. Next peel away the masking tape which had separated the pink from the green. No matter how carefully you do it, some paint will be peeled away. Don’t worry about this, it’s fixable. This is the same fix that will work when you tape down the stencil and will likely peel away some paint when the stencil is removed.
Sadly I did not photo the next step.
You take a plastic cup and a paintbrush. You spray the spray paint into the cup until a sizeable puddle gathers in the bottom of the cup. You can then use this as a normal paint and simply paint the gaps where the paint has peeled away.
It’s also how we will cover any paint which has misted over onto the other sections of the shield.
Do use a different cup and different paintbrush for each colour. Washing them out with hot water doesn’t clean them enough and you’ll end up contaminating one colour with another. Stronger cleaners like white spirit or turpentine will clean the brushes but it takes time and I was working to get it done as soon as possible.
A 1-inch or a 1/2-inch brush will suffice.
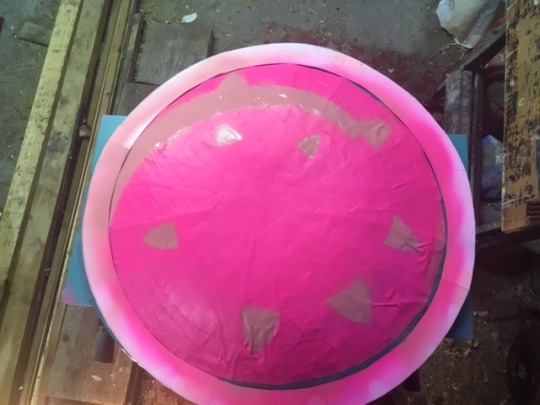
What we see here is the beginning of the spiral, when I was trying to take it in stages, one bit at a time, in the hopes of getting some accuracy. I figured quickly that actually cutting the whole thing and placing the whole spiral onto the shield leads to better accuracy.
Note the ring piece is still in place to keep the green clear of the spray paint from the spiral segment. You can’t paint it again after your done to cover any misting that happens to make it through.
The colour of the spray paint I bought was called Amanita. It’s close to flesh coloured and is probably not the right shade of pink. Again, it’s the downside of buying supplies online. It looked fine on its Amazon picture.
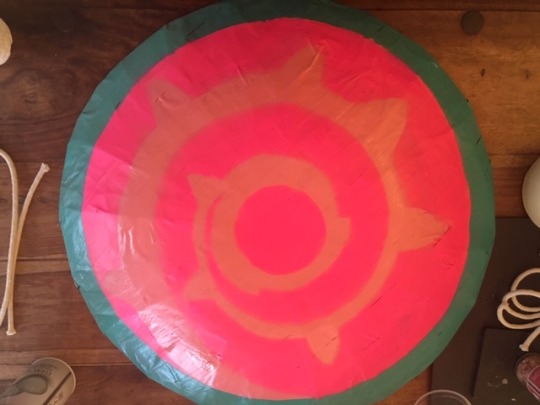
When you’ve cut out the stencil, save the circle from the centre and use a large loop of masking tape to affix it to the middle of the shield for the- I’ll call it the- gem-space.
Spray with the nozzle aimed straight down, it can stop the paint getting under some of the edges of the stencil and spreading further than you need to.
After the spiral portion has dried, peel away the stencil and you should, more or less, have something resembling the above.
Using the cup and paintbrush method can cover any spreading, patch any peeled paint and cover any droplets that have landed on a different colour.
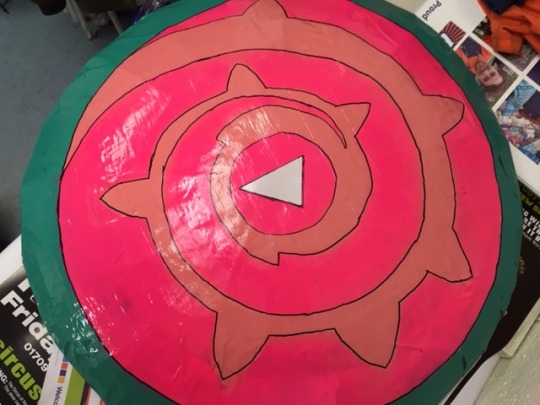
In the final stages, you need a permanent marker, some white card and glue. The white card makes the glint of light on the gem and the black marker makes the colours really pop and stand out more.
You may spot a slight purple shade on the 7 o’clock position on the shield. This is where I learned, the hard way, to use sperate brushes and cups. The green and pink mixed into purple and it was impossible to cover up with further layers of pink, the darker colour always bled through. Lucky it was just a small spot.
To finish the whole thing, spray with a Spray Paint Gloss - Clear Acrylic. As you can see, it helps to add a shine to the finished product and adds a layer of protection to the whole thing against some general wear and tear. I can also guarantee that it adds waterproofing against a light drizzle, at least. I’m unwilling to test on a heavier rain.
Like I said, I wasn’t going for a perfect replica of Steven’s shield, what I was aiming for was something that was passable enough to be recognised as Steven’s shield. I think I achieved that quite well and so did others. I’ve received a few compliments on it and people seem impressed when I tell them that I made it instead of bought it.
8 notes
·
View notes