#Weatherproof shed construction
Explore tagged Tumblr posts
Visit Tumblr Blog
Explore Tumblr blogs with no restrictions, modern design and the best experience.
Last Seen Tumblr Blogs


Fun Fact
Post activity is at the highest at 4:00 pm EDT; notes peak at 10:00 pm EDT.
Text
Waterproof shed solutions TTC Industrial Area
0 notes
Text
Choosing the Best Padlock for Your Needs: Advice from Melbourne Locksmiths
Selecting the right padlock is a critical step in securing your property. With a range of options available, understanding the unique requirements of each security scenario is essential. Here, we draw on insights from professional locksmiths in Melbourne to help you make an informed decision. Whether you need to secure a garden shed, a commercial site, or personal belongings, this guide will ensure you choose the best solution.

Types of Padlocks and Their Applications
1. Standard Padlocks
Standard padlocks are versatile and straightforward, suitable for everyday use. They feature a simple design with a shackle that locks into the body of the padlock, providing a basic level of security. These padlocks are commonly used for securing lockers, toolboxes, gates, and storage units.
For added protection, Melbourne locksmiths advise selecting padlocks with features such as:
Hardened Steel Shackles: These offer resistance against cutting or sawing attempts.
Double Locking Mechanisms: Prevent the shackle from being forced open by applying pressure on one side.
While standard padlocks are sufficient for low- to medium-security needs, they are not suitable for high-value items or areas requiring advanced protection.
2. Combination Padlocks
Combination padlocks are popular for their keyless convenience, as they use a numeric or alphanumeric code to unlock. These padlocks are widely used for gym lockers, school bags, and light-duty applications where frequent access is required.
However, locksmiths in Melbourne caution against using combination padlocks in high-security environments due to the risk of:
Code Guessing: Simpler codes may be guessed or cracked.
Weak Mechanisms: Lower-quality combination locks are more susceptible to tampering.
To maximise security, choose models with resettable combinations and sturdy construction. For added convenience, consider combination padlocks with illuminated dials for use in low-light conditions.
3. Keyed Padlocks
Keyed padlocks remain one of the most reliable options for securing property. Available in various materials, sizes, and security levels, these padlocks cater to both residential and commercial needs. Melbourne locksmiths recommend models with:
Anti-Pick Technology: Prevents tampering with the locking mechanism.
Anti-Drill Plates: Protect the keyway from drilling attacks.
Key Retention Feature: Ensures the padlock cannot be locked without the key being inserted, reducing the chances of accidental locking.
Keyed padlocks are ideal for securing gates, fences, storage units, and other areas requiring moderate to high security. For added convenience, some models offer master key systems, allowing multiple padlocks to be unlocked with a single key.
4. Weatherproof Padlocks
Designed specifically for outdoor use, weatherproof padlocks are built to withstand harsh environmental conditions, including Melbourne’s variable climate. These padlocks are commonly used to secure garden sheds, outdoor gates, boat lockers, and industrial equipment. Key features include:
Corrosion-Resistant Materials: Such as stainless steel or brass to prevent rust.
Sealed Locking Mechanisms: Protects the internal components from moisture, dirt, and debris.
UV-Resistant Coatings: Prevents deterioration due to prolonged sun exposure.
For long-term outdoor use, Melbourne locksmiths suggest choosing padlocks with rubberised covers and reinforced shackles for additional durability.
5. High-Security Padlocks
High-security padlocks are engineered for maximum protection in high-risk scenarios. They are commonly used in industrial facilities, warehouses, and securing high-value items such as vehicles or machinery. Features to look for include:
Hardened Steel Bodies: Resistant to cutting, sawing, and hammering.
Shrouded Shackles: Prevent tools from accessing the shackle for cutting.
Advanced Locking Mechanisms: Such as disc-detainer or cylinder locks, which are harder to pick or manipulate.
Locksmiths in Melbourne highlight that high-security padlocks often comply with stringent security standards, such as those set by insurance companies. These padlocks are a long-term investment for critical applications.
6. Smart Padlocks
The latest in padlock technology, smart padlocks utilise Bluetooth or Wi-Fi for keyless entry. Controlled via smartphone apps, they offer advanced features such as:
Activity Logs: Track who accessed the lock and when.
Customised Access: Grant or revoke access remotely, ideal for shared spaces or rental properties.
Weatherproof Designs: Suitable for outdoor use in Melbourne’s unpredictable weather.
Smart padlocks are perfect for tech-savvy users securing personal items, storage units, or office spaces. However, Melbourne locksmiths advise selecting models with:
Backup Access: Such as a physical key or combination code to prevent lockouts in case of connectivity issues.
Robust Security Features: Ensures the padlock is resistant to hacking or electronic interference.
By understanding the unique applications and features of each type of padlock, you can confidently select the best option for your specific needs. Melbourne locksmiths can provide personalised advice to help you make the right choice, ensuring your security is never compromised.
Factors to Consider When Choosing a Padlock
1. Security Level
Assess the value of the items or area you are securing. High-value or sensitive assets demand high-security padlocks with advanced features like anti-cut and anti-tamper designs.
2. Location
Consider whether the padlock will be used indoors or outdoors. Melbourne’s locksmiths advise weatherproof padlocks for external applications to ensure durability against rain and humidity.
3. Size and Fit
Ensure the shackle size and body of the padlock are compatible with the item or area being secured. A poorly fitting padlock may compromise security.
4. Ease of Use
For frequent access, opt for user-friendly options such as combination or smart padlocks. If access is less frequent, keyed padlocks with robust mechanisms are a more secure choice.
5. Brand and Quality
Investing in reputable brands ensures better build quality and reliability. Locksmith Melbourne professionals often recommend brands with proven track records in durability and performance.
How Locksmith Melbourne Services Can Help
Selecting the right padlock can be overwhelming, given the variety of options available. Consulting a professional locksmith in Melbourne can simplify the process. They offer expert advice tailored to your specific needs, helping you identify the best padlock for your requirements. Additionally, they provide services like key duplication, padlock rekeying, and maintenance, ensuring long-term reliability.
Conclusion
Choosing the best padlock depends on understanding your security needs, the environment of use, and the level of protection required. With expert guidance from locksmiths in Melbourne, you can secure your belongings with confidence. Whether you need a basic lock or a high-security solution, prioritising quality and functionality is key.
For professional advice and assistance, contact a trusted Locksmith Melbourne service to ensure your security requirements are met with precision and expertise.
https://yourlocallocksmith.com.au/choosing-the-best-padlock-for-your-needs-advice-from-melbourne-locksmiths/
0 notes
Text
Custom Sheds in Portland: Crafting the Perfect Solution for Your Needs

When it comes to custom build sheds near me in Portland, finding the right builder is essential. Sheds are no longer just about storage; they’ve evolved into personalized spaces that can serve as workshops, studios, guest accommodations, or even offices. Better Built Barns specializes in crafting custom sheds near me in Portland that are tailored to your specific needs, providing top-tier quality and exceptional service.
Why Choose a Custom Shed?
Custom sheds offer unparalleled versatility. Unlike pre-fabricated options, custom shed construction in Portland allows you to design a space that aligns perfectly with your requirements. Whether you need extra storage or a functional workspace, custom sheds give you the freedom to create a structure that reflects your personal style and meets your practical needs.
The Benefits of Hiring a Custom Shed Builder in Portland
Personalized Designs: Tailored layouts ensure your shed is the perfect fit for your space and purpose.
High-Quality Materials: Reputable builders like Better Built Barns use durable, weather-resistant materials to withstand Portland’s climate.
Added Property Value: A well-designed custom storage shed Portland can enhance your property’s aesthetic and market value.
Expert Craftsmanship: With experienced builders, you can trust that your shed will be built to last.
Popular Uses for Custom Sheds
Custom sheds are incredibly versatile and can be adapted for various purposes:
Home Office: With remote work on the rise, a dedicated office shed provides a distraction-free workspace.
Creative Studio: Artists and crafters can use a shed as an inspiring space for their projects.
Workshop: DIY enthusiasts and professionals often need a sturdy, organized area for their tools and materials.
Storage: Keep your belongings safe and accessible with a custom storage shed in Portland.
Better Built Barns: Your Trusted Custom Shed Builder Portland
At Better Built Barns, we take pride in being one of the top shed builders near me in Portland. Our process is designed to make creating your custom shed as smooth and enjoyable as possible.
Our Process:
Consultation: We discuss your needs and preferences to create a tailored design.
Design Approval: You review and approve the layout and features.
Construction: Our skilled team builds your shed with precision and care.
Delivery and Installation: We handle transportation and setup, ensuring everything is seamless.
Materials and Features
Better Built Barns uses only premium materials to ensure durability and longevity. From treated wood to weatherproof roofing, we ensure your shed is built to withstand Portland’s rainy seasons. Customizable features include:
Shelving and Storage: Optimize your space with built-in organization.
Windows and Skylights: Add natural light for a welcoming atmosphere.
Insulation: Keep your shed comfortable year-round.
What Sets Better Built Barns Apart?
Our commitment to quality and customer satisfaction makes us the go-to choice for custom build sheds in Portland. Here’s why:
Attention to Detail: Every project is handled with precision, ensuring the final product exceeds your expectations.
Experienced Team: Our builders have years of experience crafting sheds for diverse needs.
Eco-Friendly Options: We prioritize sustainable practices to minimize environmental impact.
Affordable Pricing: Competitive rates make our custom sheds accessible without compromising quality.
Frequently Asked Questions
1. How long does it take to build a custom shed? The timeline varies depending on the complexity of the design, but most projects are completed within 2–4 weeks.
2. Can I customize the size of my shed? Absolutely! At Better Built Barns, we specialize in creating sheds of all sizes to suit your specific requirements.
3. Are permits required for custom sheds in Portland? In many cases, a permit may be necessary, depending on the size and intended use. Our team can guide you through the permitting process.
4. Do you offer warranties on your sheds? Yes, Better Built Barns provides warranties on our craftsmanship and materials to give you peace of mind.
5. Can a custom shed be used as a living space? Yes, with proper customization, a shed can be transformed into a guest house or studio. We can incorporate features like insulation and electricity to make it livable.
Conclusion
Investing in a custom shed near me in Portland is a smart and practical choice for anyone seeking a versatile, high-quality space. With Better Built Barns, you’re not just getting a shed—you’re getting a structure designed to enhance your lifestyle and property. From custom shed construction Portland to seamless installation, we’re here to bring your vision to life.
Contact Better Built Barns today to discuss your project and create the perfect shed tailored to your needs!
#studio shed portland#office shed salem#tool shed portland#custom sheds near me portland#workshop shed portland#prefab shed near me spokane#guest house shed portland#across the spiderverse#cabin shed salem#artists on tumblr
1 note
·
View note
Text
Why Aluminium Hanger Tents in India Are Revolutionizing Temporary Infrastructure and Event Solutions
Temporary infrastructure plays a crucial role in numerous sectors, from hosting large-scale events to accommodating disaster relief operations. Among the many options available, aluminium hanger tents have emerged as a game-changer in India. Known for their durability, adaptability, and cost-effectiveness, these structures are redefining how we approach temporary spaces.
In this blog, we’ll explore why aluminium hanger tents are becoming the go-to solution in India, delve into their unique advantages, and shed light on pricing trends while highlighting the importance of choosing reputed aluminium tent manufacturers in India.
The Growing Popularity of Aluminium Hanger Tents in India
India’s dynamic economy and diverse landscape create a constant demand for reliable and flexible infrastructure solutions. Be it weddings, corporate expos, storage needs, or disaster relief, aluminium hanger tents provide a versatile alternative to traditional brick-and-mortar structures.
Key Factors Driving Demand
Versatility Across ApplicationsAluminium hanger tents are designed to cater to a wide range of needs. From extravagant wedding pavilions to secure warehousing units, their modular nature ensures seamless adaptability.
Cost-EffectivenessTraditional construction requires substantial investments and long lead times. Aluminium tents, on the other hand, offer a budget-friendly solution without compromising on quality or functionality.
Eco-FriendlinessSustainability is a growing concern globally. Aluminium tents in India stand out as an environmentally friendly option because they are reusable and generate minimal construction waste.
Ease of Assembly and RelocationAluminium hanger tents are lightweight yet sturdy. This combination allows for quick assembly and relocation, making them ideal for events or temporary projects.
Unique Features of Aluminium Hanger Tents
What sets aluminium hanger tents apart from other temporary infrastructure options? Let’s break it down:
Durable FrameworkConstructed using high-grade aluminium, these tents are resistant to corrosion, ensuring longevity even in challenging weather conditions.
Customizable SizesAluminium hanger tents come in various dimensions to suit diverse needs, whether it’s a compact setup for a private gathering or a sprawling warehouse for industrial use.
Weather ResistanceEquipped with waterproof and UV-resistant materials, these tents offer reliable protection from India’s diverse climatic conditions, from scorching summers to torrential monsoons.
Aesthetic AppealUnlike traditional temporary structures, aluminium hanger tents provide a sleek and modern look, making them suitable for high-profile events and exhibitions.
Applications of Aluminium Hanger Tents in India
1. Event Management
The Indian event industry is thriving, with weddings, corporate events, and cultural festivals creating a consistent demand for innovative solutions. Aluminium hanger tents are ideal due to their customizable designs and ability to accommodate large crowds.
2. Industrial and Commercial Storage
Businesses often require temporary storage spaces for raw materials, finished goods, or machinery. Aluminium tents offer a secure and cost-efficient solution.
3. Disaster Relief and Emergency Shelters
In times of natural disasters, quick and reliable shelters are essential. Aluminium hanger tents provide sturdy and weatherproof accommodation, ensuring safety and comfort for displaced individuals.
4. Sports and Entertainment
From sporting events to concerts, aluminium tents are widely used to create covered arenas, backstage areas, and audience seating spaces.
Why Choose Aluminium Tent Manufacturers in India?
Selecting a reliable aluminium tent manufacturer in India is vital to ensure the quality and performance of your investment. Here’s what to look for:
Proven ExpertiseReputed manufacturers have extensive experience in designing and delivering aluminium hanger tents tailored to various applications.
Customization OptionsLook for manufacturers who offer customizable designs, ensuring the tent aligns perfectly with your specific requirements.
Compliance with StandardsHigh-quality tents adhere to industry safety and durability standards, giving you peace of mind regarding their reliability.
Post-Sales SupportMaintenance and repair services are crucial for extending the lifespan of aluminium tents. Choose a manufacturer with a strong after-sales service network.
Understanding Aluminium Tent Hanger Prices in India
When considering aluminium hanger tents, price is often a significant factor. Here's a breakdown of the factors influencing aluminium tent hanger prices in India:
Size and DimensionsLarger tents require more materials, leading to higher costs. The intended purpose often dictates the size, whether for a small event or a large industrial setup.
Quality of MaterialsHigh-grade aluminium and premium fabric coverings increase the price but ensure better durability and performance.
Customization and Add-OnsAdditional features such as insulation, advanced ventilation, or decorative elements contribute to higher costs but enhance functionality and aesthetics.
Installation and TransportationSome manufacturers include installation and transportation costs in the overall pricing, while others may charge separately.
Average Pricing Trends
For basic setups: Prices start around ₹500 per square foot.
For mid-range options with enhanced features: Expect costs between ₹800 to ₹1,200 per square foot.
High-end, fully customized tents: Prices can go beyond ₹1,500 per square foot.
It’s advisable to compare quotes from multiple aluminium tent manufacturers in India to find the best deal without compromising on quality.
Benefits of Aluminium Tents Over Traditional Structures
When evaluating options for temporary infrastructure, aluminium tents offer distinct advantages:
Faster Turnaround TimeTraditional construction can take months to complete, whereas aluminium hanger tents can be installed within days.
ScalabilityNeed more space? Aluminium tents are easy to expand, making them a flexible choice for growing requirements.
PortabilityUnlike fixed structures, aluminium hanger tents can be dismantled and relocated with ease, ensuring maximum utility.
Lower Maintenance CostsHigh-quality aluminium tents are low-maintenance, saving you time and money in the long run.
How Aluminium Hanger Tents Align with India’s Infrastructure Goals
India’s push for sustainable and innovative infrastructure solutions makes aluminium hanger tents a perfect fit. These structures address critical challenges like cost, adaptability, and environmental impact, aligning seamlessly with the country’s developmental vision.
Final Thoughts
As India embraces modern infrastructure solutions, aluminium hanger tents are becoming a game-changer. Their unparalleled combination of versatility, durability, and cost-effectiveness makes them an essential asset across various industries.
Whether you're hosting a grand event, requiring temporary storage, or looking for a rapid solution for emergency shelters, aluminium hanger tents offer a smart and sustainable choice. Their adaptability and robust design cater to diverse needs, ensuring reliability in every application.
For top-quality solutions, trust MM Infrastructure, one of the leading aluminium tent manufacturers in India. They provide competitive pricing and customized designs to suit your unique requirements. Explore the possibilities with aluminium tents and transform your approach to temporary infrastructure.
To learn more about aluminium hanger tents, visit MM Infrastructure today!

#services offered by a construction company#aluminium hangers tents infrastructure#modern a type canopy tents#pre engineering building company in india#aluminium hanger tent in india#aluminium hangers tents manufacturers#pre engineered building manufacturers in india#pre engineered building manufacturers#steel building construction company#aluminium tent hanger price
0 notes
Text
Durable and Weatherproof Garden Storage Boxes
When it comes to outdoor storage, durability and weather resistance are key factors to consider. Whether you need a safe place to store garden tools, cushions, or toys, a durable and weatherproof Garden Storage Boxes can help keep your items safe from the elements while ensuring long-lasting protection. In this article, we’ll explore the best weatherproof garden storage boxes that are designed to withstand rain, snow, UV rays, and more, offering a reliable solution for organizing your outdoor space.
Why Choose Durable and Weatherproof Garden Storage Boxes?
Outdoor storage boxes are exposed to a variety of weather conditions, from heavy rain and frost to intense sunlight. Choosing a weatherproof garden storage box ensures your stored items stay dry, secure, and in good condition, regardless of the weather. Here’s why a durable, weather-resistant storage box is a smart investment for your garden:
Protection from Rain: Moisture can quickly damage outdoor cushions, tools, and other equipment. Weatherproof boxes prevent water from seeping in, ensuring everything stays dry and rust-free.
UV Resistance: Prolonged exposure to the sun can cause fading, cracking, and deterioration of your items. UV-resistant storage boxes protect your belongings from sun damage, keeping them looking new for longer.
Snow and Frost Protection: For regions with cold winters, a weatherproof garden storage box provides insulation against frost, helping to prevent freezing and damage to items like hoses or garden tools.
Long-lasting Durability: Made from tough, weather-resistant materials, these boxes can stand up to the elements for years, saving you the cost of replacing inferior storage options.
Top Durable and Weatherproof Garden Storage Boxes
1. Keter Store-It-Out Ultra Plastic Garden Storage Box
Price Range: £150 – £200 The Keter Store-It-Out Ultra is a large, weather-resistant storage box that offers both durability and practicality. Made from durable, high-density resin, this box is designed to withstand rain, snow, and UV rays, making it an excellent choice for outdoor storage. With a spacious capacity of 1,200 liters, it’s perfect for storing large garden tools, furniture cushions, and outdoor toys.
Best For: Storing gardening equipment, cushions, and larger outdoor items.
Why It’s Great: It has a lockable lid for security, is highly durable, and has a modern design that complements most garden settings.
2. Suncast 22 cu. ft. Resin Deck Box
Price Range: £150 – £200 The Suncast Resin Deck Box combines strength with style. Made from durable resin, this storage box is both weatherproof and UV-resistant. Its large 22-cubic-foot capacity provides ample space for cushions, garden tools, and other outdoor essentials. The lid is easy to open, and the box has built-in ventilation to prevent moisture buildup.
Best For: Outdoor cushions, small furniture, and lightweight garden tools.
Why It’s Great: Resin construction makes it highly durable and weather-resistant, while its attractive design enhances your garden’s appearance.
3. Lifetime Outdoor Storage Shed
Price Range: £300 – £500 If you need more substantial storage, the Lifetime Outdoor Storage Shed is an excellent choice. Constructed with high-density polyethylene and steel reinforcements, this shed is resistant to rain, snow, and UV damage. The large capacity makes it ideal for storing larger tools, lawn mowers, and even bicycles. The reinforced roof is sloped to allow water runoff, ensuring your items remain dry.
Best For: Larger garden equipment, bikes, and outdoor furniture.
Why It’s Great: Extremely durable, UV-resistant, and large enough to store bulkier items. It also comes with a lockable door for added security.
4. Forest Garden Wooden Storage Box with Weatherproof Finish
Price Range: £200 – £300 For those who prefer a natural look, the Forest Garden Wooden Storage Box is an excellent option. Made from FSC-certified timber, this storage box features a weatherproof finish to protect the wood from moisture and UV damage. The rustic design adds charm to your garden, while the spacious interior offers room for cushions, tools, and garden supplies.
Best For: Storing outdoor cushions, gardening tools, and small furniture.
Why It’s Great: The wooden finish provides a natural aesthetic, and the weatherproof treatment ensures the box can withstand the elements.
5. Keter Rockwood Resin Storage Shed
Price Range: £250 – £350 The Keter Rockwood Resin Storage Shed offers a robust, weatherproof solution for larger outdoor storage needs. Made from durable resin, this shed has a natural wood-look design, but it offers the low-maintenance benefits of resin. It’s ideal for storing large garden equipment, tools, and furniture, providing both ample space and protection against the weather.
Best For: Large garden tools, lawnmowers, and outdoor equipment.
Why It’s Great: Highly durable, weather-resistant, and designed to withstand the UK’s unpredictable weather. It also has an attractive, wood-like finish that blends well with any garden.
Features to Look for in Weatherproof Garden Storage Boxes
When choosing a weatherproof garden storage box, here are some important features to consider:
Material: Opt for boxes made from materials like high-density resin, UV-protected plastic, or treated wood, as these materials offer the best weather resistance.
Waterproofing: Ensure the box is fully waterproof to protect your items from rain and snow. Look for features like sealed seams or rubber gaskets to keep water out.
UV Protection: UV-resistant materials will prevent sun damage, such as fading and cracking, keeping your storage box looking new for longer.
Security Features: If you’re storing valuable items, choose a box with a lockable lid or reinforced design for added security.
Size: Choose a storage box that provides enough capacity for your outdoor essentials. Consider how much space you need and select accordingly.
Ease of Access: Look for boxes with user-friendly lids or openings that make it easy to access your items when needed.
Conclusion
Investing in a durable and weatherproof garden storage box is a smart choice for protecting your outdoor belongings and keeping your garden organized. Whether you need a large storage shed for tools and equipment or a compact box for cushions and small accessories, there are plenty of high-quality options available to meet your needs.
1 note
·
View note
Text
Key Roles Of Structural Glazing Contractors
Structural Glazing Contractors In Mumbai play a critical role in modern architecture, particularly in the construction of buildings that feature extensive use of glass as a primary material. These professionals specialize in designing, fabricating, and installing glass facades, windows, and other structural glass elements. Today, in this blog, we are going to shed some light on the key roles of structural glazing contractors.

1. Design Consultation
Architectural Collaboration: Structural glazing contractors work closely with architects and engineers to ensure that the glass elements integrate seamlessly with the building’s design. They provide expert advice on the best materials, glazing systems, and installation techniques to achieve the desired aesthetic and functional outcomes.
Custom Solutions: Contractors offer customized glazing solutions tailored to the specific needs of the project, including considerations for energy efficiency, acoustics, and structural integrity.
2. Material Selection
Choosing the Right Glass: Contractors are responsible for selecting the appropriate type of glass, such as tempered, laminated, or insulated glass, based on the building’s requirements. They consider factors like safety, thermal performance, and durability in their selection process.
Hardware and Sealants: In addition to glass, structural glazing contractors select the right hardware, such as brackets and frames, and sealants to ensure a secure and weatherproof installation.
3. Engineering and Structural Analysis
Load Calculations: Contractors conduct detailed engineering analyses to determine the load-bearing capacity of the glass and its supporting structures. This includes assessing wind loads, seismic activity, and other environmental factors that could impact the integrity of the glazing system.
Safety Compliance: They ensure that all structural glazing components comply with local building codes and safety regulations, including fire resistance and impact resistance standards.
4. Fabrication
Precision Manufacturing: Structural glazing contractors oversee the fabrication of glass panels and frames, ensuring they meet the exact specifications of the project. This includes cutting, shaping, and finishing the glass to precise dimensions.
Quality Control: Throughout the fabrication process, contractors implement rigorous quality control measures to ensure that the glass elements are free from defects and meet the required performance standards.
If you or anyone you might know is searching for Structural Glazing Contractors In Navi Mumbai, then you don’t have to worry about anything at all because we are your destination.
Credit:- https://aluminefabricatorsindiaprivate.blogspot.com/2024/09/key-roles-of-structural-glazing-contractors.html
0 notes
Text
Steel modular chassis for mobile cabin house in the UK
Are you searching online for a recommended steel fabrication builder in the UK? Get all your projects monitored and assembled with UK’s highly trusted bespoke chassis development Company where we craft heavy duty iron chassis body, modular build base, motorhouse chassis, shepherd house, shower blocks, garden houses, glamping pods of small and large sizes.
Does iron chassis work better against wooden chassis bodies? What are the main difference, let’s talk with an expert to see what works best to make your steel modular chassis better than ever, we are here at UK Chassis Ltd., the leading manufacturer of caravan house, glamping pod, shepherd house, shower blocks for all types of residential and commercial industry.
At UK Chassis Ltd., we build all types of bespoke steel fabrication projects with complete furnishing, decorum, and design plan to meet your business needs and a specific budget frame you are willing to invest. Want to own a mobile like house construction, caravan chassis manufacturers in the UK, let the no.1 chassis manufacturer for all the groundwork, design plan that works well for all your iron fabrication coating, iron threading and development needs. We keep the word engineering excellence, where talent meets inspiration, innovation and discovery to build something attractive, long-lasting and colorful for a stylish steel shower block concept for your modern living luxury steel shower blocks planning in the UK.
We do work as per specification, steel fabrication project demand to fulfill your business needs, our industry certified team always work with team spirit, dedication, manufacturing competition for finest grade metal and steel body works like threading, resizing and welding of different types of caravan house, shepherd house, glamping pod project planning.
Follow these below properties while building steel metal fabrication jobs for any types with safe, weatherproof design purpose: Trust the leader for quality and superior grade product development goal at a specified budget, we are here to help you reduce the burden of finding path and transform your construction project in safe hands such as all types of mobile unit house plan, caravan house, modular build base, fitted chassis cabinet with different proportion and size you’re willing to make.
Find us online if you are looking for immediate work consultation for all types iron chassis plan, budget estimation and figure out the futuristic plan to make your business in safer direction online, we believe in curiosity where our team helps to develop things in a safe and collaborative way for all your glamping pod, shower block, caravan house, motorhome chassis, fitted cabin chassis, modular build base in UK. Take a look at our services and why we are the best in the Chassis manufacturing industry in the UK.
Expert team for fresh new fabrication and renovation project
ISO certified company
Safety feature while work and hygienic space
Sheer pleasure design concept and load maintenance check
Complete support against any issues, design negligence
Exclusive trademark grade license and support
Dedicated team of technology expert
Safety gears while work to make your fabrication work in safe process
Safe shipping of chassis body to the required location
Long lasting and durability concept chassis body
Quality metal fabrication for any types of iron house body
Whether you have a single unit project or bulk number of projects to do like teen shed chassis, motor house chassis, modular build base, iron chassis for a garden house, glamping pods are some alike we especially focus on to deliver our clients in a stipulated time frame and workmanship with highest level of industrial services at UK Chassis Ltd, the well known fabricator in UK.
0 notes
Text
Reasons Why uPVC Sliding Doors Are Particularly Important For Monsoon Weather
uPVC (unplasticized polyvinyl chloride) sliding doors are highly beneficial during the monsoon season, offering a range of advantages that make them an ideal choice for homes and buildings. The uPVC Sliding Door Supplier In Pune is offering everyone with different set of uPVC windows at economical prices. Today, in this blog, we are going to shed some light on the reasons why uPVC sliding doors are particularly important for monsoon weather.

1. Water Resistance
Excellent Seal: uPVC sliding doors are designed with tight seals that prevent water from seeping through, keeping interiors dry during heavy rains.
Weatherproof Construction: The material is inherently resistant to water, ensuring that the doors do not warp, swell, or deteriorate when exposed to moisture.
2. Durability
Corrosion-Free: Unlike metal doors, uPVC does not rust or corrode, making it highly durable in wet conditions.
Longevity: uPVC sliding doors maintain their structural integrity and appearance over time, even with constant exposure to rain and humidity.
3. Energy Efficiency
Insulation Properties: uPVC offers excellent thermal insulation, helping to maintain indoor temperatures and reduce energy consumption.
Reduced Humidity: Properly sealed doors prevent humidity from entering the home, contributing to a comfortable living environment.
4. Sound Insulation
Noise Reduction: The tight seals and insulating properties of uPVC sliding doors provide effective sound insulation, reducing the noise from heavy rainfall and storms.
Peaceful Environment: This helps create a quieter and more serene indoor atmosphere during noisy monsoon weather.
5. Low Maintenance
Easy to Clean: uPVC sliding doors require minimal maintenance. They can be easily cleaned with a damp cloth, keeping them looking new without much effort.
No Painting or Varnishing: Unlike wooden doors, uPVC doors do not require regular painting or varnishing, reducing upkeep costs and efforts.
If you are looking for a reliable uPVC Sliding Door Manufacturer in Pune, then you don’t have to search for it, because we are your destination.
Credit:- https://radiuscorporation.blogspot.com/2024/07/reasons-why-upvc-sliding-doors-areparticularly-important-for-monsoon-weather.html
0 notes
Text
Create Your Perfect Shed in Portland: Tailored Solutions for Every Need

If you’re looking for a high-quality shed in Portland, Better Built Barns has got you covered. Whether you're envisioning a man cave shed, a serene she shed, a functional workshop shed, or a stylish office shed, our custom-built sheds are designed to match your unique needs. With Portland's ever-evolving lifestyle demands, having a versatile space that serves as your retreat, workspace, or storage solution is a practical investment.
The Rise of Multi-Purpose Sheds in Portland
Sheds are no longer just storage spaces for garden tools and seasonal decorations. In Portland, homeowners are increasingly turning their sheds into creative spaces, guest accommodations, or even small studios. With a vibrant community that values sustainability and practicality, sheds have become a popular extension of modern living.
Popular Shed Options Offered by Better Built Barns
Man Cave Shed in Portland
Every homeowner deserves a personal retreat, and a man cave shed is the perfect way to claim your space. Equipped with modern insulation, lighting, and custom interiors, a man cave shed can be transformed into a gaming zone, a mini bar, or even a private cinema.
She Shed Portland
A she shed is more than just a trend—it’s a sanctuary. From art studios to yoga retreats, Portland women are embracing the idea of having a dedicated space to relax and recharge. Better Built Barns offers customizable designs to create the perfect escape, tailored to your tastes.
Guest House Shed in Portland
Portland's real estate market values creative use of space, and a guest house shed is an excellent solution for hosting visitors. With thoughtful layouts and amenities like plumbing and electricity, you can turn a simple shed into a cozy, self-sufficient accommodation.
Cabin Shed Portland
For those craving a rustic touch, a cabin shed offers the perfect blend of comfort and charm. Whether it’s a weekend getaway spot or a writer’s retreat, these structures can be styled with wood paneling and cozy finishes to emulate the feel of a classic cabin.
Workshop Shed in Portland
Craftsmen and DIY enthusiasts often need a dedicated workspace to bring their ideas to life. A workshop shed provides the perfect space for your tools, equipment, and ongoing projects, ensuring everything is organized and within reach.With features like built-in storage and ventilation, these sheds are designed for productivity.
Storage Shed Portland
Practical and straightforward, a storage shed helps you declutter your home and yard. From garden tools to holiday decorations, our storage sheds offer secure and weatherproof solutions to keep your belongings safe and organized.
Office Shed Portland
The rise of remote work has made office sheds a popular choice in Portland. With a custom-built office shed from Better Built Barns, you can have a professional workspace that’s just steps away from your home. Enjoy peace, productivity, and separation from household distractions.
Studio Shed Portland
Artists, musicians, and creators in Portland love the versatility of a studio shed. These sheds provide the perfect environment to focus on your craft, with customizable options for soundproofing, natural lighting, and shelving.
Tool Shed Portland
Every gardener and handyman in Portland needs a reliable tool shed. With easy-to-access storage solutions and durable construction, our tool sheds are built to last while keeping your tools organized and protected.
Why Choose Better Built Barns?
Better Built Barns is committed to providing high-quality, durable sheds tailored to meet your needs. Whether you’re looking for functionality, aesthetics, or both, we offer:
Custom Design Options: Every shed can be personalized to match your style and requirements.
Top-Quality Materials: We select premium-grade materials to guarantee durability and longevity for your shed.
Eco-Friendly Construction: Our sheds are designed with sustainability in mind, perfect for Portland’s environmentally-conscious residents.
Expert Installation: Our skilled team handles the entire setup process with precision, ensuring hassle-free delivery and assembly.
FAQs
1. How much does it cost to build a custom shed in Portland?
The cost varies depending on the size, materials, and features. At Better Built Barns, we work with you to create a shed that fits your budget without compromising quality.
2. Do you provide permits for sheds in Portland?
Yes, we can guide you through the permitting process to ensure your shed complies with Portland’s local regulations.
3. Can I use a shed as a living space?
Absolutely! Many of our clients customize their sheds to serve as guest houses, cabins, or studios. We can help design your shed to meet these requirements.
4. How long does it take to build a shed?
The completion timeline varies based on the project’s scope and design complexity.Most sheds are completed within 2–4 weeks after the design is finalized.
5. What materials are used in Better Built Barns sheds?
We use high-quality wood, metal, and composite materials to ensure durability and weather resistance.
Final Thoughts
Whether you need a storage shed to declutter your space or a man cave shed for personal relaxation, Better Built Barns offers top-tier solutions in Portland. Investing in a custom shed not only adds value to your property but also enhances your lifestyle.
Explore our wide range of designs, and let Better Built Barns bring your dream shed to life. Contact us today to discuss your shed project and take the first step toward creating your perfect space.
#studio shed portland#custom sheds near me portland#office shed salem#prefab shed near me spokane#workshop shed portland#tool shed portland#guest house shed portland#across the spiderverse#cabin shed salem#artists on tumblr
1 note
·
View note
Text
Building a Shed: A Comprehensive Guide to Creating Extra Storage Space

Modular construction and inexpensive materials make this shed easy to build and easy to afford.
An outdoor shed is a versatile addition to any property, offering valuable storage space for a variety of needs. Whether you're looking to store gardening tools, outdoor equipment, or even create a cozy retreat, building a shed can provide the extra space you need. In this comprehensive guide, we will walk you through the process of building a shed, providing detailed plans and a materials list to help you get started.
Don't let the size of this project intimidate you - we will utilize simple construction methods to make the building process as easy as possible.
youtube
Planning and Preparation
Before embarking on any construction project, careful planning and preparation are essential. Start by determining the purpose and size of your shed. Consider what items you will be storing and any additional features you may want to include, such as windows or shelving.
Next, check with your local building codes and obtain any necessary permits. This step is crucial to ensure compliance with regulations and avoid any potential issues down the line.
Once you have a clear plan in mind, it's time to gather the necessary tools and materials. A typical shed construction project will require basic tools such as a hammer, tape measure, circular saw, and level. Additionally, you will need a variety of building materials, including lumber, plywood, roofing materials, and fasteners.
Consult the provided materials list for specific quantities and measurements.
Foundation and Framing
Before constructing the shed itself, it's important to establish a solid foundation. The type of foundation you choose will depend on your specific needs and local regulations. Common options include concrete slabs, treated wood skids, or pier blocks.
Whichever method you choose, ensure that the foundation is level and properly anchored to the ground.
Once the foundation is in place, it's time to begin framing the shed. Start by constructing the floor frame using pressure-treated lumber. This frame will serve as the base for the walls and roof.
Next, erect the wall frames, ensuring they are plumb and square. Secure the frames with nails or screws, and reinforce them with diagonal braces for added stability. Finally, install the roof trusses, ensuring they are properly aligned and securely fastened to the wall frames.
Siding and Roofing
With the framing complete, it's time to move on to the exterior of the shed. Choose a siding material that suits your aesthetic preferences and budget. Common options include plywood, vinyl, or metal siding.
Install the siding according to the manufacturer's instructions, ensuring a tight fit and weatherproof seal.
Next, tackle the roofing. Select a roofing material that is durable and suitable for your climate. Asphalt shingles are a popular choice due to their affordability and ease of installation.
Start by applying an underlayment to protect against moisture, then install the shingles in overlapping rows. Finish off the roof with flashing around any openings or edges to prevent leaks.
Doors, Windows, and Finishing Touches
Now that the shed is taking shape, it's time to add doors, windows, and any additional features you desire. Choose a sturdy door that provides easy access to the shed's interior. Consider adding windows to allow natural light and ventilation.
Install these features according to the manufacturer's instructions, ensuring they are properly sealed to prevent drafts and water infiltration.
Finally, add any finishing touches to make your shed functional and aesthetically pleasing. This may include shelves, hooks, or storage racks to maximize organization and efficiency. Consider painting or staining the exterior to protect against the elements and enhance the shed's appearance.
Building a shed is a rewarding project that can provide valuable storage space and enhance the functionality of your property. By following the steps outlined in this comprehensive guide, you can create a shed that meets your specific needs and budget. Remember to prioritize safety throughout the construction process and consult professionals or local building authorities when needed.
With a little time and effort, you can enjoy the benefits of a well-built shed for years to come.
0 notes
Text
Which is the best company to buy portable sheds?
Finding Your Perfect Fit: Why Out builders are Central Oregon's Top Choice for Portable Sheds
Central Oregon's wide landscapes and excellent lavishness are only matched by its citizens' busy lifestyles. Whether a person is a weekend warrior or a homeowner, he/she needs more space, or, we can say, a hobbyist must look for a portable shed that provides a practical and adaptable space. However, with so many alternatives available for construction companies, selecting the most suitable firm would be more difficult. So, you don't need to look farther than Out builders, Central Oregon's leading manufacturer of high-quality, custom-made portable sheds.
Built to Last: Consistent Quality for Central Oregon's Conditions Central Oregon's weather can sometimes be unpredictable. From hot summers to freezing winters, your shed must survive the weather. Outbuilders always focus on prioritizing quality over anything else. We utilize only the best materials required and guarantee that your shed is long-lasting and trustworthy for many years to come.
Durable Construction: Outbuilders sheds are constructed by using high-quality materials such as treated timber wood (treated wood costs extra) or galvanised steel to ensure their durability. These materials are resistant to bending, damage, and insect threat, by keeping the safety of your valuables.
Weatherproof Design: Roofs are made of weatherproof materials, i.e. metal or composite roofing materials, and walls are made to shed water and snow. This reduces the possibility of leaks and keeps your room/stay dry.
Adapting to Your Needs: Whether you need a shed to survive heavy snowfall or extremely hot summer heat, Outbuilders will customize the design to Central Oregon's unique weather conditions.
Customization: Making a Shed That Exactly Fits Your Needs
Outbuilders know that each homeowner has different requirements. Their devotion to customization allows you to create a shed that is suited for their lives and property.
Size Matters: Outbuilders provide a variety of shed sizes, from small storage facilities to large workplaces. We can assist you in choosing the appropriate size to meet your individual requirements.
Functionality comes first: Do you need tool shelving? A workstation for craft projects? Outbuilders can add personalized factors to improve the shed's functioning for your specific usage.
Aesthetics that Match Your Home: Outbuilders provides a wide range of siding, like paint colors, and trim designs designed to match your home's aesthetics. You may build a shed to suit the aesthetics of your current home, giving your property a seamless look.
Locally Owned and Operated: The Outbuilders' Advantage. When you pick Outbuilders, you are not only purchasing a shed, but also supporting a local Central Oregon business. This leads to numerous significant benefits:
Unmatched Customer Service: Outbuilders take pride in providing great customer service. Their courteous and educated team will walk you through each step of the process, from first consultation to shed delivery and installation.
Understanding Local Needs: As a local company, Outbuilders have a deep understanding of Central Oregon’s building codes and requirements. They can navigate this process easily for you, saving you time.
Fast and Efficient Service: Outbuilders prioritize efficiency. They have a structured process for design, permitting, and installation, certify you get your shed quickly without compromising on quality.

Building Your Dream Shed with Outbuilders Take a chance of working with Outbuilders to get designed work which is enjoyable. Initial Consultation: During a free consultation, discuss your shed requirements and vision. Outbuilders' professionals will respond to your queries and walk you through the design alternatives.
Custom Design: Outbuilders will construct a shed plan based on your individual requirements and preferences. You may revise and improve the design until it exactly reflects your concept.
Permits and Approvals: Outbuilders will manage the permit procedure and ensure that your shed meets all local construction requirements.
Delivery and Installation: Outbuilders' expert staff will deliver and install your shed in a timely and professional manner, causing minimal interruption to your property.
Invest in Your Future with a Quality Shed from Outbuilders
Outbuilders' portable sheds are more than simply storage; they're an investment in your Central Oregon lifestyle. Here's why Outbuilders is the best option for you.
Peace of Mind: Outbuilders' assurance of high-quality materials and craftsmanship promises that your shed will survive for many years, giving you peace and relaxation of mind about your important item.
Increased Storage Room: A well-designed shed gives up room in your house, allowing you to organize your items more efficiently that attract the look.
Enhanced Property Value: A high-quality shed increase the value and standard of your property, making it an wise investment for homeowners as well as attractive to viewers.
Supporting Local: By selecting Outbuilders, you are supporting a Central Oregon business and contributing to the community's economic prosperity, which sets a good example for the future.
#storage sheds#backyard sheds#business#wooden storage sheds#wooden sheds#furniture#portable sheds#backyard storage
0 notes
Text
Top 10 Creative Uses for Shipping Container Storage Units
In recent years, shipping container storage units have gained popularity for their versatility, affordability, and durability. These sturdy steel containers are not only used for shipping goods but also serve a variety of creative purposes. Let's explore the top 10 creative uses for shipping container units.
Self-Storage Facilities
Shipping container units are commonly used as self-storage facilities. They provide a secure and cost-effective solution for individuals and businesses looking to store their belongings or inventory.
Mobile Offices
With some modifications, shipping containers can be transformed into mobile offices. These portable workspaces are ideal for construction sites, events, or any temporary office needs. They can be customised with windows, doors, insulation, and other amenities to create a comfortable working environment.
Pop-Up Shops
Shipping containers are a popular choice for pop-up shops and retail spaces. Their sturdy construction and portability make them perfect for temporary retail locations at events, festivals, or markets. With some creative branding and design, shipping container pop-up shops can attract customers and generate buzz for your business.
Art Studios
Artists and creative are using shipping containers as affordable and customisable art studios. With proper insulation and ventilation, these shipping container storage units provide a quiet and secure space for artists to work on their projects. Plus, the industrial look of the containers adds a unique aesthetic to the studio space.
Workshops and Maker spaces
Shipping containers are also being used as workshops and maker spaces. Whether it's woodworking, metalworking, or crafting, these containers provide a dedicated space for DIY enthusiasts and hobbyists to pursue their passions.

Farm Storage
Farmers are using shipping containers to store equipment, tools, and supplies on their farms. These containers provide a weatherproof and secure storage solution for farm equipment, feed, and other agricultural essentials.
Emergency Shelters
In times of natural disasters or humanitarian crises, shipping containers can be quickly repurposed into emergency shelters. With minimal modifications, these containers can provide temporary housing for displaced individuals and families.
Off-Grid Cabins
For those looking to live off the grid, shipping containers can be converted into off-grid cabins or tiny homes. With solar panels, composting toilets, and other off-grid amenities, these containers offer a sustainable and affordable housing solution.
Outdoor Classrooms
Schools and educational institutions are using shipping containers as outdoor classrooms and learning spaces. These containers provide a unique and inspiring environment for students to learn and explore the outdoors.
Garden Storage
Finally, shipping containers are being used as garden sheds and storage units. Whether it's storing gardening tools, equipment, or supplies, these containers offer a secure and weatherproof storage solution for your garden.
Final Words
The shipping container storage units are incredibly versatile and can be used for a wide range of creative purposes. Whether it's for storage, retail, workspace, or housing, shipping containers offer a cost-effective and sustainable solution for a variety of needs. With some creativity and ingenuity, the possibilities are endless!
Source: https://fbttranswest.blogspot.com/2024/04/top-10-creative-uses-for-shipping.html
0 notes
Text
Mastering Masonry: Weather-Resistant Construction
The ancient craft of masonry has stood the test of time not just because it's aesthetically pleasing, but also because of its resilience. From the grand cathedrals of Europe to the modest, yet formidable homes of the countryside, the endurance of masonry is a testament to its strength and adaptability. However, one critical element can impact even the most exquisitely crafted masonry structures – the weather.
Here, we will explore how masons historically addressed weather-related challenges and how, with modern knowledge and tools, we can craft structures that not only withstand the elements but also thrive in them. Understanding and preparing for weather conditions in masonry is a fine mix of tradition, science, and innovation, ensuring that your buildings stand proud for generations to come.
The Impact of Weather on Masonry
Weather has long been a fact of life for masons. While inert and solid, masonry is still subject to expansion and contraction from temperature changes, erosion from wind-driven rain, and degradation from freeze-thaw cycles. Exposing various types of masonry to the elements can have different effects. For instance:
Brick and Clays: Bricks can absorb moisture, leading to efflorescence – the appearance of salt deposits on the surface – and spalling, where the brick's face peels away.
Natural Stones: Limestone and sandstone are particularly susceptible to dissolution from acidic rain and moisture absorption. Conversely, granite and slate are more weather-resistant.
Concrete: Although exceptionally durable, concrete's greatest enemies are cracks that allow water penetration, leading to corrosion of embedded metals and spalling.
Proper preparation is critical, as reactionary fixes can be less effective and more costly than proactive measures.
Historical Mastery of Masonry Weather Precautions
Masons of yore relied on ingenious methods to manage weather conditions. Ancient Greeks and Romans used special drainage systems along walls and under floors, while medieval Europeans developed sloped roof designs to shed water away from walls. In Colonial America, masons mixed in ox hair or animal blood to enhance the structural cohesion and water resistance of mortars and limewashes. These approaches highlight a deep understanding of both materials and environment.
Modern Techniques for Weatherproofing Masonry
Advancements in science and technology have afforded masons a rich repertoire of weatherproofing techniques. Here are a few:
Sealants and Repellents: Modern formulations can provide a barrier against water intrusion without inhibiting masonry's ability to breathe.
Grout and Mortar Additives: Latex and acrylic polymers added to mixes can increase adhesion and flexibility, preventing cracks and leaks.
Flashing and Cavity Systems: Strategic placement of metal flashing and installation of cavities and weep holes in walls can redirect water without disrupting the visual uniformity of the structure.
Drainage Systems: Subsurface and surface drainage systems can alleviate hydrostatic pressure, a primary cause of basement and foundation water infiltration.
Weathering the Future
The craft of masonry continues to evolve, incorporating new materials and methods that address the complex challenges of today's climate. The long-standing principles of proper preparation, durable construction, and attention to the local environment remain steadfast. Masonry will always require careful, experienced hands, but by leveraging our collective knowledge, we can build structures that reflect the past's ingenuity and the future's innovation.
Preparing for weather conditions in masonry is not only about protecting the present but also about ensuring a legacy of solidity and beauty that lasts for centuries in the face of dynamic environmental factors. Whether you're a professional mason, contractor, or someone looking to enhance their home, taking the weather seriously is key to your project's longevity. Plan for the elements, and your masonry will stand tall – not just in spite of the weather, but because of it.
0 notes
Text
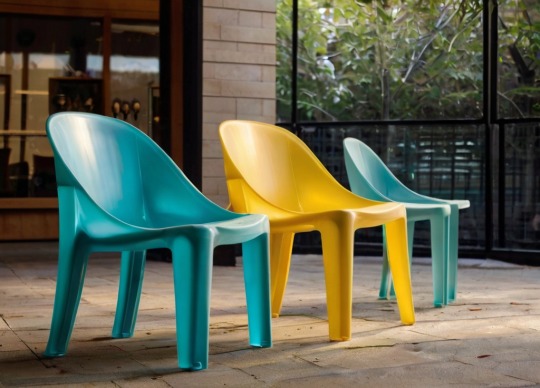
Storing Plastic Chairs: Space-Saving Solutions for Every Home
In every household, maximizing space is a constant challenge, especially when it comes to storing bulky items like plastic chairs. Whether you are dealing with limited indoor space or looking for efficient outdoor storage options, there are several creative solutions to neatly store your plastic chairs while keeping them easily accessible. Let's explore some effective strategies to store plastic chairs in a space-saving manner.
Choosing the Right Storage Solutions
The first step in effective chair storage is evaluating your available space and the specific needs of your home environment. Indoor and outdoor spaces may require different approaches to ensure chairs remain protected and accessible.
Indoor Storage Solutions
Folding Chairs: Advantages and Storage Tips
Folding plastic chairs are versatile and can be conveniently stored in closets, under beds, or in corners when not in use. Opt for chairs that fold compactly and consider using storage bags to protect them from dust.
Wall-Mounted Racks and Hooks
Install wall-mounted racks or hooks in your garage or utility room to hang chairs vertically. This not only saves floor space but also keeps chairs organized and easily visible.
Under-Bed Storage Containers
Utilize the space under beds by storing folded chairs in flat containers designed for under-bed storage. This hidden storage option is ideal for maximizing space in smaller rooms.
Outdoor Storage Solutions
Weatherproof Covers
Invest in weatherproof covers designed specifically for plastic chairs to protect them from rain, sun, and dust when stored outdoors. Choose covers made from durable materials for long-lasting protection.
Shed or Dedicated Storage Space
If you have a backyard or garden, consider setting up a shed or designated storage area to keep plastic chairs safe from outdoor elements. This dedicated space can also accommodate other outdoor furniture.
Stackable Chair Storage Solutions
Opt for stackable chairs that can be easily stacked when not in use. This not only saves space but also makes storage and retrieval more convenient.
DIY Storage Ideas
For those who enjoy DIY projects, there are several creative ways to build custom storage solutions for plastic chairs using readily available materials.
Custom-Built Storage Racks
Construct simple storage racks using wood or PVC pipes to create a designated storage area for your plastic chairs. Customize the dimensions to fit the available space.
Repurposing Household Items for Storage
Repurpose old bookshelves, cabinets, or unused furniture to store plastic chairs. Add wheels to create mobile storage units that can be moved around as needed.
Tips for Efficient Storage
To ensure your plastic chairs remain in good condition while in storage, follow these essential tips:
Clean chairs thoroughly before storing to prevent dirt buildup.
Apply protective sprays to maintain plastic surfaces and prevent degradation.
Utilize vertical space by stacking chairs or using wall-mounted storage solutions.
Organizational Tips
Organize your stored chairs efficiently to make retrieval easier:
Label storage containers or shelves to identify different types of chairs.
Implement a rotation schedule to evenly distribute wear and tear on chairs.
Benefits of Effective Chair Storage
Implementing efficient chair storage offers various benefits:
Prolongs the lifespan of plastic chairs by protecting them from damage.
Frees up space for other activities, making rooms more functional and organized.
Conclusion
Effectively storing plastic chairs is essential for maximizing space and maintaining a tidy home environment. By choosing the right storage solutions, implementing organizational strategies, and prioritizing safety, you can ensure that your plastic chairs remain in good condition for years to come.
#furniture#plastic#interior design#home decor#decor#interior decor#interior#home & lifestyle#ankurwares#plastic chairs
1 note
·
View note
Text
Essential Hiking Tips: Don't Forget Your Rain Jacket

Bracing yourself for the challenges that the wilderness may present is key to any successful hike. That crisp mountain air might carry with it a sudden shower, and having the best equipment at your disposal is not just a luxury, it's a necessity. So, before you set out on those winding trails and breathe in the freedom that only the great outdoors can offer, make sure to prepare for all that Mother Nature has in store with the proper wet weather gear.
Key Takeaways
Packing a rain jacket is a fundamental hiking essential for dealing with the unpredictable weather.
Quality rain gear ensures that you remain dry, comfortable, and safe during your outdoor adventures.
Weatherproof hiking apparel is not just about staying dry but also preserving the overall experience of your hike.
Consulting trail tips related to weather preparedness can help you choose the right wet weather gear.
Prioritizing the inclusion of a rain jacket in your hiking essentials list protects you from sudden downpours and windy conditions.
Remember, being equipped with the right gear is part of the adventure itself, enhancing your connection with nature and ensuring peace of mind.
Understanding the Importance of a Rain Jacket on the Trail
When you're miles from shelter on the trail, the weather can transform from sunny to stormy in an instant. The key to staying protected? A good rain jacket, like the ones dwights.co.nz offer. With advances in waterproofing technology, these essential pieces of gear provide hikers with the weather resistance they need to face the elements with confidence. But it's not just about staying dry; it's also about comfort and moisture management—ensuring that from deep forests to high peaks, your outdoor adventure isn't hampered by the unpredictability of Mother Nature.
Protection Against Unpredictable Weather
Rain jackets serve as your first line of defense, offering a shield from wind and rain while allowing perspiration to escape thanks to breathable fabrics. This balance between protection and breathability is critical for any hiker who wants to remain comfortable regardless of the atmospheric mood swings.
The Science of Staying Dry: How Rain Jackets Work
At the heart of a rain jacket's function is a marvel of textile engineering. Materials such as Gore-Tex or eVent use a membrane that has pores smaller than a water droplet but larger than a molecule of water vapor. This means rain can't penetrate, but sweat can escape. Such membranes are often paired with a Durable Water Repellent (DWR) coating, which causes water to bead up and roll off the fabric's surface. A jacket's construction with taped or sealed seams ensures that water doesn't sneak in through the stitching. With these technologies combined, hikers can stride through downpours while staying enviably dry.
Understanding how these jackets keep you dry and comfortable involves knowing what to look for while shopping. Let's compare common rain jacket features:FeatureBenefitsConsiderationsGore-Tex MembraneExceptional waterproofing and breathabilityUsually found in high-end, more expensive jacketsDWR CoatingRepels water, enhancing the fabric's shedding abilityMay require reapplication after extensive wear or cleaningSeam TapingPrevents water seepage through seamsImportant for complete water protection, especially in severe weatherVented ZippersAllows for adjustable airflow and moisture controlLook for zippers under the arms or along the sides for maximum efficiencyAdjustable Hoods and CuffsCustomizable fit for added comfort and enhanced barrierShould be easy to adjust, even when wearing gloves or on the move
By understanding the innovations behind rain jacket design, hikers can make informed choices. Whether bracing for a drizzle or a downpour, your rain jacket is much more than a barrier—it's a complex ensemble of waterproofing technology and moisture management that works to keep you dry and cozy. It's a testament to how technical apparel can elevate our connection with the outdoors, allowing us to explore more—with less worry about the weather.
Picking the Right Rain Jacket for Hiking Adventures
When embarking on a hiking journey, the selection of the right lightweight rain gear is as crucial as the trail you choose. Not all rain jackets are created equal; factors such as durability, waterproof ratings, and additional features can vary widely, making some options more suited for your adventure than others. This guide will help you navigate through the necessary specifications and highlight the must-have attributes of trail-ready jackets for any outdoor enthusiast.

Durability doesn’t just entail surviving the rigors of nature; it must also mean retaining its protective qualities over time. The most durable jackets use robust materials and quality construction to resist tears and abrasions while maintaining their waterproofness after multiple uses and washes.
The best jackets are lightweight and packable, fitting neatly into your backpack without adding much weight or bulk. They often have smart features like pit zips for added ventilation, adjustable hoods that can fit over a helmet, and pockets that are accessible even with a backpack on.
Pit Zips/Ventilation Options: For regulating body temperature on strenuous hikes.
Adjustable Hood: To ensure visibility and protection in heavy rain.
Articulated Sleeves: For high mobility without compromising coverage.
Remember, the perfect rain jacket is the one that matches the intensity of your hikes, the climate you'll face, and your personal preference for comfort.
FeatureBenefitDesirable QualityWaterproof MaterialKeeps you dry in the heaviest of rains>10,000mm ratingBreathabilityPrevents moisture buildup from sweatHigh MVTR (moisture vapor transmission rate)DurabilityLong-lasting protection session after sessionAbrasion-resistant fabric like Ripstop NylonWeightEasy to carry without straining your backLess than 500gPackabilityConvenient to stow away when not in useStuffs into its pocket
Brands like Arc'teryx, Patagonia, and The North Face have set benchmarks in producing exceptional rain jackets, balancing the trinity of lightweight design, high durability, and impressive waterproof ratings. Consulting their collections would be a wise starting point in your search for the rain jacket that will protect you without fail, whether on a casual day hike or a challenging mountain expedition.
Proper Usage and Maintenance of Your Rain Gear
Whether it's a drizzle or a downpour, your rain jacket is your shield against the elements. To ensure maximum protection and gear longevity, it’s crucial to know not just how to wear your rainwear, but also how to maintain it. Below, discover invaluable usage tips and care instructions that will extend the life of your rainwear and keep you dry on the trail.
How to Effectively Wear and Adjust Your Rain Jacket
Putting on your rain jacket seems straightforward, but there are nuances to ensure a snug fit without sacrificing comfort or mobility. Always start by loosening all adjustable components – cuffs, waist hem, and hood. Once on, progressively tighten each area to seal out moisture and wind, while confirming you retain full range of motion. Remember, an effective fit is one that keeps you dry while allowing you to move freely.
Keeping Your Rain Jacket in Peak Condition
Maintenance is not just about repair; it's a regimen that starts from day one of usage and continues through the lifecycle of your gear. - Outdoor Care Expert
Just like any high-use gear, rainwear maintenance is pivotal in preserving its functionality. Cleaning your jacket after outings prevents buildup of oils and dirt which can degrade waterproofing over time. When washing, use a gentle, non-detergent soap and always reference the manufacturer's care instructions. Air-drying is typically recommended, but some jackets can tolerate a tumble dryer on low heat. Periodically, reapply a Durable Water Repellent (DWR) to the outer fabric to restore its water-shedding capacity.Care ActionFrequencyNotesWash with gentle soapAfter heavy use, or once per seasonAlways follow the manufacturer's guidelinesAir dry or tumble on lowAfter each washCheck care tag for specific instructionsDWR re-applicationWhen water no longer beads on the surfaceUse a DWR spray or wash-in product
For storage, ensure your rain jacket is completely dry to prevent mold and mildew. Hang it in a cool and dry place, or if space is limited, fold it loosely to avoid permanent creases that could damage the fabric. Occasional conditioning of the jacket helps maintain rainwear maintenance and gear longevity.
Monitor for signs of wear and address them promptly.
Clean all zippers and Velcro to preserve their functionality.
Avoid long exposures to direct sunlight, which can degrade the fabric.

Dont Forget Your Rain Jacket When Hiking
Embarking on a hike without the proper gear can turn an adventure into a trial, especially when you're faced with unexpected weather changes. A major component of your hiking checklist should be a well-selected rain jacket, crucial for your preparedness and trail safety. To ensure you're never caught off guard by mother nature, here's a detailed list of what to include for weather preparation during your hiking trips.
Rain Jacket: Opt for waterproof and breathable materials.
Waterproof Backpack: Keep your essentials dry.
Trail Map and Compass: For proper navigation in limited visibility.
First-Aid Kit: For unexpected injuries.
Extra Water and Snacks: Stay hydrated and energized.
Headlamp/Flashlight: In case the trail takes longer than expected.
Emergency Shelter: A lightweight tent or bivouac can be lifesaving.
Extra Clothing: Include moisture-wicking base layers and insulation.
Sun Protection: Sunscreen, sunglasses, and a hat – weather can change quickly.
Fire Starting Gear: Waterproof matches or a lighter can prove essential.
When packing your gear, consider not only the likelihood of rain but also the potential for temperature drops and extended exposure to the elements. Your rain jacket acts as the shield against the rain, but it's the combination with other essentials that ensures a safe and enjoyable outdoor experience. Remember, the key to a successful hike lies in balancing the essentials without overpacking.
Consider each item on this list a staple in your preparedness kit. With this hiking checklist, you can set out on your journey knowing you’re equipped to tackle the twists and turns of the trail—rain or shine.
Packing Strategies for Hiking in Rainy Conditions
When the forecast hints at rain, your hiking pack should be tailored to stay dry and organized. Understanding what to bring and how to pack it can make the difference between a soggy trek and a comfortable adventure, regardless of the drizzles.
Essential Items to Pack Alongside Your Rain Jacket
To complement your rain jacket, prioritize waterproof packs that ensure your belongings are shielded from moisture. Dry bags are indispensable for protecting electronics and dry clothing. These lightweight, secure containers come in various sizes, making them perfect for any gear that absolutely must stay dry. Moreover, don't overlook your feet – a pair of waterproof boots will keep you moving confidently along the wettest trails.
Waterproof backpack or pack cover
Dry bags in multiple sizes
Waterproof hiking boots
Extra socks and a rain cover for your pack
Compacting Your Gear for Efficient Space Management
Strategic gear organization can vastly improve your hiking experience, especially when you're faced with limited space. Use these space-saving tips:
Start by lining your pack with a large dry bag as an extra layer of defense against moisture.
Employ roll-compression dry bags to squeeze out air and reduce volume.
Organize items by necessity, keeping those needed most frequently within easy reach.
Rolled clothing takes up less space and can double as padding to cushion other items. Not only does it save space, but it can also help prevent wrinkles and assist in keeping your items neatly sorted for quick access.Taking the time to plan your packing before your hike can pay off in both comfort and convenience, ensuring that rain never dampens your outdoor adventures.
Implementing Layering Techniques with Your Rain Jacket
Mastering the layering system when dressing for the outdoors is critical for any hiker. It’s all about ensuring that warmth and thermal insulation are maintained while also managing sweat through moisture-wicking materials. To achieve this, the selection of base layers plays a foundational role. Not only do base layers serve as a second skin to regulate body temperature, but they also transport moisture away from the skin to keep you dry and comfortable.
As you gear up for an adventure in varying climates, remember that each layer you wear has a specific function.
Base Layer: Manages moisture and wicks sweat.
Mid Layer: Provides insulation and retains body heat.
Shell Layer: Your rain jacket, it protects from wind and rain.
Choosing the right materials is essential for each layer. Merino wool is excellent for base layers due to its natural moisture-wicking and temperature regulating properties. For the insulating layer, fleece or synthetic insulation can trap heat effectively. Always top it off with a quality rain jacket chosen for its waterproof capabilities and breathability.LayerMaterial OptionsPropertiesBrands To ConsiderBase LayerMerino Wool, Synthetic FabricsMoisture-Wicking, Quick-Drying, Odor-ResistantSmartwool, Under ArmourMiddle LayerFleece, Down, Synthetic InsulationWarmth Retention, BreathabilityThe North Face, PatagoniaShell Layer (Rain Jacket)Gore-Tex, eVent, PertexWaterproof, Windproof, BreathableArc'teryx, Marmot
Remember, the key to thermal insulation is not just the thickness of your layers but their functionality. Ensure that you can comfortably add or remove layers as conditions change without sacrificing mobility or protection against the elements. By implementing these layering strategies efficiently, you’re well on your way to maximizing your comfort and safety while braving the great outdoors.
The Importance of Testing Gear Before Heading Out
Before venturing out into the embrace of nature, it's imperative to assess the reliability of your hiking essentials. **Gear testing** not only contributes to **outdoor preparedness**, but it also instills a sense of confidence in your equipment. A pragmatic approach is to carry out **trial runs** with your gear, notably your rain jacket, to assess its responsiveness across various weather scenarios. This preemptive step ensures that your gear is not just a silent companion but a trusted ally against the unpredictable elements.
**Performance checks** are not about scrutinizing every thread of your rain jacket, but about simulating real-world conditions where its capabilities can be evaluated. This could be as simple as a jog around the neighborhood under a sprinkler system or as involved as a short local hike during a misty morning. Through these practical experiences, any shortcomings or maladjustments can be identified and remedied before they become a problem during a critical moment on the trail.
Ultimately, your objective should be to leave no stone unturned in your **outdoor preparedness** journey. The wilderness respects the well-prepared, and so should every hiker. Wrapping up our discussion, always remember that the might of your adventure lies not in distance traveled or peaks conquered but in the trust you place in every piece of gear you carry. A well-tested rain jacket is more than a shield from raindrops; it's the armor within which confidence and safety in the great outdoors are enshrined.
0 notes
Text
Bridging the Divide: Unveiling the Expertise of Gap Sealing Contractors in Brisbane

In the ever-expanding urban landscape of Brisbane, the importance of maintaining infrastructure integrity cannot be overstated. One often overlooked aspect is the sealing of gaps in buildings and structures, a task that requires precision and expertise. In this blog, we will explore the critical role played by Gap Sealing Contractors in Brisbane and shed light on the significance of their services.
Understanding the Significance of Gap Sealing:
Gaps in buildings, whether caused by design, construction, or wear and tear, can have far-reaching consequences. These openings expose structures to the elements, allowing water, air, and pests to infiltrate. Over time, this can lead to deterioration, reduced energy efficiency, and even compromise the safety of occupants. Gap sealing addresses these issues, providing a protective barrier against external elements.
The Expertise of Gap Sealing Contractors:
Brisbane, with its diverse architectural landscape and varying environmental conditions, demands specialized solutions for gap sealing. Gap Sealing Contractors in the city are equipped with the knowledge and tools to identify, assess, and effectively seal gaps in a wide range of structures, including residential, commercial, and industrial buildings.
Key Services Offered by Gap Sealing Contractors:
Comprehensive Gap Assessment:
Before sealing any gaps, contractors conduct a thorough assessment of the structure. This involves identifying existing gaps, understanding their causes, and determining the appropriate sealing methods.
Customized Sealing Solutions:
Every building is unique, and Gap Sealing Contractors tailor their solutions to address the specific needs of each project. This may involve using different materials, techniques, and sealing products based on the type and location of the gap.
Weatherproofing:
Brisbane's climate, characterized by subtropical conditions, necessitates effective weatherproofing. Contractors ensure that sealed gaps provide a robust defense against rain, humidity, and temperature fluctuations.
Energy Efficiency Enhancement:
Sealed gaps contribute to improved energy efficiency by preventing air leakage. This, in turn, helps maintain a comfortable indoor environment and reduces energy consumption for heating and cooling.
Pest Control:
Gaps in structures can become entry points for pests. Gap Sealing Contractors implement measures to deter pests, ensuring a secure and pest-free living or working environment.
Maintenance and Repairs:
Continuous exposure to environmental factors may lead to wear and tear of sealing materials. Contractors offer maintenance services, including periodic inspections and repairs, to ensure the ongoing effectiveness of gap sealing.
Case Studies:
Highlighting successful projects undertaken by Gap Sealing Contractors provides real-world examples of the impact of their services. Showcase instances where contractors identified and sealed gaps, addressing structural issues, improving energy efficiency, and enhancing the overall resilience of buildings.
The Benefits of Professional Gap Sealing:
Structural Integrity: Effective gap sealing contributes to the structural integrity of buildings, preventing water damage, corrosion, and other issues associated with gaps.
Energy Savings: Sealed gaps lead to improved energy efficiency, reducing heating and cooling costs and creating a more sustainable living or working environment.
Enhanced Comfort: A well-sealed building provides better insulation, maintaining a comfortable indoor temperature and reducing drafts.
Pest Prevention: Sealed gaps act as a barrier against pests, ensuring a hygienic and secure environment for occupants.
Long-Term Cost Savings: While professional gap sealing services may involve upfront costs, they prove cost-effective in the long run by preventing extensive damage and the need for major repairs.
Conclusion:
Gap Sealing Contractors in Brisbane play a pivotal role in maintaining the resilience and functionality of structures in the face of environmental challenges. By investing in their expertise, property owners can ensure that their buildings stand strong against the test of time, providing a secure and energy-efficient space for occupants to thrive. Bridging the divide between exposed vulnerabilities and fortified structures, these contractors contribute significantly to the sustainability and longevity of Brisbane's built environment.
#gap sealing contractors in brisbane#waterproof joint sealing specialist brisbane#joint sealing company in brisbane#residential joint sealing brisbane
0 notes