#TTL flash
Explore tagged Tumblr posts
Text
Frogman's Camera Buying Guide
A few weeks ago someone asked if I could recommend an interchangeable lens camera (ILC) to supplement their smartphone photos and hopefully get better pictures of important things like vacations and pets.
I decided to go very extra with my response and due to that... I'm still not finished with it.
I'm worried I am letting this person down because they did not ask for a giant post explaining every detail about cameras in the history of forever.
So I am going to do a camera recommendation post without as much explanation and hopefully I can finish the giant post at some point in the near future.
If you want to take better pictures you are probably going to need a camera with a decent sized sensor, a fast lens, a tripod, and a flash.
The bigger sensor gives you more dynamic range so you can capture brighter and darker things in the photo.
A fast lens has a giant hole in the front that lets in a ton of light. That hole is called the aperture and the bigger it is, the better your photos in dark environments will be. So you will want something that does f/1.8 or f/1.4 (lower f-stop number = bigger hole = more light). This can also help you get a lot of cool background blur.
A tripod will help get you longer exposures without any blur from camera shake. Especially good for landscape photos.
And a flash is for taking photos of pets and other moving subjects when you are indoors and don't have a lot of light. A flash is an absolute game changer for indoor photos.
HOWEVER, never point it directly at your subject.
Point it at a large white ceiling or wall. The flash happens so fast that it freezes motion. It is how I got all of my indoor photos of Otis.
Here he was playing and being rambunctious and he is not blurry.
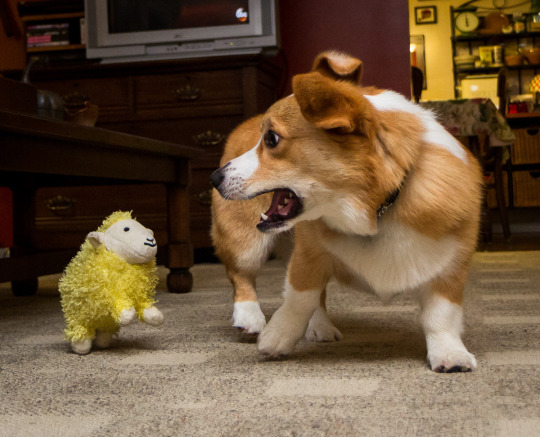

I used no special settings. I just stuck on a flash and pointed it at the ceiling and suddenly sheep are sticking to things.
Oh, and one other huge benefit of using a flash... you can take much better photos of pets with dark fur. So if you have a cute little void in your home, a flash can help you capture detail in their fur.
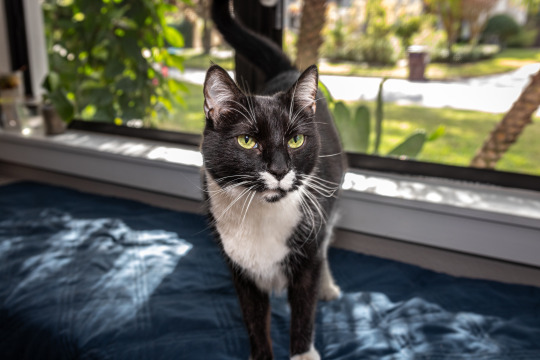
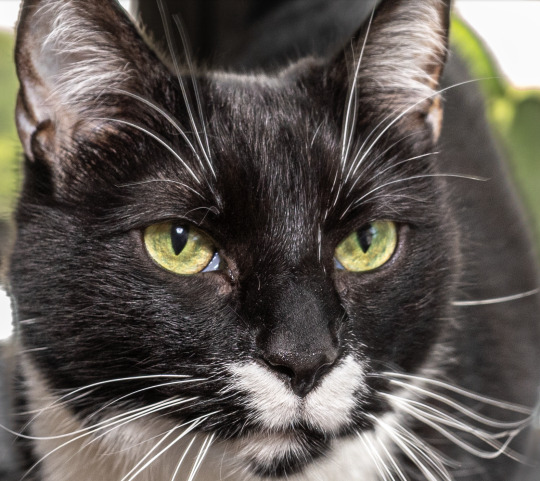
Just lift the shadow slider in your image editor and that beautiful fur will reveal itself.
If you get an ETTL or TTL flash, it will output the correct amount of light automatically. You can literally just put your camera in automatic mode, aim the flash at the ceiling, and press the shutter button.
Before I talk about recommendations I want to make one thing very clear.
GETTING A GIANT CAMERA WILL NOT AUTOMATICALLY GIVE YOU BETTER PHOTOS.
Aside from my flash aimed at the ceiling trick, a big boy camera is not a magic solution for better photos. In some cases, you might actually get *worse* photos than your smartphone. You need to learn the basic fundamentals of photography and you also need to learn some basic photo editing skills.
Smartphones employ powerful algorithms and computational processes to make every photo you take look as good as possible.
ILCs say, "Here is your RAW data, you figure out the rest."
You don't have to become an expert, but if you watch this free 6 hour photography course, that will ensure you have the knowledge needed to improve your photos.
youtube
Okay, let's get into the nitty gritty of buying a nice new old ILC.
If you are on a tight budget and cannot afford a fancy mirrorless camera, I would highly suggest a used DSLR. You can get them for very reasonable prices. And unlike just about every other modern technological gadget, cameras and lenses are built to last for decades. So I have no qualms about recommending used photography gear.
However, I do highly recommend using either KEH or MPB, as they have a long trial period and decent customer service. If something goes awry with your used gear, KEH has a 180 day warranty and MPB has a 6 month warranty. So there is much less of a risk than eBay or Facebook Marketplace. You pay a bit of overhead, but the piece of mind is worth it.
Before I start my recommendations I want to quickly explain the difference between APS-C and Full Frame camera bodies. (For brevity's sake I am going to omit Micro Four Thirds bodies as they are not typically geared toward beginner photography.)
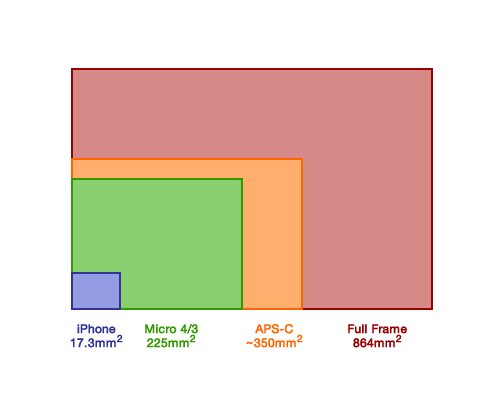
APS-C has a "crop" sensor. It is a bit smaller than full frame and does not perform as well in low light (more noise). However these bodies are cheaper and can still produce great photos. You can see above the sensor is still significantly larger than a smartphone. APS-C adds a 1.5x zoom to all lenses. This can be annoying in small spaces but advantageous for outdoor photography like wildlife and sports. You can use full frame lenses on a crop sensor body (within the same brand). APS-C lenses are usually cheaper but of lower quality.
Full frame has a larger sensor that will give you less noise in low light. It is also much easier to get background blur. Full frame also allows you to work in more cramped spaces. You *cannot* use APS-C lenses on a full frame body. However, the lenses meant for full frame cameras tend to be better quality in general.
If you can save up a little more and get a full frame body, I would recommend it. These bodies used to be geared more toward professional use, but since mirrorless cameras became popular, used full frame DSLRs have become much more accessible to those on a budget. Full frame cameras make it easier to get better results in challenging circumstances. And challenging conditions are really the main area where ILCs still kick a smartphone's ass.
For tight budgets I would recommend the following...
Canon or Nikon APS-C DSLR camera body
50mm f/1.8 lens (Nifty Fifty)
18-55mm APS-C lens (good for landscapes and portraits)
Yongnuo ETTL Flash
There are lenses called "superzooms" which can go from (as an example) 18-200mm or 70-300mm and other crazy focal lengths. That sounds fantastic and very versatile... but these are usually utter shite. You may be tempted to get one of these lenses hoping it can do everything you need, but there are no free lunches in lens land. Unless you are spending many thousands of dollars, the wider the focal range, the worse the lens will be.
When you stick to the 18-55mm range, you can be assured the images will be decent. And if you find yourself really needing a telephoto lens, you can save up and add it to your collection later on. The 18-55 will give you wide angle for landscapes all the way to slightly telephoto for portraits and moderately close wildlife. This lens cannot be used indoors or at night without a flash. Which is why I recommend the Nifty Fifty for that purpose. $100 for a moderately sharp low light lens is a no brainer.
Also, stick to Canon, Nikon, Sigma, or Tamron lenses. You can try exotic 3rd party lens brands when you know more what you are doing. And always make sure the lens has autofocus before buying.
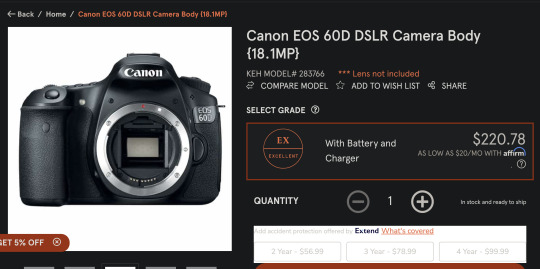
It's hard to give you exact recommendations as used items are not reliably in stock. So I'm going to show you an example of the above, but I am not necessarily saying you should buy this *exact* combination. You might be able to get something similar with Nikon as well.
Canon 60D APS-C DSLR
50mm f/1.8 lens

Canon 18-55mm APS-C lens (EF-S mount)

Yongnuo TTL Flash
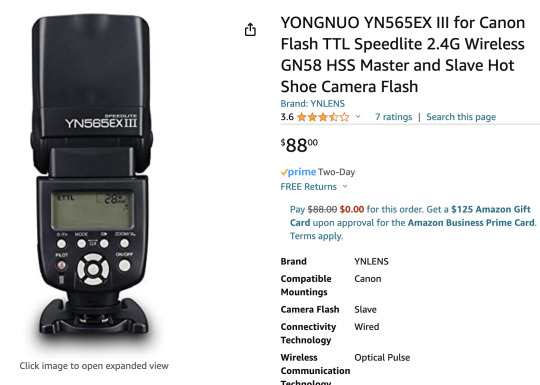
(I wouldn't recommend getting a used flash, as the Yongnuo is already a great price and you can't know if someone used the flash 100,000 times or 20 times.)
Altogether that is about $500. You can start with the 60D and the 50mm Nifty Fifty for $330 and add on the other two items later on.
My recommended full frame setup...
Full frame Canon or Nikon DSLR body
50mm f/1.8 lens (same as before)
24-70mm full frame zoom lens (full frame equivalent to 18-55mm)
ETTL Yongnuo flash (same as before)
And an example from KEH might be...
Canon 6D Full Frame DSLR


Canon 50mm f/1.8 Lens

Sigma 24-70mm Full Frame Zoom lens (EF mount)
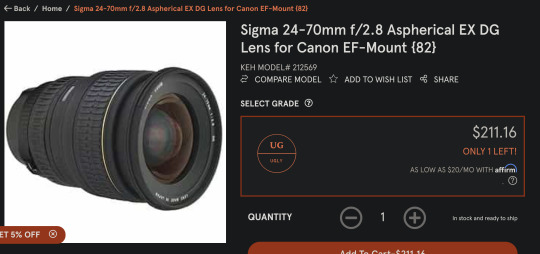
Yonguo ETTL Flash

And that would be about $800 total.
Again, you can start with just the camera and 50mm lens and add the other items later. So invest $500 initially and go from there.
And just to give a Nikon example as well...
Nikon D600 Full Frame DSLR
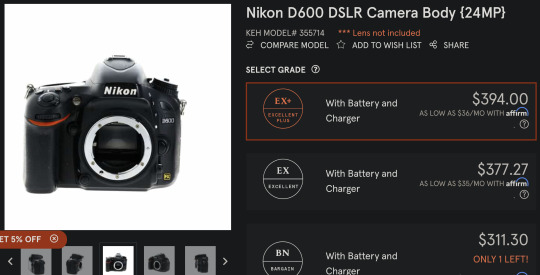
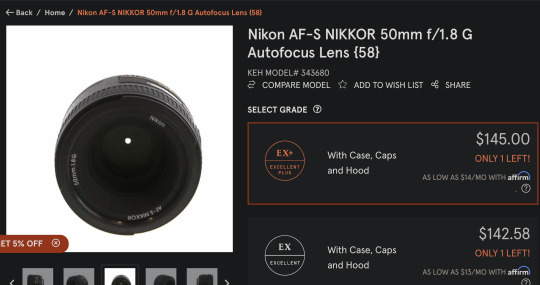
Nikon 50mm f/1.8 Lens
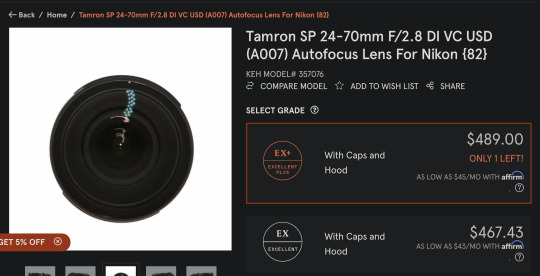
Tamron 24-70mm

Yonguo ETTL Flash (Nikon version)

I highly recommend researching any camera body and lens before purchase. I can vouch for the items above, but you should definitely check out some YouTube videos before buying.
All of the stuff on KEH and MBP is marked down in price for aesthetic reasons. They do test everything to make sure it is functional. If you care if the camera or lens looks pristine, it will cost a little extra. But if you don't mind if it is beat to hell, you can save some money. Ugly or not, you will get the same photos out of the gear. As I said, photography stuff is built to last for a long time. Almost all repairs are due to user damage and not defects. And usually defects manifest when the product is brand new.
Oh, I forgot about the tripod!
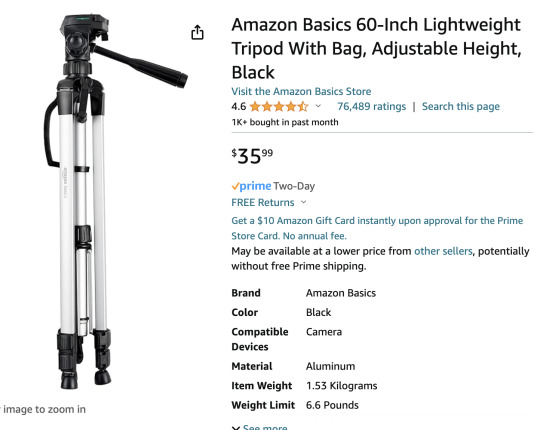
Amazon's $35 tripod is surprisingly decent. It even got a good review on a very picky tripod review site. I recommend starting with this and then upgrading when you know more what you need out of a tripod.
Amazon 60 inch Tripod
I worry I'm leaving out a lot of important information, but hopefully I can expand in the other post I am working on.
That said, if anyone is thinking of buying a camera and you are not sure about the items you selected, please feel free to message me and I will help you assess your choices. Please make sure you include a budget range when asking for buying advice.
I hope that helps. I will try to finish the more in depth post soon. And it will include tips for how to get better photos from your smartphone if you cannot afford an ILC at the moment.
Further resources...
Recipe for Landscape Photos Froggie's Encyclopedia of Lens Terms
202 notes
·
View notes
Text
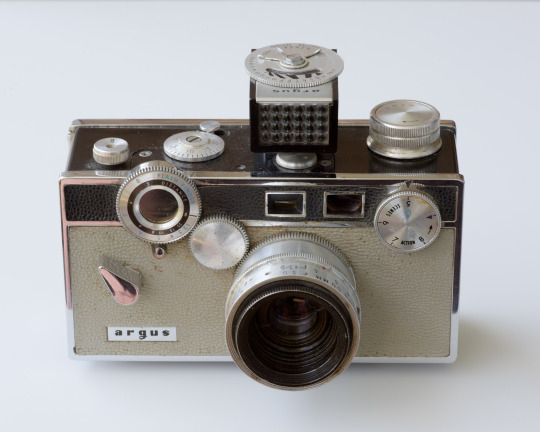
Vintage Camera Review
The Argus C3 Match-Matic
from 1958–1966
I was at a local thrift store and I saw an Argus camera in the showcase, I asked to see it. It had a tag saying it had been put out just the day before and was marked for $7.50. It's a pretty cool looking camera! Argus was a local to Ann Arbor camera company so its pretty well known in the area. There is even an Argus museum near downtown that's worth a visit.
It's a hefty camera, it's shaped like a small brick and weighs almost as much. It's a range-finder, completely mechanical except for the detachable light meter that doesn't even use a battery. The light meter is probably the most impressive aspect of the camera, with no battery, it has a solar cell that generates electricity. That electricity is measured to tell you how much light is in the scene and how to set the exposure. Its pretty common for cameras of this era but interesting none-the-less.
The camera it's self it pretty typical to start; a 50mm ƒ3.5 lens, it has a shutter dial, a frame counter, film winder and re-winder knobs, instant/bulb switch, cold shoe, and a very old style flash connector.
But then I notice the apertures and shutter speeds are not labeled as usual. The apertures count 3½, 4, 5, 6, 7, 8. I looked this up and they are equal to ƒ3.5, 4, 5.6, 8, 11, 16. The shutters are labeled 4, 5, 6, 7, 8 which are equal to ⅟10, ⅟30, ⅟60, ⅟125, ⅟300th. Ok, weird, I know scales weren't standardized for a while but I was surprised that a camera of this era wasn't, but I can get past that. Also, the shutter dial indicates that it should only be turned in one direction. If you turned it the other way, it may not change the exposure. I haven't tested enough to know for sure.
It also has an Argus iconic Flash Finder / Distance dial connected with an external gear. It gives a (yet again) proprietary flash guide number to help you set your Argus flash. According to the manual, this only works when using ISO 10 film and a specific type of flash bulb. You'll have to reference the manual for the math for different films and if you have a regular flash, you'll have to reference the manual to convert flash finder numbers to standard flash guide numbers. (I hate flash anyway, but if I didn't, I'm glad we have TTL flash or at least automatic flash for the last several decades)
So I loaded a roll of Tri-X 400 into the camera... but nope, I had to look that up too. I've used quite a few old cameras and I wasn't absolutely sure I could figure out how. Once loaded, strange, but not that hard, I started to take some pictures. Focusing is a pain it the butt! It uses a two lens focusing system where it shows you two images similar to the split focus system in an SLR. This isn't so bad except it's in a separate viewfinder than your main viewfinder. So if you are focusing on a moving subject, you can't focus while keeping an eye on your framing. Maybe my almost two-year old wasn't a good test subject for this camera (haha).
Like any mechanical camera, you have to cock the shutter. The lever is in a very inconvenient location. Its right where you want to hold this (did I mention) very uncomfortable camera. Ok, there is a lever in the way, thats not the problem. If you take a picture with your finger in the way of the lever, it'll stop the shutter from moving, giving you a much longer exposure than the dial is set to! It even says this in the original manual, its not just because its old and needs lubrication.
Film winding is weird, to be honest, I'm not 100% sure I loaded the film correctly. I have checked, it is winding the film but the counter doesn't count right. (I'll update this post with more info on that later) Also, when winding to the next frame, it doesn't stop it's self, you have to look at this little button next to the counter and when it moves, you've reached the next frame. Its very easy to under or over wind unless you are paying very close attention.
Resources with more info: http://www.cameramanuals.org/argus/argus_match-matic.pdf https://collectiblend.com/Cameras/Argus/Argus-C3-Matchmatic.html
Summery:
Its a cool looking, "entry level" camera for its time. It's much more difficult to use than other cameras of it's era. It's heavy and very awkward to hold. The light meter it pretty cool. I won't use this camera again. Its a display camera only.
Here are a few pictures of the camera, light meter, and viewfinder. Maybe later I'll add a photo of the inside (there is still film in it now).
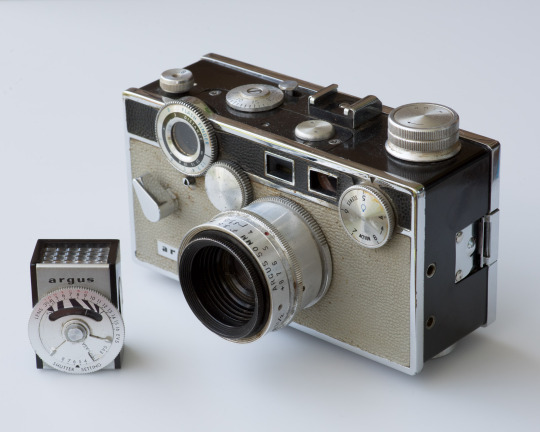
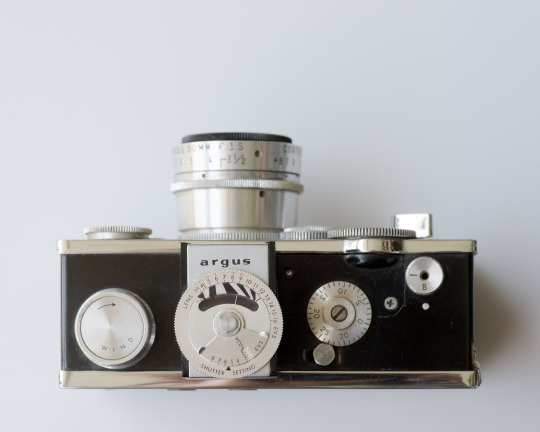
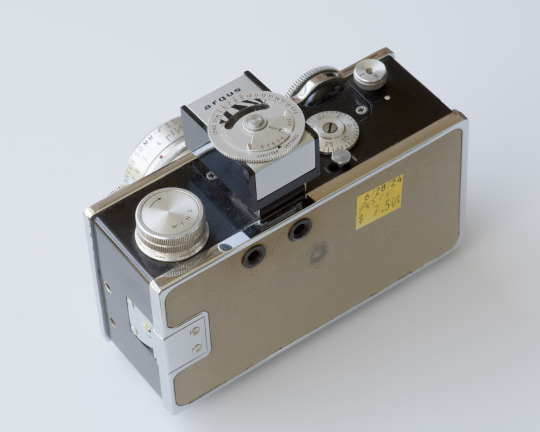
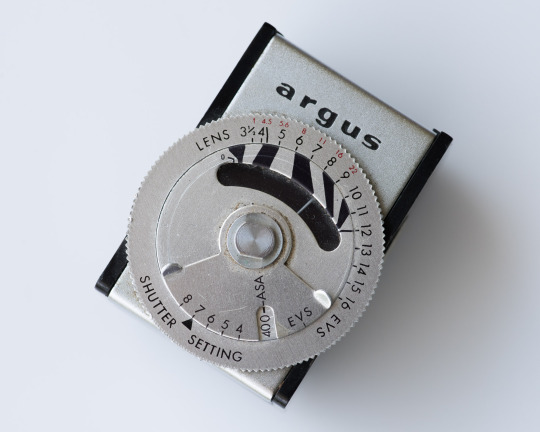
In the closeup of the light meter you can see it is set to ISO 400. The outer ring rotates to let you choose a combination of aperture and shutter. If you follow the line, the needle is pointing to the 7 which is ƒ11 while the shutter is 7 which is ⅟125. The last two are looking through the viewfinder and through the focus finder. A double image as seen would be out of focus.
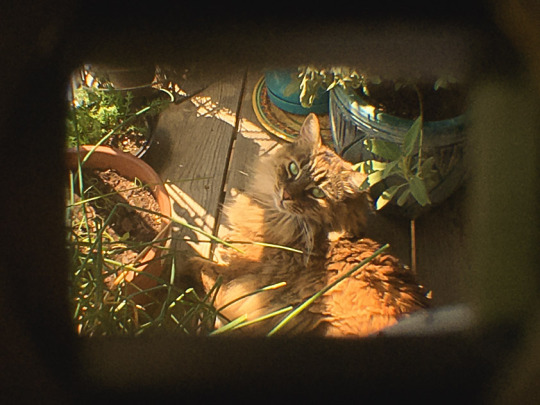
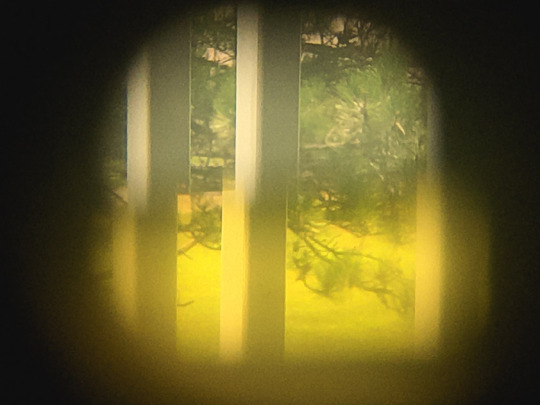
BTW was this interesting? Would anyone like to see reviews of other cameras I've used? Petri FT, Nikon F100 (my usual 35mm), Minolta SRT 101, Minolta XD5 (my secondary 35mm), 4x5 view camera, Sony HVC-2400 video tube camera, Kodak ADVANTiX F350 (my first camera as a kid), Polaroid Automatic 250 Land Camera?
#vintage camera#1950s camera#Argus#ann arbor#camera review#1950s#1960s#camera#Argus C3 Match-matic#Argus camera#ann arbor michigan#michigan#C3#Match-matic#1960s camera#vintage camera review#tech#photography#maisy#cats of tumblr
3 notes
·
View notes
Text
Camera Showcase
Olympus OM2 Spot Program
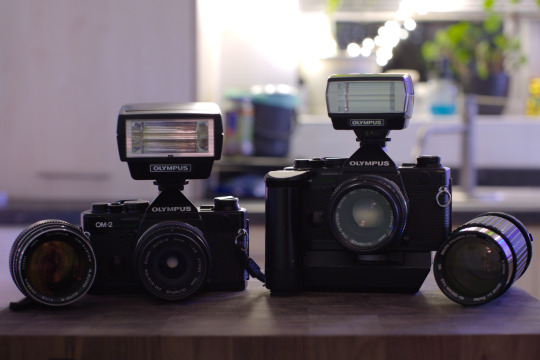
Pictured: Olympus OM2 Spot Programs with all owned OM specific lenses, flash units and motor winder
In the OM series of cameras, double digits such as the OM10 were consumer grade, whereas single digits were professional grade. First manufactured in 1984, the OM2 Spot Program (OM2S in the US) was a thorough overhaul of the OM2 to make it more competitive, meaning it's internals have more in common with the OM4 than it's predecessor.
Personally speaking, this is the most feature-rich, reliable 35mm film camera I have owned, making it my go-to workhorse for 35mm work. It’s compact design was very well-thought out and lightweight compared to other cameras before it.
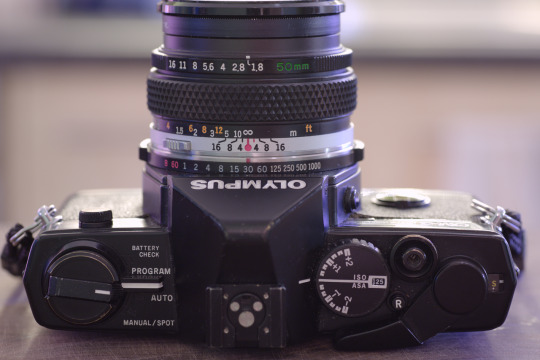
Pictured: Top view of the OM2 Spot Program highlighting camera controls
One of the really well-thought out designs of this camera is how the shutter speed, aperture and depth of field preview controls are all in the same area on or next to the lens, meaning with one hand you can set all the main exposure controls without looking away from the viewfinder. Instead of a shutter speed selector on top, it’s a combined ISO speed/exposure compensation dial.
The OM2 Spot Program has 3 shooting modes: Program, Auto and Manual/Spot. In Program, the lens is set to the highest/tightest aperture and the camera will set both the aperture and shutter speed according to the light levels. In Auto, the camera shoots in an aperture priority mode where the user sets the aperture and the camera deals with the rest. In both Program and Auto modes, the camera meters centre weighted but in the full manual mode the camera switches to spot metering. This is an extremely useful feature when shooting high contrast images and with light sources behind the subject matter.
Another great thing versus it's predecessors is that it has a mechanical 1/60th shutter speed option, meaning if the batteries are depleted mid-shoot there's still a way to take photos depending on light levels.
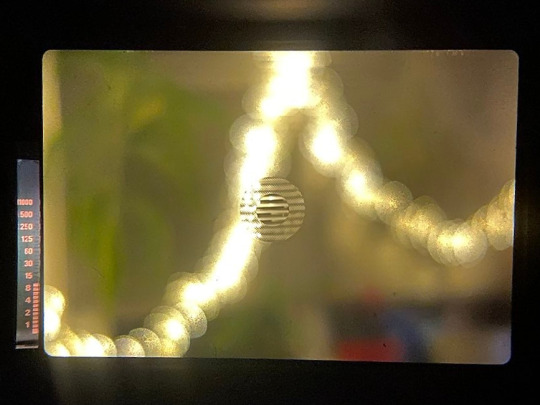
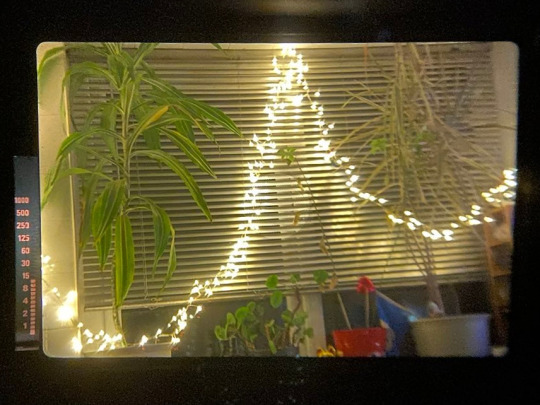
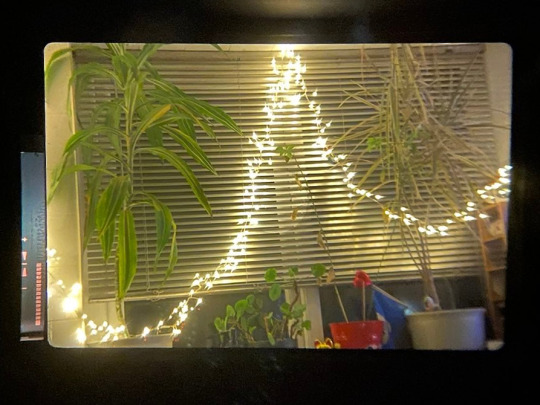
Pictured: 3 shots through the viewfinder showing the current focus screen's split centre and microprism centre, the Program/Auto mode metering and the Spot/Manual's digital match needle meter
The viewfinder's light meter is a LCD style display which can be illuminated for 90 seconds for better viewing in low light scenes. In Manual/Spot mode it switches from a bar depicting the shutter speed to a match needle style display. The viewfinder itself (dependant on chosen focus screen) is very clear and bright making composition a lot easier.
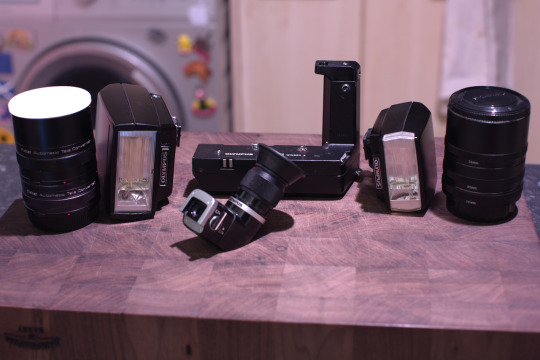
Pictured: A selection of various attachments for the OM series of cameras. teleconverters, extension tubes, right-angle viewfinder, motor winder and flash units
The OM series of cameras have a wide range of accessories to further extend the capabilities of this camera. The motor winder allows for shooting up to 3.5 frames a second in continuous mode. The right angle viewfinder is especially useful when shooting at awkward angles or with telephoto lenses on a tripod, and has a toggle switch to add a 2.5x magnification to it for really dialling in the focus. I have a T20 and T32 flash for my cameras, and although the more lightweight and smaller T20 is more portable and uses half the amount of batteries, I prefer the T32 as it allows for bounce flash photography. Both flash units have 3 modes: TTL camera auto, flash unit auto and full manual. I have only really used the TTL camera auto mode but with the lens set to f4 I haven't had any photos with blown out highlights or muddy shadows.
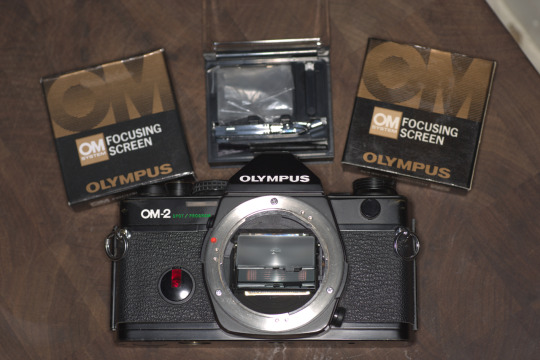
Pictured: three different focus screens and an OM2 Spot Program with no lens and the current focus screen unclipped from the camera
A great thing about the OM2 Spot Program and other single digit OM cameras is the ability to fairly easily switch focus screens. Different lenses and scenarios work better with different screens and the ability to change really increases the versatility of the camera. For example, for general use I tend to use a split centre with microprism focus screen to give me 3 ways to focus, but with a telephoto (especially with teleconverters) the split centre goes black due to the low light levels. At that point, I have the option to switch to a microprism only or ground glass screen to make it easier to focus.
All in all, a fantastic camera with a solid design, accurate light meter and a wide selection of lenses and attachments which if in good condition will be a fantastic addition to any vintage camera collection.
#photography#film photography#ishootfilm#analog photography#filmisnotdead#vintage cameras#camera review#35mm film#35mm format#reviews#retro camera#olympus camera#olympus om2sp#olympuscamera#35mm camera#analog camera#old camera#camera#om2sp
3 notes
·
View notes
Text
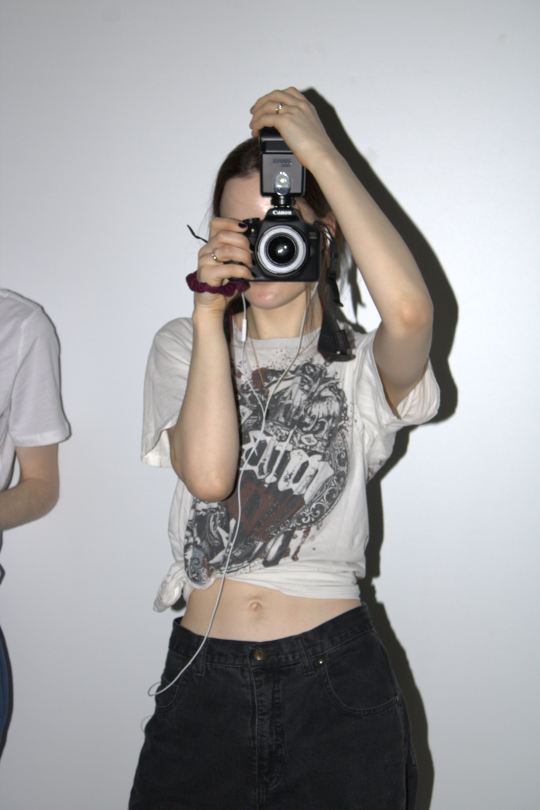


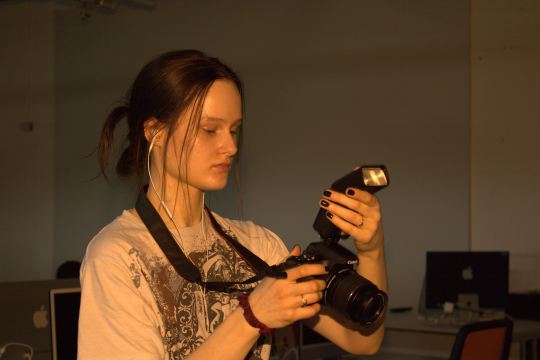
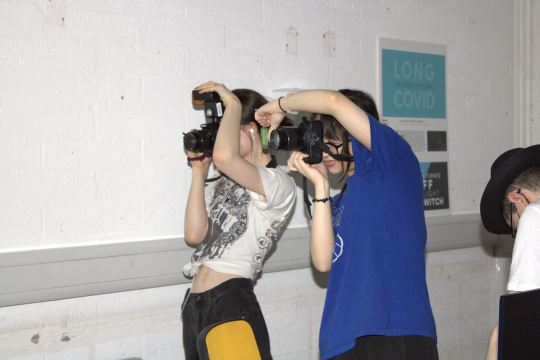

LAB THREE: Bounced Flash
In this lab, we explored how bounced flash can be used to create different light situations. I created portrait exposures using the flash in TTL mode. I experimented with this equipment by creating a portrait flash shot with a harsh shadow, and by having my model stand against the wall as seen in the first picture. I also tried out several coloured flash lenses to experiment with coloured shots, the orange lens created a sunset look which I loved. We decided to shoot with our flashes amongst a studio background with artificial lighting.
My models used were Mia Sherry, Auste Mockapetryte, Lela Cullen and Liam Angelo Carrag.
2 notes
·
View notes
Text
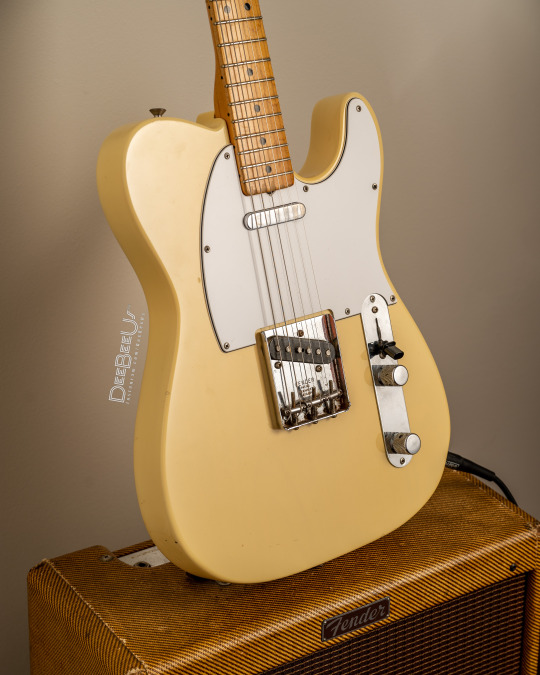
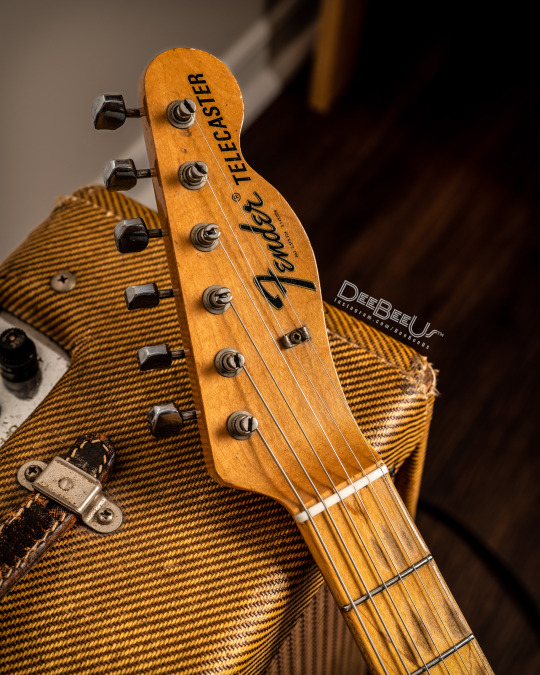
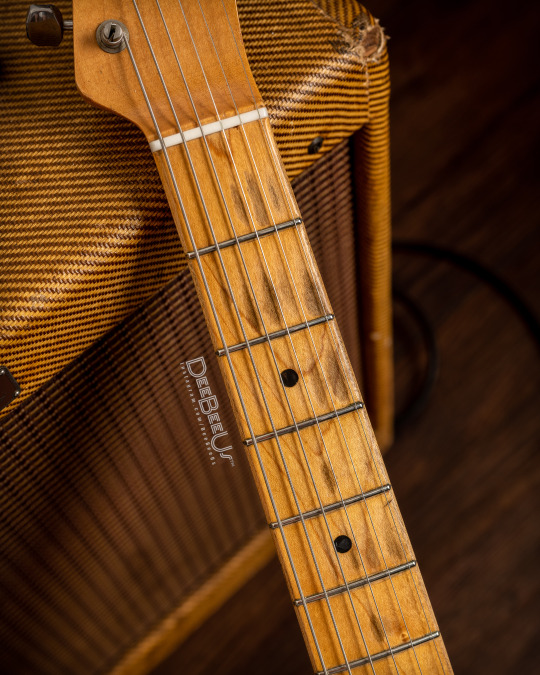
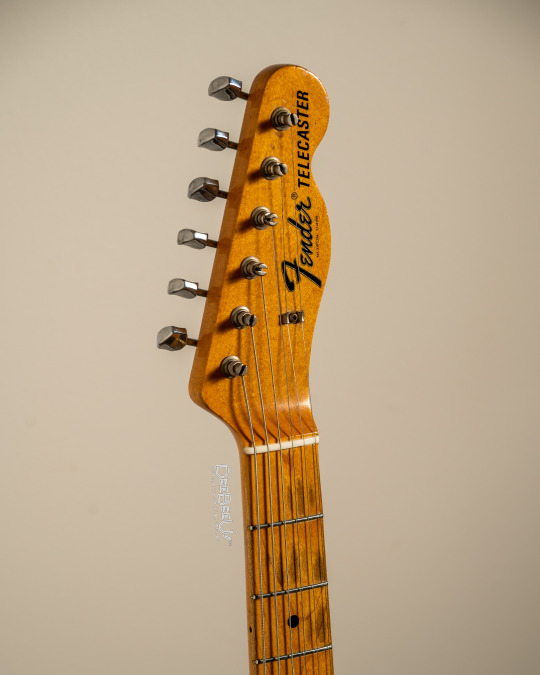
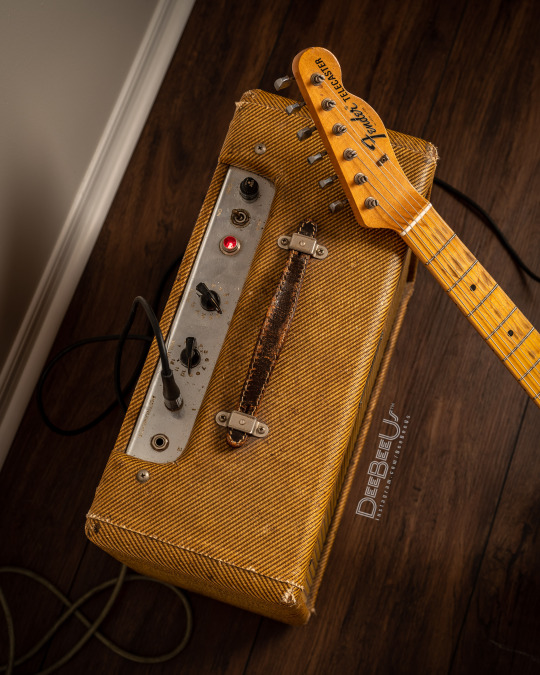
1968 #Telecaster & 1959 5F2A #FenderPrinceton.
More fun with the new AD200 flash & Z 24-120 f/4 S lens. These were all taken at ISO 100, f/5.6 and 1/125th of second.
In terms of the lens I am finding it very sharp. I was hesitant to buy it at first because it is "only" an f/4. This means the lens is not particularly "fast" for taking pictures in low light conditions. The lower the "f" number is, the "faster" the lens is, and f/4 is not very fast lol. Ideally, you would want a lens with a wider aperture (f/2.8, f/1.8 etc) for low light shooting, but these tend to be much more expensive lenses. And you know what? Since I got my fancy new flashes I don't usually shoot at anything below f/5.6 anymore anyway, so why pay a fortune for a faster lens that I will never use? This lens is compact (enough) for the Z6ii, very sharp, and (relatively) affordable, thank you very much!
The other exciting (for me anyway...) thing about this series of shots is that they are all taken using the "TTL" setting on the flash! Usually I shoot 100% manual, meaning I set the camera up to a specific ISO, aperture, and shutter speed, and then I have to manually adjust the power of the flash until I get the right exposure (i.e. not too dark, and not too bright). TTL ("Through The Lens") on the other hand, uses the wireless flash trigger on top of my camera to send information about the exposure from the camera's light meter to the flash, and the flash sets itself automatically to the correct power to get the proper exposure. It basically eliminates the trial and error involved manual mode and saves time. FUN (I assure you)!
I probably won't use TTL all the time, because I like to manually control every aspect of the exposure and it won't work if the flash is pointing away from he subject (which I do all the time to soften the light). But for some quick basement snaps like this, it sure is a time saver!
#guitar#guitars#guitarra#chitarra#guitarre#electricguitar#vintageguitars#fenderguitars#vintagefender#guitarphotography
12 notes
·
View notes
Text


2 notes
·
View notes
Text
Film & Night
It's intriguing how life makes us revisit lessons we thought we had learnt. My recent plunge back into film photography and my newfound appreciation for the Nikon F5's robustness was marred only by its weight. This beautiful but bulky beast tipped the scales at a back-breaking 2kg with my heaviest lens, often making me leave it behind in favor of my DSLR. That's when the FM2N entered my life.
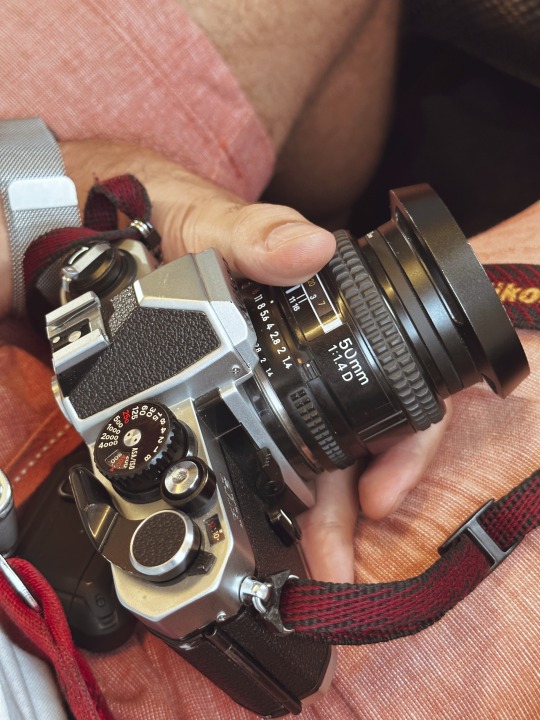
This nimble camera, weighing a featherlight 300g, was an absolute joy to work with. It may have been restricted to a 50mm 1.4 lens, but the lightness of the setup filled me with a renewed sense of vigor. However, there was a downside: with a fixed film ISO, I was confined to daytime photography or risked grainy, unusable photos. Considering my work schedule is skewed to the night, I found myself leaning back on my trusty DSLR again. But life had a surprise up its sleeve.
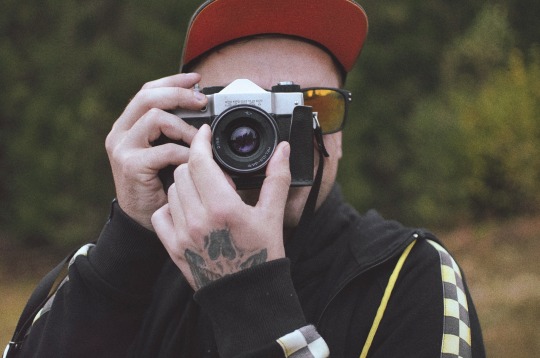
Last evening, while rummaging through my luggage, I discovered a pair of forgotten companions - two flashes! My first instinct was to pair the compact SB400 with the FM2N, but alas, their electronic incompatibility was a setback. The alternative was the hulking SB600. A check with some online forums confirmed it could work with the FM2N. With a shrug and a spark of adventurous spirit, I decided to give it a shot.

Suddenly, I was thrust back into the world of manually setting up a flash. This was a task I had long abandoned in favor of built-in flash and auto modes on my digital gear. With my FM2N mounted with the SB600, I was suddenly the center of attention, drawing curious gazes from people around me. It felt just like the early days with the Zenith TTL and its quirky Soviet flash.
It was back to the basics for me, reading the scene, adjusting the settings, and dealing with the flash's imposing presence. Each captured moment was a balance between the right exposure, perfect timing, and managing not to startle anyone in my vicinity. This was not what I had signed up for, but here I was, trying to master the flash all over again, this time with an old film camera and a more seasoned perspective.
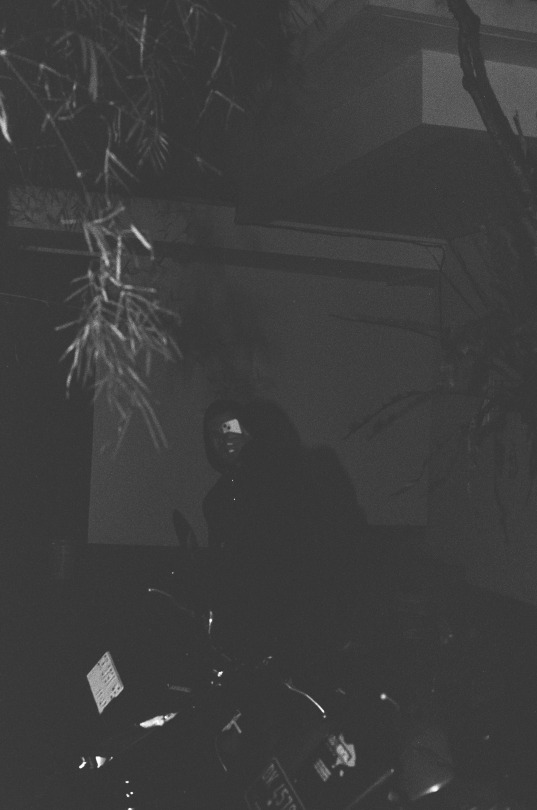

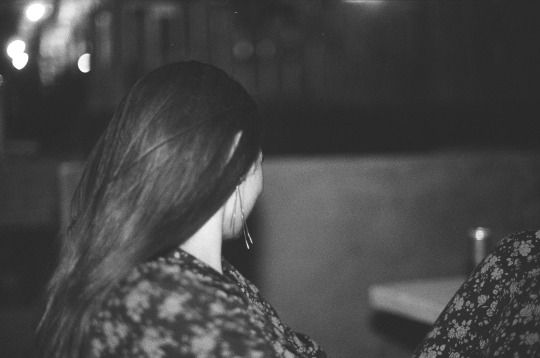
Night photography with film isn't as simple as cranking up the ISO on a DSLR, but this rediscovered tool promised a new horizon of possibilities. My journey with film, flashes, and learning to shoot in the dark is far from over, but with each click and flash, I can see myself getting closer to perfecting the art. From the silent streets of Bali to the vibrant scenes of everyday life, my FM2N, armed with the SB600 flash, is ready to capture it all in its grainy glory.


Stay tuned for the results of this enlightening adventure. Let's hope the images speak louder than the flash itself!
2 notes
·
View notes
Text

Chonkiest ESP32-S3 Metro is pulling into the station and it is piled high with PSRAM 🚂💾🔌
This ESP32-S3 metro brings the chonk, with 16 MB of Flash and 8 MB of PSRAM - that's the max you can get in the WROOM module . but we think it's worth it's weight in gold cause when we start messing around with the parallel TTL TFT driver we're gonna need that space to buffer the full 16 bit 800x480 display… heck we could even double buffer the graphics at that point.
Lots of power options here, too: 6-12V DC jack with on-off switch, USB type C or lipoly battery . the lipoly can be charged on board and monitored with a MAX17048 .
One frustration from our Metro ESP32-S2 is that the Espressif Arduino board support package never added pin-reordering, so in this Metro we use consecutive numbered pins from 2-13 so shield pin configurations don't have to change.
For IoT datalogging projects we Stemma QT I2C & a micro SD card socket. We also added a JTAG connection and the hardware UART debug pins in case we have to do some more-than-printf debugging. All the edges are so packed full of stuff that we had to stick the boot0 button and D13 / ON LEDs in the middle!
#adafruit#electronics#pcb#opensource#opensourcehardware#pcboftheday#espressif#esp#esp32s3#arduino#metro#esp32s3metro#psram#flashstorage#iotdatalogging#electronicboard#usbtypec#parallelttft#debugging#arduinosupport#jtagconnection
4 notes
·
View notes
Note
sea im sorry but i just Have to share this, anytime i read toeing the line and it’s the part where y/n is bathing 00z and admiring chan from a distance i ALWAYS think of this photo

like y/n bathing the boys and i Always visualize chan like that even tho form wise it’s not correct but IT ALWAYS FLASHES IN MY BRAIN AND ITS SO FUNNY
LMFAOOSOSODSODD CUS THIS WAS MY INSPO FOR TTL

im crying every wolf meme does remind me of ttl
4 notes
·
View notes
Text
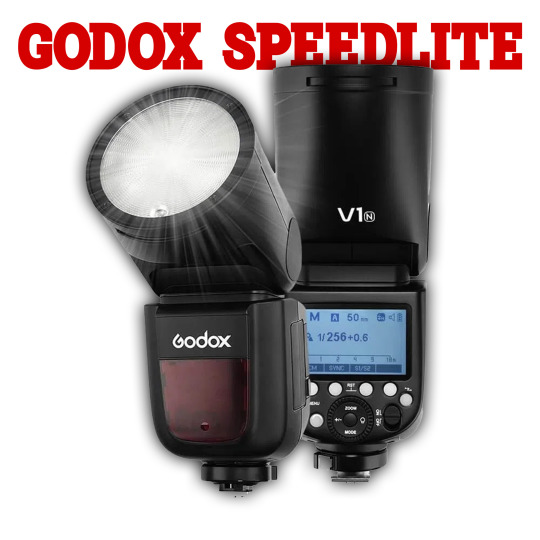
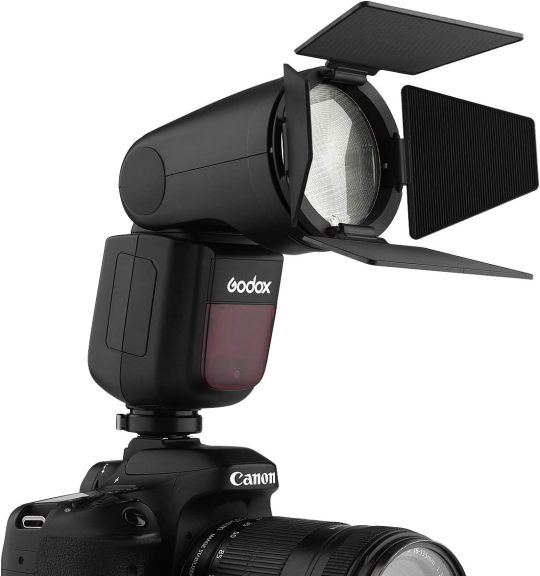
GODOX AD 200 Pocket Flash, Black
Price: (as of – Details) From the manufacturer AD200 pocket flash has strong power with lightweight and great portability. Easily packed in your pocket. With professional ithium battery pack and two different flash head offer diverse light effects. Builtin Godox 2.46 wireless X system and fully support of TTL functions. With the AD200 pocket flash, your shooting will become simper. You can…

View On WordPress
0 notes
Text
Arduino Nano Board R3 with CH340 chip

Based on the Arduino platform, the Nano R3 Board CH340 Chip without USB Cable does all the functions of the Uno, but has a smaller footprint.
Using Nano CH340 Soldered Board R3 Chip without USB cable is essential for your small project where you don’t need many pins, but the small size is very important to make it look nice.
In comparison to older versions of Arduino Nano with FTDI USB-Serial Chip, the Nano uses a low-cost USB-Serial Chip.
With the ATmega328 (Arduino Nano R3), the Nano is small, complete, and breadboard-friendly. It has more or less the same functionality as the Arduino Uno but in a different package. In addition to lacking a DC power jack, it uses a Mini-B USB cable instead of a standard one.
This device can be powered by a mini-USB cable, a 6-20V unregulated external power supply (pin 30), or a 5V regulated external power supply (pin 27).
Six PWM I/O are included from a total of 14 digital I/O, eight analog inputs, 16Mhz clock speed, and 32kB flash memory.
Please note:
The CH340 chip might not work directly with some PCs/laptops. You will need some drivers for the CH340 chip.
Arduino nano features :
TTL level serial transceiver ports (RX / TX)
Atmel Atmega328P-AU MCU used
It has a bootloader installed
Supports USB download and power supply
Provides support for external DC power supplies of 5V and 12V
1 note
·
View note
Text

Aluguer de transmissor GodoxXpro-S (Sony) | 21 Media Rental
GODOX Xpro: Xpro-S TTL wireless flash trigger can not only control flashes with built-in RUNFALOX wireless systems. G. Camera flash, outdoor flash and studio flashes, but also can control Canon original flashes when combined with ×1R-S/1R-C receiver. Featuring multi-channel triggering and stable signal transmission, this flash trigger is applied to hot-mounted Canon EOS series cameras.
0 notes
Text
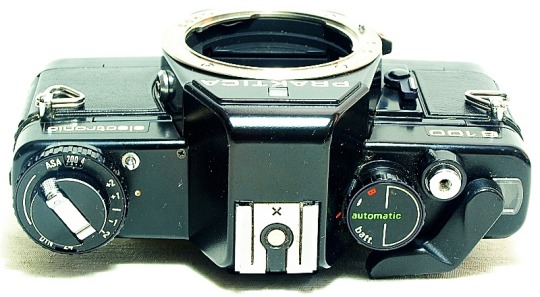
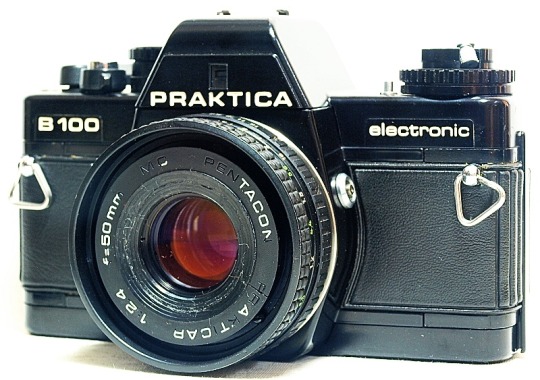
Praktica B100 Electronic.
The Praktica B100 Electronic, an iteration of the B-series 35mm SLR film cameras manufactured by Pentacon in Dresden, Eastern Germany, is an interesting and easy-to-use AE (Automatic Exposure) 35mm SLR film camera. The camera, built for the same target sector enthusiasts as the Pentax MV and Canon AV-1, is an aperture-priority 35mm SLR film camera with minimal control and an electronically controlled stepless shutter with a speed range from 1 sec. to 1/1000 second.
The camera is fitted with a vertical travel metal shutter and has a shutter speed dial with only three settings - automatic, flash, B, and a battery check option. Flash sync and mechanical shutter speed are 1/90 seconds, metering is open aperture TTL (Through the Lens), and the camera accepts films with an ISO speed rating from 12 to 3200, and exposure compensation is from 2V to + 2V. The Praktica B100 is also fitted with an 8-second delay self-timer with a starter button. The standard issue lenses for the Praktica are the Proktica B-mounts, which are fitted with three-point electronic contacts to allow the exposure system of the camera to read the aperture set on the lens. The Praktica B100 is typically sold with Pentacon Prakticar 50mm 1:2.4 as a kit lens. Other models of the B-series from Pentacon include the Praktica BCC (1979 - 19900, Praktica B200 (1979, Praktica B100 (19810, Praktica BCA (1983 - 1990), Praktica BC1 (1984), Praktica BC3 (1987 - 1988), and Praktica BMS (1989).
Although small, it's quite a heavy camera to carry about, which possibly indicates that it is made of mostly metal components. The vertically operating shutter is certainly metal, and there is quite a hefty 'clunk' when an exposure is made. This was obviously not the camera to use for street photography or anything where you didn't want to be noticed. As I said above, the camera has a fully automatic shutter speed setting - it's not possible to select the shutter speed yourself, other than by changing the aperture to shift it. I would imagine this camera was aimed at the beginner photographer who wanted a 'point and shoot' camera. While this is fine if you use the PB mount lenses, any Praktica owner with a collection of M42 lens would have also needed to purchase the M42 to PB lens adaptor if they bought this camera as an upgrade. I'm not sure how this combination would work, however, since the camera would not be able to read the aperture?




0 notes
Text
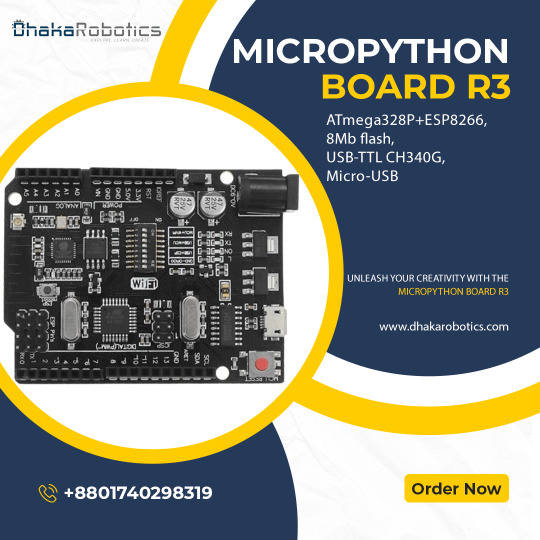
Introducing the MicroPython Board R3 ATmega328P+ESP8266!
Are you ready to take your projects to the next level? Meet the MicroPython Board R3, a powerhouse combining the classic ATmega328P microcontroller with the versatile ESP8266 WiFi chip. Here’s why you’ll love it:
Dual Processors: Enjoy the best of both worlds with the ATmega328P and ESP8266 working together or independently.
8MB Flash Memory: Store more with 8MB of flash memory, perfect for complex projects and data-heavy applications.
USB-TTL CH340G: Seamless USB connectivity with the CH340G converter, making programming and debugging a breeze.
Micro-USB Port: Convenient and modern Micro-USB port for easy power and data transfer.
Versatile Applications: Ideal for IoT projects, home automation, robotics, and more. The possibilities are endless!
Whether you’re a hobbyist or a professional, the MicroPython Board R3 is designed to meet your needs. Get yours today and start creating!
Order Now: https://dhakarobotics.com/.../1039-micropython-board-r3.../
Contact Us: +8801740298319
visit our website: https://dhakarobotics.com/
0 notes
Text
ESP8266 Wifi Module | Nodemcu ESP8266 for IoT Solution
The Internet of Things (IoT) is revolutionizing the way we interact with technology, making our lives smarter and more efficient. At the heart of this revolution is the ESP8266 WiFi module, a low-cost, powerful solution perfect for your IoT projects. Whether you're a hobbyist, a professional developer, or a business looking to integrate smart technology into your products, the ESP8266 WiFi module offers unmatched versatility and performance. Here's why you should consider buying the ESP8266 WiFi module and how the NodeMCU ESP8266 can be your gateway to a myriad of IoT solutions.
What is the ESP8266 WiFi Module?
The ESP8266 is a highly integrated chip designed for the needs of a new connected world. It offers a complete and self-contained WiFi networking solution, allowing it to either host the application or offload all WiFi networking functions from another application processor. With its low cost and high performance, the ESP8266 WiFi module has become a popular choice among IoT developers.
ESP8266 NodeMcu WiFi Development Board Features:-
It is based on ESP8266, integates GPIO, PWM, IIC, 1-Wire and ADC all in one board.
Power your developement in the fastest way combinating with NodeMCU Firmware!
USB-TTL included, plug&play
10 GPIO, every GPIO can be PWM, I2C, 1-wire
Open source IoT Platform
Easily Programmable
Low cost & Simple to Implement
WI-FI enabled
ESP8266 NodeMcu WiFi Development Board Applications:-
Home Appliances
Home Automation
Smart Plug and lights
Mesh Network
Industrial Wireless Control
Baby Monitors
IP Cameras
Sensor Networks
Wearable Electronics
Why Choose NodeMCU ESP8266 for Your IoT Projects?
Ease of Use: NodeMCU's integrated USB-to-serial interface and pre-flashed firmware allow for immediate programming and development.
Versatile Programming: You can program the NodeMCU using the Arduino IDE or NodeMCU’s native Lua scripting language, giving you flexibility in development.
Wide Community Support: As one of the most popular IoT development platforms, NodeMCU has extensive documentation and a large community, making it easier to find support and resources.
Cost-Effective: NodeMCU provides a highly cost-effective solution for IoT development, offering excellent value for money.
Rapid Prototyping: Its comprehensive feature set and ease of use make NodeMCU ideal for rapid prototyping and deployment of IoT solutions.
Conclusion
Purchase Your ESP8266 and NodeMCU ESP8266 Today!
Don't miss out on the opportunity to enhance your IoT projects with the best technology available. Purchase your ESP8266 WiFi module and NodeMCU ESP8266 development board today and join the growing community of IoT developers who are shaping the future of technology.
Innovation awaits at Campus Component, where you can buy genuine ESP8266 NodeMCU boards at competitive prices. Take the first step towards realizing your IoT dreams and explore the endless possibilities of connected devices. Order now and join the IoT revolution with Campus Component as your trusted partner.
0 notes
Text
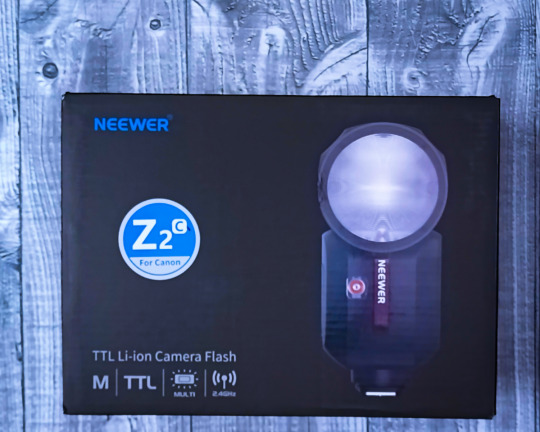
Flash per Fotocamere NEEWER Z2-C (versione Canon): Potente e Versatile con Alcuni Punti da Migliorare
NEEWER Z2-C Flash Speedlite TTL 2.4G a Testa Rotonda per Canon, 2 Lampade Pilota a LED, Tasto TCM per Cambio Rapido TTL/M, 76W 1/8000s HSS Batteria al Litio 7.4V/2600mAh 480 Flash a Piena Potenza Se sei un appassionato di fotografia, saprai quanto sia importante avere un buon flash a disposizione per ottenere scatti di alta qualità in qualsiasi condizione di illuminazione. Recentemente ho avuto…
View On WordPress
#Canon 85mm f1.8#Canon R6#flash photography#flash photography basics#flash photography for beginners#flash photography outdoor#flash photography settings#flash photography tips#flash photography tutorial#neewer strobe#neewer z2#Neewer Z2 flash#neewer z2-c"#photoshoot#photoshoot pose#portrait photo#portrait photography#portrait photography lighting#speedlight portrait#trigger qpro c#Z2
0 notes