#Simplicity patterns
Explore tagged Tumblr posts
Text
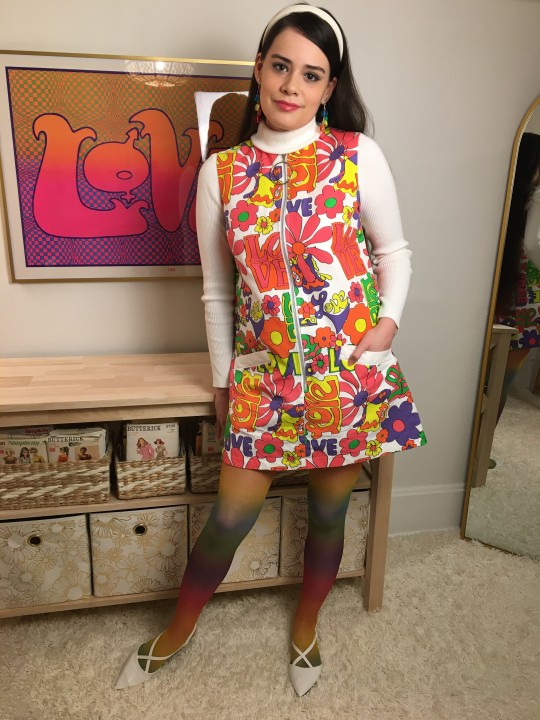
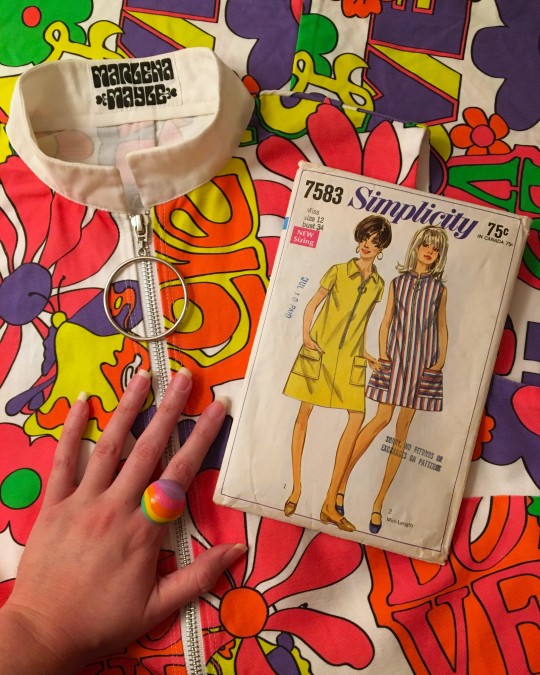
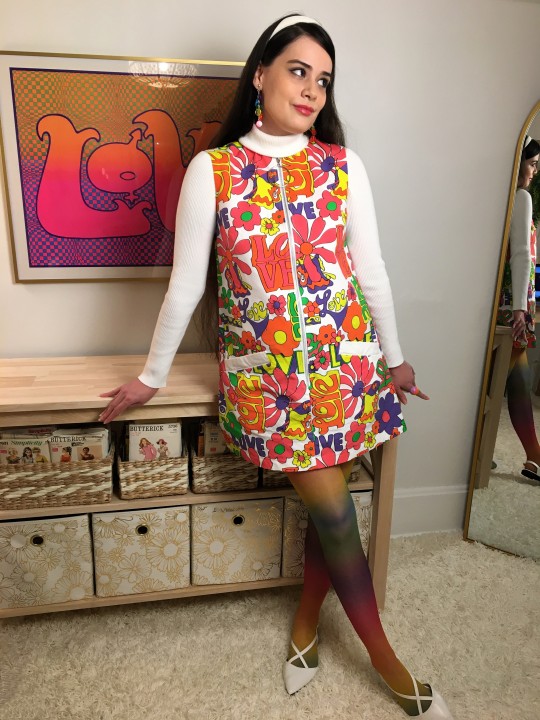
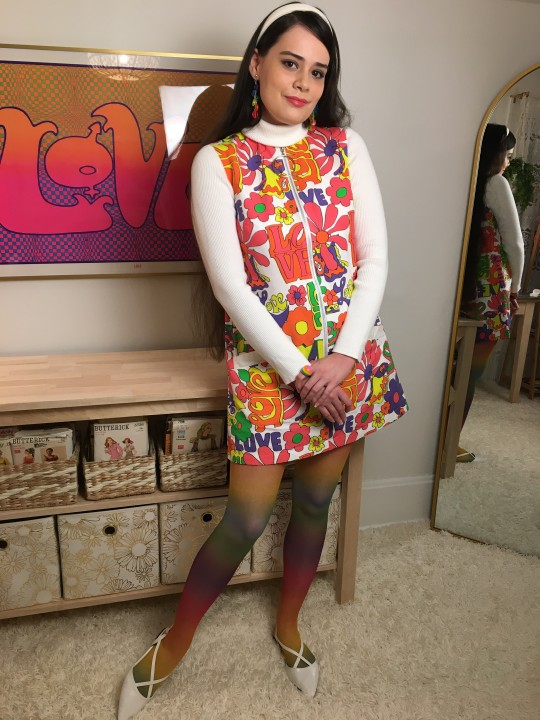
Here are a few pics I took back in February of the colorful look I wore for Valentine's. 🌈🩷 I made the dress myself using a vintage pattern and vintage-inspired print fabric from Spoonflower. 🌼
The pattern itself was a nice and straightforward sew, so if you're into casual '60s styles I definitely recommend it! It's the perfect simple a-line style for showcasing a fun graphic fabric print and with the addition of oversized pockets and a chunky metal o-ring zipper down the front you can get a pretty authentic mid-late '60s look without much effort!
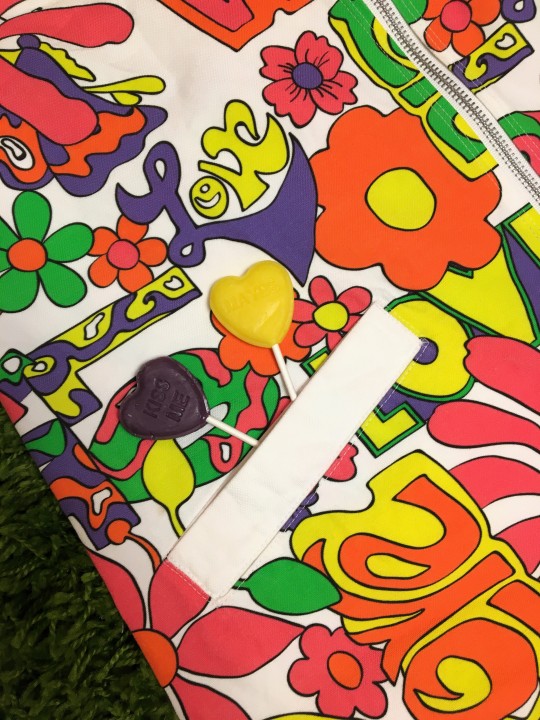
My version of the dress deviates slightly from the pattern as I opted to make single welt pockets rather than large patch pockets. This design choice was mainly out of necessity as I was short on fabric yardage and didn't have enough for much else aside from the main body of the dress. Luckily I was able to utilize the generous plain white selvage edges that were provided on the fabric to create the pocket welts and contrasting stand collar.
I'm currently in the process of putting together a good old fashioned BLOG (what a throwback, right?) where I'll get more into technical detail about my sewing projects, including this one. So if that's something you're interested in watch this space for updates! I'm hoping to have it launched by the summer. 🤞😊
#completed projects#sewing#handmade wardrobe#rainbow fashion#rainbow style#vintage sewing#'60s#simplicity patterns#1968#spoonflower#60s style#my outfits#shemakesrainbows
131 notes
·
View notes
Text

1970s Simplicity crochet fashions
67 notes
·
View notes
Text

Simplicity Pattern Book Summer 1950 Tootal Linen
Tootal is a British clothing brand that has been around since 1799.
#simplicity#simplicity patterns#year: 1950#1950s#decade: 1950s#1950s style#1950s fashion#1950s vintage#vintage magazine#vintage style#vintage fashion#vintage model
27 notes
·
View notes
Text


Welcome Fall Sale: Buy 2 Get 2 FREE on all patterns and items storewide, now thru October 15, 2024
Use Coupon Code: PUMPKIN at checkout to receive discount!

#vintage fashion#vintage sewing patterns#retro fashion#fashion#sewing patterns#simplicity#1950's#vogue patterns#mccall's#simplicity patterns#hip#mod#retro#fall sale
14 notes
·
View notes
Text

Simplicity S9920. Technically an unfinished muslin, but as finished as it is going to get. Wasn't going to waste a zipper because I am not keeping it. I think it is top tight around the neck and isn't a very flattering shape. I liked the idea of the cut out because it reminded me of Kate Bishop, so I was going to make it in purple because I thought that would be fun. Instead I don't like it very much, so I might not make it again at all.
8 notes
·
View notes
Text
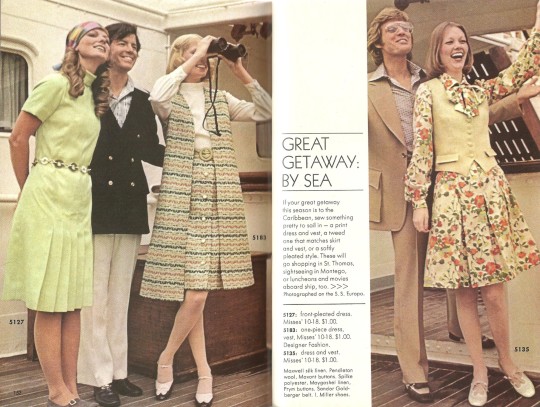


"Great getaway: By sea". Simplicity Fashion Magazine, vol. 25, no. 3. Simplicity Pattern Co., F/W 1972.
"These will go shopping in St. Thomas, sightseeing in Montego, or luncheons and movies aboard ship, too."
"These will go from games to buffet lunches to adventures in port."
"For the captain's dinner, formal dress is required."
#roberta#sewing-scans#vintage sewing#1970s fashion#simplicity patterns#fashion magazine#cruise travel#lol
20 notes
·
View notes
Text
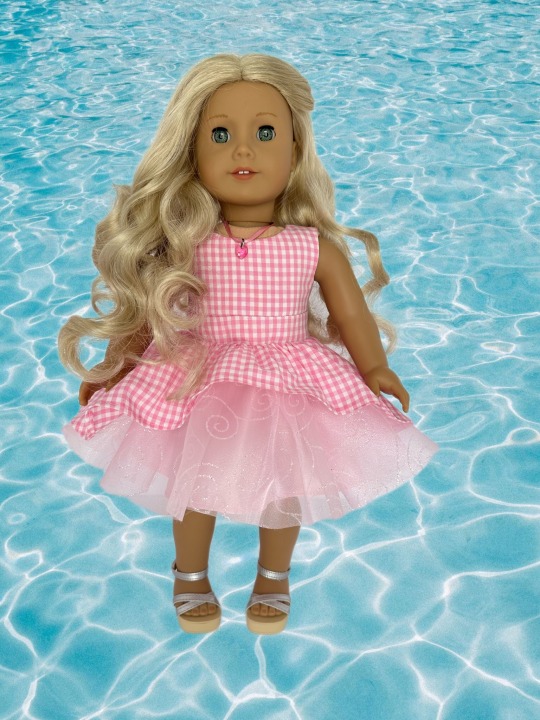
We are getting super excited about the Barbie movie around here! I used Simplicity 8280 (one of the AG branded patterns) to make this dress with scraps I already had in the sewing cupboard. Of course, Caroline is playing Barbie for us today because that hair 🎀
Here’s the outfit I used for reference:

#american girl#Barbie#Mattel#caroline abbott#the movie#margot robbie#pink gingham#Simplicity patterns
61 notes
·
View notes
Text


Hotel sewing project!
Hubs asked me to make him a flannel shirt out some hotdog fabric we found at JoAnns, so I’m working on a mock shirt currently because I’m not confident in my buttonholes or how this pattern is written (Simplicity S9388)
But since I finished the term for my masters I brought my sewing machine and the mock shirt on a work trip! I’m glad I did a mock shirt - it isn’t perfect buuutttt I’m so far happy with how it is coming along!
#hotel sewing#the front desk always gives me a hard time with how much I over pack… whoopsies!#hotdog flannel#simplicity patterns#my projects#my sewing#my crafts
4 notes
·
View notes
Text
I don’t own a dress form, so some unaesthetic pics of the first successful dress I’ve sewn (including a liner!) and some sewing geekery under the cut.


Fourth ever zipper installation and first invisible zipper. I misaligned the tops of the zipper, which resulted in a small gap at the top and the waist seams being slightly off, but I’m pretty happy with how it turned out (and no special zipper foot involved). And I don’t know where the buttonhole guide for the old Kenmore sewing machine is, so hand sewn buttonholes for me. I ordered a pack of covered button blanks to make matching fabric buttons.
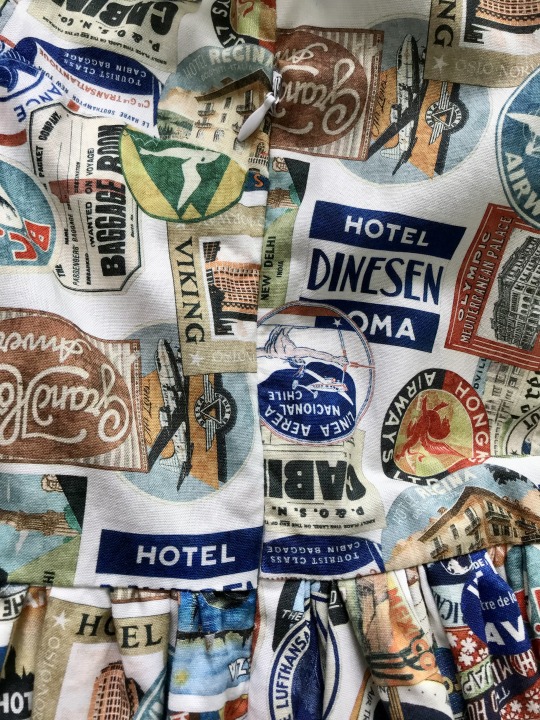
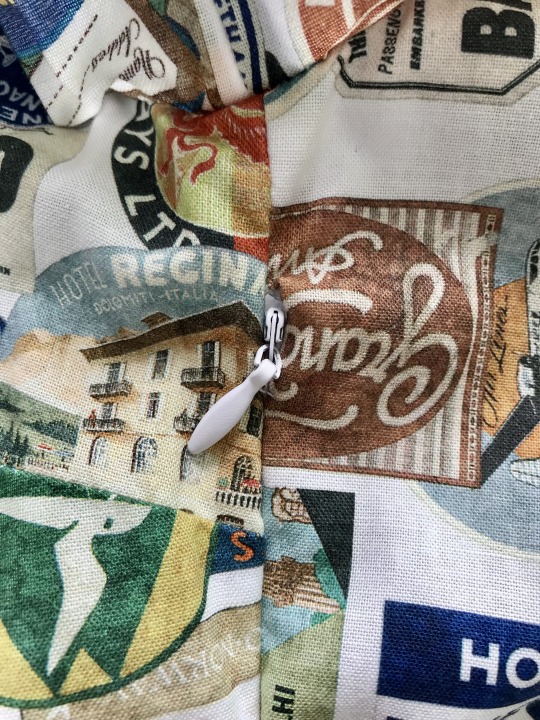
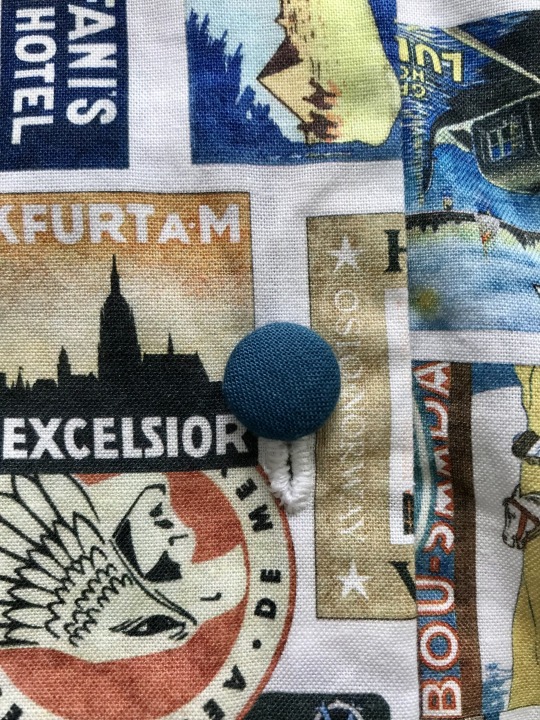
I hand gathered the waistline for the skirt, but the layers of fabric were so thick in places, that the Kenmore was like ���wtf are you doing to me” and skipped stitches in multiple areas when it was time to attach the skirt to the bodice. I ended up doing a weird version of a backstitch by hand to reinforce the waist. And because I don’t care if the inside looks a little weird since no one will see it, I hand stitched bias tape to close up the raw edges.

I used dress option A from Simplicity Pattern 9164, and modified it to include a side seam pocket, a skirt liner, and I didn’t use the included pattern for the skirt itself. Instead I just used the entire width of the fabric, one panel for the front and one for the back. Overall, this pattern was easy-ish to follow as a beginner, but one does have to read the directions pretty well. For background, this is the third rectangle/dirndl-style skirt I’ve done, so that wasn’t very difficult. I’ve attempted making a bodice before when I tried to make a collared shirt for my mom’s dog and one too-big 40s style dress, so I had a little bit of experience with that.
It might be me being a beginner at sewing, but the instructions for the collar were on the confusing side. What the instructions said vs the diagrams showed and what would make sense when actually sewing the collar didn’t match up. I ended up remaking the collar according to how I did it with the dog shirt and then following Simplicity’s directions to attach the collar to the neckline. The inside still looks a bit weird, and I’m going to veer a little from the pattern directions the next time I make this dress to see if it makes things easier because there was still some awkward hand sewing. Thankfully the sleeves included multiple points to match up with the armholes, so that made setting them a breeze compared to doing the collar.
There’s some weird sections but I’m very happy with how it turned out. I ordered a belt making kit, so once that arrives I’ll be making a matching belt using the leftover fabric I used for the collar and sleeve cuffs.
14 notes
·
View notes
Photo
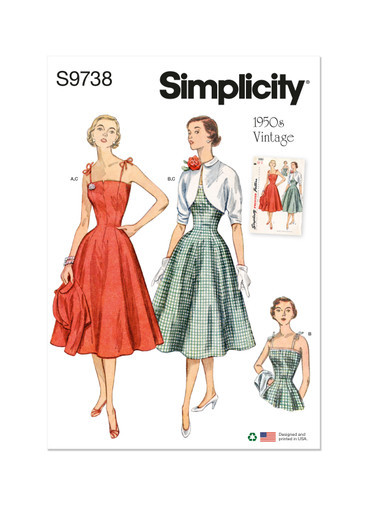

Variations on the Date Dress in the 1950s: Simplicity 9738
At first glance, the green and the red-orange versions of this dress from the 1950s seem identical. Both create the hour-glass silhouette which was so popular during the decade. Both use princess seams to shape the fitted bodice and waistline and then flare to a long and wide hemline, over 2 yards in diameter. Both have ties at at shoulders to hold the dress up and both can be worn with the the little bolero jacket with cut-on 3/4 sleeves, with a small, rounded collar.
But the green version offers the slightest bit more coverage. See how instead of the notched front alone at the top center of the bodice, a little strip of contrast fabric runs along the top of the front and back underneath the notch. It is such a small change, and yet for a woman who felt self-conscious about how the notch might expose more than she liked, it would make a difference.
The designer imagine this dress in a range of woven fabrics. So cottons, linens, even rayons, which strike me as having too much drape were recommended. So, cottons and lines are perfect for a summer dress that was not too fancy. But then, you might also use fancier silks, including taffeta which has a stiffness which works well for a flared skirt. The jacket could match, of course, but it could also be dressier and warmer in brocade or velvet which are much thicker.
You can find it at your local fabric store or here: https://simplicity.com/simplicity/s9738
#1950s#1950sfashions#1950ssewingpattern#vintagesewingpattern#vintagesewing#vintagedressmaking#sewing#dressmaking#vintageeveningwear#vintagedatedress#vintagedress#vintagefashion#costumehistory#dresshistory#fashionhistory#simplicity patterns#simplicity9736
14 notes
·
View notes
Text

Maybe today’s the day Midge gets a new dress. The curvy girls deserve pretty things too, Mattel, and they have waists.
0 notes
Text
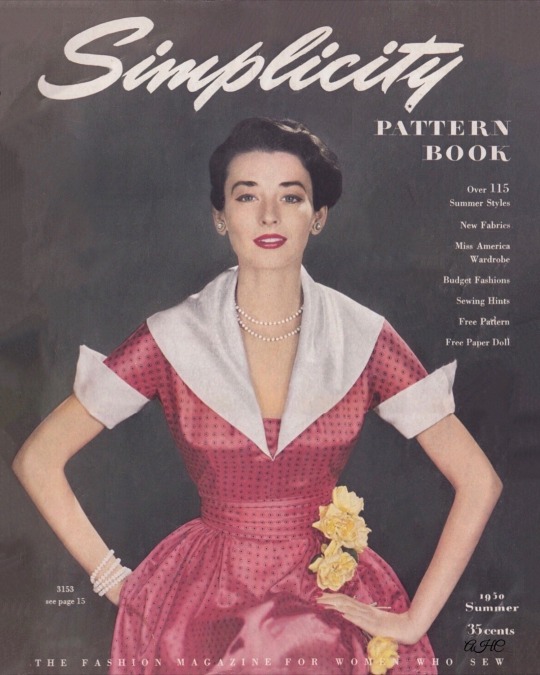
Simplicity Pattern Book Magazine Summer 1950 Model Dorian Leigh
#simplicity#simplicity patterns#vintage magazine#decade: 1950s#1950s#1950#1950s fashion#1950s style#yesterdays#1950s vintage#1950s magazine#vintage style#vintage fashion#vintage fashion model#dorian leigh
69 notes
·
View notes
Text


CHRISTMAS SALE on now through January 1, 2025
Buy 2 Get 2 FREE on all patterns, booklets and items storewide!
Use coupon code: CHRISTMAS at checkout to receive discount!
https://www.vintagepatternwarehouse.com
#vintage fashion#vintage sewing patterns#retro fashion#fashion#sewing patterns#simplicity#mccall's#simplicity patterns#1950's#Christmas Sale#bogo sale#buy2get2 free#freestuff
4 notes
·
View notes
Text

Simplicity 8023. Not overly thrilled with the pattern, but that is OK because I doubt I will ever make it again. Joann's was having a good sale on their Halloween cotton, which I know isn't good quality cotton but is fun. So, of course, I bought a ton of fabric. And, of course, since my intention was to replace my now very depleted spooky wardrobe (I got rid of a lot when I lost the weight), my kids took one look at the fabric and asked what I was making them. They hardly want anything I make them anymore, so none of the kids patterns I have actually fit them anymore. So this is an altered adult small. I fudged some stuff since I was resizing the pattern (it should have darts, but doesn't, it should have more buttons, oh well). Anyway, hopefully it fits my son and he likes it, but also not enough to ask me to make him more.
7 notes
·
View notes
Text

"Long for day." Simplicity Fashion Magazine, vol. 25, no. 3. Simplicity Pattern Co., F/W 1972.
"Take an all-in-one approach to ankle-grazing fashions with a dress, or be the girl in a grey flannel suit that's really a dress and jacket."
2 notes
·
View notes
Text


Simplicity 4405 from 1943, UK edition
Misses' and Women's Jumper or Skirt and Blouse.
The jumper is fashioned with a surplice closing and an inset belt joins bodice and front-pleated skirt. The blouse is made with a convertible collar and the fronts gather to forward shoulder seams. The sleeves may be long and gathered to wrist bands or short. The skirt is pleated in front and finished with a belt.
From the collection of @kalocheyna
1 note
·
View note