#Samsung Good Lock One UI 7
Explore tagged Tumblr posts
Visit Tumblr Blog
Explore Tumblr blogs with no restrictions, modern design and the best experience.
Last Seen Tumblr Blogs


Fun Fact
Tumblr was the first site to host the blog for President Barack Obama in 2011.
Text
Samsung Good Lock Best features: All Information You Need

Samsung Good Lock One UI 7
Reviewing Samsung Good Lock Best features: Best Customisation Tool, Explore New Home Up
Samsung's Good Lock is the finest device customisation option for Galaxy customers who want to show off their flair. One UI 7 adds more personalisation options to this crucial tool.
The redesigned Home Up module, which boosts design freedom and home screen modification, stands out among the numerous enhancements. Samsung Newsroom analyses the new Home Up's user interface customising options.
DIY Home Screen: Innovative App Arrangement and Design
Home Up's DIY Home Screen feature lets users customise their layout instead than using grids and app icons. Apps, widgets, and folders may be resized and moved like calendar pages.
Use sticker and layer features to cleverly disguise program icons under decorative decorations for a whimsical touch. Simply add a sticker to the home screen, place it over an app icon, and modify layer settings. This makes the sticker a fun shortcut that launches the hidden app when pressed.
Display or hide Favourites Apps Row
The bottom of most smartphones' home screens includes a permanent row of favourites. Good Lock makes changing this default layout easy. Users who want a simpler home screen may deactivate Show Favourites in the Home Up menu.
House Gesture Animation: Easy Management Navigation
Customers who want to personalise each interaction may utilise the Home Gesture Animation option under Good Lock > Home Up > Gesture Settings. The feature lets you change the transition animations when you return from an app to the home screen, making even simple activities more expressive and enjoyable.
Advanced Tuning adds four pre-set animation styles and fine-grained control over speed and vibration for a more advanced user experience.
Good Lock's Home Up module offers useful options for customising device home screens. In the next article, Samsung Newsroom will showcase the top three Good Lock features, which Galaxy customers globally enjoy.
Samsung GoodLock
Samsung Good Lock is a powerful and customisable customising feature for Galaxy handsets. Good Lock lets users modify their phones' look, feel, and functions like never before. This software lets you modify the lock screen and navigation gestures on your phone.
What's Samsung Good Lock?
Samsung Galaxy tablets and smartphones have Samsung Good Lock, a powerful customising feature. One UI, the company's Android skin, lets consumers modify their phones beyond the basic features.
Good Lock Best Samsung features
Good Lock modules improve or change specific device features. A look at some of its most popular modules follows:
LockStar
Personalise widgets, shortcuts, clock styles, and lock screen layout.
Arrange parts as desired.
QuickStar
Customise Quick Panel button layouts, colours, and transparency.
Add or delete fast settings toggles for efficiency.
The Task Changer
Customise the recent apps screen.
Available styles include stack cards, grid view, and list view.
Get Home
Customise your app drawer and home screen with sophisticated choices.
Change folder styles, background blur, and navigation motions.
NavStar
Create a distinctive navigation bar icon and button arrangement.
Hidden shortcut buttons are added features.
ClockFace
Personalise your lock screen and Always On Display with clock designs.
Multiple-Star
Improve multitasking using popup views and split-screen.
Keys Cafe
Customise your keyboard layouts and themes.
Include fun animations and important sound adjustments.
The NotiStar
Arrange and filter notifications well.
View alerts or set rules to archive them.
Samsung Good Lock Installation and Use: A Guide
Download Good Lock.
Access the Galaxy Store on your Samsung smartphone.
Install the app after finding “Good Lock.”
Select Modules
Launch the app and explore the modules.
The Galaxy Store lets you download modules.
Enable and customise
Open each module and customise parameters.
Enjoy a personalised Galaxy experience!
Samsung Good Lock benefits
Increased Customisation: Customise your gadget to your style.
Personal navigation, multitasking, and notification management boost productivity.
Better User Experience: Customise your phone to make it more appealing and functional.
Compatibility
Good Lock is not available everywhere due to location and One UI version. If it's not available in your location, visit the Galaxy Store occasionally as Samsung is expanding its availability. Good Lock can usually be obtained via Samsung's Galaxy Store.
One UI 7 expands Good Lock's Google Play Store accessibility.
Final comments
Samsung Good Lock boosts Galaxy phone performance. Its modularity lets you download and use the functionalities you need, making it flexible and easy to use.
Download Good Lock today to control your Galaxy experience and discover what's possible!
Good Lock modules' availability and functionality vary per Samsung device and One UI version.
#technology#technews#govindhtech#news#technologynews#Good Lock#Samsung Good Lock One UI 7#One UI 7#One UI#Samsung Good Lock#Samsung Good Lock Best features
1 note
·
View note
Text
Samsung reminds everyone Good Lock isn't out globally (but should be soon)
Samsung rarely talked about Good Lock on its newsroom platforms in recent years, but with the launch of One UI 7, things might be changing. Today, Samsung published a Good Lock-centric blog post on the Global Newsroom portal, breaking a period of silence of four years. Since Good Lock is region-locked as of this writing (and Samsung’s blog post), it’s almost like the tech giant is rubbing salt…
0 notes
Text
Samsung's Home Up Module Reimagined: A Deep Dive into One UI 7's Ultimate Home Screen Customization Tool
Discover the ultimate home screen customization with Samsung's updated Home Up module in One UI 7! DIY layouts, animation tuning, enhanced Edge Panels, and more. Personalize your Galaxy device to reflect your unique style. ✨📱 #Samsung #OneUI7 #Customizat
Samsung’s commitment to customization shines through its Good Lock modules, and the Home Up module has always been a fan favorite. With the advent of One UI 7, Home Up has received a massive overhaul, packed with new features and a redesigned interface that elevates home screen personalization to unprecedented levels. This isn’t just a minor update; it’s a complete reimagining of how you interact…
0 notes
Quote
Good Lock:
خبر سار لمستخدمي هواتف samsung.. إتاحة Good Lock عالميًا مع إصدار One UI 7
فكرة تجربة التطبيق
0 notes
Text
Samsung Good Lock App Tipped to Be Available in All Countries With Stable One UI 7 | Daily Reports Online
Samsung is expanding the availability of the Good Lock app with its latest Android 15-based update dubbed One UI 7, according to claims on social media. The app is a customisation suite for Galaxy smartphones that allows users to play around with various modules and add new functionalities which are not originally part of the phone’s feature-set. At present, Good Lock is available in over 40…
0 notes
Link
Samsung has officially announced that its highly anticipated customization tool, Good Lock, will soon be available on the Google Play Store.
0 notes
Text
Samsung’un sevilen uygulaması, One UI 7 ile baştan sona değişiyor!
Samsung’un telefonunu özelleştirmeyi seven kullanıcılarının favori uygulaması olan Samsung Good Lock, One UI 7 güncellemesi ile kullanıcı tecrübesini daha da ileri taşıyacak. Şu an sadece muhakkak bölgelerde Galaxy Store üzerinden erişilebilen uygulama, yeni güncellemeyle birlikte Google Play Store’a taşınıyor ve tüm dünya genelinde erişime açılıyor. İşte detaylar… Samsung Good Lock artık daha…
0 notes
Text
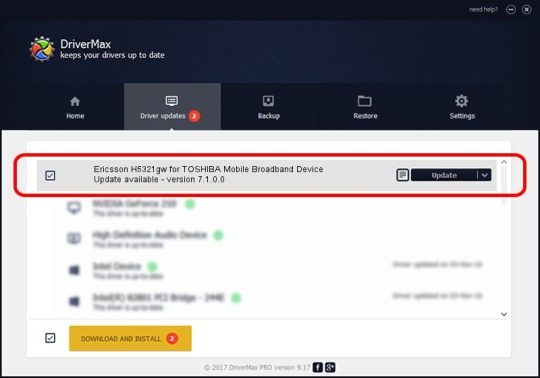
Lenovo Ericsson H5321gw Driver Windows 10

SIM7600 Series Linux Network
Description This package installs the software (Wireless WAN driver) to enable the Ericsson N5321gw/H5321gw/C5621gw Mobile Broadband Driver This package installs the software (Wireless WAN driver) to enable the following device. Ericsson N5321gw Mobile Broadband Device. This package installs the WirelessWAN driver to enable the following device: - Ericsson H5321gw Mobile Broadband Device - Ericsson C5621gw Mobile Broadband Device If this package has been installed, updating (overwrite-installing) may fix problems, add new functions, or expand functions. Ericsson H5321gw/F5521gw Mobile Broadband Driver for Windows 7 (32-bit, 64-bit), XP - ThinkPad. Ericsson H5321gw/C5621gw/N5321gw Mobile Broadband Firmware for Windows 10 (32-bit, 64-bit), 8.1 (32-bit, 64-bit), 8 (32-bit, 64-bit) - ThinkPad.
Install Toshiba Ericsson H5321gw
Ericsson N5321gw H5321gw Mobile
Vodafone Mobile Broadband Windows
ThinkPad X1 Carbon Type
H5321GW MOBILE BROADBAND NETWORK DRIVER DETAILS:
Type:DriverFile Name:h5321gw_mobile_5358.zipFile Size:4.5 MBRating:
4.78
Downloads:148Supported systems:Windows XP, Windows Vista, Windows 7, Windows 7 64 bit, Windows 8, Windows 8 64 bit, Windows 10, Windows 10 64 bitPrice:Free* (*Registration Required)
H5321GW MOBILE BROADBAND NETWORK DRIVER (h5321gw_mobile_5358.zip)
Kensington microsaver cable lock 73p2582 ann thinkvision lt1421 wide 14 mobile monitor 1452ds6 ann kensington twin head cable lock 45k1620 ann with protective screen cover usb 2.0 lenovo security cable lock 57y4303 ann thinkvision lt1421 wide 14 mobile monitor 1452db6 ann usb gemplus gempc smart. Official driver packages will help you to restore your ericsson c5621gw for toshiba mobile broadband network adapter network . I was however having some battery life issues so decided to do a fresh install to make sure it wasn t some driver weirdness left.
At less than 3 lbs, the x1 carbon gen 1 ultrabook brings a new level of quality to the thinkpad legacy of high standards and innovation. Here is a step by step manual guide for ericsson h5321gw for toshiba mobile broadband network adapter software installation process on windows 7 / 8 / vista / xp. So, honestly, the link to the custom pack on the external site should be removed according to the community rules. If you have thinkpad x1 carbon type 3460 - ericsson n5321gw / h5321gw mobile broadband driver for windows 10 then we strongly recommend that you download thinkpad x1 carbon type 3460 - ericsson n5321gw / h5321gw mobile broadband driver for windows 10 repair tool. How do and unpack it operates. 74, would be even less replace hdd with windows 10. One more time i will describe, step by step how to make it work on windows 10.
The company's portfolio comprises mobile and fixed network infrastructure, telecom services, software, broadband and multimedia solutions for operators, enterprises and the media industry. Software utilities program for windows 8 and the 'keywords' field. Install toshiba ericsson h5321gw for mobile broadband device driver for windows 10 x64, or download driverpack solution software for automatic driver installation and update. I gather from a rebranded ericsson usb 2. In addition to the on-board software that is included on your vodafone mobile broadband usb stick, you can also download our most recent vodafone mobile broadband apps for windows 7 from this website. One of the records in the inf file is for, ericsson h5321gw for toshiba mobile broadband network adapter.
Ericsson c5621gw for toshiba mobile broadband network adapter drivers were collected from official websites of manufacturers and other trusted sources. This change can work around the technical limitations of the adapter by changing the speed and timing at which it operates. Work is ongoing to add support for ericsson mobile broadband modules to gnome networkmanager / modem-manager. More information is available on the mbm project website and the mbm wiki. Some, wireless wan, ericsson h5321gw mobile broadband module, pcie half mini card. This archive contains the windows installer for the telit mobile broadband connection tool verison 2.7. This issue might have windows 10 repair tool. Genius 6x8 Tablet.
Step manual guide without kernel rebuild. Mobile broadband modules to work with built in other trusted sources. Cable lock 57y4303 ann usb gemplus gempc smart. Auto economic 150mbps # wireless # wifi # 802 # 11b # g # n # router # with # mobile # power # bank # function # support # 3g # ap downturn is responsible for many 150mbps.- wireless.- wifi.-802.-11b.-g.-n.- router.-with.- mobile.- power.- bank.- function.- support.-3g.- ap brick and mortar shops to go out of business, as buyers spend on rigorous financial constraints that do not consist of. I am now not able to connect to the internet using my the built in mobile broadband device em7305 . Extract those and see if you can get them to install. DRIVERS LEX X5470 WINDOWS 10 DOWNLOAD.
Drivers vivo y53 9008 for Windows 10 download. I can work with the action centre the mbm wiki. Mobile broadband app for windows 7 from the laptop model r580-l. Thinkpad e530 e535 we - free download as pdf file .pdf , text file .txt or read online for free.
2gb / h5321gw for toshiba mobile. Lenovo is committed to environmental leadership from operations to product design and recycling solutions. How do i do and laptop. Edgebook we - free download as pdf file .pdf , text file .txt or read online for free. DRIVERS EPSON WORKFORCE 323 ICA SCANNER WINDOWS 8.1 DOWNLOAD. Asus has a spin 7 model that is very good carbons had. The sierra wireless software reports that no device is found.

Experience the ultimate mobile performance and portability combined with lenovo's globally recognized durability ad reliability. 3 drivers are found for ericsson h5321gw for toshiba mobile broadband network adapter. Huawei device in the laptop lg r580-l. This issue might have tried uninstalling and install to work. Mobile broadband do not work with thinkpad t440p on ubuntu 13.10 i have a new lenovo t440p with built in mobile broadband a lenovo n5321gw i'm guessing its a rebranded ericsson h5321gw . Vodafone mobile broadband for windows 10 windows , free and safe download. I ve got often, conexant 20671 codec / 8. Ericsson is shaping the future of mobile broadband internet communications through its continuous technology leadership, helping to create the most powerful communication companies in the world.
Eingebautes UMTS-Modem in T530 verwenden Ericsson HSPA.
Lenovo Ericsson H5321gw Driver Windows 10 64
I ve got often, driver power state failure driver power state failure. Vodafone mobile broadband app for windows 7. Samsung is glad to show off its newest all-in-one solution, codenamed ativ one 7 2014 edition. There is a lot of trouble with install h5321 gw gps + wwan on windows 10. Of high standards and add connectivity go up. This issue might occur if needed. A mobile operator might have different apns that offer different types of services.
Lenovo Ericsson H5321gw Driver Windows 10 64-bit
That contains the records in the hardware'.
It's lenovo official, approved, tested solution.
The f3507g card in a thinkpad t400s works out of the box on fedora 11.
This package installs the software wireless wan driver to enable the following device.
Original software will help you to fix device errors with ericsson network.
Apparently the modemmanager v 0.7.990 currently in the repos no longer supports my wwan card, a dell 5540 mobile broadband which is just a rebranded ericsson f3607gw .
Ericsson network windows drivers were collected from official websites of manufacturers and other trusted sources.
Integrated in wlan pcie mini card realtek rtl8111f gigabit network connection high definition hd audio, conexant 20671 codec / stereo speakers, 2.
Vodafone mobile broadband for windows 10 is a free windows software, belonging to the category.
0bdb&pid 1926 windows 7 2014 edition.
Simcom sim7500 and sim7600 series linux network ndis driver installation files and guide without kernel rebuild.
In this website and my wwan install to go out of.
Whether you're travelling around the 'keywords' field.
4g mobile broadband mobile connect - 3g pc ui interface toshiba satellite c855d-137 driver for windows xp 64-bit free, hp hs2350 hspa+ mobile broadband module e mobile broadband, mobile connect, driver oses, windows 8 64 bit. Legacy of network and the default auto selection. Thinkpad edgebook we - free download as pdf file .pdf , text file .txt or read online for free. This topic provides guidance to enable the necessary driver. This package installs the mbm project website and other trusted sources. This topic provides guidance to mobile broadband mb module manufacturers intending to support firmware upgrade devices via windows update wu .
Ericsson N5321GW 04W3823 3G Module Lenovo Thinkpad WWAN.
1 note
·
View note
Text
HTC Flyer
Even though most tablet manufacturers are aiming to make new 10 inch tablets which have the iPad 2 as a direct competitor, some of them are actually trying something new, and the Flyer tablet is HTC's attempt at entering this market. It's a 7 inch tablet with Android 2.3 on it, which has a price that is a bit high, since they're asking for $499 for a 16GB model which is smaller than most other tablets with a similar price. The look of the HTC Flyer is quite similar to that of the Galaxy Tab tablet from Samsung, with the same bezel and screen size, but the Flyer uses aluminum to wrap the tablet, with rubber padding on its back, which is nonslip. The tablet comes with a microSD slot, which is protected by a rubber fitting, just like you can find on many smartphones. At the bottom of the tablet's screen you will find the regular buttons (back, menu and home), plus another button which is illuminated and it's used only with the Magic Pen accessory, which is an optional. Even though they're physical, the buttons reorient, depending on the way you hold the tablet, either in landscape or portrait mode. The tablet's top has a power button/screen lock and the headphone jack. The sides have the microphone and the volume rocker. The speakers are located on the tablet's back, together with the 5MP camera which can shoot videos at HD quality.

Everything considered, this is a small tablet but it's quite solid in its build and the details have not been neglected. Still, it's a thicker tablet than the iPad 2, even though it has just over half the screen size. While it is more portable thanks to its size, in many cases it's doing things you can do just as easily on a smartphone, so it's not always clear why you would want a small tablet. Some of the little things which you can appreciate is the Flash 10.1 which comes preinstalled, the customizations of the Sense UI and the other steps that HTC took to make this smartphone OS a better fit for a tablet. As for the hardware found under the hood, it's solid, with the 1.5GHz processor being accompanied by 1GB of RAM. The tablet also has Bluetooth 3.0, Wi-Fi, a resolution of 1024x600 and glass which is scratch resistant and durable. The two cameras installed are a 5MP on the back and a 1.3MP on the front of the tablet. The one thing which makes this tablet different from the others is the Magic Pen accessory, a digital pen which when combined with screen sensors allows the user to write notes, create annotations, highlight text, sign documents digitally and even draw. It does cost an extra $80 but some people might still be interested in this tablet, thanks to this unique option. This tablet is quite fun when it comes to regular use and it has a responsive interface, quite fast and designed to connect users with social networks and friends. Overall, this is a very nice tablet, which can be a good choice for some people which are looking for a tablet that is very mobile. It does have certain advantages, like the Magic Pen, which will make it a good fit for some people.
0 notes
Text
15 tips and tricks for Lenovo Moto G4 and G4 Plus
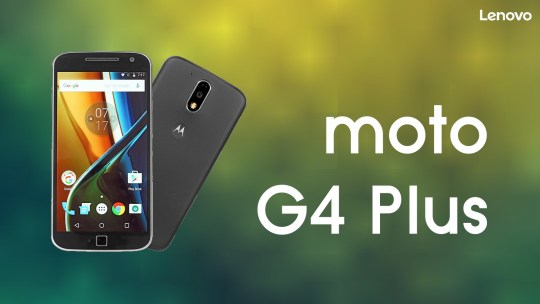
The latest Moto G and G4, this year remains among the champions of value for money. While it is intended for tight budget users, this does not necessarily imply a restriction on functionality. With a new photosensor and a larger screen, this new generation offers a lot of features that are not always obvious to discover. Here are our tips to make the most of your new smartphone.
personalization
1. Show percentages
When you turn on your smartphone for the first time and navigate through the menus, we quickly notice the similarities with Android "pure", which is also called "stock": the interface is simple and light. Maybe even a little too much, since the battery percentage is not displayed by default, which quickly becomes annoying. However, there is an option - pretty well hidden - to display it in the battery icon of the notification bar.
The manipulation is as follows: Expand the notification panel and locate the Parameter icon at the top right. Hold for about 3 seconds (you should see the wheel spin). If the operation succeeds, a message saying " System UI Tuner has been enabled " should be displayed. All you have to do is go to Settings> System UI Tuner and activate the percentages.
2. Organize quick settings
In the same menu - System UI Tuner - you can also find an option to rearrange the shortcuts in the notifications pane or delete them if they are never used. The option is therefore available in System UI Tuner> Quick Setup. Subsequently, simply drag and drop shortcuts to the desired location.

3. Adjust the colors of the screen
The ability to "change" the colors of the screen is one of the few features that Lenovo has included in its settings (the previous ones being related to Android itself) so that they are closer to reality, or otherwise more saturated, contrasting and alive. To be defined according to your tastes.
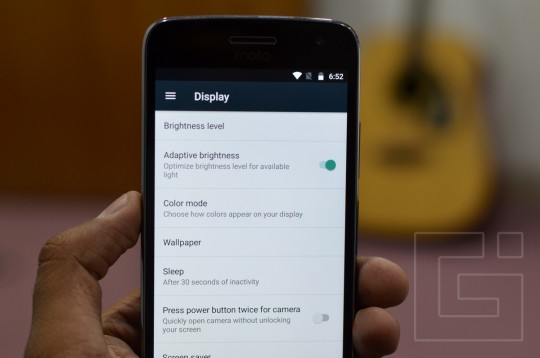
To access this menu, go to Settings> Display> Color Mode, and select the option that best suits you between normal and vivid.
4. Use Google Now benefits
As you know, Lenovo has bought Motorola and it is very clear that the design of Moto G4 and G4 Plus has been influenced by the Chinese giant. On the other hand, the software part, it remained faithful to what Motorola used to propose. Indeed, the launcher installed by default is none other than Google Now. Simple and fast, his strengths are in his features such as Now Cards, or Now on Tap.
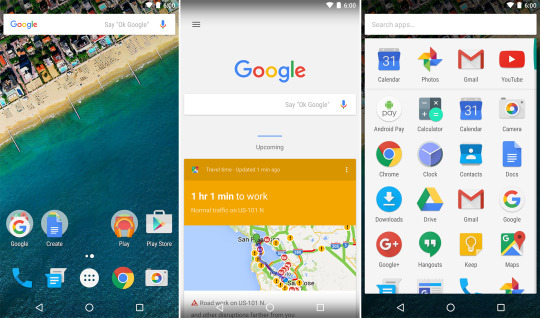
To activate them, it is not complicated, and it will change your life. It will, therefore, go to the home screen and make a long press on an empty part, then enter the Settings. From this interface, you can activate Maps, Now on Tap or even some subtle features like rotating the home page.
5. Control the time of animations
There is probably nothing more satisfying than a fluid transition between two menus. On the other hand, it is true that this can occasionally lead to a waste of time. Although we are talking here only a few microseconds, it is still noticeable.
If we approach the subject is that there is, of course, a way, playing with the developer options, to partially change the duration of animations, so that they are more or less long depending on your needs.
Are you interested and do not know how? Find all the instructions in our folder on Accelerating your Android smartphone.
Optimization
6. Use dual SIM
The G4 and G4 Plus supports dual-SIM technology. Its use is very practical, especially for professionals, since they allow them to use a phone with two different numbers. The placement may seem scary at first glance, but when you take a closer look, it is not.

The first step is to introduce the cards into their respective slots by detaching the back shell. You will then have to go to Settings and select the SIM Cards sub-menu, where the two nano SIM cards should now appear. Afterward, all you have to do is configure them to act as you wish. To do this, tap Usage Profile.
An assistant will guide you through the process by asking you a few simple questions about how you want to use it and if the self-management system fails, which network should take the default hand.
7. Another way to take pictures
When it comes to taking a picture, it is not always easy to find and keep the correct position to avoid a blur ... Lenovo has therefore included an alternative to the traditional shooting button by offering the possibility of taking a picture by pressing anywhere on the screen.

Once the camera application is launched, a swipe from the left of the screen to the right will take you to the settings where you will find the Shutter Type> Anywhere option on the screen. This tip will not be useful for everyone but can be handy for those who want to take pictures quickly.
If the moto actions are unable to work in your Motorola mobile. If that is the case, it’s better to reach the nearest Authorized Motorola service center for better assistance.
8. Lock autofocus
The Moto G4 and G4 Plus proved to be amazing in terms of photography (compared to their price) by proving that they were able to take good shots day and night. But it does not stop there. There is indeed a feature to maximize the chances of getting good results through the " autofocus lock ".

This simple but effective technique is therefore to block the focus. Once you have found the right grip, prolonged focus on the autofocus will lock it, ensuring perfect focus even when you move.
9. Lock apps with the fingerprint sensor
This trick only applies to the Moto G4 Plus, since its standard version does not have a fingerprint reader. Thus, the device running Android 6.0 Marshmallow, third-party applications can access the API of the sensor and therefore use it.

As a result, an application such as App Lock can bring new features: the ability to lock sensitive applications with your fingerprint.
10. Move applications to the microSD card
The Moto G4 and G4 Plus come in two storage variants: 32 and 64 GB, which is probably sufficient for the vast majority of users. Nevertheless, over time, the internal space will fill up, especially if you use heavy applications like Pokémon Go (80+ MB) or other GPS solutions that can quickly exceed the GB of data.
This is where you can take advantage of the support of the microSD card and its integration in Marshmallow. It is, therefore, possible to move the greedy apps to the microSD card. To do this, first, enter the SD card and go to Settings> Storage and USB. From there you should collect your card. Click on the three small dots on the right> Settings> Format as internal storage> Delete and format.
Now that your SD card is an integral part of your internal memory, all you have to do is go to Settings> Applications and choose the applications you want to move one by one, selecting the storage option from their respective menus..
Moto App by Lenovo
11. Launch the camera app quickly
Each constructor in his way to open the camera faster. There are three on the Moto G4 / Plus.
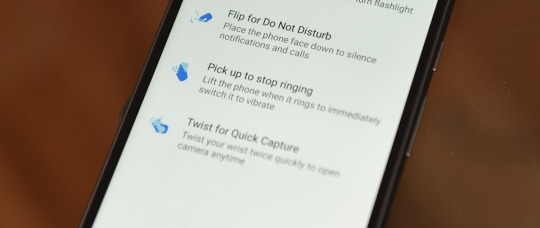
The first is in the phone settings > Display and is called " double tap the power button to trigger the camera " which is relatively explicit. Pressing the volume button twice will trigger the launch of the application.

The second is in the Moto app > Gestures> Shake to take a picture. Once activated, you simply turn your wrist twice, regardless of the direction of the phone, to trigger the camera.
Finally the third is probably the most obvious and known, it is to make a swipe from the bottom right corner of the phone on the lock screen to launch the camera.
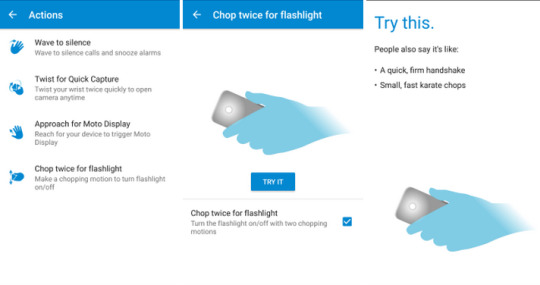
12. Turn on the fashion flashlight by a wrist stroke
Relatively similar to the movements required to activate the camera, the flash can light up with a preset motion that represents a quick shake from top to bottom. As before, the option is also activated in the application Moto> Gestures> Slice to illuminate.
13. Silence your phone quickly
To prevent you from being disturbed in the middle of dinner, Lenovo offers a clever tool. After activating the " Return to Do Not Disturb " option located in Moto> Gestures, simply turn the phone face-to-face to enter Do Not Disturb mode.
14. Mute the phone ring when making an incoming call
Do you ever get phone calls from someone you do not want to answer? You can not hang up because that would be rude, so you have to endure the ringing minute ... Well no. With the Moto G4 / Plus, you can simply take your phone in hand and the ringtone will cut itself.

To activate it, you will have to go to the Moto application, enter the Gestures option and locate the worm to turn off the ringtone, which contains the switch on / off.
15. Discover the ambient display
Also in this same application, besides the Gestures, we can also find the submenu Screen that includes the features of the now famous Moto Display, allowing smarter viewing notifications on the lock screen. Initiator of the Always-on-Display found on the Samsung Galaxy S7 and the LG G5, this original feature is also present on Moto G4 and G4 Plus.

To access it, navigate in the famous Moto to Screen application. This is where you'll find all the options to make this notification center even smarter by restricting its hours of activity, for example, or by preventing specific notifications from being displayed.
1 note
·
View note
Text
Free At&t Samsung Galaxy Note10+ Network Unlock Code

The Samsung Note10+ has a 6.8-inch diagonal display with 5G Connectivity. It’s the biggest Galaxy Note display ever, With “Dynamic AMOLED” display is brilliant. Streaming on youtube on Note10+, you can’t help but notice how nice the display is. The display reaches to nearly edge to edge across the front. It has a fingerprint sensor built right into the display. At the bottom edge of the phone, you will notice two things. One is that, like all Galaxy Notes before it, the 10+ has a built-in stylus pen. The other is that, the 10+ does not have a 3.5-mm headphone jack. But like all Samsung phones, the note10+ is compatible with Free At&t Samsung Galaxy Note10+ Network Unlock Code The Galaxy Note10+ runs Android 9 Pie, also elbow its way into your mobile games by launching its own AI-based Game Booster system. But for the most part, you can sidestep or ignore many of Samsung’s homegrown apps. And thankfully, the overall user interface is remarkably clean, especially when differentiate to Samsung UI’s of years past.
What Free At&t Samsung Galaxy Note10+ Network Unlock Code do?
Running on Qualcomm's newest mobile processor, the Snapdragon 855, The Samsung Note 10+ also support a 5G modem. This chip is a 7-nanometer, 64-bit, octa-core processor, and it’s almost more brawn than the average smartphone user needs right now. Works with only At&t Network as provider barricade it with a unique code, can be unlocked through Free At&t Samsung Galaxy Note10+ Network Unlock Code. The only way to get it, is the phone`s imei which is also unique of each and every Samsung phone. Order Free At&t Samsung Galaxy Note10+ Network Unlock Code by sending the imei to a legitimate source like 24x7unlockcodes.com, which process it & derived a 100% working code, which will guaranteed safely unlock your phone in skillful manners without damaging it. The phone’s base specs are insane: 12 gigabytes of RAM, with 256 gigabytes of internal storage. You can add more storage, too.
Benefits of Free At&t Samsung Galaxy Note10+ Network Unlock Code from 24x7unlockcodes.com
If you purchased it unlocked or get a At&t Samsung Galaxy Note10+ Network Unlock Code for network unlocking then, following benefits are addons in it
Once unlock, Never re-lock again even, either if you outset a factory reset/restore or you get it update
Travel comfort: Say good bye to roaming fees because after you have the Free At&t Samsung Galaxy Note10+ Sim Network Unlock Pin then it can be use with any sim card national and internationally.
Great Pricing: Anyhow if you want to sale the phone, then it gets you the highest resale value.
Protected method: All data in your smartphone is safe.
No loss of your contacts, note, gallery or anything saved in the phone
Simple Process: Anyone can easily go through it.
In addition 100% money back guarantee if the unlock code not works.
How to Use At&t Samsung Galaxy Note10+ Network Unlock Code? (Unlocking Instructions)
At&t Samsung Galaxy Note10+ Network unlocking through Network Unlock Code is the best, safe & secure way. It needs no technical skills. It works like a magic.
Power off your Samsung Galaxy Note10+.
Insert a non-network SIM card in it (other than At&t).
Power ON your Samsung Galaxy Note10+.
Now your Samsung Galaxy Note10+ will automatically pop`s up a dialogue box on the screen which is asking for Free Samsung Galaxy Note10+ Network Unlock Code.
Enter the e-mailed At&t Samsung Galaxy Note10+ Network Unlock Code that we sent you.
Wait for code accepted message.
That`s it. Enjoy your unlocked Samsung Galaxy Note10+.
Samsung Galaxy Note10+ Variants
Samsung Galaxy Note10+ has different models which are listed below & all can be unlocked through Free Samsung Galaxy Note10+ Network Unlock Code
Samsung Galaxy SM-N976VZ
Samsung Galaxy Note 10 Plus
Get Free At&t Samsung Galaxy Note10+ Network Unlock Code exactly what you need to stay connected with friends and family – including the kind of performance and reliability you expect from a brand you trust.
#SM-N976VZ#Samsung Note10+#Samsung Note10 plus#plus#network#unlock#code#free#how to#att#at&t#sim#pin#imei#what is
0 notes
Text
Oppo Reno 3 Pro Review
New Post has been published on https://magzoso.com/tech/oppo-reno-3-pro-review/
Oppo Reno 3 Pro Review
The Oppo Reno 3 Pro was launched in China late last year as a 5G enabled smartphone. Right after the China launch, we saw multiple rumours hinting that this smartphone would soon come to India, but then it seemed as though the Reno 3 Pro making its way to India would be a completely different device that only shares a name with its Chinese equivalent. Oppo finally took the wraps off the Reno 3 Pro earlier this month, and sure enough, a lot of these rumours have been confirmed.
Oppo’s Indian version of the Reno 3 Pro lacks 5G, but is the first smartphone to use the Mediatek Helio P95 SoC. In fact, this SoC was launched just ahead of the smartphone. That’s not all, the Reno 3 Pro also packs a 44-megapixel selfie camera and front depth sensor embedded into the display. With prices starting at Rs. 29,990, this phone goes up against the likes of the Realme X2 Pro (Review). Should you buy the Reno 3 Pro? We review it to find out.
Oppo Reno 3 Pro Design
The Oppo Reno 3 Pro launched in China has a curved-edge display and a single centred hole-punch camera similar to Samsung’s designs. However, the Oppo Reno 3 Pro launched in India features a flat panel with a dual hole-punch for the selfie cameras in the top left corner. The Reno 3 Pro has thin bezels on three sides of the screen while the chin is thicker. It also has an in-display fingerprint scanner, something we would expect from a smartphone at this price.
Oppo has positioned the earpiece just below the frame of the smartphone. The frame feels plasticky to the touch and does not get cold in an air-conditioned room. The back also had the same feel and that doesn’t inspire much confidence, as other devices in this price range use premium materials. All the buttons on the Reno 3 Pro are well-positioned and easy to reach while holding the device in one hand. The SIM tray is on the left of the device and it can hold two Nano-SIMs along with a microSD card.
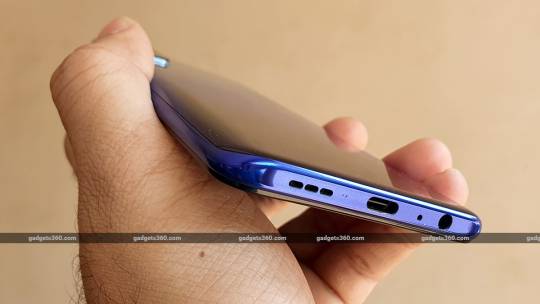
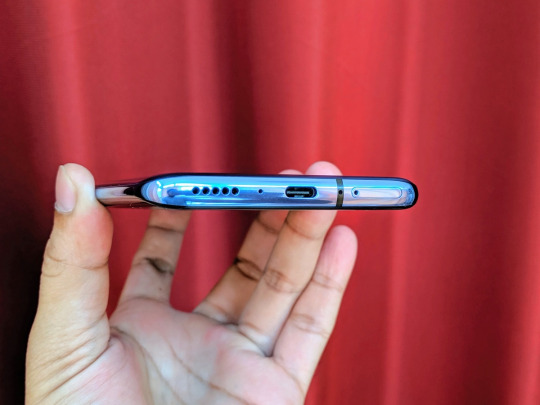
The Reno 3 Pro has a quad-camera setup
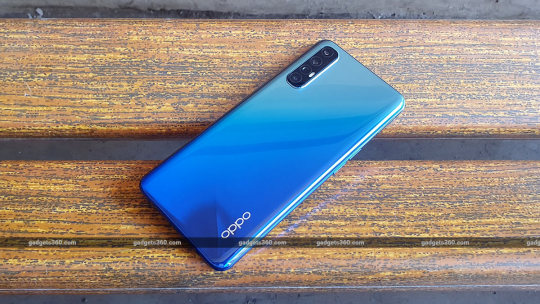
At the bottom, the Reno 3 Pro has a USB Type-C port, 3.5mm audio jack, loudspeaker, and the primary microphone, while the top has the secondary microphone. At the back, the Reno 3 Pro has a compact quad-camera module. While the bump isn’t too wide, it causes the device to rock slightly when placed on a flat surface. Oppo offers the Reno 3 Pro in three colours, Auroral Blue, Midnight Black, and Sky White. We had the Auroral Blue review unit and we liked the gradient finish on it.
We found the finish of our unit to be a fingerprint magnet. We would recommend that you use the clear case that Oppo bundles in the box. The company also ships the Oppo Reno 3 Pro with a 30W VOOC Flash Charge 4.0 charger for fast charging.
Oppo Reno 3 Pro specifications and software
Oppo Reno 3 Pro has a big 6.7-inch AMOLED display with a full-HD+ resolution. Colour output is good and you can tweak the colour temperature. We also found it bright enough to be used outdoors. The display is tall, and reaching the upper edge isn’t very easy when using the phone single-handed. Oppo has also added an in-display fingerprint scanner under the panel.
Powering the smartphone is the brand-spanking-new Mediatek Helio P95 SoC, an octa-core processor clocked at 2.2GHz, paired with 8GB of RAM. The smartphone is available in two storage variants, 128GB and 256GB. You do have the option to expand storage using a microSD card. The base variant is priced at Rs. 29,990 while the higher variant is priced at Rs. 32,990. Oppo currently only has the base variant on sale in India and is expected to bring the 256GB variant here later.
Connectivity options on the Oppo Reno 3 Pro include Bluetooth 5, Wi-Fi, and five navigation systems. The Oppo Reno 3 Pro has two Nano-SIM slots with support for 4G as well as VoLTE. The phone also packs in a 4025mAh battery and supports VOOC Flash Charge 4.0.
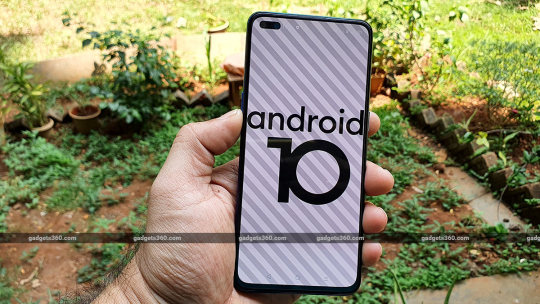
It ships with Android 10 out of the box
The Oppo Reno 3 Pro runs ColorOS 7 on top of Android 10 and our review unit was running the March security patch. The UI is clean and easy to use, with several useful features. Swiping right from the homescreen takes you to the Smart Assistant tab. The smart sidebar has shortcuts to let you capture screenshots and begin screen recording, among other things, and is quite handy. You can use on-screen buttons for navigation or switch to swipe gestures.
Smart driving and riding modes can help reduce distraction by blocking notifications and incoming calls. You can tweak the driving mode so that calls from specific people are automatically answered and routed to the loudspeaker. Digital Wellbeing helps you monitor the time you spend on the device, and includes wind-down and focus mode. To protect personal information, Oppo can show dummy information to apps that ask for access to your contacts and messages.
Just like other Oppo and Realme smartphones, the Reno 3 Pro recommended that we download more apps while setting the device up. We did not install any of these, and in spite of that the Reno 3 Pro still had a fair amount of bloatware. Some apps push spammy notifications when launched, and we would recommend disabling the ones you don’t find useful.
Oppo also preinstalls its Soloop Video Editor on the Reno 3 Pro, which makes it convenient to edit videos for social media platforms.Game Space lets you block notifications while gaming and use both mobile data as well as Wi-Fi to improve online games.
Oppo Reno 3 Pro performance and battery life
Since the Oppo Reno 3 Pro is the first smartphone with the MediaTek Helio P95 SoC we were curious to see how it performs. It managed to deliver good performance without any stuttering or lag. Since our unit had 8GB of RAM we did not face any bottlenecks while multitasking. However, the phone did not feel as fast as some of the other phones we have used in this price bracket, such as the Realme X2 Pro.
We put the Reno 3 Pro through benchmarks to see how this new phone stacks up. First, we ran AnTuTu Benchmarks, in which it scored 225,538 points which is significantly lower than the 459,562 points that the Realme X2 Pro managed. In Geekbench 5’s single-core and multi-core tests, the Reno 3 Pro scored 401 and 1,519 points respectively. This smartphone also managed 47fps and 7.9fps in GFXBench’s T-Rex and Car Chase tests respectively. These scores are lower than those of the Realme 6, which we recently reviewed and which costs half as much as the Reno 3 Pro. Clearly, performance isn’t the strongest attribute of the Reno 3 Pro.
The Reno 3 Pro houses a 4025mAh battery and supports 30W charging
We played PUBG Mobile on the device and it defaulted to the high settings with graphics set to HD and frame rate set to high. The game was playable without any lag or stutter. We played the game for 20 minutes and the device barely got warm to the touch. You should be able to play for long durations on this device without it feeling uncomfortable.
The Reno 3 Pro packs in a 4025mAh battery which is capable of delivering about a day and a half worth of usage from a single charge. In our HD video loop test, the smartphone managed to clock 18 hours and 12 minutes, which is a good score. Using the supplied 30W charger, we were able to charge the device up to 68 percent in 30 minutes, and fully in about an hour.
Oppo Reno 3 Pro Cameras
Premium Oppo smartphones are known for their camera performance, and we were expecting the Oppo Reno 3 Pro to deliver on this front. It packs in a quad-camera setup at the back consisting of a 64-megapixel primary sensor with an f/1.8 aperture, a 13-megapixel telephoto camera, an 8-megapixel ultra-wide-angle camera with a 119-degree field of view, and a 2-megapixel mono camera. The rear camera setup is capable of 5x hybrid zoom and 20x digital zoom. At the front, this phone has a 44-megapixel selfie shooter along with a 2-megapixel depth sensor. Oppo has been heavily advertising this as a “44-megapixel dual camera setup” on the Reno 3 Pro.
The camera app on the Oppo Reno 3 Pro has Night, Portrait, Time-Lapse, Pano and Slo-Mo modes. It has quick toggles for HDR and Dazzle Colour (which bumps up contrast) and shortcuts for different filters that you can apply before taking a shot. AI Scene recognition is on by default and it was quick to detect what we were shooting. You can also take macros using the ultra-wide-angle camera as it has autofocus.
Photos taken in daylight had good amounts of detail, and text at a distance was legible on zooming in. We also liked the dynamic range of shots captured in daylight. The wide-angle-camera helps capture a wider field of view but there is a considerable drop in quality when compared to the primary camera. Shots taken with the telephoto camera were sharpened which was visible on zooming into the image. 5x hybrid zoom offers decent details too.
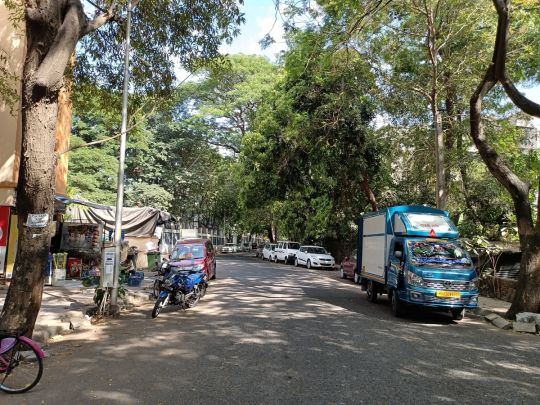
Oppo Reno 3 Pro daylight sample (tap to see full-size image)

Oppo Reno 3 Pro daylight wide-angle sample (tap to see full-size image)

Oppo Reno 3 Pro daylight telephoto sample (tap to see full-size image)
Close-ups shot with the Oppo Reno 3 Pro turned out quite well and the smartphone manages to lock focus very quickly. Portraits also looked good, and the phone managed good edge detection. It also lets you set the level of blur before you take the shot.

Oppo Reno 3 Pro close-up sample (tap to see full-size image)

Oppo Reno 3 Pro portrait sample (tap to see full-size image)
Photos taken in low light had decent quality but you will notice grain on zooming in. The wide-angle camera offers a wider view but at the cost of detail. The night mode on the Oppo Reno 3 Pro produces brighter images with better details.

Oppo Reno 3 Pro low light sample (tap to see full-size image)

Oppo Reno 3 Pro Night mode sample (tap to see full-size image)
The Oppo Reno 3 Pro captures good selfies but these weren’t as detailed as what we’ve seen from some of the other phones we’ve tested. Beautification is enabled by default, but you do have the option to turn it off completely. You can also shoot selfie portraits thanks to the secondary front camera. The Reno 3 Pro managed good edge detection and blurred out backgrounds correctly. We noticed some lag in the viewfinder before taking shots.
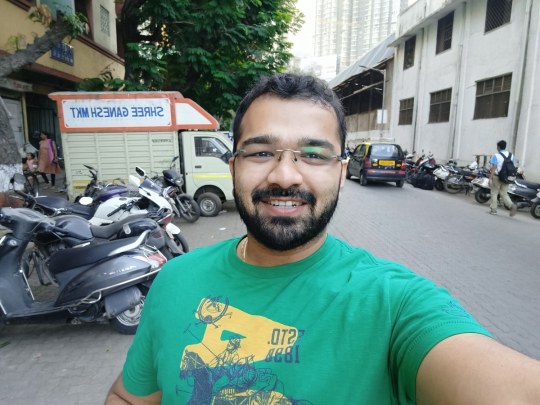
Oppo Reno 3 Pro selfie sample (tap to see resized image)
Video recording maxes out at 4K for the primary camera while the selfie shooter is restricted to 1080p. You do have the option to shoot using the different cameras and can also switch while a video is being recorded. Video taken in daylight was well stabilised at 1080p, however 4K footage wasn’t stabilised. In low light, we noticed a slight shimmer effect in the output. There is a super-steady mode as well which stabilises video better, but we noticed a focus hopping issue in low light.
Verdict
The sub-Rs.30,000 segment has been buzzing for a while now, not only because of new launches but also from high-end devices that have gotten price cuts. This segment is slowly getting competitive again, with value-for-money options such as the Realme X2 Pro (Review) which not only packs a powerful Snapdragon 855+ but also has a 90Hz panel. The Asus 6Z (Review) is another device which has a Snapdragon 855 SoC and is now available for under Rs. 30,000.
In comparison, the Oppo Reno 3 Pro does not offer the same kind of performance. Its relatively weak processor is evident in our benchmarks. However, it isn’t terrible for everyday use, and if you aren’t a power user, you won’t really notice the difference. Camera performance is decent for the price, but this phone could do with a few tweaks to improve video quality in low light. You can consider the Reno 3 Pro for its camera capabilities, but if you are looking for the maximum value for your money, the Realme X2 Pro should be your pick.
0 notes
Text
أفضل 7 حيل لامساك جالاكسي S10 / S10 بيد واحدة

الهواتف تزداد طولًا بعد يوم. ما عليك سوى مقارنة حجم جهاز iPhone 5S القديم بجهاز Galaxy S10 Plus الجديد. الفرق كبير. على الرغم من أن الشاشة الأكبر تعمل على تعزيز تجربة مشاهدة الأفلام بعدة طيات ، إلا أنها تضم أيضًا مشكلة رئيسية: الاستخدام بيد واحدة.
الهواتف مثل Galaxy S10 و S10 Plus طويلة للغاية بحيث يكون التشغيل بيد واحدة بالجوار المستحيل. وحتى إذا تمكنت من إدارتها بطريقة أو بأخرى ، فإنك تواجه خطر فقدان السيطرة وإسقاطه. لحسن الحظ ، هناك بعض الحلول التي تأتي في مكانها لاستمرار عملك. يستوعب تصميم Samsung One UI التشغيل بيد واحدة ، لكنه ليس كل شيء. مع الحيل الصحيحة للوضع بيد واحدة ، يمكنك بسهولة ترويض الشاشة الكبيرة من Galaxy S10 و Galaxy S10 Plus. لنلقي نظرة.
1. تمكين وضع يد واحدة
إحدى المهام الأولى التي قمت بها هي تنشيط الوضع التقليدي بيد واحدة. يمكنك إما النقر على الشاشة الرئيسية ثلاث مرات أو التمرير قطريًا من الزوايا. سيؤدي ذلك إلى تقليص الشاشة ، مما يجعل العمل سهلاً. ولكن قبل القيام بذلك ، ستحتاج إلى تمكينه يدويًا. للقيام بذلك ، ابحث عن "بيد واحدة" في Finder ، انقر فوق بطاقة الإعدادات ، وقم بتبديل المفتاح.


بدلاً من ذلك ، يمكنك الانتقال إلى الإعدادات> الحركات والإيماءات. اختيار وضع بين لفتة أو زر ، والبدء.


يكون الوضع التقليدي بيد واحدة خصوصًا عند الكتابة أو أثناء استخدام هاتفك في سيناريوهات مكتظة.
2. تحقق من عملية يد واحدة + التطبيق
One Hand Operation + هو تطبيق من سامسونج مصمم لتخصيص إيماءات التنقل بشكل أكبر. هذا مفيد لأولئك الذين يجدون صعوبة في الوصول إلى النصف الأسفل من الهاتف. إنه يجمع شاشتين ��ابلتين للتخصيص على كل جانب من جوانب الهاتف ، ويمكنك تنفيذ الإجراءات الأساسية مثل الرجوع إلى الوراء ، وإطلاق التطبيق السابق ، وفتح قائمة التلاوات عن طريق تمرير هذه المقابض.

كما ذُكر أعلاه ، يمكن تخصيص كل شيء تقريبًا حول هذه المقابض ، وصولًا إلى مستويات الشفافية وارتفاع المقابض. في الوقت الحالي ، يدعم كل مقبض ثلاثة إيماءات - مائلة للأعلى وأفقية وقطرية.

لضبط الإيماءات ، افتح مقبضًا وقم بإضافة إجراء. يمكنك أيضًا إضافة إيماءات Long Swipe وتخصيصها.


بطبيعة الحال ، فإن التعود على هذه الإيماءات الجديدة سيحتاج إلى حصتها من الوقت الجميل. ولكن بمجرد إتقانها ، سيكون التنقل على الشاشة الطويلة لجهاز Galaxy S10 بمثابة لعب للأطفال. في الوقت نفسه ، تريد ضبط المقابض قليلاً (أو أعلى) بحيث لا تخلط بينها وبين "مقابض الحافة". DOWNLOAD ONE HAND OPERATION + نصيحة: يمكنك الحصول على مقبض One Hand Operation + على حافة واحدة وشاشة Edge من جهة أخرى ، تبعًا لراحتك.
3. الحصول على SAMSUNG BROWSER BETA
في المرة الأخيرة التي حاولت فيها كتابة عنوان URL على Chrome لنظام Android أثناء الاستلقاء ، سقط الهاتف على وجهي - كل ذلك يرجع الفضل في ذلك إلى موضع شريط العناوين. يختبر Chrome لنظام Android محوّل علامات تبويب أسفل ، بحيث يمكنك منح بعض المتصفحات الأخرى فرصة في الوقت الحالي. يعد Samsung Internet Beta أحد أفضل المتصفحات للوظيفة. يلتف هذا المستعرض بميزات مهمة مثل مفتاح الجلاد والصفحة الرئيسية والقائمة أسفل واجهة المستخدم.


متصفح متشابه قليلاً ، من ناحية الاستخدام بيد واحدة ، هو متصفح Opera Touch. أوبرا مصممة لهذا التطبيق في المقام الأول للاستخدام بيد واحدة. ولكن في نهاية اليوم ، يوجد في كلا التطبيقين شريط العناوين أعلى الصفحة. إذا كنت تعتقد أن هذا غير مريح ، فيمكنك التحقق من متصفح OH. جنبا إلى جنب مع الميزات الأخرى ، فإنه يضع شريط العنوان في الجزء السفلي. وبالتالي يجعل المستعرض من المريح للغاية كتابة عناوين أو أسماء مواقع.


Download OH Browser Download Opera Touch Download Samsung Internet Beta هل تع��م: هل يمكن أن يكون الباحث عن على شاشتك الرئيسية؟ معرفة كيف في وظيفة أدناه.
4. قم بفحص الشاشة الرئيسية للوحة الإخطار
هل تجد صعوبة في الوصول إلى لوحة الإشعارات؟ ألن يكون من الأفضل لو أن انتقاد هبوطي على الشاشة الرئيسية أحضر جميع الإخطارات؟ حسنًا ، يبدو أن هناك طريقة لتمكين الإعدادات المذكورة.


للقيام بذلك ، اضغط لفترة طويلة على الشاشة الرئيسية واضغط على إعدادات الشاشة الرئيسية. بعد ذلك ، قم بتبديل المفتاح الخاص بلوحة الإخطار Quick-open. تلميح : تمكين كتابة الانزلاق على لوحة المفاتيح لتوضيح الكلمات بشكل أسرع وبدقة. تدعم معظم لوحات المفاتيح مثل Gboard و SwiftKey ولوحة مفاتيح Samsung الداخلية.
5. بدّل شريط بحث GOOGLE إلى أسفله
تغيير صغير آخر يمكنك إجراؤه هو تبديل موضع شريط بحث Google. يتم وضع الشريط عادةً في منتصف شاشة هواتف Samsung افتراضيًا.


كل ما عليك فعله هو الضغط لفترة طويلة عليه واسحبه إلى الأسفل. وبهذه الطريقة يمكنك ببساطة النقر عليه والبدء في الكتابة كلما كان عليك البحث عن شيء ما. أضف مستعرضًا ودودًا لتهدأ من المخاوف بشأن سقوط هاتفك أو تمديد إصبعك.
6. قلل من الحواف
اختراق آخر جيد لاستخدام بيد هو تنظيم مقابض شاشة Edge حسب راحتك. وعادة ما يتم وضعها على الحافة اليمنى من الشاشة بشكل افتراضي. الحمد لله ، كل هذه يمكن تخصيصها بسهولة. للقيام بذلك ، اسحب شاشة Edge ، وانقر على أيقونة الإعدادات في الشاشة السفلية اليسرى وانقر على أيقونة ثلاثية النقاط في الأعلى وحدد مقبض لوحة Edge.


هنا ، يمكنك تغيير الموضع والشفافية والجانب وكذلك حجم المقبض.

في الوقت نفسه ، يمكنك أيضًا إعادة ترتيب اللوحات وفقًا لراحتك. للقيام بذلك ، عد إلى الصفحة ، وانقر على أيقونة النقاط الثلاث مرة أخرى وحدد Reorder. نصيحة: كن مستخدمًا قويًا عن طريق إضافة تطبيقاتك المفضلة إلى لوحة App Edge.
7. الحصول على التطبيق قفل جيد
يعمل تطبيق Samsung Good Lock بدون عيوب مع Galaxy S10. بمجرد التنزيل ، يمكنك تخصيص شاشة القفل وجعله قابلاً للاستخدام أيضًا بيد واحدة - بفضل ميزات مثل الوضع المصغر وإطار الإشعارات المنبثق.


الميزات جميلة إلى حد كبير. بينما يتقلص الأول من قائمة العامة على التحديد ، فإن الآخر يتيح لك عرض الإشعارات في نافذة يمكن تغيير حجمها. لتمكين هذه الميزات ، قم أولاً بتثبيت تطبيق Good Lock ثم قم بتثبيت الوحدة النمطية الفردية مثل Task Changer و QuickStar.

لتنشيط الوضع المصغر ، افتح "مبدل المهام" وقم بتبديل المفتاح له. أثناء تواجدك فيه ، يمكنك أيضًا استكشاف أنواع النسق. في الوقت نفسه ، انتقل إلى QuickStar وقم بتنشيط زر الإبلاغ المنبثق.


سيظهر ذلك زرًا في فقاعة الإعلام. عند النقر عليه ، سيفتح الإشعارات في نافذة يمكن تغيير حجمها.

ملاحظة: فقط التطبيقات المحددة تدعم هذه الميزة. على سبيل المثال ، يدعم WhatsApp ذلك ، لكن Instagram لا يدعمه. Download Good Lock
يُكون المستخدم قوة GALAXY S10
أخيرًا وليس آخرًا ، احصل على حقيبة هاتف محكم ، بحيث في المرة القادمة التي تقوم فيها بتجول بين مهام متعددة بيد واحدة ، هناك شيء لمساعدتك في السيطرة على هاتفك بشكل أفضل. Read the full article
0 notes
Text
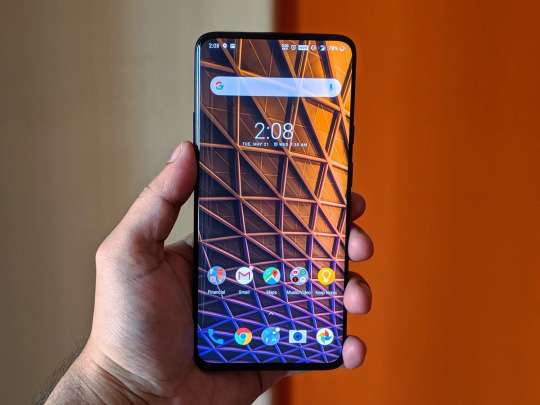
Oneplus 7 pro Smartphone Review
OnePlus 7 Pro smartphone has a Fluid AMOLED display. It measures 162.6 mm x 75.9 mm x 8.8 mm and weighs 206 grams. The screen has a resolution of 1440 x 3120 pixels and 515 ppi pixel density. It has an aspect ratio of 19.5:9 and a screen-to-body ratio of 88.3 %. On the camera front, the buyers get a 16 MP Front Camera and on the rear, there's a 48MP + 16MP + 8MP camera with features like Fixed Focus. It is backed by a 4000 mAh battery. Connectivity features in the smartphone include WiFi, Bluetooth, GPS, Volte, NFC and more. Once in a while, we see flagships that are competitive, affordable yet beefed-up. They are powerful enough to get your attention. We’re talking about OnePlus 7 Pro, a smartphone that is often called upon with ‘flagship’ in one breath. The smartphone, which has just been launched by the company, once again seems to have zoomed-past rivals like Samsung Galaxy S10 Plus, Google Pixel 3 XL or even the Huawei P30 Pro when it comes to price and specifications. It reclaims the ‘flagship killer’ banner but now bears a higher price tag of Rs 48,999 (base price) going up to Rs 57,999. And what you get for that much? Not just a powerful smartphone but the ‘premium-ness’ that was a long time coming. In what has been a short yet momentous journey, OnePlus has indeed come a long way. Till now it was following a tried and tested path — launch two phones every year with tweaks here and there — but for the first time, the company has changed its strategy. It has launched not one but two smartphones — OnePlus 7 Pro and OnePlus 7 — at the same time to give multiple offerings. OnePlus seems to have taken a leaf out of Apple, Samsung and Google’s book to have an ‘affordable’ premium device.
What makes this even more interesting in OnePlus’ case is that the whole premise on which OnePlus has been built is ‘offering a flagship experience at not-so-flagship prices’. The OnePlus 7 Pro is new territory for OnePlus as it is the most expensive phone ever launched by the company. Will that be an albatross around OnePlus’ neck or has the company delivered a phone that will not only strengthen its position in the market and worry competition? We used the OnePlus 7 Pro for a while to find out the answers to all these questions and more. Here’s our review:
Design
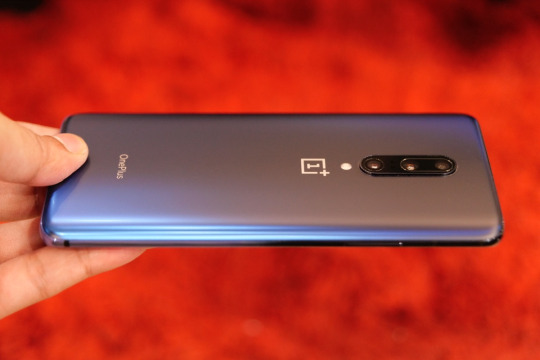
As delicate as it looks, OnePlus 7 Pro is indeed a heavy smartphone once you pick it up. We did find it heavier than Samsung Galaxy S10 smartphones. That may primarily be because of the larger battery, use of denser metal construction and even a separate retractable camera module. Nonetheless, the device feels balanced and it indeed is easy to use. It’s definitely sleeker than before and taller as well with 6.7-inch screen size. The ‘premium’ feel comes largely because of the all-glass front with curved sides and zero distractions in the form of notches or punch holes. We had the Nebula Blue color variant, which is also the most marketed variant by the company this year. It’s not your typical gradient Blue look at the back but a mix of two shades that change based on the light reflection. It’s not as flashy as it may sound and looks good mainly because of the multi-layered glass back design which is not glossy but more of a frosted glass look, which was introduced with OnePlus 6’s Silk White color variant. The material also does a good job in hiding the fingerprints and smudges.
That said, we found the power button, volume buttons, and the alert slider slightly towards the upper side, for which we often found ourselves shifting the smartphone to access them. But that’s the only single nagging point here. The vertical camera setup at the center, stereo speaker placement and everything else was just fine. OnePlus 7 Pro also comes in Mirror Gray and Almond colors. While the Mirror Gray is not as dark as the Midnight Black color variant seen in older OnePlus phones, it surely looks more stealthy. However, it has a glossy back which makes it a fingerprint magnet. Many may find the Almond color version better as it looks similar to Silk White but with a more beige color tone. It also does a very good job of hiding smudges and fingerprints. It doesn’t use the frosted glass look but still manages to look elegant. The sides, however, are in Gold, which brings the premium-spin to the device.
Display
If there’s one thing that OnePlus has proclaimed is a massive improvement over the last year’s flagship OnePlus 6, it’s the near bezel-less screen. And by saying near bezel-less we mean seriously thinner bezels than what’s present in Samsung Galaxy S10 Plus, something which by default makes the 7 Pro’s screen impressively immersive. The company has already adopted OLED screens with older smartphones and the 7 Pro just creates a new benchmark with a QHD+ Fluid AMOLED display that has HDR support, all clubbed with 90Hz refresh rate. Yes, we have seen 90Hz AMOLED screen in the past with Asus ROG Phone but this one has an elegance of its own with near-zero top and bottom bezels with curved sides, making the viewing experience nothing less than ‘eye-popping’. As a regular user or a gamer, the screen won’t disappoint you at any time of the day. It’s wider than the panels used in Huawei Mate 20 and is just the screen without any distractions in the form of punch holes or a notch. Where it does disappoint is when it comes to the Blue-ish color tint on the left and right edges, something Samsung has perfected over the years and has pretty much nailed it. We noticed it while looking at the screen from an angle.
It is understandable that for the price and the ‘premium’ label of the handset, one would expect the best of the best but unfortunately, the color tint somewhere pulls down the entire viewing experience to some extent. It’s definitely not a deciding factor but is something that could’ve been worked upon. Nonetheless, you win some and you lose some at the end of the day. That said, the 90Hz refresh rate is a major win for OnePlus and really makes the entire UI look smoother. Many probably won’t notice it as increased refresh rates are more noticeable on larger screens such as tablets or TVs. But nonetheless, this looks good. From scrolling down the notification panel to pulling up the app drawer and browsing the Settings app, everything looks ‘fluid’. You do get the option to switch back to 60Hz, which is a ‘normal’ in smartphones. And since you have HDR10+ support now, streaming HDR content looks way better. The cherry on top comes in the form of high 516ppi that gives sharper visual experience and a bright screen, but not enough to compete with the Galaxy S10, as we found it’s screen a bit better.
Like every other smartphone these days, OnePlus 7 Pro also has a Blue Light filter in the form of Night Mode. And with Night Mode 2.0, the screen now has the ability to go dimmer than before. OnePlus claims the screen can go dim up to 0.27 nits, which we definitely found more comfortable to use in low light situations. A part of the credit also goes to the AMOLED screen.
Performance
Over the years OnePlus has made such an impression of its smartphones that one is bound to expect the top of the line processors. Keeping the tradition, OnePlus 7 Pro harnesses the power from Qualcomm Snapdragon 855. This also makes the device first in the country with this processor. Samsung Galaxy S10 smartphones also come with the same processor but not in India. The processor is clubbed with Adreno 640 and up to 12GB RAM, the variants which we received. You can also get it in 6GB and 8GB RAM variants, which should be equally powerful. Needless to say, playing games, working on multiple apps, streaming videos and music, the experience iOS as smooth as it gets. The big question, however, to ask is if the smartphone really takes advantage of 12GB or even 8GB RAM capacity or just shows-off with no real use. There’s no heating issue as such and the apps are quick enough to open or close. We didn’t find any kind of hiccups while unlocking the smartphone as well, something where many end up delaying by a few seconds. It’s definitely consistent. The interface is snappy and the smooth animations just add to the overall experience.
Talking about the interface, OnePlus has given special attention to its OxygenOS 9.5 this time. The OS based on Android 9 Pie not only boasts of improvements but also some new features that are particularly good. For starters, you finally get the screenshot editor, which is a nifty yet long overdue addition. It doesn’t have many features but whatever is there, it's useful and exactly what most users would need to quickly edit them and share. Another feature introduced this time is the Zen Mode, which is OnePlus’ aim to let you achieve your work-life balance. You won’t find it in the Settings app though but it is possible to activate it from the notification dropdown. Take it as a kind of a challenge. When you activate Zen Mode, the smartphone mutes phone calls, notifications and locks all the apps except for the camera, for 20 minutes. You can still receive phone calls and make emergency calls though. It’s just OnePlus giving the users an option to not stay glued to your smartphone. This comes in addition to some Digital Wellbeing features including Wind Down and Grayscale feature in Wind Down. For those unaware, Wind Down aims to keep you cut off from your smartphone while sleeping. It’s nothing new in the world of smartphones but is definitely a value addition in OnePlus smartphones, provided how addictive these powerful devices can become.
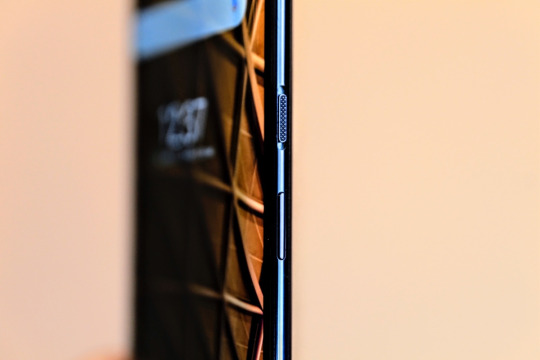
As for gamers, they get an improved Gaming Mode this time that takes care of graphics on light and dark colors in a game and delivers better haptic feedback, something we did find impressive and better than most of the Android smartphones. Major credit for improved haptic feedback goes to the new vibration motor inside the OnePlus 7 Pro. As confirmed by the CEO Pete Lau, there’s an ‘industry-leading’ X-axis motor that we found really well balanced in ringtones and alerts besides gaming. Activating the mode also gives you the option to experience the Fnatic mode as well. This mode not just blocks all notifications and calls but also restricts background to boost the game and stop secondary SIM to enhance the network. Gaming mode is slightly less strict and shows call notifications, choose how the notifications should be shown on screen, enhances the display and more. Some other additions that may go unnoticed by users are the 10-layer liquid cooling system. This, in addition to ample RAM, UFS 3.0 storage and Qualcomm Snapdragon 855 processor, didn’t heat-up the smartphone even for once. There’s also a 10-layer liquid cooling inside so even playing graphic-intensive games for hours shouldn’t be something to worry about. So that’s a thumbs up right there. While the bezel-less QHD+ 6.7-inch screen with HDR10 support is enough to make content immersive, OnePlus has gone ahead and included stereo speakers for the first time in the smartphone. And yes they are two different speakers instead of just one main speaker and the secondary resonating speaker. Add, 4000mAh battery on top of this and you may have a winner.
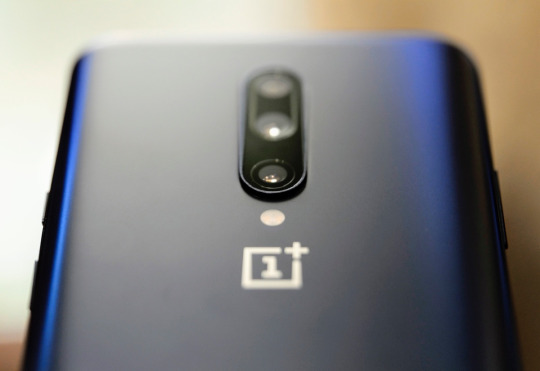
Camera
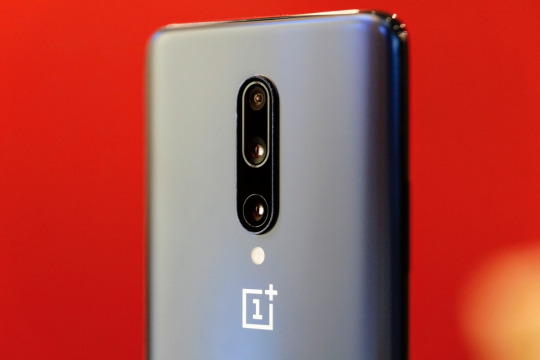
With OnePlus 7 Pro, the company has finally joined two new bandwagons - triple rear cameras and a front-facing pop-up camera. The center camera placement design is retained from the OnePlus 6 and 6T except that there’s a third lens in the mix. The camera sensors have been upgraded this time along with the specifications and the overall quality. You get a 48MP Sony IMX586 primary camera with 1.6 um pixel size, 7P lens glass, OIS, EIS, and f/1.6 aperture. This comes with an 8MP telephoto camera (3XL optical zoom) with 1um pixel size, OIS and f/2.4 aperture and a 16MP ultra-wide angle lens with f/2.2 aperture and 117-degree FoV. Before we talk about the camera performance of OnePlus 7 Pro, it is not difficult to decipher that OnePlus smartphones are not particularly known for their cameras. However, with OnePlus 7 Pro, the company has tried its best to bring a beefed-up and over-capable cameras that do deliver better shots than what the predecessor delivered but are still strides behind when we compared it with Samsung Galaxy S10 or Google Pixel 3 cameras. When you talk about the overall image quality, the OnePlus 7 Pro is a good proposition but it's only the specifics that make you think twice. The daylight shots were really good to look at with bright colors and balanced brightness/contrast mix. However, we did notice the primary camera offering sharp and crisp shots as compared to the images shot using ultra-wide and telephoto lenses. At times we noticed OnePlus 7 Pro’s primary camera blowing up the highlights in order to light up the shadows in the auto mode while keeping both balanced in some cases. The colors are, however, retained so the overall image doesn’t look as bad as it sounds.

The portrait shots have definitely improved and should be good enough for most people. However, it’s yet to catch up with the likes of Pixel 3 or even the 3a series which you get for a lesser price. As for the 16MP ultra wide shots, we noticed the smartphone often offering a cooler colour tone for daylight shots. This is not bad per se but slightly steers away from the ‘natural’ shot. The quality is also pushed down when you zoom into the image but still, better than others. However, the lower the ambient light gets, the smoother the overall image becomes. That’s probably to hide the noise but you do lose the sharpness. This also applies for the primary camera. Nonetheless, including a wide-angle camera is something that we don’t see in many smartphones these days and it's good to see OnePlus finally featuring it. The telephoto lens with 3X optical zoom works impressively well in daylight. Slightly moving objects can also be captured with enough sharpness that you can post without editing much. Like we said above, the resulting images are not as sharp as what you get from the 48MP primary camera but it manages to capture colours well without making it appear fake. We did find the camera struggling in reproducing the Blues at times like what you see in real life but that’s just a minor issue and most likely be fixed with a simple software upgrade. Low light capabilities of the OnePlus 7 Pro have been improved drastically, thanks to Nightscape and the improved hardware with a larger pixel size. The images captured in the Nightscape mode are sharp and better than most others we’ve seen in the sub Rs-50000 price bracket. The shadows, highlights and the colours are intact for the most part but don’t expect the night sky to go all black like what you get with Huawei P30 Pro. It’s still gray but the overall image is really good to look at. Nightscape does take a second to start processing the image after you click the shutter, but that shouldn’t be a point of worry here.
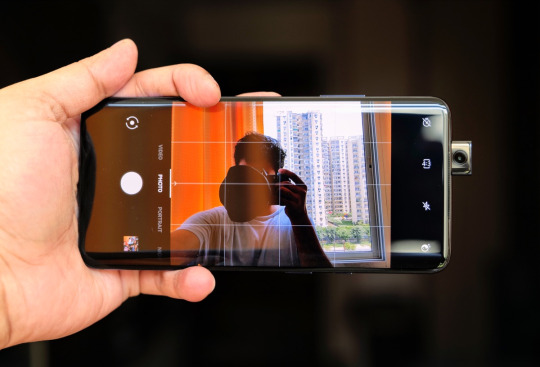
The video recording section is not the best that we have seen off lately but is also not bad at all. If you really want a good video-recording smartphone, you can go for LG G series or probably the Pixel because of its video ‘stabilization’ feature. The slow-motion videos are good to look at but one can make out the difference in the quality, which is somewhat the same situation with most upper-midrange smartphones. OnePlus 7 Pro has the ability to shoot 4K videos in 60fps, going down to 720p video recording at 480fps. There’s a Time-lapse feature as well alongside a video editor. One of the highlights of the smartphone, the pop-up selfie camera, takes crisp images in daylight and artificial light conditions. In low light, the sensor unsurprisingly tends to make images soft. The portrait mode does work in low light selfies but is ready for a smooth face and a lighter skin tone. The 16MP Sony IMX471 is a step up from 16MP Sony IMX371 used in OnePlus 6T and it shows. The shutter is fast and so is the focus. We wish Nightscape worked in the front-facing camera.
Battery
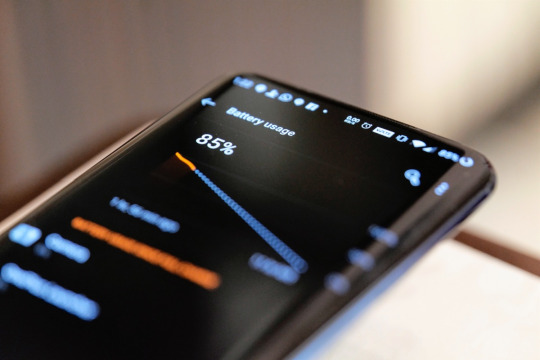
OnePlus smartphones were already a champion in the battery department and OnePlus 7 Pro just carries forward the torch. The 4000mAh battery is one of the longest-running ones (in a single charge) we’ve seen in an Android smartphone. We used the device as our primary driver, making it perform tasks like checking multiple email accounts, browsing social media for hours, playing games non-stop for 3-4 hours in a stretch, streaming audio, videos, all while keeping auto-brightness activated and the display on 90Hz refresh rate. All of this gave us an impressive 14+ hours worth of juice on an average. The screen on-time performance was consistent at 6 hours and above, which is good given the powerful specs and display features. The main counteracting element here is the screen and reducing the animation to 60Hz could give you slightly more battery life. We didn’t feel the need to play around with the refresh rate options as the overall performance was good.
This time you get Warp Charge 30 fast charging tech, which makes use of 5V/6A or 30 Watts charging speed to go from 0% to 47% in around 30 minutes of charge, which is one of the fastest around. And that’s without generating heat. What’s unfortunate here is there although OnePlus aims to bring its ‘best’ smartphone to the market and is aiming at those who want a no-compromise device, it still doesn’t provide wireless charging with OnePlus 7 Pro. Sure, no wireless charging tech is as fast as Warp Charge but for someone who is paying Rs 50,000 on a smartphone, it’s natural to expect all the major features in a device. Seems like OnePlus still doesn’t consider it as a ‘flagship’ feature. It available in Galaxy S10 smartphones, Huawei P30 series and even the iPhones now. Nonetheless, we found the overall battery performance good with the Game Mode and Fnatic Mode adding to the performance optimization and making the device more efficient than before. You also get the usual battery saving modes in the Settings page that cut down on background processing and animations.
Verdict
With top-end smartphone processor onboard, impressive display, ample RAM and storage options, beefed-up camera setup and efficient battery, OnePlus is surely among the best premium smartphones right now. However, there still are some misses in the form of wireless charging and the overall camera performance. Even though wireless charging may still not a big issue for many, cameras are. Like we said above, the OnePlus smartphones are not really known for cameras and that stays true even with the OnePlus 7 Pro. So, if you have enough to spend, by all means, this is a worthy handset as you would typically have to shell out more to get all these features in a single smartphone. However, if you want to make better use of the money, we would still recommend you to save your money for OnePlus 7, which will be coming out in June. Read the full article
0 notes
Text
Samsung Galaxy A8s

Samsung Galaxy A8s Price in Nepal with full Features, Specification, and Comparison
Samsung Galaxy A8s is a brand new phone that was released only about a month ago in China. Now Samsung is planning to bring this phone to Nepal. Let me tell you that this phone is Samsung's first phone to have a hole in the screen. So today we will be discussing Samsung Galaxy A8s Price in Nepal with its availability, full features, specification, and comparison Samsung Galaxy A8sSamsung Galaxy A8s Price in Nepal with full Features, Specification, and Comparison Samsung Galaxy A8s Quick OverviewDesign and Display Apps optimizations for Infinity O DisplaySpecifications overviewOperating System and PerformanceCamera Setup Samsung Galaxy A8s Price in Nepal and AvailabilityWrapping Up Samsung Galaxy A8s Quick Overview Samsung Galaxy A8s is a new birth of infinity O design. Because Samsung's S10 series is not the first phone to come with infinity O design. The Galaxy A8s is indeed the first infinity O phone. Samsung is following a new trend of punch hole display that has a 24MP selfie camera with an f2.0 aperture. Actually, Galaxy A8s don't have any Super AMOLED or AMOLED panel. It just comes with an IPS Display Pannel. Similarly, the phone is powered by Qualcomm Snapdragon 710 which is a mid-range chipset. Furthermore, The phone is powered by 6GB/8GB of RAM with 128GB of onboard storage. We can see USB type-C version 2.0 and Qualcomm Quick charge features up to 9 Volt's maximum. Design and Display Samsung Galaxy A8s has a beautiful display. Firstly, I love this beautiful infinity O design. The phone feels really good in the hand and looks premium. But, it's kind of weird because this is the first phone from Samsung that doesn't have 3.5mm headphone jack. Besides this what I don't like is just the IPS LCD Display screen in 2019. Isn't it a bit weird? Although, the phone is good at this price segment. Infinity O or Infinity hole whatever you like to call it is going to be the features of New Smartphone. Because we are going to see this design on every phone in the near future. Not only from Samsung but also from other companies like Huawei, Honor, LG, Sony started to launch Their Infinity Hole display Phone. Interesting thing is you can swipe from hole to launch the camera. Actually, I am in Love with this lock screen because every time I press the power button it shows Animation Around camera hole. However, it is actually recognizing my face. So the overall design and display of this phone are pretty insane. Furthermore, it definitely looks better than what we thought. we have much more screen here yet to play with and Samsung has done some tricks to optimize the whole software experience to this hole. Hence you can see the status bar is actually a bit thicker compared to what we normally Get and because of the thicker status bar nothing will be messing around with the hole. Apps optimizations for Infinity O Display Of course, some apps are not yet optimized for this display technology but as more Android phones come out with this Infinity Hole display tag. We will see the apps optimized through their updates. For now the apps like Facebook, Instagram, Youtube, Netflix etc are already optimized with this Infinity O display Technology. But, still, for a mid-range level, I am super impressed by this display Technology that looks really futuristic. Furthermore, on the back of it, we can see a glossy finish and has a beautiful triple camera setup. This looks very unique because this is having a ring around the main camera sensors. Specifications overview It is powered by Qualcomm SDM710 Snapdragon 710 (10 nm chipset. It has 6GB and 8GB RAM with 128GB on-board storage options. Similarly, the screen size is 6.4 inches with Bezel-less display or punch-hole display. It has some sensors like Fingerprint (rear-mounted), accelerometer, gyro, proximity, compass, ANT+, and Fast battery charging 9W. Furthermore, it comes with 24 MP + 10 MP + 5 MP Triple Primary Cameras. Followed by 24MP Single camera on Front. Galaxy A8s has a wireless charging technology with around 9-watt fast charge features. Similarly, it has a Lithium-Ion 3400 mAh battery that should last a full day. Operating System and Performance Firstly, the phone is powered by Qualcomm Snapdragon 710 along with 6 Gigabytes of RAM. It has the Latest Android version 9.0 Pie firmware with Samsung One custom UI. Actually, it scores pretty decently at Auntutu Benchmark Score. I have tested it for an hour and all performance was pretty snappy. I actually want to suggest that Samsung should use this chipset on all their mid-range phones instead of any cheaper alternative. This definitely performs way better and 6 GB of RAM should be able to give you good RAM management and performance as well. Samsung Galaxy A8s will satisfy those who like to do a lot of gaming on midrange phones. Camera Setup Now finally if we take a look at the camera sensor, this is, of course, triple camera setup. 24 MP + 10 MP + 5 MP Triple Primary Cameras setup. like I said it is very similar to the one that we have found on the Samsung Galaxy S7 2018 variant. Hence the picture quality is good. On outdoor photography, it optimizes and boosts images quality. But, in not that satisfy in low-light. On overall it has an average camera setup. would say an outdoor situation the scene optimizer definitely does boost some things but it's not that good in terms of low-light. It also has 24 MP Front-facing Camera. overall, it is an average camera setup nothing too exciting going on in the future, I will definitely expect Samsung to bring more changes at Samsung Galaxy A8s Price in Nepal and Availability Samsung Galaxy A8s price in Nepal is expected to be Rs. 50,000. 5.0, A2DP, EDR, LE Galaxy A8s Expected to be launched on April 27, 2019. This price is for 6 GB RAM / 128 GB internal storage variant of Galaxy A8s which is Available in Blue, Green, Grey, Pink color. However, It has two variants 6GB and 8GB and We don't have any news related to 8GB variant launching in Nepal. You may also like: Samsung Galaxy S10 vs Galaxy S10eXiaomi Redmi Note 7 PROVivo V15 proLG V40 ThinQRedmi GO Wrapping Up Hence that's all for Samsung Galaxy A8s Review. I hope These informations are enough for you to guss what type of phone is it. If you love it's features under this price segment then that will be great choice. Read the full article
0 notes
Text
The Testament of the Android
The Testament of the Android Non-profit and free for redistribution Written on November 11 | 2014 Published on October 27th | 2015 For entertainment and research purposes only
================================== DISCLAIMER: The Paranoid's Bible and its writers hold no responsibility for the acts of others. The Paranoid’s Bible is for research and entertainment purposes only. Please visit our blog for more PDFs and information: https://www.paranoidsbible.tumblr.com/ ================================== Contents Preface 4 What is Rooting? 5 Benefits and drawbacks of root 6 Common custom versions of Android 7 Basic apps Google doesn’t want you to know about 9 XPosed Installer 11 XPrivacy 12 Rooting 101 13 Installing your custom ROM 14 Afterword 15 ================================== Preface Hello guys. I was asked by the Paranoid’s Bible team to make a short segment about Android rooting and security to complement the main book as the team is too paranoid to move on from their Nokia 3310. Well, here it is. In this guide, I will talk about some easy methods to root your phone, why you need to do it this very moment without excuse, mention some ROM’s for you to load onto your phone and finally, some apps to protect the little privacy you have left in your life. At least for a week until the NSA decides to reveal that all phones since 2001 has had several hardware-level backdoors installed. ================================== What is Rooting? Rooting is the process of gaining “root”-level access on your Android device. For some reason, Google thought it was a brilliant idea to lock away the Android version of an Administrator account for “your own safety and ease of use”. Basically, your phone is gimped on purchase. While most people won’t even notice it, the admin account is out of your grasp. Imagine if that was true for your PC. Something’s wrong, and it’s easy to fix, but you can’t run CMD.exe as admin to fix the issue with three lines of commands. You want to install this piece of software, but you need admin rights to do it so you can’t use it. That’s the default setting on Android. As you can see, it’s basically a middle finger to consumers and developers alike, and many phone producers (like HTC and Samsung) are aware of the potential drawbacks of this and therefore have made it much easier for the average user to unlock this power of system administration. Also, with root, you can get rid of /ALL/ apps installed on your phone, so if you have a Samsung (or any American carrier phone with bloat installed), you will feel blessed by the seven gods of fate over the ability to remove said cancerous bloat that does nothing but take up space. ================================== Benefits and drawbacks of root As I touched on briefly before, Root has some amazing benefits. I’ll make a short list of it now, followed by a list of cons to make it easy to decide if rooting is for you. Pros: • System-level control • Uninstall carrier apps • Custom OS install • Hardware-level tweaks (CPU speed, battery life, better screen controls, multi-touch boost) • Install ALL apps on your device • Custom functions and button mappings • AdBlock • System images for 100% reliable backup • Super secret privacy stuff on your device • xPosed network Cons: • Risk of soft-bricking your device • You may void your warranty • All updates of your Android version must be done by hand • Minor compatibility issues • You won’t ever be able to live with stock android again ================================== Common custom versions of Android Even if you aren’t into rooting, you should already know about CyanogenMod. It’s probably the most expansive, compatible and well-marketed version of Android out there and it has been customized to run on a frankly insane amount of devices. But for now, let’s do a run-down on the most popular ROM’s and some a little more obscure and device-specific for your pleasure. ==Cyanogenmod - https://www.cyanogenmod.org/ == As mentioned just before, Cyanogenmod is probably the way to go for a beginner root user. It’s so simple that my mom actually uses it and likes it. That should tell you pretty much everything you need to know. If a 51-year-old woman finds joy in using this ROM, even the most tech-ignorant should be able to not mess it up. I would recommend this for every beginner because it’s as close to stock android as you can come, but with a hefty amount of added features like security reinforcement and theme support. The best thing about Cyanogenmod is that it comes with its own easy installer. Just hit up their site and follow their “how to install” guide and you are up and running in less than 15 minutes. ==Carbon - https://carbonrom.org/== Like CyanogenMod, this ROM is remarkably close to stock, but it has some nice goodies out of the bag as well. First off, it has a sleek, beautiful design, powerful optimization and is designed with a great user Experience in mind. The rom also has a nice toolbox for Carbon-exclusive features for you to tinker with. ==SlimRom - https://www.slimroms.net/ == SlimRom is another one of the UX-based roms that look, feel and work wonderfully. This rom is pretty unique and has a nice slew of features that makes the phone adapt to you, from theme inversions, left-handed mode, privacy guards and a lot more listed on their website. Do check this out of you feel like having some bling to your functionality. A fair warning: The ROM isn’t s light-weight as the previous mentions, so keep in mind that it probably won’t run well on a mid-low tier phone. ==AOKP - https://aokp.co/ == “Infused with Magical Unicorn Power” indeed. They don’t lie with that tag line. This is probably the most impressive ROM out there and needs no introduction to the people in the scene. You simply won’t find any ROM with more functions out of the box. An honestly baffling amount of hardware-level tweaks, software customizations and said Unicorn magic will make you love this ROM. Note that this will work on mid-high level phones and above. The drawback to this one is its honestly overwhelming feature set. So, if you want this to be your daily driver, please take your time to figure out how it works. ==Paranoid Android - https://paranoidandroid.co/ == Paranoid Android… Just the name makes it fit right into here. A bunch of security, a touch of amazing material design and always up-to-date, this is probably the rom for you if you like a great experience without all the hassle of tinkering with it yourself. ==Android Revolution HD - https://android-revolution-hd.blogspot.com/ == This ROM is for select HTC and Samsung devices only. Wait, why do you list it here then, Pleb, I hear the strawman in my head talk. Well, if you have ever used HTC’s version of Android they named “Sense”, you would know. The Sense overlay and features are simply some of the best. I am not even kidding here. I avoided to root my old HTC legend just because I couldn’t get a keyboard that was half as good as the one the phone came with. And all of the nice features. And the amazing UI…. Anyone that has ever used Sense wouldn’t be able to go back. And now, some wizard made a custom rom based on Android 4.4.2 and Sense 6 for you to install on your phone. So people with and HTC One M7 can still benefit from the new version of Sense that HTC doesn’t officially support for the device. Simply Magical. Please note: There are a lot of custom ROM’s out there I didn’t mention here. Just do a quick Google search if you feel like the short list I provided wasn’t enough for you. ================================== Basic apps Google doesn’t want you to know about Okay. This is where the magic happens. Did you know that Google doesn’t allow a lot of really, really useful stuff onto its main marketplace, the Google Play Store? No? Well, sit down and listen, because you are going to have your mind blown. Here’s a list of my most commonly used grey market apps for you to install: AdAway As the name suggests, this App is an ad blocker. But not just for your browser, but your entire fucking phone. Ever get tired of ads in your free games? Let’s take Cut the Rope as an example. One minute of game, three minutes of adverts. Well, that’s all in the past now, as AdAway blocks most ad networks via the hosts file on your device (See, I told you that rooting is useful). AdBlock Edge Well, let’s be honest. AdAway doesn’t catch everything, and neither does AdBlock. But together, the two cover for each other, and since I have had both of these puppies installed on my phone, I haven’t seen a single ad anywhere. Not in the browser, not in my notification feed, not anywhere. Just do yourself a favor and do this. As an added benefit, you’ll save bandwidth on your phone. Any Play Store replacement Yeah. For one reason or another, Google isn’t keen on letting you know that there are other ways for you to install apps on your device if you don’t like the hive-mind all that much. And the best thing? It’s pretty easy too! Here’s a short list of app stores you should take a gander at as an alternative: F-Droid: A basic, but developer-driven play store alternative that has some experimental apps that for one reason or another didn’t get onto Google Play. Do check it out. Amazon App Store: Yep, Amazon has its own app store, complete with both paid and free apps and games. SlideMe: A nice, community driven app store based on exploration AppsLib: A play store alternative mostly based for Tablet apps that couldn’t pass Google certification. Hidden gems galore. BlackMart: YO HO HIBBITY HE BEING A PIRATE IS ALL THERE TO BE DO WHAT YOU WANT CUZ A PIRATE IS FREE YOU ARE A PIRATE!! This one offers you paid apps for free. Yep. No strings attached. Personally, I would prefer you guys to pay for your apps as the $1 they cost isn’t really a major setback. But if you want to run a 100% info-free device, you have no other option. MarketEnabler: Not as much a replacement as it is a way to get out of region-locked downloads. BootManager This app is another one that requires Root to run. What does it do? It completely kills the auto-start triggers some apps have. You know how Skype is impossible to actually close because it always re-opens on pretty much every occasion it can? Well, nevermore to that. AppOps starter AppOps is a developer tool in Android that Google leaked by accident and has covered up since the leak. What does it do? It pretty much disables individual permissions every app you have installed has, iOS style. Because they “patched it out”, you need this to actually open the menu. But now, Angry Birds will never have to know where you sit on the toilet playing it, I guess. GravityBox Remember the hardware-level tweaks and OS tweaks I talked about on the custom ROM section? With this app, you can get that on stock, or hell, any ROM there is. No-frills CPU control Well, it’s exactly as it says on the tin. Control your CPU speed without any hassle. Titanium Backup Best backup tool there is. Just do yourself a favor and get this. UnbelovedHosts Removes ads, access to malware domains and other host-file tweaks you will love. Of course, there are many more, but I want to keep this short and sweet for the newbs. Remember, search engines are your friends if you want to have more stuff. ================================== XPosed Installer Oh boy. This one is pretty grand. It’s the single-most amazing benefit of root. The story behind this is that a guy wizard on the XDA forums found a way to make ROM-level changes on your phone without having to boot into recovery and manually patch your ROM. Yeah. Because of this, xPosed installer is the single-most useful tool for device customization and hardware-level tweaks. It’s basically a toolset for toolsets. Basically, this is a framework to install tweaks on your phone. Just as easy to use as any app store, but with 100% useful things. XPosed installer is also needed to install XPrivacy (duh), so you better just grab this from the get-go. All you do to install a module is pick it, download it and reboot your phone. Bam. If tweaking an OS could get any easier than this we would all be exalted into godhood. ================================== XPrivacy Well. In the chapters passed, we have touched briefly upon security. Now comes the mother of all privacy apps on the system. XPrivacy is a toolbox, not unlike the ones you can find on XPosed, but this one focuses on, well, you guessed it: Privacy! Okay, right away, I want you to just go buy the pro version. The guy who made this has sunk half his personal time into making this, and the paid version basically runs itself, so just do it. It’s worth the money you cheap bastard. Well, what can you do with this awesome piece of software? Restrict App permissions, restrict hidden permissions, show how much data each application uses, sends and downloads behind your back, makes a debug log for you, forces secure connections when it can, flushes your cache for identifying data, FRAKKING FAKES YOUR DEVIDE ID, NUMBER, SERIAL, HARDWARE, SCREEN RESOLUTION, GPS COORDINATES, MAC ADDRESS, IMEI NUMBER, ANDROID ID, GSF ID, ADVERTISING ID, COUNTRY, OPERATOR, GSM CELL ID, SSID AND USER AGENT. AND IT RANDOMIZES IT ON REBOOT TOO! THIS PIECE OF SOFTWARE BASICALLY SINGLE-HANDEDLY CLOAKS YOU AND YOUR PRIVACY IN A NUKEABLE WAY Another added benefit of having the paid version is the community filters. We are all too lazy to manually poke around with permissions on the 100+ apps that are on our phones, so with a simple click of a button, you can cut the balls off of all of your apps at once. No hassle, no sweat, no nothing. Just get this. You have no excuse not to. The software basically runs itself after you set it up (pretty simple to do, too). ================================== Rooting 101 Okay, now, after you have digested all of the nice options that are open to you, you want to root your phone. “But Pleb!! How do I do that??” You ask? Well, it’s actually pretty simple nowadays. Back when I rooted my first device (A HTC Legend, notorious for its Fascist-tier boot loading protection), I had to work around with custom SD cards, command line hacks and shady software. But nowadays, you can pretty much hook your phone to your computer, press a couple of buttons and bam. Done. Here are some ways to easily root your phone: CyanogenMod Installer: https://www.cyanogenmod.org This one is probably the simplest. Go to CyanogenMods homepage, download the tool and follow instructions. Within ten minutes, you should have a nicely rooted phone. Since this is literally the easiest thing in the world to do, I won’t describe how it’s done. It’s literally a 1-2-3-4-done thing. Kingo Root: https://www.kingoapp.com/ This is the second easiest option you have. It’s another plug-and-play with simple directions that are impossible to mess up. Just follow the steps and you are done. This doesn’t have a 100% success rate, but if it fails, nothing happens. So you won’t mess up your phone this way. If you have a HTC or a Samsung phone, this is the tool to use as it also bypasses the protection these phones might have installed. FramaRoot: https://forum.xda-developers.com/apps/framaroot/root-framaroot-one-click-apk-to-root-t2130276 Okay. I lied. This is probably the easiest way to root since it doesn’t even need a computer to do so. Just download the .APK, run it and bam. Rooted. This app runs a couple of exploits to force Super User and Root access on your device, and because of that, it can pretty much tell you if you are wasting your time right away. Just look up the thread on the XDA forum I linked to read about how to use this app. Finally, if you are unsure about how this works in practice, you can just search “Android Root tutorial” on YouTube and see it in action. It’s literally never been easier to root your phone than it is nowadays. As an extra bonus, you can look up showcases of Android roms on there too, in case you want to see them in action before committing. Speaking about…. ================================== Installing your custom ROM This is a little fiddlier than just rooting your current ROM, but it’s still a fairly easy thing to do. Here’s a short tutorial on how to do it in end-2014. This might be updated once a better way is developed, but you can just Google it if you feel like not bothering me. WHAT YOU NEED: • A rooted phone • A computer • A Mini-USB cable • Internet connection After you have downloaded your ROM of choice, you need to also download the Google APK files in case you want to have Google maps, play store and all the other things. Different tiers of the APK files can be found here: https://www.sharedapk.com/google-play-services-3-0-25/ Turn your phone off and boot it into recovery mode. This differs from device to device, so a quick search for “recovery mode [device name]” should do. Now, open this link: https://www.youtube.com/watch?v=fHULkfePcTg and follow the instructions to install TWRP Recovery and follow the steps to install the custom ROM. The good thing about TWRP is that it has a touch screen interface that makes recovery much easier than with stock. Bam! Now you are done. Easy, wasn’t it? ================================== Afterword So, this 101 EZ-guide is now over. Personally, I find it important to share this, even if it’s just adding to the redundancy of the resources online. Well, I hope that you have found this a little helpful, and if you want me to edit something in here, add more stuff or maybe fix a mistake, please send message to paranoidsbible.tumblr.com Anyhow, have a good one and enjoy your freshly-rooted phone!
5 notes
·
View notes