#ProtoMachines
Explore tagged Tumblr posts
Visit Tumblr Blog
Explore Tumblr blogs with no restrictions, modern design and the best experience.
Last Seen Tumblr Blogs


Fun Fact
Tumblr has 4 main sources of revenue.
Text
Bright ideas: The best light painting tools for night photography
A common question is what light painting tools I recommend for light painting for night photography. Here’s what I recommend—and why. I’ll start with the most inexpensive light painting choices and work my way up. Light painting a vintage Model T. Night photography. What is light painting? Light painting is a term that is often used loosely to describe any addition of light to a night…
View On WordPress
#Ants on a Melon#astroscape#inexpensive#LED#light#light painting#light painting tools#long exposure#Lume Cube#night photography#night sky#ProtoMachines#recommendations#RGB Critter
0 notes
Video
Such Have But a Shadow's Bliss by Ken Lee Via Flickr: Such Have But a Shadow's Bliss ~~~~~ Moonlight paints the light and shadows in an abandoned service station in the Southwest desert near the border of Mexico. I illuminated the scene with a handheld ProtoMachines LED2 RGB light painting device while the camera's shutter was open during this long exposure night photo. This was part of a Notorious RGB 1165-mile photography safari with Mike Cooper, George Loo, and George the monkey. Located in the California mountains near the border of Mexico. Thanks. ~~~~~ For photos, books and more: www.kenleephotography.com ~~~~~ (Plate 8459) Pentax K-1/28-105mm f/3.5-5.6 lens. 2 minutes f/8 ISO 200. October 2022. ~~~~~ #kenlee #nightphotography #lightpainting #YourShotPhotographer #mojave #mylensrental #nightportraits #astrophotography #universetoday #astrophoto #nightsky #nightscaper #starphotography #landscape_nightscape #igsouthwest #divine_deserts #splendid_earth #instagood #beautifuldestinations #urbex #urbanexploration
#nightscaper#YourShotPhotographer#igsouthwest#beautifuldestinations#kenlee#astrophotography#astrophoto#nightphotography#lightpainting#divine_deserts#landscape_nightscape#mojave#instagood#urbanexploration#universetoday#nightportraits#starphotography#nightsky#splendid_earth#mylensrental#urbex#flickr
0 notes
Video

flickr
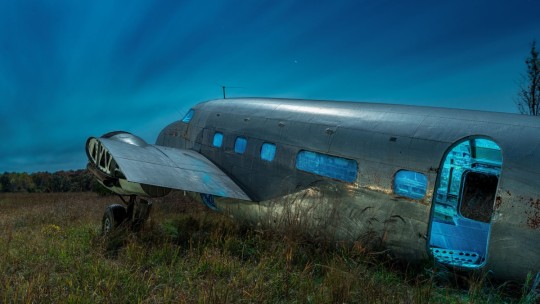
In darkness we are revealed par Nocturnal Bob Via Flickr : While everyone else was busy going blind staring at the sun, I took the opportunity to try out the Sigma 14mm ART. The image quality was fairly good and the construction was solid. However it did exhibit coma in the corners, and the lens had the ergonomics of a brick. I may have to look at the lighter, smaller and cheaper Venus Optics Laowa 15mm f/2 next. (25 second exposure + LED8 photo light) [ website ]
#Mono County#California#CA#abandoned#farm#house#Milky Way#galaxy#long exposure#clouds#mountains#hills#rural#decay#light painting#night photography#ProtoMachines#LED8#Sony#A7R#Sigma#14mm#1.8#DG#HSM#Art
1 note
·
View note
Video

flickr
Bedrock Barber and Beauty Salon. 2017. by Sandra Jungling Via Flickr: Bedrock Barber and Rockhead Beauty Salon. In the distance are some soft clouds, 20 minutes of star trails and traffic passing by on SR6. Added purple and pink light to the inside and incandescent light on the outside. Full moon, Canon 6D. Bedrock City, Williams Az.
#Arizona#Bedrock City#Flinstones#USA#Williams#forgotten places#light Painting#long exposure#low light#night photography#vintage roadside attraction#Canon 6D#Slik Tripod#protomachine#clouds#Star Trails#SR64#full moon
10 notes
·
View notes
Video
flickr
Bedrock Barber and Beauty Salon. 2017. by Sandra Jungling Via Flickr: Bedrock Barber and Rockhead Beauty Salon. In the distance are some soft clouds, 20 minutes of star trails and traffic passing by on SR6. Added purple and pink light to the inside and incandescent light on the outside. Full moon, Canon 6D. Bedrock City, Williams Az.
#Arizona#Bedrock City#Flinstones#USA#Williams#forgotten places#light Painting#long exposure#low light#night photography#vintage roadside attraction#Canon 6D#Slik Tripod#protomachine#clouds#Star Trails#SR64#full moon
2 notes
·
View notes
Video
Large and In Charge by Ken Lee Via Flickr: Large and In Charge ~~~~~ Night photo of a 1921 Union Pacific Steam Engine 2564. This behemoth was built in 1921 and weighs 300,000 lbs./136,077.71 kg. This "Mikado"-type coal-burning steam locomotive was originally built for UP subsidiary Los Angeles & Salt Lake Railroad. My joints and muscles felt sore from my second COVID-19 vaccination photo, but this didn't dampen my enthusiasm. I met up with my friends Ron, Dave, and Ivan on this beautiful warm March night. Bathed in light from numerous streetlights, I worked around it by photographing it from the opposite, darker side. I then created some depth with a ProtoMachines LED2 light painting device. ~~~~~ IG, FB, Flickr, website: kenleephotography ~~~~~ Pentax K-1/15-30mm f/2.8 lens. 104 seconds f/8 ISO 200. March 2021. (4066) ~~~~~ #kenlee #kenleephotography #lightpainting #longexposure #nightphotography #slowshutter #amazing_longexpo #longexphunter #longexpoelite #longexposure_shots #supreme_nightshots #ig_astrophotography #super_photolongexpo #nightscaper #MyRRS #ReallyRightStuff #feisol #Nikon #westbysouthwest #travelzoo #desert #train #urbex #urbanexploration
1 note
·
View note
Text
Lighting up the dark Research
1.
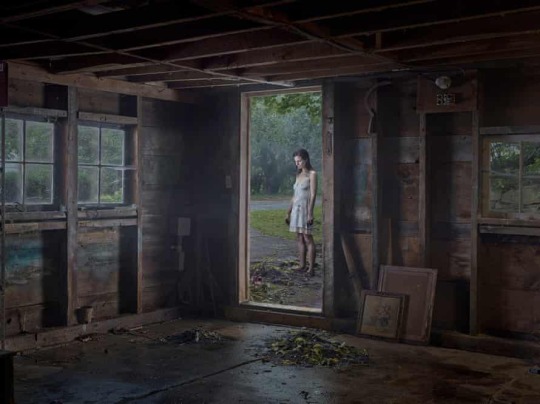
1. I have chosen to look further into this image as it is almost making the viewer feel ‘uncomfortable’ and uneasy. This style of photograph is very unique and it is a common theme throughout Crewdson’s images. He has created this image by using artificial light and has staged this photograph to look as though there is a random girl standing outside however it is all set up. It looks as though he has lit this image from the sides and there seems to be a light source infront of the girl too giving her that glowy look. The image itself is very cool toned and the use of white lights emphasises this.
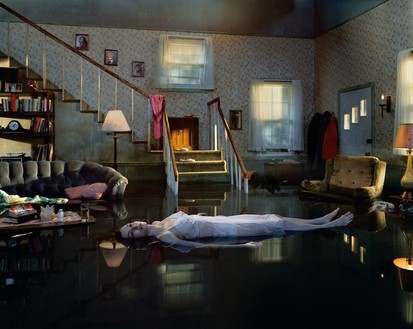
2. In this image, it lhas been set up to look as though there has been a disaster the night before. If you look closely, there are warm lights coming through the windows, maybe representing the sun coming through in the morning and things have just been left from the night before. This image is maybe warmer in tone but it has that same eerie atmosphere as the rest of Crewdson’s images. The light seems to be coming from above and also from the sides, but not directly on the subject herself, making the eye wander around the image.
2. Troy Pavia
Light painting photographer Troy Paiva has been capturing night imagery since 1989. He considers himself an “Urban Explorer” and says that his light painting photography is a byproduct of his passion for investigating the ruins of “Lost America”. Troy spends much of his time alone, in the middle of nowhere, photographing abandon building and places that America has lost to time.
Source -https://lightpaintingphotography.com/light-painting-artist/featured-artist-2/troy-paiva/
Troy likes to incorporate a lot of colour into his work including coloured LED lights to add either warmth, coldness or depth in the image. The bright lights draw the viewers eye in towards his pictures giving him that unique look and everyone can recognise his work.
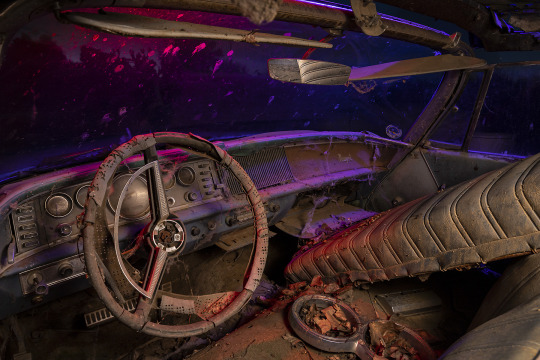
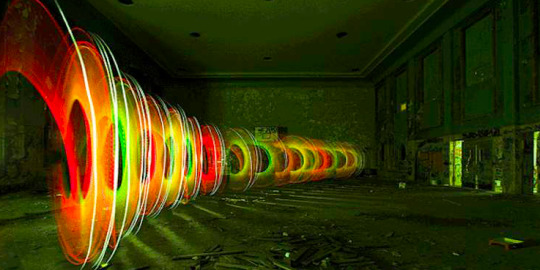
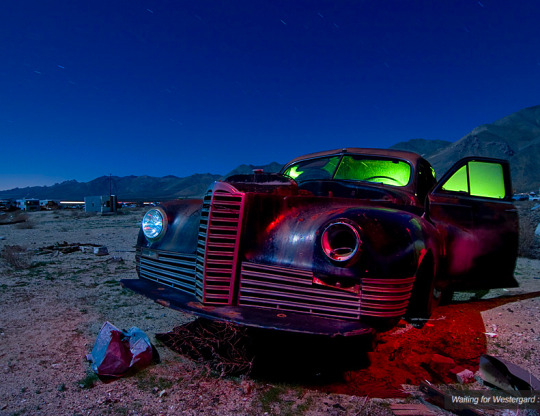
“A minute-thirty-four in total darkness, with purple and red from outside and warm white diffused inside for ambiance. Protomachine flashlight, hand-held, single frame.”
In this image, Troy is using those LED colours of blues and purples to light the image face on. The use of long exposure has captured the stars moving in the sky but also the way the light reaches around the whole scene.
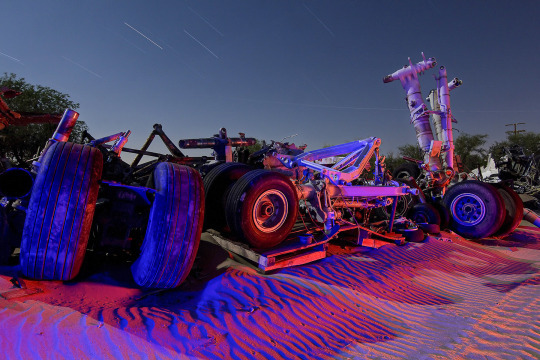
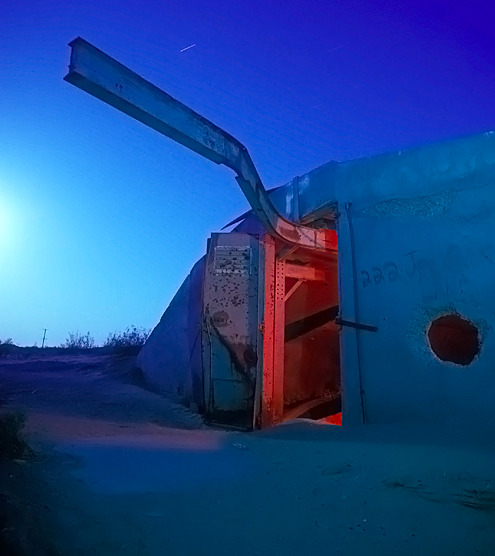
“Broken airliner landing gear tower over the endlessly shifting dunes. 25-minutes total exposure (in several stacked images) with blue and pink from the Protomachines flashlight, and then layered together in Photoshop.”
My Own Approach
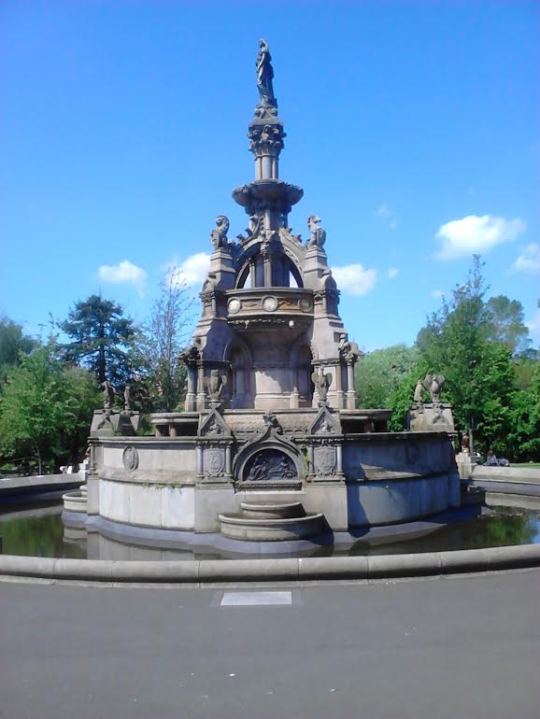
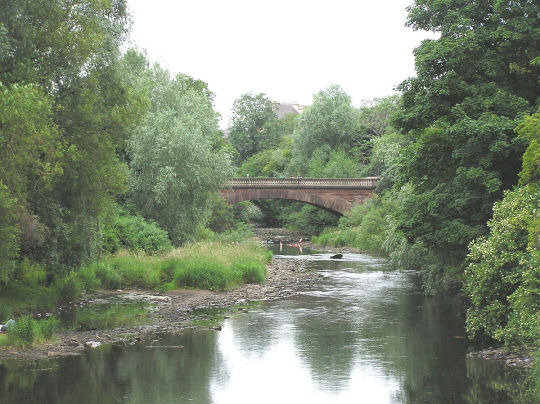
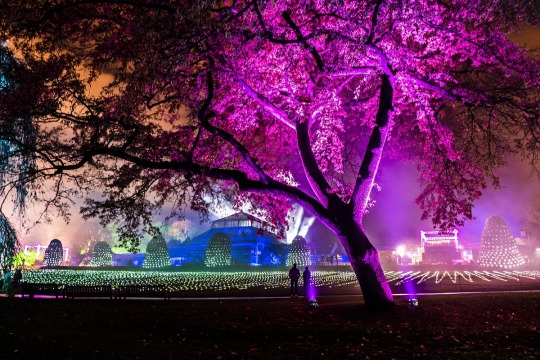
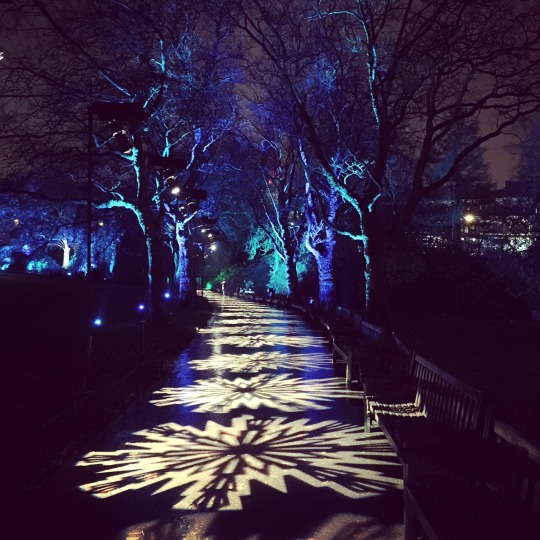
I like the idea of lighting up the dark with the use of colour. I am drawn to the luminous colours of reds, pinks, blues and oranges swell as some greens. I live in the West End of Glasgow, so a short walk to the botanic gardens and Kelvingrove Park. I am thinking of going down when it gets darker with my friend and trying to capture some of the beautiful old trees, rivers, plants and bridges in a different light. I am inspired by GlasGLOW and the different colours of light used to illuminate the gardens at night time and want to try and almost recreate that using my own light and techniques.
I also really like the idea of setting my tripod up top capture moving artificial light. such as sparklers, led lights or flash lights as well as candle flames or fairy lights.
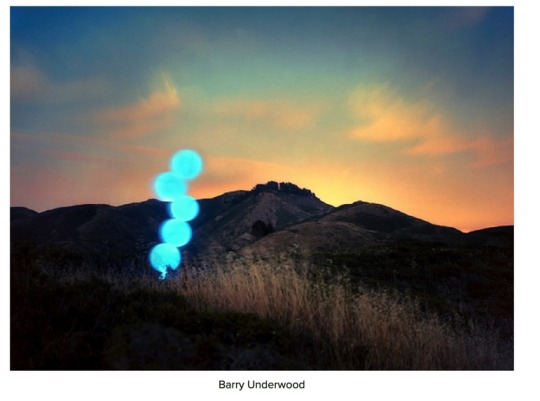
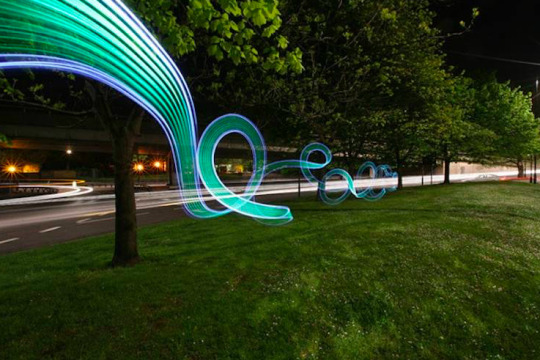
I am inspired by this image from Barry Underwood, using long exposure to capture light as well as keeping the background well lit and in focus.
0 notes
Photo
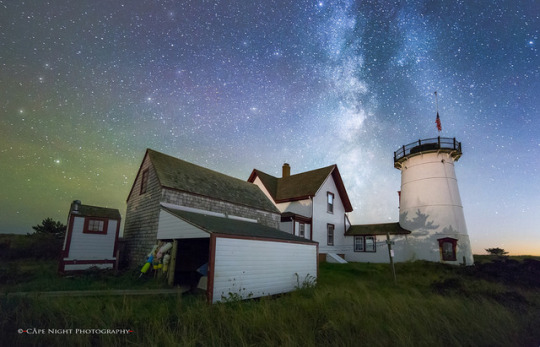
Stars on Stage "Stars on Stage" I had the opportunity to trek back out to Stage Harbor Light during an unusually warm evening in October and this was the result. At this point in the year, the Milky Way has pushed west making such compositions possible around 9pm... rather than 3am like earlier in the season. I used a Protomachine LED 2 to throw some light on the lower half of the light house and residence. The beam from nearby Chatham Light created an amber glow on the upper half. capenightphotography.smugmug.com/Lighth…/i-fqqv573/A
12 notes
·
View notes
Text
ILLUMINATE
ILLUMINATE
During my research to this project, I came across LLAP(Light Art Performance Photography) it is a duo Jan Leonard Woeller and Joerg Miedza. Their technique differs slightly from standard light painting in that the camera is capturing the light performance. They create such good work that their projects are sponsored by Canon, Zeiss and Led Lenser. They worked with Nike in 2010 to create an ad for the World Cup.
Technique
- long time exposures
- moving light sources used to create luminous light sculptures
- one composition includes 1-20 steps during one exposure what demands body control to achieve the desired effect
- no Photoshop manipulation
Equipment
- 12.8-megapixel EOS 5D DSLR or 21.1-megapixel EOS 5D MARK II(allows print large formats); both of these cameras capture long exposures with very little or no visible noise
- very solid tripod
- remote control to trigger exposure(that often goes to 60 minutes!)
- a range of different light source: fireworks, light sticks, flash, specifically developed luminous tools
References:
https://petapixel.com/2013/08/27/10-amazing-light-painting-photographers/
https://allthatsinteresting.com/light-painting/2
http://lightpaintingphotography.com/light-painting-artist/featured-artist-2/lapp-pro/
https://cpn.canon-europe.com/content/interviews/light_art_performance_photography.do
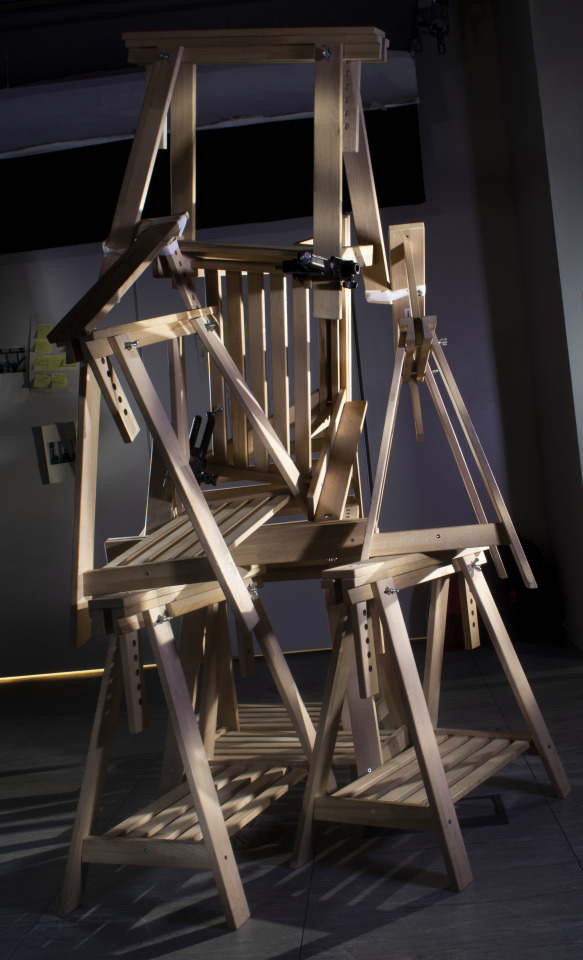
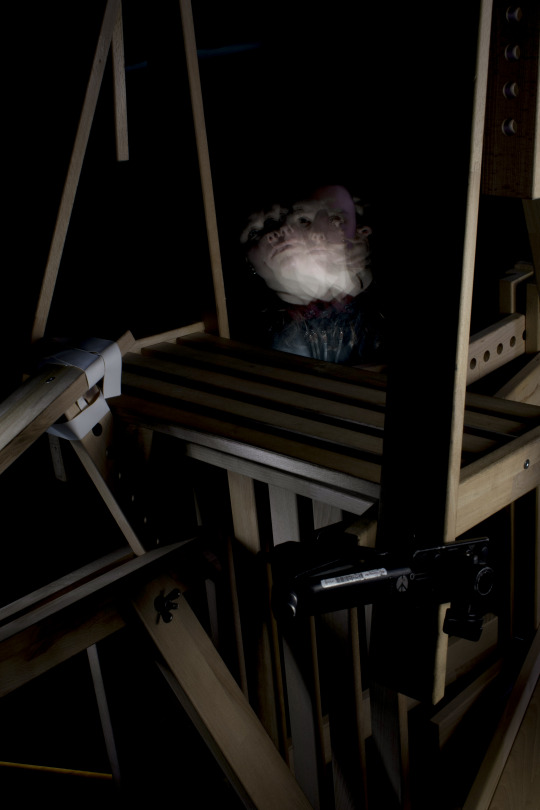
Dean Chamberlain is the father of light painting photography. He was the first person who used the term “light painting”.He has created stunning portraits of well-known individuals such as David Bowie and Paul McCartney.His works have appeared in Vanity Fair and the Washington Post.
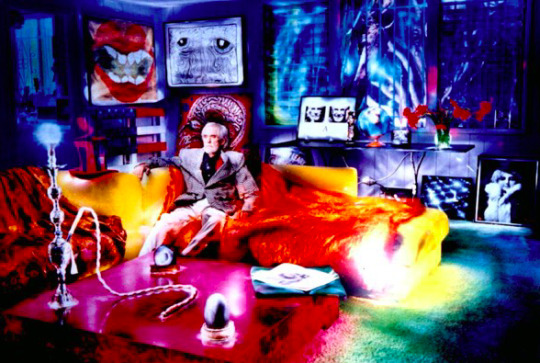
The photo above was taken like all others in complete darkness. The exposure time 3 hours(the exposure times vary between some minutes and some hours per sheet of film).Due to he uses a film camera he doesn’t use any Photoshop manipulations so all lights which we see were captured by the camera. He uses a different source of light like a torch for example. The model was sitting there for the whole time of exposure.
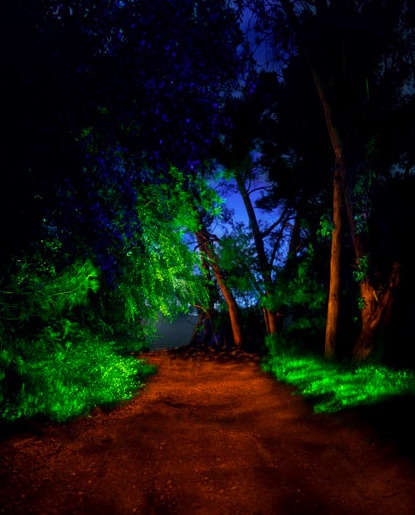
The image of the forest patch has a kind of light with I would like to recreate on my own image.
References:
http://lightpaintingphotography.com/light-painting-artist/featured-artist-2/dean-chamberlain/
https://petapixel.com/2013/08/27/10-amazing-light-painting-photographers/
Troy Paiva photographs abandon buildings and places that America has lost to time as he says.
Technique
All his photos were taken in full darkness, in- low or no-light condition, on or near the full moon what with the added light was the main source of light. Camera settings: ISO 100 or 200, at f/5.6 or f/8, exposure times 2-8 minutes, WB 3500-4000K or 5000-8000K; Cameras: Kodak160T(FILM CAMERA), Canon 20D and 60D DSLR with wide angle lenses
Lighting(all hand-held).He used one single source of light from several angles also snoots and gobos to manipulate the way the light falls.
- xenon and LED flashlight
- single Canon 430EX strobe mask with a theatrical gel material
- HSB- adjustable Protomachines Flashlight
Post-production
Lighting and color all done in camera. The contrast and perspective adjustment also lens flare clean up only made in Photoshop.
References:
http://lightpaintingphotography.com/light-painting-artist/featured-artist-2/troy-paiva/
https://lostamerica.com/technique/
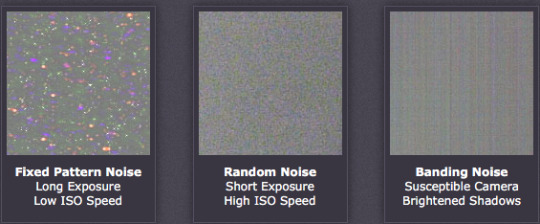
Digital noise is the equivalent of film grain for the analog camera. For digital images, noise appears as random speckles and can degrade image quality. Noise increases with sensitivity settings in the camera, length of exposure, temperature and even vary amongst different camera models.
Types of noise
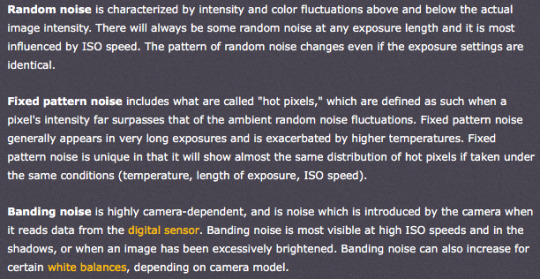
How to reduce the noise
1. Shoot at lower ISO- higher ISO settings tell your camera’s sensor to group pixels together to capture more light what makes an image look noisy. Use the widest shutter speed, tripod or flash for lower ISO
2. Shoot in Raw-Jpg files has already some noise, Raw files are more flexible in post-production to remove noise and increase exposure.
3. Be careful when doing long exposure - if the exposure is too long the sensor of the camera can begin to heat up and pixels will render incorrect colors and exposure
4. Use in-camera noise reduction- the function in a camera called High ISO noise reduction or Long Exposure Noise Reduction allows reducing noise after an image was shot. The camera analyzes the image and fixes pixels which are not properly rendered. It takes some time usually the same as long exposure was.
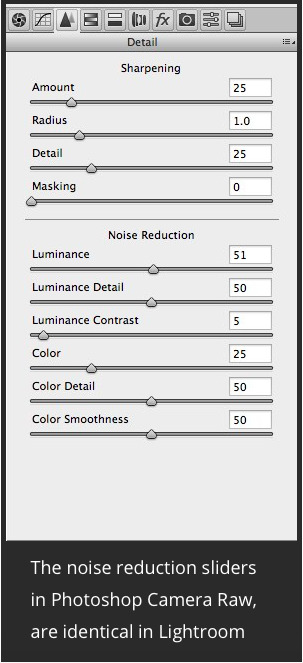
5. The noise might be reduced in post-production in Photoshop(Camera Raw-Noise Reduction) or in Lightroom.

References:
https://www.cambridgeincolour.com/tutorials/image-noise.htm
https://digital-photography-school.com/how-to-avoid-and-reduce-noise-in-your-images/
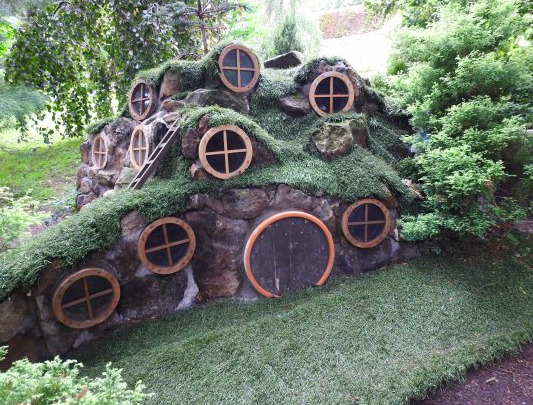
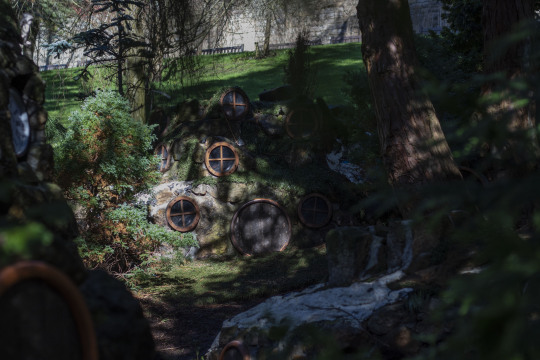
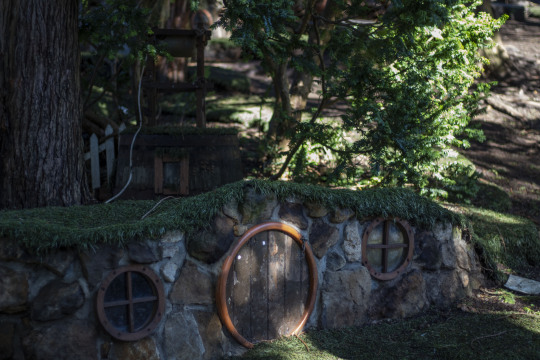
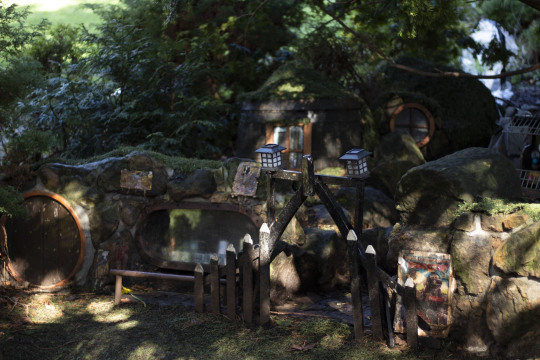
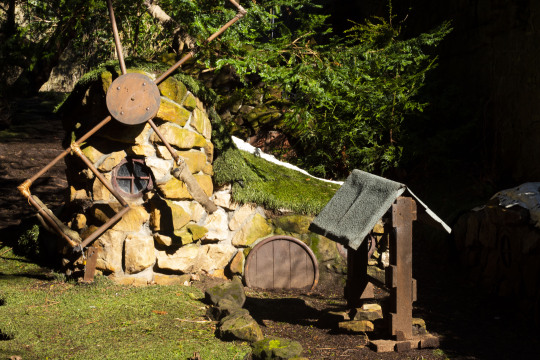
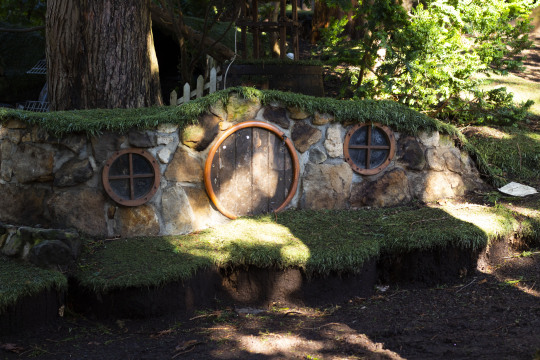
Planning
I am planning a shoot in the Pollock Park the fairy garden. At first, I thought about the portrait but then I realize that this location will give me a more interesting image. I would like to use single light from different angles or two sources of light with different color.
https://www.tripadvisor.co.uk/LocationPhotoDirectLink-g186534-d189013-i267091061-Pollok_Country_Park-Glasgow_Scotland.html
I would like to illuminate the windows which make my image mystery. The test shots will be taken during the weekend.
Equipment
- 50 mm lens
- led light and torch
- tripod
- LCD Timer Remote Shutter Release Controller
I made test shots, unfortunately, the place is open 7.30am-4.00pm so it won’t be possible to make my project there. I am so disappointed:(
We made an experiments at the studio.Using a variety of light source (large torch, phones torches, flash light)we painted with light.Our aim was to find the balance between aperture ,shutter speed and speed light power.

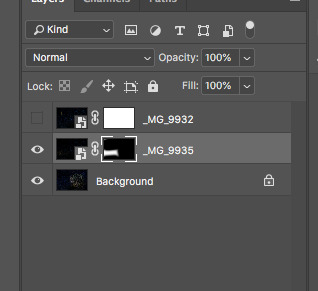
Our final image was layered in Photoshop.We took four separate photos of every kind of light individually.
Camera settings:f22 ISO100 13 sec
New location
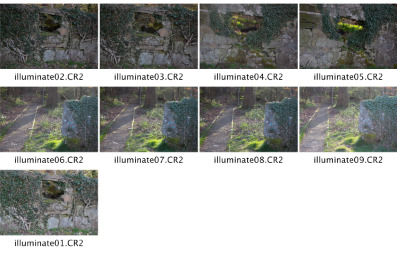
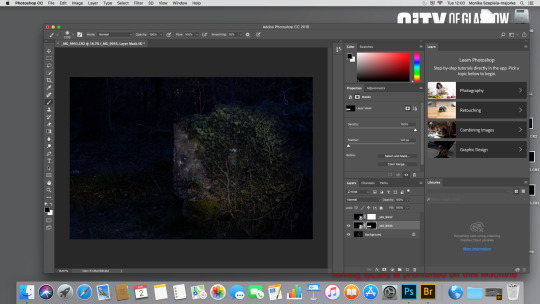
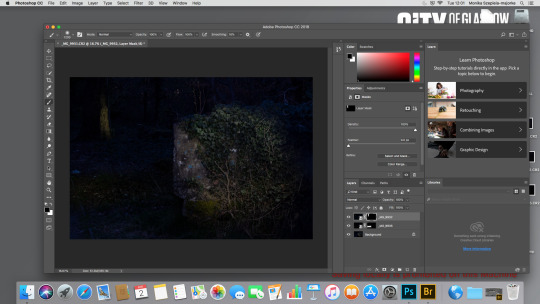
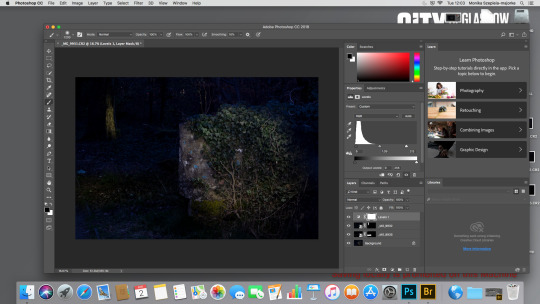
My final image for Illuminate project
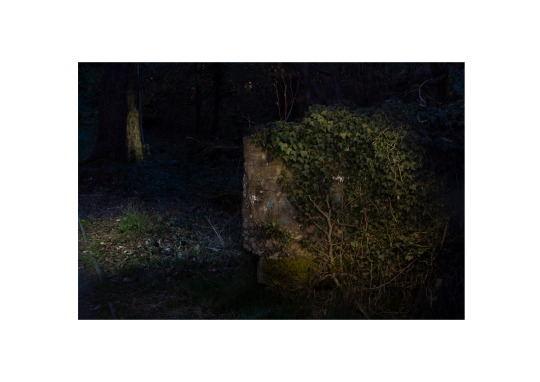
This image was created from the combination of 3 photographs.
EVALUATION
I always like painting with light technique especially for still life. I use this technique in my personal project because I like how many different results it can give us. Using a different source of lights we can create a wide range of images using the same objects and composition. Playing with the intensity of light, its size, power and distance from the objects we might create incredible images.
Project Illuminate was quite demanding for me because I’ve never tried to photograph such a big object with this technique. At the very beginning, I made recognition at the potential location. I’ve found perfect location but the place was closed to early to could be photographed after twilight. I was disappointed and have to find another location. I chose a place near to my home to get there easily at the proper time of the day.
I use my husband to help me because the place was dangerous and I need someone who might press the shutter button. As a source of light, I planned to use the torch but at the location, I noticed that the stream of the light was too narrow and gave to a strong, point light. My aim was to illuminate the whole object with even amount of light.
I decided to take 3 separate photographs and then combined them as one. I used 15 sec exposure time and a short distance to the object for each photograph. My aim was to avoid strong noise which is caused by long exposure time. As we know the longer exposure time the sensor made wormer what cause noise at the image. We might avoid that applying a shorter time when few people at the same time illuminate different part of the composition. I have to light the object on my own so I had to find a different solution. Even though I had to use a quite long exposure to achieve a desired amount of light. I used my phone’s torch which gives more even lighting due to the rectangular shape.
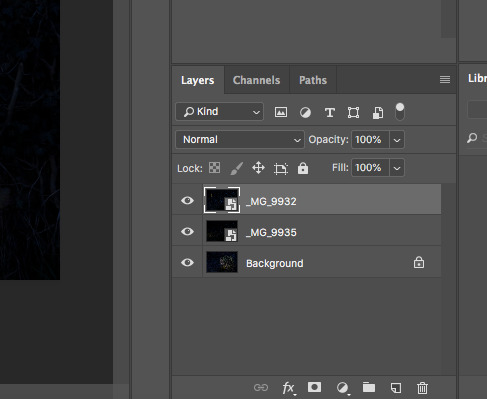
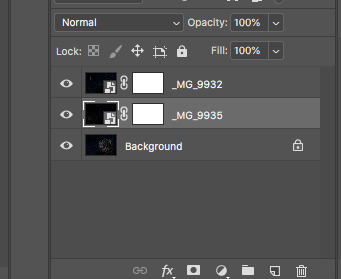
In post production with the help of my classmate, I combined the 3 photographs in one image. Using the eraser tool we uncovered the proper part of the image. At the final image, light appears on the 3 different objects.
I am not totally happy with my final image. I like the lighting and the mood but the image seems to be too dark. I chose the location with many trees which cover all the sky. The sky could create a nice contrast. The details on my image aren’t visible as I would like to.
This project was something new for me even though I’ve tried this technique before. I learned a lot about shooting on the location, about lighting and post-production. The next time I would definitely choose the better location. The sky is an important part of this kind of images and gives a totally different dimension to the photograph.
The next time I would like to try using a different type of lighting. I am going to use a speed light flash which is going to be a more powerful source of light and give me more opportunities to illuminate the objects in the desired way.
This project was an interesting experience and a great opportunity to learn something new.
0 notes
Video
Velvet Frankenstein (tull) by Troy Paiva Via Flickr: Variation on a 1958 Chevy school bus, at Nelson Nevada. Lit by the full moon and Protomachines flashlight.
2 notes
·
View notes
Photo
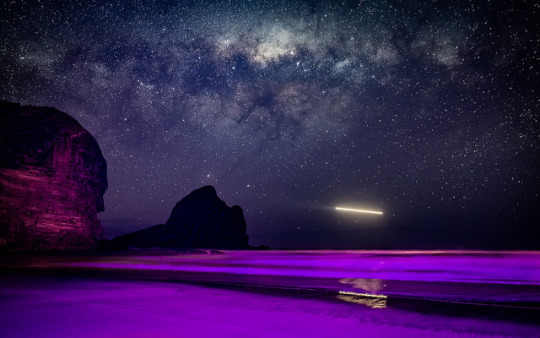
Night Flight To Venus - We flooded the beach with purple light from the protomachine LED 2 - gives it a pretty otherworldly feel - especially with the passing 'craft'... by Elton McAleer on Flickr.
3 notes
·
View notes
Video
Eat Eat Eat (4752) by Ken Lee Via Flickr: A night photo of an abandoned building with chicken and face graffiti, Halloran Springs, CA. Illuminated by a ProtoMachines LED2 flashlight and a full moon. This is not a post-processing creation. No pixels were harmed during the creation of this photo. :D This is a real photo. This evening, everything was illuminated by a big bright moon, an almost full moon, almost bright enough to read a book. And setting the camera to a long exposure made the camera much more sensitive to light than our eyes on this already bright evening. This is why this photo seems brighter than what we might see at night. It is not due to post-processing.The moon, which reflects light from the sun, also makes the sky bluer, and when the photo is a long exposure photo, the sky will appear brighter, making the blue more apparent. I also illuminated parts of this scene with an LED flashlight while the camera shutter was open. This is not a post-processing creation. No pixels were harmed during the creation of this photo. :D The streaks in the sky are stars, showing the movement across the sky while the camera shutter was open and registering the photo. The movement of the stars are, of course, created by the rotation of the earth, and the long exposure photo shows these movements over time. I am fascinated with how a single long exposure photo can show movements and the cumulative effects of light in a single image. Thank you for reading this and looking at the image. www.kenleephotography.com www.facebook.com/kenleephotography www.500px.com/kenleephotography plus.google.com/+KenLeePhotography/ Ken Lee Photography Nikon D610/14-24mm f/2.8, 168s f/8 ISO 200 Oct 2016 #nightphotography #night #lightpainting #abandoned #california #kenlee #fotografianocturna #pinturadeluz #abandonado #MyRRS #feisol #noche #luna #moon #ruins #urbex #urbanexploration #desert #awesomeearth #awesomeglobe #beautifuldestinations #WeOwnTheNight_CA #shutterbugpix #nikon #halloransprings #mojavedesert #reallyrightstuff #triggertrap #feisol #photopills
#abandoned#Ken Lee#Ken Lee Photography#pintura de luz#light#painting#light painting#Nikon#D610#fotografia nocturna#urbex#urban#exploration#night#night photography#nightscape#astrophotography#California#desert#Mojave#forgotten#Really Right Stuff#Feisol#Triggertrap
0 notes
Text
How I got the photo: Ojo Oro Arch
How I got the photo: Ojo Oro Arch
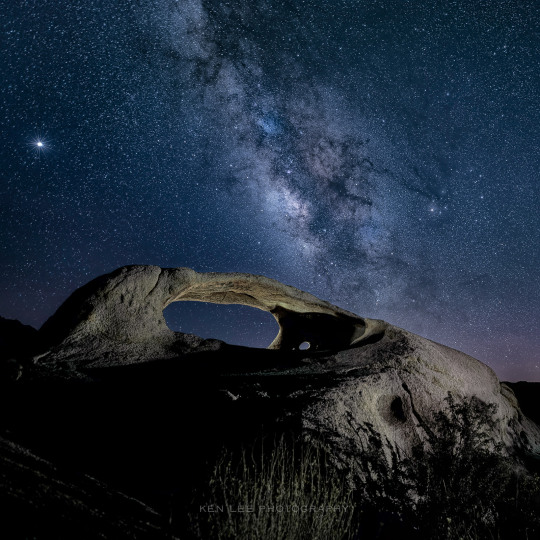
I was instant messaging with a night photographer I had known mostly online for a few years when he extended the invitation: “It’s a secret area that only a few of us know. There’s no trails, and we have to hike out really far to some rocky arch formations and very dark skies. We are going to explore out there, take Milky Way photos of Ojo Oro Arch, and sleep overnight under the stars. Would you…
View On WordPress
#astroscape#experience#gear#light painting#long exposure#Milky Way#night photography#night sky#opinion#ProtoMachines#tip
0 notes
Text
Bedrock City Star Trails - Roadside Attraction Kitsch Like You've Never Seen It!
Bedrock City Star Trails – Roadside Attraction Kitsch Like You’ve Never Seen It!
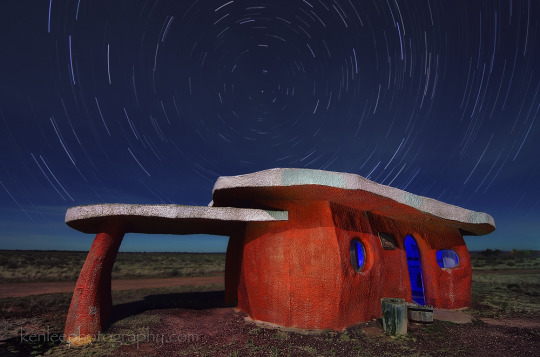
Bedrock City Star Trails (1455) I came across Bedrock City as a kid on the way to the Grand Canyon, and first photographed it at night in 2015. It felt great to return here. I also got to meet the owner briefly. Bedrock City, Arizona is a roadside attraction, a recreation of The Flintstones’ town. I photographed this on a cool, quiet evening, with the sound of coyotes howling in the distance. ~~…
View On WordPress
#Arizona#astroscape#Bedrock City#cameras#fotografia nocturna#Ken Lee#Ken Lee Photography#larga exposicion#light painting#long exposure#nature#night#night sky#Nikon#photo#photoshop#pintura de luz#ProtoMachines#stars#vibrant
2 notes
·
View notes
Text
Five Tips All Night Photographers Would Love To Know
Five Tips All Night Photographers Would Love To Know
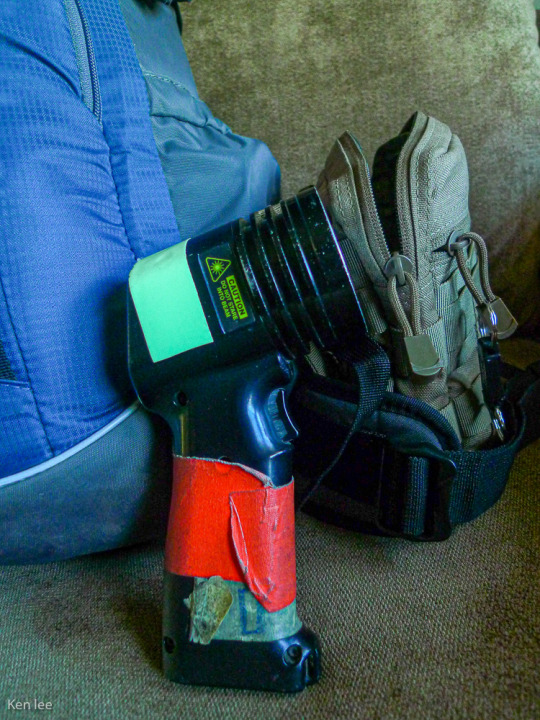
Night photography has its own quirks and needs. After all, you’re photographing in the dark, maybe not the most normal thing to do. I decided I would avoid the more obvious sort of tips, such as “know how to operate your camera in the dark” or “understand how to shoot in manual” and get to physical sorts of tips that can help immensely. Let’s dive in. 1.) Gaffer’s TapeLet’s start off with one…
View On WordPress
#"Abandoned Southern California: The Slowing Of Time"#astroscape#cameras#fotografia nocturna#Ken Lee#Ken Lee Photography#larga exposicion#light painting#long exposure#nature#night#night sky#Nikon#photo#pintura de luz#ProtoMachines#stars#tips#urban exploration#UrbEx
0 notes
Text
Ideas For Night Photographers While Staying At Home
Night photographers, just because we are staying at home doesn’t mean that we can’t continue creating photos. Here’s a few ideas we can do while not leaving the house while during the coronavirus.
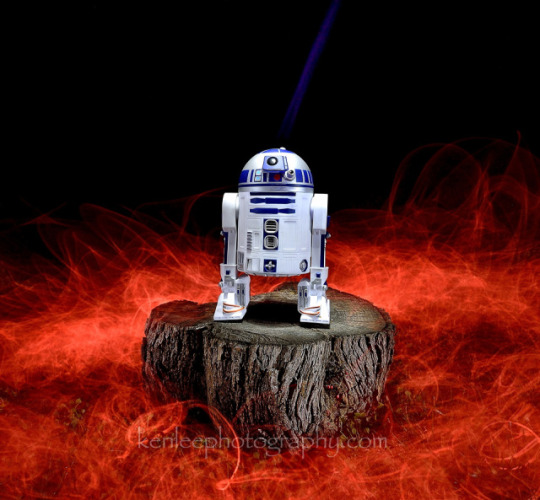
This first photo of R2D2 above was done in my backyard. I used electroluminescent wire and a little penlight laser to create the lighting as well as a regular LED flashlight. While I did this outside,…
View On WordPress
#"Abandoned Southern California: The Slowing Of Time"#cameras#coronavirus#COVID-19#fotografia nocturna#Ken Lee#Ken Lee Photography#larga exposicion#light painting#long exposure#nature#night#night sky#Nikon#photo#pintura de luz#ProtoMachines#stars
0 notes