#Olaplex Treatment Kit
Explore tagged Tumblr posts
Visit Tumblr Blog
Explore Tumblr blogs with no restrictions, modern design and the best experience.
Last Seen Tumblr Blogs


Fun Fact
Mobile Tumblr US users spend an average of 4.04 minutes per session on the app.
Text

Suguru Geto who loves having your hands in his hair
just imagine it…
Suguru would never admit it, but he took pride in his long, luscious, shiny locks. what, you think he bought that Olaplex hair repair treatment kit on accident- every month? haha, no.
oh and his routine is set in stone. hair oil, wait an hour, double shampoo, hair mask, conditioner, rinse, keratin oil, blow dry, and y/n brushes it.
yeah, this big baby insists you brush his hair whenever you can, because ‘you just have magic hands baby’.
but in reality, suguru just loves the way your hands feel through his hair. the way your perfectly manicured nails, that he paid for, scrape his scalp so perfectly it feels like you’re itching his brain.
he just adores feeling your pretty hands in his hair, and loves how you brush it so gently to keep split ends away.
suguru also loves having your hands in his hair when he’s eating you out. nose deep in your sopping pussy, feeling your fingers tug at his hair only spurs him on more.
“ah, she’s fuckin crying f’me, isn’t she baby?” as his fingers moved inside your pretty pussy, making an almost disgusting squelching sound, long black hair clouded sugurus vision.
“fuck- tie it for me, beautiful…” placing a hair bobble in your quivering hand, he went straight back to work on his favourite meal.
you tried, you really did try to tie his hair back in a neat little bun but…. it was lopsided, loose and messy. i mean, come on what did you expect? you were getting the best head of your life!
and when suguru felt your pretty little hands trying so desperately to tie his hair back, he doubled his efforts and soon has you squirming, cumming all over his pink tongue.
suguru just loves his pretty partners hands in his hair, is that such a crime?
masterlist

#jjk#geto suguru#afab reader#jjk geto#geto x reader#getou suguru x reader#geto smut#jjk smut#celisthstalks#suguru geto smut
449 notes
·
View notes
Link
Check out this listing I just added to my Poshmark closet: Olaplex Smooth your Style Kit. NEW!!.
0 notes
Text
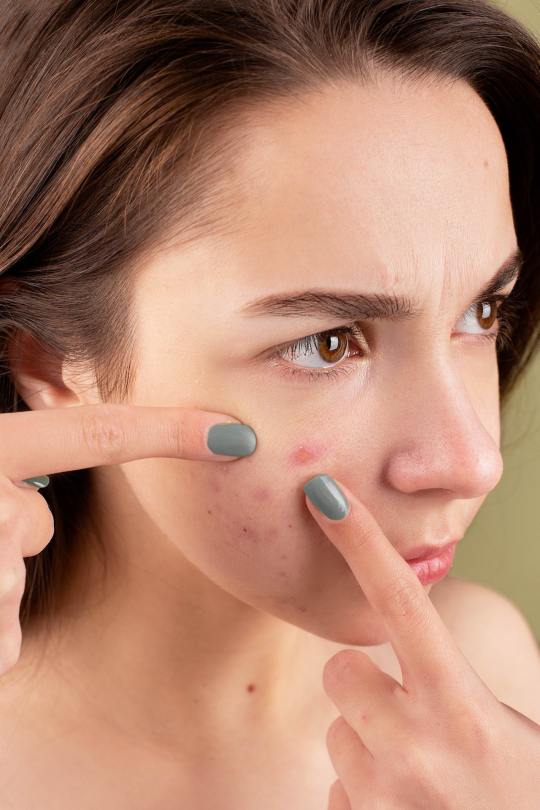
6 Easy steps to prevent acne forever !
At any point could they disappear?
As a grown-up, you anticipate that pimples should be a relic of times gone by. However, for some grown-ups, imperfections keep on damaging in any case solid skin. For certain individuals, skin break out might be far more atrocious in adulthood than in youth. As a matter of fact, it's assessed that one out of five grown-ups between the ages of 25 and 44 experience skin break out.
Beyond what is just a corrective issue, skin inflammation can enormously influence your personal satisfaction, regardless of your age or the seriousness of your condition. On the off chance that you are engaging in repeating skin breakouts, tracking down a way to more clear skin can assist with working on your confidence and self-perception.
There is no single grown-up skin break out cause, and along these lines, there is no reliable method for keeping away from it or controlling it. Skin break out is impacted by a few elements, large numbers of which are beyond your control. However, the manner in which you treat your skin assumes a significant part.
With a little know-how, you can limit or possibly dispose of incidental skin inflammation episodes all over, back, shoulders, neck, chest, appendages or somewhere else only by changing a couple of little ways of behaving.
1. Check your hair and skin products
Hair conditioners, gels, greases, shaving items, beauty care products, lotions, sunscreens and different items that contain oil can stop up your pores and cause a breakout. Just changing to hair and skin items that don't stop up pores — called "non comedogenic" — could have a major effect in the presence of your skin.
Really take a look at the names on your hair and skin items to check whether they are stamped sans oil and noncomedogenic. Additionally, consider whether you really need each item you use. Indeed, even items checked "dermatologist tried" can cause skin inflammation for certain individuals. Limiting the quantity of items you use might help further decrease flare-ups. What's more, when you work out, wear as little cosmetics as could be expected. Indeed, even sans oil and noncomedogenic beauty care products can stop up pores whenever worn during weighty, sweat-soaked work out.
Here are some best products we recommend for healthy skin.
1. OLAPLEX bond maintenance conditioner :
2. Pureology Hydrate Moisturizing Shampoo :
3. La Roche-Posay Effaclar Medicated Gel Facial Cleanser :
4. PanOxyl Acne Foaming Wash :
5. Amazon Basics Daily Acne Control Cleanser :
6. Proactiv 3 Step Acne Treatment Benzoyl Peroxide Face Wash :
7. ProactivMD Adapalene Gel Acne Kit :
2. hands-off policy
Do you frequently rest your jawline or cheeks in your grasp or rub your nose? Doing so can energize the development of microorganisms and cause disease to the areas most aroused by grown-up skin break out. Take on a severe hands-off strategy that holds for breakouts, as well. Picking or crushing can drive skin inflammation microbes more profound into the skin, prompting more aggravation and potentially to extremely durable scarring. Thus, attempt to oppose the impulse to contact.
3. Don't let sweat stick around you face

Flush off straight away after you work out. Active work warms up the body, making sweat blend in with surface skin oils. Together, they trap substances in your pores. In the event that a fast flush is beyond the realm of possibilities, dry off and change into dry garments in a hurry. Lounging around in sweat-soaked garments, particularly in the event that they are tight-fitting, can prompt skin break out on your chest, back, and different pieces of the body. Likewise, try not to wear tight headbands or caps that rub against your skin. In the event that you wear a cap or some other security gear with lashes, make certain to wash the ties often to lessen microbes.
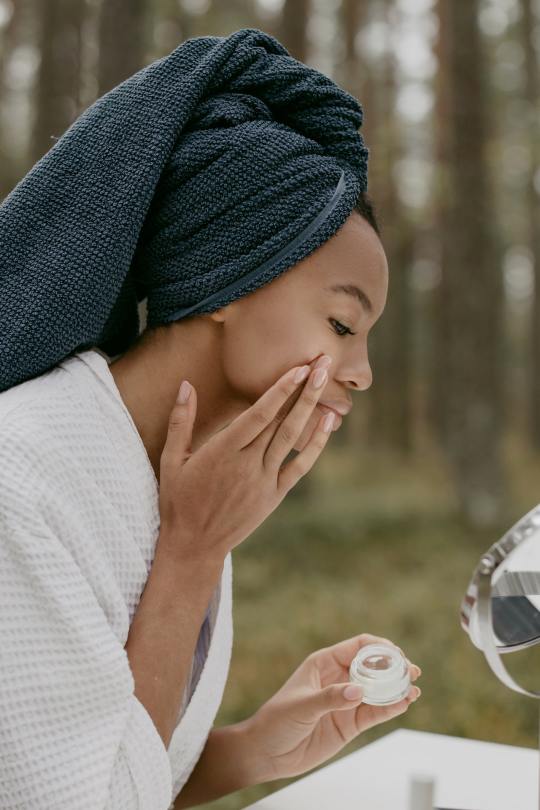
4. Avoid over washing and harsh scrubbing
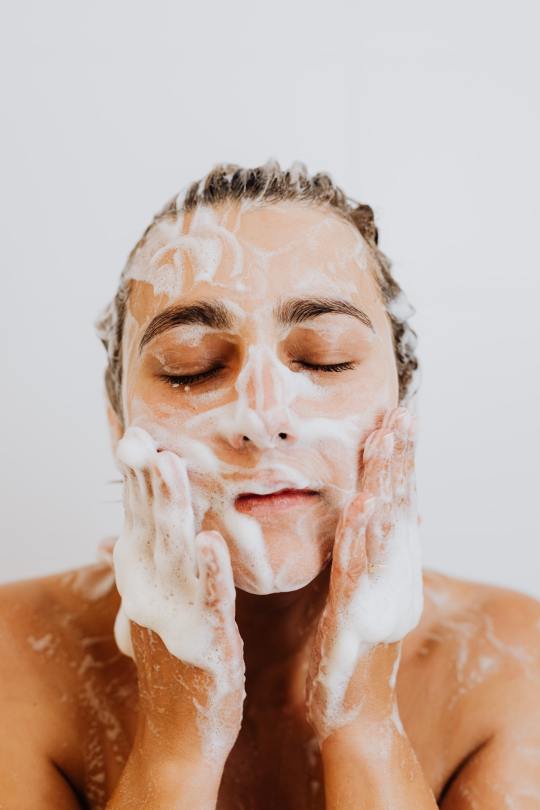
Grown-up skin break out isn't brought about by soil, so washing regularly with cruel substances, for example, liquor based items will not take care of the issue. Truth be told, it might exacerbate things by provoking abundance oil creation and more flaws. Do right by your skin by washing delicately from under the jaw to the hairline with a gentle cleanser a few times per day. You could find that essentially washing with tepid water and utilizing clean hands as opposed to a washcloth functions admirably for you. To try not to bother or kindle your skin, wipe it off — instead of rubbing it — with a delicate towel. What's more, be mindful with regards to purifying items that are planned for skin break out inclined skin, as these can leave sound skin dry and disturbed.
5. Lower stress levels

At the point when you're under pressure, your body produces pressure chemicals, for example, cortisol, which can animate an overproduction of oil from the sebaceous organs in the skin. Be that as it may, how truly does pressure cause skin inflammation? At the point when this abundance oil blends in with dead skin cells and microbes, it can make skin break out, create or turn out to be more awful. Assuming you routinely experience the ill effects of pressure, attempt to enjoy short reprieves over the course of the day to stretch and practice profound relaxation. Practicing consistently is one more incredible method for facilitating uneasiness and lessen pressure.
6. Start with simplicity

While there is no remedy for skin break out, most gentle breakouts can be controlled with legitimate skin and body care. Begin by zeroing in on the fundamental methodologies referenced here, remembering that with regards to skin health management, straightforwardness is much of the time the best arrangement.
Save up these sound propensities for a little while, and on the off chance that you actually see no outcomes, there might be different elements making your skin break out, for example,
1. Medical side effects
2. Allergic reactions to foods or cosmetics
3. Genetics issues
4. Hormonal changes (e.g., menstrual cycle, pregnancy, or starting or stopping birth control pills)
discuss with your healthcare provider or dermatologist about your potential acne causes & treatment options.
4 notes
·
View notes
Note
Ooo is Olaplex a good hair brand for women of colour then?
I really want to start growing my hair , I have 4C 😭
It is! Their marketing is terrible, but it really works. I usually get the treatment at the salon, but the at home kits are amazing too.
My hair is super strong, I’m really enjoying it. 💛
9 notes
·
View notes
Text
𝕥𝕙𝕖 𝕔𝕠𝕞𝕡𝕝𝕖𝕥𝕖 𝕙𝕖𝕒𝕕-𝕥𝕠-𝕥𝕠𝕖 𝕞𝕒𝕜𝕖𝕠𝕧𝕖𝕣 𝕘𝕦𝕚𝕕𝕖
✨ first, a disclaimer! this is a list of things which i have found to subjectively improve my own appearance. i’m sure there’s many more treatments i’ve missed, and you may also feel that some of these treatments aren’t for you- i’ve just included everything which i have enjoyed personally in order to inform you of your options, from which you can make your own decisions on which to take part in. also, little blurb; what society or others think of you doesn’t matter in the grand scheme of things and it is not my goal to promote being concerned with these things here. these are meant to help you be more excited about your own appearance every morning when you wake up, and take more time and care for yourself. partaking in these activities should add to your life, not subtract. ur all cute and valuable already ✨
also second disclaimer: i initially tried to make an amazon storefront as i thought i could put all the products i mentioned on one page so you could have access to them easily, but it turns out regular people can only get an amazon affiliation. this means that if you buy anything through the amazon links i provided, i’ll receive a very tiny percentage of the profits. this doesn’t benefit you, nor does it make the price higher for you, but if you’d like to support what i’m doing, it would be cool if you bought things through the links i provided. if you hate me or something, you can just search and buy them through amazon yourself! these are all products that i used and bought from amazon far before i signed up for the amazon affiliation, i’m just genuinely obsessed with amazon but i’m not affiliated in any way with any brand i mentioned.

✨ 𝕙𝕒𝕚𝕣 ✨
bleach/dye: personally i am a huge fan of foil highlights! tons of gals look amazing with dark hair or their natural hair color, but i have found that, for me, they really brighten the face and add depth to my hair. you could also darken your hair, do balayage, or tone it a different shade. i always recommend going to an actual well-rated salon rather than attempting to do it at home. they can ensure you’re getting the proper undertones and the correct volume developer for your hair. if you’re getting your hair bleached, look for a salon that uses olaplex or a similar bond builder in the mixture to avoid completely damaging the structure of your hair. at home, i tone my hair to remove gold/brassy tones with either this pravana mask, or a tiny amount of this semi-permanent violet hair dye mixed into my conditioner (you should only leave this in for a minute the first time as it can be very strong). i’ve found most purple shampoos are quite harsh, especially on fragile hair, so i always go for conditioner.
at-home protein treatments: if your hair is damaged from dying or styling it, i highly recommend using a protein mask on it at home once a week when you can to restore the structure of your hair. olaplex no 3 is a popular option but i really like this k-beauty collagen mask for a way cheaper option that works just as well in my opinion! many brands make protein and keratin masks though so feel free to order whichever you like.
cleansing conditioner: if you’ve used every “hydrating” and “repairing” shampoo + conditioner under the sun but your hair is still dry or fragile, i recommend using cleansing conditioner instead! shampoo, even sulfate free ones, can create friction and cause tearing in your hair, but cleansing conditioner cleans your hair without stripping or damaging it! i love this one from renpure and it’s a lot cheaper than other cleansing conditioners like wen, which i found to be less effective and weigh the hair down. if your hair does ever start to feel a little weighed down or oily, use shampoo to clean it more deeply- i tend to use it once every 1-2 weeks depending on how much i’ve been working out. cleansing conditioner will also help maintain a keratin treatment as it won’t strip the treatment from your hair, which brings me to this next consideration...
keratin treatments: keratin treatments are a semi-permanent treatment which help to make your hair quite a lot straighter, and much smoother, softer, shinier, and dry quicker! these help so much if you have frizzy or damaged hair, or your curl pattern is super irregular like mine! curly hair is beautiful too but if your curl pattern is tough to manage and make look pretty, then they’re a great option. a lot of people ask me if they're damaging but i find that they really help with my damaged fake-blonde hair and my hair stylist agrees, but he said to stay away from relaxers or japanese straightening treatments if your hair is fragile as those can be very damaging! if you’re in nyc, i recommend ‘hair bar nyc,’ their treatments are around $100 and last a couple months before they start to fade. i always go for their strongest solution, the 24 karat.
hair growth vitamins: personally i had short hair for a long time and loved it and still think it looks great on so many people! but i’m currently growing it out, so i’ve been taking hair vitamins daily to speed up the process. any brand works, but i love this brand ‘hair anew’ on amazon, or any store-brand which contains extra nutrients like zinc and pantothenic acid (not just plain biotin) as i feel that they work better and also clear my skin. they also help grow your nails longer and stronger, your eyebrows thicker, and your lashes longer and thicker!
hair extensions: these are less common/necessary, but for girls whose hair is much shorter than they want it, is damaged from bleach/dye/heat, or whose hair is quite thin, clip-in extensions can be a game changer. i’ve had tape-in extensions before and found that not only did they damage my hair and thin it out incredibly badly afterward, but they also truly were a lot of work to style and still looked bad after half an hour of trying to get it to work. a pair of clip-in remy extensions should also only set you back $60-100 while any sort of semi-permanent extension is far more expensive. i currently have this brand fullshine from amazon but it may also be wise to find a beauty supply store where you can match your hair to the extensions. this is also a great method of showing your hair stylist exactly what color you want your hair dyed to be! and pro-tip, never ever use shampoo on your extensions if you want them to last more than a month before they’re ratty and you need new ones. only ever wash them with plain conditioner, every couple of weeks!
shower filters: if you live in a place which has hard water, this can make your hair more brittle, dry, frizzy, tangled, and even make your hair a shade of green, due to the dissolved minerals drying in your hair. i installed this water filter in my shower to purify the water. it only takes 5 minutes; you simply twist off your showerhead, twist the filter on, and then twist the showerhead back on. they also help with acne, eczema, and dandruff! i definitely noticed a difference in my hair softness when i got one.
leave-in treatments: i figure my favorite leave in-conditioners and serums are worth a mention here! i’ve been using the same 2-3 products for several years and i’ve never found anything that works as well as them. the two non-negotiables for me are it’s a 10 leave-in conditioner with keratin, and either biosilk or chi silk infusion. and if and when my hair is very dry or damaged from recent bleaching, i also put some moroccanoil on the ends.
✨ 𝕖𝕪𝕖�� ✨
brows: at-home tinting is a quick and cost effective way to make your brows more defined! i’ve used henna dyes before, which also dye the skin beneath the brows and make them look extra thick, but i found that lighter colors were always more orange than “light brown.” instead i love and use this brand of lash/brow dye. i don’t buy their developer- i just followed a reviewer’s instructions to mix equal parts hydrogen peroxide and dye, and it works great! and obviously choose the color which suits your hair color. also worth mentioning, the light brown can be quite light or quite dark depending on how long you leave it on so start with 5 minutes and go from there!
also, of course always keep your eyebrows well-shaped! if you’ve never had them shaped before, it’s a good idea to get it done professionally first and then maintain it at home with tweezers. i’m a big fan of benefit brow bar for waxing! they have stand-alone locations or smaller bars in a lot of ulta’s.
lashes: getting your lashes done is a great way to feel more done-up even without makeup! lash extensions are amazing at defining your eyes and making them look bigger and more awake, but they’re also a lot of money and upkeep. personally i love lash lifts as i have long lashes (from hair growth vitamins woo) but they just don’t curl very well and are super blonde; a lash lift dyes and curls them and lasts far longer than extensions with no bi-weekly touch-up appointments! if you're not opting for any treatments, i’d still recommend hair growth vitamins to grow your lashes longer!
you can also dye your lashes at home! i’ve tried at-home lash lift kits several times and i found them all messy and completely ineffective, possibly due to my lack of skill, but i couldn’t personally recommend them as of yet. i would recommend at-home lash tints though! if i don’t currently have my lashes curled and tinted from a lash lift, i will use this dye, which is the black version of my eyebrow tint, and use the same hydrogen peroxide formula as described above, to dye my lashes black. it’s great if you’re lazy with makeup, going swimming, or wanna look a lil extra cute when you're at home.

✨𝕤𝕜𝕚𝕟𝕔𝕒𝕣𝕖 ✨
professional facials are a great option if you want to feel pampered, get extractions from someone who knows how to do it properly, or get an intensive peel or mask. but they can also get incredibly expensive, while some of their treatments can be done entirely at home!
physical exfoliation: this is pretty important for basically any skin type, in order to remove dead skin cells! you should avoid harsh scrubs, like those with walnut shell, as they can create microtears in the skin. sugar-based scrubs are safe, but personally i use either of these two items:
-facial brushes! i got a clarisonic years ago, and i love it! if i remove my makeup, then wash my face with my hands, but then wash my face with the clarisonic, there's generally still makeup that comes off on the brush. i would recommend a clarisonic but there’s now highly rated much cheaper versions on amazon so i don’t think i’d recommend spending $100-200 on one when this $33 version with similar sonic vibrations is available.
-microdermabrasion is a great, more advanced option, for removing dead skin cells and helping to clean out your pores. the ‘diamond’ tip runs along your skin to exfoliate dead skin cells, while a vacuum pulls off the skin cells and unclogs your pores. they are a bit more expensive- i got this $90 one for christmas and love it, though there are also similar ones which run around $60 and also have great reviews. i only use this about once a week.
chemical exfoliation: this is great for brightening up the skin. whenever my skin simply looks tired, dull, or congested, i opt for a chemical exfoliant. there are tons of chemical exfoliant options, but my go-to has to be these pads by dr dennis gross. they consist of 2 pads- one with the acids which will exfoliate your skin and one with a neutralizer- and only take about 5 minutes total to use! they are an all time favorite, as i see a difference in my skin right away, but aren’t so harsh that i get any redness or peeling afterwards. the ordinary is also a great skincare brand for all kinds of acids and oils for really cheap! they make a peeling solution which one of my friend uses and she loves it, and i’ve tried a lot of their products over the years and loved them too.
general masks: there are tons of different masks to help with different skin problems and skin types. basically, you've got clay masks for oily skin, hydrating masks for dry skin, and undereye masks for when you're tired as hell.
radiofrequency machine: i first found out about this from stephanie shepherd’s top shelf interview. it’s somewhat commonly used in high end facials, and my friend who is going to cosmetology school said they're great for acne and skin tightening! to my understanding, it works by killing bacteria in the skin, and stimulating blood flow and collagen production. the one i have is only $40, which makes it seem too good to be true, but apparently studies have shown they’re effective in wrinkle reduction, and i’ve found it really helpful for making breakouts heal faster.
other products: i haven’t actually found many other products that i think are a “holy grail” item, besidesss the embryolisse lait creme concentre. i have really dry skin, especially in the winter, and actually bought myself the smallest jar of la mer available this past christmas to see if it could help, but i found it to help absolutely nothing. the lait creme, though, has made my skin actually look like normal skin again, when it used to be extremely flakey and irritated. it’s known for commonly being used backstage at a lot of couture fashion shows, which sold me on it initially lol.

✨ 𝕤𝕞𝕚𝕝𝕖 ✨
teeth whitening: i use crest whitestrips to whiten my teeth at home! i’ve found them really effective, but i’d recommend using them a bit less often than the instructions recommend. the kind i have recommends using them daily at first but, anytime i’ve used them two days in a row, my teeth were sensitive and in pain for a whole day afterwards. otherwise they’re great though, just space them out a bit!
also, of course, floss and brush your teeth morning and night! i’d also recommend adding a tiny bit of baking soda on top of your toothpaste, to help with whitening. i used to do this daily back in high school and started actually getting compliments on my teeth being white.
lip filler: as many of you know, i’ve had lip filler done, and I've received a lot of questions about them, so i thought i’d include the basic rundown here. these obviously aren’t something that you should feel ugly without. your lips can be beautiful whether or not you’re following this trend. personally, i never thought i would get lip fillers, but last year i did start noticing that when i smiled in pictures, my top lip would totally disappear. i was hesitant but went and got my lips done knowing that it would dissolve in time, and i ended up loving them and feeling totally glamorous with them! i must caution you to avoid getting too much “lip flipping” done if any. over time, my injector started putting the filler around the edges of my lips to flip my lips out and make them appear bigger. it’s okay in small doses, but some injectors start cutting corners and over-doing it, which leads to the “duck face” look, and my lips have started to look slightly pursed even at rest, but are also completely lacking volume in the middle. i’m getting them dissolved and re-done soon, but let this be a lesson to you to ask for little to no lip flipping, and ask for the filler to be more in the center of your lips. before lip flipping, no one ever seemed to notice i had anything done, then suddenly after two appointments with lip flipping, everyone and their mother started asking if ive had my lips done. so i’d highly recommend them, with that caveat in mind.
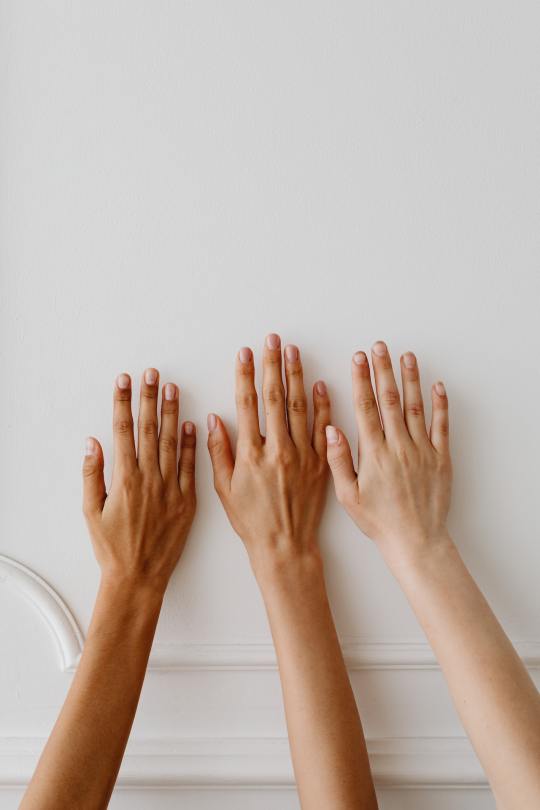
✨ 𝕙𝕒𝕟𝕕𝕤 + 𝕗𝕖𝕖𝕥 ✨
manicures: okay so you can do your nails at home if you’re doing regular polish, or even if you're using an at-home gel polish set. you should file them into a nice shape (i prefer them round as opposed to square, as they’re less likely to break), push back and trim your cuticles if needed, and paint them. but personally i love getting acrylics or dip powder! i always get tips added if my nails aren’t very long at the moment, and i feel that it makes my fingers look longer and more elegant and feminine. either way is cute though!
pedicures: okay so getting a pedicure at the salon is a great experience, but i also see no reason to get one given that i can just trim and paint my toenails at home. i would highly recommend ordering some peeling foot masks though- these are the ones i have. they’re these little plastic sock masks that you leave on for an hour, take off, and then ~3 days later an entire layer of your skin starts peeling off and your foot is baby soft. if it’s taking a while to peel off, go soak your feet in a bowl of warm water or in a bath/shower and scrub it off. i used to sit with a foot exfoliation machine for like 20 minutes whirring away at my feet but with these you can just chill on tumblr for an hour and then a few days later your feet are totally renewed.

✨ 𝕓𝕠𝕕𝕪 ✨
self tanner: self-tanning is probably my #1 beauty tip. honestly i’d give up makeup, conditioner, whatever, as long as i could hold onto my bondi sands dark tanning foam. a good tan makes you look so fresh, healthy, glowing, and fit and toned. before tanning, you should try and exfoliate yourself in the shower. i use a scrubby mitt, specifically this one, which also comes with an actual tanning mitt and a mini facial tanning mitt for applying your tanner. afterwards, you’re going to want to apply some lotion on your knees, elbows, and heels, as these areas tend to be dry and soak up more self tanner and turn darker than the rest of your body. then just apply your self tanner all over with a tanning mitt, and blend well. i swear by bondi sands dark foam! st. tropez gives me an allergic reaction personally and a lot of other ones smell bad or have an orange guide-color, but bondi sands smells like coconut and has a really pretty cool-toned tan guide-color. (DHA is the active ingredient in self-tanners- its a clear chemical which reacts with the skin cells and turns them darker after a few hours, while the initial color that you see right out of the bottle is the guide-color. self-tanners will market their tan as “not orange” or something like that, but this only refers to the guide-color, not the tan itself, as they all contain DHA which turns skin the same color. regardless, i love that bondi sands has such a nice guide-color, so even when i’m pale, i can just throw some on and run out the door looking tan!) after a week or two, your tan is going to start getting patchy no matter how many layers you’ve added, so you’re either going to want to exfoliate as much off as you can and do a fresh new tan, or if i have time i’ll apply the bondi sands self-tan remover before exfoliating to get virtually all of it off.
glitter: this is a bit more out-there, but i love love love using shimmery lotions on my body. i feel like a fairy princess, but also it gets rid of that chalky flakey dry look my skin can get in the winter. before swim shoots or the victoria’s secret fashion show, models are always getting slathered in shimmery lotion or oil. there’s a lot of expensive shimmery body oils out there, but you can also just make your own with cosmetic mica and your favorite lotion (i use a gradual tanning lotion to keep my tan looking fresh). cosmetic mica is basically what they use in all the shimmery makeup you buy, and it doubles as an amazing highlighter or eyeshadow!
✨𝕞𝕒𝕜𝕖𝕦𝕡 ✨
basic tips: i’m by no means a makeup guru, but i do feel as though my makeup skills have strengthened a lot since i was a little hippie at 16 years old who just wore hemp lip balm and organic powder foundation sometimes, so here’s some tips i picked up since then. i did also take a one-day makeup masterclass in LA with a celebrity makeup artist who has done the kardashians makeup, which is where i learned virtually all these tips:
✰ let your moisturizer sit for a few minutes before applying foundation ✩ beauty blenders tend to be far better for blending liquid makeup into your skin than brushes ✰ using just one shade of foundation on your face can make your skin look flat. either use a few different shades of foundation, or a light concealer and a darker contour stick, to add dimension to the face. also, use 2 or 3 different blush colors to add dimension ✰ blend. more than you think you need to. your foundation, contour, blush, eyeshadow, everything. just keep blending. ✰ don’t make your eyeliner too thick along the entire eye. this makes your eyelids and eyes look smaller. it should be thin until you thicken it at the outer corners of your eyes. ✰ as for the rest, fill in and brush your eyebrows, wear a lip color that goes well with your skin tone, highlight the inner corners of your eyes to look more awake, use a setting spray if you want to look dewier and make your makeup last longer ✰
if you’re curious about my full makeup routine here are all the products i use:
✰ embryolisse lait creme concentre moisturizer ✰ giorgio armani luminous silk foundation ✰ tarte shape tape concealer ✰ anastasia beverly hills contour stick in ‘mink’ ✰ too faced born this way setting powder ✰ wet n wild blushes in ‘mellow wine’ and ‘apricot in the middle’ ✰ huda beauty rose gold eyeshadow palette (this is pretty but doesn’t blend super well you should probably buy the abh modern renaissance palette) ✰ stila micro tip eyeliner ✰ too faced better than sex mascara ✰ abh clear brow gel ✰ eyebrow powder, doesn't matter what brand but i got tamnova at the makeup course so i use that. thin eyebrow pencils are good for a natural look but my brows are too thick for them lol ✰ this cosmetic mica for highlighter ✰ glossier generation g lipstick in the color leo ✰
makeup bag: a somewhat extensive list of on-the-go beauty products for you to consider carrying with you in your makeup bag:
✰ perfume. you can buy small on-the-go perfume bottles like these and fill them with your favorite scent ✰ lip products, such as lip balm, lip gloss, or lipstick ✰ lotion. i bring a small hand lotion bottle, and also carry a small container of my body lotion and cosmetic mica mixture ✰ mini lint roller ✰ tide stain stick ✰ downy wrinkle releaser fabric spray ✰ eyelash curler ✰ foundation powder ✰ mascara ✰ mini hairbrush ✰ mini dry shampoo ✰ mints, mint gum, or mini mouthwash ✰ mini deodorant ✰ summer’s eve wipes ✰ hydrating facial mist ✰ blotting papers ✰

✨ 𝕜𝕚𝕟𝕕𝕟𝕖𝕤𝕤 ✨
no matter how manicured, tanned, and sparkly you are, if you act with jealousy, spite, and hatred, you will never be beautiful, on the inside or outside. live authentically, act with integrity, and be kind ♡
244 notes
·
View notes
Text
How to Bleach Your Hair and Not Completely Ruin It
I get it. You want to be platinum NOW. If you’ve done your homework, you know what everyone says: it’s a process, it can take weeks of being brown, then light brown, then dark blonde, then medium blonde, light blonde, and finally platinum. For people who can afford it and have the patience of Mother Teresa, this is no big deal. But you work part time and go to school, and ain’t nobody got time for that! So before you pop on down to Sally’s, or your local beauty supply store, PLEASE READ THIS.
EDIT: for clarity regarding level of damage to hair.
Disclaimer: I am not a professionally licensed cosmetologist, so everything I say, you listen to at your own risk. However, I have been trained by a popular beauty supply store to ADVISE others on bleaching and or coloring their own hair at home, and I’ve done my own research. About three years worth. So, be advised, be warned, be smart. Please. The integrity of your hair is at risk.
If you’ve done your research, and all of this looks familiar to you, go ahead and skip down the section titled THE METHOD to see the process i’ve used to avoid fried, patchy hair.
For the sake of this post and time, I’m not going to cover every single thing about hair color and chemistry, but I’m going to go over some important stuff if you don’t know what you’re doing. I’m hoping you’ve already done some research, either on google or youtube. If not, you might want to watch a few Hair Bleaching Fails from Brad Mondo’s youtube channel. He periodically gives tips and tricks during these and is actually licensed. If not, here’s a quick article that explains the process of bleaching that I think covers the basics that I’d like to add.

[child with natural ~level 10-11 hair. About the lightest hair can really get without bleaching out all pigment to white]
So onto a few basics and info that I think is worth noting:
KNOWN TRUTHS OF HAIR BLEACHING:
To achieve Platinum hair, THE HAIR MUST BE TONED. More on that later.
The thicker your hair is, the more bleach it can take, usually. If you have curly/kinky hair, it’s not necessarily impossible to bleach, but because of your curls and the tendency your hair has to frizz, bleach can be more damaging. (Or, rather, the damage is much more visible on curly/ kinky/ natural hair. Sorry ya’ll :/ ]
Fine/thin hair is fragile. TAKE CAUTION. Test strand.
Test strands are your FRIEND. Please don’t bleach all your hair in one go before test stranding.
Bleach will damage your hair. There’s no way around it. You’re hair will never be the same. It will be drier, a little frizzier, more brittle, and it probably won’t hold a curl as well. You have to accept this, and realize that you will be spending a little more to mask the damage.
You cannot repair bleached hair. The process is permanent and so is the damage. All of the products that claim to repair are tongue-in-cheek. Many of them say “Reduces the appearance of damage of the hair” on the back. This is not the same as actually repairing the damage. As far as the Hair community knows, Olaplex is the only thing that reverses the hair damage, but it is expensive, it is only sold to professionals, and only yields the greatest results when mixed in with dye or bleach, when the hair is being chemically altered.
Bleaching is a PROCESS. This is why professionals will have you visit the salon multiple times before you get platinum/ silver. It’s healthier for the hair, it saves length, it stops your hair from looking like spaghetti- Which is why it’s so expensive. But you’re here because you don’t have patience, don’t lie to yourself. You’re probably also here because you want to save money. Which brings me to…

[ the usual bleached hair process from this site]
WHAT DO I NEED and HOW MUCH WILL THIS COST?
BLEACHING HAIR IS EXPENSIVE, no matter which way you go. Product breakdown, 2019 prices:
1 pound tub of powdered bleach (trust me. You want the tub. It’s cheaper in the long run): ~ 30 dollars. This tub will be enough to bleach a shoulder length bob (normal hair thickness) two or three times.
16 Ounce bottle of developer: ~5
Manic Panic/ Other brands: ~10 for one tub. One manic panic is about 4 ounces of color, which can color an above shoulder bob if you have normal/ thin hair. For thicker, longer hair, you WILL need more. So the price for this is anywhere from ~ 10— 50 dollars for first time application.
Brush for color: ~2
Brush for bleach: ~ 2
Bowl for bleach/ color (it can be washed and rinsed)- ~3-4
Toner (wella, most popular toner)- ~5
10 0r 20 Vol. Developer for toner: ~3
Shampoo Toner (less permanent than well, but also less damaging) ~ 12-15 dollars.
gloves: ~ 4
Hair clips/ ties to section hair: free if you have them: ~ 5
Protein masks/ deep conditioners: ~1 for the mask or ~ 10+ for the bottle.
(There are bleaching kits, like the manic panic one and “High lift” boxes of color at walmart, but I don’t recommend them as they usually are packaged with a 40 developer and not one box fits all. Plus, they’re way WAY more expensive than buying a tub of bleach if you have long hair compared to buying five boxes of Feria high lift or whatever at 10 bucks each. And they don’t contain as much product, so. YEah.)
Total: ~80. Sales tax (CA)= 5.60. That’s around 85 dollars MINIMUM if you have shoulder length hair. If you have longer hair, you WILL be spending much more than this. A salon visit will cost about 175+ for a bleach process alone, not including color or toner.
Does it sound like i’m trying to convince you to just go to the hair salon? I kind of am. If you’re going to spend this much money, you might as well just go to a professional, sit down in a nice comfy chair, and have someone else slave over your hair while you chillax. But I gotchu- you want to do this yourself! It sounds fun! Plus, the pride of doing it yourself? Addictive. And the potential to save money? Even more so. So okay. You’re buying all this stuff. Now the other question is….
[Loreal Quick Blue Bleaching Powder. Probably the most popular tub of bleach.]
WHAT DO THESE PRODUCTS DO??
Bleach powder: chemically lightens hair.
Developer: Activates bleach and opens the hair cuticle, allowing the chemical reaction to take place inside the hair strand and take out your natural color. A lower level developer is typically used to deposit color/toner back onto the hair.
Toner: Light glaze of color that tones hair, usually purple or blue. Why? Think of it in terms of the color wheel. Your hair will be some shade of yellow no matter how much you bleach, so you have to neutralize the yellow with a purple to create that beautiful silver/grey/ platinum/ white color. It’s just color science. This can be achieved with long term results with Wella or similar toners, or you can use a shampoo that’s purple colored for short term results.
The darker the purple OR the longer you leave on the toner, the darker grey it will get. Some people have the misconception that using a toner like Wella’s T14 will lighten their hair to grey which is not true. The developer lifts a little bit of pigment out, but it also replaces some with the purple- it doesn’t really lift :/ . To clarify: toner NEUTRALIZES the yellow hue in your hair. It’s like toggling the “hue” tool in instagram editor: you’re not changing the darkness or lightness of anything, you’re just changing the color a bit.
Okay! So you have these products, you’ve watched some youtube videos, you have a general idea of how to apply it. But..

[Ahh, Brassy hair. The bane of our existence. Katy’s got about three different levels of hair going on here, all untoned and brassy. The hair at the crown of her hair behind the bangs isn’t bad- it’s a nice golden color. But the rest might be a little yellow/orange for some of us. ]
HOW DO I AVOID PATCHY/ BRASSY HAIR??
Test strand! Mix enough bleach using the ratio on the tub, it’s usually 1 parts bleach to 2 parts Developer. So get a tablespoon of bleach in your bowl (parts can mean anything used for measuring but a table spoon should be enough), mixed with 2 tablespoons of your Developer and apply it either to some hair you’ve collected from your hairbrush, or snip a few strands from the back of your head. Follow the rest of the directions on the tub. It is crucial that you test hair that is in the same condition that your hair is in now. Don’t use old hair.
Okay, so you’ve done that, and the hair still is only a weird orange/yellow color! Can I bleach it again?
Technically, yes. But in a salon, they would make you wait a week or two, even a month before daring to touch your hair again. So I tell you the truth: bleaching it immediately will cause more damage then if you’d waited for a few weeks while using conditioning treatments like moisturizing and protein packets. Your hair will be more brittle, dry, and rough if you bleach again immediately.
But that’s your call. It will be more expensive in the long run, because you will probably purchase more expensive conditioners and more treatment packets to mask the damage.
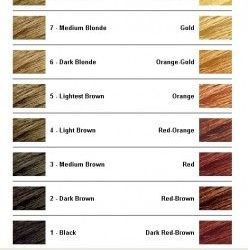
Just for clarity, here is a hair level chart from Pinterest, showing toned levels of hair on the left and the underlying warm pigment of that hair on the right:
THE METHOD
Okay, so to avoid patchy hair when you bleach, I find that this method described below is time intensive but almost foolproof. It works best on hair that is longer than shoulder length, as hair this long can end up the patchiest. Like I said above, your hair will be damage, but using this method, it won’t be as bad as the “hair bleach fails” that you see on youtube. On virgin hair this process should yield hair that is a uniform color with minimal damage. After you’ve test stranded and found the appropriate amount of time that works for you, section your hair into four sections, buns is good. Now apply bleach to one section of hair beginning an inch away from the roots all the way down, making sure the hair is thickly coated in bleach on BOTH sides (bleach is thick and not as runny as water and will not “soak” into your hair like water. You need to make sure to get both sides or patchiness will ensue). Then go back up and do the roots. Now this is the important part!
LET THAT ONE SECTION SIT FOR THE AMOUNT OF TIME YOU NEED. DON’T DO THE OTHER SECTIONS. Then rinse, shampoo, rinse, maybe shampoo that one section again until it is free of bleach, taking care not to wet the other sections. And repeat. Yes, I am advising you to bleach and wash your hair in sections. We can’t do our own hair fast like the professionals can, we just can’t. Bleaching it like this in sections will ensure that each section is bleached for the same amount of time, every time, ensuring a nice even color all around. Is it labor intensive? Yes. And if your hair is still only a level seven after you do all that work, you may have to do it again before you can tone.
But this method will save your hair. Get your supplies, test strand, bleach and rinse in sections. You and your hair will thank me. I’ve done this, and it worked!... for the most part. I got cocky during the last section and waited an extra ten minutes longer than all the other sections, and wound up having to get a trim, but that was my fault. So don’t do what I did; go by the time you have used on your test strand for. Ever. Section.
If your hair is already patchy/ has previous color tackle those sections first. I’m not guaranteeing anything for hair that has been previously treated- that’s a color correction and is very hard and expensive to do. This method works best on virgin hair, but not really on hair that’s already been colored.
If you have any questions, let me know and I’ll try to answer them the best that I can. Good luck!

[the beautiful silver hair of all our dreams....]
#hair#hair dying#fashion hair#fashion colors#manic panic#arctic fox#ion hair brilliance#directions dye#silver hair#white hair#grey hair#gray hair#bleached hair#bleaching#bleaching my hair#bleach fail#hair dye fail#dyeing my hair#hair color
34 notes
·
View notes
Note
Asks: 5, 18!
5. what color are your eyes?
brown!!!!! combo of a-1 and c-4 (left upper and right lower) on the image below

18. what hair products do you use?
drug store shampoo and conditioner!! it’s a purple round squat bottle with a gold cap and it’s got biotin and volume shit in it, idk it smells soooo good
(when i had silver hair, i used nexxus purple shampoo and conditioner)
i like hask’s argan oil line, specifically the leave-in conditioner and hair oil
every now and again i’ll do an olaplex treatment using their starter/travel kit twice a week until that runs out (as my hair gets longer that time gets shorter haha)
if i don’t feel like waiting for that to show up, hask has an argan oil hair mask that does very nicely
1 note
·
View note
Text
Amazon October Prime Day: Save 35% on Crest Professional Effects White Strips With 53800 5-Star Reviews
Amazon October Prime Day: Save 35% on Crest Professional Effects White Strips With 53,800+ 5-Star Reviews https://ift.tt/IUzhVe9 If you need additional insights before you shop, check out these rave reviews. Crest 3D Whitestrips, Professional Effects, Teeth Whitening Strip Kit Reviews A shopper reviewed, “I use these white strips once a year. It’s so worth the money and gets my teeth extraordinarily white!! I get so many compliments on how white my teeth are. Next time I’ll take a before and after picture.” Another said, “They’re amazing. I had years of yellowing and now my teeth are practically perfect.” An Amazon customer wrote, “These work so quickly, and are super inexpensive compared to professional, in-office treatments. My dentist actually recommended these to me, and I could not be more thrilled! I wanted to whiten my teeth as fast as possible before my wedding, and these were the perfect choice. So happy with these!!” Someone else explained, “I have a 2 month old and have been struggling to find time to care for myself. As a result my teeth started yellowing. I brushed them prior to use with crest vivid white and applied these strips once for 30 mins and my teeth are significantly whiter after just one use.” A fan of the product gushed, “I’m so glad I went back to the strips! They really are the best and you get so many at a good price. I’ve been using crest white strips for years and then I stopped and started getting staining from coffee etc. these whitened my teeth after just two uses!” Another shopper raved, “Best whitening results I’ve had with any product or method. LED whitening doesn’t work and neither do whitening toothpastes and mouthwashes. I had whiter results in a few days after once nightly sessions. Pricey, but worth it!” While you’re shopping at Amazon, check out these 30% off Olaplex deals. The post Amazon October Prime Day: Save 35% on Crest Professional Effects White Strips With 53,800+ 5-Star Reviews first appeared on Suave Media. Tags and categories: Uncategorized via WordPress https://ift.tt/sWOrKgb October 11, 2022 at 10:00PM
0 notes
Text
Hair Reconstruction Treatment Traveling Stylist Kit Olaplex Nº 1 - Nº 2 (3 pcs)
Hair Reconstruction Treatment Traveling Stylist Kit Olaplex Nº 1 – Nº 2 (3 pcs)

View On WordPress
0 notes
Text

Hair Reconstruction Treatment Traveling Stylist Kit Olaplex Nº 1 - Nº 2 (3 pcs) http://dlvr.it/SXC63l
0 notes
Photo


Lash Enhancing Serum by Grande Cosmetics ➡️ https://amzn.to/3xsDSBZ
Hair Perfector/Repairing Treatment by Olaplex ➡️ https://amzn.to/3fFCzK4
Head-to-toe Beauty Favorites Kit by L'Occitane ➡️ https://amzn.to/2WZWCMJ
Confidence in a Cream - Facial Moisturizer by IT Cosmetics ➡️ https://amzn.to/3jD8RXs
Healing Strength Neem Plant Silk Serum by L'ANZA ➡️ https://amzn.to/2VqfhkE
TOP 5 SELLING BEAUTY PRODUCTS [AUGUST 2021]
0 notes