#Inazuma eleven go alt
Explore tagged Tumblr posts
Text

#inazuma eleven go#inazuma eleven go alt#inazuma eleven#inazuma eleven go au#isozaki kenma#mitsuyoshi yozakura
19 notes
·
View notes
Text
💄 [ALT] Hayabusa Hideki
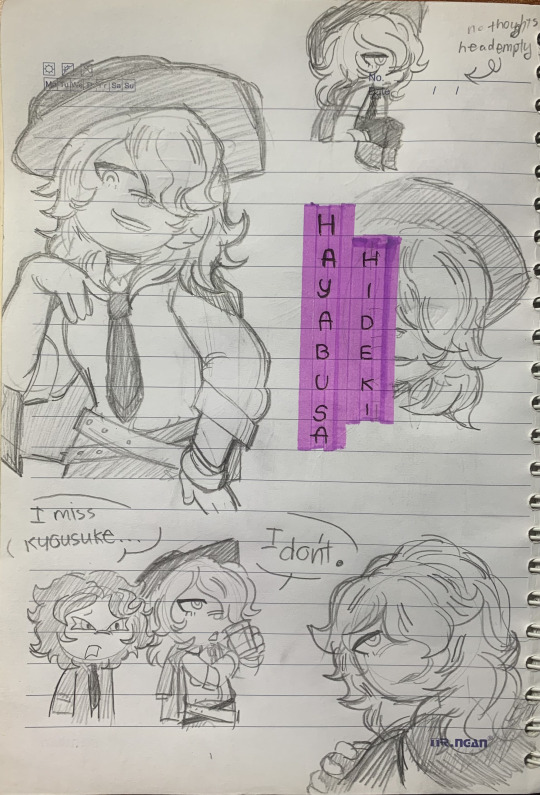
-> @inago-alt-au [NOT MY AU] tiny kyoiso mention bc I love them :( anyhow, Hideki's pose was drawn inspiration from oxanaalexphotography's article this was drawn right after Isozaki's because fixation goes wild
#inazuma eleven#inazuma eleven go#inazuma eleven go au#inazuma eleven go alt#hayabusa hideki#isozaki kenma#petalz art
11 notes
·
View notes
Text


Doodle dump #1
#inazuma eleven#inazuma eleven go#chmeese’s art#wanda naoto#hyoudou tsukasa#inazuma eleven go alt#isozaki kenma
7 notes
·
View notes
Text
Check out this wonderful collab with @kapane-luyeshu and their art of Mitsuyoshi!

my part of the art trade with @inago-alt-au
i know u are not done with yours yet but I was so anxious and couldn't wait to post this one!
#fanart#inazuma eleven#ina11#inazuma eleven go#inazuma 11#ie go#art trade#mitsuyoshi#mitsuyoshi yozakura#inazuma eleven go alt#inazuma eleven go au#!!! important
33 notes
·
View notes
Text
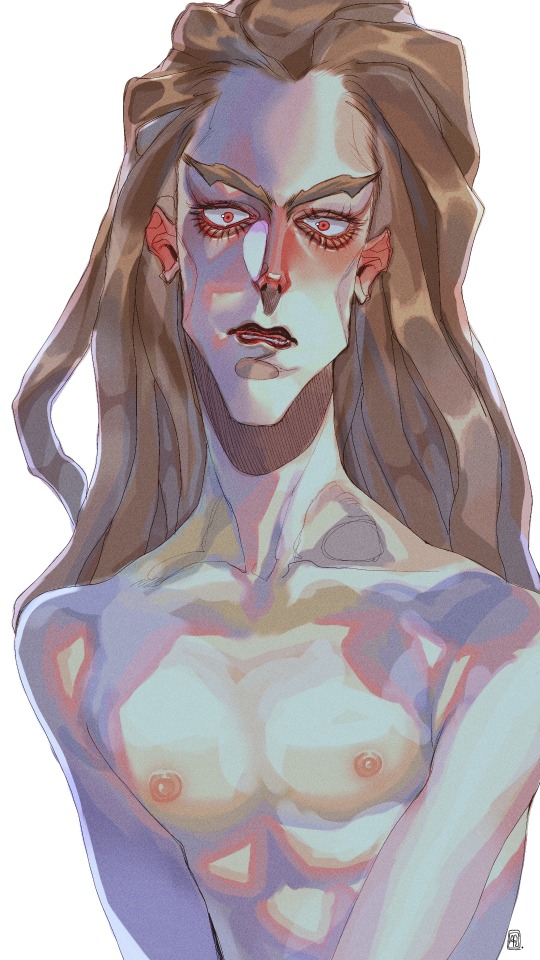
#fanart#art#inazuma eleven#inazuma eleven fanart#alt art#kidou yuuto#jude sharp#artists on tumblr#inazuma eleven go#ina11
33 notes
·
View notes
Text


Inazuma Eleven Go fans are well acquainted with the "Shadow" and "Light" versions, but few know that a third version, titled "Inazuma Eleven Go Twilight," was initially planned by Level-5.
After the success of "Inazuma Eleven 3: The Ogre Attacks," Level-5 wanted to create an intermediate version with a unique storyline and exclusive characters. However, this project was abandoned as Level-5 was already working on Inazuma Eleven Go Chrono Stone.
The central character would have been Dusk Yūhi (Yūhi Takatsuki in Japanese), a charismatic midfielder with a unique technique called "Eternal Twilight" (エターナルトワイライト, Etānaru Towairaito). His name evokes twilight in English and sunset in Japanese.
Leaks and internal documents from Level-5 have revealed concept art and screenshots of the game, showing Dusk Yūhi in action and settings inspired by twilight.The development of Chrono Stone took precedence, but the influence of "Twilight" can be felt in some elements of Chrono Stone. The rare images and information available remain a source of fascination for fans.
More info in alt hehehe xD
#ie11 fanart#ie11#inazuma eleven fanart#inazuma eleven#inazuma eleven go chrono stone#inazuma eleven go character#inazuma eleven go#inazuma 11#inazuma eleven go chronostone#inazuma eleven go light#inazuma eleven go shadow#inazuma eleven go twilight#inazum eleven oc#inazuma eleven go oc
6 notes
·
View notes
Text
Waking up early
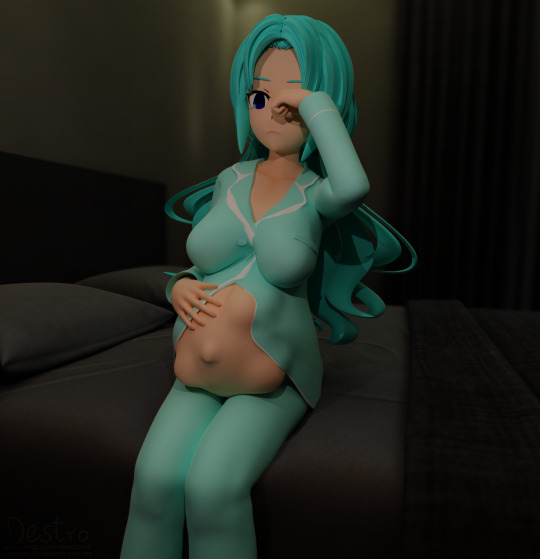


Fran from Inazuma Eleven GO vs Danball Senki W had to wake up because of the intense movement of the baby. Alts with other form are included and a bigger belly too. Commissioned by mafty_navue
#pregnant#3d#pregnantart#pregnant art#pregnancy#danball senki wars#danball senki w#inazuma eleven go#inazuma eleven#inazuma eleven go vs danball senki w#fran
13 notes
·
View notes
Text
Blues

🩵💙"His eyes are a portable ocean and we both know that I love the sea."
Friends to Lovers
And They Were Roommates (Dorm edition)
(Almost) Birthday Buddies
Clown to Clown Communication
I came to Jujutsu Tech as an American exchange student and accidentally let it slip I thought he was going to look like Gojou Masaru from Inazuma Eleven. He got over it after ten minutes and we became pretty good pals.
Status: Married
Kids: Gojou Chiaki (M10), Gojou Kokomi (F8)
Beats: Electric Love, Love Talkin', Candy Rain, Finesse, I Love Me Some Him
Lore | Jujutsu Tech Days
1st Year
My Standard CT + How I got recruited // Alt CT: Dark
First Meeting
Joint Birthdays (Yaga is cheap)
2nd Year
tba
3rd Year
tba
4th Year
tba
Lore | Official Sorcerers+
Our first real argument
Present day birthday celebrations
Ways Satoru's students avoid lectures
Satoru's cameral roll
#look it's self shipping hours#blues#i swear they never want you to listen to love talkin' so you have to settle with a slowed and reverbed version#it still eats though soooo#it's about time i start making these pages they've been in drafts for too long
0 notes
Text
@basedness-is-a-prison

1. The Kidous are the ones who mentioned and agreed to Kageyama raising Kidou, not me. I only repeated what theyre talking about.
[Image description: 7 consecutive screenshots from the anime inazuma eleven episode 14. The setting is inside the office of Kidou's father; inside of their house. Yuuto (standing) went to talk to his father who was sitting in front of his bookshelf behind transparent glass, books arranged smartly. The dialogues are in the image alt.]
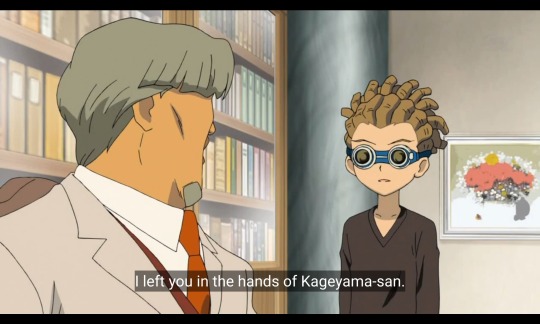
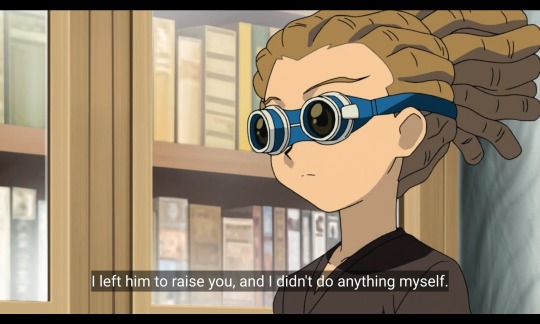
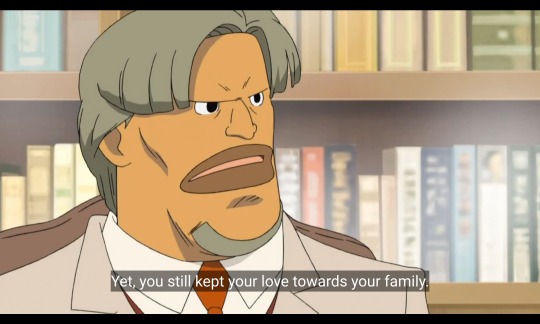
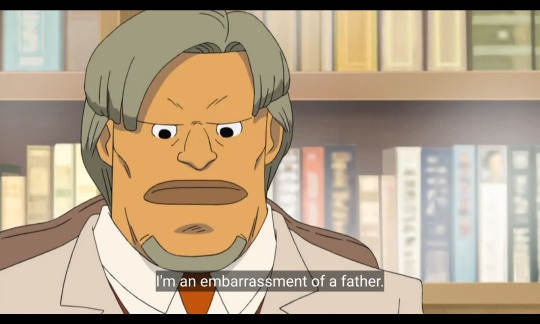
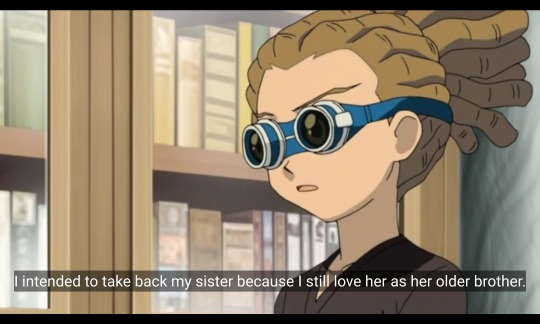
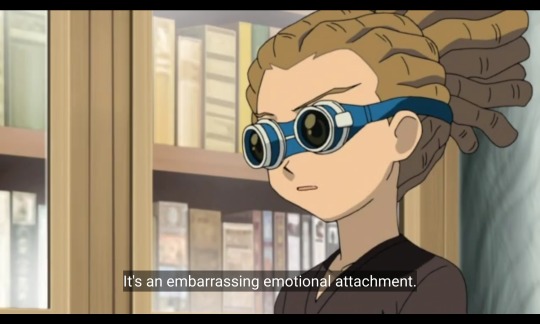
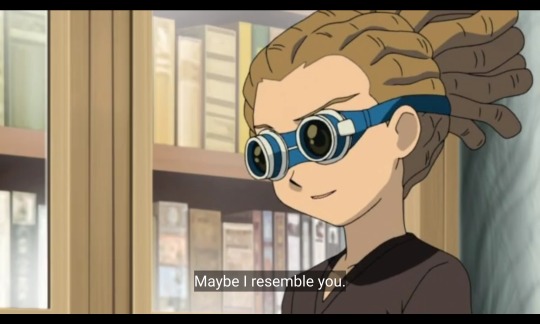
The first 4 screenshots shows Kidou's father admitting to not putting considerable time and effort into raising Kidou and letting Kageyama do most of the heavy lifting and feels ashamed of it. The rest of the screenshots show Kidou's acceptance of his father's words and acknowledgement on why his father let Kageyama raised him (intentionally or not) and him validating him by saying that in the end, they're actually the same (implying they really are father and son).
2. As much as you want it to be, what's canon in the game is not always canon in the anime; I'm only talking about the japanese script + english subs canon all the time. I'm not even sure why you're bringing up the games here; THEY ARE DIFFERENT.
Tbh I consider the anime dub's canon as different from the anime sub in almost all anime because they have different lore and I think it's important to preserve the lore that a studio created for a dub as it has the touch of the culture where it aired and meant to cater to.
3. I don't care if you think I'm ignoring canon but I hope you do see the irony of what you said here:
"Also, Jude isn't the main user of Emperor Penguin in the games, Samford is. THAT MEANS that if anyone was the main user of Emperor Penguin no.1 it was PROBABLY Samford, not Jude."
Because if you called my making conjectures based on character lines and actions as someone ignoring the story to make up something else entirely, then you're no better.
4. Main user does not equal to first user. I don't understand where you were going with that.
I hope I addressed everything that irked you about the post.
Yes, a lot of fans know that Emperor Penguin No. 1 was a hissatsu that teikoku created specifically to counter God Hand and that Kidou himself credited Kageyama to have come up with it. But not a lot of us think about how Kidou is probably the first user of that technique and that Kageyama made sure that penguins will be hurting/biting the user of that technique knowing that penguins are Kidou's favorite thing in the world
#theres something to be said abt how a person can have more than one person to raise them#and that it's something that already exists in cultures w big families where they treat aunts/uncles/family friends as 2nd parents#but im not diving into that today#and i never talked abt the games ever#kidou yuuto
122 notes
·
View notes
Photo


seduction failed succesfully
why yes i WILL sail my own silly little ships into the sunset and there’s nothing anyone can do to stop me
#inazuma eleven#gamma (ie)#tsurugi yuuichi#inazuma eleven go#inazuma 11#my art#yuugan#is what i've been calling them#i decided to go with future alt yuuichi because... i think he deserves a happy ending and a silly bf#and also because i didn't wanna draw a whole wheelchair
27 notes
·
View notes
Text
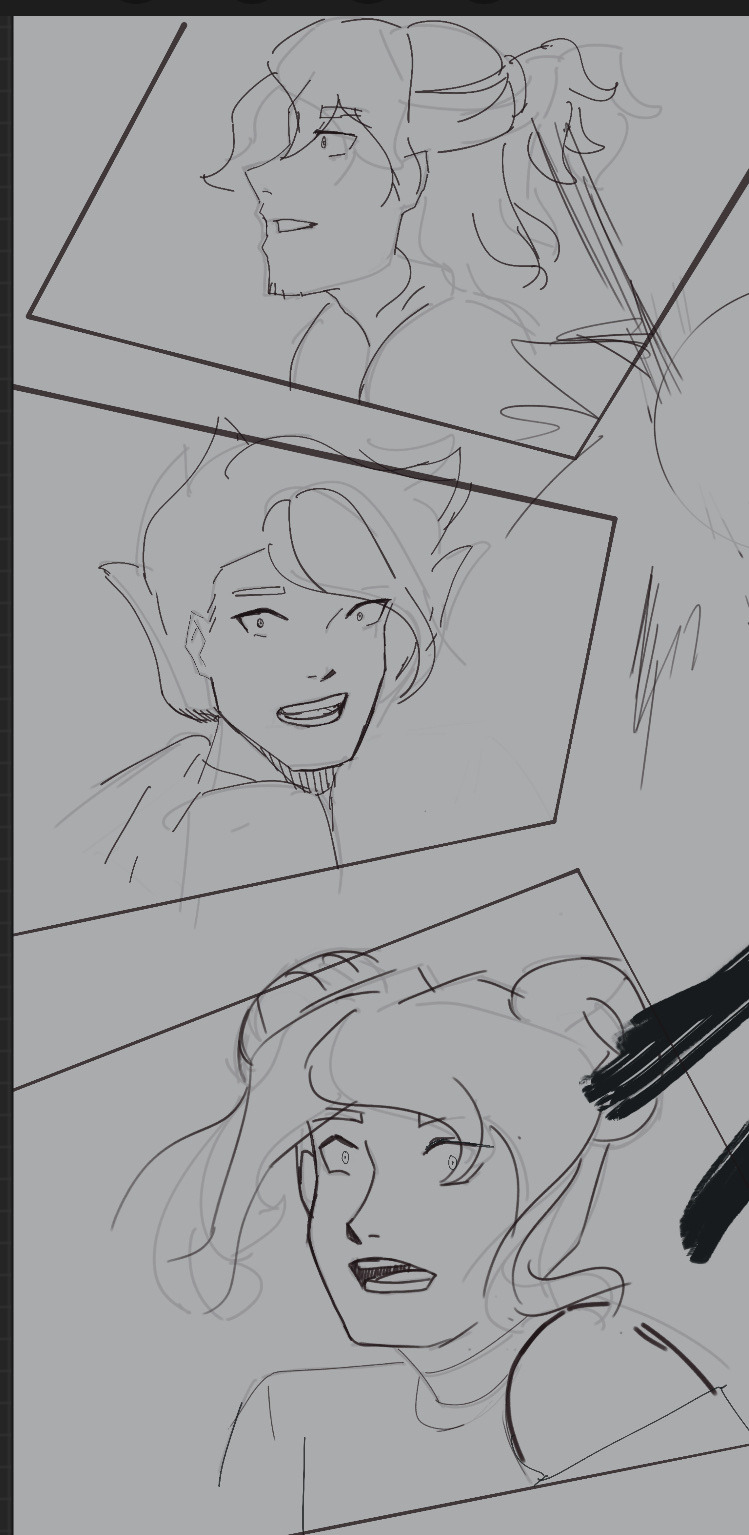
Wip #3
#inazuma eleven go#inazuma eleven go alt#inazuma eleven#inazuma eleven go au#isozaki kenma#mitsuyoshi yozakura#taki sousuke#hyoudou tsukasa
7 notes
·
View notes
Text
🔪 [ALT] Isozaki Kenma
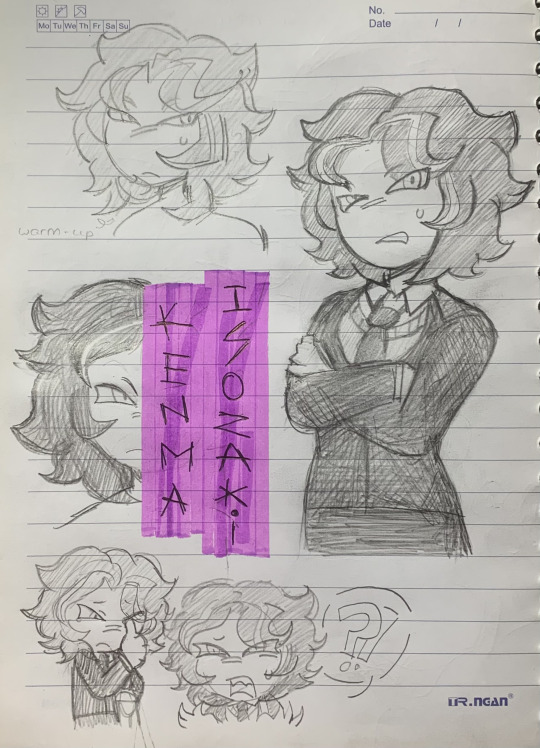
-> @inago-alt-au [NOT MY AU] i fixate on random things ppl make thats just kinda how my brain functions,,, its like a game of who's the lucky person but for fan-media by me,,,
#inazuma eleven#inazuma eleven go#inazuma eleven go au#inazuma eleven go alt#isozaki kenma#petalz art
14 notes
·
View notes
Text
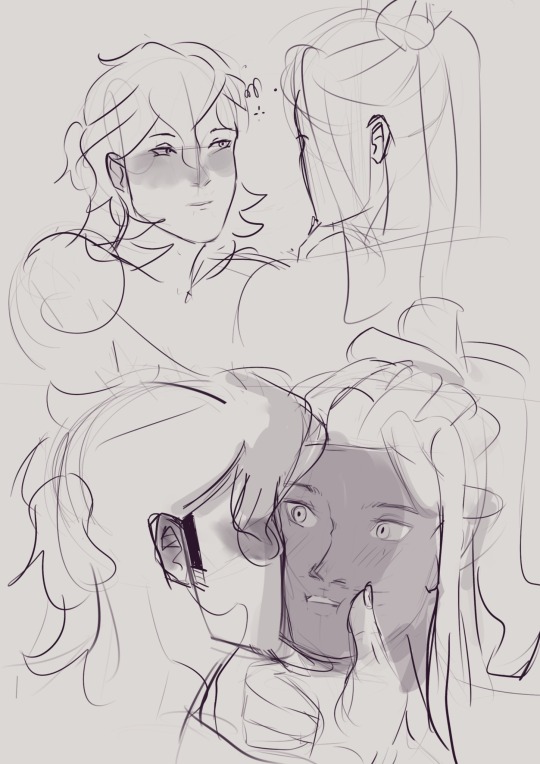
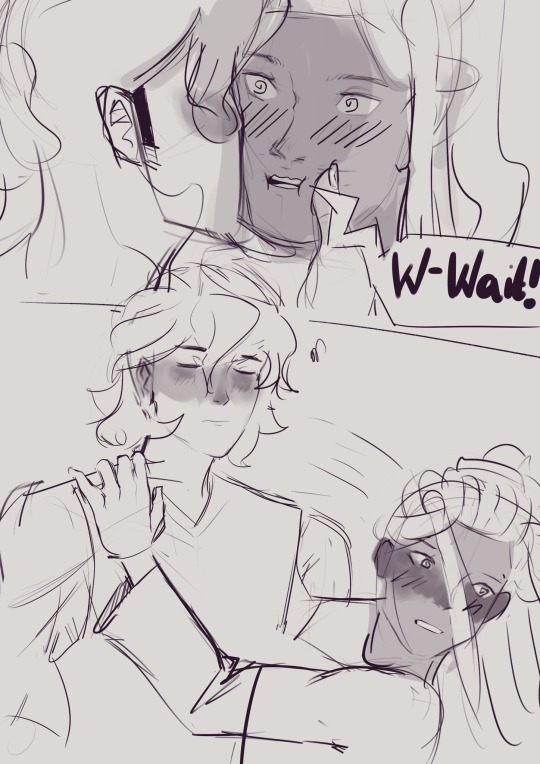
These two are too embarrassed about kissing
14 notes
·
View notes
Photo
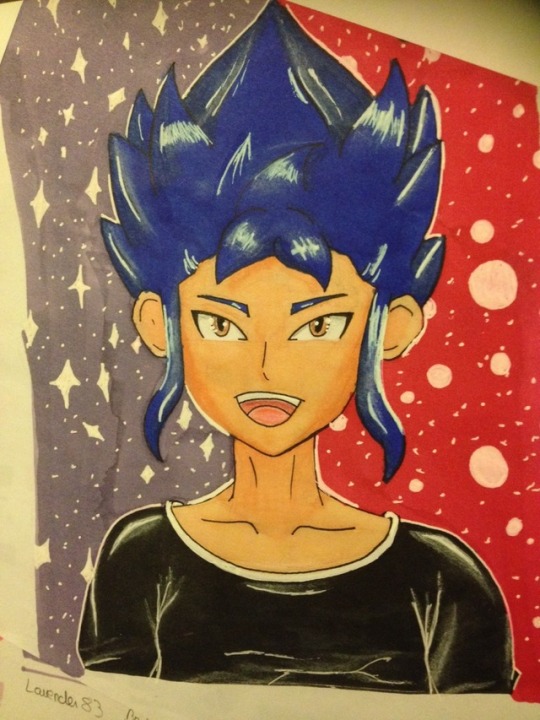
I am happy because I buyed a lot of things for coloring my doodles "correctly" lol What is a better first try than test them on your favorite character? lol
#Inazuma Eleven go#Tsurugi Yuuichi#Inazuma Eleven Go Chrono Stone#Alt Tsurugi Yuuichi#Traditionnal art#ma boi xD
6 notes
·
View notes
Text

#fanart#inazuma eleven#art#inazuma eleven fanart#alt art#kidou yuuto#jude sharp#artists on tumblr#ina11#ina11 go
25 notes
·
View notes
Text
Manga scanning: a practical example
Lately I've been getting a lot of people asking questions about how to scan and subtitle. And it's kinda hit me: there aren't a lot of visible, accessible resources for this, are there? As time winds by, the masters of these arts have moved on and vanished from the internet. So for posterity, I want to talk about my own work process. (Remember to save a backup of this post somewhere if you like it...)
Maybe someone else has already written this up better than me, but it's nice to infodump about the process regardless.
The book I'm scanning is Inazuma Eleven GO: Saikyou Senshu 100-nin Zukan. It was a magazine extra drawn by multiple artists, and to my knowledge it's never been rereleased in tankobon format. Which is a damn shame, because it's full of hilarious gags! Time to bring it back to the world. So, how do we start?
0) Tools and programs
Before anything else, ya gotta have a good, clean scanner. My actual scanning is done with a basic 11x17 flatbed scanner with 1200dpi max. Default OS scanning programs usually suck, so I always download the scanner drivers and programs from the manufacturer's site!!
Other physical requirements are a microwave and some black paper. The digital steps are all done in Photoshop and XNView.
1) Scan the cover
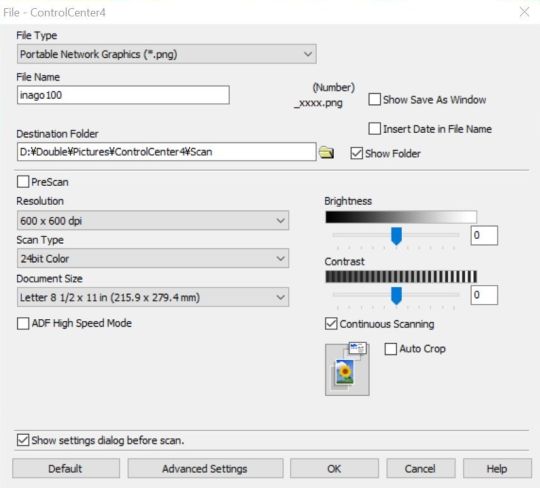
For scan settings, I default to 600dpi PNG. I used to scan things at 200/300dpi, and while this is quicker and more economical, it's not nearly as crisp! It can also cause some weird color banding, due to some scientific phenomenon that still confuses me! Basically, if a scan looks stripey, change the DPI. It's much better to work at higher resolutions and then shrink it down later. I don't have to fret over 100mb+ raw images anymore because I have plenty of external storage! Yippee!!

Before doing anything else, I scan the cover while it's still in the best possible condition. Obviously, opening the book too far will cause creasing near the spine.
Since my edition was a well-loved secondhand copy, there is a LOT of creasing. But I don't feel like spending 3k yen to get a mint copy that I'm just gonna rip apart anyway, so this is where Photoshop comes in!
2) Retouching cover damage
Fortunately, there isn't any color fading to deal with here. The majority of these imperfections were touched up with Content Aware Fill. It's a very powerful tool that assumes what the selected pixels *should* look like based on the surrounding pixels. Use the Lasso or Magic Wand to select the imperfections, and try to avoid selecting pixels you don't want fixed. Content Aware works best on small spots, so you kinda have to break it up by color blocks, but it's still a million times faster and way less depressing. Seriously, cleaning and typesetting let my mind wander too much.
I currently have two Actions shortcuts to make this process even faster:
1) regular Content Aware Fill
2) Expand by 5px > Content Aware Fill > Deselect

When Content Aware fails, this is when I have to go manual. Clone Stamp is my best friend ever. Carefully select a source with the Alt key, line up the dots over the touchup area (toggle Enter for better viewing), and keep brushing! This can be painstaking, but man, I love seeing and comparing the finished result.
Healing Brush is helpful when you have to clone a pattern but the color is different. It'll preserve the source pattern but adjust the lighting to match the surrounding pixels. It's a lot more finicky and will blur colors *too* much sometimes, especially near borders. This tool's really better on photographs, but it still comes in handy.
(I hear that Patch combines the functionality of these two! I wanna try it out next time...)
When Healing Brush can't blend colors well enough, using Clone Stamp in combination with Dodge (lighten) or Burn (darken), with strength adjusted accordingly, is the next best thing. Burn is GREAT on lines that aren't quite black enough! This technique works wonders when touching up gutter shadows especially. I will spend an exorbitant amount of time on retouching if it means I don't have to rip apart my nice books (that being said, it's important to really gauge whether it's worth retouching in the first place! I waste too much of my time on tiny details that nobody else cares about!!)
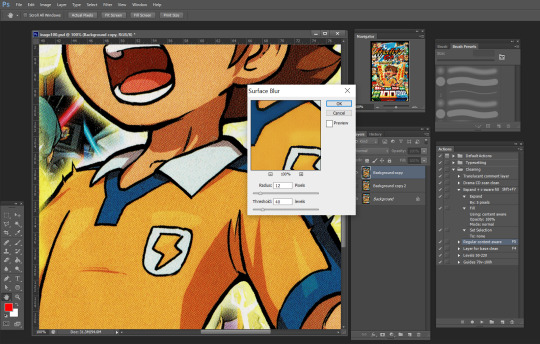
If being able to see the printer dots bothers you, there's an easy fix: the Surface Blur filter. This is one I've only discovered recently and I'm still playing around with it. On one hand, it gets rid of the tiny white dots and can make scan images look absolutely magnificent. On the other hand, it has some trouble preserving sharp lines and small highlights. Since I don't like altering the original image too much, the scans I post aren't usually blurred -- but it's something you can try out at home!
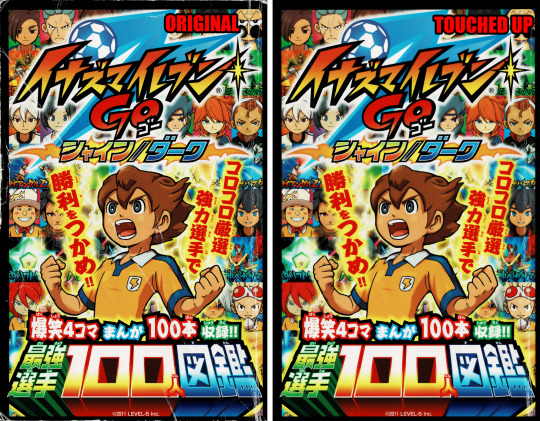
Hot damn! Look at the difference! Look at my boy Tenma! You'd hardly guess the condition the original is in!
Note that the final version does not have all the creases removed. At this point I had already spent a couple of hours retouching and decided nobody else was gonna care THAT much about the peripheral damage. If you do care that much, feel free to spend *your* time perfecting this.
3) Melt
Now that the cover's scanned... it's time to toss the book in the microwave!
vimeo
(Pictured is a *different* book, but you get the picture.)
No, seriously. Microwaving is the easiest way to warm up the glue enough to tear the pages out. Or more accurately, gently tug on the pages till they separate from the rest of the bunch. I start from the front cover and tease the pages out one by one. On thicker books, I'll alternate between front and back covers.
I set the initial heating count to 30-50 seconds, and sometimes I turn down the power level if I'm feeling apprehensive. Really gotta play it by ear depending on the book’s size and condition. After tearing out a couple dozen pages, the glue gets cool again and the pages start to resist again. Continuing like this results in the paper tearing!! This is when I chuck the book back in for another 10-15 seconds.
It's a little scary at first, but the toner on the pages heats up too! It doesn't bleed and it shouldn't be *too* hot to the touch though. So it's just something I've had to get used to.
This particular book kinda smelled when I heated it up! I blame either the paper quality or, y'know, being secondhand and maybe not being stored in perfect condition. But the stink was fortunately temporary.
Some people prefer ironing the spine (with a towel over it), but IMO that's more precarious and time-consuming. Maybe it works better for the middle pages though...? Worth trying out someday.
You could just slice out the pages with a knife or something, but with melting, it's possible to rebind the pages later! This is another thing I haven't done myself yet, but I'm excited to try it out with a nice archival glue. I'll update with the results eventually.
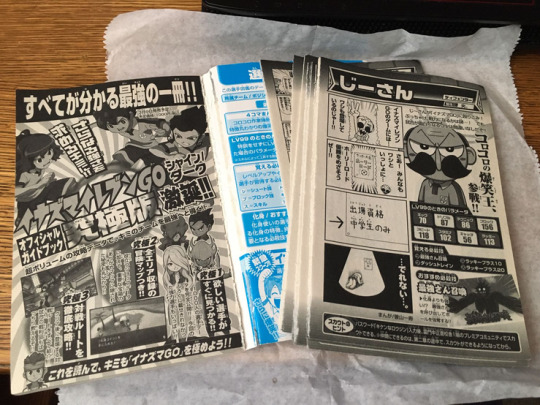
So, with the "how" out of the way, "why" would you take apart a book in the first place!? It still feels a little sacrilegious. But scanning pages one at a time gets you the best possible results.
It eliminates three major issues:
1) Gutter shadow
As mentioned before, shadows at the "gutter" (the inside spine) naturally happen because the page isn't lying flat there. It looks bad. And it takes a whole lot of work to retouch.
2) Angled pages
The cousin to gutter shadow, angled pages happen when the spine is a leeeetle more open/closed at the bottom/top. So with a spread, you've got the left page at -1 degree and the right page at .5 degree. Both of these pages are going to have things cut off when they're cropped. And it's going to look very weird when you're flipping through pages and have slightly alternating angles. Rotating these pages so that they're at the same angle is a lot more trouble.
It's really hard to keep the spine open exactly the same way for an entire book! The weight of the scan lid can throw off careful positioning anyway!
3) See-through pages
Manga in Japan is CHEAP and is not printed on the best paper possible. If you have the pages all bundled together, you can see large splotches of black or white from the spread that's behind the page being scanned. Leveling the image can fix this, but it comes at the cost of destroying midtones. Which is to say, any gray in the image becomes off-white or almost-black.
I hope you're beginning to understand how much effort and technical detail goes into the scans you enjoy.
4) Scanning
Same scan settings as the cover (600dpi PNG). I always scan in color, even for grayscale images. And I don't trust the auto settings enough to let the machine fiddle with colors and cropping.
You know how scanners have a little arrow at the corner saying "align here"? Don't do that. The ones I've worked with like to shave off a few millimeters from the edge because they assume there's a margin anyway. So I place my documents about 1cm AWAY from the edge just to make sure the whole page is scanned in. This inevitably causes some slight rotation, which will be fixed later.
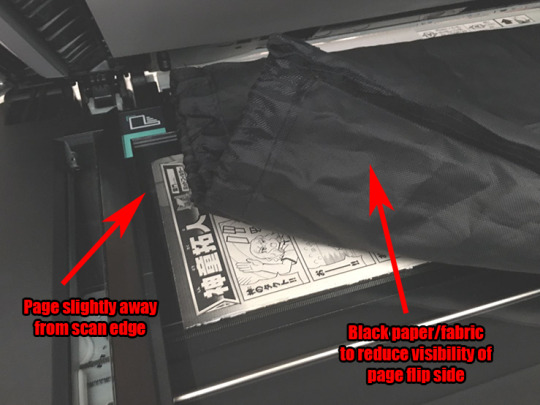
A new technique I've learned to reduce the effects of aforementioned see-through pages: use a black background! The toner blends in with the dark backing. This reduces the luminosity of the whites, but that's something that can easily be fixed via leveling later. I do not have black paper around the house, so I resorted to fabric.
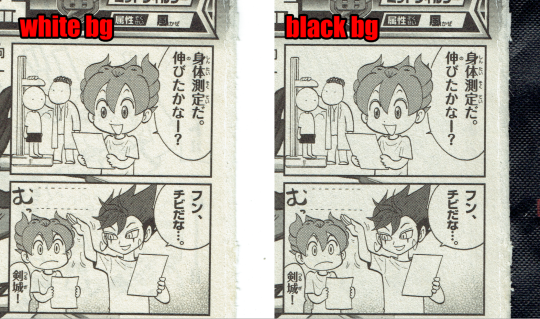
For comparison, here's the first page scanned with both a white and a black background. Note that white is slightly brighter, but there are some weird shadowy lines in the background. If you look really hard, the line goes through the screentone on Tenma's hair! Maybe it's excessive, but these tiny details can be weirdly distracting.
This book doesn't have page numbers, so I had to be extra cautious about missing pages (or accidentally dropping the stack)!
5) Leveling
Typically this step is something I leave for last, but since it significantly reduces file size, that's going to make the next steps easier.
So I've mentioned leveling before. But what is it?
Essentially, Levels make black *blacker* and white *whiter*. This is one very easy step to make pages look SO much better.
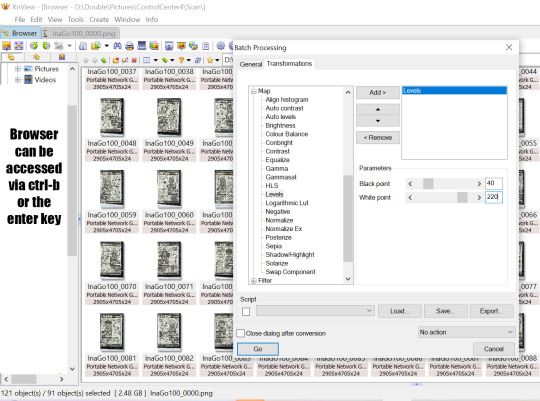
Switching over to XNView now, I'm setting these pages to about 40-220. Usually this would be a bit too heavy -- this could easily erase something light or turn something dark into pure black. But in this instance, the high dpi means individual screentone dots are visible and any grays are pretty well preserved anyway. So let it rip! XNView batch processing can run through all selected pages all at once and save the leveled copies to a new folder.
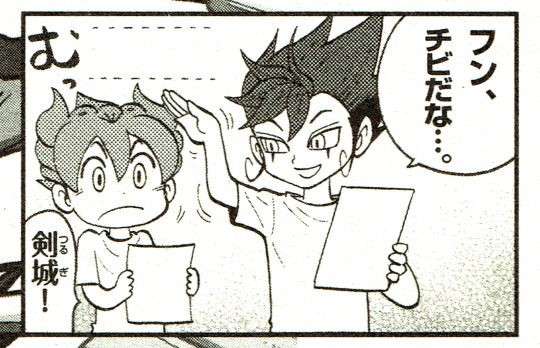
There's a ton of dust left still. Leveling gets a *lot* of it, but again, the paper quality is not great in the first place so it's kind of unavoidable. Resizing and cleaning the page later will help somewhat.
6) Rotate
This is the one step I do fully manually. I haven't had much luck with auto deskew/crop before, nor have I tried any different methods for it recently. Please tell me if there's a better way of doing this step that won't sacrifice border pixels.
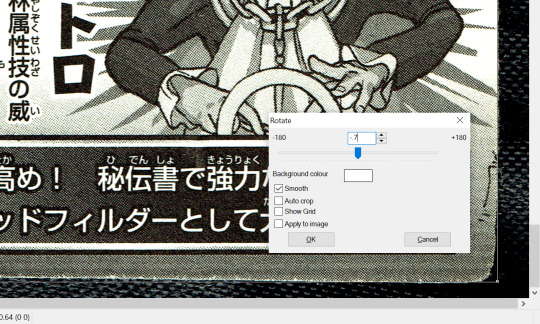
Anyway, since I scanned slightly away from the edges earlier, the resulting digital image is slightly rotated at a random angle! For some ungodly reason, Photoshop doesn't have a shortcut for custom rotation, nor can you really set an action for it. XNView once again comes in clutch here. The basic steps are:
5a) Click and drag to create a bounding box. This will be used as a guideline to check whether the digital image is actually upright.
5b) Shift-O and test out values from -3 to 3. Ctrl-Z and repeat until it's just right.
After a while, you get a hang for approximate values, but "just right" means getting within .05 of a degree!! Even the untrained eye can tell when something's off by a mite.
5c) Adjust the bounding box's borders to the edges. If the box is aligned to one corner and the adjacent corners *aren't* aligned too, that means you have to rotate until all four corners are aligned. Then crop and save and move onto the next one!
7) Align
This is a new step I've never done before! Given the number and size of pages I'm working with here, I had to think and plan out this process in advance for once. Basically, instead of cropping and resizing each individual file, I load them all in at once so that they're perfectly aligned with each other. This is gonna require a lot of Photoshop automation.

First off, I go to File > Scripts > Load Files into Stack. There are four types of pages here: 1 comic on the left, 1 comic on the right, 2 comics on the left, and 2 comics on the right. This process will have to be repeated for each type so that the automation doesn't get confused. Then we check the "Align Source Images" box and let the process run... for a while.
So now I have a single file with one layer for each of the pages, and the comics themselves are all nicely aligned! Yahoo! The edges are mismatched though, so it's time to crop again. There's gonna be some cutoff but that's acceptable in this instance since I just care about the small comics. If I was doing bigger, full-page manga, I'd probably *add* some margin after cropping.

The pages are approximately a 5:8 ratio, so I've decided to crop these down to 2550 x 4080. To make sure that the comics are at the same distance from the margin regardless of page type, I'm using Guides to roughly estimate the comic positions after cropping. I want them to end up at about 70px and 100px from the horizontal and vertical margins respectively. I could also change the size of the canvas instead of cropping if I really wanted to.

Once I'm satisfied with the cropping, I use the Timeline/Animations window to flip through (at about 0.5 seconds) and check that all of the layers look right. There are a couple tears and visible background instances which are quickly fixed with Content Aware Fill and Clone Stamp. Since the background's black, I even had to temporarily change the Photoshop interface color lighter so that I could detect the imperfections better.
Then at last I go to File > Scripts > Export Layers to Files and... wait for a while again. Now we have separate files! And now I have to repeat these steps all over again for the three other page types!

Lastly, it's time to rename the resulting files in order. I actually screwed up on this step. Photoshop exported all the files *backwards*, which gave me file names like "PSexp0025-InaGo01". This is an issue because it makes batch-renaming via XNView a whole lot harder!! Photoshop automatically adds a numbered prefix to all the auto-exported files, and XNView can't remove wildcards from filenames. The result is weirdly staggered out-of-ordered files. It took some careful manual work to fix this, but at long last, we have a whole folder of 90 beautiful pages!
8) Translate (FINALLY)
You see how long it took to get here!? This took at least six hours for 90 pages. After all that work with the raws, finally I can do something with them!
Guess what! If you have a digital edition, you can skip all of these steps! Instant gratification for five bucks! Buy digital editions when you can and give your money directly to the author!!
Anyway, further stages may be discussed in another post once we get around to them. Lassoing translators and typesetters is its own struggle. I hope you learned something new from this post!
44 notes
·
View notes