#I just quickly doodled an additional first page for better posting format
Explore tagged Tumblr posts
Photo


Having my tablet connected to my laptop and the drawing application open, I started to make some doodles for a small comic idea I had, and somehow (even tho I still need to write an actual script) I just. kinda storyboarded a scene from it. You can tell I just had a vague sense of what I want to happen, bc the posing is rather inconsistent and there’s probably some unnecessary movement/shots/drawn out scenes/repetitive, unclear and unnaturally spliced text going on
#I just quickly doodled an additional first page for better posting format#so the first pic is just a quick addendum for establishing the scene I guess and is much less effort than the rest#this takes place in distortion world and munchlax had an almost encounter with a togepi that peels pokemons or smth#dunno if the naked togepi section is a keeper or too much or what exactly would even happen there so kinda iffy on that#doodle#thought about putting a mosaic over the steak but dunno yet if I'd draw it or censor it for comedy
1 note
·
View note
Photo
What exactly IS Bullet Journalling…and why should anyone care? Bullet Journalling is an analogue planner ‘system’ created by Ryder Carroll, a digital product designer based in Brooklyn, New York. You can find out the backstory, as well as the original guidelines, at “Bullet Journal - The analog system for the digital age”, but in a nutshell: Bullet Journalling is a way of taking planning and organisation back to basics. This is the official description from Ryder: “The Bullet Journal is a customizable and forgiving organization system. It can be your to-do list, sketchbook, notebook, and diary, but most likely, it will be all of the above. It will teach you to do more with less” The basic concept is that you take a notebook (any notebook)…and use it to help you get – and stay – organised, clear and productive. As solopreneurs, we are not strangers to overwhelm and procrastination. Bullet Journalling is the ONLY system I’ve found to date that truly helps me stay on top of what I’ve got going on, and keeps me moving forward. I attribute this to its simplicity – it’s simple, flexible, and completely practical.
What you need to get started ?

Unlike most other organisational tools or planners, the Bullet Journal requires no expensive or special materials to set up. All you need is: ~ A good notebook ~ A good pen And that’s it! That’s all you need to start your own BuJo. Of course, there are so many other things you can use in your BuJo (such as washi tape and stamps). I cover these further down the post. But all you really need is a notebook and pen, and you’re good to go.
How to choose the PERFECT notebook ?
As you’ll be using your BuJo for probably at least a couple of months (depending on how much you use it), it makes sense to choose a notebook that can stand up to the strains of everyday life. Size: Probably the most important thing to think about when it comes to choosing your BuJo notebook is size. I personally find an A5 (half-letter) size notebook is perfect, although I know of others who use letter sized, and others who use Midori (personal) sized notebooks. Size really doesn’t matter – but what does matter is that you choose a size you’re most comfortable with. Cover: Another thing you might like to think about is whether you’d prefer a hard or soft cover notebook. I personally prefer a hard cover, as I like to throw my BuJo in my handbag when I head out. With soft covers, I find that the edges are more susceptible to curling and tearing, so I like the protection that a hard cover offers. If you plan on adding pages or sticking things into your BuJo, a soft cover may be more suitable, as there is more give in how much the notebook can expand. Binding: Hard-bound, spiral-bound, ring-bound – there are many different types of notebook to choose from. Again, choose something that you feel most comfortable with. I personally prefer a hard-bound book format, as I just love the way it feels! I have tried to incorporate my BuJo into my Filofax, and although it didn’t work for me, I know many people who have done this successfully. Paper quality: I would ALWAYS recommend spending just a little more on a quality notebook (and I’ll share my favourites below), as paper thickness and weight can make all the difference. I personally hate bleeding and shadowing, so using good quality paper can stop your ink looking ugly and messy. Experiment with what feels right to you, and remember that this notebook should last you a while, so it makes sense to buy the best quality you can afford. Paper style: Most notebooks – especially Moleskines and Leuchtturms – are available in a variety of paper styles: plain, lined, gridded and dotted being the most popular. Gridded and dotted tend to be the most versatile, as they’re extremely handy for tracking and sketching. If you don’t really plan on tracking anything in your BuJo, lined may be a better option for you. I personally use dotted.
How to choose the PERFECT pen ?
Pens are a BIG deal in the BuJo community! Some people are extremely particular about which pens they stick to for their BuJo (and I must admit…there is something strangely sexy about gliding a fountain pen over crisp white paper). The way to choose the PERFECT pen for your BuJo is to experiment. Try lots of different types to see what works for you, and what you feel most comfortable with. I personally love my Pilot Frixion pens. These are erasable pens (perfect for crazy creatives like me who change their minds every five seconds 😉 ). The only downside to Frixion pens, however, is that if left in the heat the ink disappears. You can bring it back, but the ink isn’t archival quality (which may not be so great if you’re planning on keeping your journals to reflect on in years to come). Many people swear by Staedtlers, and others love the Sharpie Pen. Again – experiment, and try to choose something that flows freely and easily. I have a page at the back of my BuJo that I call my ‘scratchpad’ – when I want to try out a new pen, I doodle on that page to get a feel for how the pen writes, and how much ink bleed there is.
Now its the most important point that is how to set up bullet journal...

When it comes to setting up your BuJo for the first time, I highly recommend that you watch Ryder’s video to get a grasp of the basics. There are so many ‘adapted’ Bullet Journal systems out there that it really does help to see the system in its native form. You can then adapt it from there as you need to. In addition to watching Ryder’s video, here are some examples from my own BuJo that will hopefully inspire you to get yours up and running.
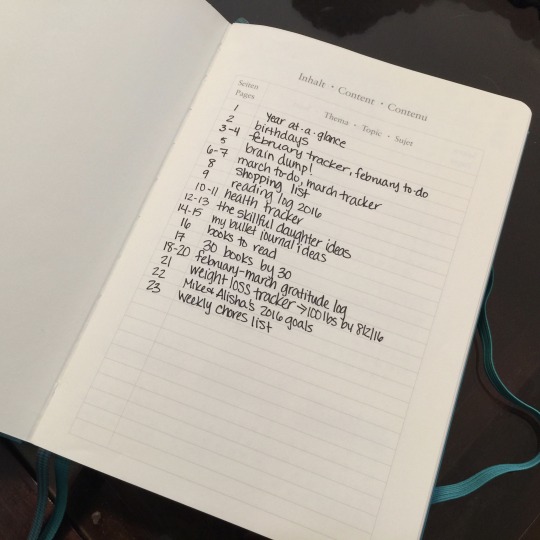
INDEX PAGE: I must admit, I don’t use the Index page as much as I probably should, but it’s still really useful to have as a reference. I personally prefer to identify my key pages using tabs (I’ll talk about those later in the post), however having an Index means you can easily find certain pages. In my first BuJos, I used to enter all of my pages into the Index; now, I just enter important things I want to be able to reference quickly. I don’t generally index daily pages.
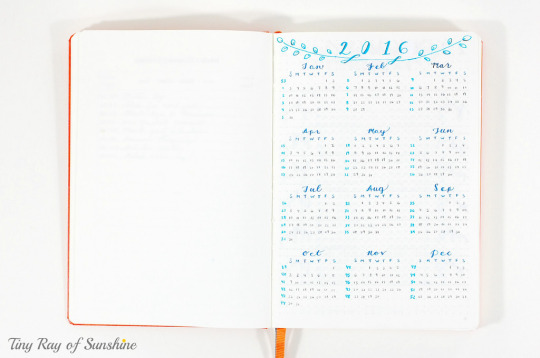
YEAR AT A GLANCE: The first page of my BuJo isn’t something that’s included in Ryder’s original setup, however I find it invaluable for quick reference. I have a ‘year at a glance’ page, where I can quickly look up dates for the whole of 2016. I was inspired to do this page by an image I found on Pinterest, though I can’t find it now. If you have seen it, please let me know so I can attribute it!
FUTURE LOG: One of the challenges with the Bullet Journalling system has always been future planning. As it emphasises logging and planning ‘as you go’, traditionally there wasn’t much accommodation for future plans to be made. Ryder has recently updated the system to make it easier to log future events, and he suggests that your first ‘spread’ is your ‘Future Log’. This is simply a convenient place to log any events that you want to make a note of that are coming up in the following months.

RUNNING TO-DO LIST: After my Illumination tracker, I have a running to-do list. I didn’t really need two pages for this list, as it’s just general things I know I need to get done at some point. The GREAT thing about the Bullet Journal is that there is no wasted space – you just turn to the next blank page and fill it with whatever you need to. In this case, I have a reference for what counts towards my five-a-day.
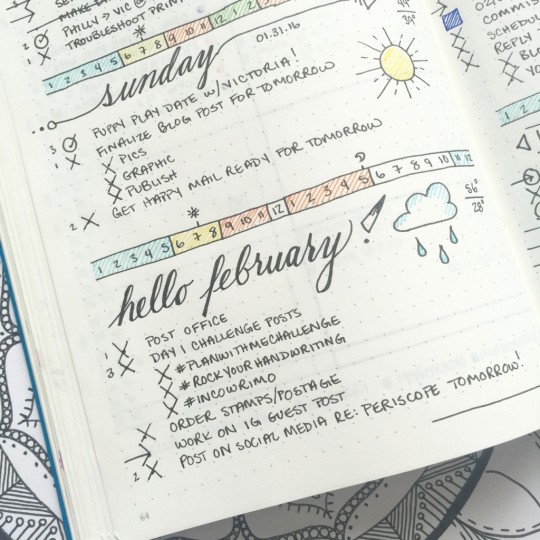
WEEKLY SPREADS: This is where I think I have quite radically departed from the original Bullet Journal system. In general, Bullet Journals have a spread for the month, and then you start a new page for each day, logging your tasks and notes as you go. These are your daily spreads. I personally much prefer to have my week on a spread, because I like to think in terms of what I have on each week. The whole point of Bullet Journalling is that it’s meant to make your life easier, and for me…I just can’t do without my week at a glance. Some people create just one weekly spread on a Sunday for the week ahead on the next available double spread of pages. I personally like to create all the weeks of the month in one go, all together. I like the fact that my weekly pages are together, and laying them all out in just one sitting is so much easier than creating one a week. My weekly spreads are probably the main thing that I do decorate in my BuJo. I like to give each week a different washi, and I like to use my stamps. I’ve played around with layouts over the years, and I feel like I’m starting to really settle into these now. If you’re looking for some inspiration on weekly layouts, this is a wonderful resource.
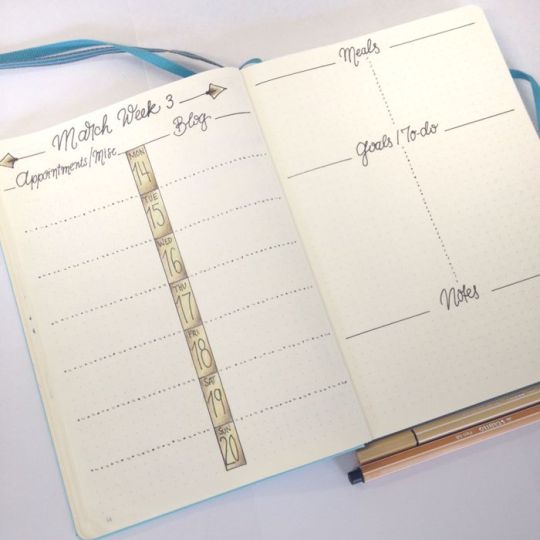
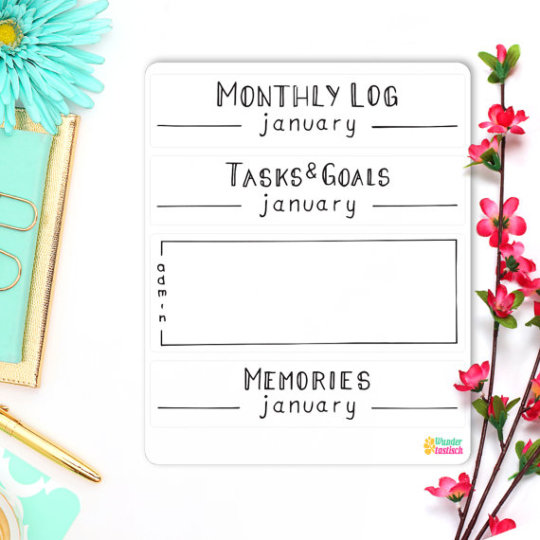
MONTHLY TRACKER: There are certain things that I like to track throughout the month, such as medication, diet, and business goals. These objectives tend to change each month, so I don’t have a set list of things I ‘track’ – I just add them in as I feel like it.
That’s about it as far as my setup goes! The only pages I’ve not shared here are my daily pages. Every day, I start a fresh page with the date, and I write out the things I have to get done that day. This really is more about being conscious of my time, and grounding myself in the day. I do this first thing in the morning, while Poppy is eating her breakfast – that way, when I get back from the school run I’m ready to hit the ground running. Part of the original Bullet Journal system is ‘Migration’. This is where you take any incomplete tasks and migrate them over to a new day or month. I personally don’t migrate my tasks all the time – I just start a blank page each morning, and centre myself in what I know I need to do. Sometimes, my daily pages become filled with notes, or brainstorm pages. I free-flow these pages, and don’t think about presentation at all. Whatever’s on my mind, I simply jot down on my daily page. If it’s something I want to come back to, I’ll put a page flag to remind me that this was something worth revisiting.
How to set up your Bullet Journal for the first time...
Hopefully you’re feeling all inspired and fired up to create YOUR own Bullet Journal. I’ve told you everything you need to get started (all two items – a notebook and pen!), but when you’re sat holding your new notebook in your hands and open it up to the first blank page…you may FREEZE, and not know what to do first. Here’s the thing about Bullet Journalling: It’s not meant to be perfect! It doesn’t matter how much of a perfectionist you are – learning to let go when it comes to planning and keeping track of your life is seriously the best move you could ever make. There are going to be things in your journal that don’t work for you…and that’s fine. As you keep using the system, you’ll soon figure out what works and what doesn’t – it’s all about trial and error. With that said, it can still feel ridiculously daunting to make that first move in a new notebook. My advice would be to watch Ryder’s video , you can even check the bullet journaling video from buzzfeed, and just start practising the basics (if it helps, tell yourself that this first notebook is just an experiment – no pressure!). Set up your first BuJo as per Ryder’s instructions, and just notice what helps you, and what doesn’t. The more open you are to experimentation, the more quickly you’ll find your BuJo groove. Within a short space of time, you’ll be rapid logging like a pro. It does take a bit of practice, but don’t get overwhelmed by doing it ‘right’. Find out what your style is by trying out new things, and don’t be afraid to make it your own 🙂
#bullet journal#bullet journalling#student#study#studyhard#ib#myp#dp#experi#set up#studyblr#studygram#supportthestudyblr
1 note
·
View note