#I forgot to change some layers to Overlay which is why this looks so drastically different.
Explore tagged Tumblr posts
Visit Tumblr Blog
Explore Tumblr blogs with no restrictions, modern design and the best experience.
Last Seen Tumblr Blogs


Fun Fact
There are dozens of funny blogs to kill time on Tumblr.
Note
the gooper

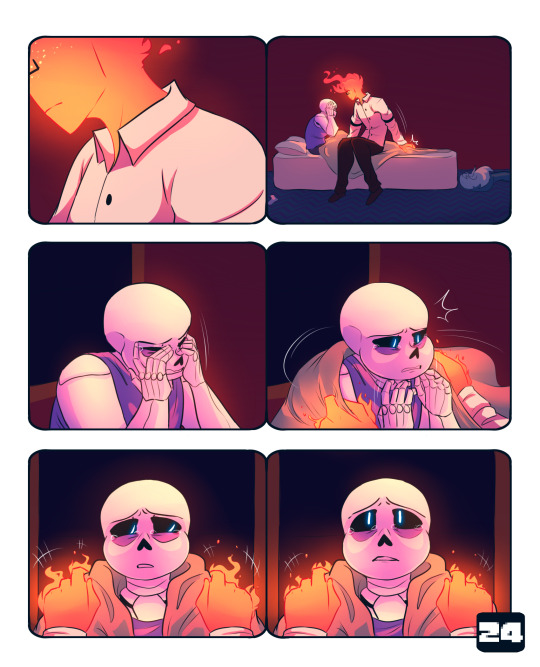
Literally so fuckin gooped right now
#I forgot to change some layers to Overlay which is why this looks so drastically different.#Shes literally supposed to look like this and i forgot to change things so she would.
22 notes
·
View notes
Note
Idk if this has been asked already, but how long does it take you to create a comic/art piece? And what is the order of the steps you go through? (Btw I love your art)
That’s a good question! I’m gonna use the most recent page as the example. I’ve talked a little bit about how long it takes, but I haven’t really explained my process. Heads up, this is pretty long! I could have just put in one panel’s process, but it’s more fun to show the whole page
1. The Sketch ~ 1-2 Hours

This can take a while for a number of reasons. A few factors could be business, tiredness, a lack of inspiration, creating too many options for myself, etc. But generally this part goes at a decent pace. I have a script that I follow loosely, where I’ve written dialogue and actions that seem good for what’s going on. I will spend more time on panels that I have a specific image in my head for. Those last two panels are much cleaner/more fleshed out than the previous four because I had a much better idea for how I wanted them to look.
2. The Lineart ~ 2-4 Hours
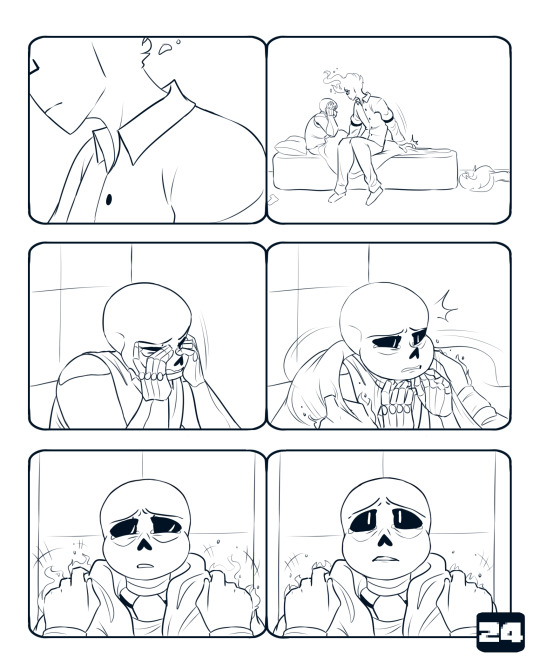
The lineart takes the longest, hands down. It’s the clean up, final changes/additions, and just making everything look all nice for the rest of the piece. This is where I spend like 5 minutes comparing facial expressions to see which one I like better, drawing another one, and then choosing the first one I drew.
3. The Background ~ 30 minutes
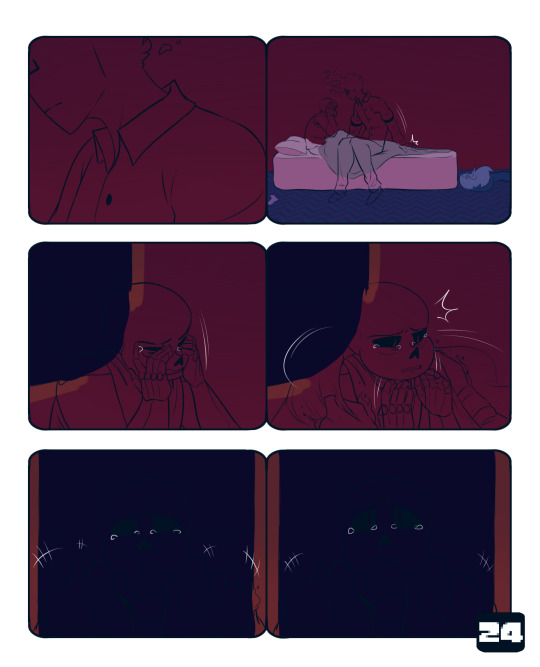
The coloring is so much faster than the lineart. I will usually go slower here on purpose because I enjoy it, and it’s a relaxing break from the lineart. I just color right underneath the lineart, I don’t worry about anything looking messy under the character linearts because I know they’ll just be covered up. Typically, if I start the lineart in the afternoon, I’ll get to this point and stop for the evening.
4. Flat Colors ~ 5 Minutes
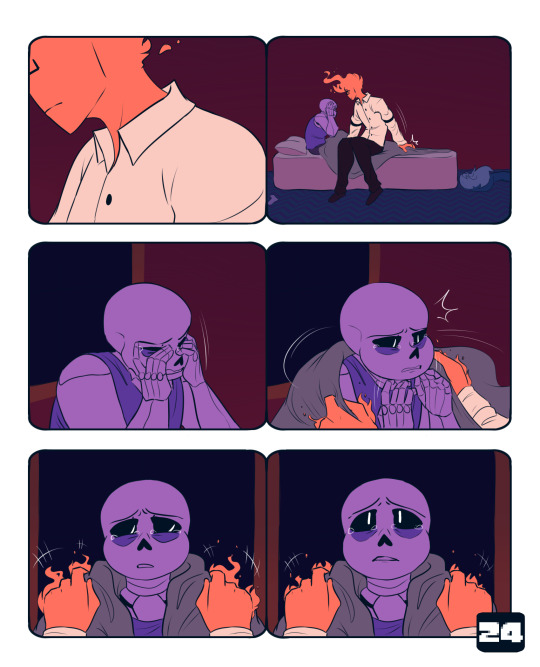
This goes relatively fast as well. I take my time for the most part. It’s just tedious to select the lineart. I kind of color them differently. Sans gets his darkest colors first, and then I add light layers on top. With Grillby, I put on the lightest color for his shirt and the middle color for his flames (I use 3-4 colors for them). Doing that kinda helps me establish that Grillby is a light source and Sans is not.The color schemes are almost direct complements, and I do eventually add yellow to Grillby’s flames. It makes them contrast with each other, and is generally satisfying to look at imo. It also makes Sans’ colors somewhat analygous to his surroundings, because of the deep blues and reds. The purple does stand out, but not nearly as much as the bright orange.
5. Finishing Grillby ~ 45 Minutes - 1 Hour

I have a general routine for adding Grillby’s details, which is why it goes quick. ((There will be a separate post on that process later)) It only takes that long because I have to do it for multiple panels per page. I’m sure this page was even shorter because it mostly featured incomplete shots of him. To finish his flames, I use an airbrush to add the reds, then I do the same with the yellows. I take the brightest yellow on the palette and use that for his freckles, eyes, and mouth ((if it’s open)). The last thing I do is color his lineart a dark red. His eyes are lined with a darker red to compensate for the glow I put over them, which makes the lines look faint and hard to see. For his shirt, I shade it with the lighter pink color, and then airbrush the darker pink on the areas that are further away from his flames.
6. Finishing Sans ~ 1 hour

Sans definitely has a more drastic change than Grillby. Almost none of the original purple survives the overlay layers. I have two or three light layers on top of the flat colors. I use one of the colors that is from grillby’s color palette, it’s a slightly altered version of his flat orange. First I do hard lights, that don’t have their edges blurred. The top of his skull and those half circle shapes under his eye sockets are some of the most noticeable examples. Then I go over that layer with another overlay, but this time with an airbrush. I put it in the same areas, but it makes everything look softer. There’s one more overlay, which uses the dark purple of Sans’ shirt. It helps me to not make everything too light. On top of all three of those is a a Luminosity + Shade layer in the orange color to make the brightest spots pop.
7. Finishing Background Details ~ 15-20 Minutes

This is basically doing the same thing I did to Sans on the background. I use the same orange from Grillby’s color scheme and add light where it needs to go. I can be more lenient on details because it’s not the main focus of the page.
8. Adding the Glow ~ 5-10 Minutes
This is just me taking the orange light color and airbrushing it just above the background on a Lum + Shade layer. This goes under the layers that Sans and Grillby are lined and colored on. The next layer is the same as the last and goes over both figures. It acts as a final highlight to the lightest points of the two. Usually it’s the top of Sans’ skull, the tips of Grillby’s fingers, and the area around his mouth. Then I airbrush Sans and Grillby’s eyes in blue and orange respectively on a Lum + Shade Layer.
9. Text and Final Details ~ 20 - 30 Minutes

This is where I figure out where I want to place the dialogue, and add in anything I might have missed. In this case, I forgot to fully draw and shade Sans’ tears at the beginning. I slap my signature on and boom! All done!
I hope this was helpful! And sorry it’s super long 0v0;; If you need clarification on anything, feel free to ask!
333 notes
·
View notes