#How to screenshot on a macbook pro retina
Explore tagged Tumblr posts
Visit Tumblr Blog
Explore Tumblr blogs with no restrictions, modern design and the best experience.
Last Seen Tumblr Blogs


Fun Fact
69% of Tumblr users are millennials.
Text
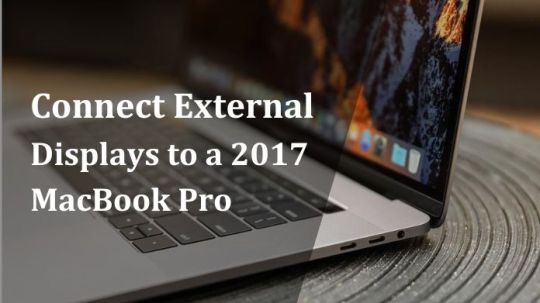
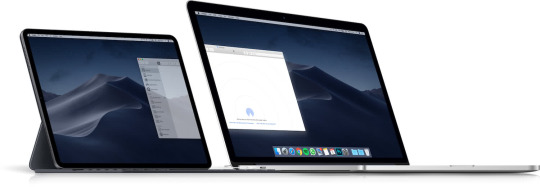
Easily Connect External Displays to a 2017 MacBook Pro
The 2017 MacBook Pro is a powerful and versatile laptop with many features and capabilities.
However, the Mac has many features, and it is important to learn it. Suppose you want to learn the basic features of Mac, like how to screenshot on Mac, how to use Mac, etc.
Then, must visit the mentioned blogging site. Here, you get all the information related to this term.
Although the 2017 MacBook Pro is a potent and adaptable laptop, adding an external display is a wonderful alternative to increase your workspace or view material on a bigger screen.
This thorough instruction will take you through every step of the process, whether you need to extend your desktop for more screen space or mirror your MacBook's screen for a presentation.
Overview of the 2017 MacBook Pro
Apple created the potent and adaptable 2017 MacBook Pro laptop. It rapidly became a favorite among professionals and creative people thanks to its svelte appearance, outstanding performance, and high-resolution Retina display.
However, the MacBook Pro's ability to connect to additional displays makes it one of its prominent features.
It enables users to enlarge their workspace, mirror their screen, or view content on a bigger screen.
This complete guide will explain the benefits of attaching extra displays to your 2017 MacBook Pro and walk you through the process step-by-step.
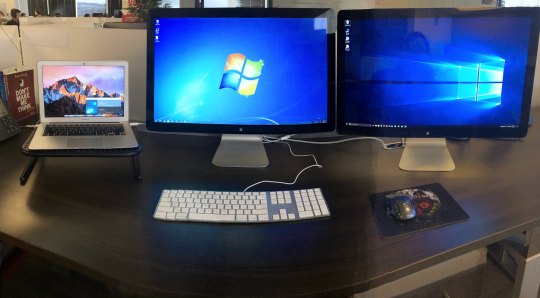
Need to Connect External Displays to a 2017 MacBook Pro
You should connect an extra display to your 2017 MacBook Pro for several reasons.
Productivity Gains: Attaching an external display can considerably boost your productivity.
Having numerous apps and windows active at once makes multitasking simple.
Enhanced Graphics and Video Editing: An external display with excellent resolution and color accuracy can offer a more precise and immersive workspace whether you're a creative professional working with graphics, video editing, or 3D modeling.
Gaming and Entertainment: When playing games on an external monitor, gamers can use a bigger screen and greater graphics performance.
You can watch movies, stream content, or share presentations on a bigger screen for entertainment, which enhances the viewing experience.
Collaboration and Presentations: An external monitor can be quite helpful for sharing your work with others in a conference room or during a meeting when working in teams or presenting presentations.
Extended Desktop: You may extend your desktop with an external display, giving you more screen space for different tasks.
This is especially helpful when handling numerous papers or complex data.
Now that we know how crucial connecting an external monitor to a 2017 MacBook Pro is, let's dig into the detailed instructions.
Requirements for Connecting an External Display to a 2017 MacBook
Ensure you have the following before connecting your 2017 MacBook Pro to an external monitor.
Compatible Display
Make sure you have an appropriate external display.
You'll need a monitor that supports Thunderbolt 3 (USB-C) because the 2017 MacBook Pro has these connectors.
To ensure compatibility, check the specifications of your display.
Correct Cable or Adapter
A suitable cable or adapter will probably be required to connect your MacBook to the external display.
You may require a USB-C to HDMI adaptor or a USB-C to DisplayPort cable, depending on the connection type of your display (HDMI, DisplayPort, VGA, etc.).
Latest macOS Updates
Make sure the most recent macOS version is installed on your MacBook Pro.
Maintaining your system's compatibility is essential, and Apple frequently provides updates that do so.
Steps to Connect External Displays to a 2017 MacBook Pro
When you have everything you require, connect your external display to your 2017 MacBook Pro by following these instructions.
Step 1: Power Off Your MacBook Pro
To prevent potential problems or damage, turn off your MacBook Pro before connecting any cables.
Step 2: Connect the Cable or Adapter
Connect the cable or adapter's one end to the MacBook Pro's Thunderbolt 3 (USB-C) port and the other to your external monitor.
Verify the security of the connection.
Step 3: Power On Your External Display
Check the input source on your external display before turning it on. Use the display's buttons or remote to change to the proper input if necessary.
Step 4: MacBook Pro Setup
Your MacBook Pro should instantly detect the external display once it is turned on and attached.
Alternatively, select "System Preferences" > "Displays." The display's arrangement, resolution, and mirroring settings can change here.
Step 5: Configure Display Settings
Mirror Displays: Select "Mirror Displays" to mirror your MacBook Pro's screen on an external monitor.
This is useful if you want the same content on two screens or for presentations.
Extend Displays: Uncheck "Mirror Displays" to spread your desktop across both displays. You have greater room to multitask as a result.
Step 6: Adjust Resolution and Arrangement
You can modify the resolution and configuration of your displays in the "Displays" settings to suit your tastes.
To arrange the displays on your desk as they are set up, drag & drop them there.
Step 7: Enjoy Your Dual Monitor Setup
Your external monitor is currently set up and connected.
Whether you want to use a larger screen for work, enjoyment, or productivity, you can profit from them.
Troubleshooting Tips
Consider these troubleshooting suggestions if you encounter difficulties throughout the setup procedure.
Check Cable Connections: Make sure all wires are firmly connected by checking the connections.
Restart your MacBook: Restarting your computer might sometimes solve connectivity problems.
Try Another Cable or Adapter: Make sure your macOS and graphics drivers are up to date by updating them. If the display is still not functioning, try using a new cable or adapter.
Check Monitor Compatibility: Make sure your external display is compatible with your MacBook Pro by checking the monitor compatibility.
Conclusion
Your computing experience can be greatly improved by adding an extra monitor to your 2017 MacBook Pro, giving you more screen space for work and entertainment.
You can set up and use a dual monitor setup without any problems if you follow the instructions in this article and consider the troubleshooting advice.
Connecting an external monitor is a useful and simple operation, whether you're a professional looking to increase productivity or just want a bigger screen for viewing movies.
1 note
·
View note
Text
How to screenshot on a macbook pro retina

How to screenshot on a macbook pro retina how to#
How to screenshot on a macbook pro retina pro#
How to screenshot on a macbook pro retina tv#
How to screenshot on a macbook pro retina windows#
One day with the retina screen convinced me that the critics are wrong. Like Ian Malcom castigating John Hammond for his hasty decision to bring dinosaurs back from the dead, these critics insist that just because Apple can make such a screen, doesn’t mean that they should. I’ve read several articles lately from creatives who are actually quite angry with Apple for pushing the industry down such a troublesome path. And since these screenshots are saved automatically on a desktop, the desktop will clutter up if you take one too many screenshots.“As we see high density screens get larger and larger I start to question, why? Just because we can?” – John Carey Then i went to resolution settings and slided it all the way right, to the highest offered by the system. Move the crosshair to wherever you require beginning the screenshot, next drag to make that selection. Here's a primer on capturing screenshots on a macbook pro.
How to screenshot on a macbook pro retina pro#
Tested the truth behind the macbook pro s terrible battery life. You should find the screenshot of the window on your desktop. How to screenshot on macbook pro.Īsked dec 15 '18 at 10:43. Press and hold the command + r keys on your keyboard immediately after hearing the startup sound. But if you use a macbook pro you can change the default location of the screenshots. Screenshot from retina display macbook pro shows 5.1 million pixels of dashboard. Power on your macbook pro and listen for the startup sound. Take a screenshot of the touch bar on a macbook pro.
How to screenshot on a macbook pro retina how to#
Tutorial how to take a screenshot on a macbook pro 2012. You will be prompted to choose an internet connection type. Taking a screenshot on a macbook is a great feature which people use a lot. Mulai dari membuat lelucon visual yang cerdas hingga melaporkan masalah untuk mendapatkan dukungan teknis, mengambil screenshot adalah trik yang berguna untuk mengenali komputer anda. Open the window you would like to capture. My macbook pro mid 2012 screen is flickering occasionally. To cancel taking the screenshot, press the esc (escape) key. Continue to press the mouse button, release the keys, and then press shift, option, or the space bar while you drag to resize the selection area. The nvidia chipsets in general are furnaces. To capture a screenshot directly to the clipboard instead of an image file, add ctrl to any of the shortcuts listed above. My macbook pro's screen started freaking out lately when i carried it from one place to another. Here is a picture of the computer when it freaks out.īest hdd for macbook pro 2012.you can also drag the thumbnail to a folder or document. Any idea why it is happening, also any workarounds to eliminate it. In macos mojave or later, you can change the default location of saved screenshots from the options menu in the screenshot app. No other resolution apps, just the standard os x setting. Or wait for the screenshot to be saved to your desktop. A couple times the computer started beeping 3 times with 5 second interval, which os diagnosis as a ram problem.
How to screenshot on a macbook pro retina windows#
Wait till you hear the shutter sound.īoot camp taking screenshots in windows with apple keyboard. Check your display screen for screenshot result. While dragging, you can press shift, option, or spacebar to adjust the direction the selection moves.Ĭara mengambil screenshot pada macbook. How to take a screenshot of a single window on a macbook pro screen on a timer in that example, the shot only takes place when you click, and in all the others, it happens immediately. If you see a thumbnail in the corner of your screen, click it to edit the screenshot. Click on the window you want to capture Screenshot the selected area in mac.
How to screenshot on a macbook pro retina tv#
My Apple TV (eBook) in 2019 Apple tv, Tvs, Apple I have a mid 2012 macbook pro retina. To exclude the window's shadow from the screenshot, press and hold the option key while you click.
0 notes
Text
Screen Capture On Mac Not Working

Screen Capture On Mac Not Working
Screen Capture On Mac Not Working Windows 7
Screenshots On Mac Not Working
I have your same issue, I was trying to record my mangastudio session and even with 5 minutes of recording it stucks with the rainbow wheel, and upon forced exit and re-opening quicktime shows a clip of maximum 1 minute and few seconds. With other software it doesn't even save that, you can just force exit.
I'm working on a cintiq 22HD, so I don't know if that may be the issue frankly, I tried with dual standalone monitor or simply duplicating and same result.
I am running the latest version of Mojave and my Screenshot app just started not working. I tried restarting my macbook, resetting NVRAM, I checked screenshot shortcuts and dropbox settings. The problem is when I double click or try to open the Screenshot app, nothing happens. The screenshot key combos do not work either. You have three choices, each with different results. It captures a screenshot of your entire screen. It turns the cursor into a cross hair, which you can then drag to select a portion of your screen to capture. Stop Background Programs. Many background programs such as OneDrive, Snippet tool or Dropbox. Skitch was working so far without any issues. I recently updated the OS and its now macOS Catalina (mac airbook 2017 model). When i tried to take a screenshot, only the underlying desktop/wallpaper image was captured. Skitch version - 2.8.4 I even uninstalled and reinstalled the app. I still could not capture what i wanted.
MacBook Pro (Retina, mid 2012)
2,6 GHz Intel Core i7
16 GB 1600 MHz DDR3
NVIDIA GeForce GT 650M 1024 MB
Dec 2, 2014 5:37 PM
QuickTime Player is a built-in app on Mac, which allows users to play, record, edit and share audio and video files on your Mac. Lots of iOS users will choose to record screen with QuickTime Player by themselves, but sometimes, QuickTime screen recording is not working on Mac. Then, you may be not able to record iPhone, iPad or Mac screen with QuickTime because of different errors.
Screen Capture On Mac Not Working
So, this post is going to guide you solve these QuickTime screen recording not working errors and show you how to use QuickTime to record screen on Mac step by step. Please go through these errors and solutions one by one, and solve your QuickTime issues quickly.
How to Fix QuickTime Screen Recording Errors?
If you're used to use QuickTime Player to record a movie, audio or iOS screen, then you might have encountered various errors, right? Here, we have picked up the top 4 errors and listed as follows:
#1. QuckTime Player Quit Unexpectedly
Sometimes you may receive a pop-up window suddenly while you're recording screen with QuickTime Player and inform you that the app quite unexpectedly. This is mainly because of the disk is lack of storage space. So, checking your Mac's disk and make sure it has enough storage space. If you have checked and it has enough space, you can try to repair the disk permission as below:
Go to 'Disk Utility > Select Drive > Repair > Repair Disk Permission'
#2. Your iPhone or iPad Cannot Be Recognized
Generally speaking, when your iPhone or iPad is connected to Mac, QuickTime Player will detect and recognize your device automatically. However, sometimes you may found that your connected iPhone, iPad does not show up in QuickTime. Then what wrong with it?
When you meet a situation like the above, you can try to solve the problem as follows:
- Check the USB cable or change another USB cable. If you're using a 30-pin to USB cable, you can try to use the lighting cable to connect your iDevice to Mac.
- Quit applications like Micro Snitch or other similar apps.
- Update your Mac OS to the latest one.
#3. QuickTime Screen Recording is Stuck on Finishing Process
Let's suppose that you have recorded a movie or a game video on iPhone, and then click on stop recording, you think that you have created an excellent video but QuickTime is stuck at 'Finshing Recording' process bar and here is no end. Annoying, right?
When you meet this situation, you can try the below steps to close QuickTime Player:
- Launch Terminal on Mac, and type the command 'top -u', then press 'Enter'.
- Find the PID (process ID) of your QuickTime Player. Then note the ID.
- Type in 'sudo kill (PID)', then press 'Enter' to quit QuickTime Player on Mac.
After that, you can find back the screen video from here:
'$HOME/Library/Containers/com.apple.QuickTimePlayerX/Data/Library/Autosave Information/Unsaved QuickTime Player Document.qtpxcomposition/Screen Recording.mov'
The mov file is not a regular QuickTime video file, but a container. So, if you wish to open this container file, you need to use 'Finder' to locate the file and control click on the file to open it.
#4. QuickTime Screen Recording Freezes
Sometimes, QuickTime may freezes suddenly, and you can't do anything but only waiting while you're taking a video with QuickTime Player. Actually, this is probably happen because of low RAM on your Mac. And here is no practical actions you can do about it, but maybe a Mac OS system update can make the situation better.
How to Use QuickTime Player to Record Screen on Mac?
You know that, QuickTime Player can record a movie from your camera, or record the screen of iPhone, iPad or iPod touch. And you can also use it to record audio from a microphone as you like. In order to help you record screen on Mac successfully, we have summarized the steps as follows. You can follow it to use QuickTime Player to record screen on Mac as you like.
If you want to use QuickTime Player to record iPhone, iPad or iPod touch screen, you can read another page - how to capture iPhone screen with QuickTime Player.
Step 1. Download and install QuickTime Player on your Mac and ensure it is the latest version. Then, launch it.
Step 2. Directly choose 'File > New Movie Recording', then begin to chagne the recording settings.
- Click the arrow next to the Record button, then choose the camera, microphone and recording quality as you like.
- If you want to record the audio, you need to select a microphone before recording.
Step 3. Click on the Record button to begin the process, and when your video is recorded, you can click on Stop Recording to end your session.
Screen Capture On Mac Not Working Windows 7
Write in the End
Screenshots On Mac Not Working
Do you know how to solve the QuickTime Player not working on Mac problems? If you have any other errors or solutions, please leave your comment and discuss with us in the below area. And if you don't like to use the QuickTime Player to record screen, you also can find some alternatives to QuickTime Player as you like.
Related Articles:
1 note
·
View note
Text
Gta 5 the professional


Low resolutions make the game look really blurry and thus it��s not recommended. Change resolution only as the last resort. If you want to really lower it then 1280*720 is the lowest you should go. So I recommend using the same resolution as your Monitor for the Best Gaming Experience. You can play for longer durations and also it’s less straining to your eyes. Using a high resolution for gaming is good for your eyes. Resolution: Same as your Monitor Resolution If later GTA starts support for DirectX 12 switch to it. Unless your graphic card is older than 5 years I recommend using Directx 11. Go with the highest version of DirectX 11 your graphics card supports. You can use enable this option only if you have a high-end system. This option if enabled tends to cause heating issues in some systems and laptops. I recommend you keep this setting off especially if you are using a laptop or a low-end system. Graphics settings: Ignore suggested Limits: off So without further ado lets begin: Best Graphics settings for GTA V: If you have bought the game from steam then you can also use the steam launch settings for GTA V. You can edit the graphics, advanced graphics, and Display Settings in GTA V. Must read: How to get GTA V free on epic games High Detail streaming while flying: off.These are meant for high-end systems only. For low-end systems simply disable all the advanced settings.Refresh rate: Same as monitor refresh rate.Resolution: Same as your Monitor Resolution.If there is anything you want to know, just ask - although I've only done the first couple missions so far.Īlso, sorry for the bad gameplay, I'm not used to playing with WASD and a trackpad while trying to keep the camera steady.Įdit: Title should read 'How GTA 5 runs on Retina Macbook Pro', or something like that.Įdit2: Updated video with different graphics settings and FRAPS. For those of you who are on the fence about this game and have a similar spec Macbook, I hope the video is informative for you and sets your expectations. So far, It is running better than expected, looks good enough and performs well enough as you can see. I have not messed around with the graphics settings to see how much I can push the graphics while still having it perform well enough. The game is running at 1400 x 900 on a Windows 7 Bootcamp partition from an external USB 3 HDD. There is no sound as I was wearing headphones (kids are asleep!).Įverything is on the default 'medium' setting (the lowest) apart from textures which are on 'high'. The video should be 1080p 60fps as I recorded on my iPhone. 2.6GHz Intel Core i5 / 8GB Ram / Intel Iris 5100 1536MB GFX.I am currently playing GTA 5 on my Retina Macbook Pro What does the update to macOS Catalina mean for games?Ī short selection of great, free-to-play games that are available on MacĪdditional resources: News, stores and platforms, deals, related subreddits, forumsĮverything you need to know about Apple Arcade Approved posters can arrange for more daily posts by contacting the moderators. It is also required to properly format posts. When self-promoting content, please provide as much meaningful information as possible, such as a detailed description, trailers, or screenshots. Read the FAQ, and refer users to it if applicable. The simplest is About This Mac, available by choosing About This Mac from the Apple menu in the upper-left corner of your screen. Your Mac provides several tools to help you identify it. If you are asking for advice on games or your system, post the specs of your Mac such as model name, CPU, and GPU. Before asking for help, or installing a game, please visit r/macgaming/wiki/catalina, and check both the compatibility test chart provided by our community and the list of unsupported 32-bit Mac games by Mac Gamer HQ. Please make use of the search and read the FAQ before asking questions, many have been answered already and it will save you time!Ĭan my Mac run it? The MacGameStore App, or Mac Gamer HQ's extensive list of performance results and benchmarks are good ways to check if your Mac will run a certain game.Ĭan macOS Catalina run it? Games that are 32-bit only will no longer run on macOS Catalina. The home for gaming on Mac machines! Here you will find resources, information, and a great community of gamers.
0 notes
Text
Macbook air ssd upgrade crucial ssd

#Macbook air ssd upgrade crucial ssd how to
#Macbook air ssd upgrade crucial ssd mac os
#Macbook air ssd upgrade crucial ssd install
#Macbook air ssd upgrade crucial ssd upgrade
Apple Expert: These folks have received the highest level of training Apple has to offer, whether as an Apple Genius, an independent contractor, or an authorized service professional.Apple Certified: Current or former Apple employees who have a certain level of certifications are given this title.Apple Trained: Current or former Apple employees who do not possess a higher level of certification.It is granted solely at the moderator's discretion.) Which SSD’s would you recommend I looked up on Samsung Evo 980 but a lot of people say it’s an overkill and I don’t. Apple Helper: These fine individuals are hand-picked by the moderators as a badge of their expertise, despite not having any formal Apple training.We have four flairs to offer! PM the Mods with a GCX screenshot (or other proof), and we'll add flair proudly proclaiming your expertise! No rank is an indication that the person is always, or even mostly, correct. However, if a response is rude, irrelevant, or harmful, please report it. Do upvote interesting questions and helpful answers.ĭownvoting questions you feel are annoying or repetitive is counterproductive. PCIe NVMe Gen3x4 SSD 1TB 512GB 256GB 128GB 3D TLC NAND Flash Hard Drive SSD Replacement for MacBook Air 2013-2017, MacBook Pro Retina 2013-2015, iMac 2013-2017, Mac Pro 2013, Mac Mini 2014 (1TB) 4.5 out of 5 stars. All comments should have some relation to their parent.Ĩ. Top-level comments should contain an answer to the question(s) in the post. Answers must be within the bounds of Apple’s EULA.įor a list of subjects inappropriate for /r/AppleHelp, see Guideline 2 above. People come here for help, so please don't shove them right back out the door. Rudeness will not be tolerated! Suggesting someone "Google it" is a good example of this. Fixing problems over the internet is incredibly difficult! Guidelines for Readers We're here to help, and this is the easiest way for us to do that. If posting the same question in multiple places, include links to the other threads.If posting a log or crash report, upload it to Gist.Photos or screenshots of the issue Mac or iOS device.Your model of Mac, iPhone, iPad, iPod, etcetera.Please make sure to include the following: Bypassing an Activation Lock or firmware password.Ĭertain information may be crucial for solving issues.If you are running a beta or developer preview, head over to /r/AppleHelp_Betas. Developer Previews and AppleSeed Betas.Questions must be within the bounds of Apple’s EULA.Ĭertain subjects are not appropriate for /r/AppleHelp, including: Readers attempting to help you deserve thank-you's and upvotes! Also, after finding a solution, please make sure to mark your post using the "edit solved status" (or "flair") button.Ģ. Install your old hard drive in your usb enclosure and use it as a back up drive.Check our /r/AppleHelp FAQ and basic troubleshooting guide before posting. restart your macbook and you should have a startup time of 14 sec. If you find that your boot time in your new ssd is too slow - go to system preferences - startup disk and select your ssd as your startup drive.
#Macbook air ssd upgrade crucial ssd install
Once the clone is done - install your ssd in your macbook - turn it on and your back in business. Source drive (your old hard drive) destination drive (your new ssd drive)Ĭlick on clone - you might get a pop up message saying that a recovery partition wasn't created - create one using carbon copy and proceed with the clone.
#Macbook air ssd upgrade crucial ssd mac os
Open disk utility - format/erase your ssd to mac os extended journaledĬlose disk utility and open carbon copy and proceed to clone your drive. Install your ssd in your external enclosure.
#Macbook air ssd upgrade crucial ssd upgrade
Second - download carbon copy - free to download.Īssuming you've installed and downloaded carbon copy and have a usb external enclosure. If youre not able to shell out 1000 or more for a new machine, you can squeeze out a few more years with a storage upgrade for some older MacBook Air or MacBook Pro models.
#Macbook air ssd upgrade crucial ssd how to
When you decide to go SSD.Here are the step by step on how to do a data transfer.įirst - make sure you have a usb external enclosure or a usb data cable.
0 notes
Text
Video Player For Mac 10.6.8

Video Player For Mac 10.6.88

And to eject that disc, you need to go to Start = Computer. In the computer window where the drives are listed, please locate the drive with the CD or Disc icon which indicates it is the optical drive. It could be D, E or F depending on your configuration and actual disk drives. How to open cd drive on a dell laptop. Emergency CD drive opening Step. Straighten the paper clip. Find a small pinhole on the computer CD-ROM panel located near the 'Eject' button. Insert the straight piece of the paper clip in the hole. Keep gently pressing the paper clip until the CD-ROM tray pops open. Then take out the paper. If you can't find the button, you can open the Computer window (assuming you are running windows) and right click on the optical drive and select eject. You could also stick a paper clip into the hole in the front of the drive to eject it. (I guess if you can't find the button you wouldn't be able to see the tiny hole in the front of the drive.
Download the latest version of VLC Media Player for Mac - Popular multimedia player. Free Mac video player I have used. OS X 10.6 or later aber mit 10.6.8.
Skyrim special edition or skyrim with mods. Welcome to a very special edition of my Skyrim Mods Series! Today, we are checking out a mod called 'Skyrim Together'! This mod will bring online functionality to skyrim! Thanks to the guys over. The best mods for Skyrim Special Edition. Since the last time we updated our list of the best Skyrim Special Edition mods the Skyrim Script Extender has been made compatible with it. The first Nexus Mods Screenshot Community Event is here! Submit your screenshots of Skyrim, Skyrim Special Edition, Enderal, Fallout 4, or Fallout 76 illustrating the event theme and seize your chance to win one of three £25 Steam Gift Cards ($33 depending on exchange rates). As we announced earlier this week. List of all Skyrim: Special Edition non adult oriented mods available.
Free Mac Os X 10.6
Well, I’ve listed and tested a bunch of Mac video players and screened out the top 10 best free video player for Mac with the above reference in mind. Top 10 Best Video Player for Mac 2020 Video player software isn’t rare, but top free video player for Mac users is not easy to come. Download gom player for mac os x 10.6.8 for free. Audio & Video tools downloads - GOM PLAYER by jp.sourceforge.mikuinstaller.NegiHelper and many more programs are available for instant and free download. MPlayerX is an alternative media player powered by ffmpeg and mplayer. MPlayer OS X ran OK, but it was slow. And also, the new technologies from Apple prevailed-such as Core Animation, Grand-Central Dispatch, even OpenCL-and pushed me to give them a try.
VLC will be a free and open up supply cross-platform multimedia system player and framework that performs almost all multimedia documents as well as Dvd disks, Audio CDs, VCDs, and different streaming methods. VLC is certainly an open source product developed by VideoLAN Task licensed undér GNU GPL v2. VLC for Home windows 8 app for Mac pc OS X in the. VIc media player Mac pc. Vlc media player home windows 8 gratuit.I think that VLC Mass media Player is so far the greatest video and tone of voice participants I've ever utilized.its a excellent app for video clip we can view with higher quality video clip without flow.VLC media player needs Mac Operating-system Back button 10.6 or afterwards. It operates on any 64bit Intel-based Macintosh.
VLC Media Player For Mac Free Download 32/64-bit for Windows 10, Windows 7, Windows 8. The latest version released of VLC for Mac requires the OS X 10.6. Download Old Version of VLC Player for Mac for Mac OS X 10.6 (Snow Leopard) (Intel).
Previous gadgets are backed by old releases. Note that the very first era of Intel-based Apple computers equipped with Primary Single or Core Duo processors is certainly no longer supported. Please use edition 2.0.10 connected beneath.How can I install the VLC média player on Operating-system X Mavericks.How can I install VLC media pIayer on my Macbóok Atmosphere with Operating-system X Mavericks?Macbook pró, iMac, macbook atmosphere, macbook, macbook retina screen, macbook retina screen 2, mac pro, iMac retina 5k screen, mac mini,apple laptop computer. IMac 27 in ., iMac 21 inch, Macbook 15 inch, Macbook 13 inch.
Video Player For Mac 10.6.88
Yosemite Operating-system X, yosemite osx 10.10.3. My Internet site - My Blog page - My Facebook Web page - Google+ - Twitter - Pinterest - Text Situation Converter - Epoch Timéstamp Converter - Decimal - Bináry - Hexadecimal Converter - 8-little bit Checksum Loan calculator.
0 notes
Text
Android Studio 1.5 Download For Mac

Google offers this official Android app development kit for free, it includes a series of drivers, tools and different resources needed to develop apps for the Android mobile operating system, or to run certain desktop apps. Even though this SDK can also be obtained in the Developer Tools pack, where the IDE Eclipse is also included, it can also be downloaded independently. Android SDK includes several tools to help you take your first steps programing for this platform, including API's brought to you by Google, both for control of the device's features and for integration of all services, apart from a debugger, an emulator for you to test the apps on your PC, and a huge amount of information for you to use when learning to program on Android using Java. Android is a Linux-based kernel operating system that uses a virtual machine to run the apps, and offers support for all the usual features on modern devices, such as 3G, Wi-Fi, GPS, touch screens, among others which are all now commonplace on any smartphone or tablet.
The Android Studio download page auto-detected that I'm running a 64-bit Windows operating system and selected android-studio-ide-1-windows.exe (927 MB) for me to download. How to install Java JDK on Mac OS X ( with JAVAHOME ) - In this video we will see How to Install Android Studio on MacoS.
Android Studio 1.5 (AI-1) for Mac is crashing randomly quite often. I'm using a Macbook Pro 15' Retina (mid 2105) and Mac OS X 10.11.1 It's really annoying.
Whether you use Mac®, Windows®, or iOS®, we have an interface that fits your application and budget. Mixing Systems Finder PreSonus StudioLive® Series III, StudioLive AR, and StudioLive Classic digital mixers provide complete, easy-to-use solutions for live and studio applications.
How to install Java JDK on Mac OS X ( with JAVAHOME ) - In this video we will see How to Install Android Studio on MacoS.
Java macbook pro download. The purpose of this section is to guide you to install in your development environment all the dependencies for Android development.
The fastest way is to download and install Android Studio.
Latest current version for Android Studio is available at: https://developer.android.com/studio/index.html
Select the Installer Icon:
Download Android Studio 4
To install Android Studio on your Mac, proceed as follows:
Launch the Android Studio DMG file.
Drag and drop Android Studio into the Applications folder, then launch Android Studio.
Select whether you want to import previous Android Studio settings, then click OK.
The Android Studio Setup Wizard guides you though the rest of the setup, which includes downloading Android SDK components that are required for development.
Click the Next button.
Select a Standard installation and click Next.
On the Verify Settings window, click Finish.
Once installed, you get the Welcome to Android Studio window :
Click on the Configure Button and select SDK Manager:


In the left pane select Android SDK. On the right pane, select the SDK Platforms Tab and select the SDKs for API level 22 up to 24.
Android Studio 1.4 Download
Click the OK button to download and install these Android SDKs.
After accepting the licence you should see the following screen:
Wait until all components are installed.
Setup the ANDROID_HOME system variable
Open the SDK Manager and make a copy of the Android SDK Location :
Open the Terminal app and type the following command:
To check the ANDROID_HOME is correctly setup type the following commands:
You should see the following result:
Persist the ANDROID_HOME system variable for the current user
The ANDROID_HOME system variable must be persisted when you leave and resstart a new Terminal Window.
One way to do this is to create or update a .profile file in the user's home directory. This file should contain all the commands that should be executed before the Terminal Window session starts.
Macbook pro openvpn connect download. Open the Terminal app and type the following commands:
Android 5.1.1 Os Free Download
In the Text Editor, add the following line
Why won't my iphone photos download to my macbook pro 2020. You should have a screen similar to the following screenshot:
To save the .profile file, type CTRL + X, then type Y followed by the ENTER key.
Once done, quit the Terminal window, reopen a new one and type the following command to check if the system variable has been persisted:
You should have a non empty response.
Android Studio 1.5 Download For Mac Os
References
0 notes
Text
Free Hd Player For Mac

8-in-1 Mac Blu-ray/DVD/H.265… Media Player Software
With invincible Blu-ray playback, this top Blu-ray player for Mac inherits high quality multimedia cinema-style playback design. And beyond a multi-functional video app, it gives you an impressive immersive Ultra-HD viewing experience. No matter what you're expecting to have— stunning crystal-clear pictures, delicate dolby digital sound, or 'ONE-KEY' to create GIF for sharing — 8K Player for Mac will change how you experience movies and videos.
8K Player for Mac (Blu-ray Power version) supports to play all kinds of multimedia file formats including every Blu-ray disc released in different region, DVD disc and digital video from high definition to 4K/1080p/1080i/720p on your iMac (Retina), Mac Mini, Macbook Air, Macbook Pro, Macbook, Mac Pro, etc. It is your one-stop solution for all types of audio, video and Blu-ray/DVD contents on Mac.
8K Player for Mac
Delicate, crystal 4K Ultra-HD and HEVC/H.265 video playback on Mac. Universal media player for Mac to play all your media including Blu-ray, 3D, MKV, MP4 and more. Double click ISO and directly play ISO files from Blu-ray and DVD, NO extra installation tool needed. NEW Seamlessly play high frame movies, more fluency than other Mac media players. NEW Breakout to play any movie and video even the general video players can't, 'ONE-KEY' to make GIF. NEW Automatically loop to play any video you love by single or section so as to keep it playing in repeat. NEW Visual screenshot to capture every moment you love in the video. Accurate screen recording to create professional-like video tutorials and screencasts. Add bookmarks to a video and make yesterday on-the-go activities vivid once more. NEW
For Mac OS X 10.7, 10.8 (32- and 64-bit), 10.9, and 10.10.2. Available in English, German, French, Spanish, Japanese and Simplified Chinese. Ask your help desk for set-up instructions. New features in this release. Support for Mac OS X 10.10; Native Full-Screen and Spaces Support. Enables use of multiple monitors without the need to disable. Xencenter-for-mac/ free download. Tor Browser Tor Browser enables you to use Tor on Windows, Mac OS X, or Linux without needing to install any sof. XenServer does not support Apple Mac OS X as a guest operating system. Additional Resources. For more information, refer the supported list on the vm on XenServer Citrix XenServer ® 6.5 Service Pack 1 Virtual Machine User's Guide. Was this page helpful? Sorry to hear that. Xencenter for mac os recovery tool.
Utmost simplified movie time
but perfect 1080P/4K/5K/8K Ultra HD playback
The uprising 4K UHD technology is reforming our viewing experience gradually, and with four times as many pixels as 1920*1080p, how to high-quality smoothly play Blu-ray disc/4K/5K/8K UHD videos successfully has become more and more crucial, instead of taking a Samsung/Sony/Oppo 4K Blu-ray player to connect to your Mac. To breakout those high playback industrial standards, 8K Player for Mac is designed to instinctively enhances the quality of video, and bring you high-definition of clear and natural visual experiences without stutter or lags, from every refined pixels and sharp subtitles, every niche motion whatever they are still or moving.
Infinite formats and codecs support
Supporting the latest in video formats and codecs, as well as offering unparalleled audio format support, 8K Player for Mac make you virtually enjoy any media with this all-around player no matter what format it is, like Blu-ray disc, Blu-ray ISO file, BDMV, DVD, H.265/264, MOV, MKV, AVI, FLV, WMV, MP4, FLAC, AAC, AC3, MP3, OGG, WAV, WMA, etc. on Mac (OS Mojave/High Sierra). Compatible with Dolby Digital and DTS 5.1/7.1 channel audio with perfect audio effect. No need extra conversion app, it provides 'one-stop' media playing service to free you from any complicated astronomical parameters settings.
StatisticS reads all data files from Microsoft Excel or others and produces by one click graphic descriptions (bars or pies), graphic comparisons with. Mac OS Classic/X 10.0/X 10.1/X 10.2/X 10. This chapter looks at Mac OS X 10.11 El Capitan. The chapter begins at the top level or root directory, and it works down the file system. This chapter highlight areas of forensic interest. StatisticS is available for all Windows and Mac OS, in English, French or Spanish language. Version 4.0 may include unspecified updates, enhancements, or bug fixes. Best VPN Services for 2020. Statistica for mac os.
Easy to switch among subtitles and soundtracks
Apart from being compatible with all file formats, this Blu-ray playback software for Mac also lets you run Blu-ray disc/folder/ISO media along with your preferred soundtracks and subtitles on Mac. You are allowed to switch between different subtitles as well as audio tracks to suit your movie enjoyment and preferences.
Create your personal GIF emoji on Mac at your will
Fast and easy to make GIF with ONE-KEY, 8K Player for Mac (Blu-ray Power version) acts like a transformer in Beast Wars, to help you make funny animated gifs from your videos on Mac OS. Speaking out your love, it can generate your animated digital art, or create GIF from your favorite videos on Mac instantly. Get creative to light your spirit up now.
Bookmark any impression to vivid yesterday once more
Adding bookmarks to indicate time points of interest in a video on Mac, can help you develop critical business skills, techniques for creative pros, and inspirational documentaries to trigger animations in a video. Build-in bookmarks — one of the multi-task — are useful, while delivering a presentation, you can use them to help you find specific points in a video quickly.
Accurate screen recording to make impressive memories
'Seeing is believing!', 8K Player for Mac enables you to record whatever activity on the screen including your Mac applications, games playing to review or demonstrate whatever you see, then output high quality industry-standard .mp4 video files. Without time limitation, you can communicate your point clearly and quickly, it's vital to anyone who needs to demonstrate, share, teach, or explain.
Screenshot the inspiration at your fingertips
With simple 'ONE-KEY' screenshot in 8K Player for Mac, it's ease to capture any frame of whatever you see on your movies at your will, and never miss an inspiration from a video screenshot to make a professional-like presentation or a photo album for instant sharing.
Video Looping to long live your learning and fun
8K Player for Mac makes a video or a section looping extremely simple for any video file on your computer to play repeatedly, so you can not only focus on the details you desire to learn whatever from demonstration videos, tutorials, kiosks, but also long live your fun by repeating.
Choose Your Right 8K Player for Mac: Standard or Blu-ray Power or Pro version
Three products, three choices, they can all bring you perfect audio-visual experience anytime and anywhere you want.
Most Popular
Exchange client for mac. 8K Player for Mac Standard
8K Player Pro
(4K) Blu-ray Disc Blu-ray Folder Blu-ray ISO File DVD Disc DVD Folder DVD ISO File HEVC (H.265) AVC (H.264) 4K 5K 8K UHD movies MKV, FLV, AVI, MOV, etc. 3D/VR 360 degree video Free bulit-in subtitle Online URL & M3U8 Videos DTSDTS HD/DTS (HD) Master Dolby TrueHD
5.1
5.1/7.1
Dolby Digital Dolby Digital Plus
5.1
5.1/7.1
Lossless HD Audio(APE/FLAC/ALAC) Online URL & M3U8 Audio FilesGif output
With watermark
Record screen Make Bookmark Video Loop Take Screenshots Check History Adjust aspect ratio Free UpgradeCustomer Service
Purchse & Download
Price, 30-day money back guarantee
$35.95 $59.95
Get Now
Download | Purchase
Free Hd Player For Macbook Air
Best Media Player For Mac
Free Hd Player For Macbook Air

Best Media Player For Mac
Free Media Player on Mac and Windows. HD video player This lossless HD media player supports video resolutions up to 4K from 1080p HD. High-quality audio player Supporting DTS-HD and Dolby TrueHD audio, it gives you lossless audio effect. Various video formats You can playback video formats in MP4, AVI, MKV, FLV, MOV, WMV, 3GP, MXF, etc. Elmedia Player is a media player for Mac with an all-inclusive rundown of upheld. 8K Player for Mac. Delicate, crystal 4K Ultra-HD and HEVC/H.265 video playback on Mac. Universal media player for Mac to play all your media including Blu-ray, 3D, MKV, MP4 and more. Double click ISO and directly play ISO files from Blu-ray and DVD, NO extra installation tool needed. Elmedia Video Player. This MacOS media player has an incredibly smooth, stylish interface that.
0 notes
Text
Apps That Display Phone Screen On Mac

Your Phone App On Mac
Apps That Display Phone Screen On Macbook
Screens App Mac
View Iphone Screen On Mac
Lonely Screen is another explicable platform that has presented us with a very compelling structure, allowing any iPhone user to connect to a PC and display their screen onto a bigger system. With no need to install anything on your iPhone, unlike many other platforms, Lonely Screen utilizes Airplay for communicating with the iOS device.
Four Ways to Display your Phone Screen on PC
Method 1: Employ ApowerMirror
The first tool you need is ApowerMirror! ApowerMirror excels in displaying your phone screen on PC and provides the powerful function in controlling Android from PC with keyboard and mouse. By following several simple steps, users are allowed to play mobile games mirrored on a larger screen by using mouse. What’s more, it will be a perfect choice to enjoy movies with family on PC instead of the tiny phone screen. During the process, you are able to take snapshots and record screen.
The device's screen will instantly appear and any actions taken on the device will be mirrored to the Mac's display. Mirroring the iPhone to Mac using QuickTime. An added advantage of this method is that the record button is just one click away. Using QuickTime's built in recording feature makes creating iOS based screencasts a breeze.
The iTools should immediately detect the phone and give many options to configure. On the iTools, look at the left panel section. Click the available phone, select Desktop, and click Live Desktop. This app mirroring phone and screen at the same time, you can control it, either by computer or directly from the iPhone.
For iOS devices
Go to Apple Store to download ApowerMirror app. Then connect your iPhone and PC to the same network. You can also use the download buttons below.
Swipe up from the bottom of the screen and open AirPlay on your phone. Then choose the device name including “Apowersoft”. Soon you will find phone screen is displayed on your PC.
For Android devices
Click the download button below to get the app
Turn on your USB debugging and plug in the cable to connect two devices. Then you will get a notification box asking for your permission to install the application on the phone. Choose “Accept.” If it fails the installation, you are supposed to download it manually.
Activate the app on your phone and a window will pop out. Choose “Don’t show again” and click “START NOW”. Soon you will find phone screen cast on the desktop.
Note: If you have connected your Android to PC via USB cable for once, next time you could also connect them via WiFi and control your phone from PC. Click the “Mirror” button on your phone. Wait for it to detect your computer’s name. Tap the name of your PC. Within seconds, your phone screen will be mirrored on PC.
Method 2: Use LetsView(Free)
The second tool you can use to display phone screen on PC is LetsView. It is a practical screen mirroring tool which is totally free! It is compatible with both Android and iPhone and the interface is very clear and simple. Using LetsView, you can record the phone screen, take screenshots and control PC from phone.
Download LetsView on your computer. You can also go to the App Store or Google Play to install it on your phone.
Connect your phone and computer to the same WiFi.
Open LetsView on your phone and choose the device you want to mirror.
Then your phone screen will be successfully mirrored.
Method 3: Use ApowerManager
For those who want to utilize a professional tool to display phone screen on computer, you could try this ApowerManager. It can transfer data between phone and PC, backup mobile files. It has the ability to restore contents from previous backups, take screenshots, manage multimedia contents, and many more.
Below are the instructions of how to display phone screen on laptop using this software:
Install ApowerManager on your Windows/Mac.
Install ApowerManager app on your phone.
Connect your Phone and your computer via USB cable.
Click on the “Reflect” icon. Then you will get a notification box asking for your permission to capture everything that’s displayed on your phone. Choose “Start Now” on your phone.
ApowerManager is an easy and practical way to display mobile screen on PC. Aside from real time screen mirroring, you could also do other stuffs such as transferring files or sending text messages by clicking the designated icons located on top of the interface.
Method 4: Use Android SDK and Droid@screen
Droid@screen is yet another tool that can display phone screen on computer. It is simple to use and best of all free. With this tool you don’t need to have a rooted phone or pay highly priced mobile apps just to mirror your Android screen on PC. However, it requires a bit of patience and some technical know-how’s.
First download and install Android SDK Tool on your PC.
Then download and install Droid@screen on your computer.
Make sure that you have the latest version of Java running on your PC but if not, install it first before proceeding with the next step.
Enable USB debugging mode on your Android phone.
Open Droid@screen on your PC.
Enter the location of adb.exe by typing in “C:UsersYour Account NameAppDataLocalAndroidandroid-sdkplatform-toolsadb.exe”.
Attach your Android device on your computer with USB cable to be able to display mobile screen on PC.
The main problem with Droid@screen is that you need to install two different programs on your computer before you can start using its service. Additionally, locating the Android Debug Bridge or adb.exe is somewhat complicated. It is definitely not for non-techie individuals or those with very little knowledge when it comes to file exploration. Also, it doesn’t have extra features but only screen mirroring.
Conclusion:
There are many ways on how to display phone screen on laptop. You can choose from Droid@screen, ApowerMirror, ApowerManager and others. However, ApowerManager is a professional app that transfers data between different devices mostly though it can mirror phone screen on PC. As a result, ApowerMirror is specialized in displaying phone screen on PC and enables users to control Android from PC, which offers the excellent experience.
Related posts:
iMac, as the all-in-one desktop computer, has been the favorite computer for many users, and 4K retina screen is one of the highlights.
As time goes, old iMac may be put in the room corner.
If you did that, it is a big pity that you miss the large screen.
Why not use iMac as an external monitor for your PC, or other Mac computers?
That’s what we shall uncover in this post.
We will show the step-by-step guide to use iMac as an external monitor for PC, MacBook, and other computers.
Part 1. Use iMac as External Monitor for PC/MacBook via Target Display Mode
Target display mode is the hidden feature in iMac, which you can mirror PC or other Mac models into iMac for large screen.
For using the iMac as the external display, you should prepare what is as following:
● iMac computer
Your Phone App On Mac
27-inch iMac models introduced in 2009 and 2010 with a Mini DisplayPort.
All iMac models introduced in 2011, 2012, 2013 and mid 2014 with a Thunderbolt port.
● A Thunderbolt cable or a Mini DisplayPort to Mini DisplayPort cable.
● Mac from 2019 or earlier or PC with a Mini DisplayPort or Thunderbolt port.
Then let’s follow the steps below to get iMac as the external monitor for MacBook/mini or PC.
Step 1 Turn on both source MacBook/PC and iMac.
Step 2 Make sure the MacBook is logged in to the user account.
Step 3 Plug the cable into the Thunderbolt or Mini DisplayPort on MacBook or PC. Then connect the other end of cable into the Thunderbolt or Mini DisplayPort on your iMac.
Note: If you are using an adapter, connect the cable to the adapter first, then insert the other end into the Mini DisplayPort or Thunderbolt port on the iMac.
Step 4 Press Command + F2 on the keyboard of the iMac to trigger the target display mode. In a few seconds, you should now see the screen of MacBook/PC mirrored on the iMac.
To exit the target display mode, you should press Command + F2 again or disconnect the cable.
Part 2. Use iMac as External Display for iPhone/iPad via QuickTime
Not only using iMac as the external monitor for PC and other Mac models, but also can you mirror iPhone/iPad into iMac for large screen. The tool that can help you is QuickTime.
QuickTime is the media player and screen recorder. Here, it acts as the screen mirror. The steps of using iMac as the large display for iPhone/iPad are also easy to follow.
Step 1 Connect iPhone to iMac
Get the USB cable to plug your iPhone into iMac.
Step 2 Enable QuickTime screen recording
Run QuickTime on your iMac. Click File in the upper left corner to choose New Movie Recording option.
Step 3 Select your iPhone
Click the drop-down list of the recording button to find your iPhone in the camera list.
Step 4 Mirror iPhone into iMac
Now you can see the screen of iPhone is mirrored on iMac. Meanwhile, all the actions you did on iPhone will be recorded in iMac.
You can choose to export the recording or give it up.
Apart from QuickTime, you can also use the third-party software, e.g. Reflector, to share your iPhone or iPad screen in iMac. More details about mirroring iPhone to Mac are here.
Part 3. Pro Tip: Use PC as External Display for iPhone iPad
To use iMac as the external display monitor for PC and other Mac models are easy. Moreover, you can also mirror your iPhone screen into iMac to use the large screen. However, not all the users are the fans of Mac computer. Sharing the iPhone or iPad screen on PC can also enjoy the large display.
How to use PC as the monitor for iPhone or iPad?
Apeaksoft iOS Screen Recorder is the fix. It is the professional software to enlarge iPhone/iPad/iPod screen on PC wirelessly and safely. With it, you can connect iPhone and iPad with PC and watch the videos on a large screen.
Use PC as the external display monitor and recorder for iPhone and iPad.
Share videos, music, and other data from iOS device to PC easily.
Compatible with Windows 10/8/7 and iPhone/iPad running in iOS 14/13/12/11, etc.
Mirror iPhone/iPad to PC with Wi-Fi easily.
Download for Win
Step 1 Enable Screen Mirroring on iPhone
Make sure both your iPhone/iPad and PC connect with the same Wi-Fi network.
Run iOS Screen Recorder program on your PC.
On iPhone, swipe down from the upper-right corner of the screen to open Control Center, and tap Screen Mirroring to choose Apeaksoft iOS Screen Recorder to enable the mirror feature.
Step 2 Make recording settings on PC
Return to this software on PC, you will see three tabs, Welcome, Settings and About.
Navigate the Settings tab, and you can customize the recording settings freely.
Step 3 Mirror and recording iPhone on PC
While all the settings are made well, just click the red record button on your iPhone, and it will start mirroring and recording iPhone screen on PC.
Click the Start Export button to save the recording as MP4 on PC.
To same extent, this software is similar to QuickTime. However, it works more powerfully than the latter.
Part 4. FAQS of Using iMac as Extremal Monitor
Target display mode does not work in iMac?
You can fix the target display mode by following the solutions here: 1. Make sure you are logged into iMac. 2. Make sure your iMac is running in macOS Big Sur or earlier. 3. Make sure the cable is connected correctly.
Why does it fail to use the iMac with 5K screen as the monitor for my PC?
In general, iMac has the resolution of 2560 x 1440 and 5120 x 2880 (5K). If you use the iMac with 2560 x 1440 resolution, then you should make sure the PC resolution is also 2560 x 1440. To use iMac with 5120 x 2880 resolution as the monitor for the PC, it is hard to make it. That’s why you cannot use the 27-inch iMac with 5K Retina and newer ones as the monitor for PC.
Apps That Display Phone Screen On Macbook
Can I use multiple iMac computer as the monitor for one PC or Mac?
Screens App Mac
Yes, you can use more than one iMac as a display provided all Mac computers. Both iMacs and the source Mac computer are using Thunderbolt connectivity. Each iMac used as a monitor counts against the simultaneously connected displays supported by the source Mac.
What is the maximum connected Thunderbolt monitor for Mac?
The maximum connected Thunderbolt display is 1 for MacBook Air (Mid 2011), MacBook Pro 13-inch (2011), Mac mini 2.3 GHz (Mid 2011), 2 is for MacBook Air (Mid 2012 - 2014), MacBook Pro Retina (Mid 2012 and later), MacBook Pro 15-inch (Early 2011 and later), MacBook Pro 17-inch (Early 2011 and later), Mac mini 2.5 GHz (Mid 2011), Mac mini (Late 2012 - 2014), iMac (Mid 2011 - 2013) and iMac 21.5-inch (Mid 2014), and 6 is for Mac Pro (2013).
Conclusion
To use old iMac as the external display monitor is a good solution for those who needs the large screen. You can use the target display mode to do it by connecting PC/Mac to iMac with the cable. Moreover, QuickTime also shares the mirror way to get iMac as the monitor for iPhone and iPad. As for watching the large screen on PC from iPhone/iPad, you can also use Apeaksoft iOS Screen Recorder.
Do you have any idea to use the large screen as the monitor for your device?
View Iphone Screen On Mac
Let me know by leaving your comments below.
0 notes
Text
Display For Mac

Display For Mac Pro
Display For Mac Mini
Display For Mac Pro
If you’re considering an external display for your Mac, there’s a few important decisions to make. Apple doesn’t sell external displays any more, so you can’t just default to their wisdom. That’s an issue, because not all displays are well suited for Macs.
The Displays preference pane acts the same way with your Mac’s built-in Retina display, too, except that “Default for display” automatically chooses the Retina mode. Share this: Facebook.
Which size? #
I can’t really help you with this one. It’ll likely be set by your budget, desk space and personal preference. The factors below will play a role, too.
Until Apple makes a stand-alone monitor option to replace the now-defunct Cinema Display monitor discontinued in 2014, finding an external monitor to increase the real estate of your MacBook Pro means heading out of the Apple universe. Luckily, quite a few monitors are offering USB-C connectivity to make it easy to hook your MacBook Pro to an alternate monitor. We’ve compiled a list of.
The most advanced display for your Mac. Built for professionals. Built For Professionals. Duet is built by ex-Apple engineers, delivering a retina display at 60 frames per second with zero lag. Using an additional display can double your productivity by reducing time to switch contexts.
Both the Mac and all displays in the chain must support DisplayPort 1.2, except for the last display which can be DisplayPort 1.1. In the image to the top right from StarTech, for example, Screen.
Retina or non-Retina? #
Thunderbolt 2 and DisplayPort 1.2 have a maximum resolution of 3840×2160 at 60FPS, which means non-Retina resolutions up to about 40-inch are supported by most current Macs. But, that only covers Retina displays up to 20-inch. Thunderbolt 3 equiped Macs, like the 2016 MacBook Pros, can run 27-inch Retina displays though.
There is another issue to contend with. Apple’s interface design in macOS is set up so it is comfortable for most people at a density of about 110 pixels per inch for non-Retina, and about 220 pixels per inch for Retina — text is readable and button targets are easy to hit at a normal viewing distance. Using a display that isn’t close to 110PPI or 220PPI means text and interface elements will either be too big, or too small.
The Display pane in System Preferences includes “larger text” and “more space” options. These can be used as a solution, but if you do, macOS will render the entire screen to a virtual canvas, then bitmap scale it up or down to the desired size. The result is blurry pixels, higher memory usage, more work for the GPU to do, and shorter battery life for laptops. You want to use the “default for this display” setting, if you can. It’s better quality, faster, and gives longer battery life.
Blurry pixels and a scaled display make it very difficult for designers and developers to see if elements are where they need to be. Elements that animate will appear to shimmer as they move. For me, “default for this display” is the only way to go.
The divider above shows the shimmering — it’s a 1pt or 2 Retina pixel line, but when the display is scaled down by a fractional amount (72%), those pixels don’t map directly to pixels on the display. As the list scrolls, the divider shimmers as the scaling represents the line differently.
You won’t need to choose a display that is exactly 110PPI or 220PPI. A slightly lower value will mean text and interface elements are larger. A slightly higher value will mean text and interface elements are smaller. You can use Sven Neuhaus’s PPI calculator to work out the pixel density of any display you’re interested in. Here’s a list of common external displays, with the 110PPI and 220PPI zones indicated.
Buying a display with a pixel density in the red zone usually isn’t a good choice, if you want to run “default for this display”. For example, 160PPI will show non-Retina UI too small, but Retina UI too large (it’s worth noting this can be used to buy a display that shows larger text and UI for those who need or prefer it).
The 4K iMac, 5K iMac and Surface Studio are listed as points of comparison, and can’t really be used as external displays. The Surface Studio’s 193PPI display is actually perfect for Windows, where the non-Retina (1×) UI scale is 96PPI, and the Retina (2×) UI scale is 192PPI. If I could buy a Surface Studio as an external display for my Mac, I think I would.
Wide gamut support? #
Wide colour gamut support — displays that use the Adobe RGB, Display P3, or DCI-P3 colour spaces — are great for photo editing, if your source material is created in those colour spaces.
But, the majority of web design, iOS apps, Android apps and game design is in the sRGB colour space. If that’s your line of work, you probably only need and want sRGB support (and an IPS LED display). Incorrectly set up, a wide gamut display used with non-colour managed software will produce overly saturated colours, and those colours won’t match how the final product is seen.
Xenu's Link Sleuth is spidering software that checks Web sites for broken links. It performs verification on normal links, images, frames, backgrounds, and local image maps. It also displays a. The Screaming Frog SEO Spider is a small desktop program (PC or Mac) which crawls websites’ links, images, CSS, script and apps from an SEO perspective. Commercial Mac Windows Linux Scheduled Data Crawling Seo Website testing Add a feature 23 Like. Xenu's Link Sleuth is not available for Mac but there are plenty of alternatives that runs on macOS with similar functionality. The most popular Mac alternative is Screaming Frog SEO Spider. It's not free, so if you're looking for a free alternative, you could try Integrity or Beam Us Up. If that doesn't suit you, our users have ranked 46 alternatives to Xenu's Link Sleuth and 12 are available for Mac so hopefully you. Xenu sleuth for mac.
It’s often possible to put wide gamut displays into an sRGB emulation mode, or to calibrate them to sRGB. But, not always. I am unaware of a way to calibrate an 5K iMac to use sRGB (if you know, please get in touch). “99% coverage of the sRGB spectrum” or similar message in the marketing text is usually a good sign, and what you’ll want to look for if buying a display for web or app development.
There is another significant issue with wide colour gamut support — wider colour gamut stretches the same value range, 0-255 for 8bit per channel colour, over a larger range of absolute colours. The number of available steps is the same, and each step becomes bigger. Using a wide gamut display with colour management aware software also typically requires conversion to and from the display’s profile once, twice or more times for everything displayed. Doing so can result in rounding errors, which are presented as gradient banding or noise.
That’s all fixable by using more colour precision. The 5K iMac uses 16bit per channel for the macOS window manager and it sends 10bit per channel to the display. That’s a great fix, but it requires double the GPU memory, double the GPU memory bandwidth, and 25% more port bandwidth. That’s the likely future, but we’re just not there yet for the majority of displays.
In short, if you only need sRGB, buy an sRGB only display.
Published 12 December 2016.
If you bought Displays on the Mac App Store, you’re eligible to a free license. Read more
Migration from the Mac App Store
Displays was previously available on the Mac App Store, but for technical reason, the app could not live anymore on this store without breaking support for Retina resolutions.
Instead, we’re now selling license keys directly from our webstore. All people having bought Displays on the Mac App Store are eligible to a free license key.
Download our Migration Assistant to request your key
Click on Displays icon in the upper-right corner of your screen and choose your monitor resolution among all supported resolutions. Displays is listing even resolutions hidden by macOS.
Displays supports all active monitors attached to your Mac, including AirPlay monitor. With one click, you can enable or disable mirroring mode.
To easily identify a resolution, you can set a custom label instead of resolution width/height and you may choose or not to group Retina resolutions, and even hide too-small resolutions.
Light at night is part of the reason so many people don’t get enough sleep. When night is coming, you can enable a night mode to rest your eyes and avoid unwanted effects of lights, especially blue light.
With just one click, or with a keyboard shortcut, you can switch to macOS Dark theme (10.9 or later), lower screen brightness, reduce blue light emitted by your display, enable grayscale mode or even set another wallpaper. If your screen does not support brightness control, Displays will simulate screen dimming.
And night mode can be scheduled, either in a user-defined period or based on sunset/sunrise. You can even automatically switch to night mode when you launch any app of your choice!
Display For Mac Pro
With Displays, you can take screenshots easily, either entire screen, specific area or a window. Many options are offered like timer, presets, mouse pointer, window shadow…
Divx for mac codec pack. Put the mouse over the video thumbnail, there will be a Play icon over it. Or you can click on the Add Files to browse videos on your Mac. There are more than 500 video formats supported.02 Click the Play iconYou can see your videos have been displayed in the program.
Use our various tools to annotate your screenshot: free drawing, rectangle, polygon, star, arrow, speech bubble, text… Another useful tool allows you to pixellate or blur some sensitive part of your screenshot.
Sharing screenshots has never been easier. Displays supports many cloud services where you can upload your screenshot and obtain a share link: Dropbox, Google Drive, OneDrive, Box, CloudApp, pCloud, FTP and SFTP.
You’re doing presentations like app demonstration or Powerpoint? Displays can act like a virtual laser pointer to grab your audience’s attention on what you’re doing.
Entire screen will be dimmed, except the part where your mouse cursor sits and mouse clicks will also be visually highlighted. Everything is customizable: circle or rectangular shape, screen color, opacity, highlight radius, play sound, differentiate left and right mouse clicks…
When one of your external monitor is in another room or not directly visible, it’s hard to see what is displayed on it. The same happened when you’re doing a Powerpoint presentation and the slides are behind you. That’s why we implemented Picture-in-Picture (PiP) for monitors.
Displays can enable a PiP overlay, that reflects the secondary screen content in real-time. And for sure, PiP can be enabled for more than one monitor at a time.
Do you need to hide temporarily the mess on your desktop? With one click or through a customizable keyboard shortcut, you can quickly hide all your desktop icons, without loosing essential features of your desktop like drag & drop or contextual menu.
French
Spanish
ALL FEATURES
Displays is not just a resolution switcher for macOS, as it comes with a lot more features for people managing multiple monitors and developers.
List all resolutions supported by your monitor, even those usually hidden by macOS.
Click on Displays icon in the macOS menu bar and choose the desired resolution. That’s it.
Replace default resolution name like “1680 x 1900 (60 Hz)” by any other text.
Resolutions can be grouped or not by Retina, and you can filter/hide any resolution.
Enabling or disabling macOS screen mirroring is actually just two clicks.
Display For Mac Mini
Rotate your monitor display to 90°, 180° or 270° (only if monitor supports rotation).
Get detailed information, like serial number, manufacturing date, active graphic card…
Rest your eyes in one click by reducing blue light and/or switching to Dark theme.
I would point out that Macs and Windows both support FAT32 file systems though so this may be why it was successful. Acronis true image for pc and mac os. I'm not so sure how things would go using an OS X journaled drive and restoring somethign to an NTFS one, but if it is just files/folders, I don't see why it wouldn't work either. Hello everyone!I can totally understand the importance of this feature, however, due to different archive formats and different platforms, it is quite hard to implement it.We are not planning to implement it for image recovery but we are - for file recovery, however, there is no ETA for this feature.As a current workaround I would suggest using Cloud backups. I Then went to my Windows machine and restored that image to another USB flash drive in Windows and the result was a working USB flash drive.
Easily take a screenshot of a window, area or entire screen, with options like timer.
Easily annotate, crop or resize your screenshot, with 12 different tools.
Upload your screenshot to Dropbox, Google Drive, Box, OneDrive, FTP/SFTP server…
With one click or keyboard shortcut, quickly hide all your desktop icons.
Grab your audience’s attention by highlighting mouse pointer and mouse clicks.
Engadget is part of Verizon Media. Logitech s530 mac software.
Show secondary monitor live preview in an overlay window on your main screen.
Show a Test Card to help in monitor calibration, whatever screen ratio (4:3, 16:10…).
Get notifications for many events like monitor plug-in or video card change.
Set customizable shortcuts for all functions, like switching resolution or night mode.
Quickly enable or disable True Tone mode of macOS, if your Mac supports this feature.
Displays entirely supports the new Dark mode introduced in macOS Mojave.
Displays is fully optimized for the latest release 10.15 of macOS, called “Catalina”.
Displays is using all modern technologies offered by Apple for the best performance.
If bought Displays on the Mac App Store, you’re eligible to a free licence key (please check Support section).
SCREENSHOTS
WHY DISPLAYS?
Easy to use Only two clicks are necessary to change your monitor resolution
Customizable Will adapt to your needs with full customisation for every function
Reliable Every function has been deeply tested on every macOS version
Full-featured Comes with many advanced tools, no need to buy some other apps
Display For Mac Pro
Free DownloadBuy Now Version 1.9.5 – 14/08/2020 Requires macOS 10.9 or later, 64-bit processor, ready for macOS Catalina 15 days Free Trial with time limit Release notes
1 note
·
View note
Text
Apple Applications For Mac

Apple Applications For Mac Os
Apple Applications For Mac Os
Apple Mac For Sale
Apple Applications For Mac Download
Great apps for your Mac. Right there on your Mac.
The Mac App Store makes it easy to find and download Mac apps as well as widgets and extensions — like editing extensions for the new Photos app. You can browse Mac apps by category, such as games, productivity, music and more. Or do a quick search for something specific. Read descriptions and customer reviews. Flip through screenshots. When you find an app you like, click to buy it. The Mac App Store has apps for just about everything and everyone. Here are a few of our favourites.
Jan 21, 2019. The Applications folder is one of the default folders on your Mac that helps make your computer easier to navigate. However, for those who are new Mac users, finding the Applications folder can be.
Pages
Apple Applications For Mac Os
Create beautiful documents, letters, flyers, invitations and more. View in Mac App Store
Numbers
Make eye-catching spreadsheets and charts in just a few clicks. View in Mac App Store
Keynote
Put together a presentation with captivating graphics and transitions. View in Mac App Store
iBooks Author
Create stunning Multi-Touch books for iPad and Mac. View in Mac App Store
Final Cut Pro X
Bring your film to life using revolutionary video editing software. View in Mac App Store
Logic Pro X
Turn your Mac into a complete professional recording studio. View in Mac App Store
Wunderlist
Manage and share your to‑do lists across all your devices. View in Mac App Store
Evernote
Apr 24, 2019 Mac OS X Lion 10.7.2 dmg for mac free. download full version. Mac OS X Lion 10.7.2 offline installer complete setup for mac OS with direct link. Description Mac OS X Lion 10.7.2 Dmg For Mac + Overview. Among exclusive mac OS x releases, mac OS x lion is a broadly used running system. Supplying stability, safety and better compatibility features. Free Download MAC OS X lion 10.7 ISO Macintosh OS X lion 10.7 incorporated the new Aqua UI, Apache, PHP, MySQL, Tomcat, WebDAV bolster Macintosh Manager and NetBoot. MacOS x lion 10.7 is the most recent rendition of Mac with new highlights. Aug 26, 2020 Learn how to download Mac OS X Lion 10.7 ISO and keep your operating system up-to-date. If you have any queries regarding the download of Mac OS X Lion 10.7 ISO you can drop down your concern in the comment section and we will get back with the solution in minimum time. Download mac os 10.7 lion free.
Take notes, save web pages, create lists, attach images and PDFs, and more. View in Mac App Store
Cobook Contacts
Find, organise and keep your contacts up to date in even easier ways. View in Mac App Store
Things
Keep track of to-dos, deadlines and projects with this task manager app. View in Mac App Store
Notability
Annotate documents, record lectures and take notes with this all-in-one app. View in Mac App Store
Autodesk SketchBook
Take your ideas further with a complete set of digital drawing tools.View in Mac App Store
Day One
Keep a journal that sends reminders and looks great in day or month view. View in Mac App Store
The 10.7.5 update also includes fixes that resolve an issue where icons in Launchpad may get rearranged after a restart, improve Wi-Fi reliability for iMac, resolve an issue using Spotlight to search an SMB server and improve compatibility connecting to Active Directory servers. There are many great features are security tools are added to protect the Mac and user’s privacy. Mac os x lion free. The OSX Lion V10.7.5 has introduced Aqua user interface elements, which includes button and progress bar. The red, yellow and green buttons in the window decorations have also been smaller with the little bit more attractive design.It includes Gatekeeper, a new security feature that helps Mac users to keep their Mac safe from malicious software by giving more control over what apps are installed on the Mac.
Pocket
See something you like? Save interesting articles, videos and web pages for later. View in Mac App Store
Apple Applications For Mac Os
The Photo Cookbook
Follow over 240 easy‑to‑prepare recipes picture by picture. View in Mac App Store
Kuvva Wallpapers
Choose specially curated wallpapers from a new artist each week. View in Mac App Store
Tonality
Create inspiring black-and-white images on your Mac.View in Mac App Store
swackett
Get visual weather reports that turn complex data into fun infographics. View in Mac App Store
Sky Gamblers Cold War
Rule the action-packed skies in over a dozen different aeroplanes. View in Mac App Store
Sparkle 2
This easy-to-play but enthralling game makes the most of the Retina display. View in Mac App Store
Bike Baron
Beat hundreds of challenges as you master over 100 different bike tracks. View in Mac App Store
Civilization V: Campaign Edition
Build and defend the most powerful empire the world has ever known. View in Mac App Store
Galaxy On Fire 2™ Full HD
Battle your way through a 3D war-torn galaxy against an alien armada. View in Mac App Store
SimCity 4 Deluxe Edition
Build a city from the ground up and manage your metropolis in every way. View in Mac App Store
Apple Mac For Sale
Money
Set a budget, schedule payments and track investments — all in one app. View in Mac App Store
Apple Applications For Mac Download
MoneyWiz – Personal Finance
View all your accounts, transactions, budgets and bills in one secure place. View in Mac App Store
iBank
Manage your money with this fully featured, intuitive personal finance app. View in Mac App Store
Next - Track your expenses and finances
See your expenses by year, month or day, and take control of your finances. View in Mac App Store
Investoscope
Monitor your portfolio of stocks, bonds, mutual funds and more. View in Mac App Store
StockTouch
Apple's laptops have long been held up as a gold standard for portable computers. MacBooks were the first to bring technologies like aluminum unibody construction, super-sharp IPS. Apple discontinued its 12-inch laptop in July 2019. You may be able to buy one in Apple’s Refurbished and Clearance Store, but supplies won’t last long. What mac laptop to buy.
Keep track of the market in a whole new way. View in Mac App Store
djay
Mix songs from your iTunes library and spin live on a digital turntable. View in Mac App Store
Sound Studio
Record, edit and produce digital audio. Create your own mixes and add effects. View in Mac App Store
Shazam
Like what you hear? Identify a song at a moment’s notice. Then share it or buy it. View in Mac App Store
Tabular
Read and write tablature notation for guitar, bass, drums and more. View in Mac App Store
AmpKit
Turn your Mac into a powerful guitar amp and effects studio. View in Mac App Store
Sound Forge 2
Record, edit, process and render high-resolution audio files. View in Mac App Store
Install any app with ease.
The Mac App Store revolutionises the way apps are installed on a computer — it happens in one step. Enter the same iTunes password you use to buy apps and music on your iPhone, iPad, Mac or iPod touch. Within seconds, your new app flies to Launchpad, ready to go. So you can spend more time enjoying new apps and less time installing them.
Keep your apps up to date.
Since developers are constantly improving their apps, the Mac App Store keeps track of your apps and tells you when an update is available — including OS X software updates. Update one app at a time or all of them at once, for free. You can even have your apps and OS X update automatically, so you’ll always have the latest version of every app you own.
The app you need. When you need it.
Can’t open a file you’ve downloaded or received in an email? OS X can search the Mac App Store to find the app that can open the file. Buy what you need instantly and get back to business.
Buy, download and even re-download.
You can install apps on every Mac authorised for your personal use, and even download them again. This is especially convenient when you buy a new Mac and want to load it with apps you already own.
Daily Stories. From exclusive world premieres to behind‑the‑scenes interviews, original. New apple imac.
From the Mac App Store
Top Paid Apps
Top Free Apps
0 notes
Text
Mac Games For 2013

Mac App Store is the simplest way to find and download apps for your Mac. To download apps from the Mac App Store, you need a Mac with OS X 10.6.6 or later. The Division 2 Mac OS X Tom Clancy’s The Division 2 for Mac is the sequel to the first title in the “The Division” series. Action, Shooter World War Z Mac OS X – 2019 TOP Zombie Game FREE. 60W Mini Charger for MacBook Pro 13 inch Retina Display, Compatible with Magsafe 2 T-Tip Power Adapter Mac(2012,2013,2014,2015) -One Extra USB Port 4.6 out of 5 stars 42 $26.99 $ 26. SimCity ' s sixth major release was announced on March 5, 2012, for Windows and Mac OS X by Maxis at the 'game changers' event. The game was released for Windows on March 5, 2013. A download-only Mac version was released in August 2013 available for digital download on Origin.
2013 Mac Pro For Sale
Used Mac Pro 2013
2013 Mac Pro For Sale
HomePC & Mac2,013 Card, Mahjongg & Solitaire Games
Platform:
PC & Mac
File size:
504 MB
Category:
Casual Games, Card & Casino
Club Masque GOLD member price:
$6.99
Regular price:
$12.99
Not a Club Masque GOLD member?
Description
The most complete collection of Card, Mahjongg and Solitaire games -- bigger and better than ever!
Completely updated to work on the latest Windows and Mac operating systems! All the popular card, mahjongg and solitaire games are included in this massive collection, plus modern and unique variants you won't find anywhere else. Now with over 2,000 classic games, there's something for everyone -- kids, teens and adults. But if 2,000 games aren't enough, then you can create your own solitaire game or design your own mahjongg layout by using the 'Game Builder' tool. The opportunities are endless…and so is the fun!
MASQUE CARD GAMESAll of your favorite card games are included in this collection:• Spades• Gin Rummy• Hearts• Rummy• Whist• Old Maid• Euchre• Crazy 8's• Canasta• Go Fish• Cribbage
MASQUE MAHJONGG — NOW WITH MORE LAYOUTS!
This ultimate collection contains more than 1,000 different tile layouts, including over 100 brand new layouts never seen before. Plus, there's these variant tile games:• Niagara• Three Lines• Recall• Lines of Five• Alignment
SOLITAIRE ANTICS ULTIMATE PLUS — PLUS MORE!
• Over 885 Solitaire games -- including over 125 unique solitaire games never seen before!• Individual statistics for each player• Unlimited undo and redo• Check for 'no more moves'• Highlight movable cards• 13 card decks and 50 backgrounds• Create your own game from millions of possibilities using the 'Game Builder'• 80 hilarious animations
Screenshots
Features
System Requirements
9 4 likes 106,116 views Last modified Sep 24, 2018 4:59 PM
Tips on 10.4 Tiger, 10.5 Leopard(last compatible operating system for G4 867 and above, and G5s), 10.6 Snow Leopard (end of the line for PowerPC applications), 10.7 Lion, 10.8 Mountain Lion, 10.9 Mavericks,
10.10 Yosemite, and 10.11 El Capitan to 10.14 Mojave.
Mac OS X Sierra was released on September 20, 2016. A few Macs which came with 10.6 can install Sierra.
Note this tip, and the series of tips from 10.2 (10.2, and 10.3 not mentioned in above links as people must have 10.4.4 or later on an Intel Mac to get to 10.6) to 10.11 I've written here all refer to Mac OS X Client. Server versions of Mac OS X may have different limitations, and the people visiting the appropriate Server forum may be able to answer your questions better about Mac OS X Server.
When determining your Mac model, see this tip to find its age:
I would not downgrade to Leopard without erasing your data first.
Be sure to backup your data first at least twice before installing any operating system. Shut down, and disconnect any peripherals before continuing with the installation. Read the info below to ensure you are compatible. Finally, you may need to use the Startup Manager to boot the operating system when the 'C' key doesn't work in order to get the installer to work or repair the disk before installation if the initial attempt to install fails. To determine if that repair is necessary, post to the forum, and someone will be able to help you to find out which repairs might be necessary.
Java is outdated in terms of security in Mac OS X 10.6. Backup your data and at least update to 10.6.8 if your Mac says it is Intel in Apple menu -> About this Mac. Read about updating to 10.7, and this tip about how to optimize your Java in 10.6 if you are stuck with 10.6.
10.6 retail is available from the Apple Store on http://store.apple.com/us/product/MC573/mac-os-x-106-snow-leopard (the /us/ in the link may be changed for the standard two letter country code matching the store link). Note: Macs newer than April 1, 2010 but older than July 20, 2011 must use the original 10.6 installer disc that shipped with them to boot 10.6 from CD. AppleCare may have those discs if you lost or misplaced it. To determine the age of a Mac, plug it in the support status search engine, and use the serial number lookup. Using the model name, find the release date of that model on Wikipedia or Everymac.com, and the followup date.
Leopard (10.5) is not to be confused with Snow Leopard (10.6) which are different paid operating systems.

If you are interested in upgrading to Lion you can read this tip, and Mountain Lion or Mavericks, this tip. Note: Mavericks you can update to
for free, whereas both Lion and Mountain Lionyou can not. Lion requires a minimum of 10.6.6 already be installed, unless you have the USB Flash drive for it, and Mountain Lion and Mavericks requires a minimum of 10.6.8. Lion and Mountain Lion have different hardware requirements, but the Apple hardware requirements for Mavericks are the same Mountain Lion.
If you got a machine that came with Lion or Mountain Lion and wonder if you can install Snow Leopard on it, read the bottom of this tip first.
Snow leopard is available free for a limited time from this link if you have Mobileme and need an upgrade path to Lion that doesn't require erasing your hard drive.
Flashback malware has a patch on 10.6.8. Users of 10.6.7 and earlier are recommended to disable Java. For more info read this tip.
Macs that were released new as of July 20, 2011 (the MacBook Pro for instance had no new release until October 24, 2011, and that model's earlier sold models all work with Snow Leopard) or later, will generally not run Snow Leopard unless you follow this tip for Snow Leopard Server virtualization. Other than that, the following statements are true:
All Mac Pros will work with Snow Leopard (10.6.x), and they look like:
The PowerMac G5 towers which look like:
will not work with Snow Leopard. Neither will the ones that are beige, blue, or graphite colored with plastic cases.
Used Mac Pro 2013
All Apple notebooks labelled MacBook with at least 1 GB of RAM, MacBook Pro, and MacBook Air below the screen or will work with Snow Leopard.
Apple notebooks labeled iBook, and Powerbook beneath the screen will not work with Snow Leopard. Note, many of the newer MacBook Airs and MacBook Pro no longer have the label on the bottom of the screen frame, and you have to shut down the Mac, and look under the Mac for its label. Those may only be able to use the aforementioned virtualized Snow Leopard Server.
Mac minis with at least 1 GB of RAM and 4 and 5 USB ports on the rear as shown in the image below:

will work with Snow Leopard. Those with less than four USB ports will not work with Snow Leopard.
All iMacs that look like:
Will work with Snow Leopard.
From the iMacs which look like:
If they are iMac Intelthey can upgraded to Snow Leopard. To tell if they are Intel, they will have an EMC# on the base which is enumerated 2104, 2105, 2110, 2114, 2118, 2111, 2133, or 2134. All others were iMac G5 and can only be upgraded to 10.5.8. Another distinction is that iMac G5's had mini-VGA ports that looked like:

Whereas White iMac Intels had mini-DVI which looked like:
You can also tell if it is an iMac Intel by selecting Apple menu -> About This Mac. Core Duo and Core2Duo are Intel, whereas the G5 are not.
Notes: G5 refers to the CPU made by IBM for Apple before the migration to Intel CPU in 2006. It was found on iMacs, and PowerMacs. Powerbooks and iBooks maxed out using the Motorola G4 CPU, only to be replaced by MacBook Pros and MacBooks in 2006.. Intel made the CPU found in 2006 and newer Macs, and these are referred to as CoreSolo, CoreDuo, Core2Duo, i3, i5, i7, and Xeon. Don't confuse a G5 for an Intel CPU Mac. They are not the same except in exterior design when it comes to the iMac, and the means to tell them apart is stated above. In 2006, the Mac Mini changed from G4 to Intel CoreSolo CPU. In 2006 the iMac changed from G5 to Intel CoreDuo CPU.
All Intel Macs with sufficient RAM older than March 29, 2010 can take the retail 10.6.3 installer disc. All Intel Macs with sufficient RAM older than August 28, 2009 can take the 10.6.0 retail installer disc. This disc must look like and can't say Upgrade, Dropin, or OEM on it.
It is recommended those upgrading from PowerPC follow this tip:
It is recommended you backup your data at least twice before upgrading any software.
It is recommended you check these listings for compatible 10.6 software from: C!Net, Snow Leopard Wiki,Macintouch, and Apple's listing of compatible printers and scanners
and Apple supplied updates for printers and scanners:
HP, Ricoh,Canon, Epson, Brother,Lexmark, Samsung, and Fuji/Xerox
Additionally, some Ricoh printers that do not have official drivers have been found to have the resolution documented by this thread:
And Apple's phone support with iSync:
For digital cameras, these RAW formats are supported on 10.6. Note the most recent Mac Mini, iMac, and MacBook Pros
have SD card slots for reading camera media. For all other camera media, Express/34 on 17' MacBook Pro and pre-June 8 2009 MacBook Pros, PCI for Mac Pro, USB, and Firewire card readers exist for all Intel Mac models. Additionally, many multifunction printers have card readers that will work on the Mac. JPEG, TIFF, PNG
are all common formats supported by cameras outside of RAW, though RAW enables you to post process many more features of digital images than the other formats.
To be compatible with the Mac App Store, the Lion updater from the USB Flash drive or App Store, and the Facetime video software in Standard Definition minimum, you'll need the 10.6.6 combo, 10.6.7 combo, 10.6.7 combo with the font update, or the 10.6.8 combo followed by the Thunderbolt update if applicable.
10.6.8 has the following security updates: 10.6.8 2013 Security Update 004, 2013-005 Java update (note Java is not current until Mac OS X 10.7.3 from Java.com)
Sometimes when 10.6 is installed, Rosetta, the application that allows PowerPC programs to run will not automatically install. In those situations, you can manually install Rosetta from the 10.6 installer disc. The following quote explains how to install it manually:
Insert the Mac OS 10.6 installation DVD When the DVD is mounted, select “Optional Installs” then “Optional Installs.mpkg”
Follow the onscreen instructions for agreeing to the software license and selecting the hard drive for installation.
In the “Installation Type” step, select the box next to Rosetta from the list of applications presented. Continue the installation process.
After successful installation, a confirmation message will appear.
These instructions appeared on http://forums.printable.com/showthread.php?t=1110 .
As 10.6 is the last operating system that shipped on prebundled discs that come with Macs, it also is the last one that shipped with a prebundled set of iLife applications. To learn which version of iLife may have come on your computer, see this tip. 10.7 and later prebundled Macs did not ship with iDVD, but will have shipped with iPhoto, iTunes, Garageband, and iMovie. If you still desire iDVD, consult with AppleCare.
10.6 has these updates available depending on what you have on your Mac (Combo updates can be applied to any of the preceding versions, where Delta can only be applied to the immediately preceding version):
10.6.110.6.3 v1.1 Delta and 10.6.3 v1.1 Combo10.6.4 Combo, 10.6.4 Delta, 10.6.4 Mac Mini Mid 201010.6.6 Delta, 10.6.6 Combo10.6.7 for early 2011 MacBook Pro, 10.6.7 Combo, 10.6.7 Delta, 10.6.7 font update to all previous updates10.6.8 delta v1.1 (7/25/2011) and Combo v1.1 (7/25/2011), and the followup Thunderbolt update for 2011 iMacs and MacBook Pros for installation after 10.6.8
Which Macs can have Snow Leopard installed, and which can only have Lion installed based on Machine ID (also known as Model Identifier)?
You can find out which gray installer disc came with Macs that can install Snow Leopard newer than March 15, 2010 by reading: http://support.apple.com/kb/ht1159. Machine ID is in Apple menu -> About This Mac -> More info (on 10.7 and later the About Window has System Information instead of More info to access the System Profiler) under the hardware section. The 'x' value below can be any number. Older Macs indicated below can use the 10.6.3 retail installer, if not the 10.6 retail installer, if they are older than August 28, 2009. Together with partitioning, the Core2Duo (not CoreDuo, not CoreSolo), Xeon, Core i3, i5, i7 Macs which are Snow Leopard compatible can run both Snow Leopard and Lion, provided they have at least 2 GB of RAM. Partitioning requires an erase of the hard drive. A second internal or external hard drive can boot into a separate operating system on the same Macs. The Macs below which can only run Lion and later, are also known as Lion prebundled Macs. Lion prebundled Macs thankfully can run Windows in virtualization, which would allow them to use the Windows version of software that may only run in Snow Leopard and earlier on Mac OS X. The Macs listed here that won't run Snow Leopard also are not able to use the retail Lion installer USB Flash drive, and must use the instructions onMacworld to create a specialty Flash drive or be cloned onto another hard drive before their prebundled hard drive dies, to be able to restore Lion. Macs below that can't install Snow Leopard directly may be able to do so via virtualization, as described by this tip.
Mac Mini 5,x and later only run Lion and later. Mac Mini 4,x and earlier can run Snow Leopard with at least 1 GB of RAM (that's greater than 768MB of RAM).
MacBook Pro 8,x with EMC#s 2355, 2563, 2564 can only run 10.7 or later, all other 8,x EMC#s can run 10.6.3 or later, and all 7,x can.
MacBook Pro 9,x and higher can only run 10.7 and later.
Mac Pro 5,1 that are not EMC 2629 and earlier can run Snow Leopard. EMC 2629, and Mac Pro 6,x and later can only 10.7 and later.
The 10.6.3 retail installer will only work on Mac Pro 4,x and earlier.
MacBook with no Air and no Pro on the screen as of 11/30/2011 can all run Snow Leopard with at least 1 GB of RAM.
MacBook Air 4,x and later can't run Snow Leopard, while 3,x and earlier with at least 1 GB of RAM can run Snow Leopard.
iMac 12,1 i3 (EMC 2496 on foot, MC978LL/A) can't run Snow Leopard, while the 12,x i5 and i7 can run Snow Leopard, and the iMac 1,1 through 11,x can run Snow Leopard with at least 1 GB of RAM. iMac 13,1 and later can't run Snow Leopard natively.
Lastly, here the Macs that are compatible with 10.6.3 retail avialable from the Apple Store based on Model Identifier:
iMac 11,1 and older
Mac Mini 3,x and older
MacBook 6,1 and older
MacBook Pro 5,x and older
MacPro 4,x and older
MacBook Air 2,x and older
Macs that fall between those criteria must use the 10.6 installer that shipped with them to install 10.6.
* The release names Early and Late can be gotten by plugging the serial number of the machine in
1 note
·
View note
Text
Ringtone Maker For Iphone Mac

Make iPhone ringtone with any audio/video file like MP3, MP4, Online songs/video, etc. On Mac This Ringtone Maker can convert almost all-mainstream video/audio to M4R iPhone ringtone on Mac. You can make any loved music or recorded sounds by yourselfformatted in MP3, WMA, AAC, WAV, and MP2to M4R iPhone ringtone on Mac. IPhone ringtone maker to Make M4R iPhone ringtone from music/video on Mac. Ringtone maker free download - Xingtone Ringtone Maker, 4Media iPhone Ringtone Maker, 4Media Ringtone Maker, and many more programs.
Stop Paying for Ringtones
Description
Bigasoft iPhone Ringtone Maker for Mac, a professional iPhone ringtone converter for iPhone 5S/5C/5/4S/4/3G/3GS users, can easily make, boost, and transfer customiPhone ringtones M4R from your personal music/movie collection for more fun with you.
This Mac iPhone ringtone maker software allows you to create iPhone ringtones M4R from unlimited video/audio files including WMA, M4A, WAV, MP3, RA, AVI, MPEG, WMV,DivX, Xvid, MP4, H.264/AVC, AVCHD, MKV, WebM, VP8 video and so on.
Bigasoft iPhone Ringtone Maker for Mac helps you clip any music and video segment you like as your unique iPhone ringtone. Moreover, the iPhone ringtone creator forMac can boost iPhone ringtone to any desired level, and transfer the new created ringtone to your iPhone automatically.
Sony vegas pro 13 free download - Sony SpectraLayers Pro 3, iWatermark Pro, Apple MacBook Pro (Retina, 13-inch, Late 2013) Software Update, and many more programs. Sony vegas pro 13 for mac.
Free download Bigasoft iPhoneRingtone Maker for Mac and stop paying for ringtones any more.
Testimonials
'Oh, your application looks so beautiful and it works great on my snow leopard. I suggest everyone to use your application if they can't go wrong.'
Iphone Ringtone Maker Download
Screenshots
This is the main window of Bigasoft iPhone Ringtone Maker for Mac
Ready to try or buy Bigasoft iPhone Ringtone Maker for Mac?
Buy Bigasoft iPhoneRingtone Maker for Mac$14.95 Download Your Free Copy Now20.00 MB
Key Features
Make ringtones from songs
Bigasoft iPhone Ringtone Maker for Mac supports any music files such as M4A, WMA, APE, WAV, FLAC, OGG, APE, MP2, VQF, AAC, AUD, AIFF (Audio Interchange File Format), CAF (Core Audio Format), andmore. It can also be used as a MP3 to M4R converter.
Create ringers from movies
The powerful iPhone ringtone creator for Mac allows you to make ringtone by extracting audio from video files including AVI, MPEG, WMV, DivX, MP4, H.264/AVC, AVCHD, MKV, RM, MOV, XviD, 3GP, MOD,TOD, MTS and more.
Make text tones and alert tones for iOS 6 and iOS7 on Mac
Having several iPhones in your household and want to set different text tones and alert tones to each iPhone? With the help of Bigasoft iPhone Ringtone Maker, now you can make custom text messagetones or alerts for iOS 6 and iOS 7 on Mac with length of 2-5 seconds or longer than 5 seconds.
Boost ringtone volume
You can boost iPhone ringtone volume to any desired level for hearing phone call wherever you stay in a quiet room or in a noisy environment.
Pre-listen
The Mac iPhone ringtone maker let you pre-listen to ringtone before creating.
Take whole song as ringtone
The iPhone Ringtone converter for Mac can take music longer than 40-second as ringtone; moreover, it can take the whole song as ringtone also.
Manage iPhone ringtone on Mac
You can easily manage ringtones in iPhone such as remove, rename, and so on.
Work without iTunes
Just check 'Export to iPhone' option and it will automatically transfer the new created ringtone M4R to iPhone via USB cable after the converting.
Support multiple languages
Multiple languages are available such as English, German, French, Spanish, Japanese, Arabic, Italian and Chinese.
Easy to use
By super easy and intuitive user interface, only 3 steps, and you own new iPhone ringtone with ease.
Fully support iPhone series
Bigasoft iPhone Ringtone Maker for Mac is fully compatible with all types of iPhone including iPhone, iPhone 5S, iPhone 5C, iPhone 5, iPhone 4S, iPhone 4, iPhone 3G, iPhone 3GS and all iOS 5, iOS6 and iOS7 iPhones.
iPhone Ringtone Maker for OS X Mountain Lion, Lion, Snow Leopard
The iPhone 3G, iPhone 4 ringtone maker for Mac is fully compatible with Mac OS X v10.4(Tiger), 10.5(Leopard), 10.6(Snow Leopard), 10.7(Lion), 10.8(Mountain Lion), and 10.9(Mavericks).
System Requirements
Mac OS X v10.4(Tiger), 10.5(Leopard), 10.6(Snow Leopard) or 10.7(OS X Lion), 10.8(Mountain Lion), or 10.9(Mavericks).
To support direct transfer ringtone to iPhone, iTunes 7.4 or later are required.
PowerPC® G5 or Intel® processor;
512MB RAM or more
50MB free hard disk space for installation
Super VGA (800 x 600) resolution, 16-bit graphics card or higher
Awards

Related Products
iPod Transfer for Mac
Transfer music from iPod, iPhone, iPad to MacLearn More..
Total Video Converter for Mac
Convert between various video files on MacLearn More.. Iphone remote control for video.
Audio Converter for Mac

Ringtone Maker App For Iphone
Convert audio/video to any audio file on MacLearn More..
Ready to try or buy Bigasoft iPhone Ringtone Maker for Mac?
FREE Download BigasoftiPhone Ringtone Maker for Mac Now20.00 MB v1.3.6 Add to Cart$14.95
Make iPhone ringtone with any audio/video file like MP3, MP4, Online songs/video, etc. on Mac
This Ringtone Maker can convert almost all-mainstream video/audio to M4R iPhone ringtone on Mac.
Imacsoft Iphone Ringtone Maker For Mac
You can make any loved music or recorded sounds by yourselfformatted in MP3, WMA, AAC, WAV, and MP2to M4R iPhone ringtone on Mac. Or create text, alerts, and customizing tones with your music library by this powerful maker.
Ringtone Maker For Iphone How To Transfer
Besides make ringing from audio files, you can also extract and convert audio from video to create ringtone for iPhone by the powerful iPhone RingingCreator for Mac. It can extract audio from any video formats including MP4, downloaded online video, DVD files and make them into M4R file as the ringtone format for iPhone on Mac.
Ringtone Maker For Iphone Macbook Air
Spectrasonics keyscape for mac. Manage your Ringtone with this Ringtone Editor
With this professional ringtone tool, you can edit your iPhone ringtone effect before making. Such as cutting the excess parts you don't need, adjusting fade in or fade out time, and changing the ringing volume and more.
You can also directly remove your ringtone from your iPhone as you like and rename your Ringtone at your favor.
0 notes
Text
Mac Os Stands For

Need a little help figuring out your new iMac or MacBook? You’ve come to the right place.
Mac Os X Stands For
Mac Os Stands For Computers
Mac Address Stands For Computer
Check out our updated survival guide for the basics on Mac OS X, including details on the latest “Mavericks” features, illustrated guides for updating and backing up your Mac, must-know tips, and more.
Within the Open Systems Interconnection (OSI) network model, MAC addresses are used in the medium access control protocol sublayer of the data link layer. As typically represented, MAC addresses are recognizable as six groups of two hexadecimal digits, separated. And now, with just a USB cable, unlock your phone's possibilities on PC and Mac through Samsung DeX. Click to download Samsung DeX app for use on PC and Mac. FOR WINDOWS 7 AND 10 FOR MAC OS. DeX for PC is available on selected devices, and on Windows 7, 10 and versions of Mac OS higher than 10.13. Visit the FAQ page for a full list of device.
The basics
What is Mac OS X?
It’s the software that powers all the day-to-day features on your iMac or MacBook. Every time you click a menu at the top of the screen, open a folder on your desktop, or search for a document on your hard drive, you have the Mac operating system (or “Mac OS”) to thank.
OK, so what does the “X” in “Mac OS X” stand for?
It stands for “10,” as in the Roman numeral—and specifically, it means we’re currently using the tenth major version of the Mac OS. Mac OS X first arrived for desktop Macs way back in 2001, and had been preceded by—you guessed it—Mac OS 9.
“Mavericks” is the latest version of Mac OS X, the software that powers your iMac or MacBook.
What is “Mavericks”?
Over the past dozen years, there have been a series of big updates to Mac OS X, and the latest update, 10.9, is nicknamed “Mavericks.” Previous updates to Mac OS X have been named “Panther,” “Leopard,” “Snow Leopard,” and plain-old “Lion.” Yes, it’s safe to say that Apple has a thing for felines—or had, until OS X Mavericks came around.
Anyway, Mac OS X “Mavericks” (which came out in October 2013) adds more than 200 new features to the Mac operating system, including all-new Maps and iBooks apps that mirror those on the iPhone and iPad; major overhauls for Calendar and the Safari web browser; revamped folder windows that now boast tabs, similar to Safari; and enhanced desktop notifications, including alerts from Mavericks-friendly websites like the New York Times and CNN.
Check out Apple’s rundown of the 200-plus new features in Mavericks right here.
Where to get Mavericks
Mavericks is available for download from the Mac App Store—and yes, it’s free.
The “About This Mac” window will tell you is your Mac is new enough for Mavericks.
Can your Mac handle Mavericks?
Generally speaking, you’ll need an iMac or MacBook Pro that was manufactured no earlier than 2007, or a MacBook circa 2008 or later.
Specific iMac and MacBook models have different requirements, however; click here for more details.
How to install Mavericks
The Mavericks installation process is fairly straightforward, but it will require at least an hour of your time.
Once you grab Mavericks from the Mac App Store, your system will download the update and alert you when it’s ready to begin the installation process. Just follow the prompts (there are only a few), sit back and wait. After a restart or two, your Mac should be all set.
How to back up your Mac
Don’t even thing of updating your Mac’s operating system without backing up your hard drive first. Luckily, backing up your hard drive is easy thanks for a Mac OS X utility called Time Machine; here’s how to use it.
40 must-know Mac tips and tricks
1. 5 gotta-try folder tricks for “Mavericks”
Apple’s just-released (and free) software update for the Mac comes with a series of nifty folder tricks up its sleeves, including the ability to open a folder as a tab in an existing folder window—yes, kinda like you can in a browser.
Want to map a street address directly from Safari? Easy.
2. Map a street address within Safari
Ever stumble across a street address on the web—yes, an actual street address—and wish you could quickly pinpoint it on a map? Usually, you’d just copy and paste the address into Google Maps, but the latest version of the Safari for “Mavericks” saves you a step.
3. Take a screenshot
So, you know how to snap an image of your iPhone’s screen—but what if you want to take a screenshot of your Mac’s desktop? Well, there are actually four ways to snap a screenshot on your Mac, and they’re all just a few keystrokes away.
4. Customize and create keyboard shortcuts
Wish you could snap a screenshot on your Mac by tapping just the F5 key rather than tangling with the SHIFT + COMMAND + 3 keyboard combo? Well, you can.
You can create time-saving “macros” for your street address, job title, phone number, or practically any string of text.
5. Create time-saving, text-replacing “macros”
Mac Os X Stands For
You can create custom, text-replacing “macros” (or shortcuts) on your Mac for your home address, job title, phone number, or other oft-used strings of text.
6. Pick a new alert sound, or install your own
Getting tired of the little “blurp” (or “ding,” or “beep”) sound your Mac makes when it needs your attention? As it turns out, your Mac comes with more than a dozen built-in alert sounds, and you can change the sound whenever you want.
7. Set “Do Not Disturb” mode to turn on (and off) automatically
One my of favorite new features in iOS 7 is the ability to automatically silence iPhone or iPad alerts during the wee hours—and now, thanks to Apple’s recent “Mavericks” update, you can set your Mac to muzzle notifications on a daily (or nightly) basis, too.
Got a DVD-less Mac? You can wireless share the optical drive of any nearby iMac or MacBook.
8. Share a DVD drive over Wi-Fi with Remote Disc
The MacBook Air, the Mac Mini, the new “retina” MacBooks, and other optical drive-less Macs come with a feature called “Remote Disc,” which lets you wirelessly borrow the optical drive of almost any nearby Mac or PC.
9. Get the hang of desktop “spaces” in Mission Control
The Mac’s handy Mission Control feature lets you manage multiple desktop “spaces” at once, each filled with its own assortment of open documents and applications. Sounds confusing, I know. But once you get the hang of it, these additional, virtual desktops can become addicting—and even essential.
10. Why “natural” scrolling feels backwards—and how to turn it off
Does scrolling on your Mac feel backwards to you? Blame Apple’s new “natural” scrolling feature. Luckily, turning it off is a cinch.
Wish you could get your scroll bars back? All you have to do is tweak the right setting.
11. Get your missing scroll bars back
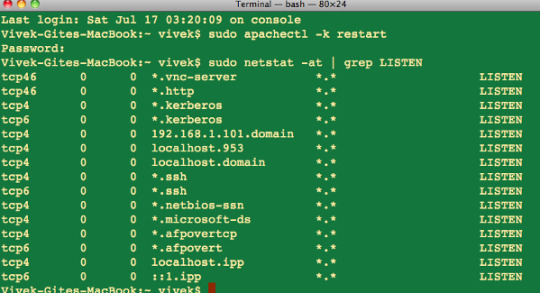
Hey, what happened to the scroll bars on your windows? Don’t worry—you can get them back in a few clicks.
12. 12 handy trackpad gestures you need to try
Want to zoom in on a web page, twirl a snapshot in iPhoto, sneak a peek at the desktop, or look up the definition of a head-scratching word? You can do all that and more with a simple swipe, “pinch,” or tap on your Mac’s trackpad.
13. Turn on your Mac’s speaking clock
Your Mac has a built-in speaking clock that will read you the time every hour, on the hour—or the half hour, or even quarter hour. Here’s how to turn it on.
You can add a new Mission Control desktop with a little help from your mouse.
14. Create a new desktop in Mission Control
Making a new “space” in Mission Control, the essential Mac feature that gives you a bird’s eye view of all your virtual desktops, is easy—if you know where to look.
15. Pin an app to a specific Mission Control desktop
There’s a way to assign an app to a specific desktop in Mission Control, perfect for keeping your programs in their proper “spaces.”
16. Paste your signature into a PDF, no scanner or printer required
Got a contract or some other document that you need to sign and return via email? Just snap a photo of your John Hancock with your Mac’s iSight camera (just about any recent iMac or MacBook should have one), then paste it into the document you need to sign.

17. Make the most of the Mac desktop dock
Thanks to the handy Dock at the bottom of your Mac desktop, your favorite programs, files, and folders are never more than a click away—and if you know where to look, you can make the Dock behave practically any way you want.
“Sticky Keys” make for a clever alternative to playing “Twister” with your fingers.
18. Enable “sticky keys”
Having a tough time maneuvering your fingertips around multi-key combos like SHIFT + ALT + DELETE? The “sticky keys” feature in Mac OS X can help.
19. Take a “Quick Look” at almost any file
Meet “Quick Look,” a handy, built-in Mac tool that lets you take a quick glance at almost any file or folder without committing to firing up a program.
20. 12 Mac keyboard shortcuts you need to know
Switch applications, take a “quick look” at a file, get help, and more, all without touching your Mac’s mouse or trackpad.
21. Give your Mac desktop icons a makeover
Got a jumble of icons cluttering your Mac’s desktop? Are you desktop icons too big—or too small? Wish they would just arrange themselves? Help is here!
22. 5 ways to make the most of the sidebar
Looking to add your own folders to the Mac sidebar? Or perhaps you’d rather make the sidebar bigger, smaller, or just plain gone. Help is here!
Just dip into your Mac’s system settings to make the mouse pointer bigger.
23. Boost the size of the mouse pointer
Want to save both your eyesight and your sanity? Here’s an easy way: by dipping into your system settings and boosting the size of the mouse pointer.
24. Control your desktop with “Hot Corners”
Turn on the Mac’s hot-corner feature to jump to Mission Control, clear your desktop, and more, all with a simple flick of your fingertip.
25. Disable the Caps Lock key
Sick of striking the Caps Lock key by mistake? The good news is that turning off Caps Lock for good on a Mac is easy.
26. Stop programs from launching automatically
How long does it take for your Mac to start up? Too long? Maybe your Mac is trying to launch too many apps when it’s first starting up.
You can zoom your Mac’s display with a few keyboard combinations.
27. Zoom the display
Squinting at your computer screen? You can zoom the entire display on your PC or Mac, a handy trick for anyone with iffy eyesight. Here’s how.
Mac Os Stands For Computers
28. Choose your default web browser
Sick of having Safari pop up when you really wanted another browser, like Chrome or Firefox? There’s single, centralized place on your Mac where you can set your default web browser once and for all.
29. Create a “recent files” folder on your desktop
It’s easy to create a folder on your desktop that’ll display only the files you’ve created or worked with in the past day, week, month … you name it.
30. Set your Mac to automatically start up (or shut down) each day
Want to wake up each morning to a freshly brewed pot of coffee and a fully powered-on Mac? It’s easier than you might think.
31. 16 Mac keyboard shortcuts you need to know
Want to switch applications, empty the trash, search your hard drive, or put your Mac to sleep, all without touching your mouse? Read on for 16 keyboard shortcuts that’ll let you zip around your Mac like a pro.
By tweaking a single setting, you can use your Mac’s function keys without having to press and hold the “Fn” key.
32. Use the function keys without pressing “Fn”
On most Mac keyboards, the function keys—you know, those keys along the top of the keyboard marked “F1,” “F2,” “F3,” and so on—don’t get the luxury of having an entire key to themselves. Want to switch things around so you don’t need to press and hold “fn” to use a function key? No problem.
33. Set multiple “home” or “start” pages for your web browser
Want more than just a single home page to appear when you fire up your web browser in the morning? No problem.
Mac Address Stands For Computer
34. Cram a bunch of files into a single “zip” archive
Got a bunch of little files that you want to send to a friend? Well, you could always drag them all into an email and send them as attachments, but talk about messy. A cleaner, tidier alternative is to take all those little (or not-so-little) files and compress them into an archive—or, to be more specific, a “zip” archive.
Tapping to click takes getting used to, but it’s surprisingly addicting, not to mention easier on your fingers.
35. “Click” the trackpad with a tap
Having a hard time clicking the MacBook’s squishy trackpad? If so, here’s an alternative: setting the Mac trackpad to “click” with a simple tap rather than an actual click.
36. Share files between nearby Macs with AirDrop
Got a file on one Mac that you’d like to send to another Mac just a few feet away? A built-in Mac feature called AirDrop lets you…well, “drop” a file from one Mac onto another.
37. Change the default programs for your files
Annoyed that the Mac’s Preview app, and not Adobe Reader, always gets to open your PDF files? There’s a way to permanently change the “default” program that opens a given type of document.
38. Customize the buttons in program toolbars
Ever wish there were a Print button next to the Reply and Forward buttons in the Mac’s Mail app, or a pair of Zoom buttons on the top of every Safari browser window? Well, here’s the thing: you can add, remove, and rearrange the buttons in the “toolbar” of several familiar Mac programs.
You can set your wallpaper to change at any interval you choose, from once a day to once every 5 seconds.
39. Put your desktop wallpaper on shuffle
Getting tired of the same old wallpaper on your Mac desktop? If so, try this: just set your Mac to shuffle some or all of your favorite desktop wallpaper (or “background”) photos, at any interval you choose.
40. 4 ways to right-click on a Mac trackpad
There are actually several different ways to right-click on the MacBook’s trackpad, which (nowadays, at least) is essentially one big button.
Get more help
Have more questions about Mac OS X, or Mavericks in particular? Click here to ask me directly—and remember, there are no dumb questions.
Related posts:
0 notes
Text
Battery Apps For Mac

About battery cycles
360 Battery Plus is the best battery saving app which reduces charging time. An app to check battery status of bluetooth headphones on Mac! I found 'Akku' app in GitHub to check the battery status of the Bluetooth headphones on Mac. It is working on macOS Catalina. The attached screenshot shows the battery status of my Sennheisser headphone.
Battery Time Indicator Version: 1.2 Release Date: October 04, 2016 Languages: English, Russian, Ukrainian Apps For Mac - Battery Time Indicator 1.2 AppsForMac.net.
What's new in this version. What's new in the latest release? -Bug fixes on app rendering -Capability to choose low battery notifications v1.0.25.123 -Performance in app startup times v1.0.23.120 -Heatmaps for battery levels maintained -Now see battery charts for the past 14 days -Improved performance and animations v1.0.23.107 -Loop the full battery alarm until dismissed -Choose or change the. Download Magic Battery for macOS 10.14 or later and enjoy it on your Mac. The App Magic Battery shows the battery level of supported input devices and headphones that are connected via Bluetooth in the menu bar.
When you use your Mac notebook, its battery goes through charge cycles. A charge cycle happens when you use all of the battery’s power—but that doesn’t necessarily mean a single charge.
For example, you could use half of your notebook's charge in one day, and then recharge it fully. If you did the same thing the next day, it would count as one charge cycle, not two. In this way, it might take several days to complete a cycle.

Batteries have a limited amount of charge cycles before their performance is expected to diminish. Once the cycle count is reached, a replacement battery is recommended to maintain performance. You can use your battery after it reaches its maximum cycle count, but you might notice a reduction in your battery life.
Knowing how many charge cycles your battery has and how many are left can help you determine when a battery replacement is required. For best performance, replace your battery when you reach its maximum cycle count.
Follow these steps to access information about your Mac notebook battery, including its cycle count:
Battery Apps For Mac Desktop
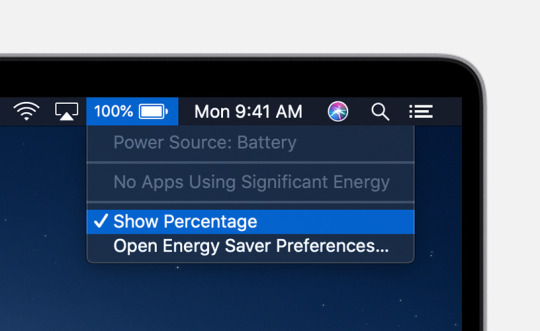
Game Apps For Mac
Hold the Option key and click the Apple menu. Choose System Information.
Under the Hardware section of the System Information window, select Power. The current cycle count is listed under the Battery Information section.
Identify your computer
Cycle count limits vary between Mac models. For help identifying your Mac notebook, use the Tech Specs page or these articles:
Cycle count limits
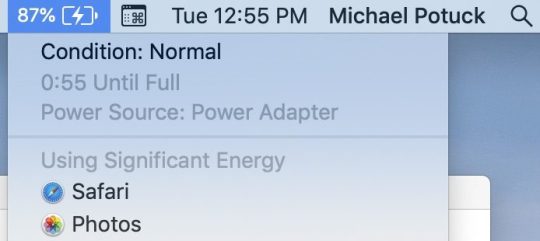
Use the table below to see the cycle count limit for your computer's battery. The battery is considered consumed once it reaches the limit.
ComputerMaximum Cycle CountMacBookMacBook (Retina, 12-inch, 2017) MacBook (Retina, 12-inch, Early 2016) MacBook (Retina, 12-inch, Early 2015) MacBook (13-inch, Mid 2010) MacBook (13-inch, Late 2009)1000MacBook (13-inch Aluminum, Late 2008)500MacBook (Mid 2009) MacBook (Early 2009) MacBook (Late 2008) MacBook (Early 2008) MacBook (Late 2007) MacBook (Mid 2007) MacBook (Late 2006) MacBook (13-inch)300MacBook ProMacBook Pro (13-inch, 2020, Two Thunderbolt 3 ports) MacBook Pro (13-inch, 2020, Four Thunderbolt 3 ports) MacBook Pro (16-inch, 2019) MacBook Pro (15-inch, 2019) MacBook Pro (13-inch, 2019, Four Thunderbolt 3 ports) MacBook Pro (13-inch, 2019, Two Thunderbolt 3 ports) MacBook Pro (15-inch, 2018) MacBook Pro (13-inch, 2018, Four Thunderbolt 3 ports) MacBook Pro (15-inch, 2017) MacBook Pro (13-inch, 2017, Four Thunderbolt 3 ports) MacBook Pro (13-inch, 2017, Two Thunderbolt 3 ports) MacBook Pro (15-inch, 2016) MacBook Pro (13-inch, 2016, Four Thunderbolt 3 ports) MacBook Pro (13-inch, 2016, Two Thunderbolt 3 ports) MacBook Pro (Retina, 13-inch, Early 2015) MacBook Pro (Retina, 13-inch, Mid 2014) MacBook Pro (Retina, 13-inch, Late 2013) MacBook Pro (Retina, 13-inch, Early 2013) MacBook Pro (Retina, 13-inch, Late 2012) MacBook Pro (13-inch, Mid 2012) MacBook Pro (13-inch, Late 2011) MacBook Pro (13-inch, Early 2011) MacBook Pro (13-inch, Mid 2010) MacBook Pro (13-inch, Mid 2009) MacBook Pro (Retina, 15-inch, Mid 2015) MacBook Pro (Retina, 15-inch, Mid 2014) MacBook Pro (Retina, 15-inch, Late 2013) MacBook Pro (Retina, 15-inch, Early 2013) MacBook Pro (Retina, Mid 2012) MacBook Pro (15-inch, Mid 2012) MacBook Pro (15-inch, Late 2011) MacBook Pro (15-inch, Early 2011) MacBook Pro (15-inch, Mid 2010) MacBook Pro (15-inch, 2.53 GHz, Mid 2009) MacBook Pro (15-inch Mid 2009) MacBook Pro (17-inch, Late 2011) MacBook Pro (17-inch, Early 2011) MacBook Pro (17-inch, Mid 2010) MacBook Pro (17-inch, Mid 2009) MacBook Pro (17-inch, Early 2009)1000MacBook Pro (15-inch Late 2008)500MacBook Pro (15-inch, Early 2008) MacBook Pro (15-inch, 2.4/2.2GHz) MacBook Pro (15-inch, Core 2 Duo) MacBook Pro (15-inch Glossy) MacBook Pro (15-inch) MacBook Pro (17-inch, Late 2008) MacBook Pro (17-inch, Early 2008) MacBook Pro (17-inch, 2.4GHz) MacBook Pro (17-inch Core 2 Duo) MacBook Pro (17-inch)300MacBook AirMacBook Air (Retina, 13-inch, 2020) MacBook Air (Retina, 13-inch, 2019) MacBook Air (Retina, 13-inch, 2018) MacBook Air (13-inch, 2017) MacBook Air (11-inch, Early 2015) MacBook Air (11-inch, Early 2014) MacBook Air (11-inch, Mid 2013) MacBook Air (11-inch, Mid 2012) MacBook Air (11-inch, Mid 2011) MacBook Air (11-inch, Late 2010) MacBook Air (13-inch, Early 2015) MacBook Air (13-inch, Early 2014) MacBook Air (13-inch, Mid 2013) MacBook Air (13-inch, Mid 2012) MacBook Air (13-inch, Mid 2011) MacBook Air (13-inch, Late 2010)1000MacBook Air (Mid 2009)500MacBook Air (Late 2008) MacBook Air300
Learn more
Battery App For Macbook Air
See these resources for more information about the batteries in your Apple notebook.
0 notes