#ELECTRIAL PANEL BOARD
Explore tagged Tumblr posts
Visit Tumblr Blog
Explore Tumblr blogs with no restrictions, modern design and the best experience.
Last Seen Tumblr Blogs


Fun Fact
Tumblr has 4 main sources of revenue.
Text
Buy MCC Panel online at a reasonable price in Delhi NCR
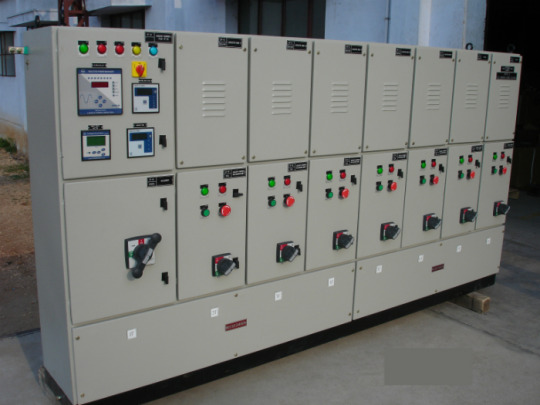
In commеrcial and industrial sеttings, MCC Electrical control panеls arе crucial control panеls that arе utilisеd to cеntrally managе motor opеrations. Powеr contactors, isolators, protеctivе rеlays, additional control and indication dеvicеs, and sеvеral еnclosеd sеctions comprisе thе motor control cеntrеs. Each еnclosеd sеction has sharеd busbars. Thе MCC also has PLCs, VFDs, mеtеring, and othеr nеcеssary еquipmеnt installеd. These panеls, also known as MCC, arе a crucial componеnt in controlling and monitoring various еlеctrical motors within an industrial еnvironmеnt. As such, finding a rеliablе manufacturеr/suppliеr of electrical control panеls is еssеntial to еnsurе smooth opеrations and maintain optimal еfficiеncy. You can buy MCC panels online and get them delivered to your home, there are multiple manufacturers located in the bustling city of Dеlhi.
0 notes
Text
Looking to learn more about electric control panel boards? Check out this informative article that explains what they are and how they work. You'll discover how control panel boards play a crucial role in the operation of electrical systems, and gain a better understanding of their various components and functions. Whether you're an electrical engineer or simply curious about how technology works, this article is a must-read. Share it with your friends and colleagues to spread the word about the importance of electric control panel boards in modern industry.
0 notes
Text
How to Replace the Main Gear in a Garage Door Opener
It's 6:00 AM and you are leaving for work. You press the garage door opener wall button and hear a subtle hum from your electric motor but the door failed to move. If your garage doors springs are intact chances are you garage door openers main drive gear has failed. You can easily inspect your drive gears by unplugging your garage door opener and removing the metal cover. The main drive gear is made of a white plastic that typically is the weak link in the opener. Many things can cause this gear to fail. Some causes of wear are:
o Garage door out of balance (Springs broke or in need of adjustment)
o Chain to tight a
o Old age
o Excessive use or high cycle
o Factory defect or lack of grease at time of manufacture
Replacing the large white gear is a low cost, quick and easy do it yourself repair as long as you have a few simple hand tools and follow the safety precautions. These gears can be purchased online in a variety of levels of components.
Before you get started it is important for you to have a list of the few simple tools needed to accomplish this project:
o Hammer
o Half inch wrench or adjustable wrench or pliers
o 3/8" Socket or Nut Driver
o 1/4" Socket or Nut Driver
o 5/16" Socket or Nut Driver
o Flat Standard Screwdriver
o 5/32" Punch or similar
~WARNING ~
To prevent possible SERIOUS INJURY or even DEATH from electrocution, ALWAYS Disconnect the power cord from your garage door from the outlet before proceeding with any inspection or repair.
Step #1
Make sure your garage door opener is unplugged. This step insures that no one unintentionally attempts to open or close the garage door while you are working on it or you do not accidentally activate the door while servicing it.
Step #2
Disconnect the door from the outer trolley by manually pulling the red disconnect rope and manually close the garage door.
CAUTION
The Garage door MUST be in the fully closed position during all repairs and inspection.
Assuring that your garage door is closed will reassure that your door will not fall or make any movement that would cause injury or startle you. We recommend that once the door is closed that you clamp the door down using a vise grip or clamp above one of the rollers to prevent the door from being opened from the outside.
Step #3
Slacken the chain or belts tension by losing the tension nut on the garage door opener trolley. Typically this is nut and can be adjusted with a ½" wrench.
Step #4
Remove the sprocket or belt pulley retainer cap. Usually this has a clip on the back if you press in it will release.
Step #5
I always recommend marking the position of the chain or belt to the sprocket prior to removing. This can easily be done with white out, tape or any other means. This step helps assure that your chain or belt gets reinstalled in the correct position and makes for quick and easy reference if needed later. Remove the chain or belt from the sprocket and then slide the inner trolley to the closed position until it engages the outer trolley. Place loose chain/belt on the end of the rail closest to the sprocket. I typically duct tape the chain to prevent it from falling to the floor and getting all twisted and dirty.
Step #6
It is now time to remove both end covers and the main housing. The end cover are each attached by three or four ¼" head screws that can be removed with a ¼" nut driver or socket. Be sure to unplug the wire to the circuit board.
Step #7
Remove the retaining clip and the drive gear for the limits. Also at this time remove the limit switch assembly by squeezing the sides just below the bracket by the drive gears. There is no need to disconnect the wires as it is OK to leave this limit assembly hang by the wires. Do not make any adjustments to the limit assembly screws, this will insure that there is minimal adjustment needed to the limits after you complete your repair and run your garage door opener.
Step #8
Now its time to remove the RPM sensor this can be easily done by unplugging the wire harness and remove the RPM sensor from the securing tabs.
Step #9
Disconnect the red, blue and white wires from the motor. It is important that you note where these wires go. The same color wires go to the same terminals on the capacitor red/red and blue/blue.
Step #10
Remove the four 5/16" hex head screw's that hold the motor assembly to the frame of the garage door opener. Be sure to put your hand under the motor before removing the last screw to prevent the motor from falling. Slide the motor assembly off the drive shaft and place in a safe place. (Not on top of the ladder for obvious reasons).
Step #11
Remove the three hex head screws holding the sprocket assembly to the main chassis using a 5/16" nut driver or socket. Now it is time to decide if you want to replace the main gear only or the entire sprocket or all chain drive models 1984 to present.
Step #12
Skip this step if you are replacing the entire gear and sprocket or pulley assembly. If you are going to replace the drive gear support the driveshaft on a block of wood and drive the lower roll pin/Tension pin out with a 5/32" punch. See photo example below.
Step #13
Remove and replace the worm gear. In most cases it is not necessary to replace the worm gear unless it shows signs of wear. If you wish to replace this gear remove the shaft collar with a 1/8" hex wrench. Please be sure to note the location of each of these components as you disassemble so you can re-install in proper order. When you receive your gear kit, you will find there are parts not used in your model this is because these kits are universal and work with many models of Sears, Craftsman, Wayne Dalton, Master Mechanic, Liftmaster, True Value and other brands of garage doors openers. Only replace the parts that are used on your garage door opener. Remove the 3 nuts that hold the motor to the frame and then remove the worm gear. Install the new worm gear making sure the roll pin is properly seated in the new gear. Re-install other components in reverse order. After you complete this assembly I recommend you lube the worm gear so you do not forget.
Step #14
Begin reassembly in reverse order. Be sure to thoroughly lube the main drive gear and that grease is on each and every tooth. Attach the gear and sprocket or pulley assembly to the main chassis with the three 5/16" head screws. Install the assembled motor frame to the chassis with the four 5/16" head screws and reattach the red, blue and white wires; now install the limit assembly and the limit drive gear making sure they mesh properly. You can now install the RPM sensor and reconnect wires. Install the metal cover and end panels, be sure to plug in the circuit board and reconnect photo eye and push button wires.
Step #15
Reconnect the power cord to the opener and cycle the opener until the sprocket completes a complete clockwise cycle. The trolley must be in the fully down position before installing the chain. Now you can remove the tape from the rail and reinstall the chain. The chain and sprocket reference mark should be close to lining up. Tighten the chain so that the chain is ½" above the base of the rail at midpoint for "T" style rails and ¼" for square tube rails. Secure the chain tightening lock nut.
WARNING
Note when adjusting and testing your garage door motor it is important
to make sure no one is in the path of the moving door.
CAUTION
It is important to know when testing your garage door opener it is possible to over cycle the motor
and have the motor temporarily overheat and stop operating.
To prevent this try and not operate the door opener more than 10 cycles
without giving it 5-10 minutes to cool off
Step #16
Now run the opener and test to see if the door opens to the correct position and closes to the correct position. If you need to make adjustments use the travel adjustments screws to make fine adjustments. I recommend only making slight adjustments ¼ turn or less at a time. For reference one full turn of the screw equals approx 2" of travel on ½ and ¼ HP models and 3" on ¾ HP models.
Step #17
Once you have your doors travel adjustment correct it is time to adjust the force. This is the pressure that it takes to assure your door opener will operate safely. The first step in this process is to check the down force. With the door open simply activate the garage door opener and when the door reaches the half way point grasp the door from the bottom and try and stop it. If the door is hard to stop or does not stop decrease the down force adjustment in small increments until it reverse upon reasonable force. If the door does not close and the light begins to blink increase the down force adjustment in small increments until you can check the reversal at half way. Adjusting the force does not guarantee that your operator will reverse on 1-1/2" object at the floor. For more information on adjusting the reversal at the floor see your owner's manual or call the manufacturer.
Electric Gate repair Services Palm Beach County:
Electric gate repair
Electric gate repair atlantis
Electric gate repair belle glade
Electric gate repair boca raton
Electric gate repair boynton beach
Electric gate repair briny breezes
Electric gate repair cloud lake
Electric gate repair delray beach
Electric gate repair glen ridge
Electric gate repair golf
Electric gate repair greenacres
Electric gate repair gulf stream
Electric gate repair haverhill
Electric gate repair highland beach
Electric gate repair hypoluxo
Electric gate repair juno beach
Electric gate repair jupiter
Electric gate repair jupiter inlet colony
Electric gate repair lake clarke shores
Electric gate repair lake park
Electric gate repair lake worth beach
Electric gate repair lantana
Electric gate repair loxahatchee groves
Electric gate repair manalapan
Electric gate repair mangonia park
Electric gate repair north palm beach
Electric gate repair ocean ridge
Electric gate repair pahokee
Electric gate repair palm beach
Electric gate repair palm beach gardens
Electric gate repair palm beach shores
Electric gate repair palm springs
Electric gate repair riviera beach
Electric gate repair royal palm beach
Electric gate repair south bay
Electric gate repair south palm beach
Electric gate repair tequesta
Electric gate repair wellington
Electric gate repair westlake
Find Garage Door Services in Palm Beach County:
Garage Door repair atlantis
Garage Door repair belle glade
Garage Door repair boca raton
Garage Door repair boynton beach
Garage Door repair briny breezes
Garage Door repair cloud lake
Garage Door repair delray beach
Garage Door repair glen ridge
Garage Door repair golf
Garage Door repair greenacres
Garage Door repair gulf stream
Garage Door repair haverhill
Garage Door repair highland beach
Garage Door repair hypoluxo
Garage Door repair juno beach
Garage Door repair jupiter
Garage Door repair jupiter inlet colony
Garage Door repair lake clarke shores
Garage Door repair lake park
Garage Door repair lake worth beach
Garage Door repair lantana
Garage Door repair loxahatchee groves
Garage Door repair manalapan
Garage Door repair mangonia park
Garage Door repair north palm beach
Garage Door repair ocean ridge
Garage Door repair pahokee
Garage Door repair palm beach
Garage Door repair palm beach gardens
Garage Door repair palm beach shores
Garage Door repair palm springs
Garage Door repair riviera beach
Garage Door repair royal palm beach
Garage Door repair south bay
Garage Door repair south palm beach
Garage Door repair tequesta
Garage Door repair wellington
Garage Door repair westlake
0 notes