#DIY Home decor
Explore tagged Tumblr posts
Visit Tumblr Blog
Explore Tumblr blogs with no restrictions, modern design and the best experience.
Last Seen Tumblr Blogs


Fun Fact
Mobile Tumblr US users spend an average of 4.04 minutes per session on the app.
Video
tumblr
presto patch
#tiktok#tiktok DIY#Mercury Stardust#trans handy ma'am#diy home decor#diy home projects#DIY home repair#dry wall#DIY#how to
11K notes
·
View notes
Text
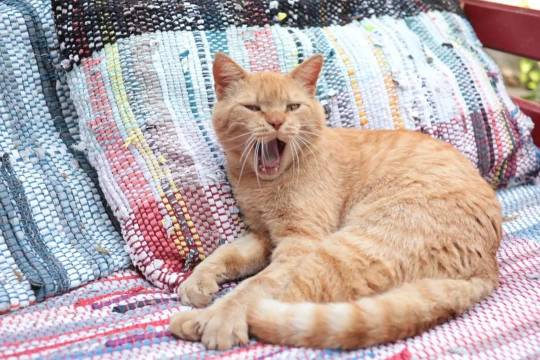
youtube
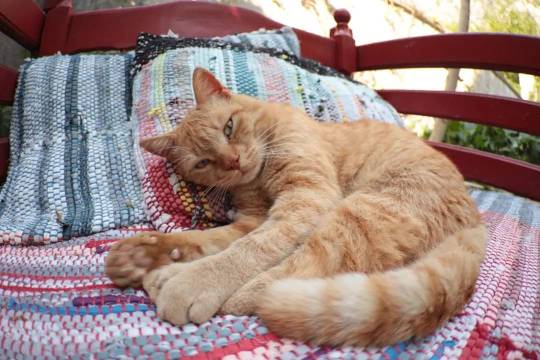
How to weave rag rug cushion for your cat
#home decor#home decorating#diy ideas#craft ideas#decor#decoration#diy home decor#diy#interior decorating#interior#weaving#weave#rag rug#pet bed#pet furniture#upcycle#upcycled#Youtube
60 notes
·
View notes
Text
I did it!!!!
Before and after of our 1950's inspired kitchen.
Honestly, the hardest part of this was the cleanup. I had to scrape some wayward paint off of the floor.


Goodbye 90's-00's styled cupboards. I wish I could have done more, but this is an upgrade on a budget. (Cost ~$200).
Bonus pic: The other angle with the atomic curtains and the dining table.
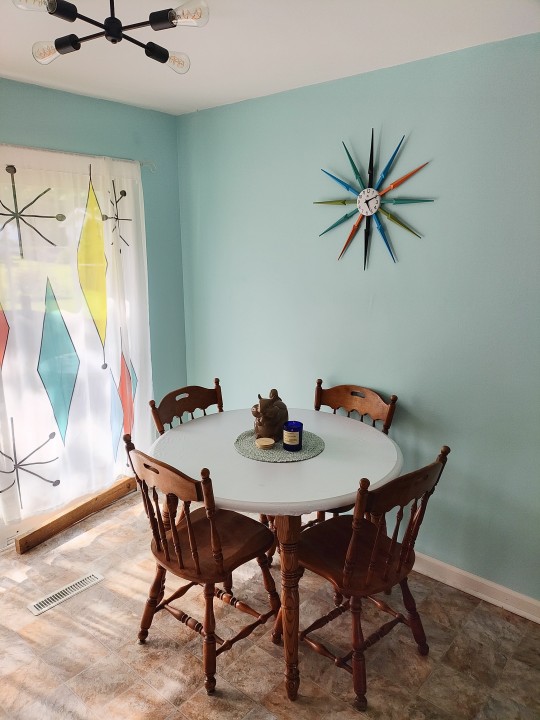
@overclocks. I know you wanted to see the results!
#chitteringabout#diy projects#diy on a budget#1950s style#1950s inspired#diy home improvement#diy home decor
15 notes
·
View notes
Text
Mossy Crochet Wall Hanging Pattern Cottage Core
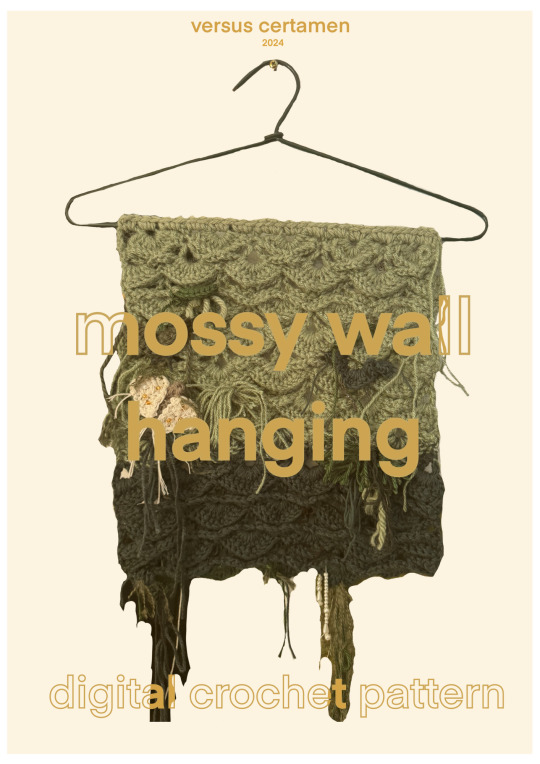
#crochet pattern#crochet#yarn crafts#crocheting#fiber art#fiber crafts#cottagecore#cozy cottage#fairy cottage#fairy core#fairy aesthetic#pattern#etsyseller#estyseller#etsystore#diy#diy crafts#diy projects#moss#mosscore#forest#forest core#forestcore#home decor#diy home projects#diy home decor#diy room decor#artwork#art and craft#art and design
23 notes
·
View notes
Text
DIY Floating Shelves: A Stylish & Functional Addition to Any Room
Looking to upgrade your space with a practical yet stylish solution? DIY floating shelves are the perfect way to enhance any room—whether it’s your living room, kitchen, or bathroom. These minimalist shelves not only add extra storage, but they also elevate your home’s aesthetic with a modern touch.

Here’s everything you need to know about creating your own floating shelves!
Why Choose Floating Shelves?
Floating shelves are a sleek and contemporary storage solution that gives any room an instant upgrade. Their no-visible-brackets design makes them appear as if they’re floating on the wall, creating a clean, clutter-free look. Plus, they are versatile, making them suitable for any room in your home!
Living Room: Showcase books, plants, or decorative pieces.
Kitchen: Store spices, utensils, or coffee mugs.
Bathroom: Perfect for towels, toiletries, or candles.
What You’ll Need for This DIY Project
Wood Boards: Choose a wood type that matches your room’s style (oak, pine, or reclaimed wood are great options).
Brackets or Floating Shelf Hardware: These keep your shelf secure without visible support.
Screws & Wall Anchors: Make sure to match these with the type of wall (drywall, plaster, or brick).
Power Drill & Level: To ensure the shelves are securely mounted and level.
Paint or Stain (optional): To add a custom finish to match your décor.
Step-by-Step Guide to Building Your Floating Shelves
Step 1: Measure and Mark
Start by deciding where you want your shelves. Measure the length of the wall and mark where you want the shelves to be placed. Use a level to ensure everything is aligned.
Step 2: Cut the Wood to Size
Cut your wood boards to the desired length (most shelves are around 3-4 feet long). Sand the edges smooth for a clean finish.
Step 3: Attach Floating Shelf Hardware
Install the floating shelf brackets or shelf mounting system onto the wood. Follow the instructions that come with your hardware to ensure a secure fit.
Step 4: Mount the Shelves on the Wall
Drill holes in the wall where you’ve marked and insert the wall anchors. Then, mount the shelves onto the brackets, ensuring they are secure. Double-check with the level to make sure everything is even!
Step 5: Final Touches
If you’re using paint or stain, give your shelves a coat of finish that suits your room’s vibe. Let them dry before adding items to them.

Styling Your Floating Shelves
Once your floating shelves are up, it's time to style them! Here are some fun and creative ways to make your shelves pop:
Layering Books: Stack books vertically and horizontally for an artful look.
Greenery: Add small plants like succulents or trailing vines for a touch of nature.
Personal Touches: Display family photos, art prints, or unique collectibles.
Lighting: Consider adding small LED lights to illuminate your shelves and create a cozy ambiance.
The Bottom Line
DIY floating shelves are the perfect blend of form and function, offering a clean, modern look while maximizing your space. Whether you’re looking to organize or display your favorite items, these shelves will elevate any room in your home with a personalized touch. Ready to get started? Grab your tools, and create your own floating shelves today!
Pro Tip: Don't forget to share your finished floating shelves with your followers and inspire them with your creativity! ✨
#DIY Home Decor#furniture#decor#home & lifestyle#home decor#homerenovation#home improvement services#Minimalist Design#Storage Solutions
3 notes
·
View notes
Text
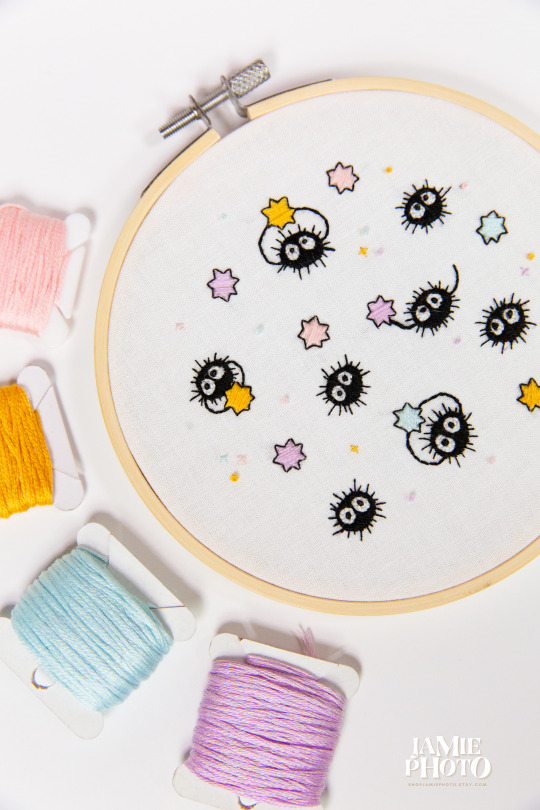
#jamiephoto#jamiephotodiy#hand embroidery#embroidery hoop#embroidery pattern#embroidery design#flower embroidery#diy wall art#diy home decor#diy gifts#geeky crafts#needlework#diy christmas gifts#handmade gifts#anime embroidery#studio ghibli art#hayao miyazaki#my neighbor totoro#spirited away#howl's moving castle#soot sprites#ghibli decor#ghibli art#ghibli#anime lover#ghibli lover#kawaii#anime gifts
91 notes
·
View notes
Text


MY BABY
It's doesn't hold much, but that's okay. It was my first time ever trying to make a container and I am incredibly happy with it. I'm the only one using it after all lol
9 notes
·
View notes
Text
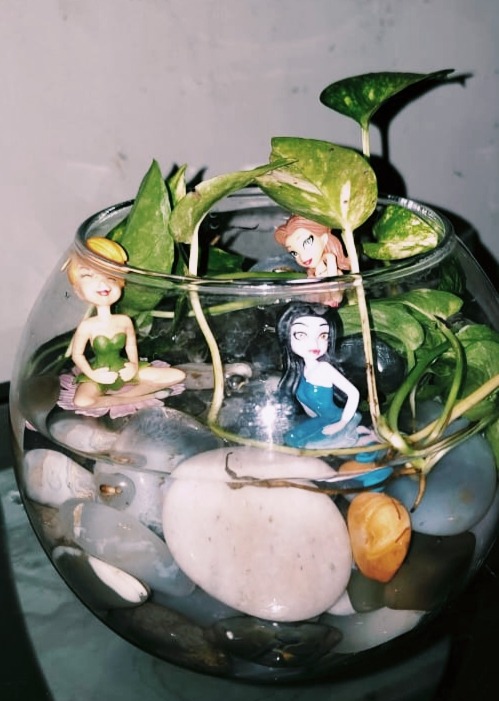
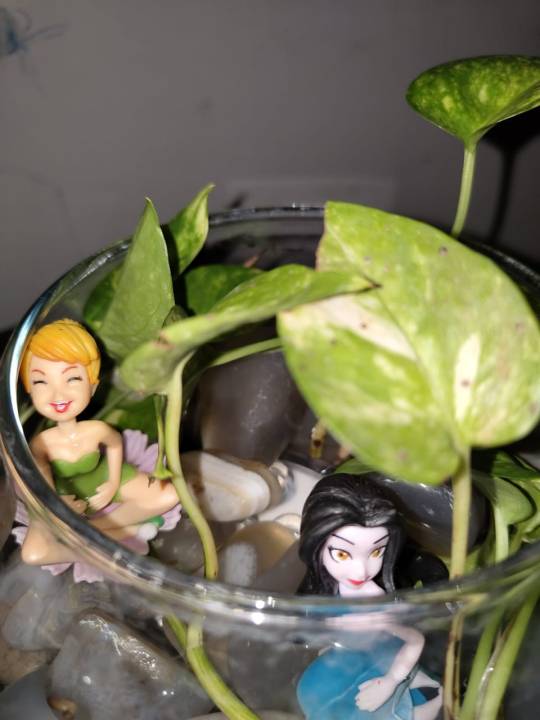

Put my little one's fairies to good use and created a little fairy hangout spot using the spare fishbowl! Can't wait for other magical additions over time 🤌🏽✨ (although the little LEDs I put inside stopped working after 15 mins, but I'll need to figure that out ig)
#fairy garden#fairycore#water fairy garden#fairy aesthetic#aesthetic#plantblr#positivity#tinkerbell#silvermist#peter pan#kidcore#toddler toys#diy#diy home decor#home & lifestyle#home decor#gardenblr#cottagecore#positive vibes#fairies#fairytale#kolkata#india
30 notes
·
View notes
Text

In today’s world, where individuality and uniqueness are highly valued, personalized décor has become increasingly popular. From custom-made furniture to bespoke wall art, people are seeking ways to express their personality and style in their living spaces. One innovative solution that has gained traction in the realm of home décor is printable vinyl. In this article, we will explore the power of personalization through the use of Printable Vinyl for creating customized wall décor.
Introduction to the Power of Personalization Personalized décor holds a special place in the hearts of homeowners, as it allows them to infuse their living spaces with elements that reflect their identity and tastes. Whether it’s a family photo collage or a motivational quote displayed prominently on the wall, personalized décor adds warmth and character to any room. At the forefront of this trend is the versatile material known as printable vinyl.
Understanding Printable Vinyl Printable vinyl is a type of material that can be printed on using a standard inkjet or laser printer. It comes in various forms, including adhesive-backed sheets and heat-transfer vinyl. One of the key advantages of printable vinyl is its ability to adhere to a wide range of surfaces, making it ideal for creating custom wall art.
Choosing the Right Printable Vinyl When selecting printable vinyl for wall décor projects, it’s essential to consider factors such as durability, adhesion, and print quality. Opting for high-quality vinyl ensures that your personalized creations stand the test of time and maintain their vibrant colors.
Designing Customized Wall Décor with Printable Vinyl Designing personalized wall art with printable vinyl is a fun and rewarding process. Armed with a printer, vinyl sheets, and a dash of creativity, you can transform any blank wall into a stunning focal point. From custom quotes to intricate designs, the possibilities are endless.
Step-by-Step Guide to Applying Printable Vinyl Applying printable vinyl to your walls is a straightforward process that yields professional-looking results. Begin by preparing the surface and carefully following the instructions provided with your chosen vinyl. With a bit of patience and attention to detail, you can achieve flawless application every time.
Maintenance and Longevity of Printable Vinyl Wall Décor To ensure the longevity of your personalized wall art, it’s essential to properly care for your printable vinyl. Regular cleaning and maintenance will help preserve the integrity of the vinyl and keep your décor looking fresh for years to come.
Conclusion In conclusion, the power of personalization knows no bounds when it comes to home décor. By harnessing the versatility of printable vinyl, you can unleash your creativity and transform your living space into a reflection of your unique personality and style. Whether you’re adorning your walls with family photos, inspirational quotes, or abstract designs, printable vinyl offers endless possibilities for customization.
FAQs (Frequently Asked Questions): Can printable vinyl be used on any surface? Printable vinyl is compatible with a variety of surfaces, including walls, glass, wood, and metal. However, it’s essential to ensure that the surface is clean and smooth for optimal adhesion.
Is printable vinyl easy to remove from walls? While printable vinyl is designed to adhere firmly to surfaces, it can be removed with the proper techniques. Applying heat with a hairdryer or heat gun can help soften the adhesive, making it easier to peel off without damaging the wall.
Can I reposition printable vinyl after it has been applied? Once printable vinyl has been applied to a surface, it may be challenging to reposition without causing damage. It’s best to take care during the application process to achieve the desired placement.
How long does printable vinyl last on walls?
The longevity of printable vinyl on walls depends on various factors, including the quality of the vinyl, environmental conditions, and maintenance practices. With proper care, printable vinyl can last several years without fading or peeling.
Are there any restrictions on the types of images or designs that can be printed on vinyl? Printable vinyl can accommodate a wide range of images and designs, from simple graphics to high-resolution photographs. However, it’s essential to ensure that the images you choose are suitable for printing and won’t infringe on any copyright laws.
#printable vinyl#wall decor#personalized decor#custom wall art#DIY home decor#vinyl decals#creative home decor
3 notes
·
View notes
Text
Best Handy Ma'am has a book!!!!
instagram
35 notes
·
View notes
Text
youtube
DIY Rag Rug Basket
#cozy home decor#rag rug weaving#rag rugs how to make#trash to treasure#craft ideas#diy craft ideas#crafts to make and sell#home decor#home decorating#diy ideas#decor#diy home decor#diy#interior decorating#interior#recylced#repurpose#upcycled#storage#storage baskets#Youtube
19 notes
·
View notes
Text
🍃Autumn 🍂
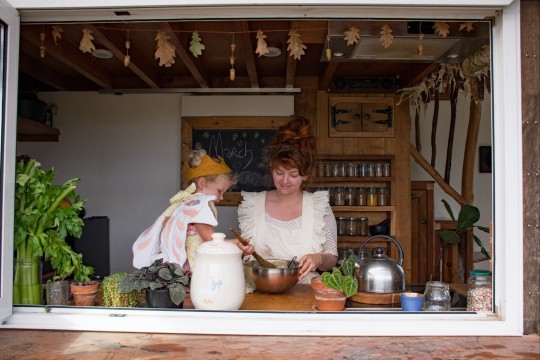
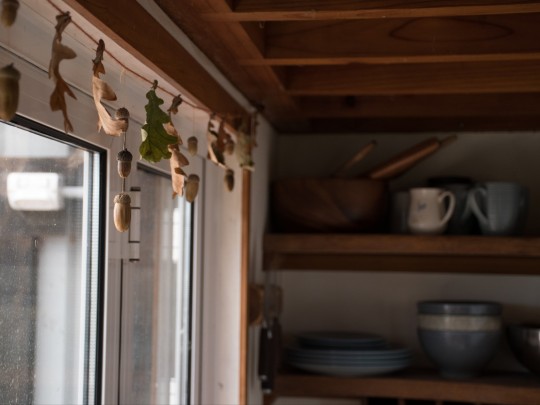

#cottagecore#cottage life#slow living#cottagecore aesthetic#hobbitcore#countryside#home & lifestyle#diy home decor#fall aesthetic#fall decor#autumncore
49 notes
·
View notes
Text
I am so, soooo close to getting my kitchen cabinets done. Tomorrow will be the day that the kitchen no longer looks like an explosion of paint and hardware tools.
4 notes
·
View notes
Text

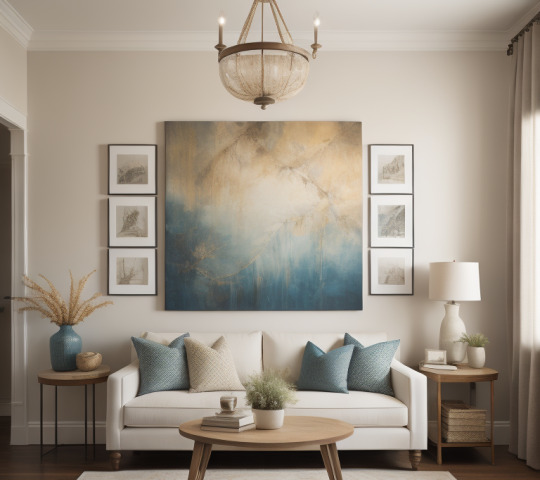
Go ahead and see cute home decor ideas.
#home decor#furniture#interior decorating#interior design#decor#decorative#decorating#DIY home decor#home decign#dream house#chandelier#home aesthetic
10 notes
·
View notes
Text
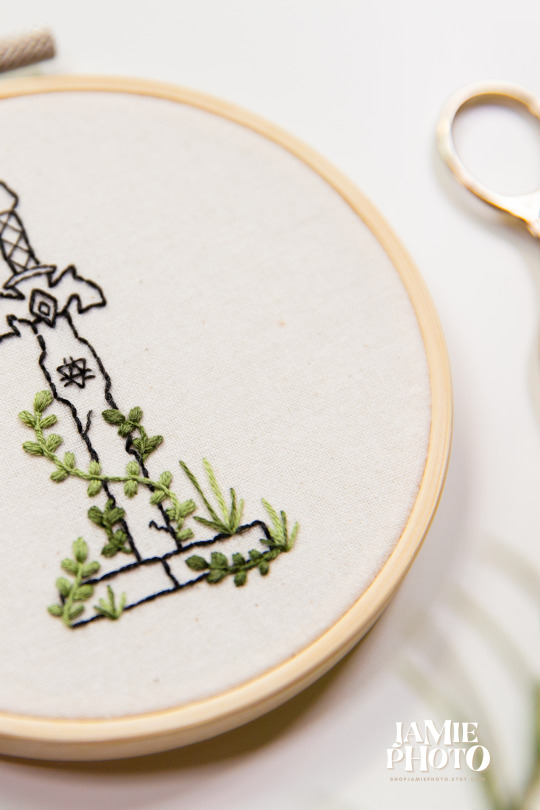
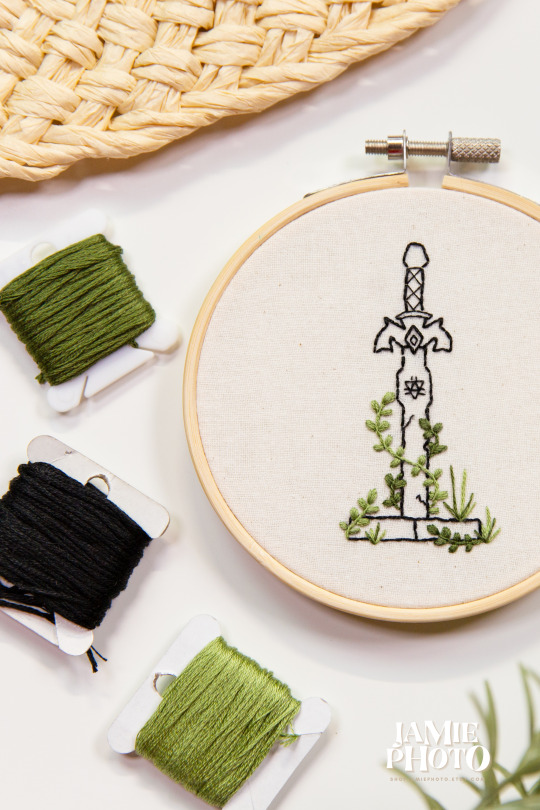
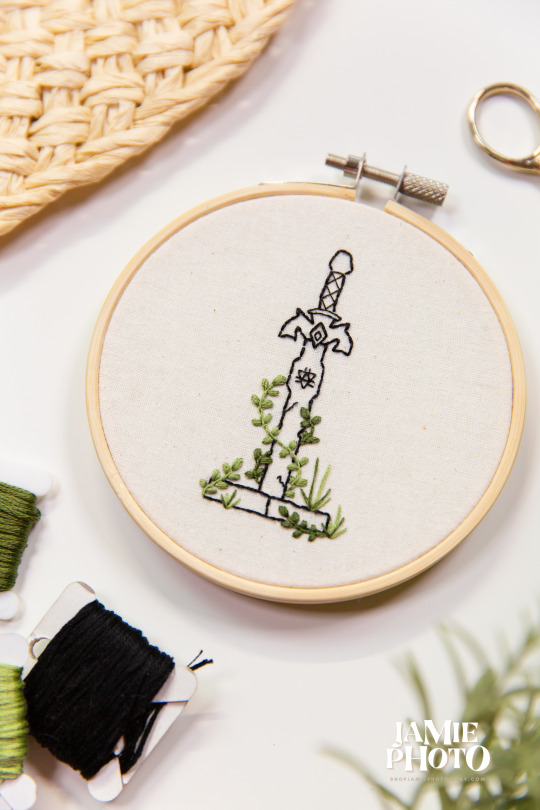
#jamiephoto#jamiephotodiy#hand embroidery#embroidery hoop#embroidery pattern#embroidery design#flower embroidery#diy wall art#diy home decor#diy gifts#geeky crafts#needlework#diy christmas gifts#handmade gifts#anime embroidery#legend of zelda#zelda#botw#totk#tloz#loz botw#loz totk#tears of the kingdom#breath of the wild#princess zelda#ganon#ganondorf#ocarina of time#master sword#hyrule
28 notes
·
View notes