#CGToolKit
Photo


Assessment 1-Milestone 1C
( KNB221 CG Toolkit)
These are the lighting environments I have done for the grey box.
1. Night Lighting
This night lighting environment is created based on the visual inspiration below. It is during the full-moon time that the moon is rather bright and round than normal time, the sky is not entirely dark and black but with blue and purple tint instead. The opacity of the cloud has also been increased which is reflected by the bright moonlight, and the star brightness has been lowered down.
Visual Inspiration

2.Wonderland Lighting
The second lighting is actually the older version of the sunrise lighting, which the bloom effect of the sunshine is too much so as the brightness of the overall environment. However I feel it might be more appropriate to be considered as wonderland lighting or heaven lighting, where the sun light is extraordinary bright that casting through the building to create a special atmosphere that does not actually existed in reality but the imaginary Utopian environment.
Visual Inspiration

3.Sunrise Lighting
This is the improved version of the second one, which I have reduced the bloom effect of the sun light and the color of the sky has also been adjusted with proper temperature and gradient. I also added the fog emitter to the environment to create the sunrise atmosphere where the temperature is low that there will be fog while the sun light is casting.
Visual Inspiration


4 notes
·
View notes
Photo


These are screenshots of my most recent update on my character model and rig. The rig has been completed at a basic level and the mesh for the character is still simple polygons with minimal detail. This is incomplete and has only reached the early stages of modelling/rigging with the model stretching and squashing horribly from movements and movements from the rig are loose and will break. The cause of this being incomplete comes down to poor time management of the project and minimal effort put into the mesh and rig resulting in a low poly basic mesh with some movement for the character. I will upload videos of what this mesh can do including a 360 view of the model. This is also showing some of the rigging applied to the model which so far moves the hips and the legs but does not currently move the head. There are controls missing except for feet IKs and hips control. If I were to do this project again I would first off choose a different character because the joints needed for the legs proved to be a difficult task when I started rigging it up and would of been better to start with a humanoid figure where there are more resources to create and rig the character.
0 notes
Link
This is my Final Pass fro assessment 1c
0 notes
Video
youtube
This video is just a short video showing off the static rig in Unreal Engine
0 notes
Video
youtube
PROGRESS POST HERE
DOWNLOADABLE FILE HERE (images included, not attached)
What would you do differently?
If I could go back and do this assignment again, I would dedicate more time to it and study more. I didn’t do as much as I’d wanted due to other projects involving modelling and animation that took up more than 50+ hours of my time a week. I believe I would’ve gotten far more done and to a higher quality if I was able to spend more time on the work.
Another change I would make is to take 3D animation 2 before this class, it felt like I was missing a fair bit of information going into this class that other students had over me.
As for tasks I went to high poly modelling too early, instead of working the proxy. I had issues with too many vertices and maintaining loops when working from a high poly mesh, outwards.
Highlights
The thing I’m most proud of in this work is the face and how it animates, but the face was already showcased in the video below so it’s not seen as clearly in the final render video:
youtube
0 notes
Photo


CG Toolkit Assignmnet 2 Final
If you were to go back to the start of this assessment to do it again, what would you do differently to complete the task
I would prioritise my time a little better. I ran out of time towards the end days of the assignment timeline, which lead me to be unable to fix certain parts of the mesh. The animation in Blender works fine, but as soon as it is exported into UE4 the mesh distorts.
I was unable to upload the video of my rig moving to Vimeo as I had run out of space, h0wever have tried to represent the IK movements this with the pictures.
Overall I am happy with my outcome.
vimeo
0 notes
Link
Breakdowns
Character: I made my characters in illustrator, he is made up of 10 different parts all saved on different layers. This is so once the character is place in after effects it is an easier time to use the plug in dulk. I used Dulk to rig and animate both my characters.
Effects: I made all the effect inside of after effects by following tutorials and guides online. The first mistake I did once I finished creating some of effect is that I forgot to make the background transparent which become an issue inside of UE4. I tried to use software called particular for after effect to create some effects. But the effect showed in the images are made will default after effects.
UE4: I had trouble with UE4 this time as I have never dealt with the 2d side of the program before and it is all new to me. After looking up some tutorials I keep working out and finding easier way to set up my scene. For all my animations I render them out as a png sequence then made to folders inside of UE4 one being the import images and the other for the sprites created from the images. Then once you have created the png’s into a sprite you able to place them in the world without creating a material. Once you have all your sprite you can create a 2d flipbook which makes the sprites into an animation
If you were to go back to the start of this assessment to do it again, what would you do differently to complete the task?
I would have done more research into what I was trying to do as I had to swap due it not working and taking up a lot of time. Then I would have spent more time looking to blueprints. In the walk through of the 2d level I created in front of the enemies I placed my fireball effect. I would to have my character place an animation on key press and shot the fireball but couldn’t work it out. I would also put more time into my character and not some of the effects. As my character has a issue where his knees break when he walks.
0 notes
Text
Assignment 2 - Final Submission
1. In the Character Development stream, I chose to do Option 2 - the high quality animated performance. I did the best that I could and the final rendered video is below.
vimeo
2. If I could go back and redo this assessment, I would have picked another rig. I did like working with the mannequin, but it was very simple and didn’t have a lot of joint controls. It made it a bit hard for me to make a really high quality and smooth animation, but as I said I did the best I could with what I had. Maybe I could’ve looked into adding more joints or something. I also think it would’ve been cool to do the building and rigging option of the character development stream.
If I could redo this, I would’ve liked to finish the animation part sooner so I could work in Unreal Engine 4 a bit more. Then I could’ve done something a bit fancier other than just a simple animated camera and directional light. I’m happy with the scene, I think it looks cool but if I had more time I’d add more detail.
3. Additional Materials
Because in my final animation you basically only see the character front on, I’ve made playblasts of a couple of other angles from the workspace in Maya.
vimeo
vimeo
I also made a time lapse video of my workspace in UE4.
vimeo
One issue that I had was that the shadow appears to be on the wrong side of the arm. It looks normal up until the 581st frame, then the shadow is on the front side of the arm instead of the back. I couldn’t figure out how to fix it.


0 notes
Text
Assessment 2: Update 2
Timeline:
After the first few weeks of working on the project I have finished most of my goals. The meshes are, with few exceptions, finished with only some tweaks remaining. Most of these models have been optimized and after exploring a number of tutorials on youtube I discovered a technique for generating normal maps using extra geometry that I was not previously aware of, and though the extra geometry has been created for most of the meshes this process still needs to be finished.
With more time put into the project I will probably be able to catch up to the timeline, though it is likely that the extra work that I intended to complete will not be finalized, or at least will suffer in quality, though that will not stop me from attempting it.
The timeline required little in the way of amendment, though the updated version is here:
· Week 11:
Finish unwrapping and exporting models - generate normals based on extra geometry, Begin texturing meshes and working on materials.
· Week 12:
Finalize texture and materials work – due to the nature of the scene provided many materials will be the same across different assets and will therefore be faster to complete. This week will also be used to integrate said materials into UE4 and the dynamic assets if they have been worked on previously.
· Week 13:
Final polish for product and extra work on Dynamic assets and rigging as time permits.


Pictures to be uploaded when my internet stops being completely dead.


The development process so far has not suffered from many internal issues and the creation of the models has been fairly easy, especially with the techniques I have learned through investigation online.
External issues, especially organizing myself to work on the project has been more difficult with a large number of other responsibilities outside of university.
regardless of these Issues I am confident that I can step up the rate of work and complete the project on time.
0 notes
Video
vimeo
GreyBox Simple Camera movement
For this Video I used the environment that I am building in KNB222 Virtual Environments. I did all the grey boxing for the environment in the video. I decided to use a cylinder for the actor as it has a similar geometry so a person.
I spent 30 minutes completely animating the cylinder and the camera moving in the animated sequence in Unreal.
It took me 3 hours to do the grey boxing for the environment as scaling was a bit of an issue. I ended up making each level 2 meters which is bigger than the average human height. I also included a bit of extra room for each level above the first one to have a bit of extra height due to the floor/ceiling and the roof for the top floor.
0 notes
Photo
Assessment 2 - Milestone 2A
(KNB221 CG Toolkit)

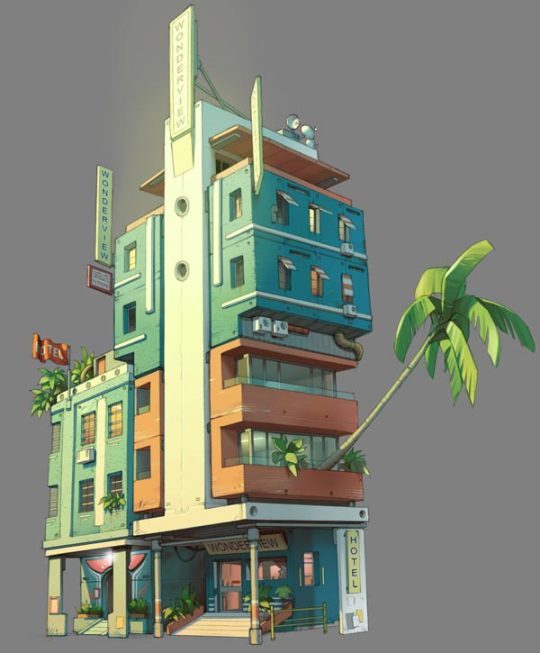
This is my progress of the Modular assets so far. I have roughly created all the almost all necessary assets in the concept art and assemble them together according to the reference image.
However as I mentioned above, this is only the rough version of the model, in order to improve on the realistic appearance of the model, I would add bevel and smoothing effects to the modular assets to make it look better.
Moreover, as for the plants in the reference image, in the following weeks I would create an improved version of it with variations to maximize the flexibility and re-usability as well as the quality of the modular assets.
And this is the rough breakdown of the assets, excluding of simple cubes and planes with various dimensions.

There will be definitely more individual assets after adding the texture to it, even though the shapes are simple and same, but the textures will not be the same such as making same 4-sided planes for walls and ceilings, but the textures will be different, even though the dimensions can be adjusted and adaptive.
Moreover, after adding more details to the shapes of the assets, some of the shapes will not be able to be shared between similar assets, so there will be increasing number of assets after adding details in terms of textures and shapes.


With some of the modular assets I have roughly assembled them into different kinds of buildings, the car-park(left) and a house with a yard (right).
Although these are not the completed version but I just wanna test for the flexibility and re-usability of the modular assets and it turns out really fine. Hence in the following weeks I will be focusing on polishing the individual assets and adding textures.
1 note
·
View note
Video
youtube
This video by Jason Baskin is a tutorial I have used to better understand the way to use and create a basic rig for my character for this project. I have decided to use this video because my character only has 2 moving limbs the two legs of the robot and this will also help create an IK option for my rig to move the legs easily.
https://www.youtube.com/watch?v=WxogLUq1rd4
0 notes
Photo


My plan hasn’t changed as I’m currently on track and haven’t run into any hiccups. These are the remaining items I still have to complete.
0 notes
Video
youtube
This Assignment has been a huge eye-opener for me, it has taught me many new techniques when creating a working rig that can be animated and textured. Along the way there were many mistakes made and multiple errors that came up, however there was one that kept showing up that ultimately made the final rig lose quality.
When exporting the rig as an .FBX, an error showed up that said something along the lines of “75 complex animations found in geometry, 1057 samples taken.” This error broke the head of the rig by displaying the low poly version of it instead of the high poly when importing it into Unreal Engine. It also stuffed up the head’s UV so that the texture couldn’t be applied properly. I believe this error has occurred because of one of the constraints in the skeleton, because when I deleted the skeleton and exported the rig, it turned out perfectly as a static asset.
If I had to do this assignment again, I would work on looking into the pipeline further and get a better understanding of it. This way there might be a chance of me avoiding an error such as the one I came across. I would try and get the proxy geometry and rig finished as soon as I could so I could work on creating a better quality Hi poly version with a much higher resolution texture set. This way the final rig would look a lot more impressive and beautiful when animating it. Although, I am very happy with how the textures turned out on the static model of the robot.
<!-- /* Font Definitions */ @font-face {font-family:"Cambria Math"; panose-1:2 4 5 3 5 4 6 3 2 4; mso-font-charset:1; mso-generic-font-family:roman; mso-font-format:other; mso-font-pitch:variable; mso-font-signature:0 0 0 0 0 0;} @font-face {font-family:Calibri; panose-1:2 15 5 2 2 2 4 3 2 4; mso-font-charset:0; mso-generic-font-family:swiss; mso-font-pitch:variable; mso-font-signature:-536870145 1073786111 1 0 415 0;} /* Style Definitions */ p.MsoNormal, li.MsoNormal, div.MsoNormal {mso-style-unhide:no; mso-style-qformat:yes; mso-style-parent:""; margin:0cm; margin-bottom:.0001pt; mso-pagination:widow-orphan; font-size:12.0pt; font-family:"Calibri",sans-serif; mso-ascii-font-family:Calibri; mso-ascii-theme-font:minor-latin; mso-fareast-font-family:Calibri; mso-fareast-theme-font:minor-latin; mso-hansi-font-family:Calibri; mso-hansi-theme-font:minor-latin; mso-bidi-font-family:"Times New Roman"; mso-bidi-theme-font:minor-bidi; mso-ansi-language:EN-AU; mso-fareast-language:EN-US;} .MsoChpDefault {mso-style-type:export-only; mso-default-props:yes; font-family:"Calibri",sans-serif; mso-ascii-font-family:Calibri; mso-ascii-theme-font:minor-latin; mso-fareast-font-family:Calibri; mso-fareast-theme-font:minor-latin; mso-hansi-font-family:Calibri; mso-hansi-theme-font:minor-latin; mso-bidi-font-family:"Times New Roman"; mso-bidi-theme-font:minor-bidi; mso-fareast-language:EN-US;} @page WordSection1 {size:595.0pt 842.0pt; margin:72.0pt 72.0pt 72.0pt 72.0pt; mso-header-margin:35.4pt; mso-footer-margin:35.4pt; mso-paper-source:0;} div.WordSection1 {page:WordSection1;} -->
Another thing that I would like to do if I did this assignment again would be to create a more humanoid character and learn a lot more about the sculpting process.
0 notes
Text
Final Progress
13.5 hours in total
1 Hour spent on neck modelling and weights


6 hours spent modelling the torso and applying weights


1 hour spent modelling the legs and pelvis


2 hours spent further modelling the legs and applying weights


1 hour and a half working on the arms and weighting them correctly, then adding the hands to the model
Fixed multiple issues throughout with weights and mesh pieces performing incorrectly


1 hour spent on clothes and texturing

1 hour spent on creating the video and animation


0 notes
Photo

Update 3
Since my previous update on Assignment 2, I believe I have caught up with my progress and am on track to completing the assignment on time. In the last week, I have finalised modelling the character’s outfit and accessories.
It’s week 10, and I have begun texturing the character as of the end of week 9. I believe I can finalised these textures and begin rigging the character prior to my holidays. I have had a few setbacks with the progress of texturing due to some of my textures not saving properly. However, as I am short on time, I have been able to teach myself complex mesh unwrapping as I would have liked. Instead, I am unwrapping the character as basically as I can to generate the textures, while I use the Texture Painter Tool inside of Blender to colour her in. This sacrifices some of the details in the character that I would have liked to include, but at this stage finalising the character is priority (if I have the time in my final week, I will go back over and add more detail into the colours of the character’s outfit). Since the textures of my character won’t be as nice as I would have hoped, I will focus on rigging the character well.
In the final week of the assignment (week 13), I will work on finalising the rigging of the character, animating her and integrating her into UE4. If I should run out of time, I would like to have a basic demonstration of my rig, even if the character does not have all textures.
0 notes
Last Seen Blogs

neckofjewels
Jewels

miu-uchiha
うちわ-メランコリア

findiklahmacun
findik lahmacun

melodramtischh
Holier Than Heaven

youjustgotgooped
iuwauefsiubfbus